
I wanted to make something for my sister’s birthday that I knew she’d love but would never take the time to make for herself. It’s hard to find sewing items that she doesn’t already have, but I thought maybe she could use a fun organizer to keep all of those sewing essentials in. I loved hers so much that I had to make another one for me and show you how to make one too.
Materials Needed
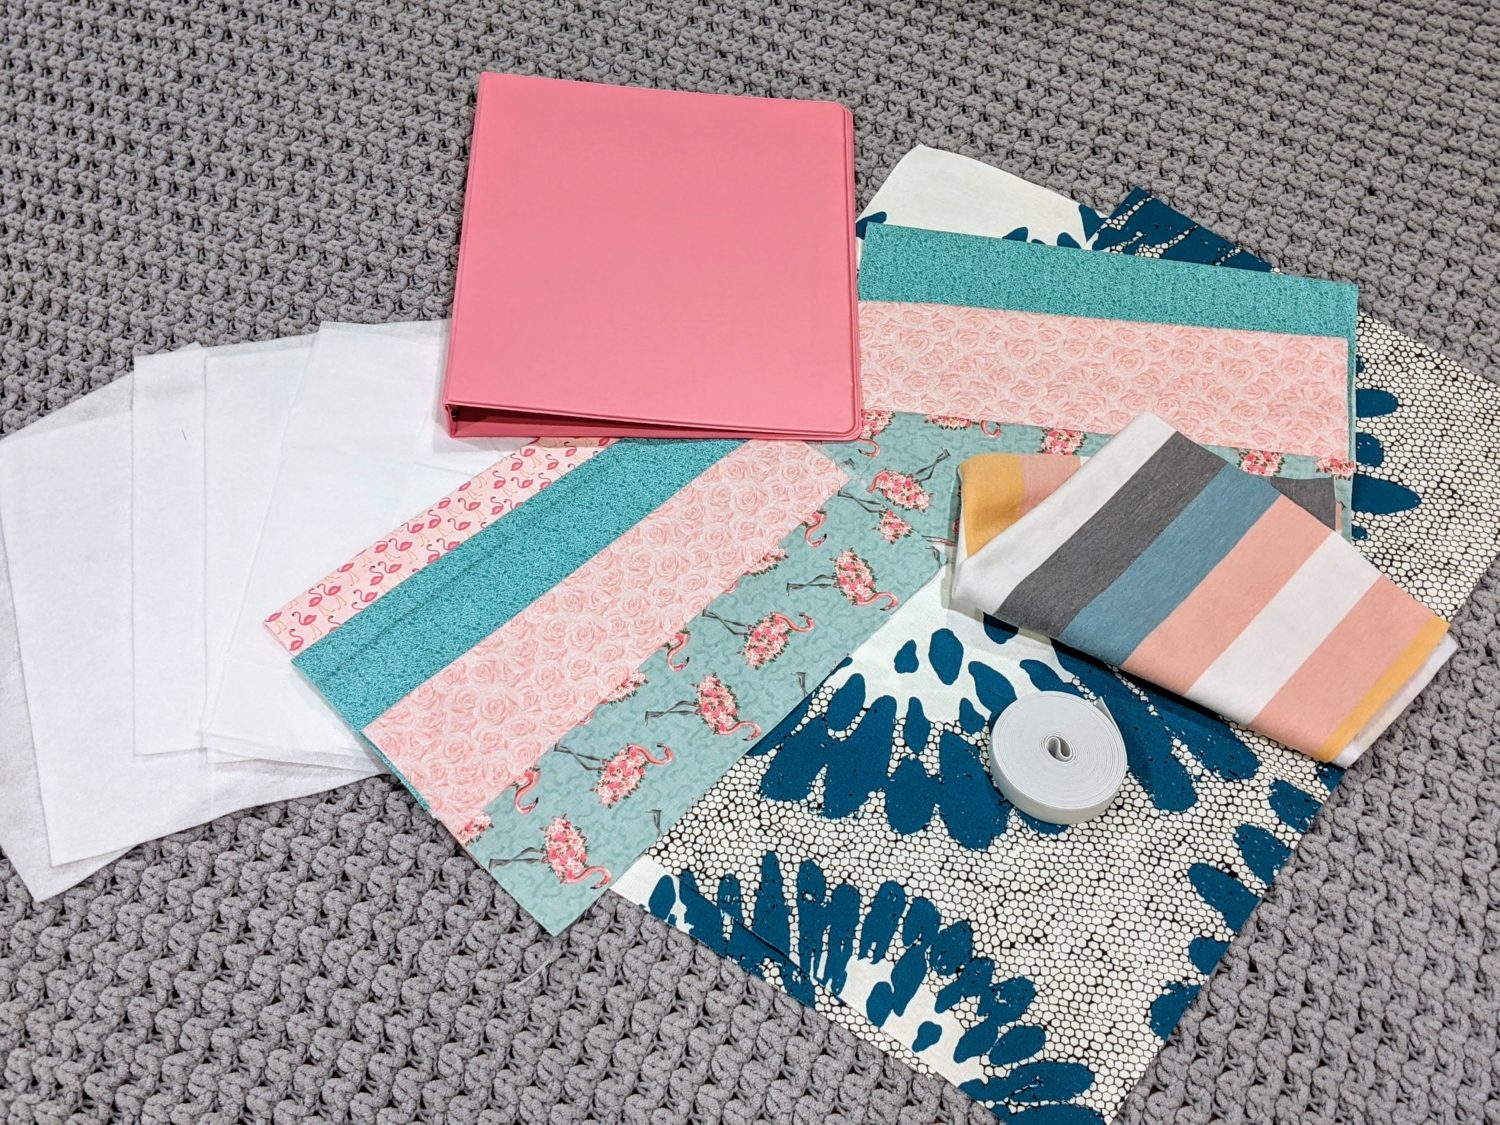
- Woven fabrics in coordinating colors and patterns (See cut chart below)
- Fusible fleece
- Fusible interfacing
- 1” binder, sturdy cardboard, or chipboard measuring 10 ½” X 11 ¾” (you will need two pieces of the same size)
- 1″ Elastic
- Sewing machine and thread, scissors
- Iron
- Heat or air soluble pen
Organizer Cut Charts:
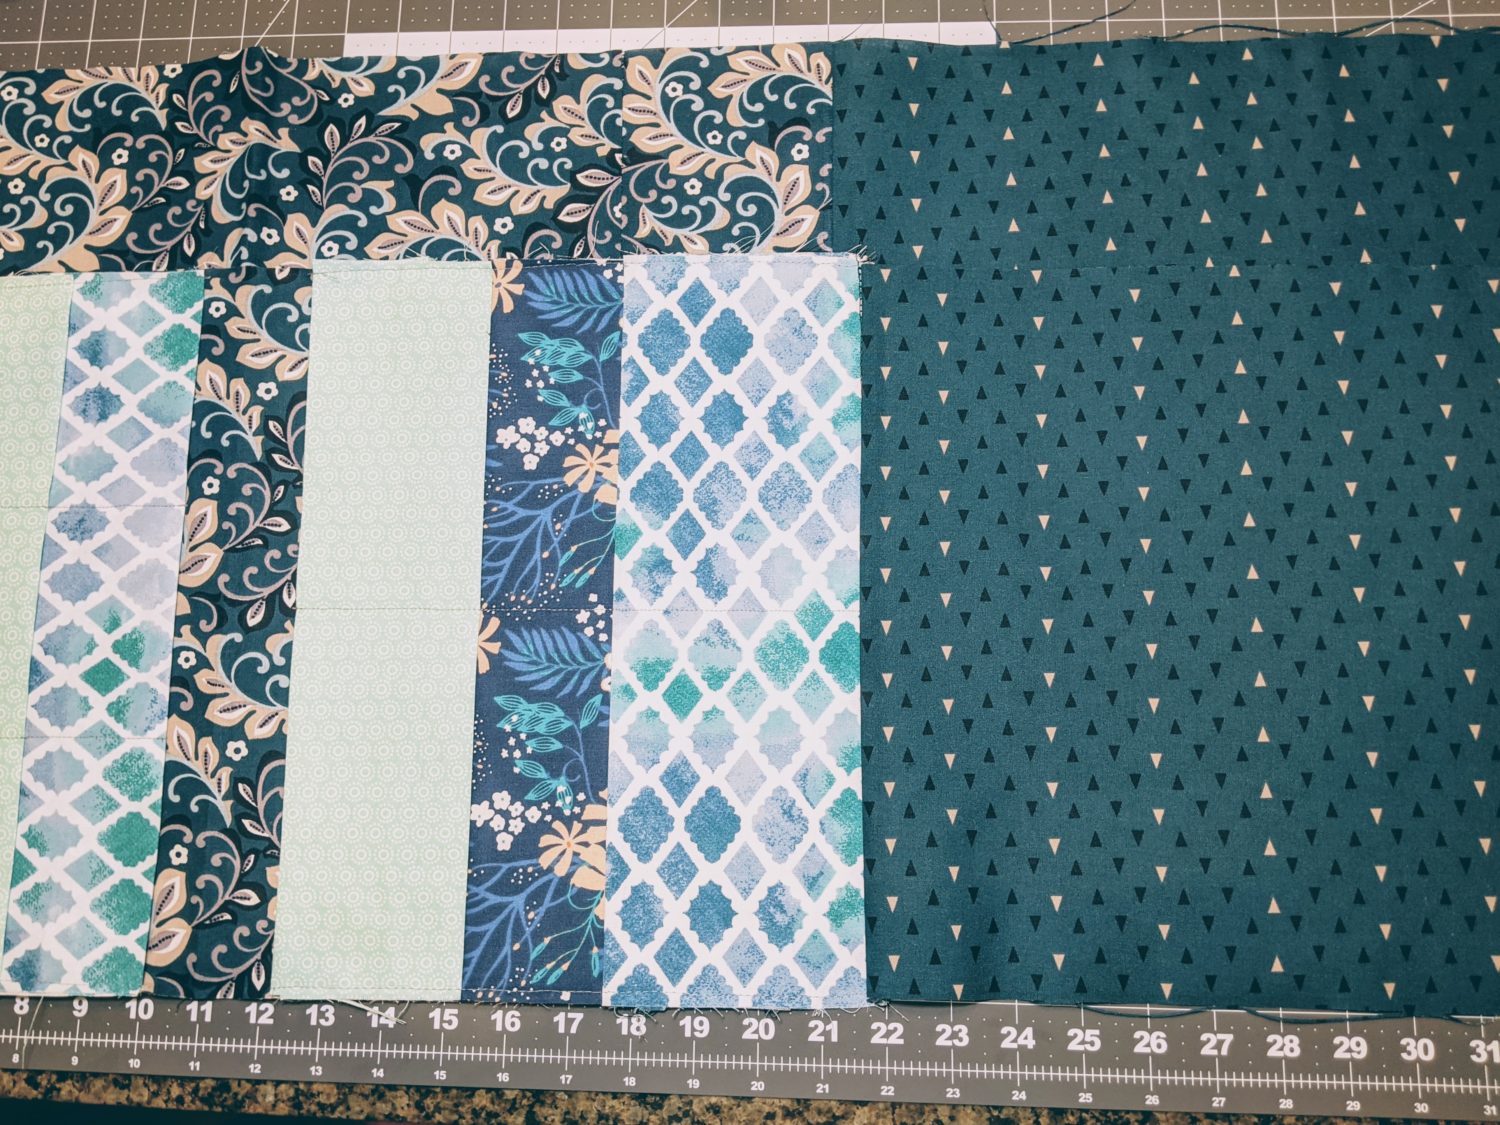
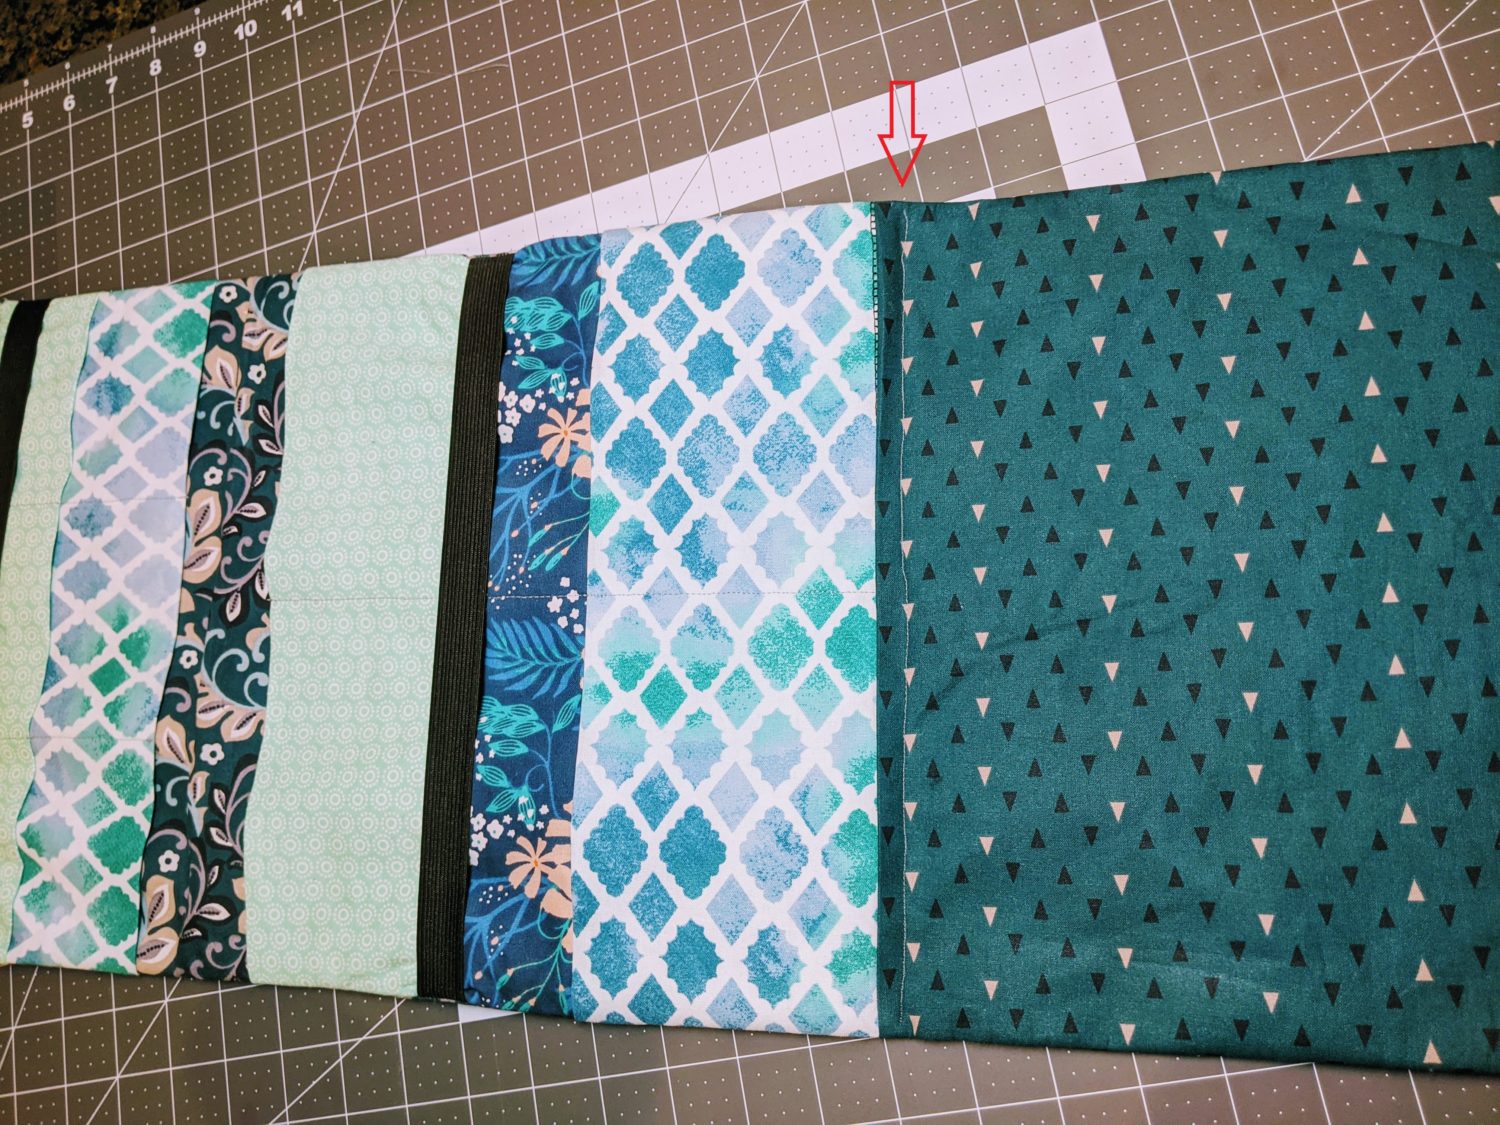
For reference, I used 6 coordinating fabrics to make my organizer. (And yes, this picture is of differnt fabrics than the one I’m showing in the tutorial, but there are still all the same pieces.)
- Fabric #1: Front and back main pieces
- Fabric #2: Covering flap piece
- Fabrics #3-6: Front and back pocket pieces


Prepare all Organizer Pieces
- Iron on all interfacings at the beginning so all of your pieces are ready to go
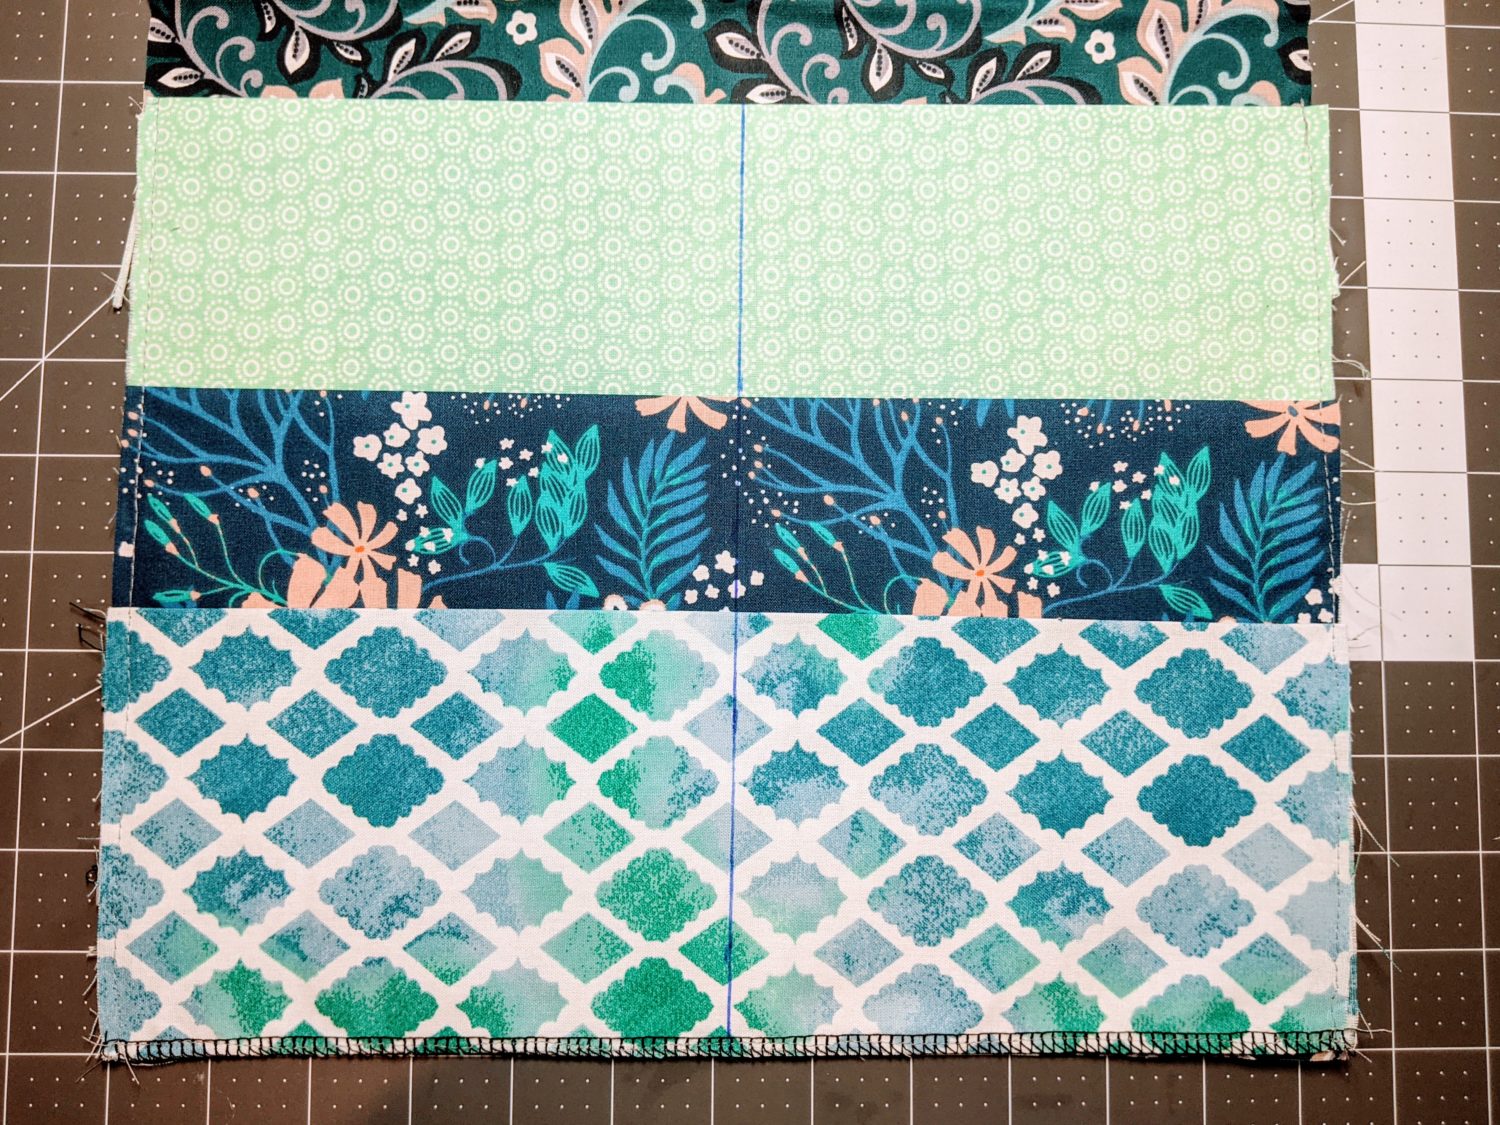
- For both the main front and main back pieces:
- Fold the pieces in half horizontally to find the center and press.
- On the wrong sides, center each piece of fusible fleece on either side of the center fold and iron on per your interfacing instructions.
- All pockets:
- Fold the fabric in half horizontally.
- Place the interfacing onto the side of the pocket that will face in on the organizer, and iron on to adhere.
- Covering/pad:
- Iron interfacing on the wrong side of each of the fabric pieces.
- Once all interfacings are ironed onto the pockets, fold each pocket back in half and press.
- Pin the bottom edge of the pocket piece together then serge or use an overcast stitch to finish the raw edge.
- Repeat with all pocket pieces.
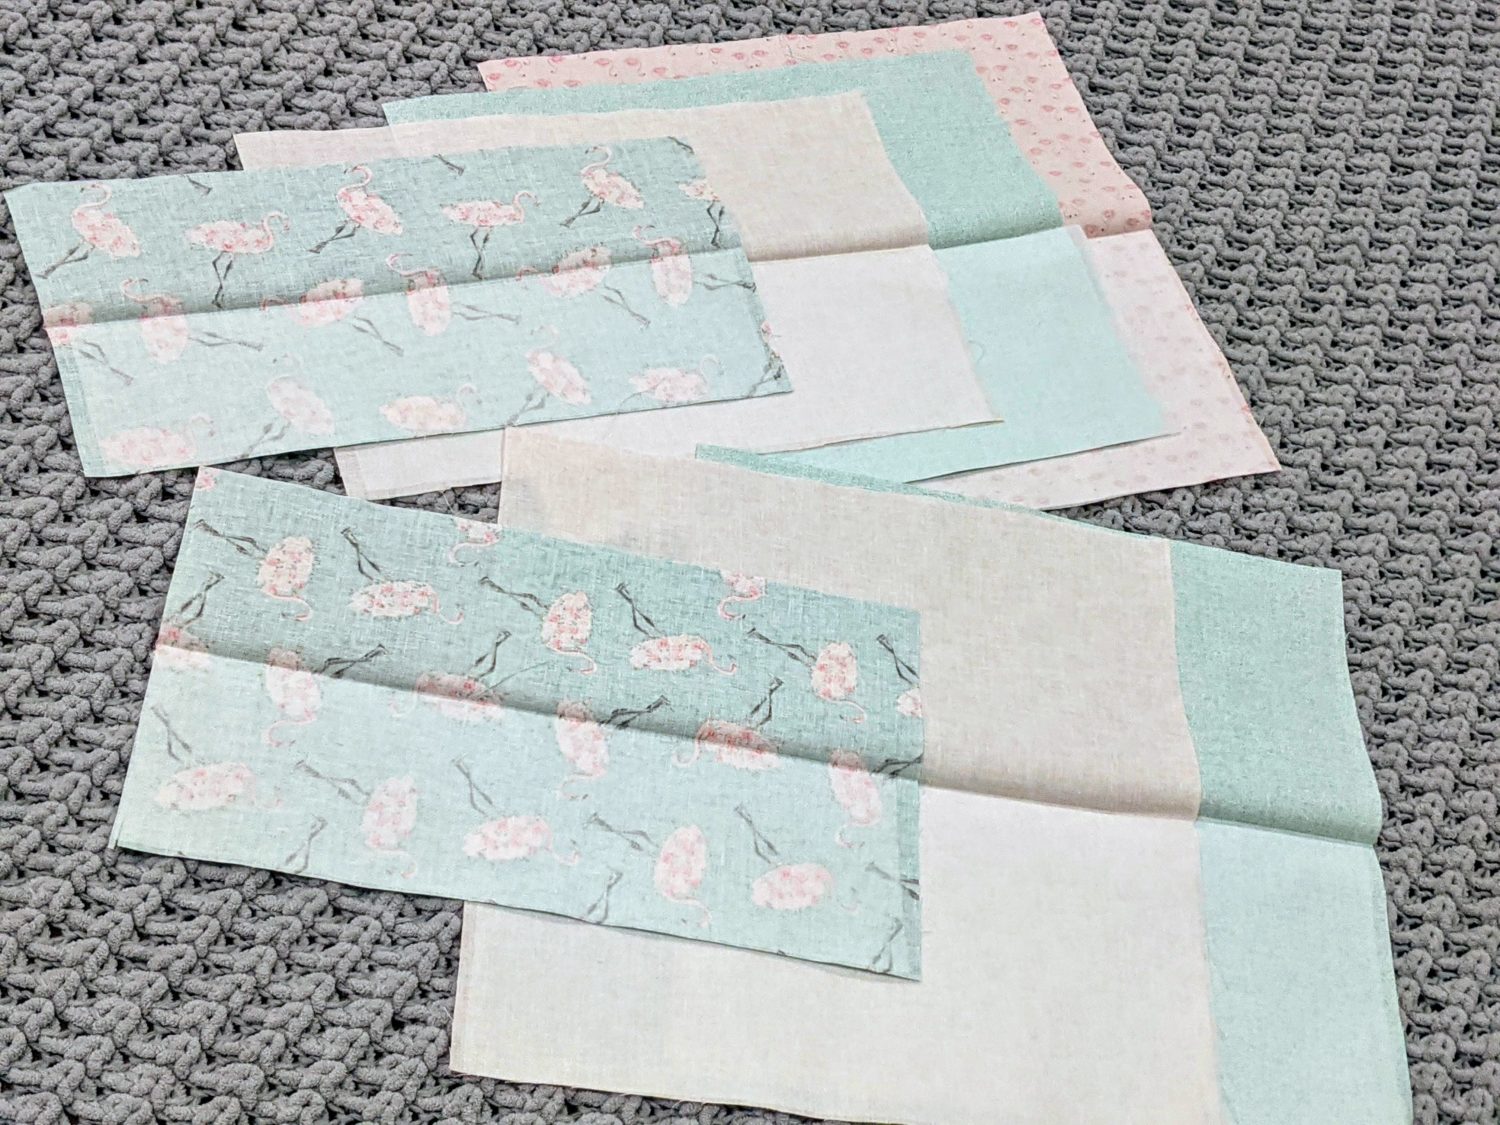
All pockets with interfacing attached 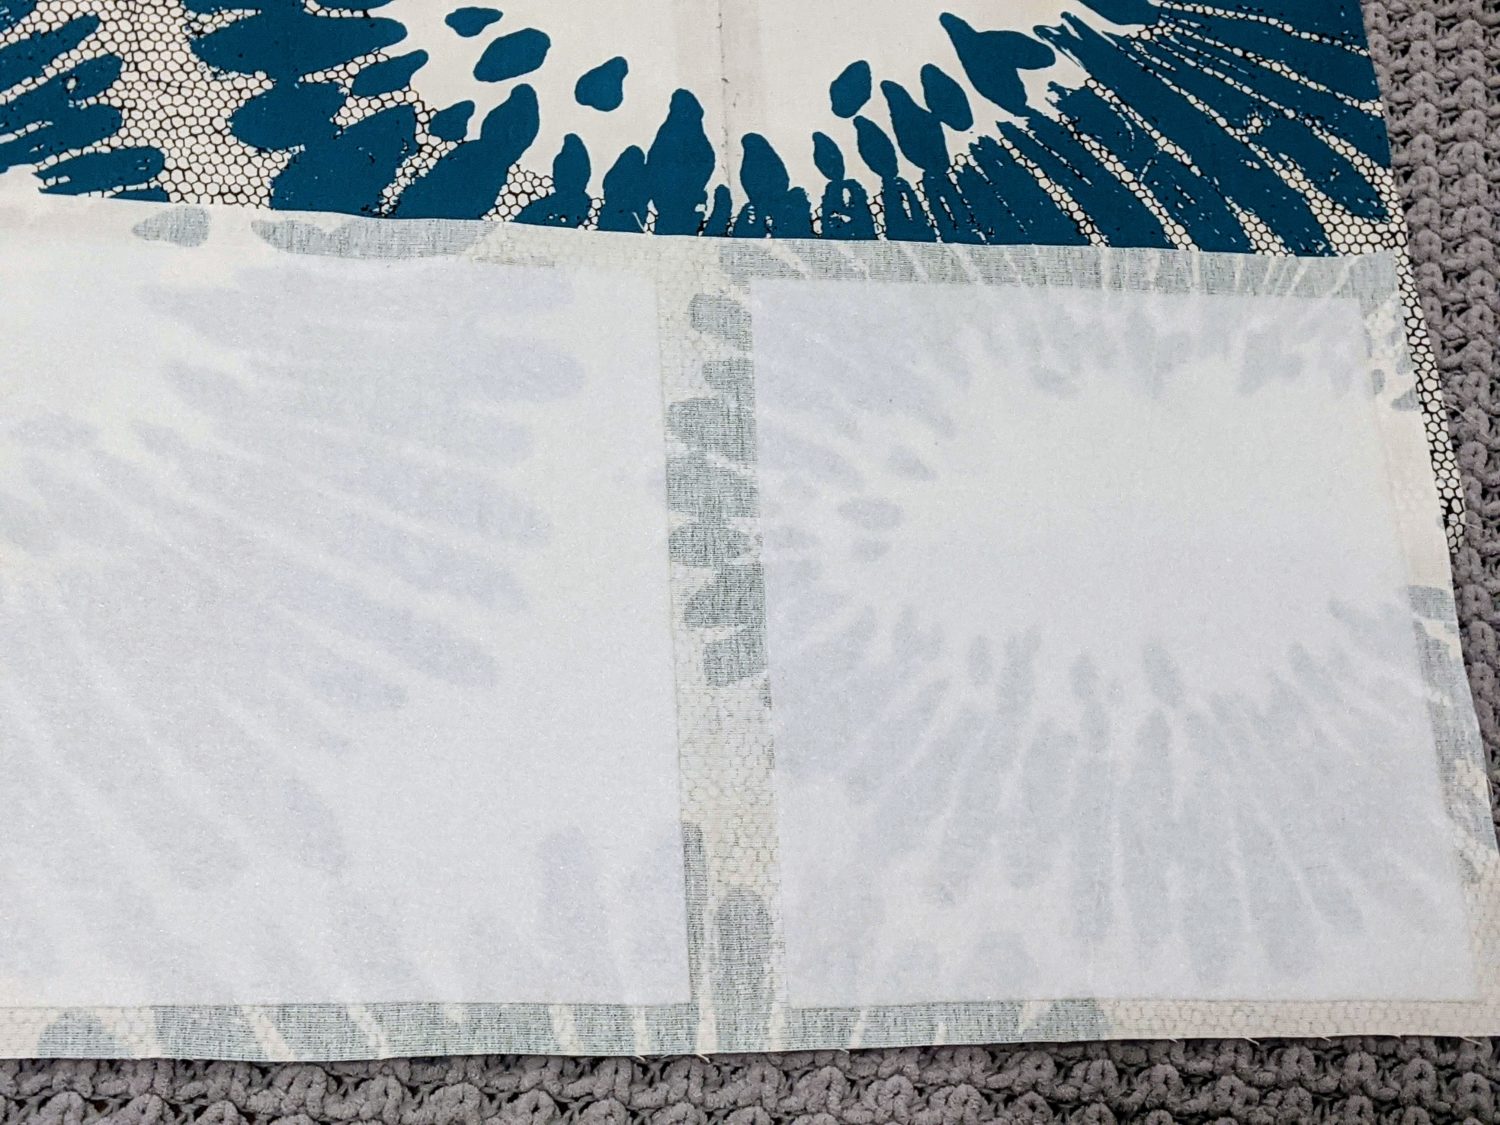
Main front and back with fusible fleece attached
Sewing on the Pockets
All Pockets will be sewn with a ¼” seam allowance along the bottom edge of the pocket only.
Set your front main fabric piece in front of you with one raw short end closest to you. Starting with the back pocket piece and working forward:
Front:
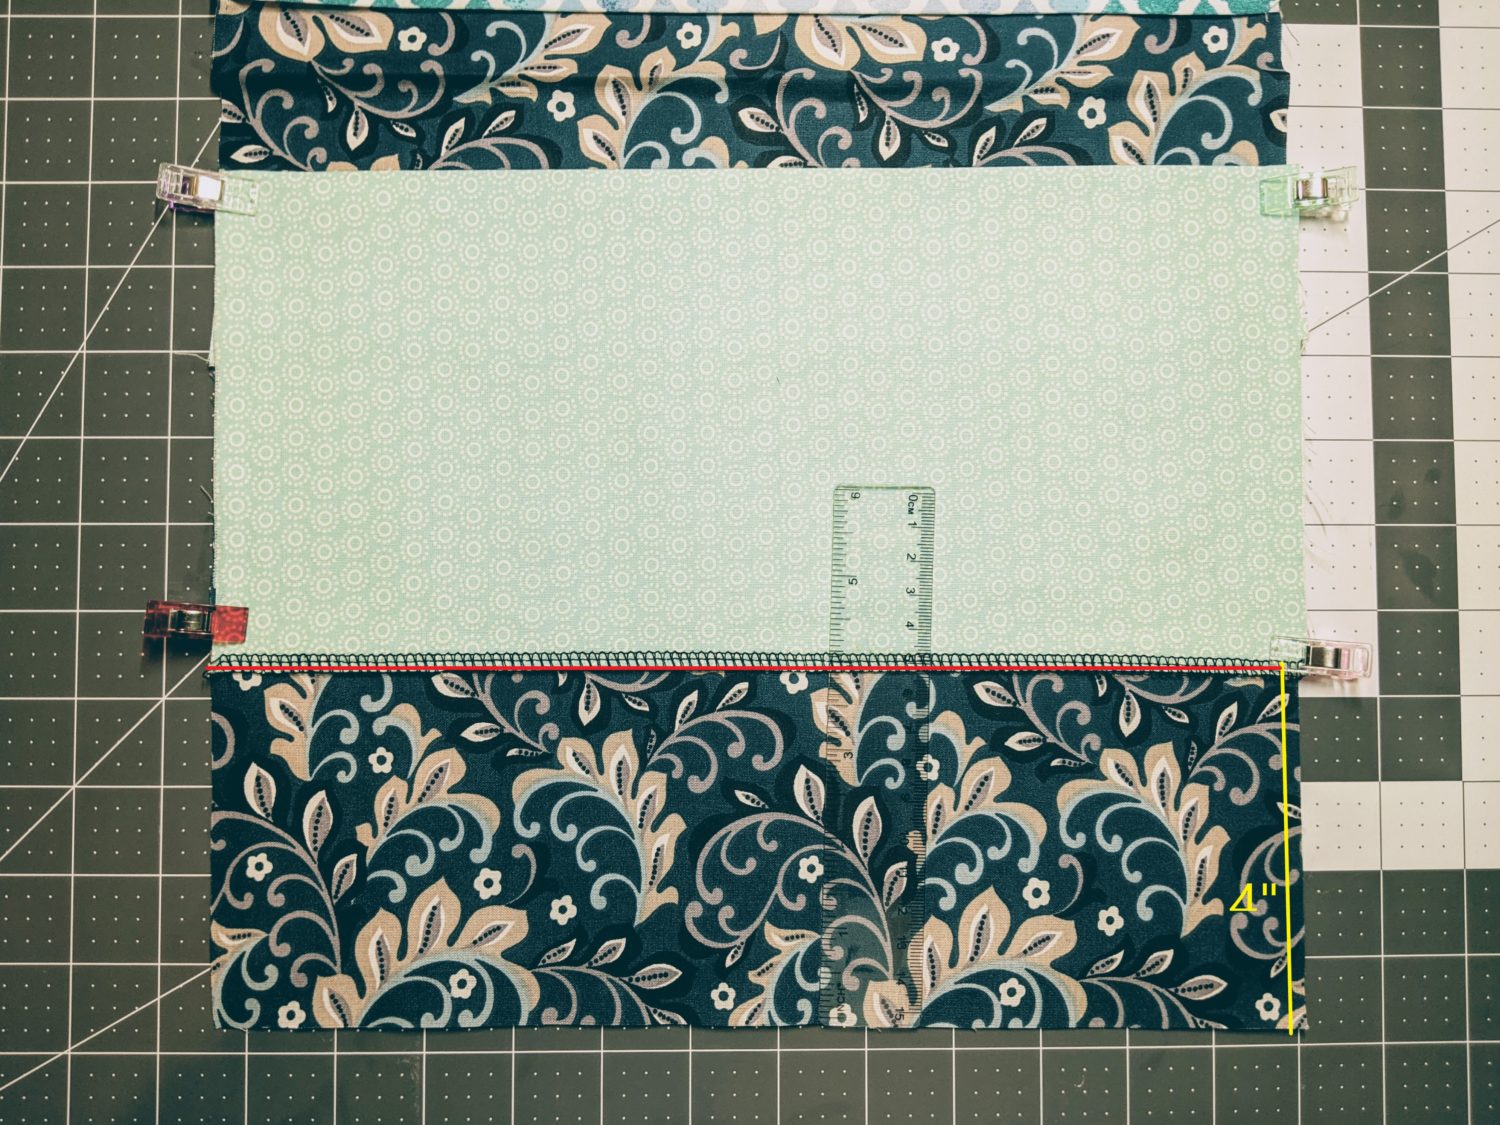
- Large Pocket:
- Measure up from the bottom edge of the main front piece 4” and line up the serged edge of the large pocket at the 4” mark, pin in place.
- Sew along the bottom edge of the pocket.
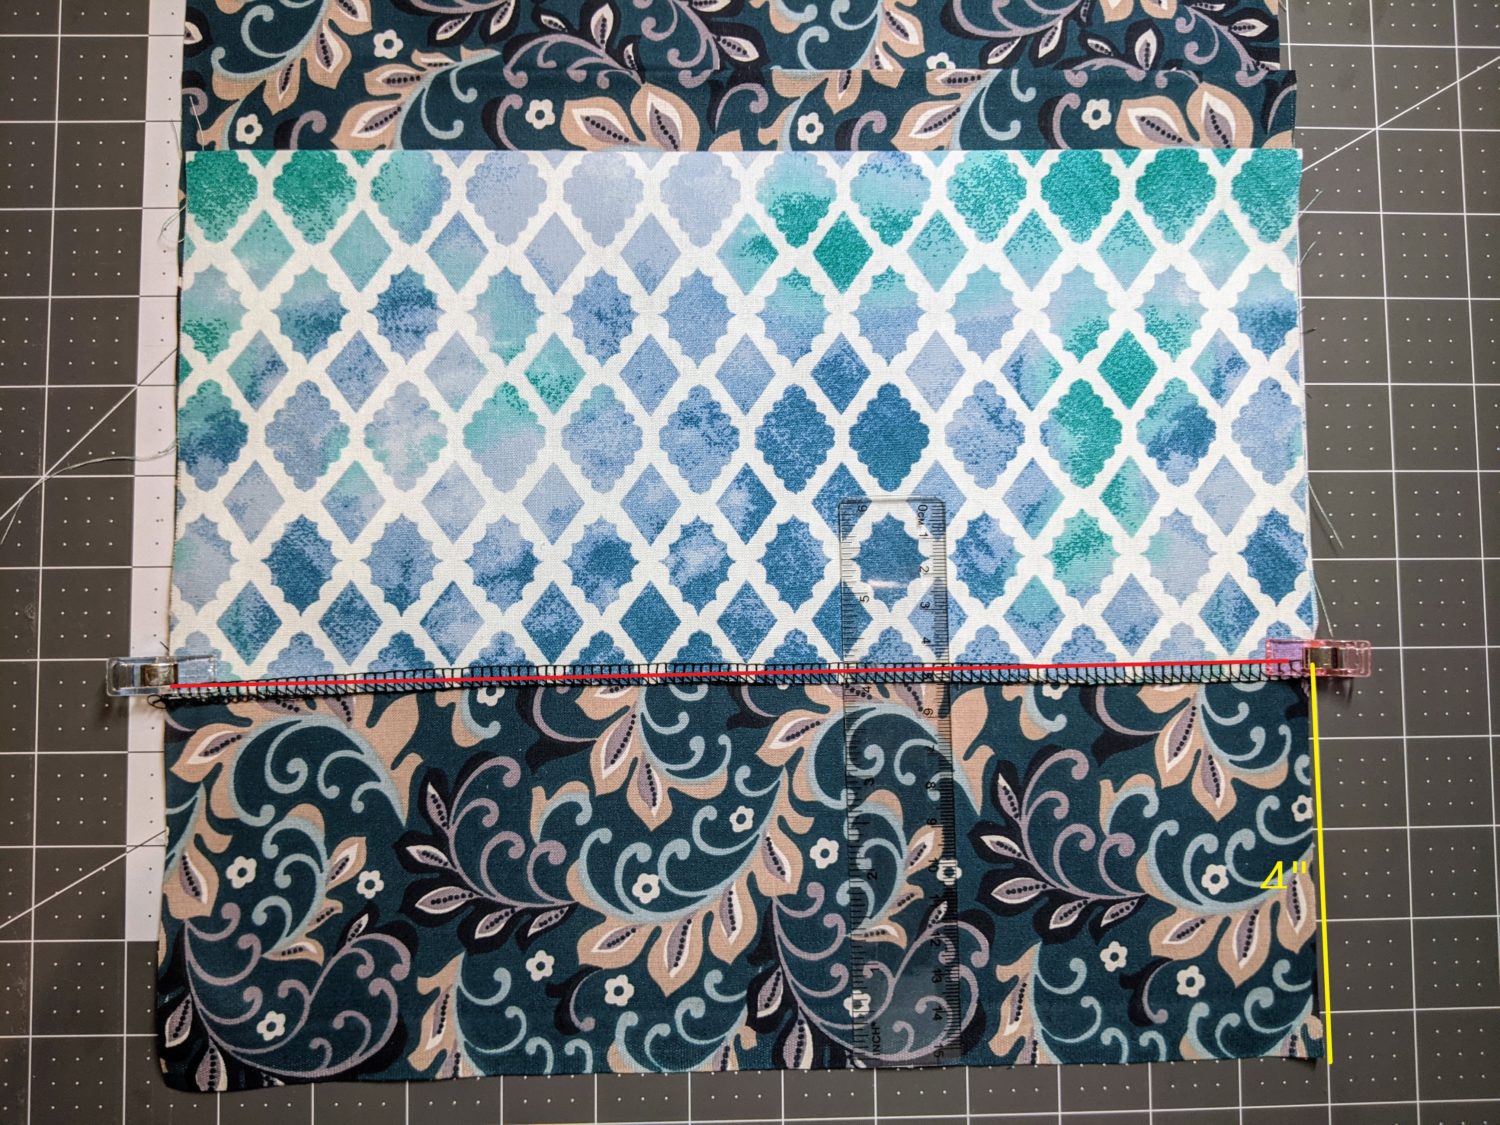
Large pocket: 4″ up from the bottom edge
- Medium Pocket:
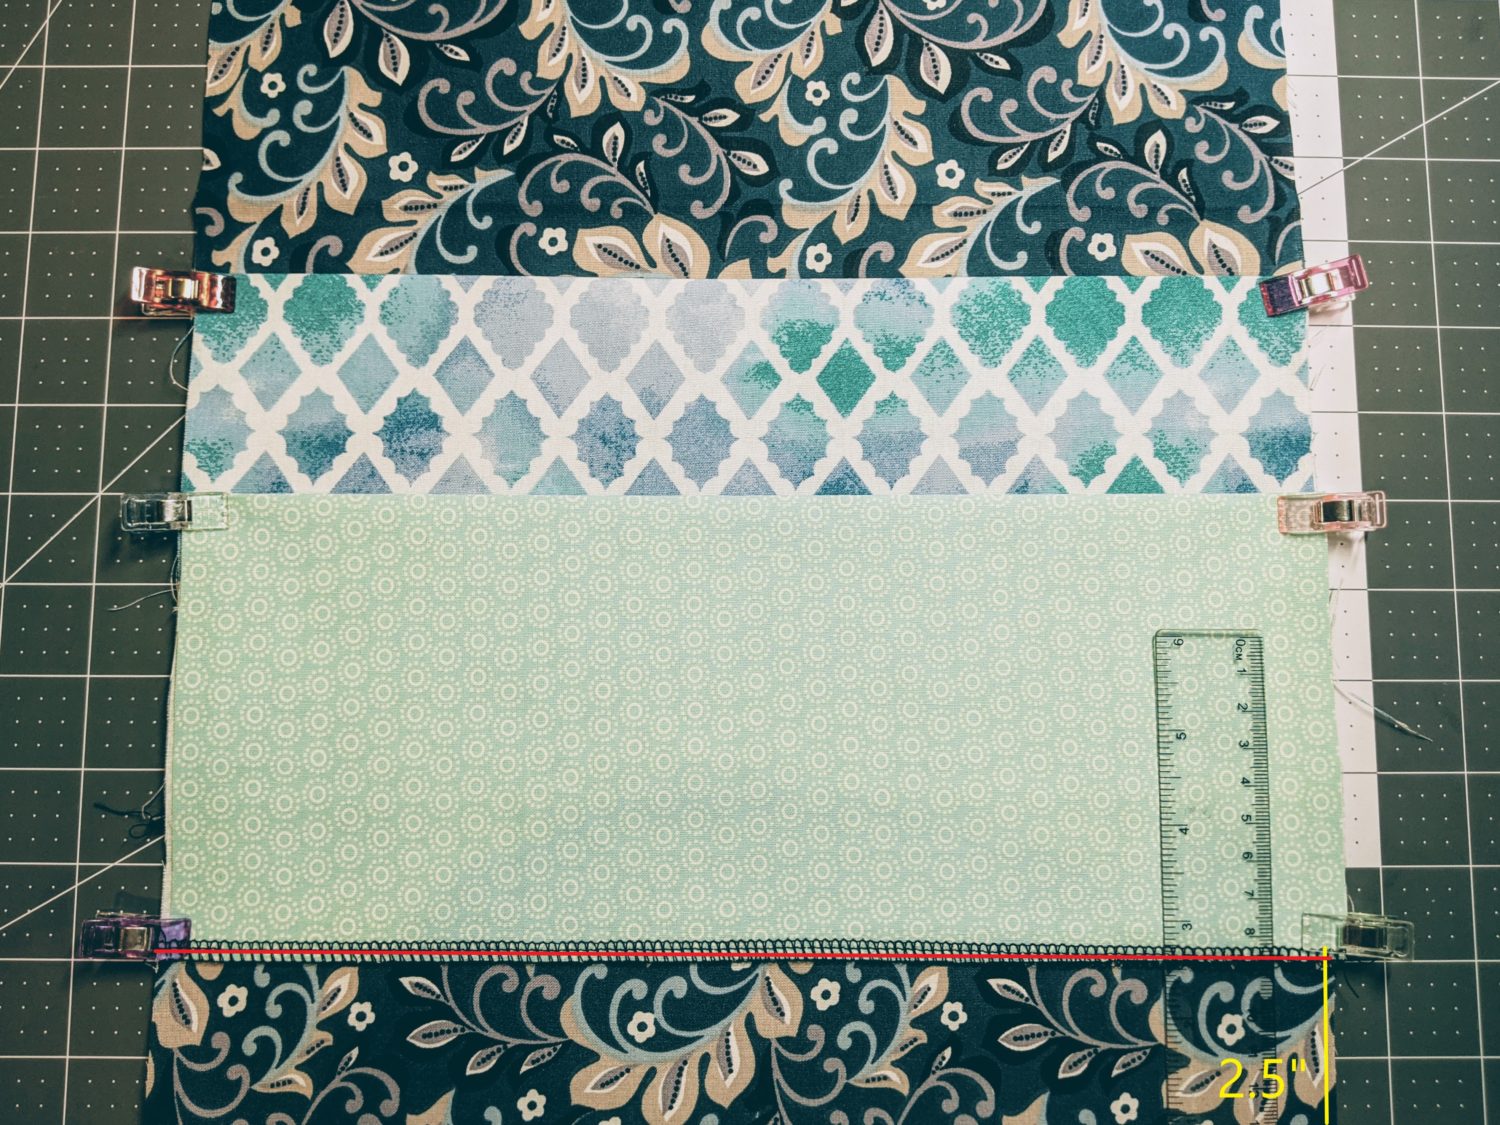
- Measure 2 ½” up from the bottom edge of the main piece.
- Line up the bottom edge of the pocket, pin and sew along the edge of the pocket.
- Small Pocket:
- Measure 1 ½” up from the bottom edge of the main piece.
- Line up the bottom edge of the pocket, pin and sew along the edge of the pocket.
Medium pocket: 2 1/2″ up from the bottom edge 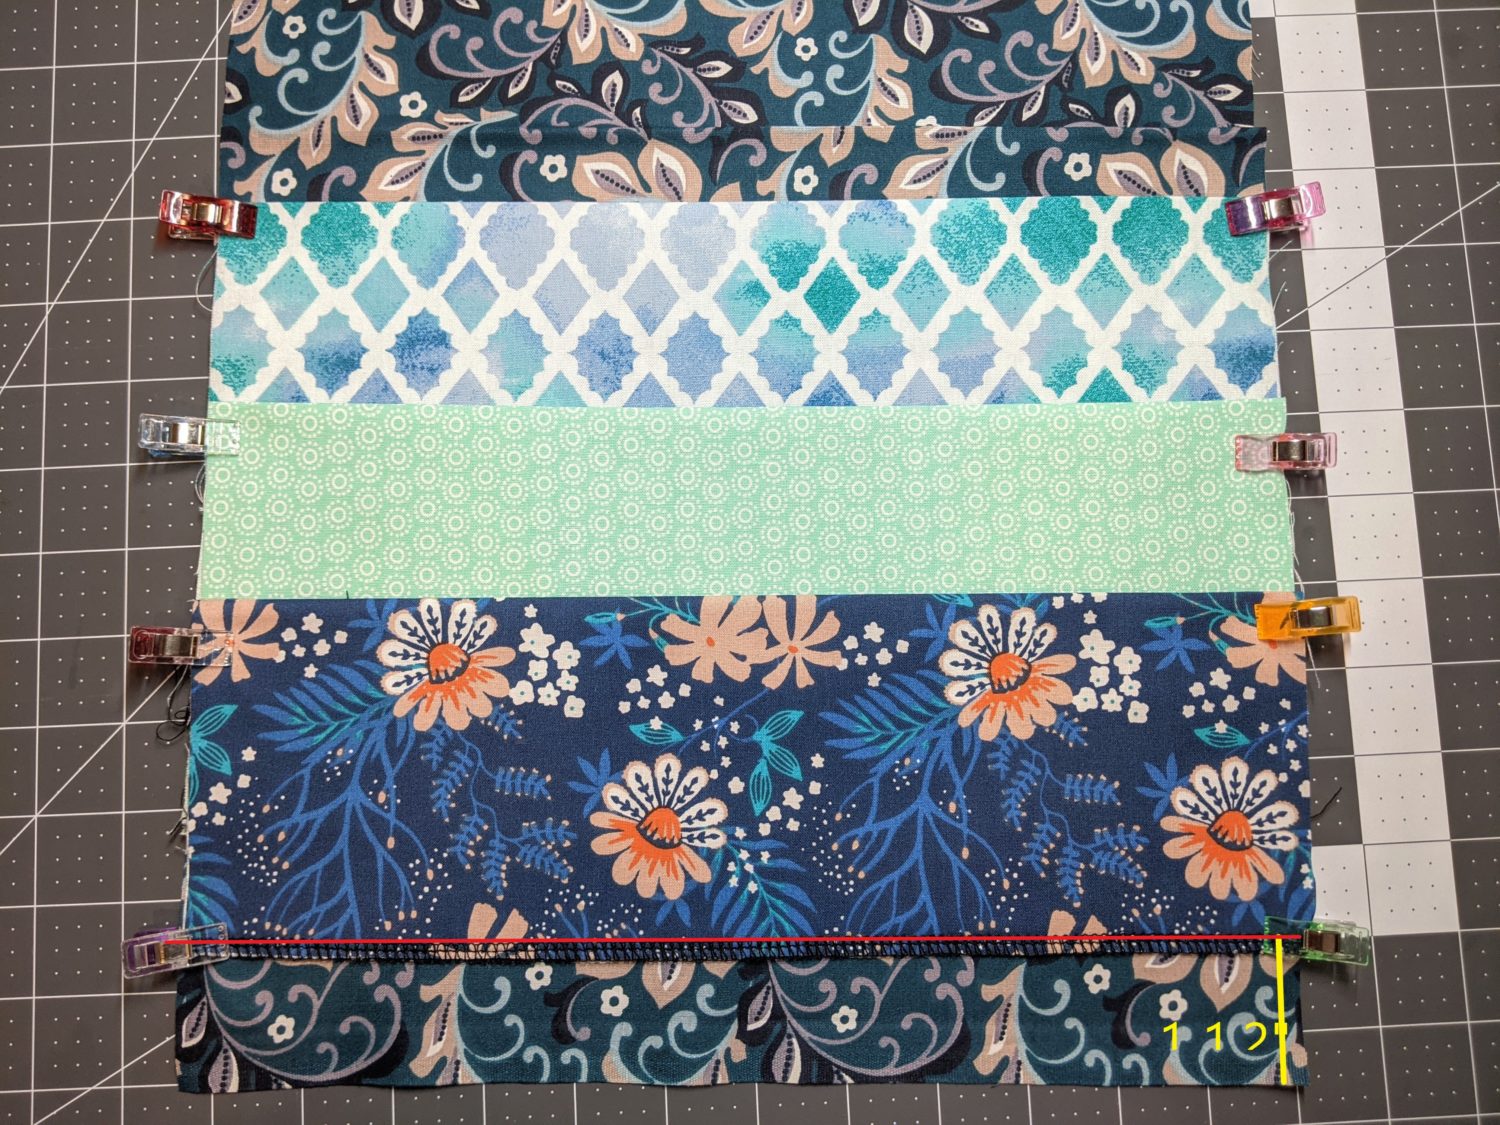
Small pocket: 1 1/2″ up from the bottom edge
- Extra Small Pocket:
- Line up the bottom edge of the pocket along the raw edge of the main fabric piece.
- Pin and sew along the bottom of the pocket.
- Pin all pockets along the vertical edges and baste in place with a long straight stitch sewing from the bottom edge up
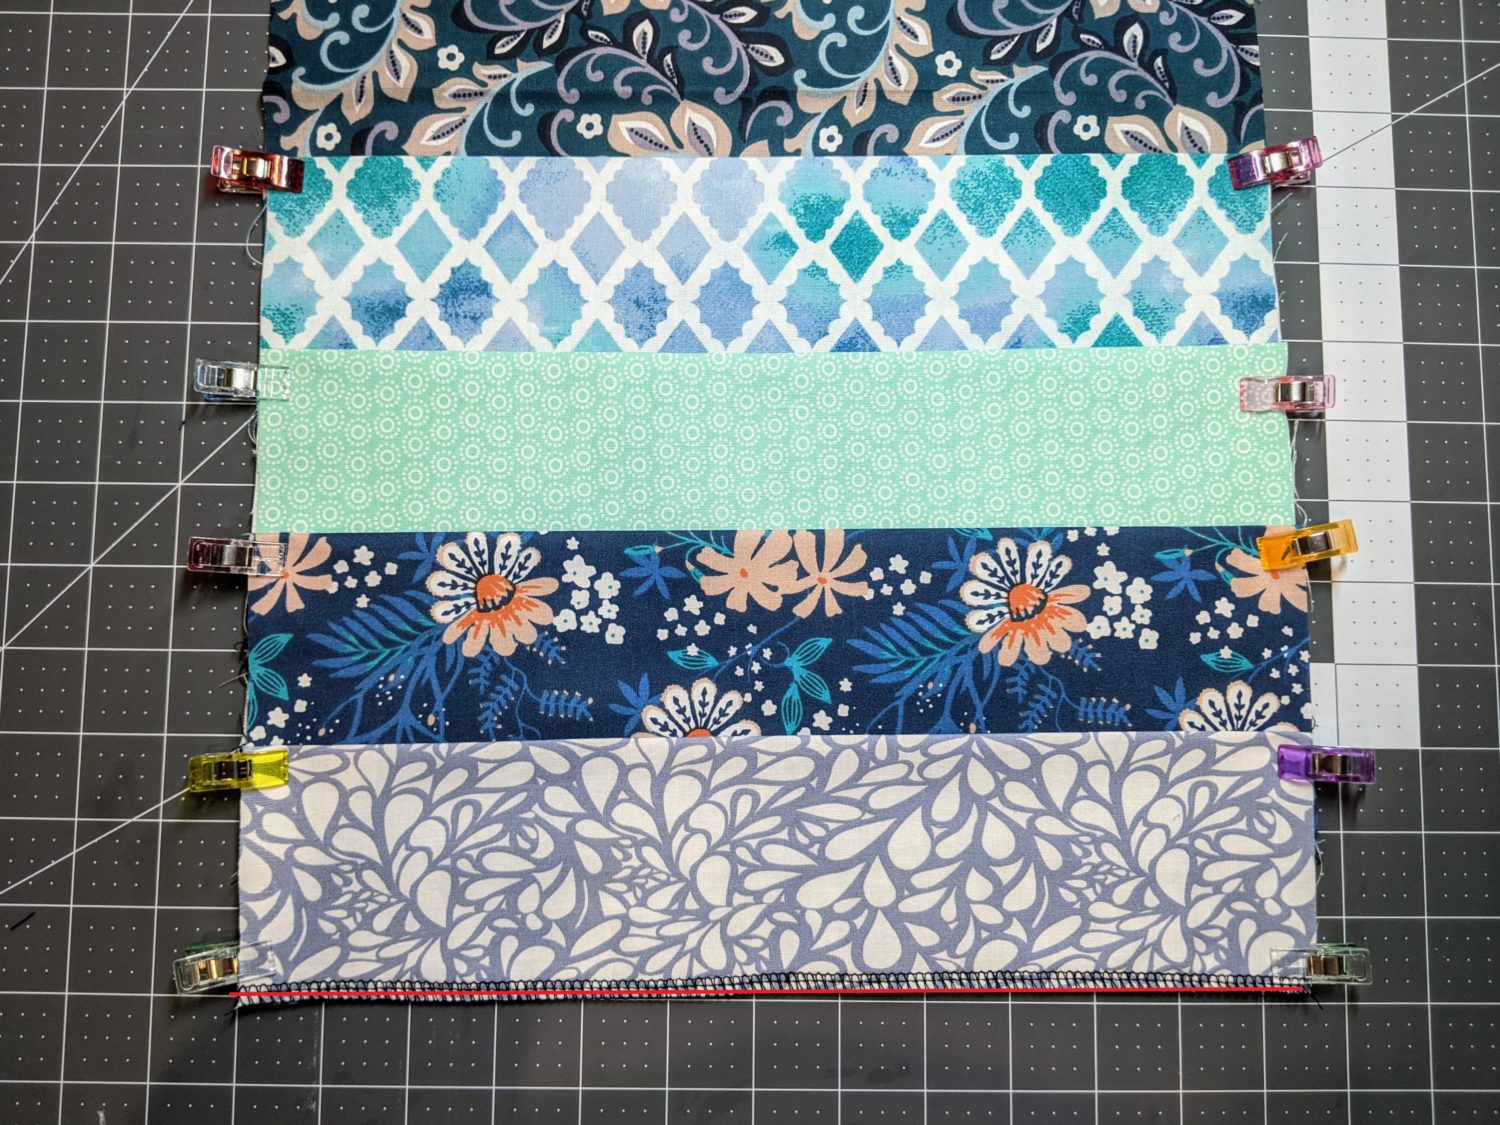
Extra small pocket: lined up with the bottom edge 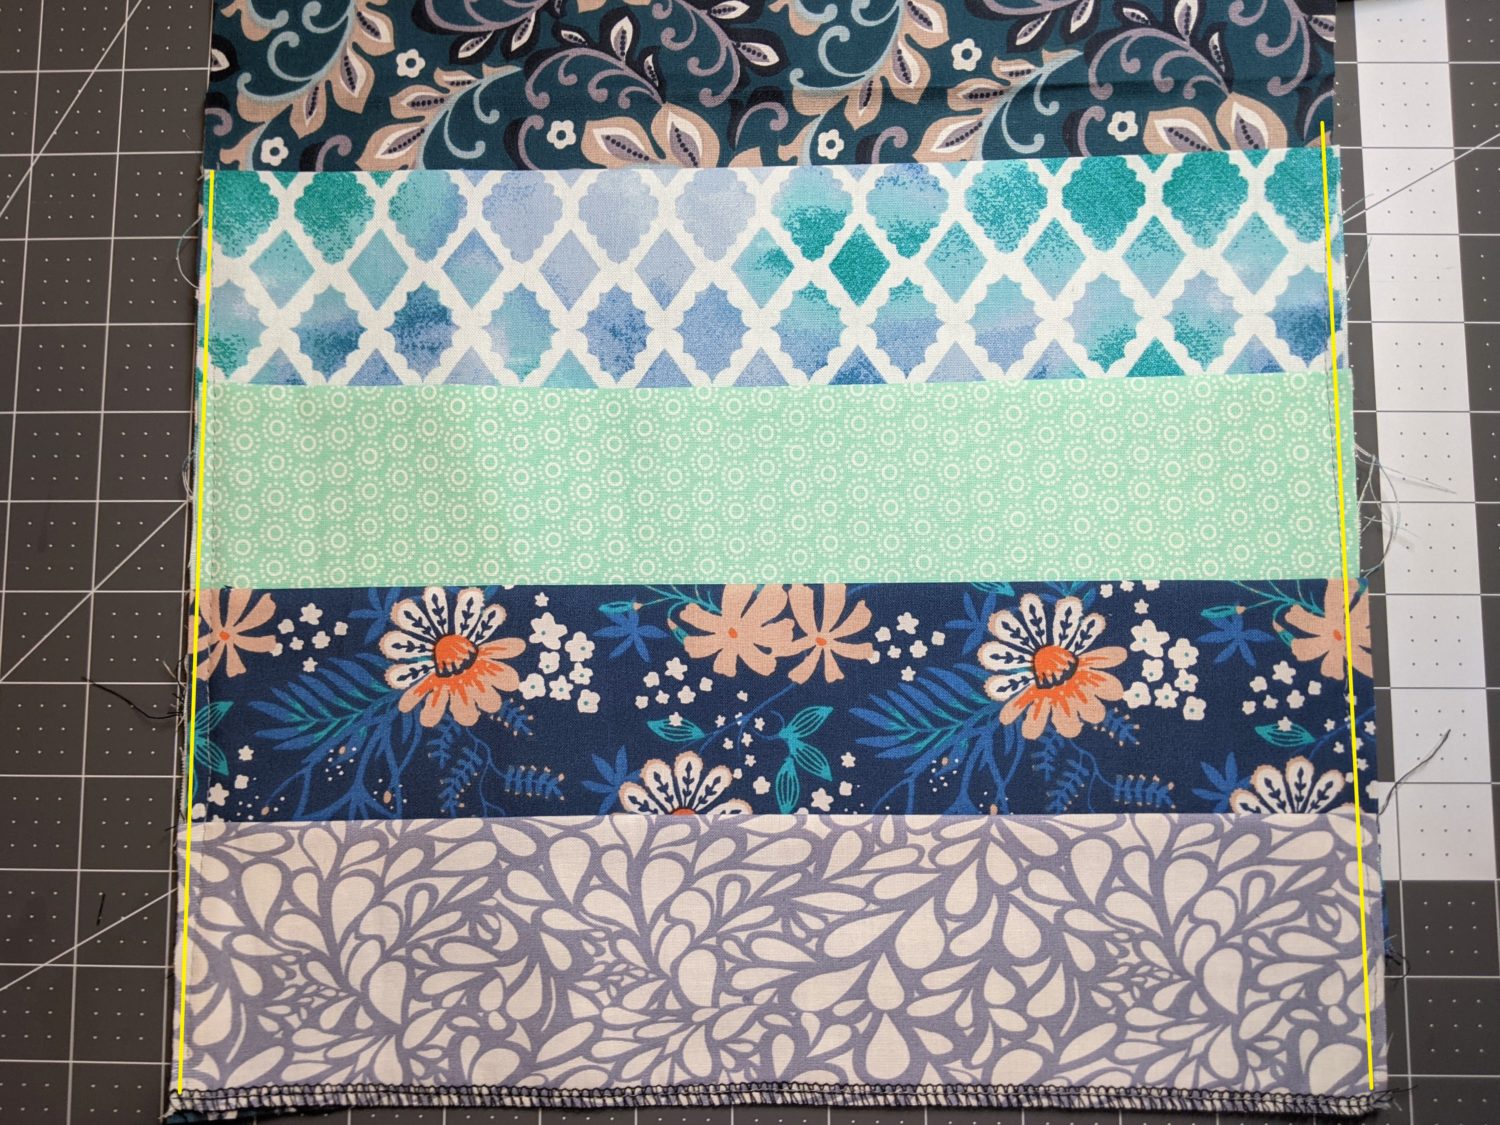
Baste the sides of the pockets to the main front piece
Back:
Flip the same main fabric piece around so the other edge is facing you and again, we are working from the back pocket forward.
- Large Pocket:
- Measure 4” up from the bottom of the main fabric piece.
- Line up the bottom of the pocket, pin, and sew
- Medium Pocket:
- Measure 1 ½” up from the bottom of the main fabric.
- Line up the pocket, pin, and sew
- Small Pocket:
- Line up bottom pocket edge along the bottom edge of the main fabric.
- Pin and sew
- Pin along the vertical edges of the pockets and baste in place with a long straight stitch sewing from the bottom edge up
Large pocket: 4″ up from the bottom edge 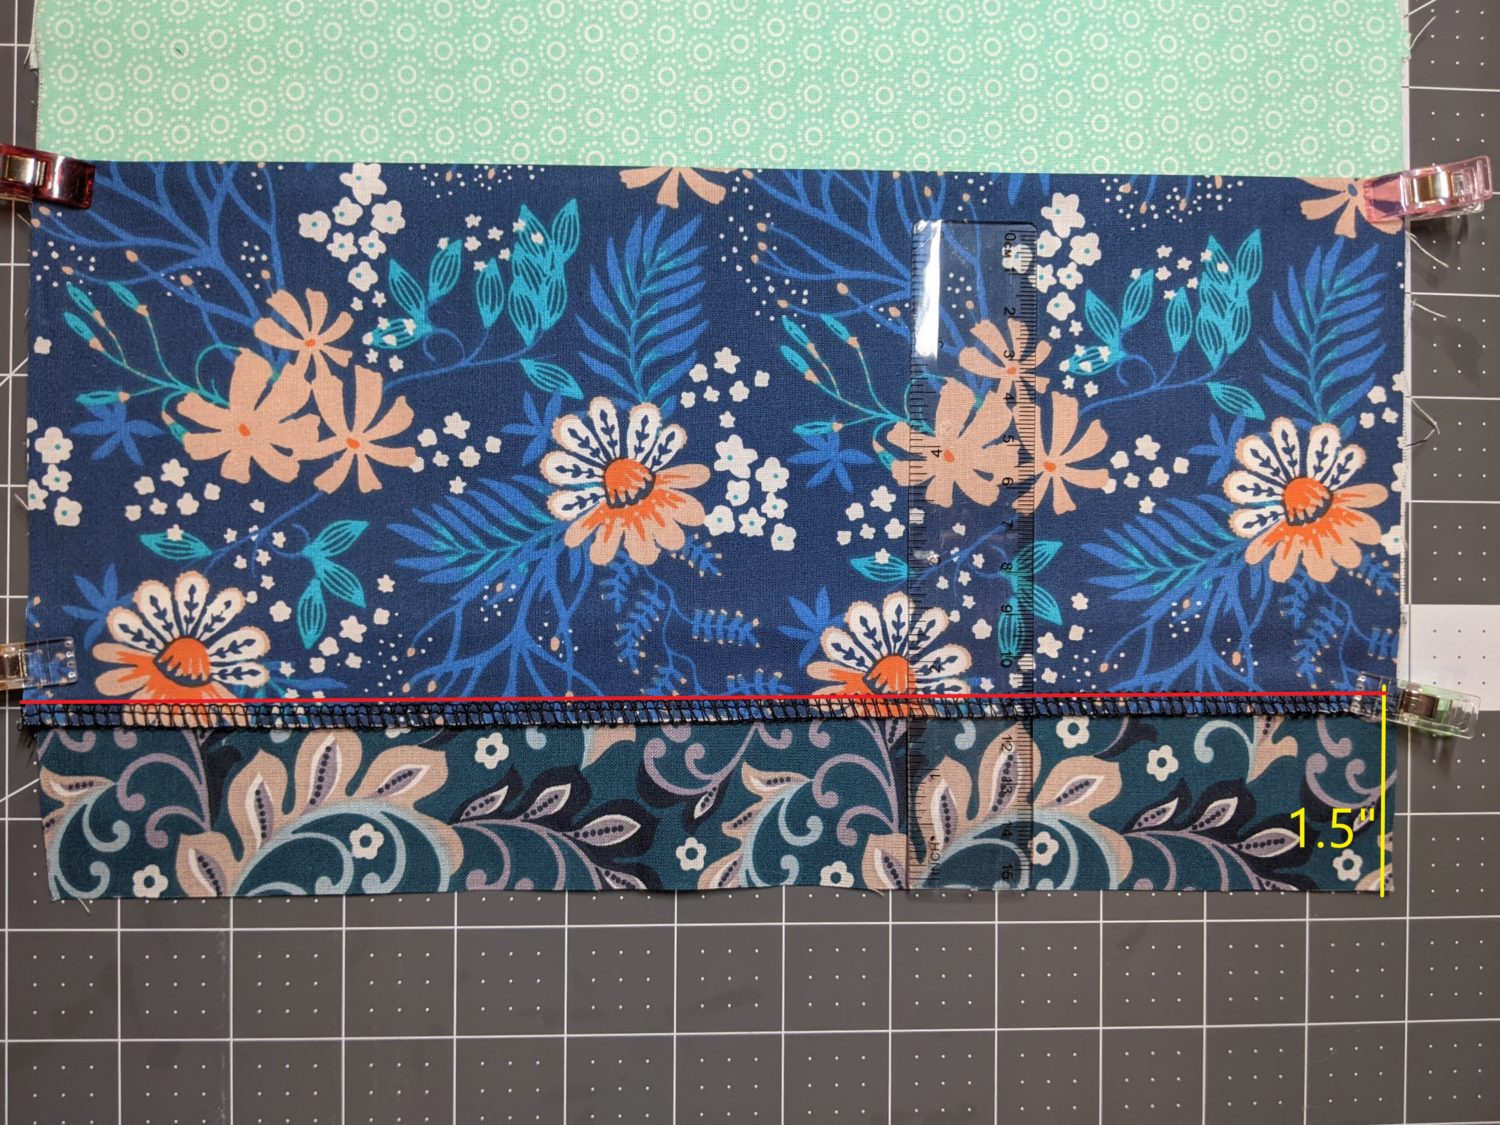
Medium pocket: 1 1/2″ up from the bottom edge 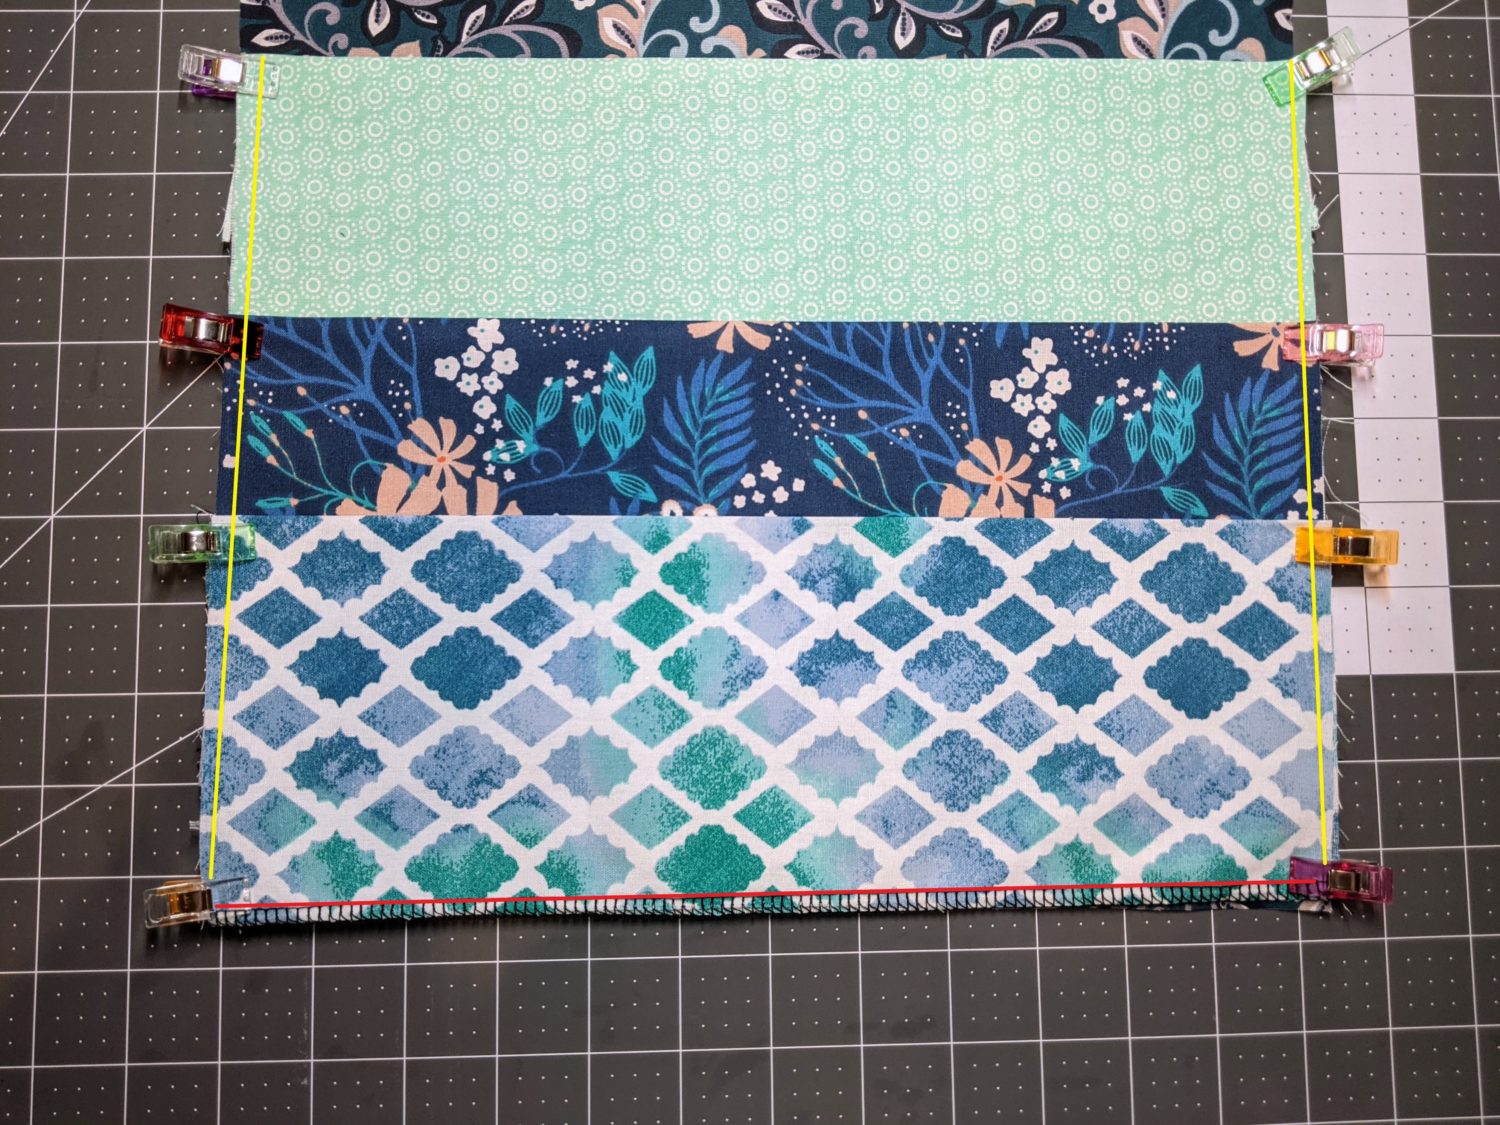
Small pocket: lined up with the bottom edge
Baste the pockets to the main fabric
Creating Pocket Sections:
You can choose to divide the pockets into whatever sections best suit your needs. I chose to divide the front side of my organizer into three sections and the back into two.
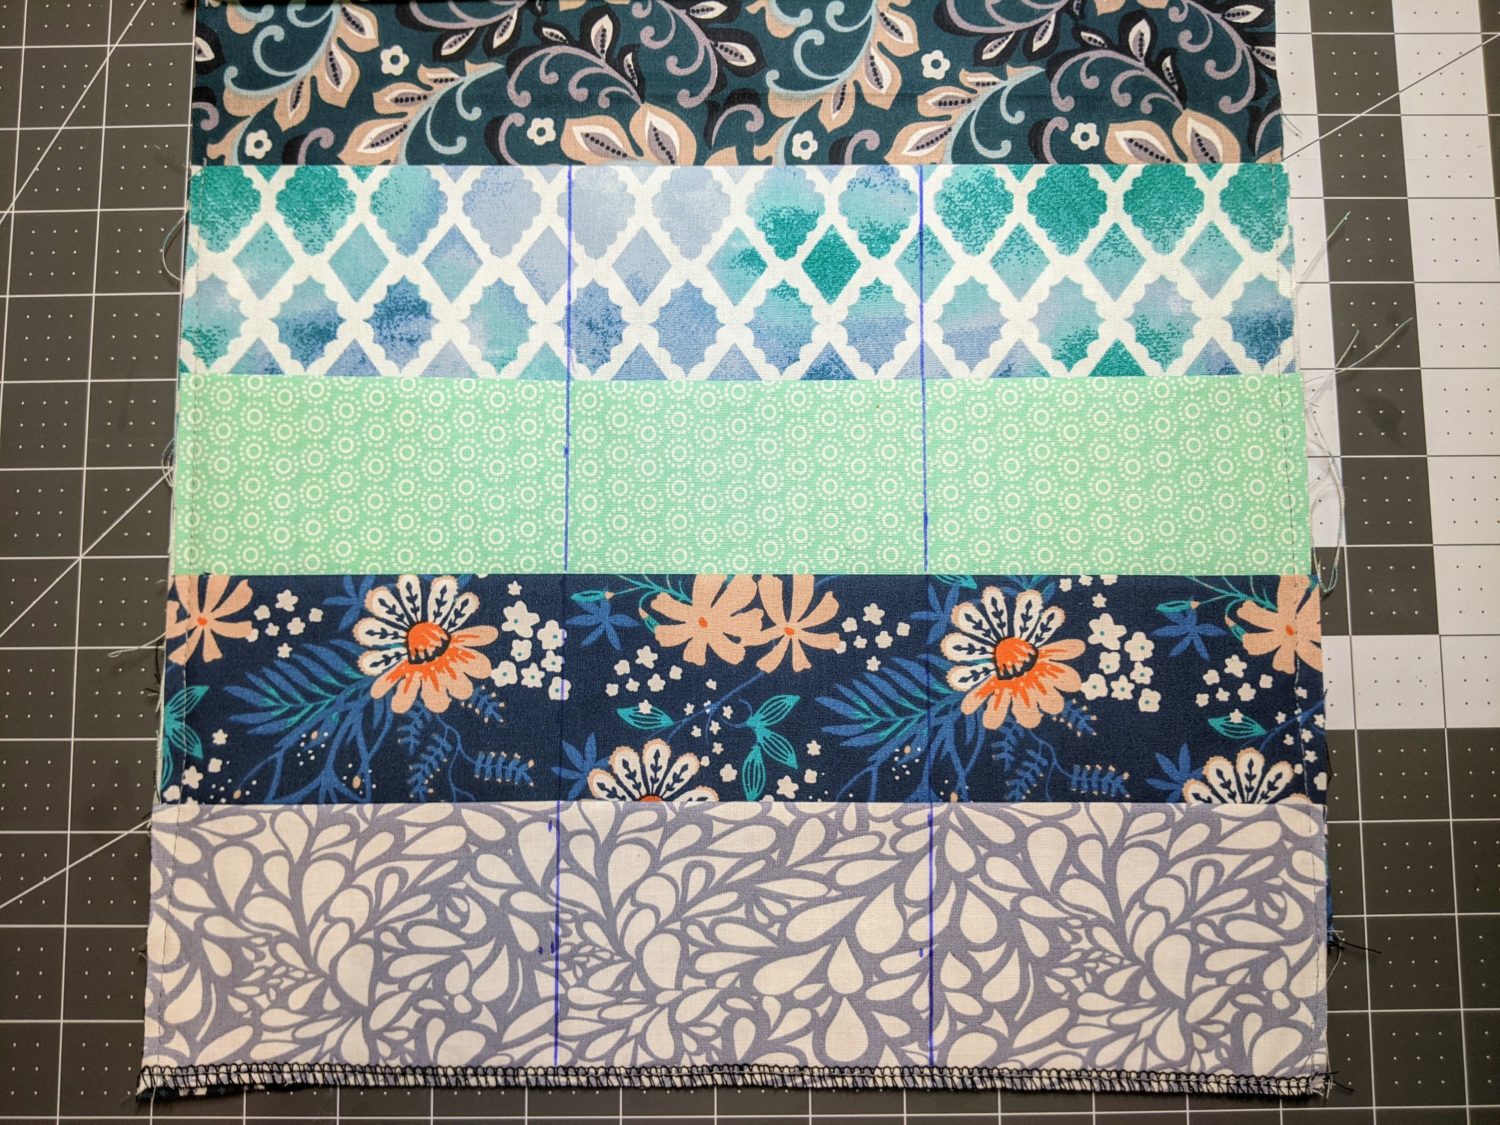
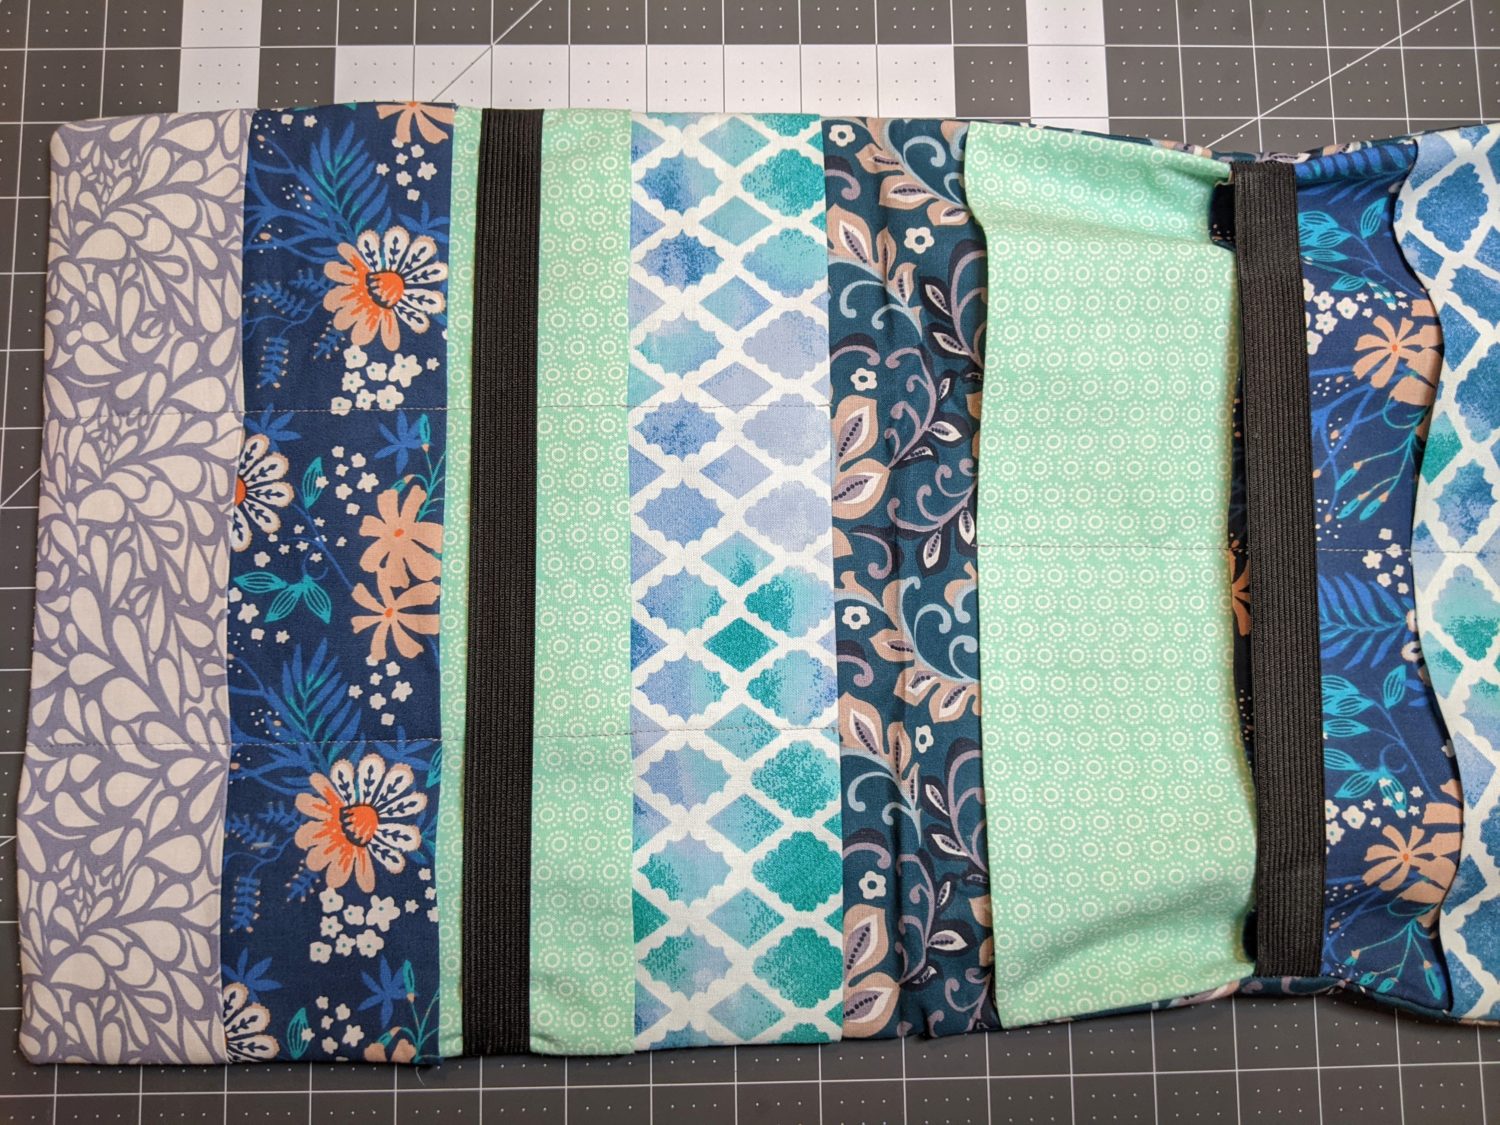
Front
- Measure 4 ¼” inches over from each outer edge and mark with a heat erasable pen (or air soluble marker).
- Mark the vertical lines along all of the pockets.
- Topstitch along the drawn lines from the bottom edge up.
- Press to erase the pen and smooth out the pockets.
Back
- Measure over from one side 6 ¼” to find the center and mark with heat erasable pen.
- Extend the line vertically across all pockets.
- Topstitch from the bottom up along the line.
- Press to remove pen and smooth out the pockets.
Front Back
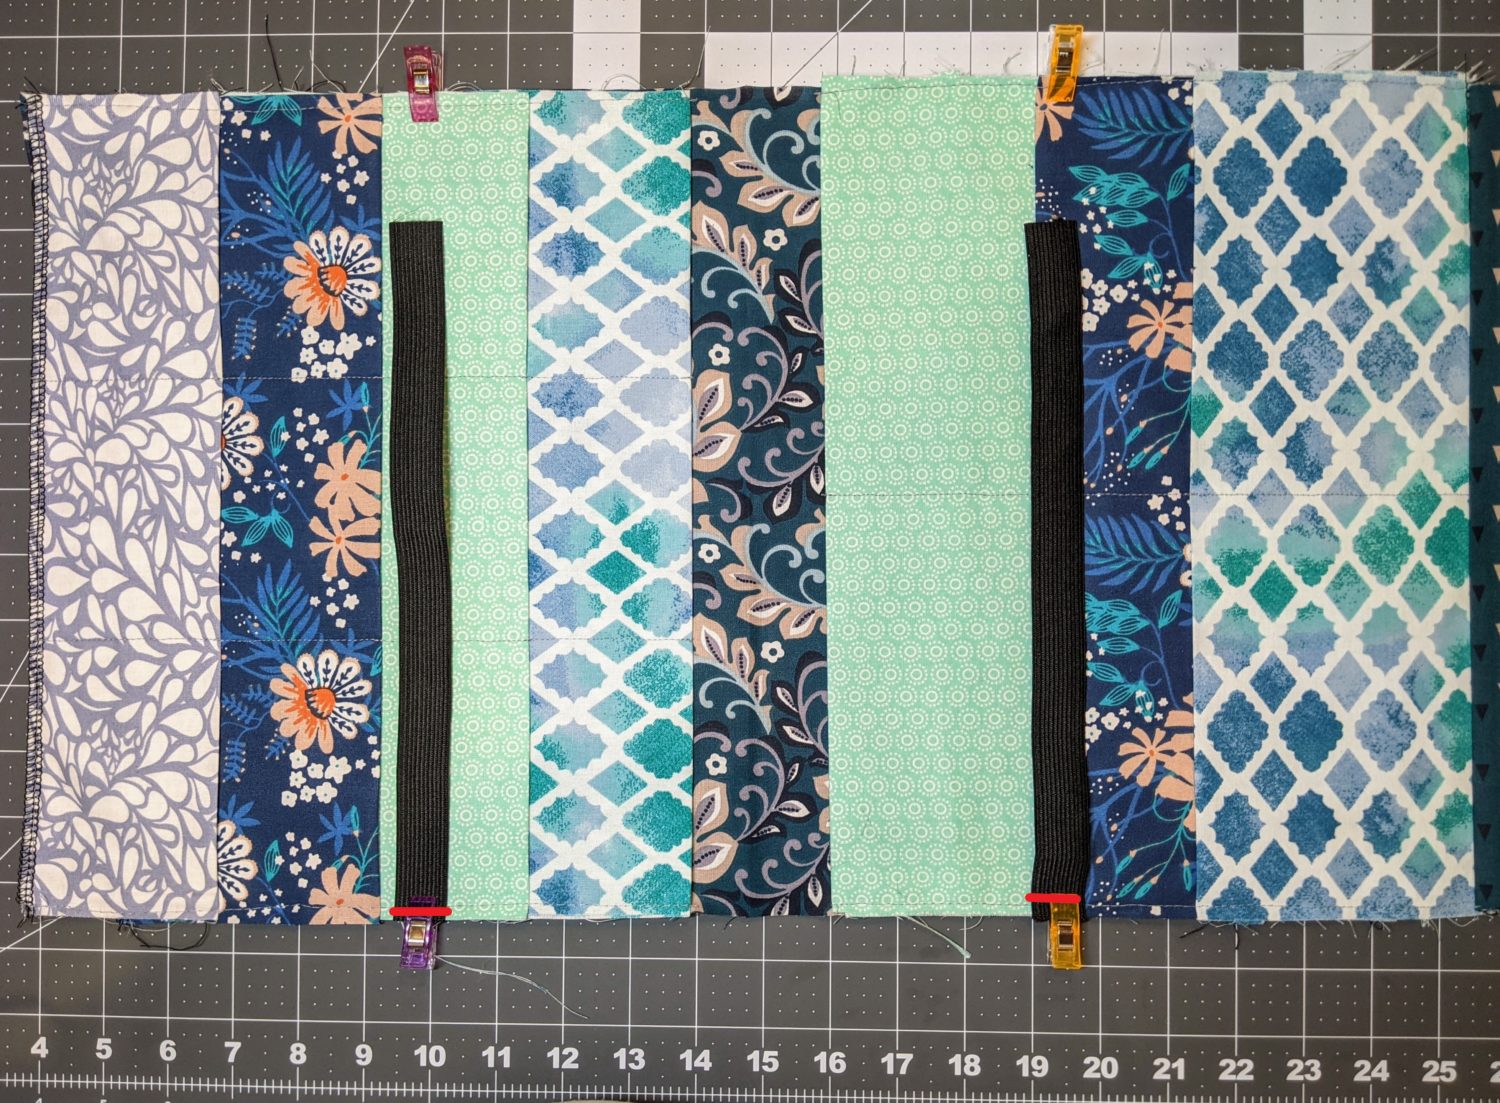
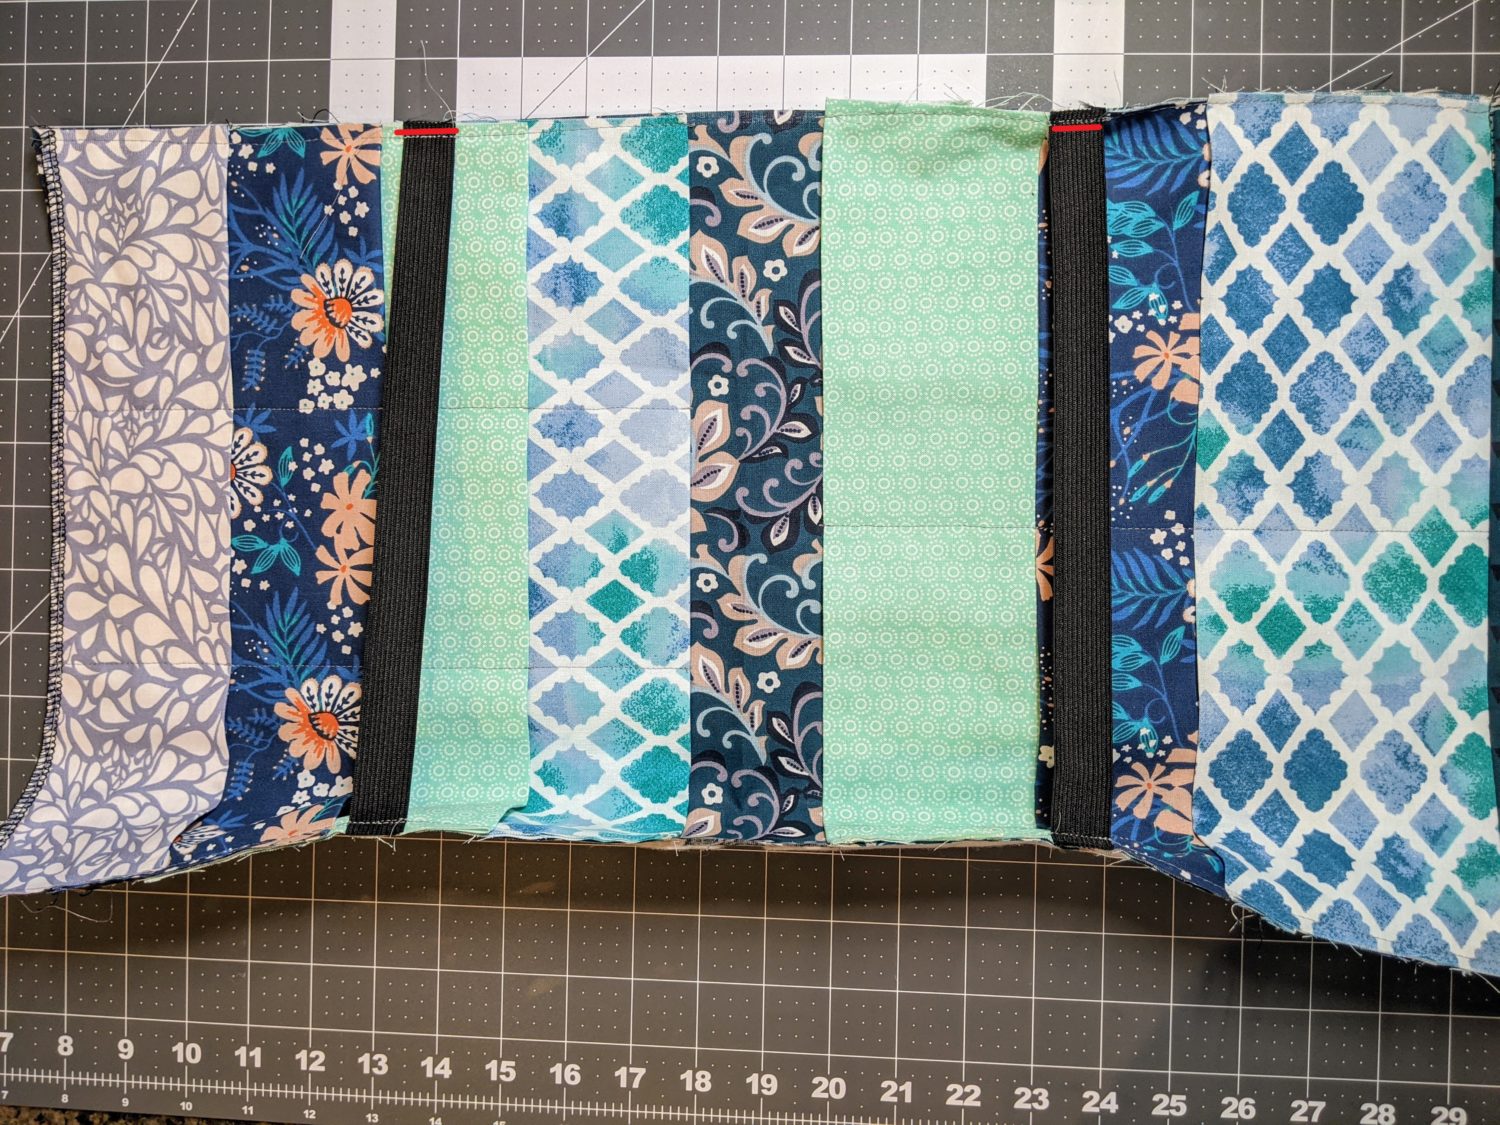
Attach Elastic
You will be sewing one piece of elastic onto both the front and back pocket sections of your organizer. The steps are the same for both sides.
- Measure 6” up from the bottom edge and place a pin on either side to mark that point.
- Line up one raw edge of the elastic with the raw edge of the fabric where you marked, and lay the loose side of the elastic towards the center of the main fabric.
- Sew in place with a straight stitch sewing back and forth multiple times to keep it very secure.
- Stretch the elastic across to the other side where you marked and pin in place.
- Sew across the elastic with a straight stitch sewing back and forth multiple times.
- Repeat the same process on the other side of the main pocket piece.
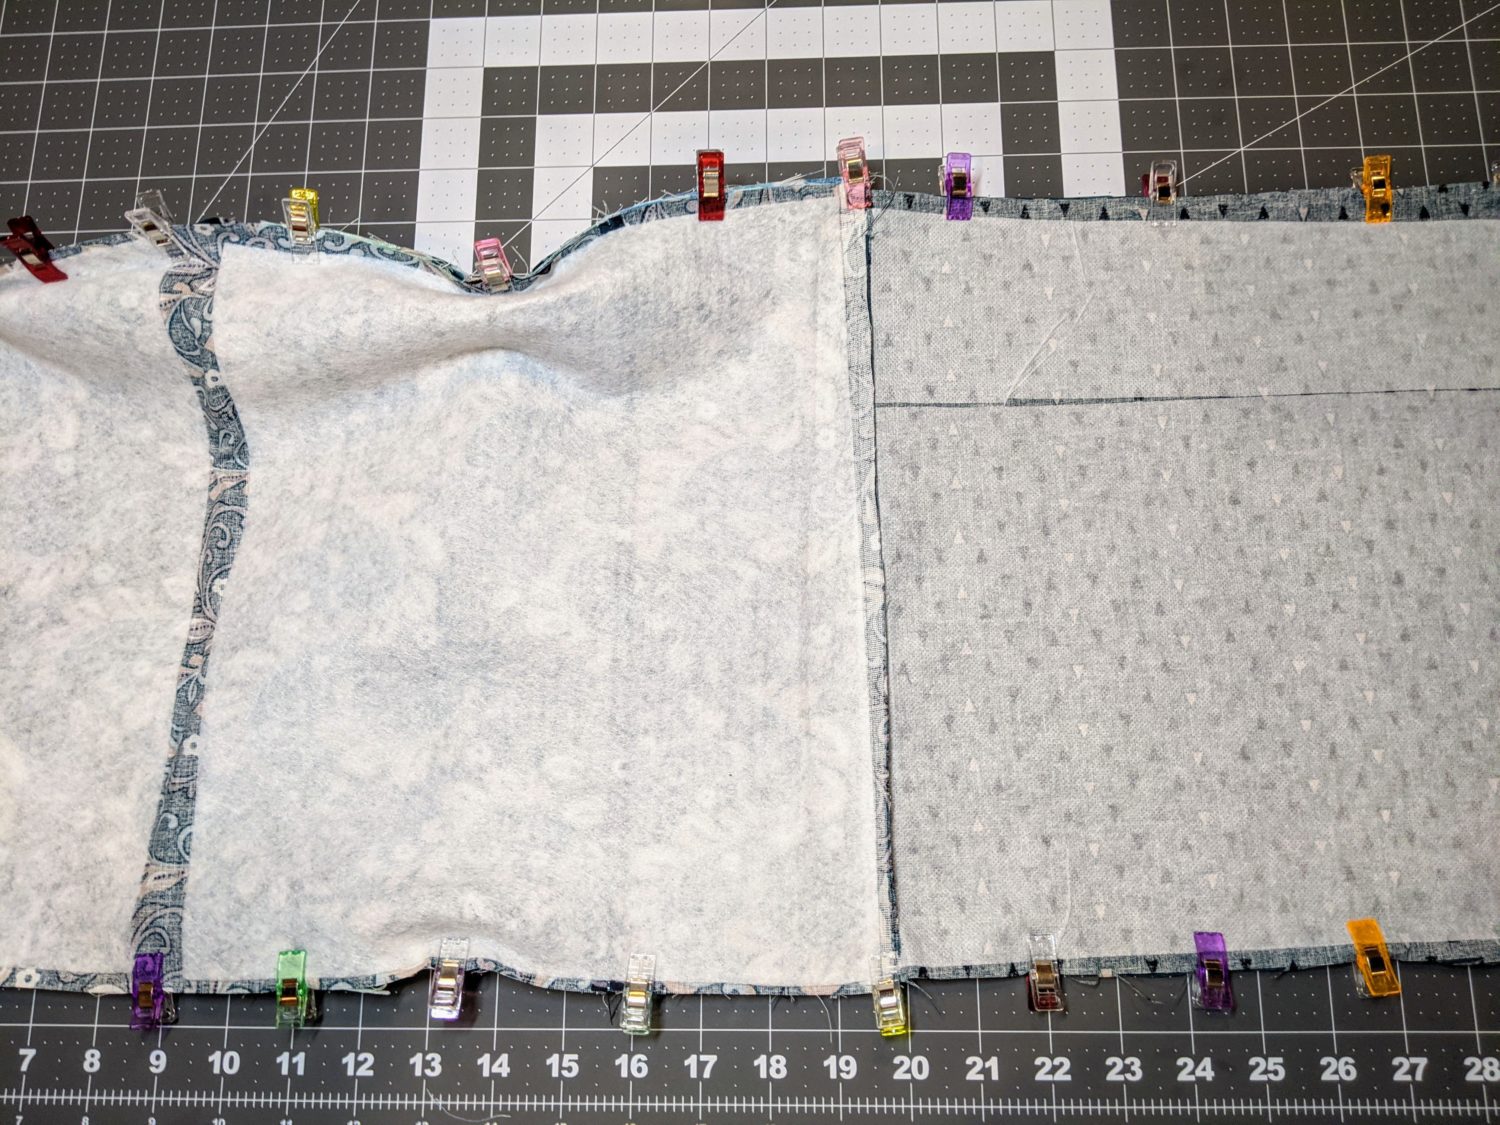
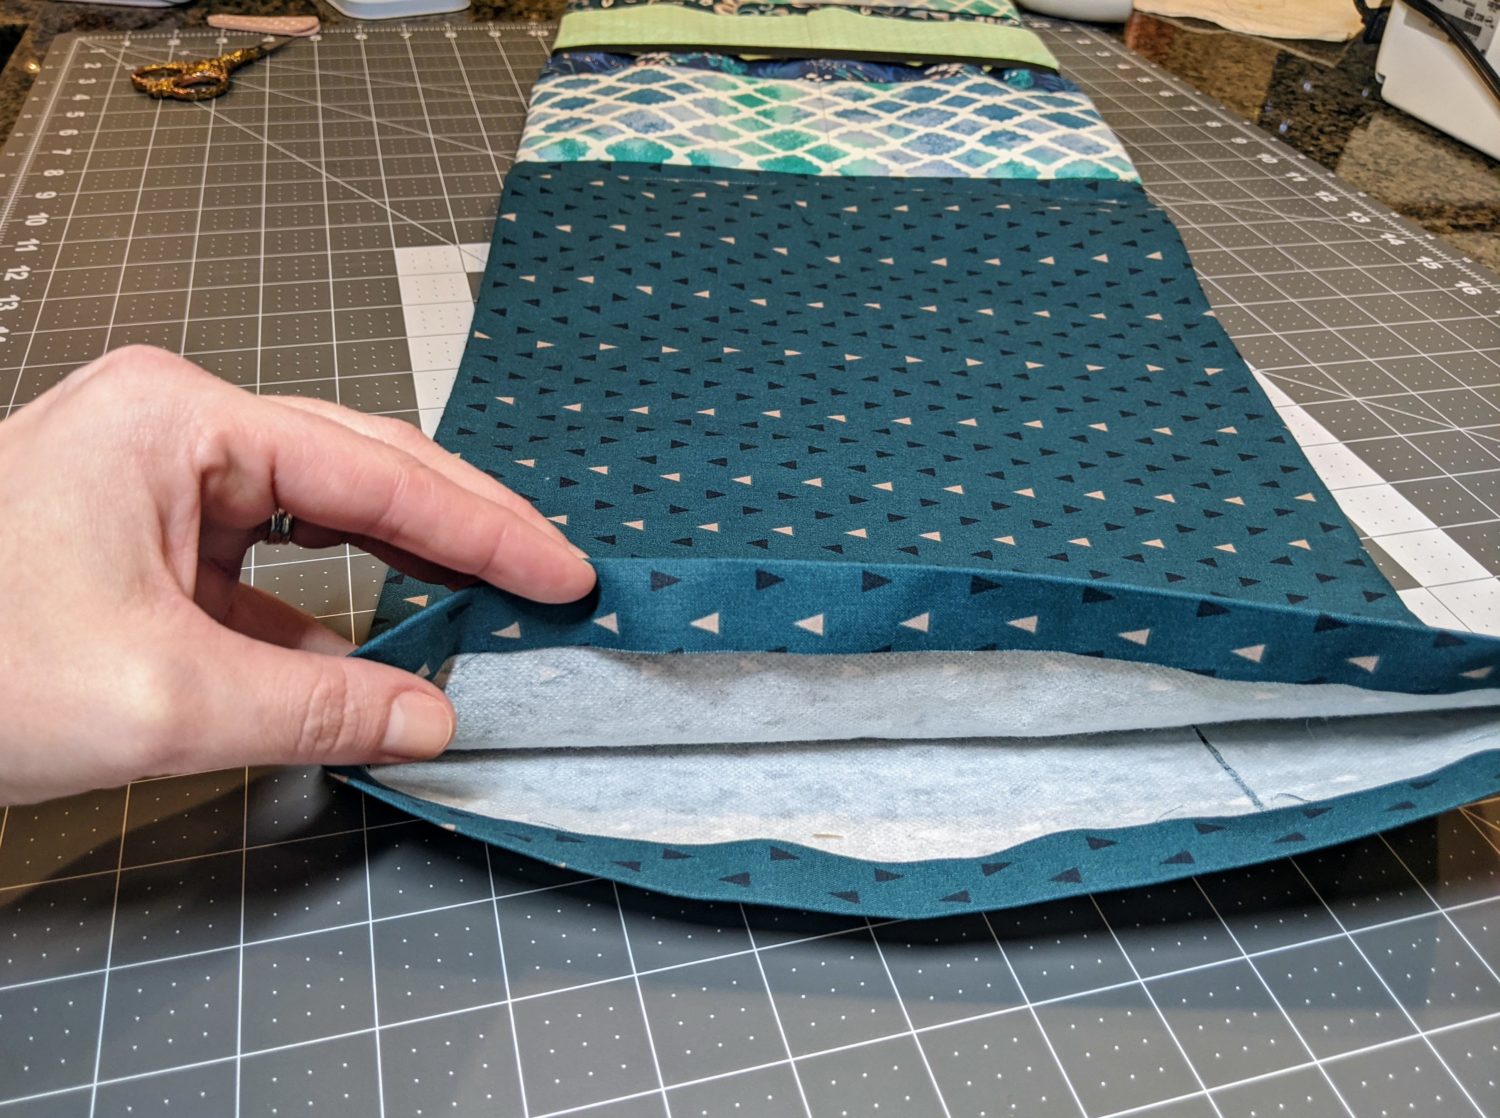
The Cover/pad piece
- Set out your front main piece (the side with pockets) right side up.
- Take one of the covering/pad pieces and place it on top right side down.
- Line up the short raw edges of the bottom of the backside pockets main piece and the cover piece, pin together.
- Sew in place with straight stitch using a ⅜” seam allowance, press the seam allowance towards the covering piece.
Line up raw bottom edges of the covering piece and backside of the pocket piece 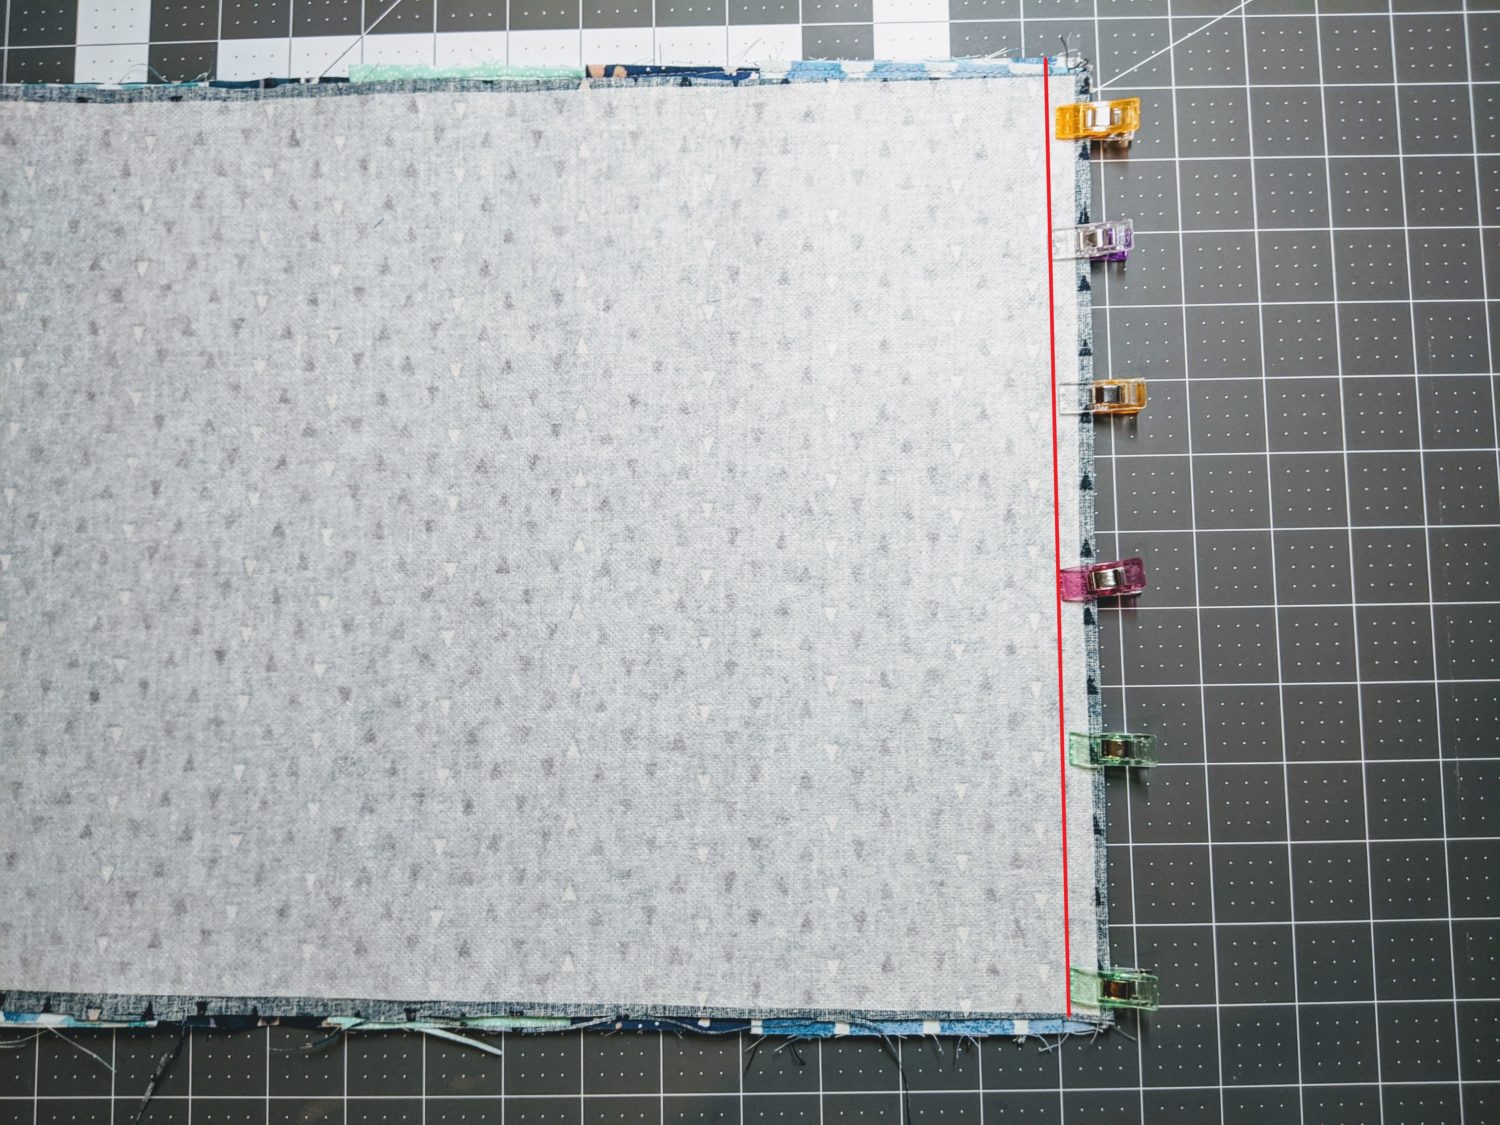
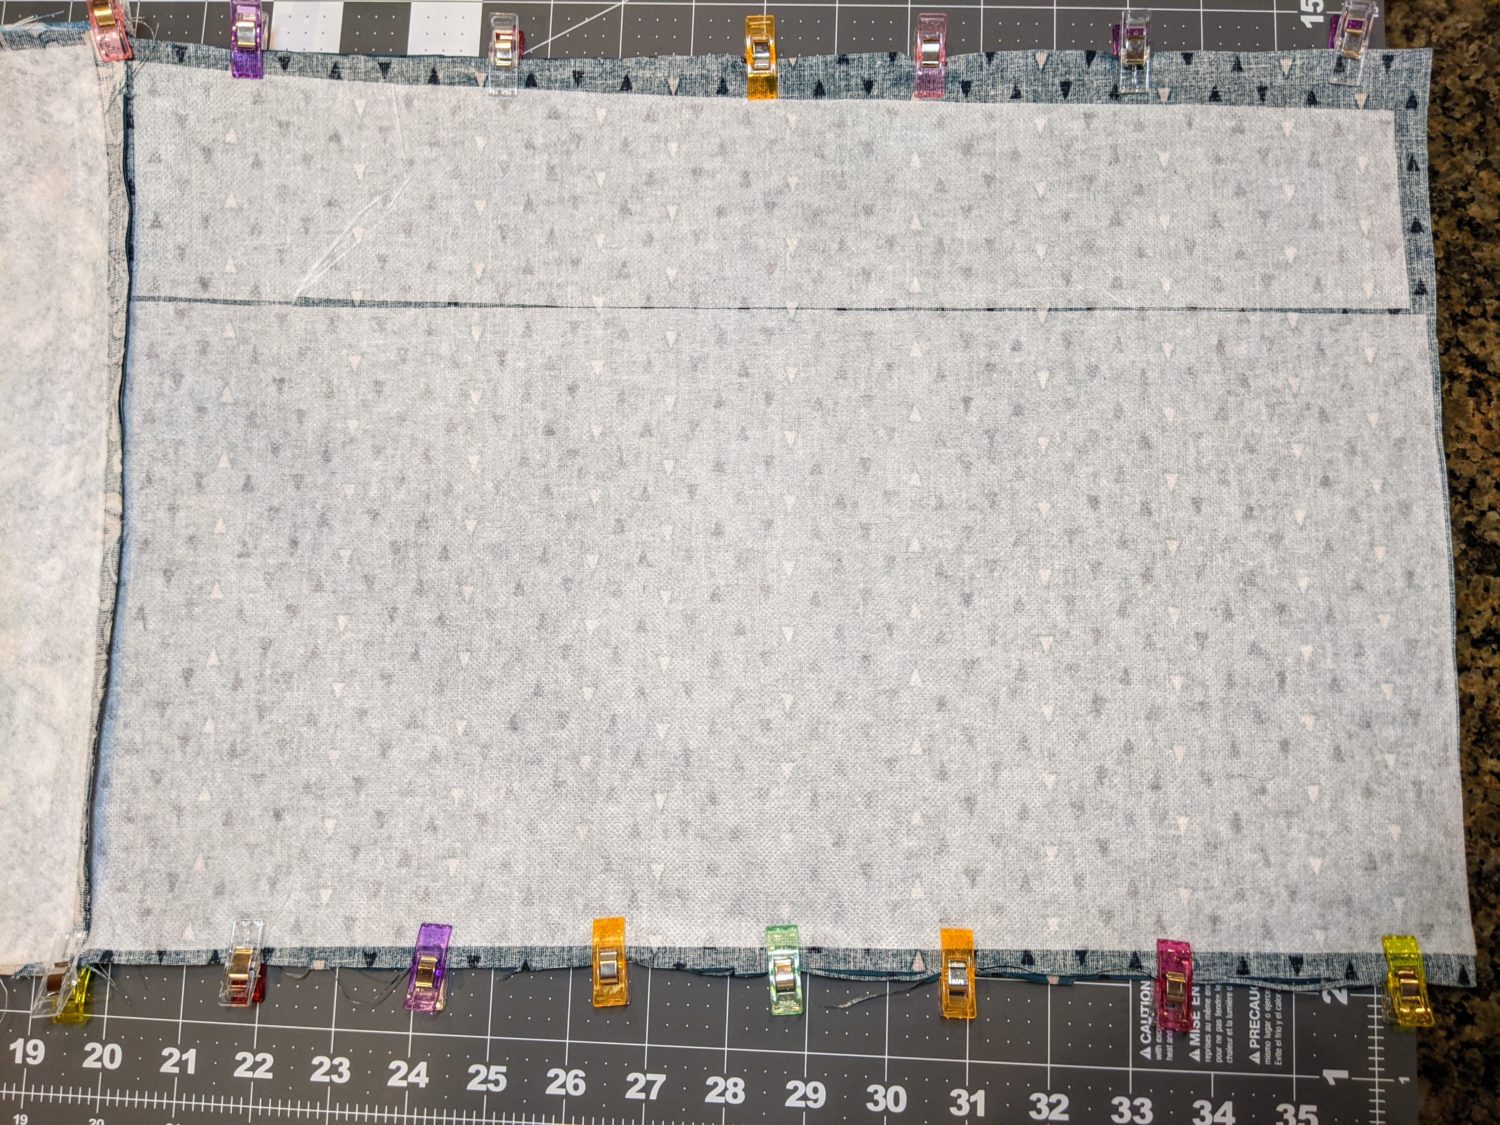
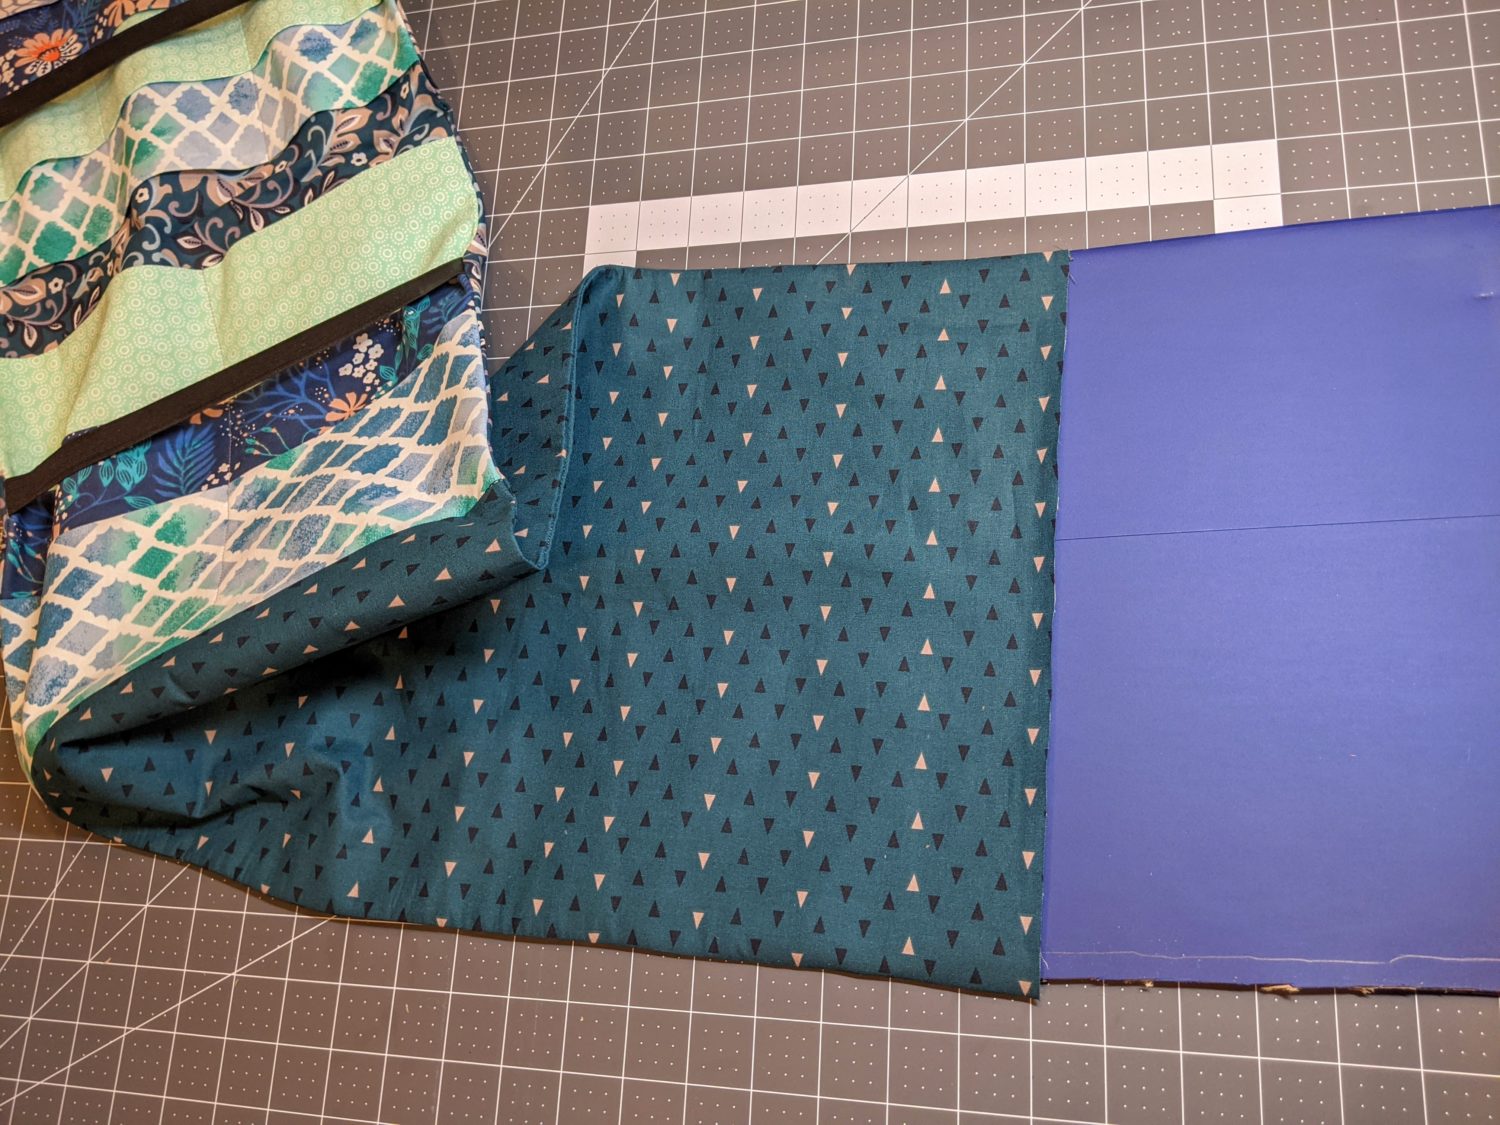
- Set out your back main piece (the side without pockets) right side up.
- Take the other covering/pad piece and place it on top right side down.
- Line up one short raw edge of the covering piece with one short raw edge of the back main piece, pin in place.
- Sew with a straight stitch using a ⅜” seam allowance, press the seam allowance towards the covering piece.
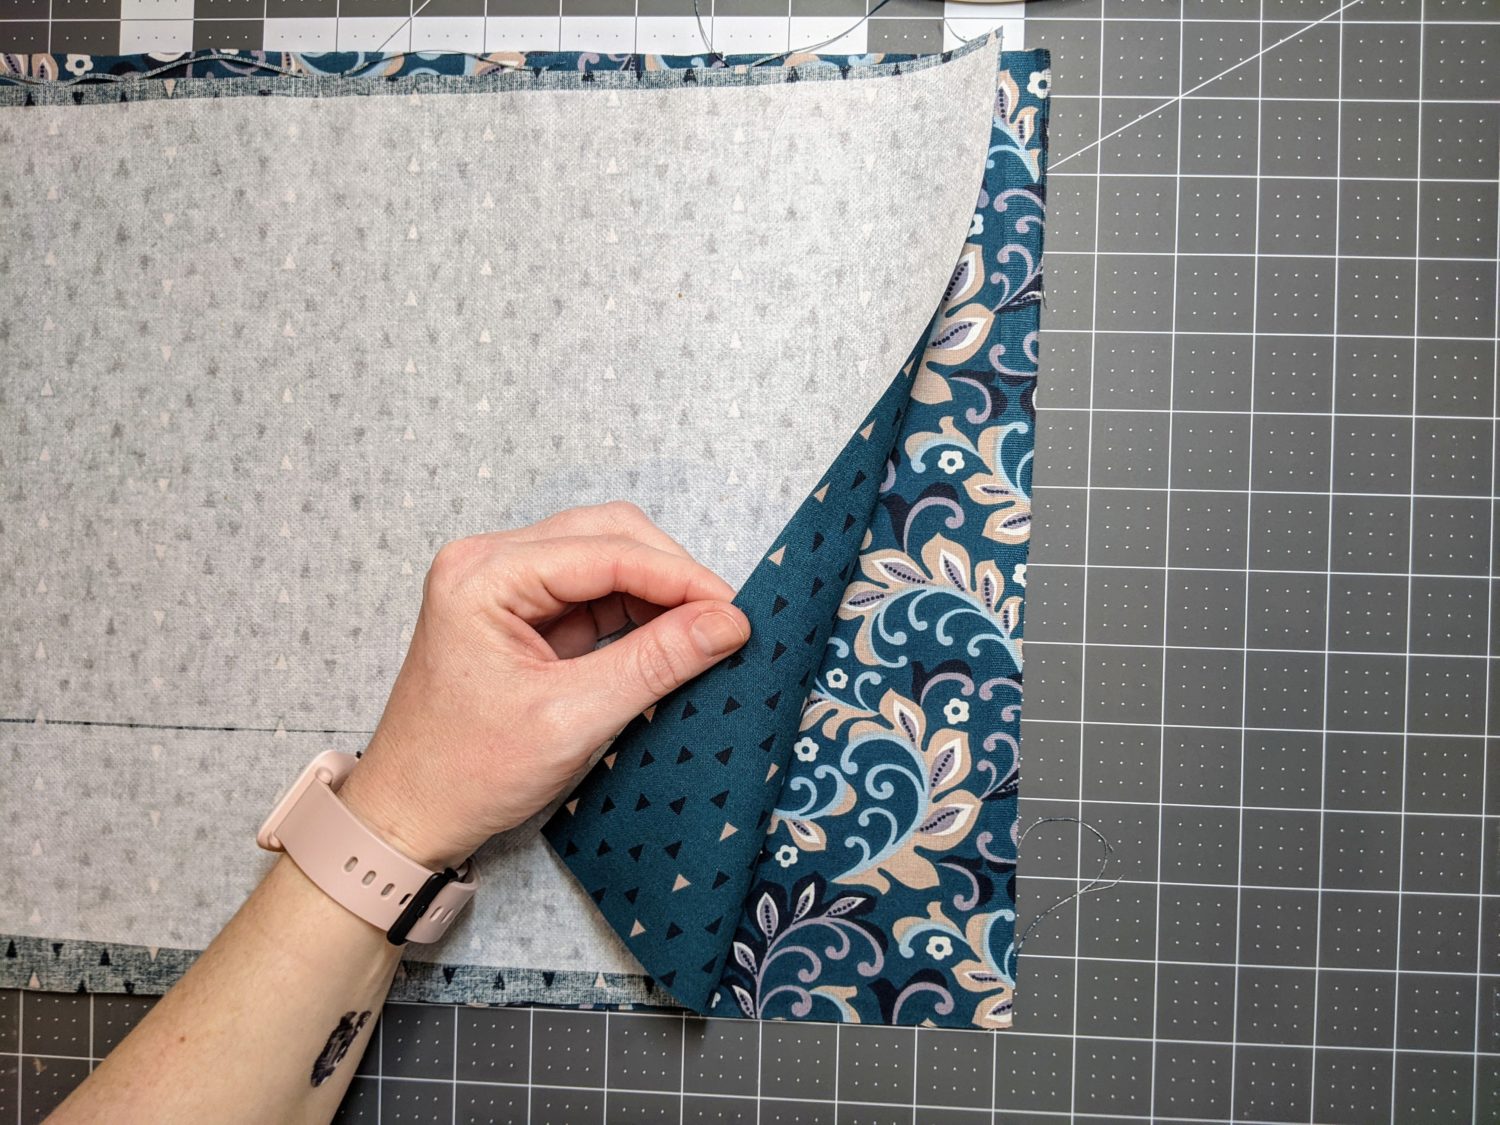
Line up back main and the other side of the cover piece 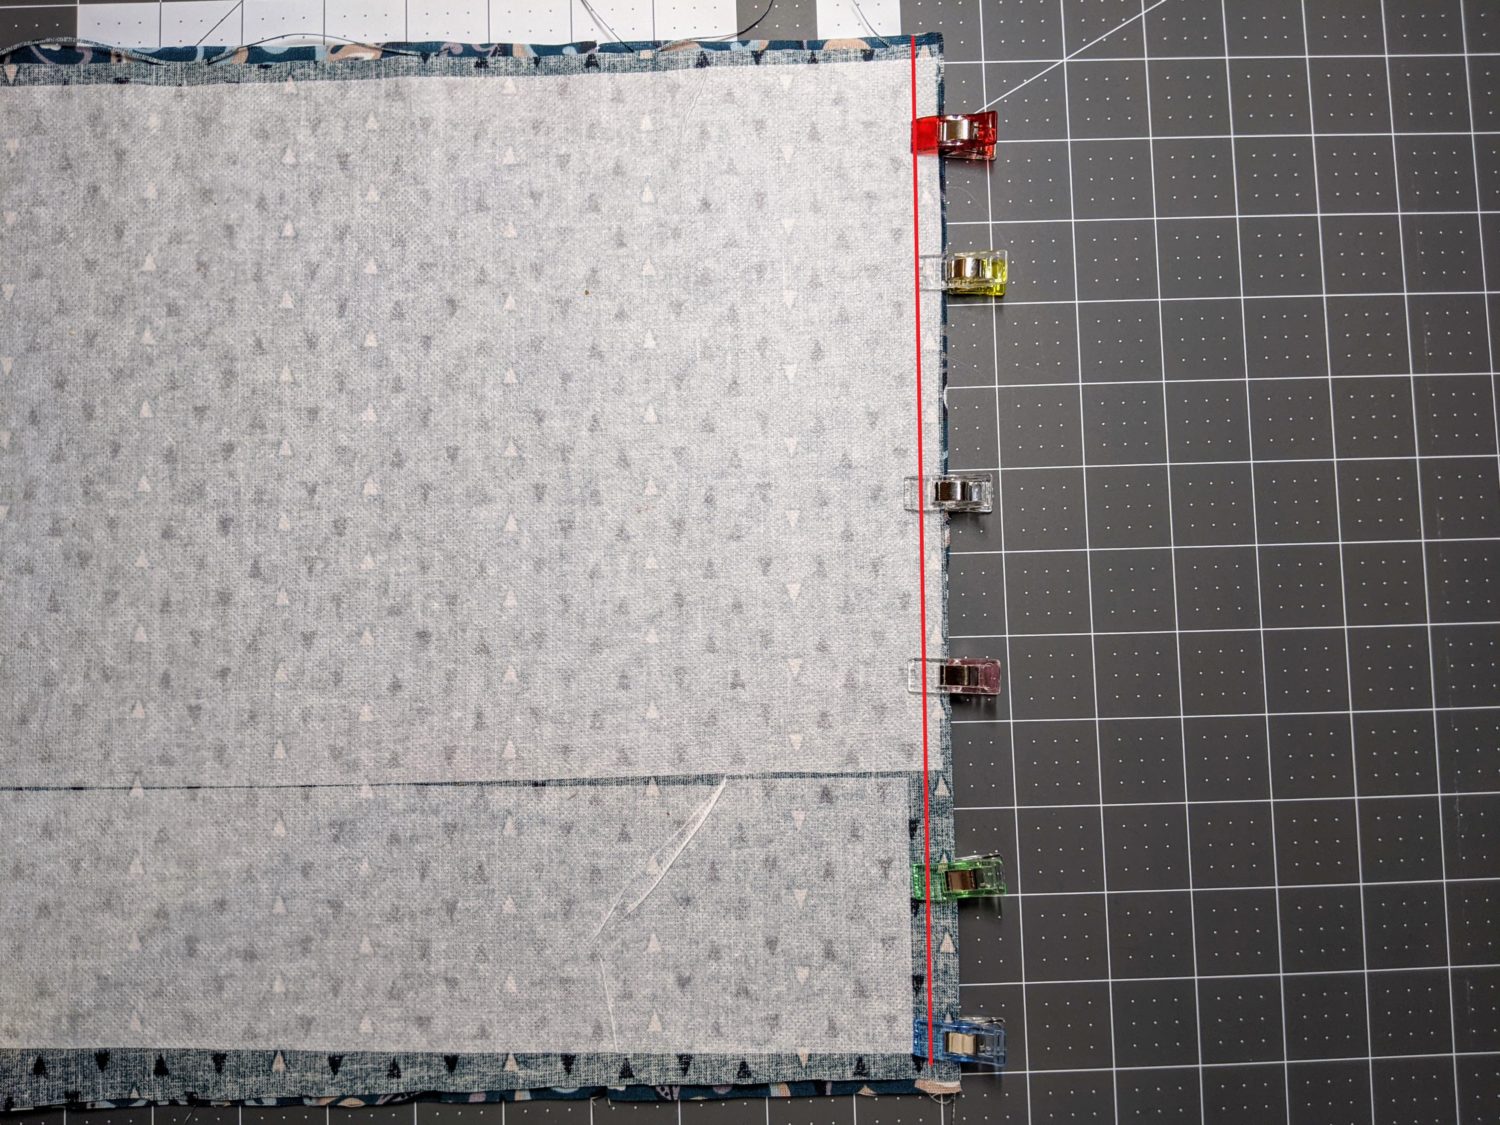
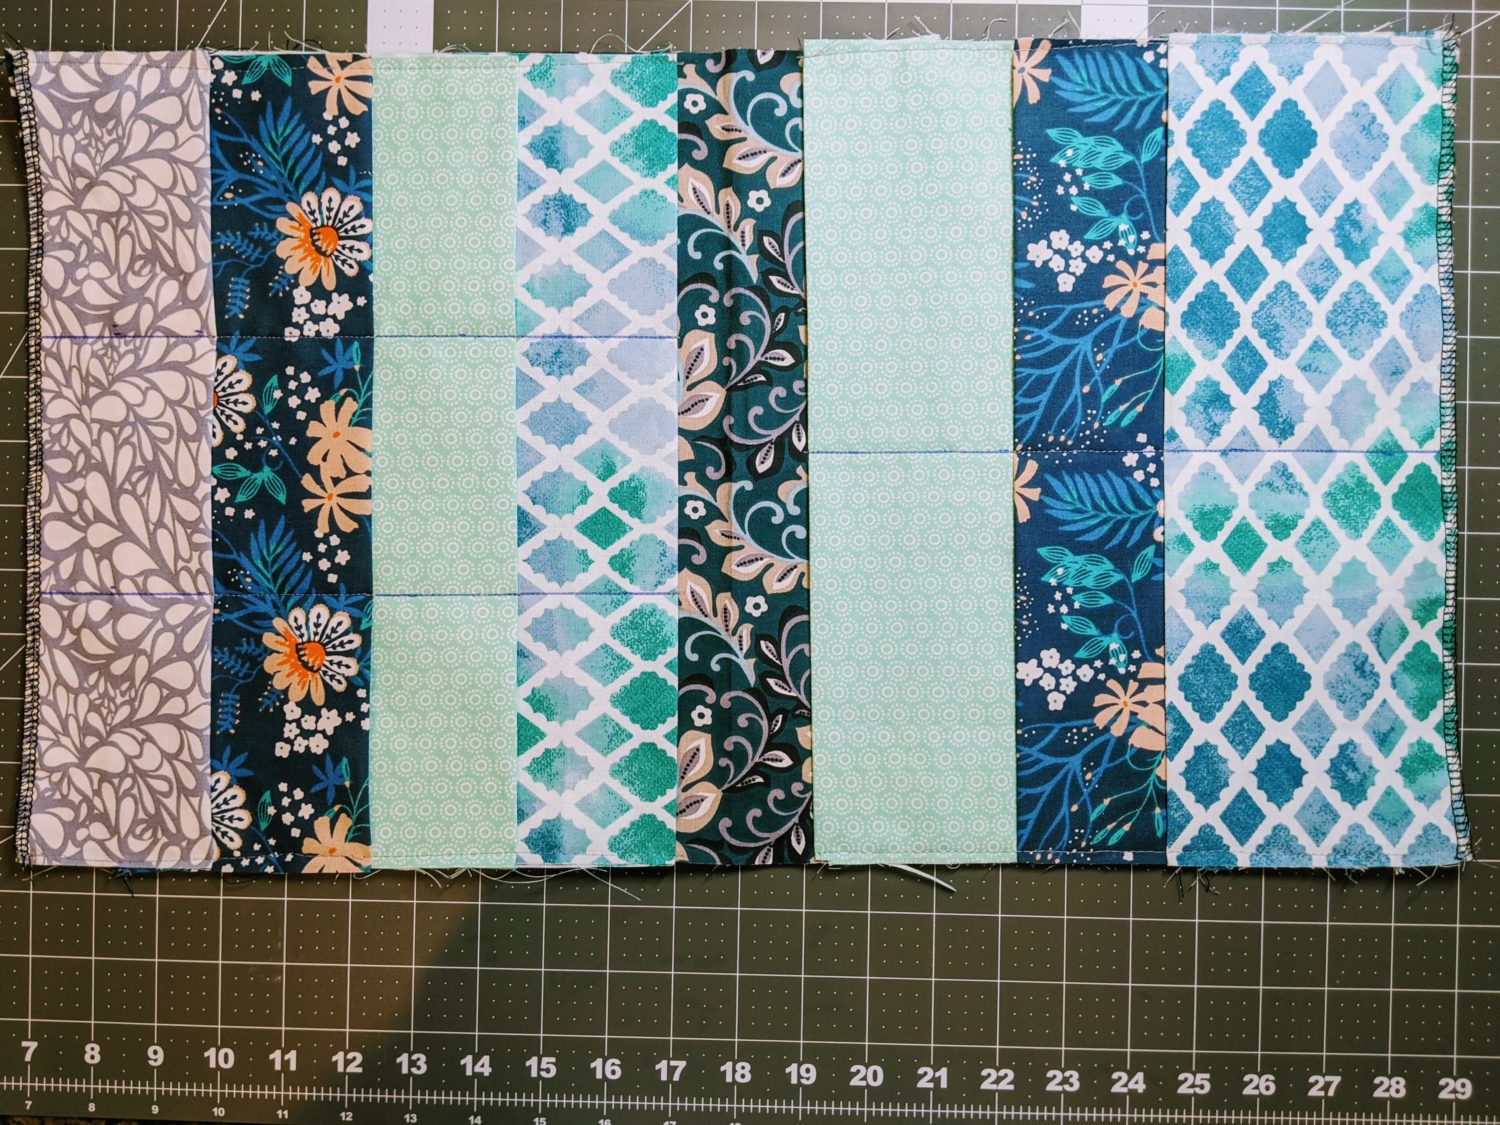
You should have two pieces that look like this (yours will have elastic)
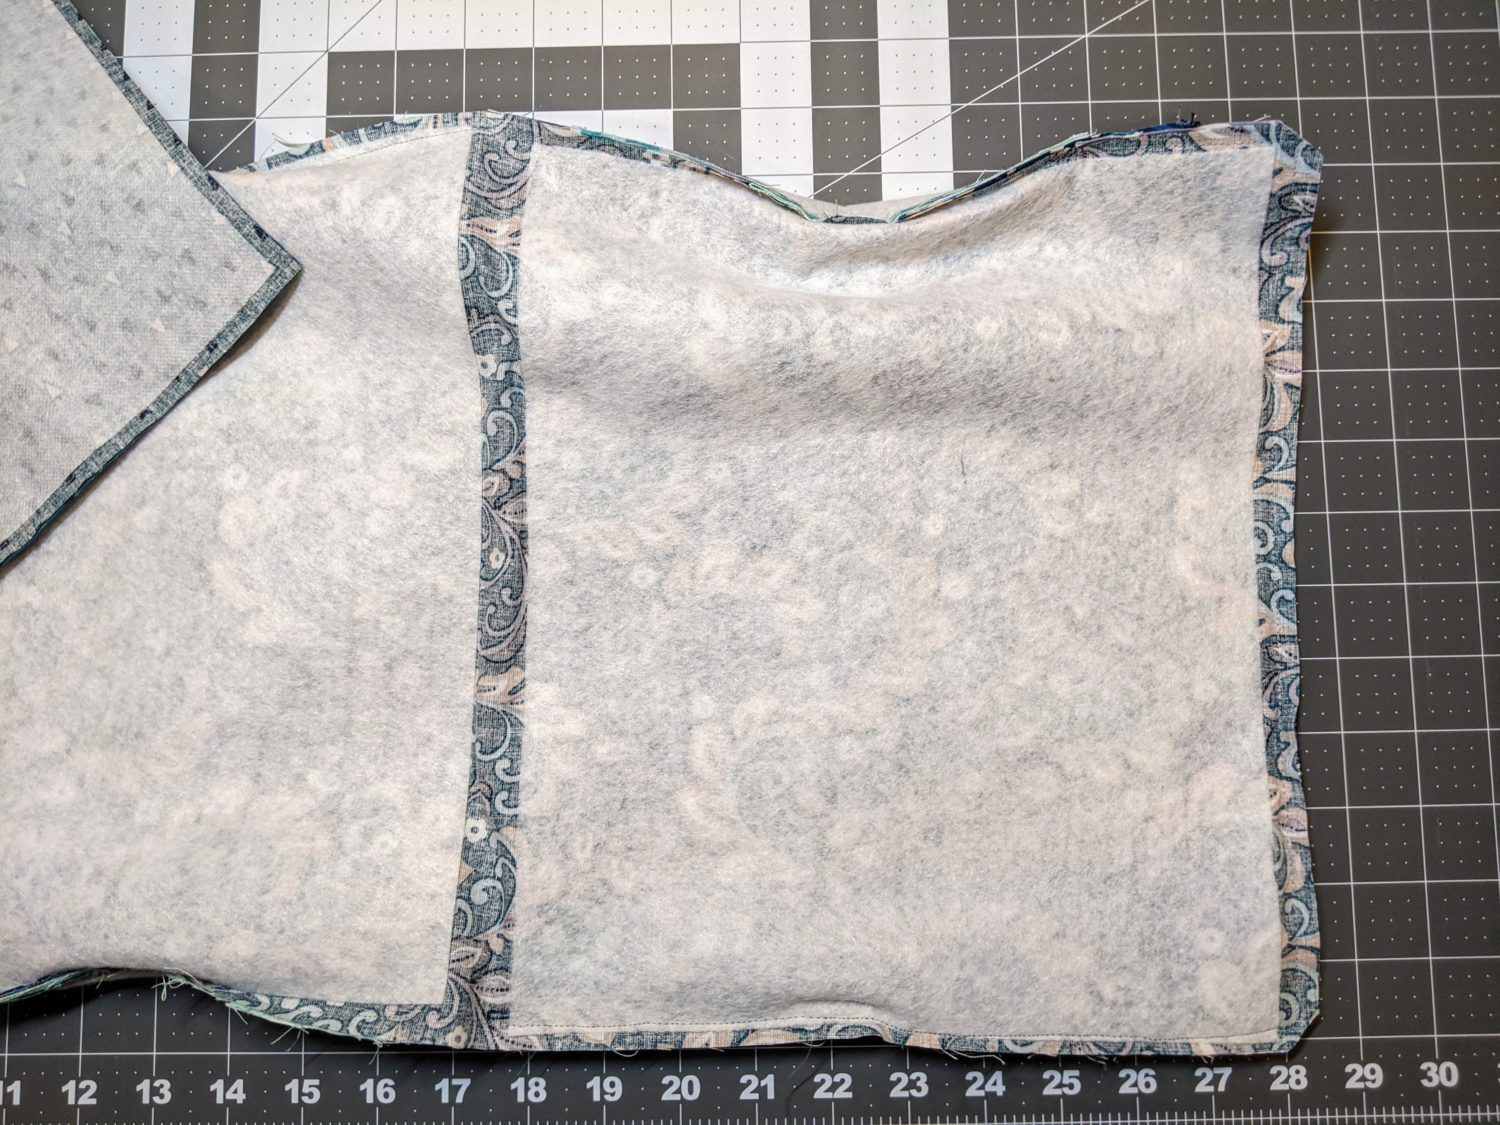
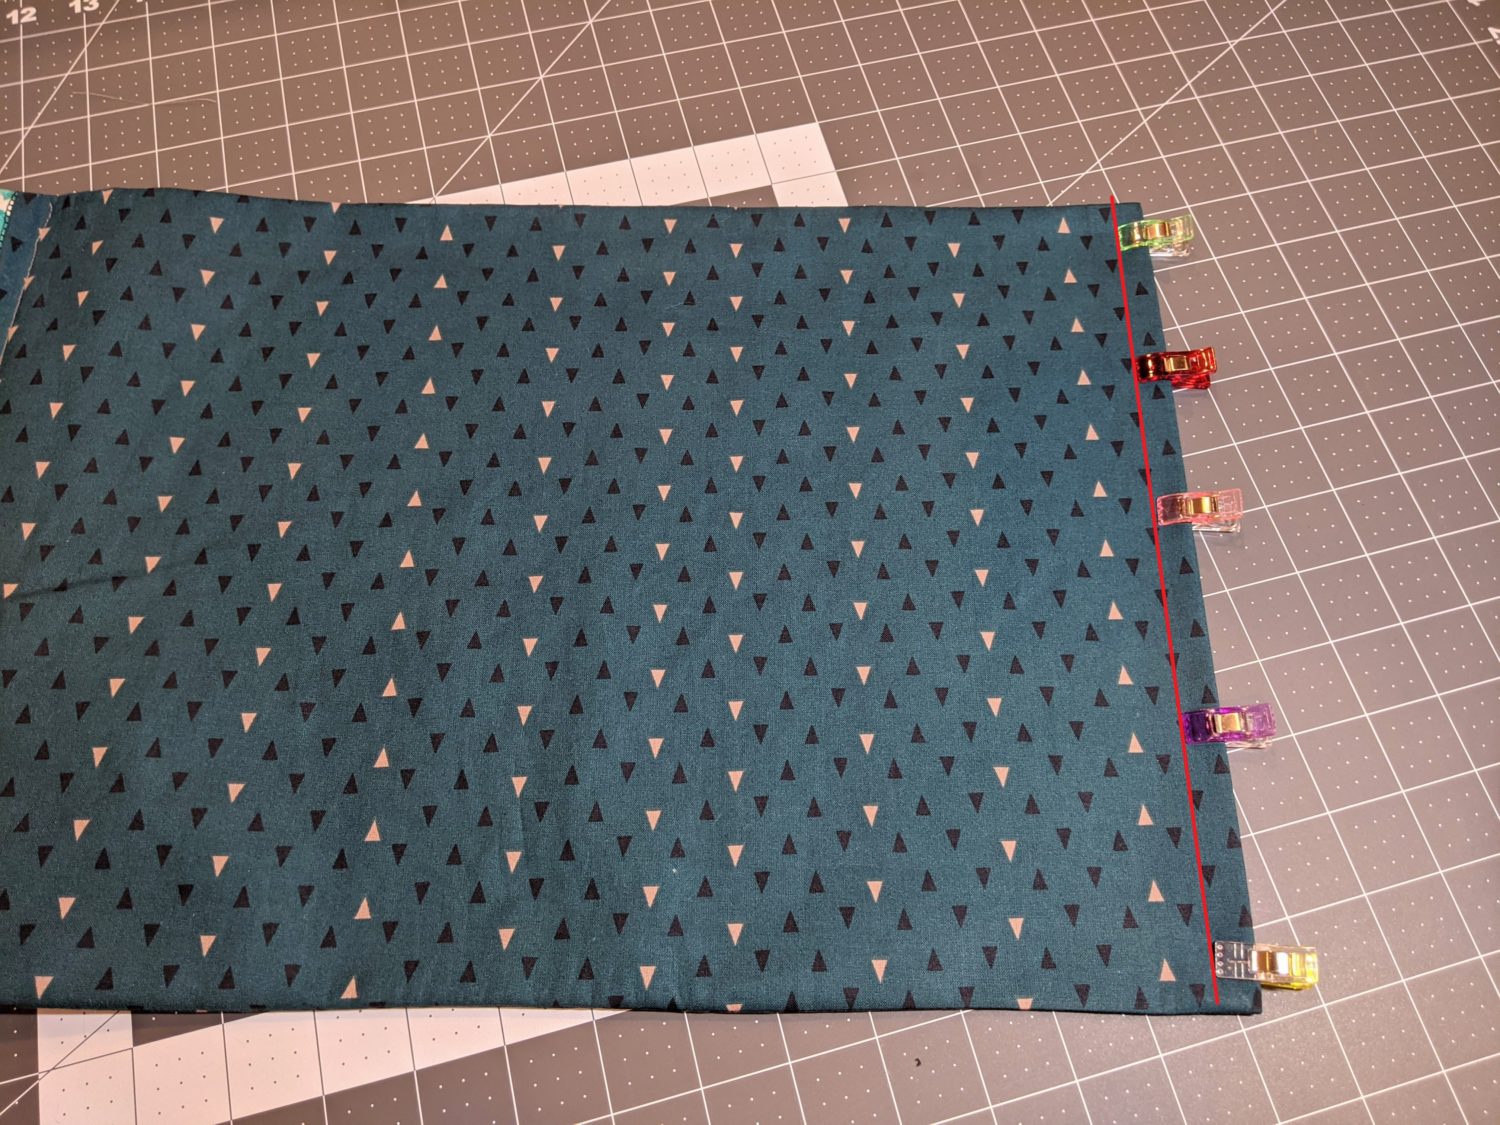
Sewing it all Together
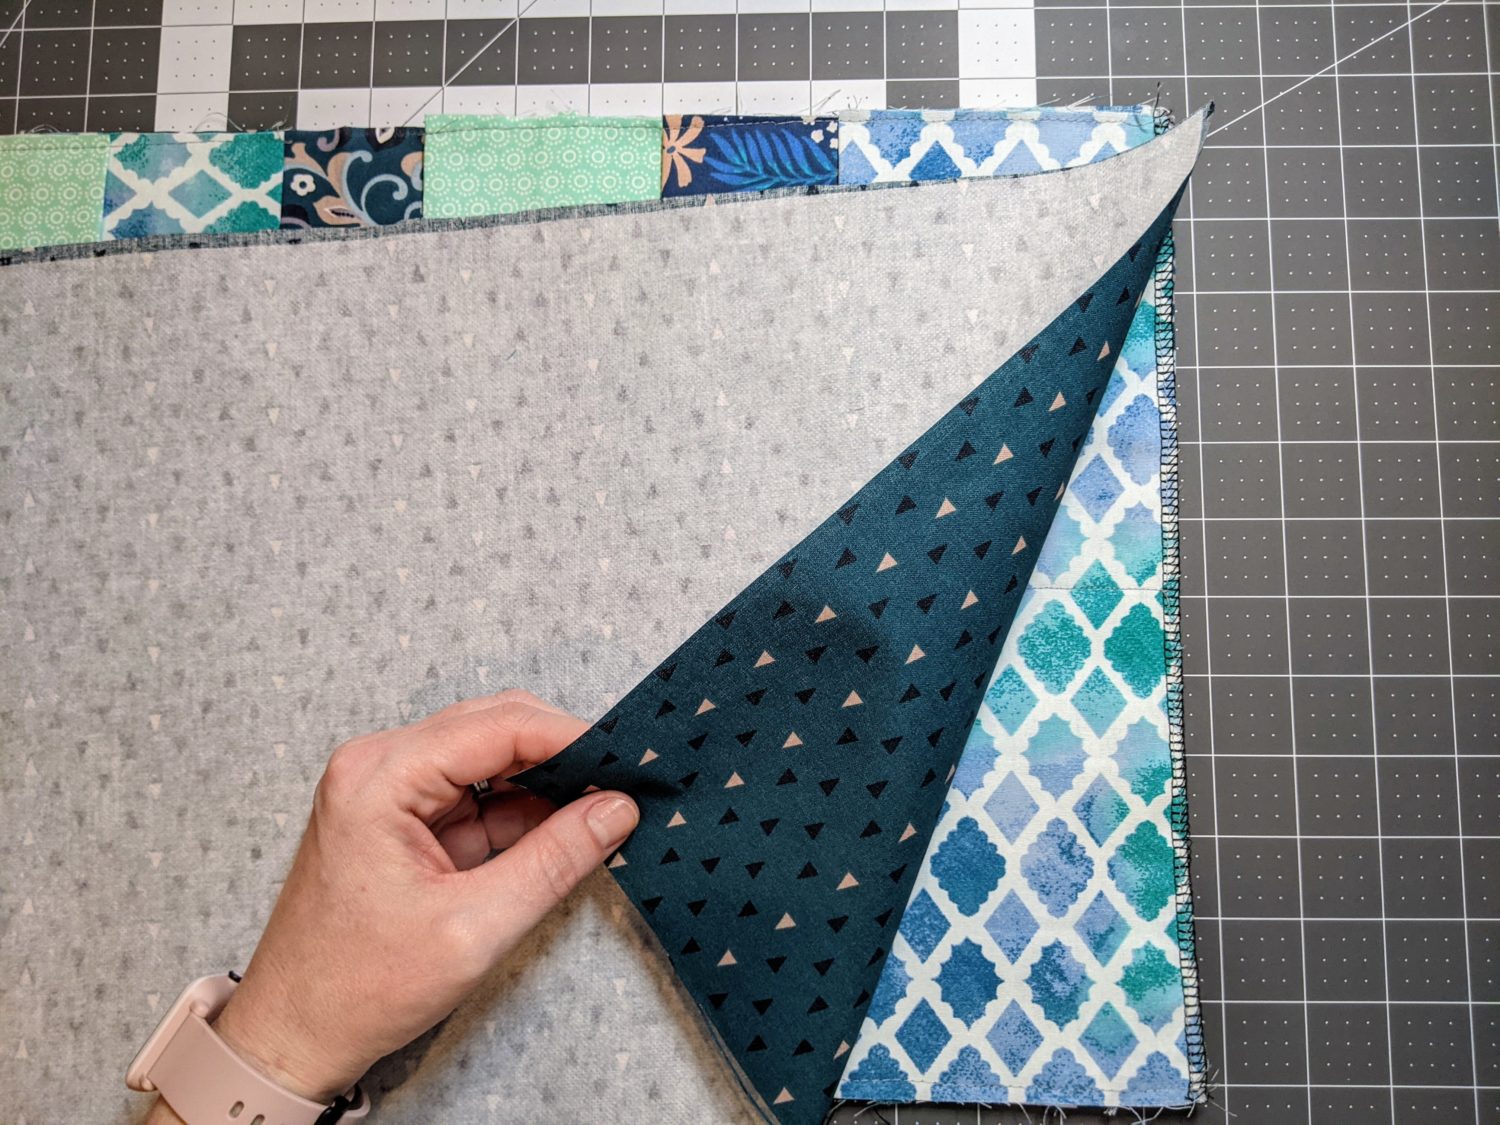
- Lay both of your organizer pieces right sides together making sure the covering pieces and main pieces of each side are matched up.
- Line up all edges and pin together leaving the covering end open.
- Sew along the 3 pinned sides with a straight stitch using a ⅜” seam allowance.
- Clip the corners of the pocket side making sure not to clip the thread.
- Turn the whole thing right side out and push out the corners.
- Press along all sides.
Give it structure
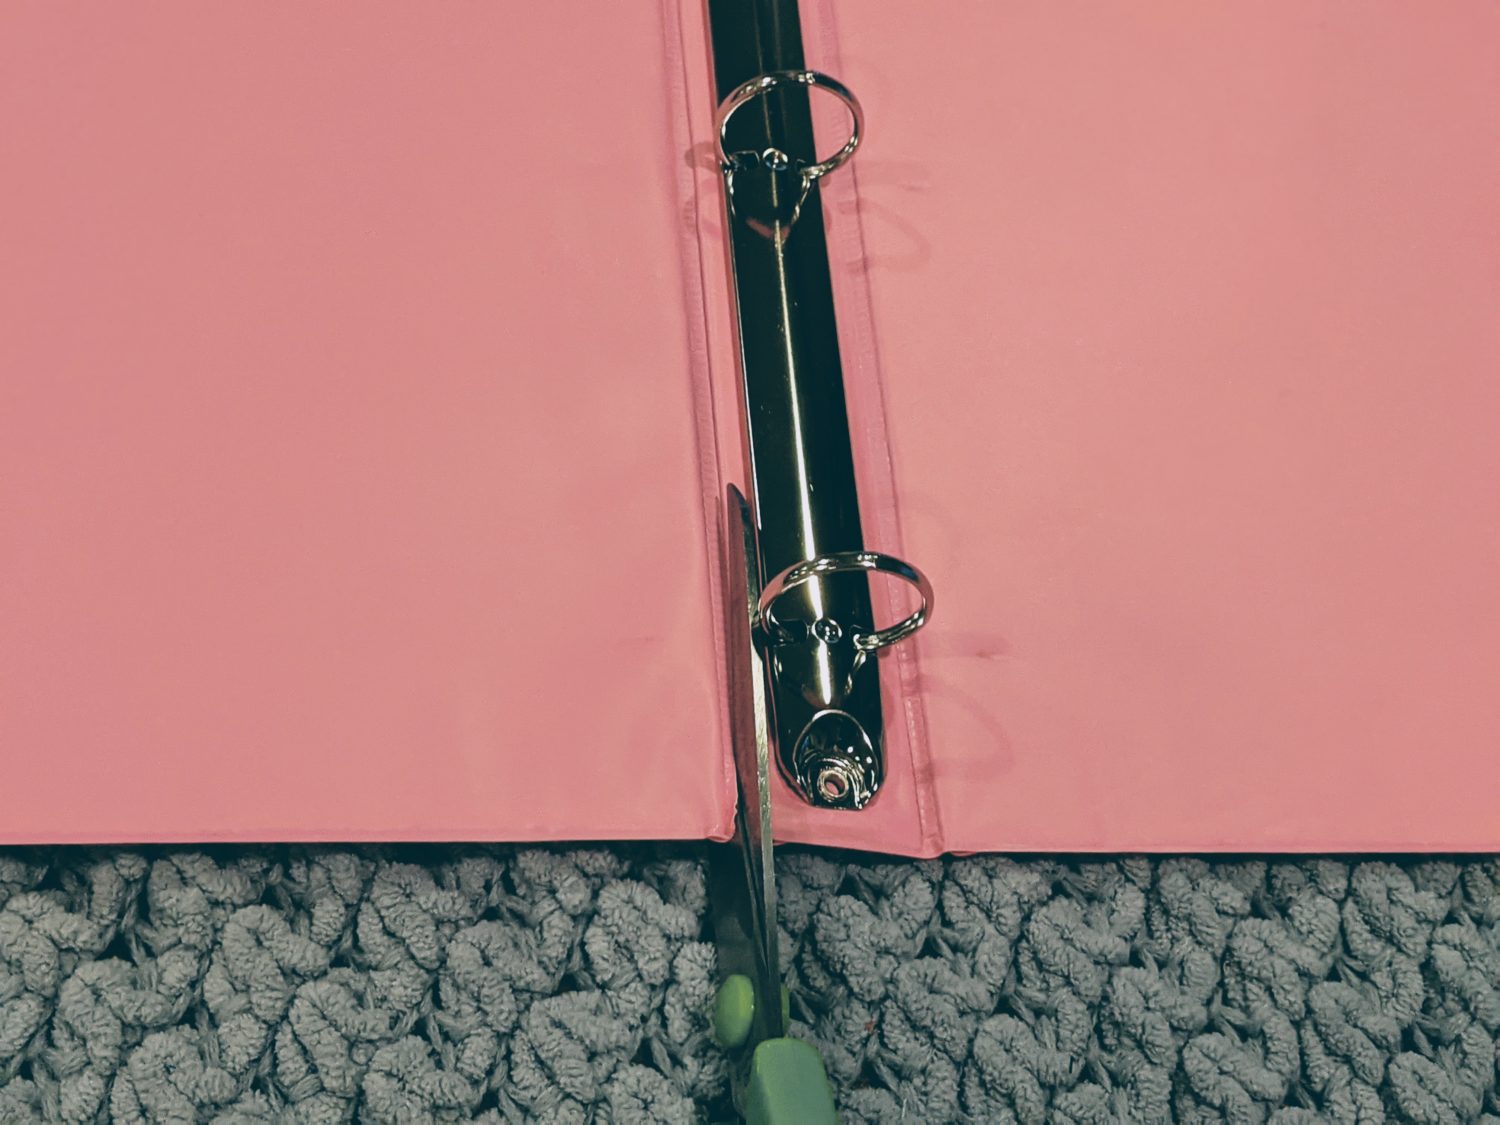
I found a 1” binder to be a good size. I measured several different brands and they were all more or less the same dimensions (10 1/2″ X 11 3/4″) For one of my organizers, I used fairly flimsy dollar store binders so I decided to use two to give it more stability. For a different one I made, I only had a slightly larger-sized binder so I cut it with regular scissors to the correct size fairly easily. A sturdier cardboard or multiple layers of cardboard would work great for stability also.
- If using a binder, cut each side off of the spine.
- If using cardboard or other option, cut two pieces to size: 10 1/2″ X 11 3/4″
- Take one binder piece, insert it into the open end of the covering piece, and push it down to the very end of the organizer “sleeve” (this will be a snug fit and takes a bit of effort to wiggle it in there)
- Get your other binder piece and slide that one in until it’s just about touching the first one.
- Try folding it in half here to see if the two pieces are spaced out enough. If they rub together at all, pull the second piece out a little bit to give it more room to fold.
- The bottom of the second binder piece should end at the bottom edge of the pockets on the backside.
- Topstitch as close to the seam between the main portion and covering piece as you can. (My foot pedal broke right before sewing this part. My older machine couldn’t get in as close, but sewing as close as I could get worked just fine, and no one will ever notice.)
Almost there!
Lastly, we need to close up the end of the cover/pad.
- Turn the open end of the covering piece in ½” all the way around and press
- Pin along the edge and sew with a straight stitch using a ⅜” seam allowance
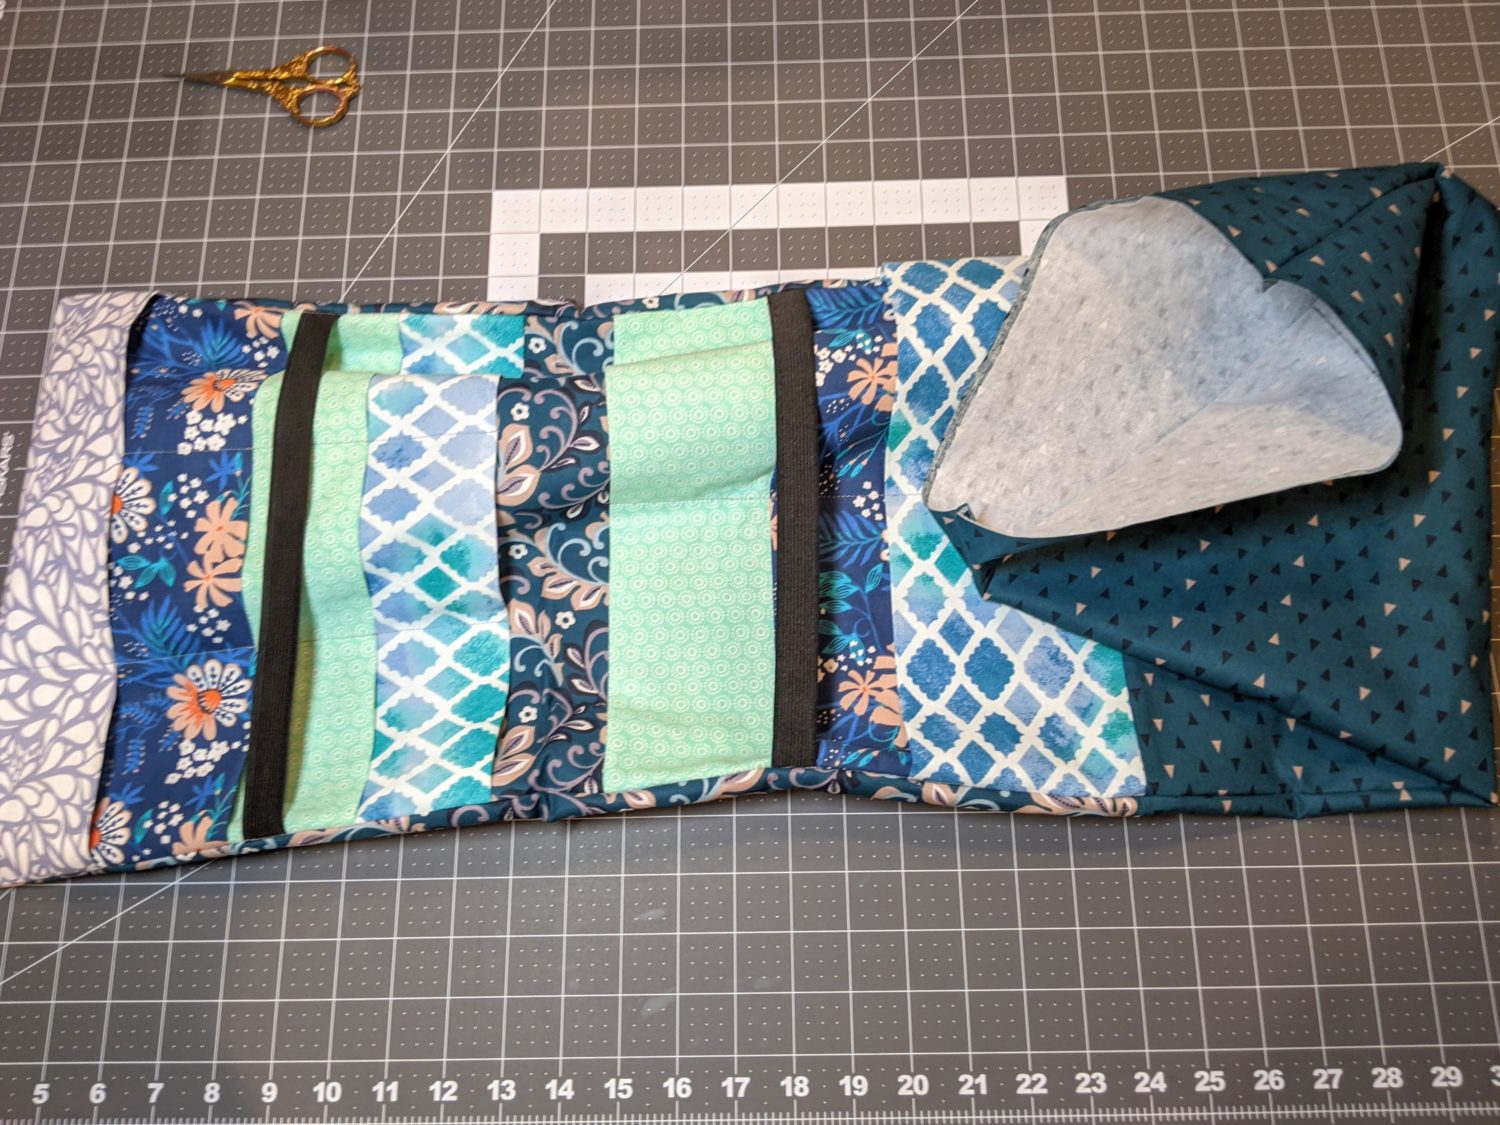
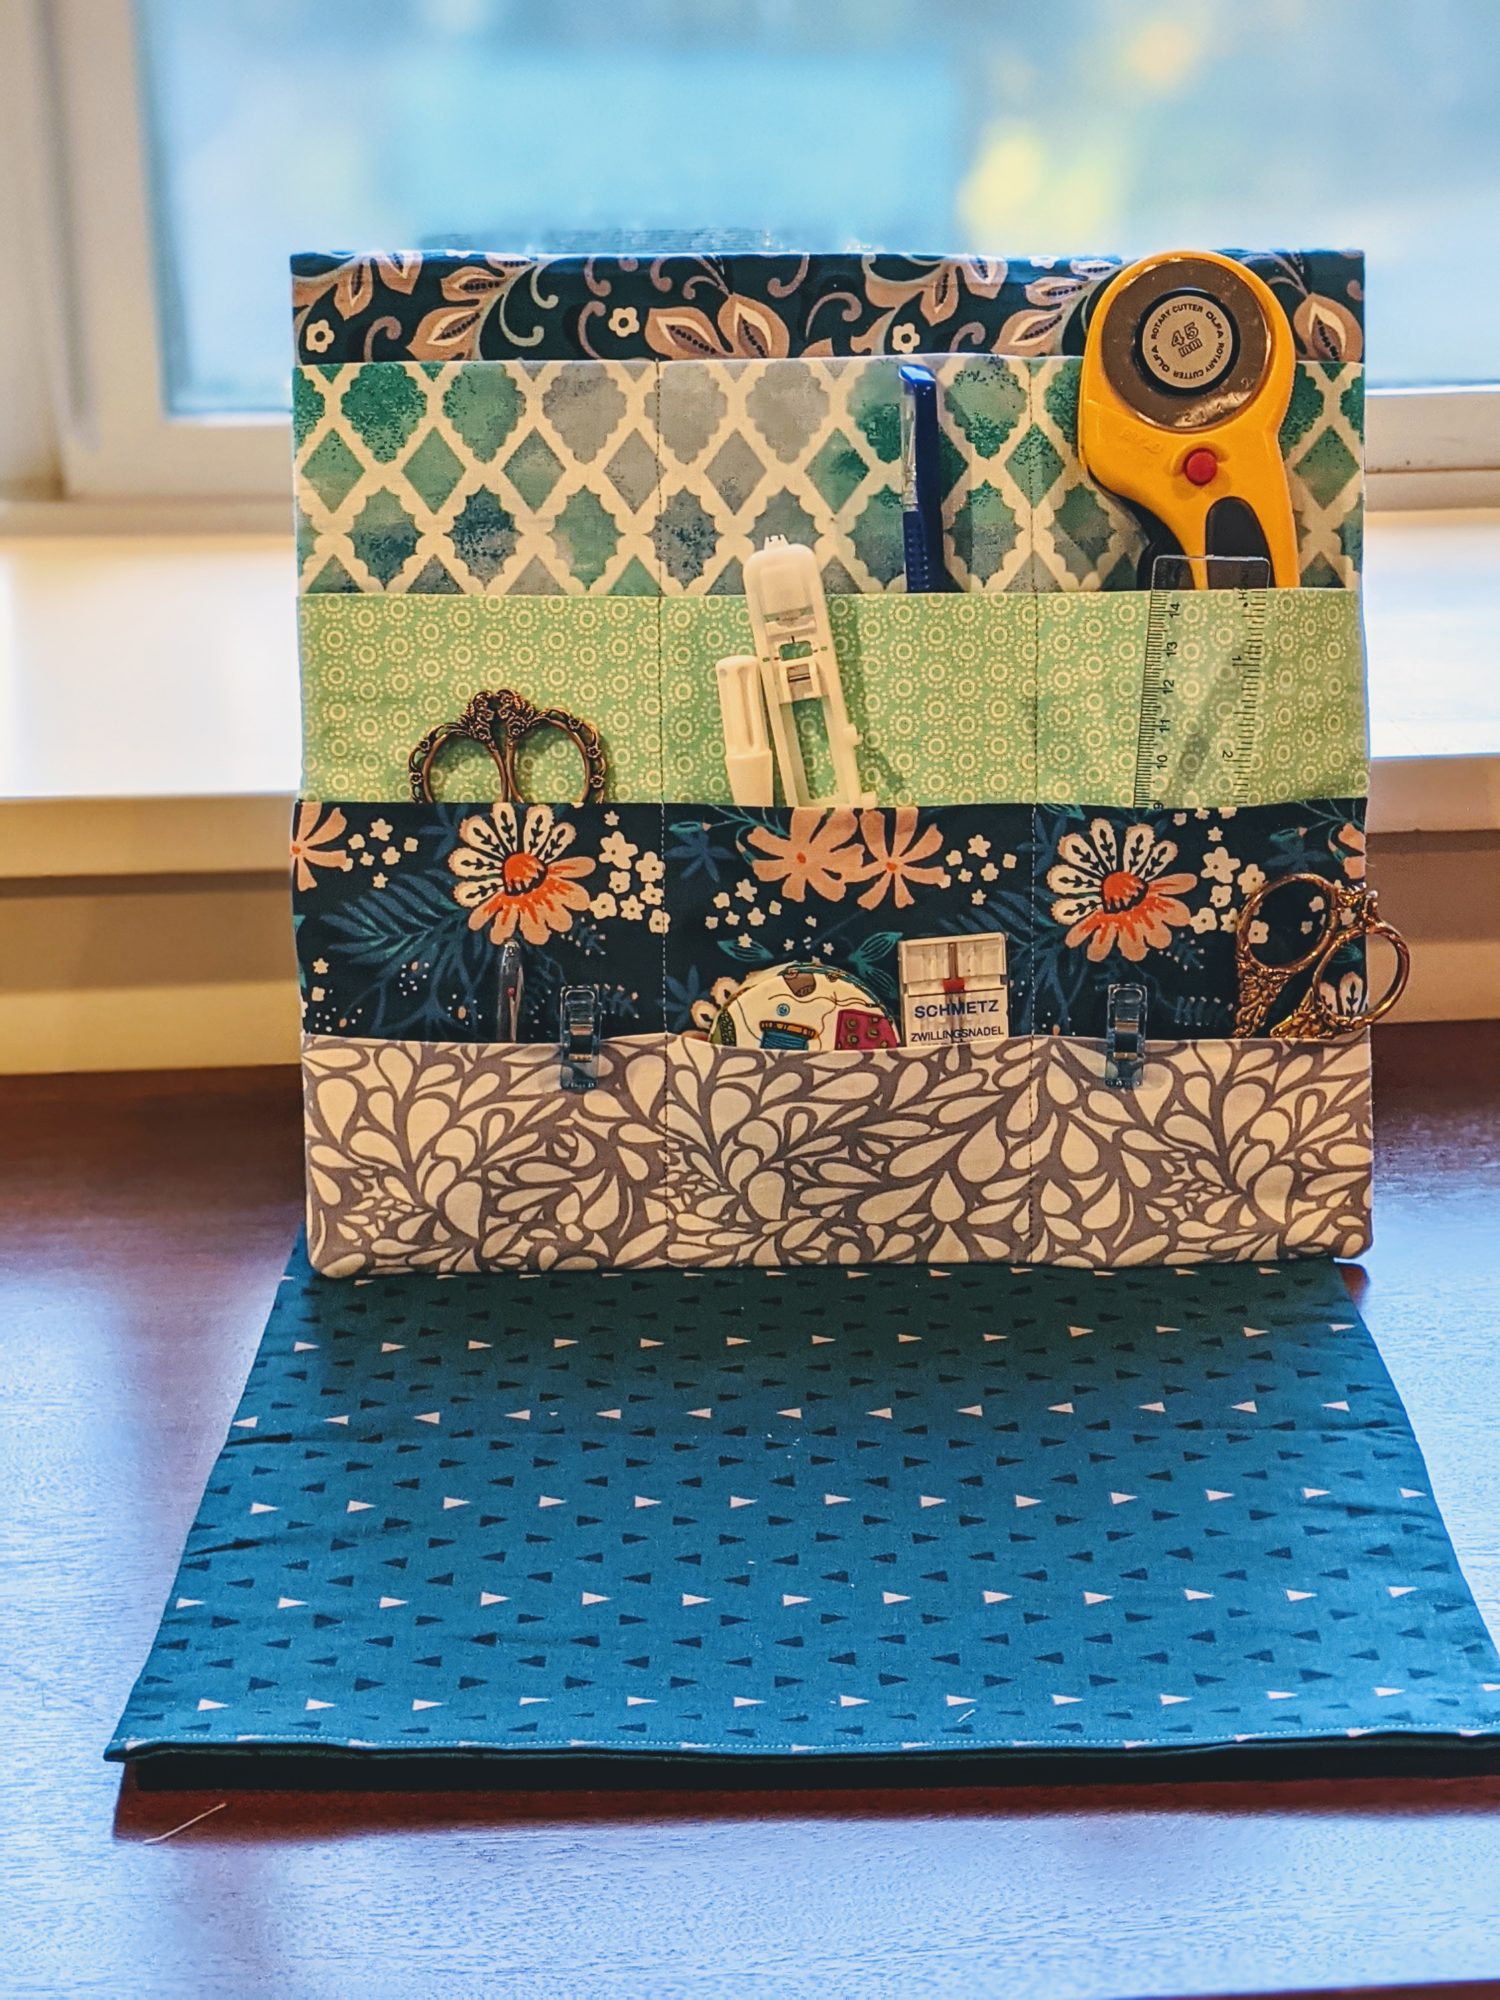
Stand your organizer on your sewing desk to have all your tools close by…
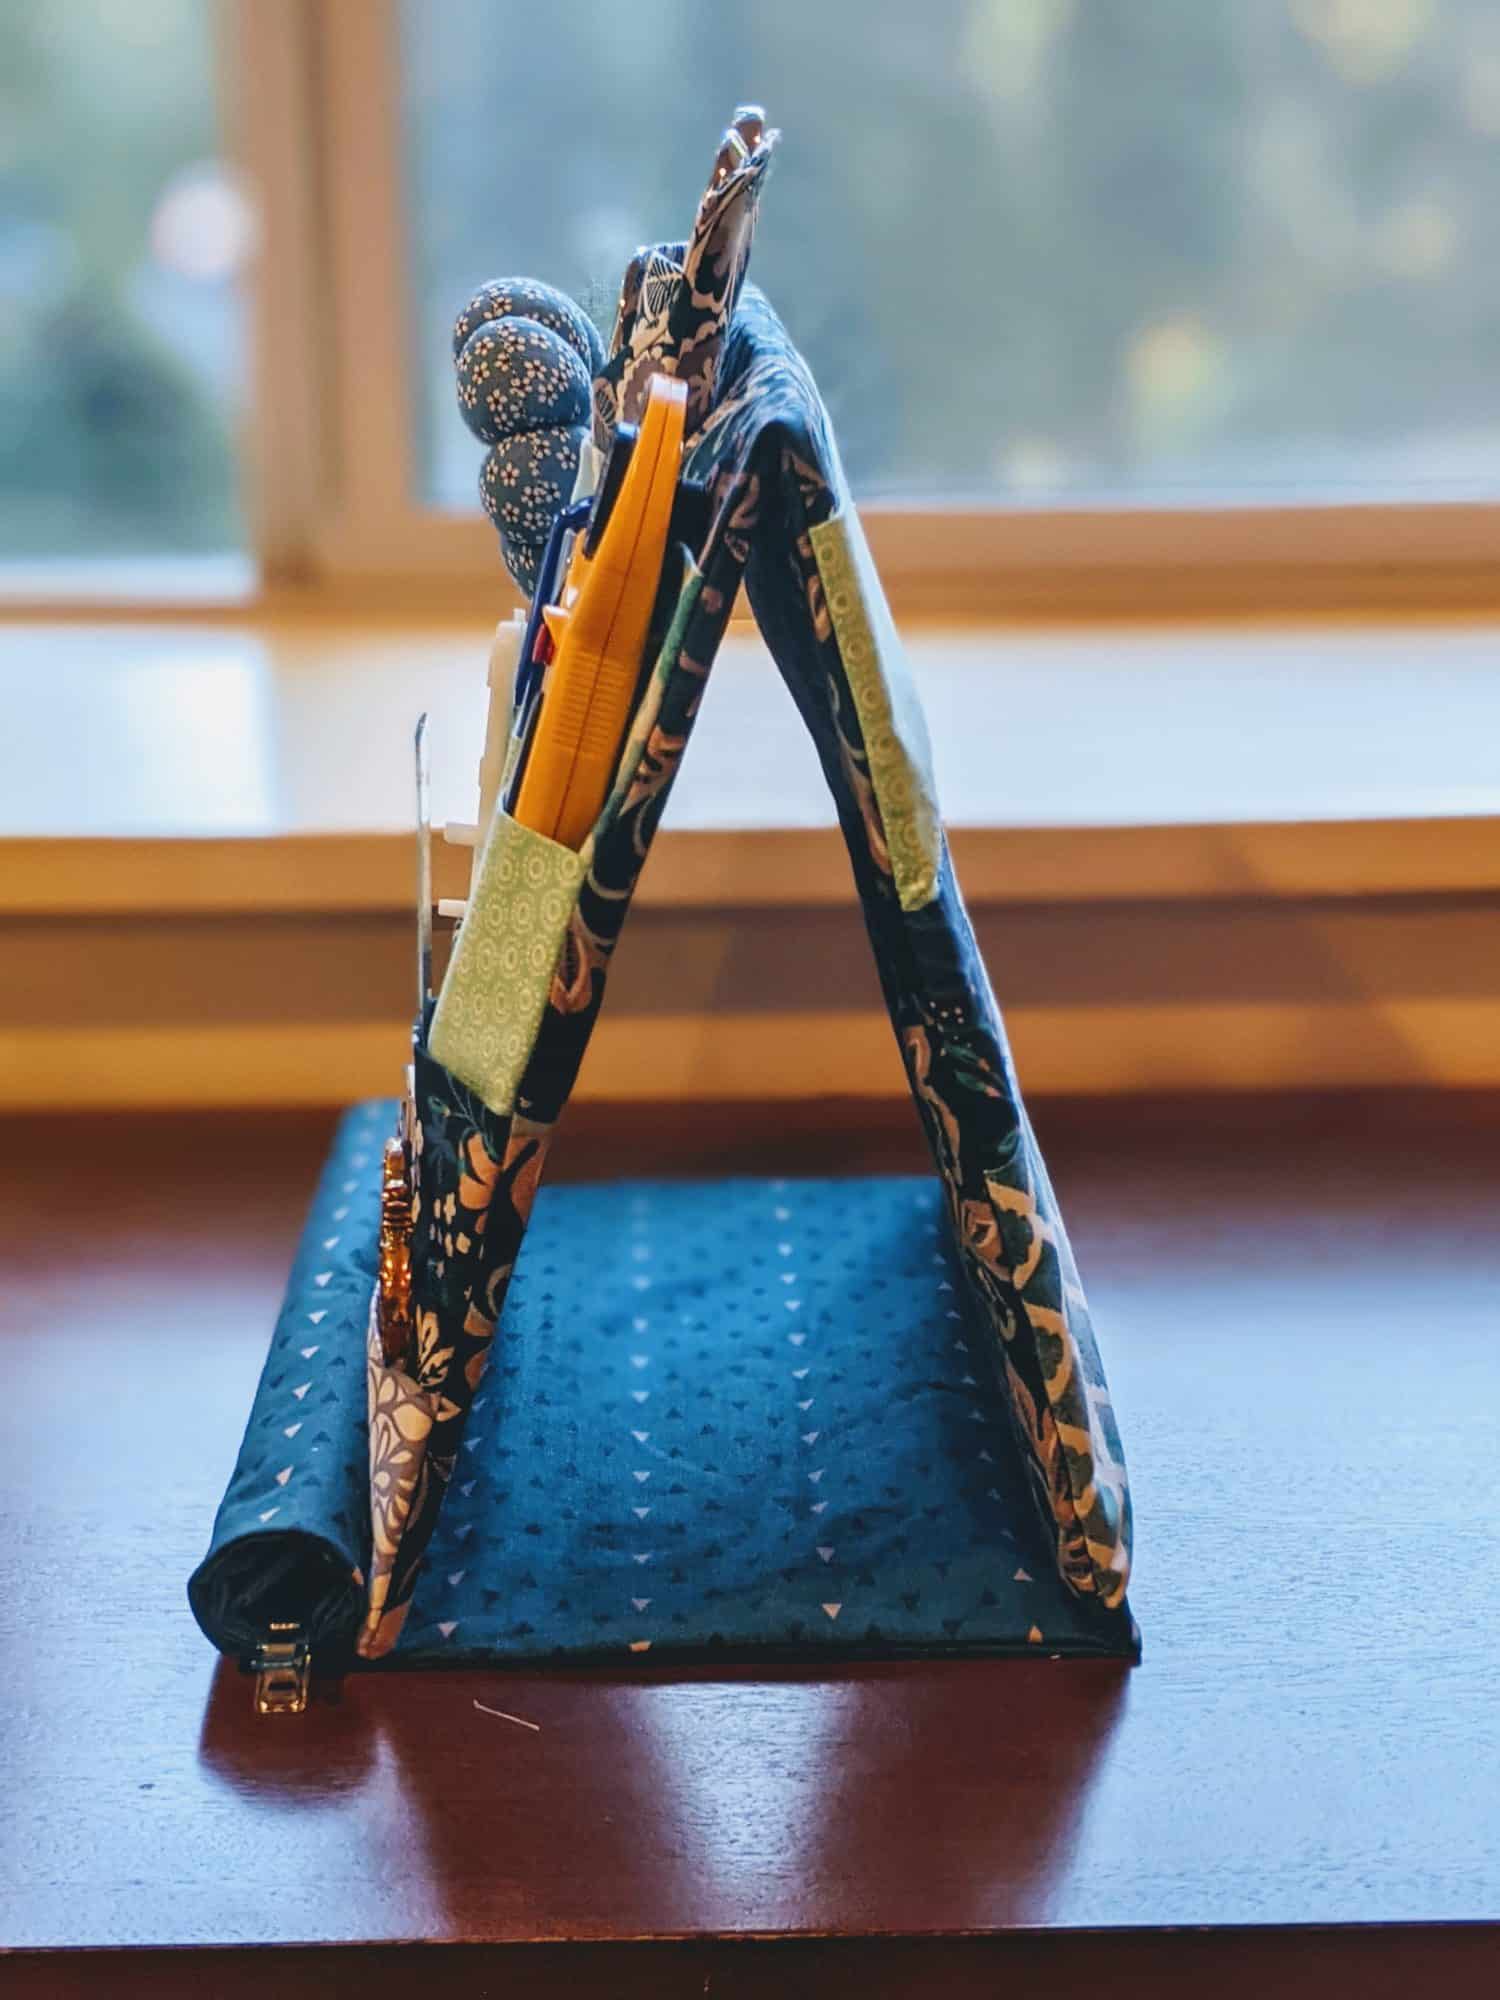
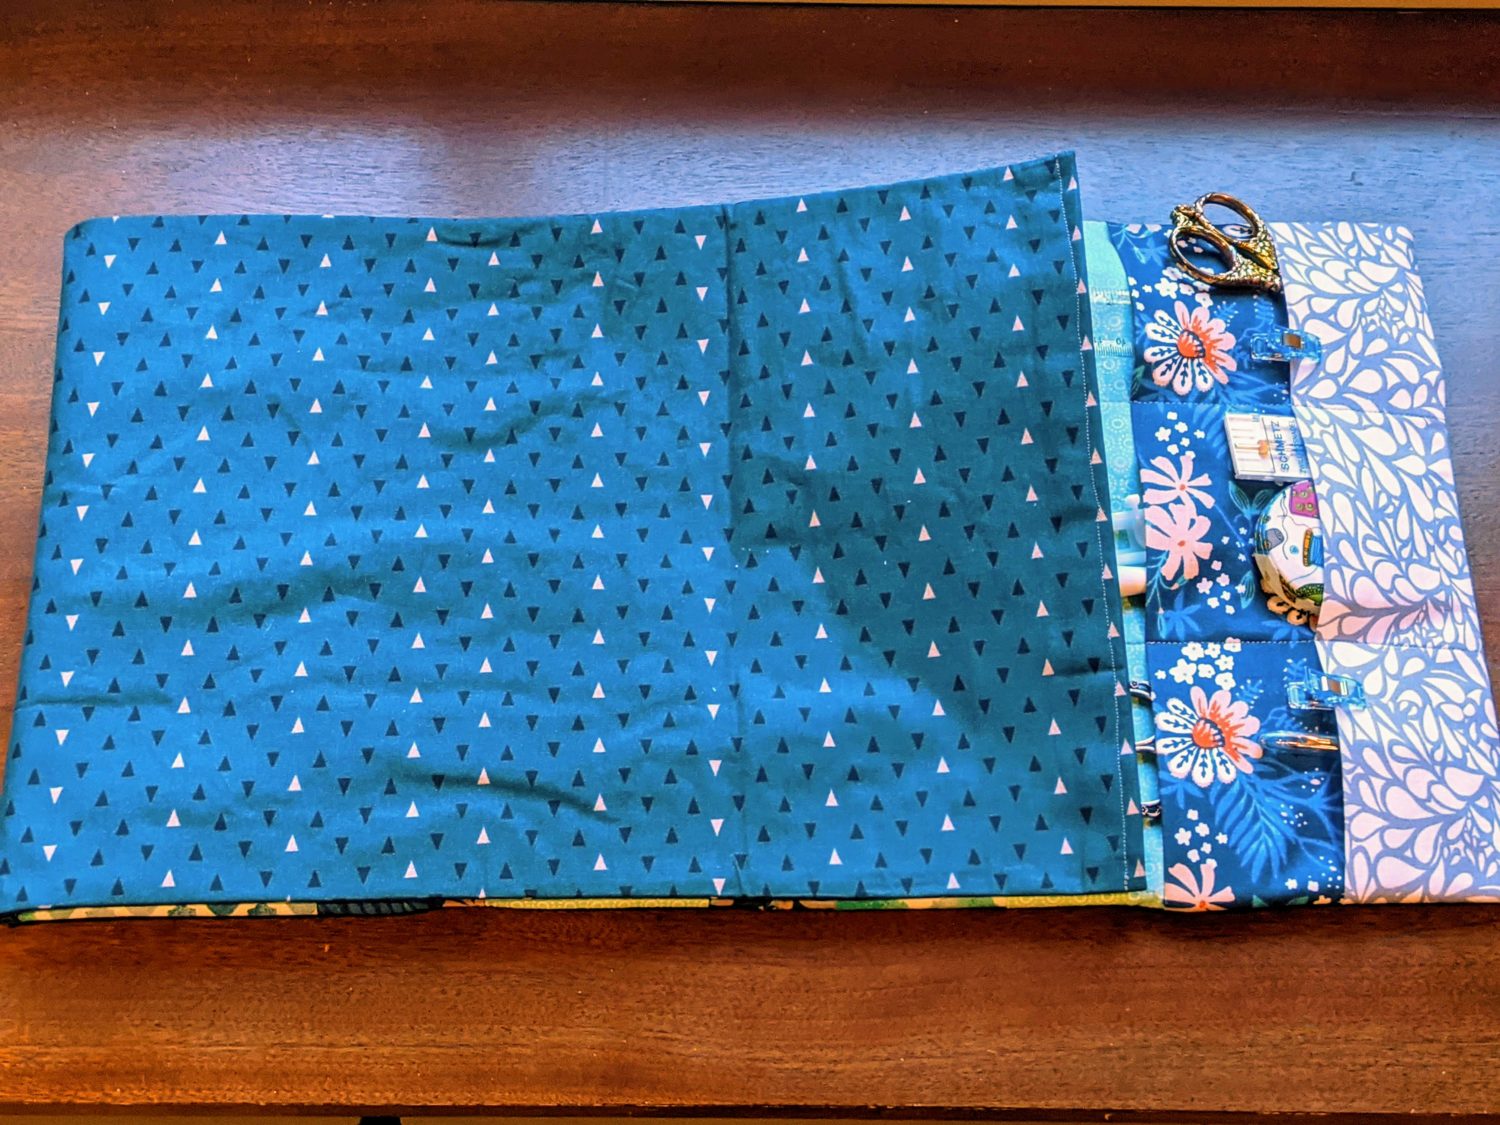
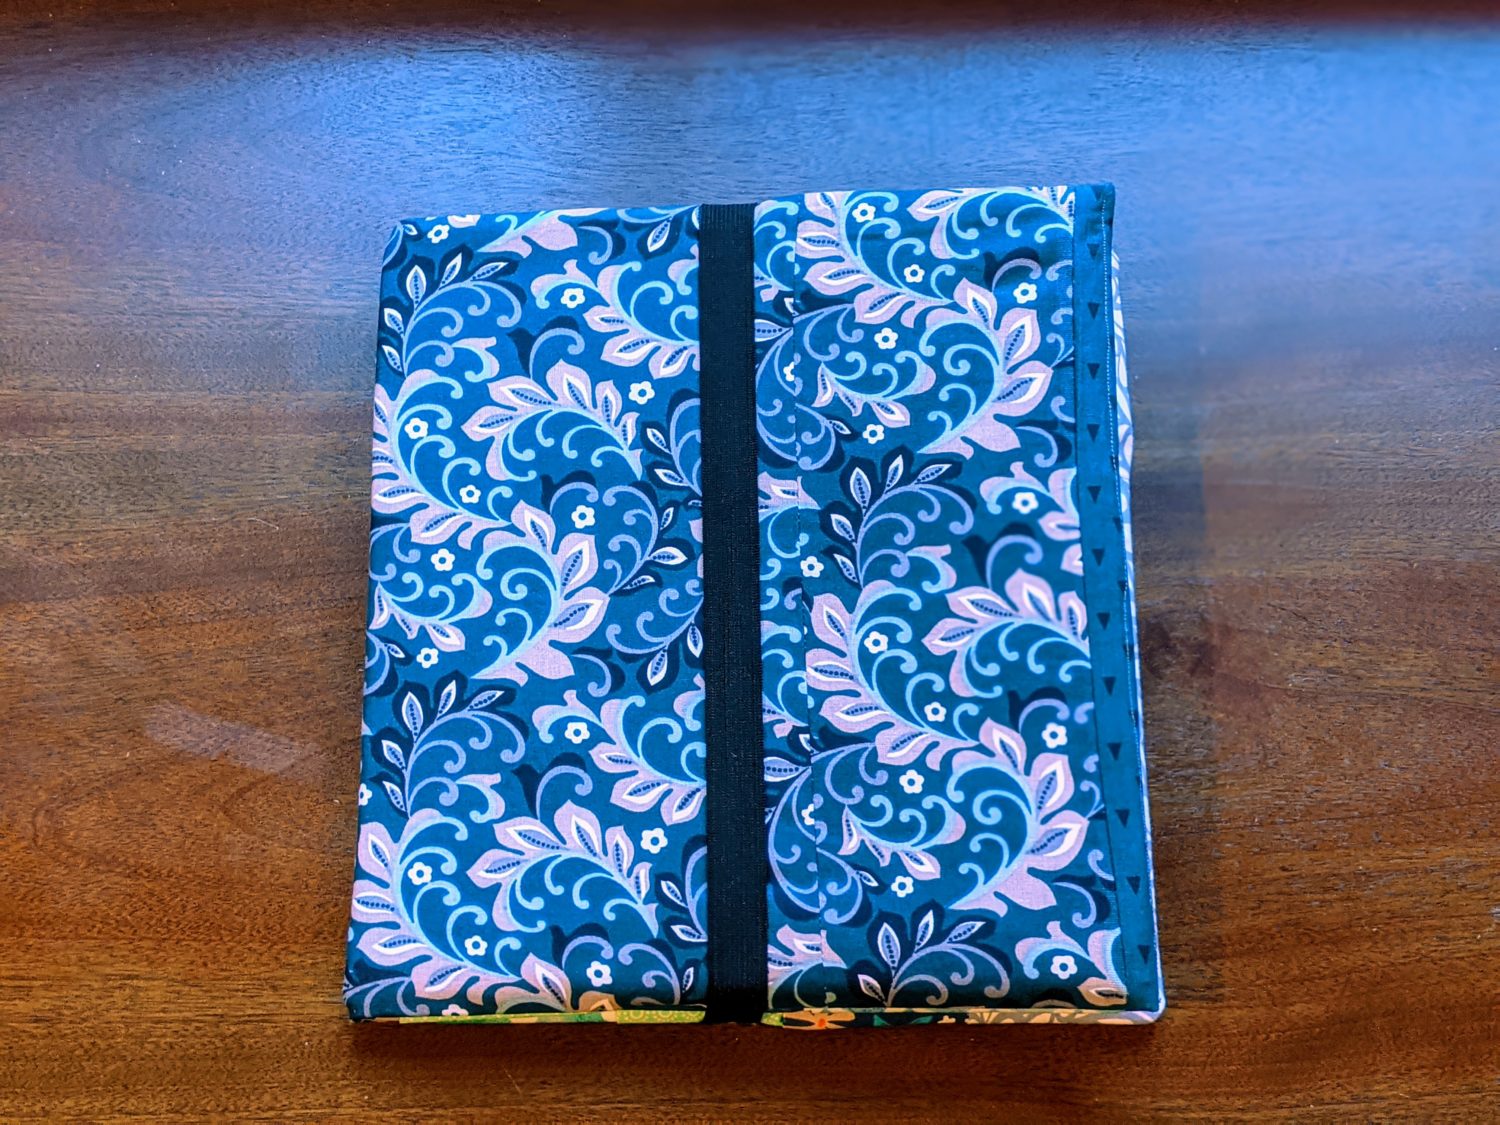
…or fold it up and take it to go!

Want more FUN DIY Freebies? Check out the FREEBIE TUTORIALS and the FREEBIE PATTERNS!
As always, we’re here to help if you need it! Join us HERE and on Facebook, Instagram, Twitter, Youtube, and Pinterest. We’re everywhere you are.
This is so awesome.
What a lovely way to store sewing bits and pieces! I look forward to making this one for myself and maybe making a gift of one to my mom. So cute!
Looks handy and attractive. I plan to make soon.
This looks very useful. I am planning to make one but I have one question, what purpose does the elastic serve and does it get turned to the back of the pocket sections? Thanks for your help, Beth Murphy
One side of the elastic is used to hold the fabric covering flap in place when it is closed, and the other side holds the folder closed when you take it on the go. When it is standing up, the elastic just flips to the back of each side out of the way.
I made this for my daughter for Christmas. Excellent instructions and wonderful photos to help with the process. Thank you for this pattern and blog!
Is there a printable tutorial for this?
Thanks, [email protected]
No, there is not a printable tutorial for this, there is just the online version.
I realize this is an older post, but I’m hoping you are still reading comments as I have 2 questions: 1) what weight interfacing are you using and 2) when applying interfacing to the pocket pieces, instructions say to apply it to the “side of the pocket that will face in on the organizer”. Can you explain what this means? The pocket is folded in half and the edge sewn shut before sewing into the organizer. Will I be able to tell which side has the interfacing, and does “side facing in” mean the side with the interfacing should be face down when placing on the main piece? Can you explain why the placement of the side with the interfacing on the pocket is important?
Thank you for the tutorial! I have been looking for a unique sewing project idea for our sewing guild holiday gift exchange.
I used a light to medium weight interfacing on the pocket pieces. The interfacing should be attatched on one half of the pocket pieces. You can use a pin or a air soluable pen to mark which side has the interfacing then place the marked side face down onto the main piece to sew them. It is just a general guidlline to apply interfacing to the inside facing pieces of fabrics. In this case, it is used for light stability so it wouldn’t be a big deal if it ended up being on the outside facing side of the pieces.
THANK YOU!