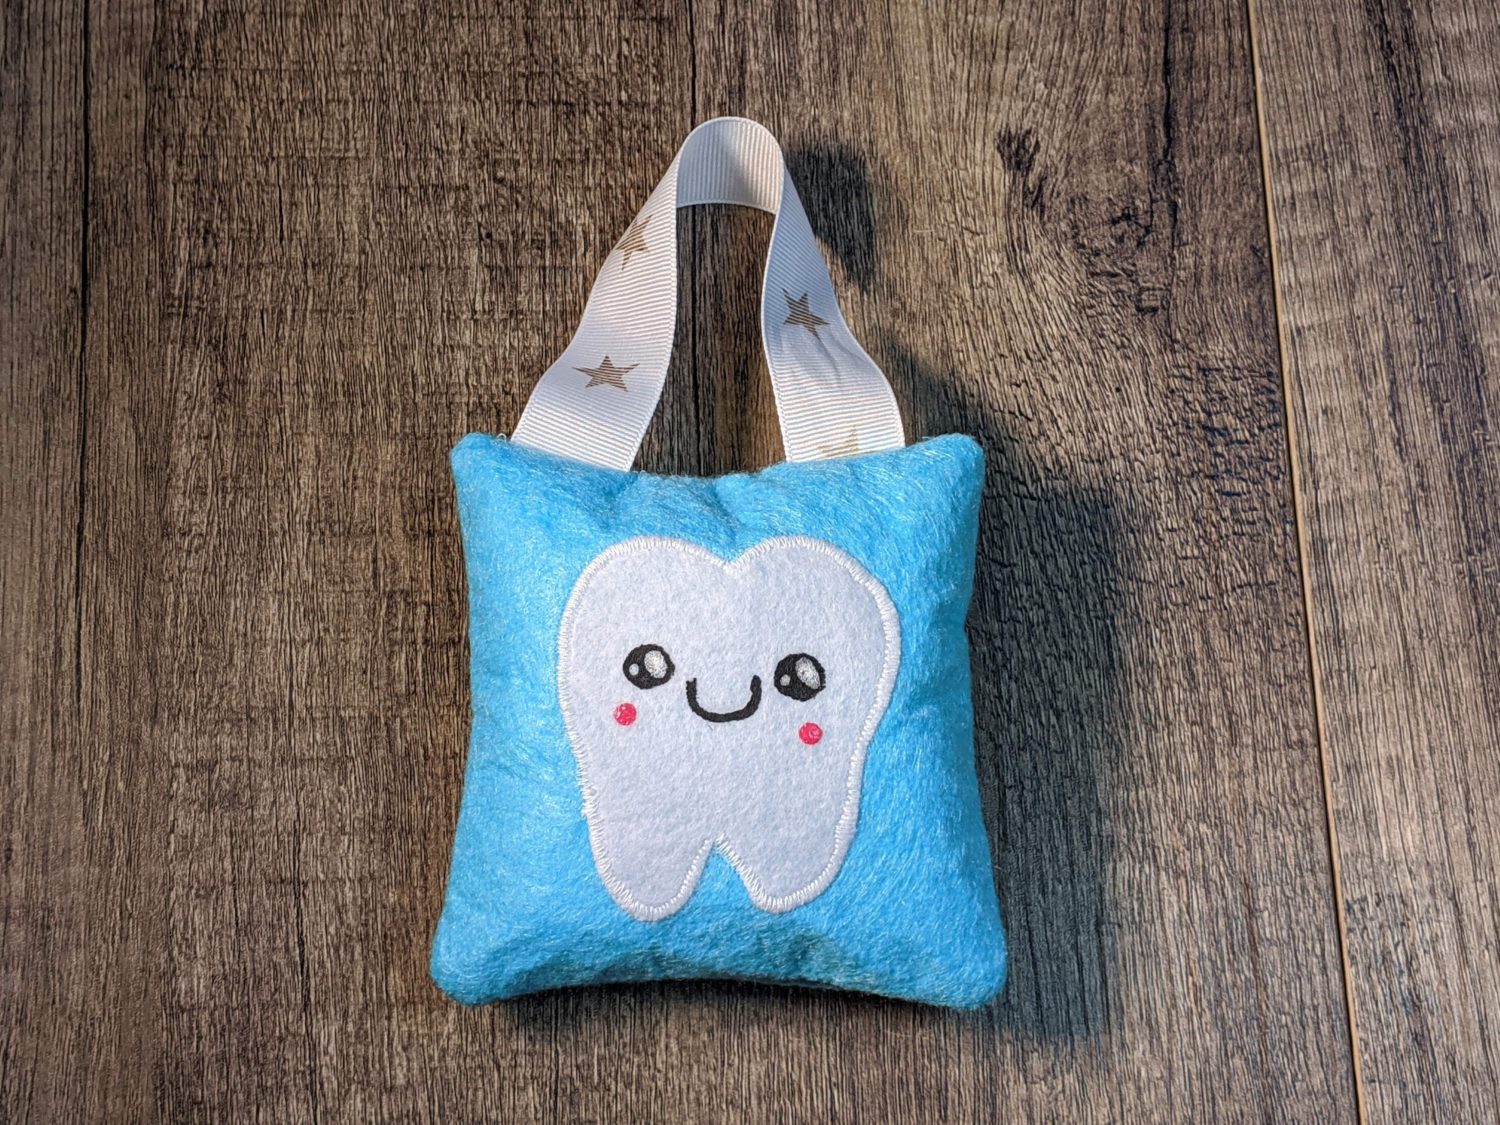
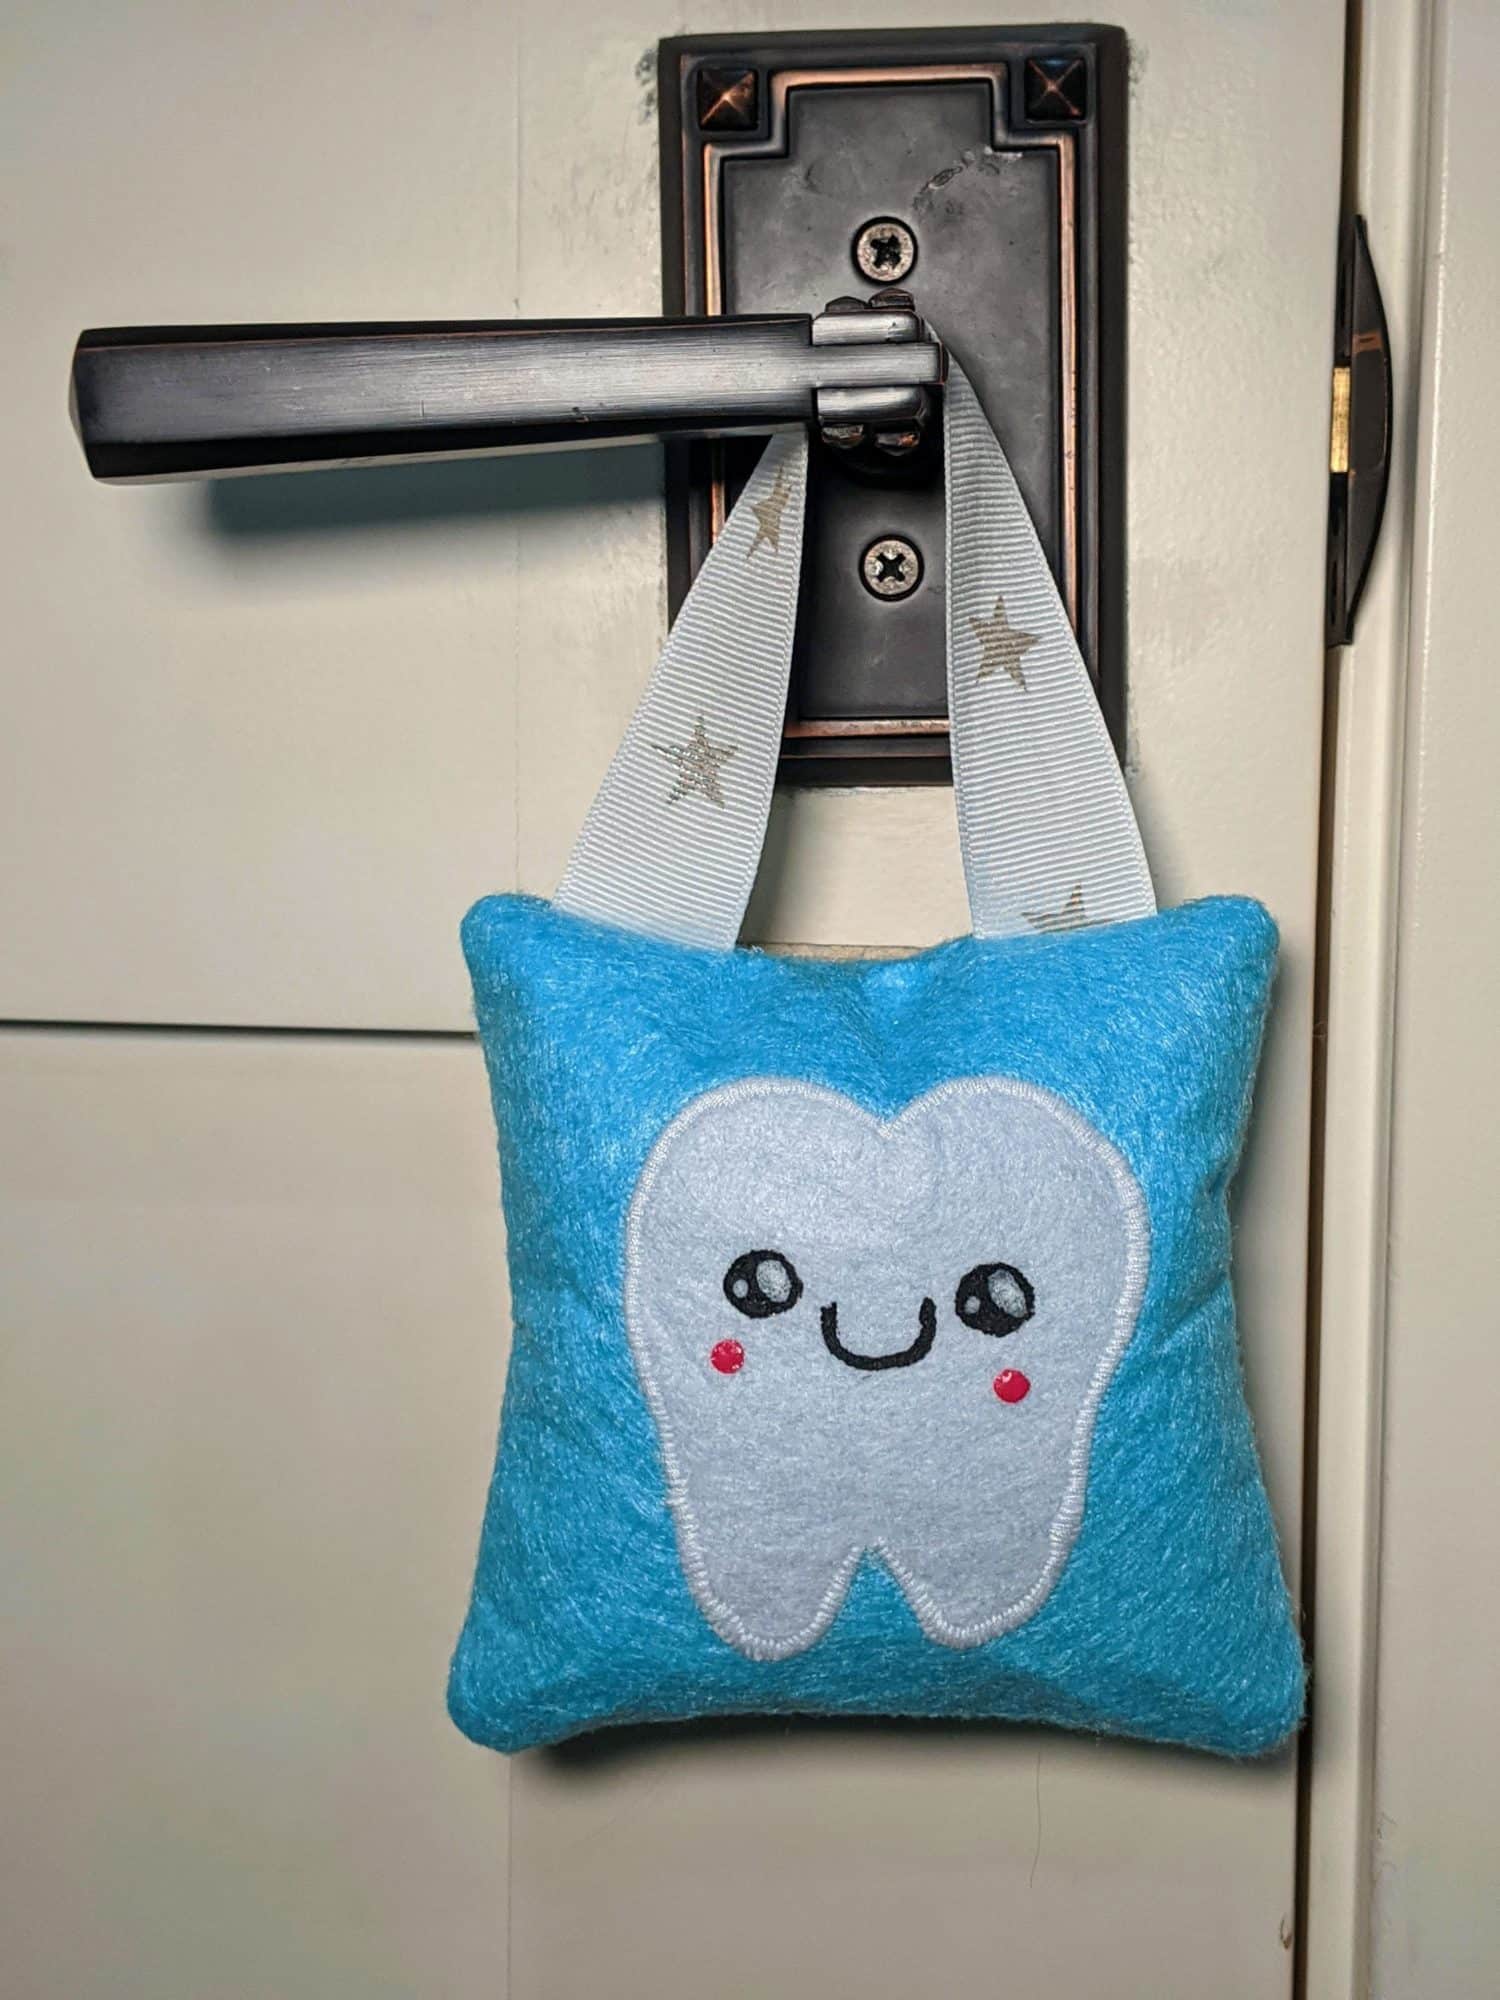
My last baby lost her first tooth last month. I was not prepared; mentally or literally. I had to have her borrow a Tooth Fairy pillow from one of her older sisters. She has another loose tooth and I have yet to make her a tooth pillow, so here we are! Now, our Tooth Fairy doesn’t want to risk waking up a sleeping child by putting it under their pillow, so I have a hanger on all of ours to hang on their door handle. If your Tooth Fairy likes to live on the wild side and see how stealth they can be dodging the toys on the floor and hoping they don’t wake up the kid while searching for the tooth pillow in their bed, you can skip the hanger part.
Supplies:
- Fabric – I used felt, but anything will work
- Sewing Machine
- Needle and thread
- Pillow stuffing or fabric scraps will work for stuffing
- Ribbon if you want to make a hanger
- Cut out shape, vinyl, buttons, fabric paint etc. Anything you want to decorate with.
I’m making mine out of felt because I like the sturdiness of it.
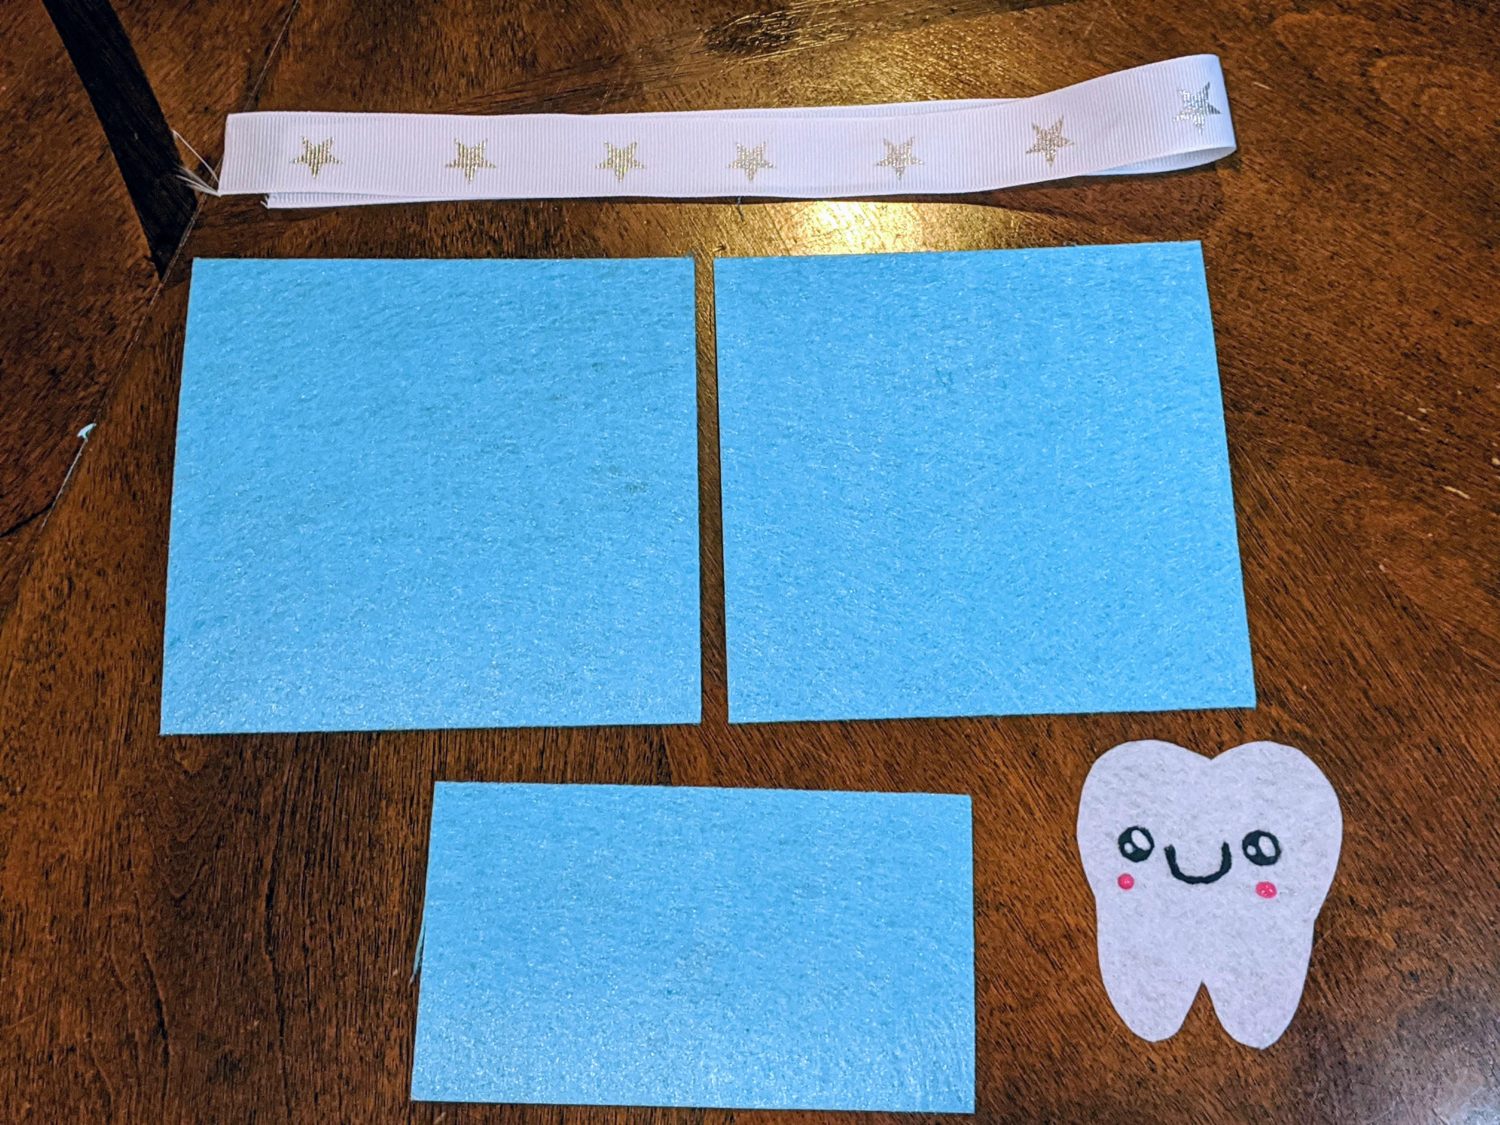
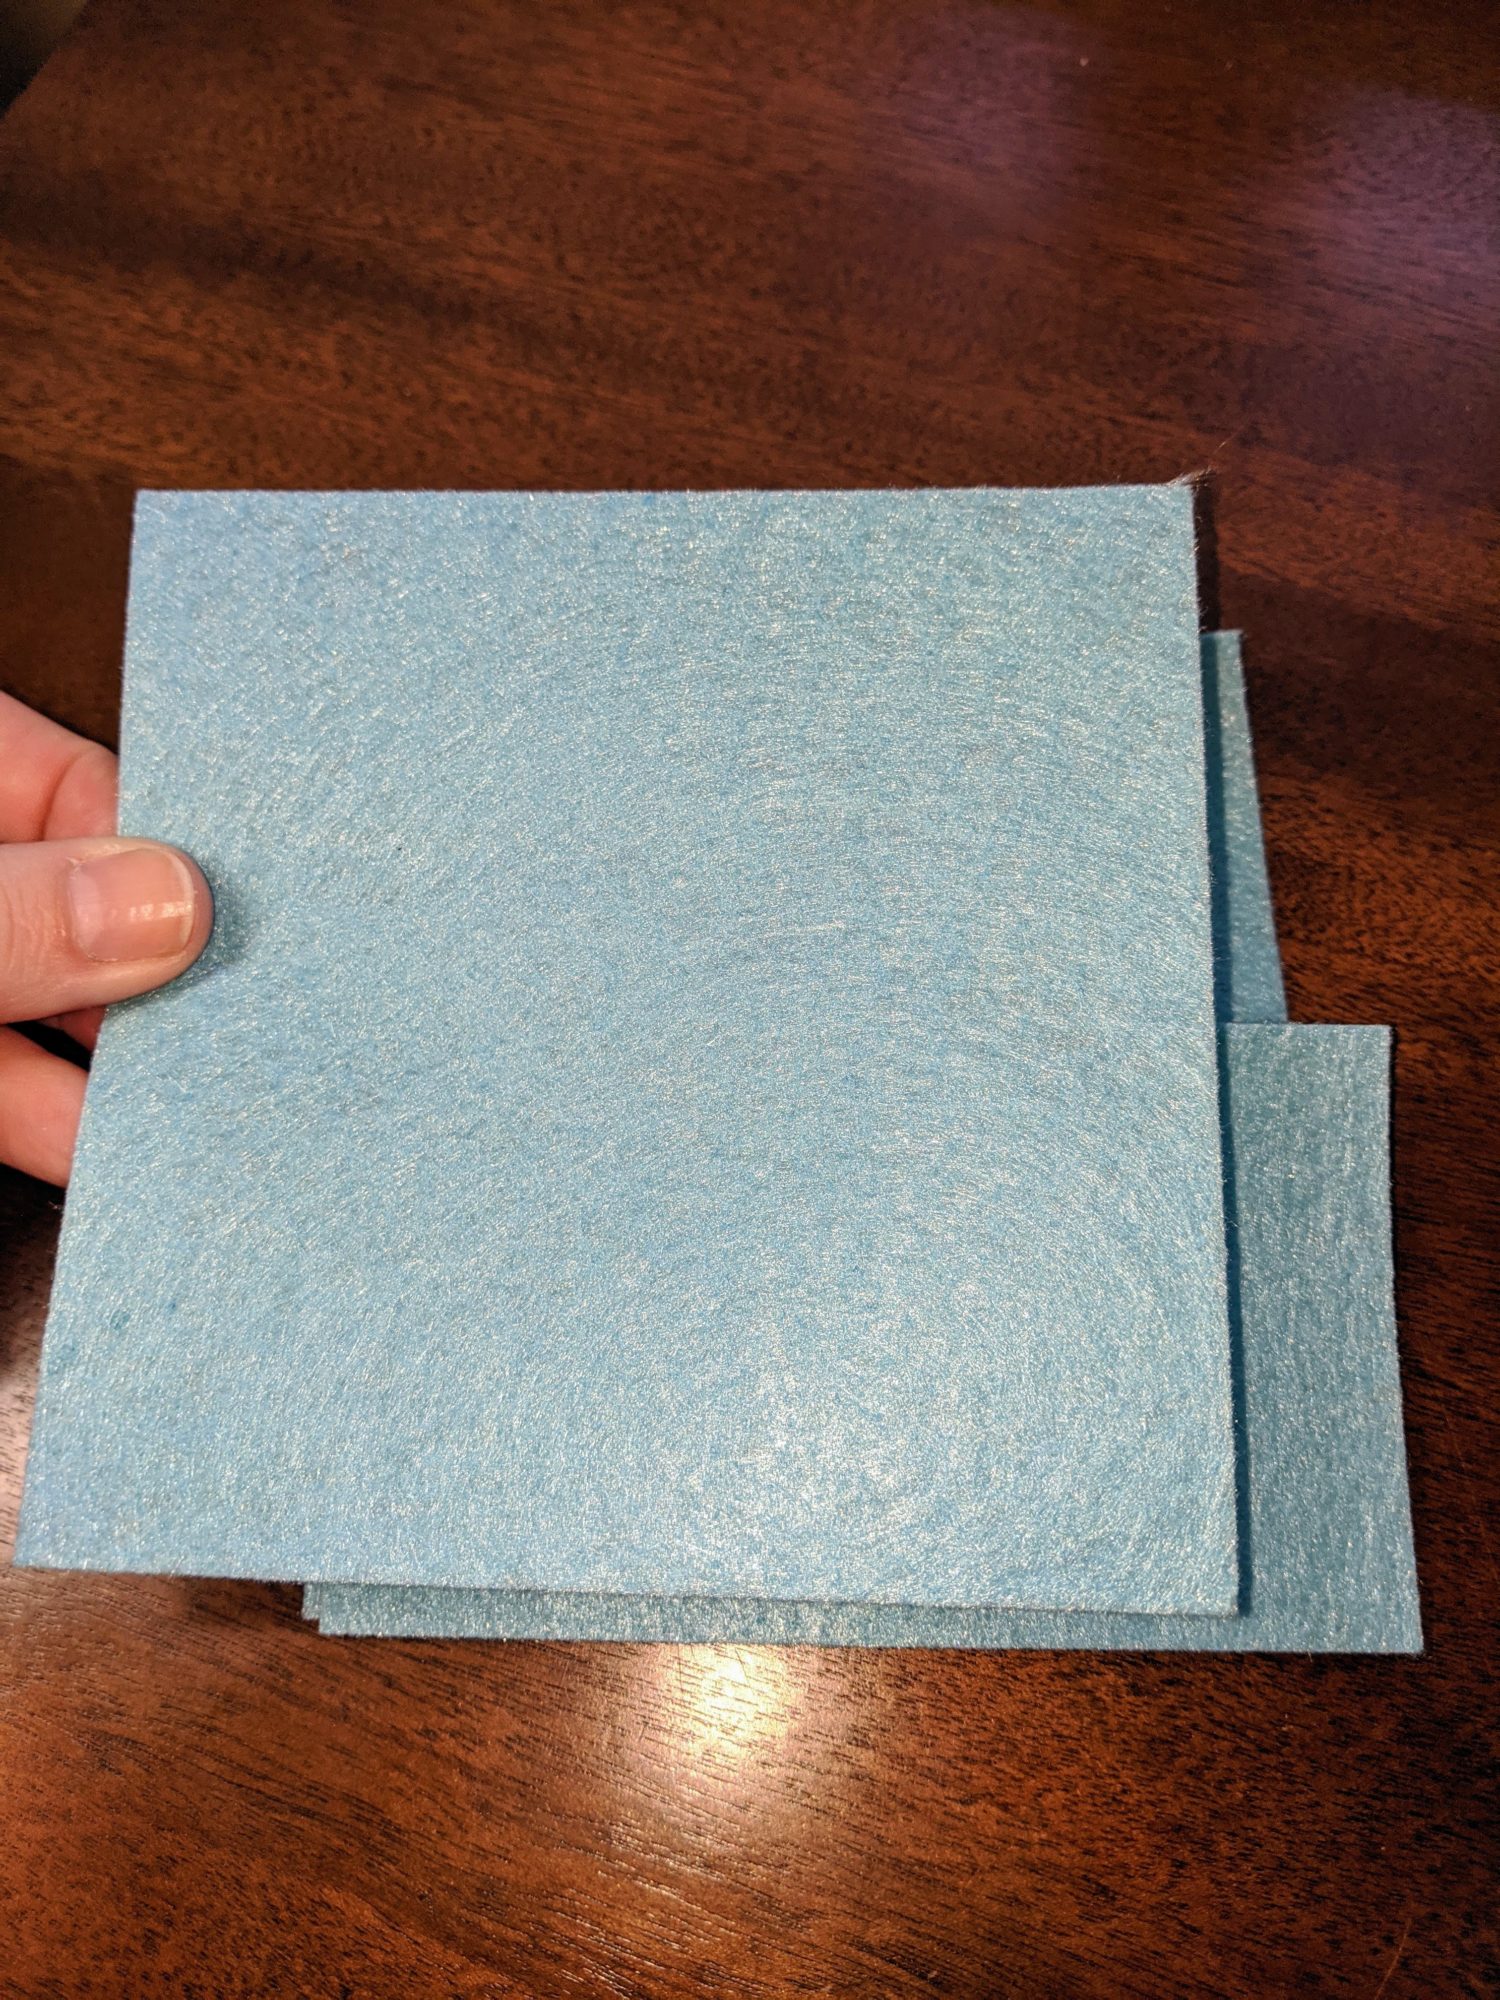
You will want to cut two 5″x5″ pieces and one 5″x3″ piece of your fabirc. If you’re doing a hanger, you’ll want to cut your ribbon to about 9″ long.
Before you start construction you’ll need to decide a couple things.
First, do you want a hanger? And second, are you going to put any decoration on the front or back? If you are adding something that needs to be sewn or ironed on, you will need to do that before you begin construction.
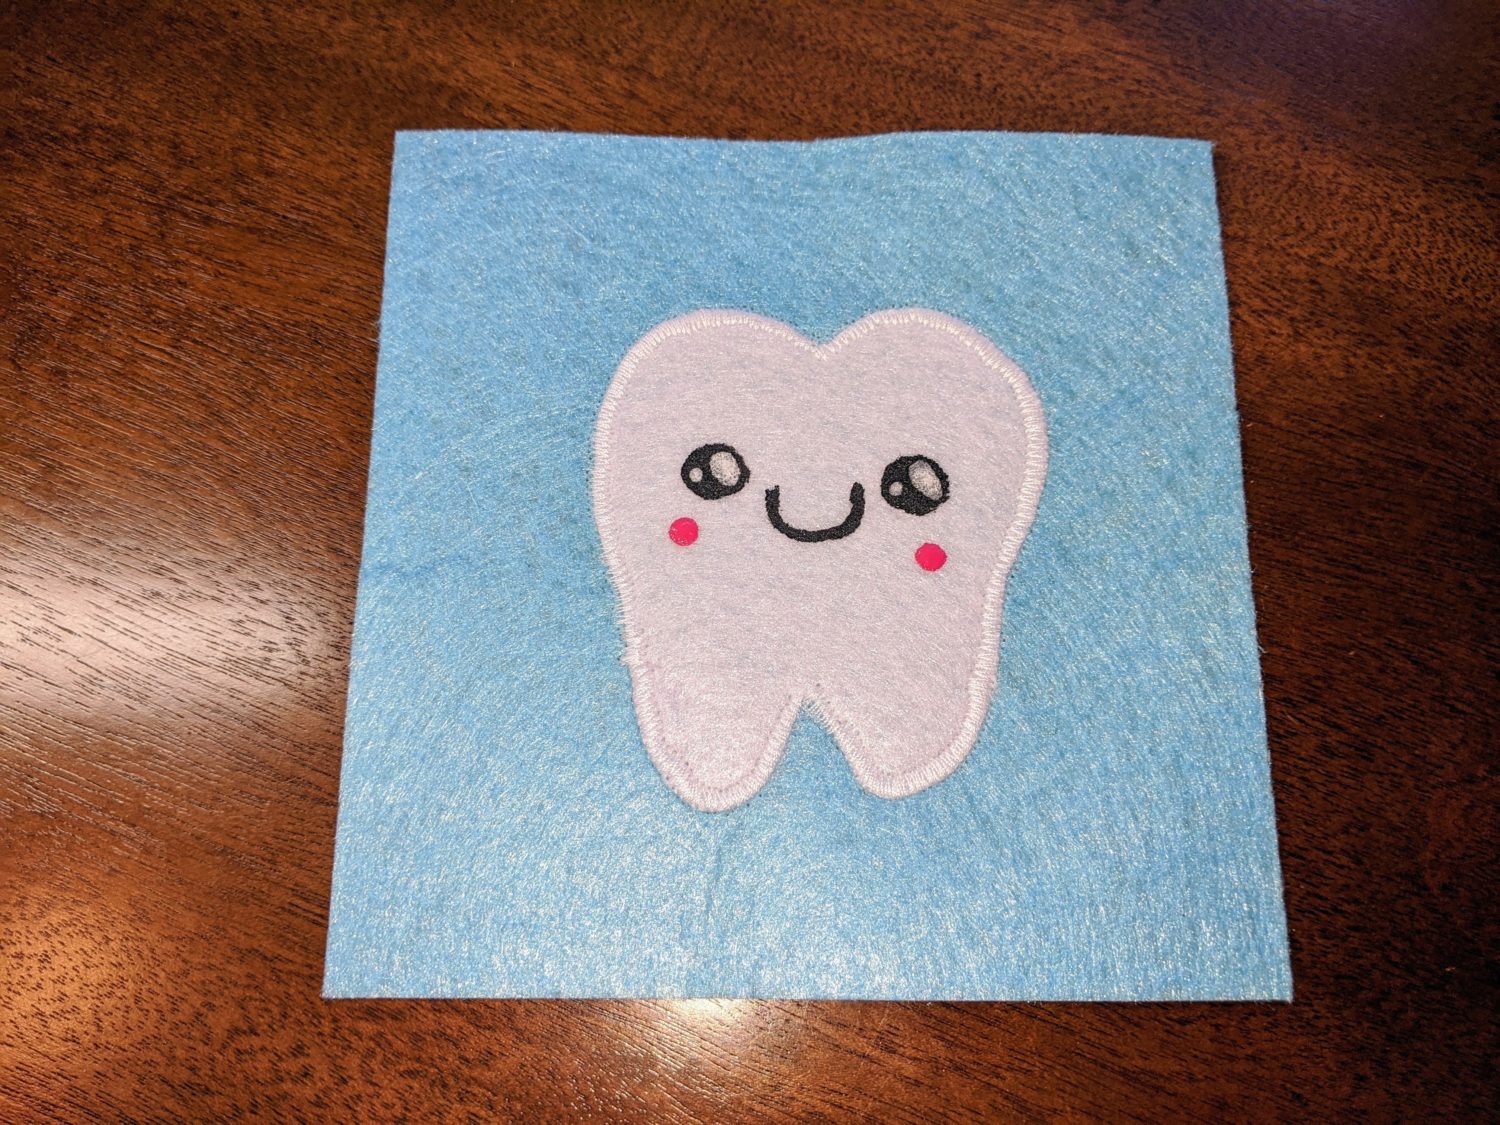
I wanted to sew a tooth on mine.
I searched for a picture of a tooth for the basic shape and drew it out. Then, found some fabric paint and put a cute little face on it. I’ve also done a felt flower on the front for one of my other girls. You can use vinyl and make something cute, or add their name, or use fabric paint to decorate. You can personalize it any way you want.
To sew my cute little tooth on, I pinned it to the front piece of my pillow and used a short and fairly narrow zigzag stitch (.5 length and 3.5 width) and slowly sewed all the way around it.
Now it’s time to start construction.
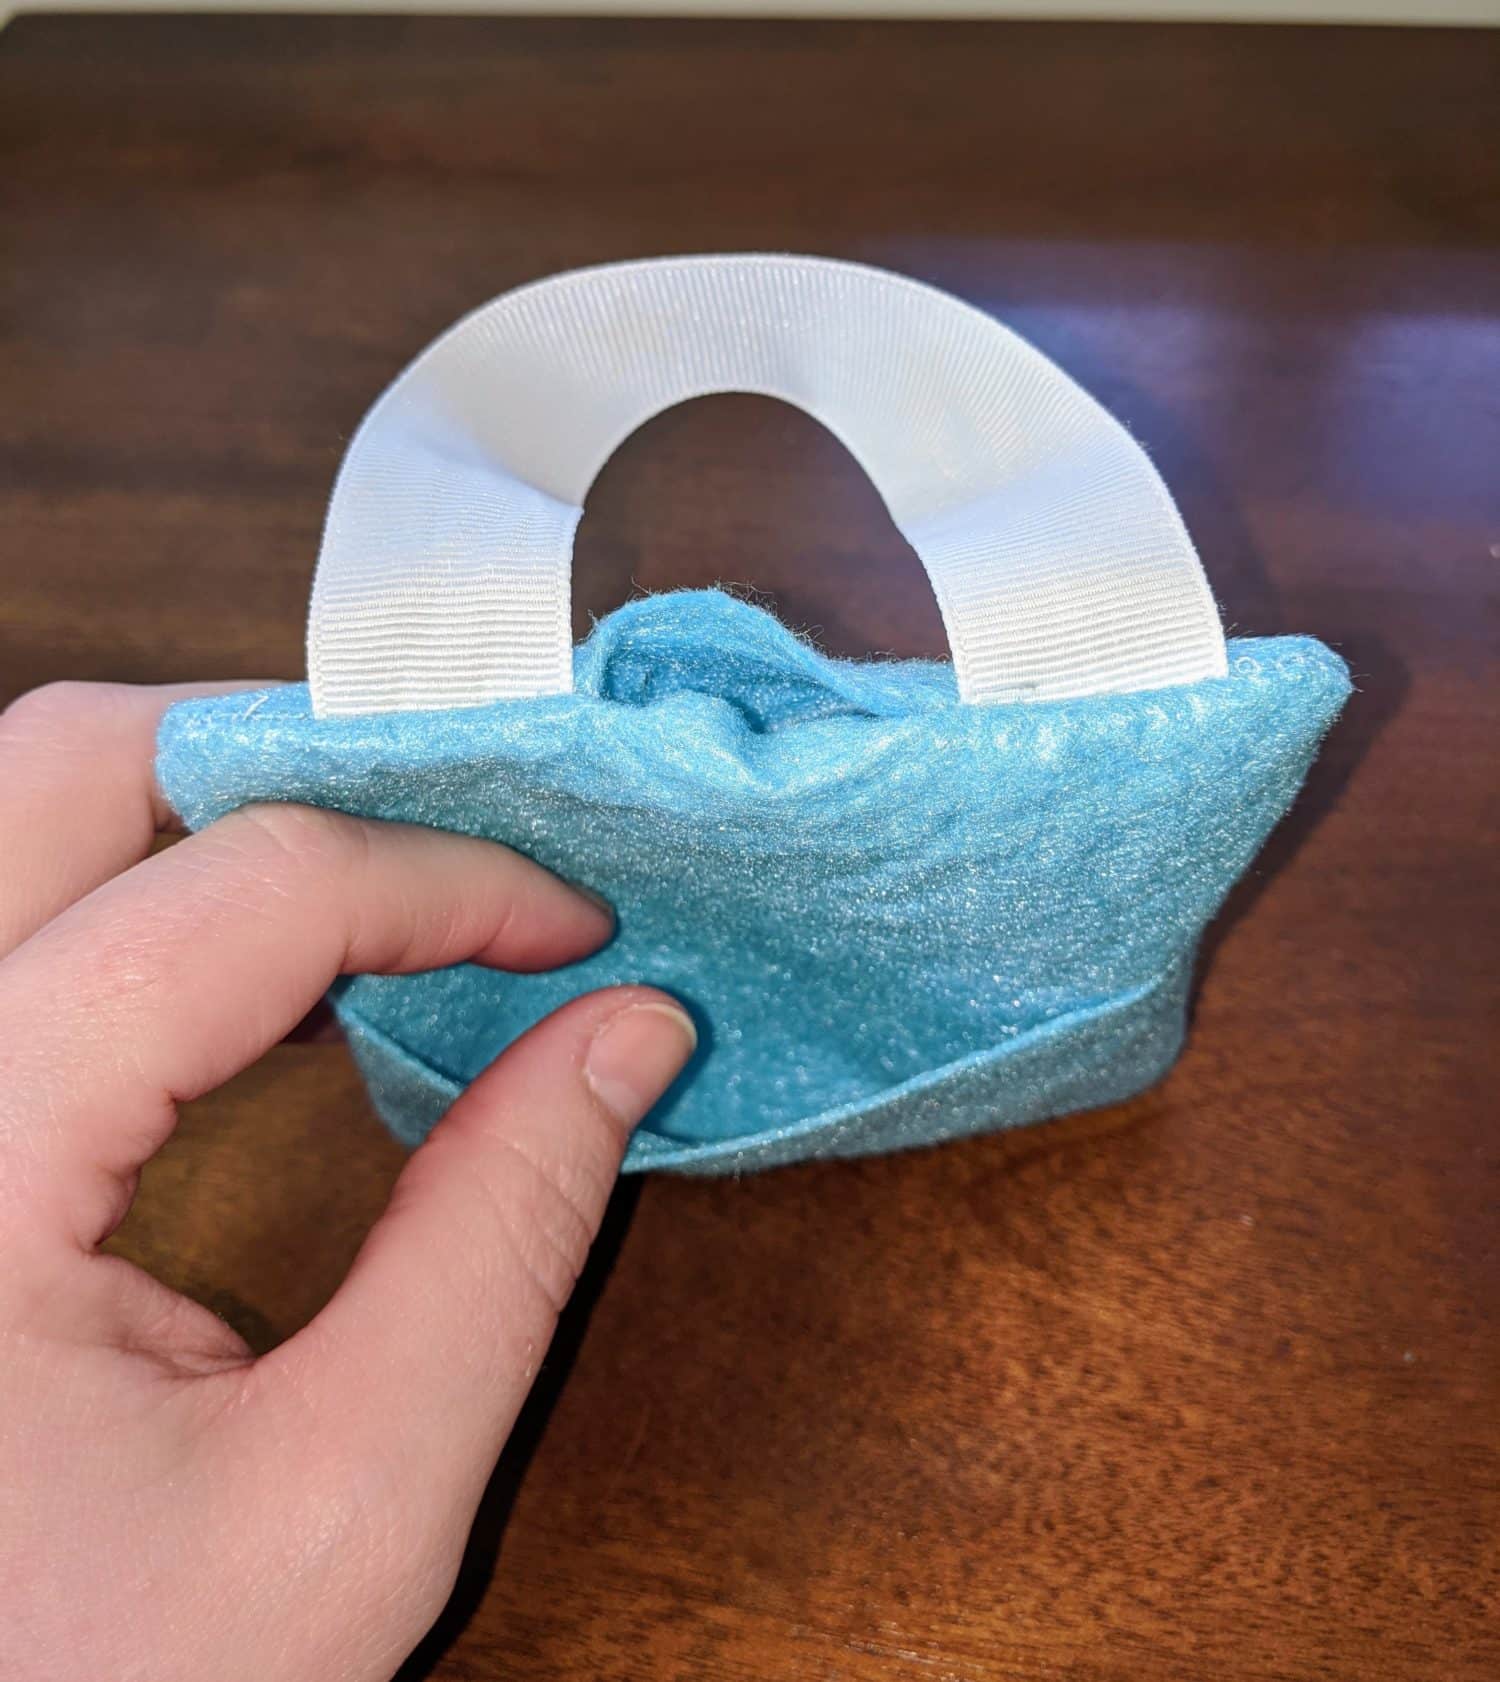
I’m showing how to make it with a hanger, but if you’re skipping that part it will be exactly the same minus the ribbon. Start by pinning the ribbon to the back side of the front piece. Make sure your ribbon is hanging over the back quite a bit to keep it from slipping out later. Once that’s pinned on, fold it forward towards the front of the pillow and lay your smaller pocket piece on top of that. Finally, set your back piece on top of both of them and pin all the way around.
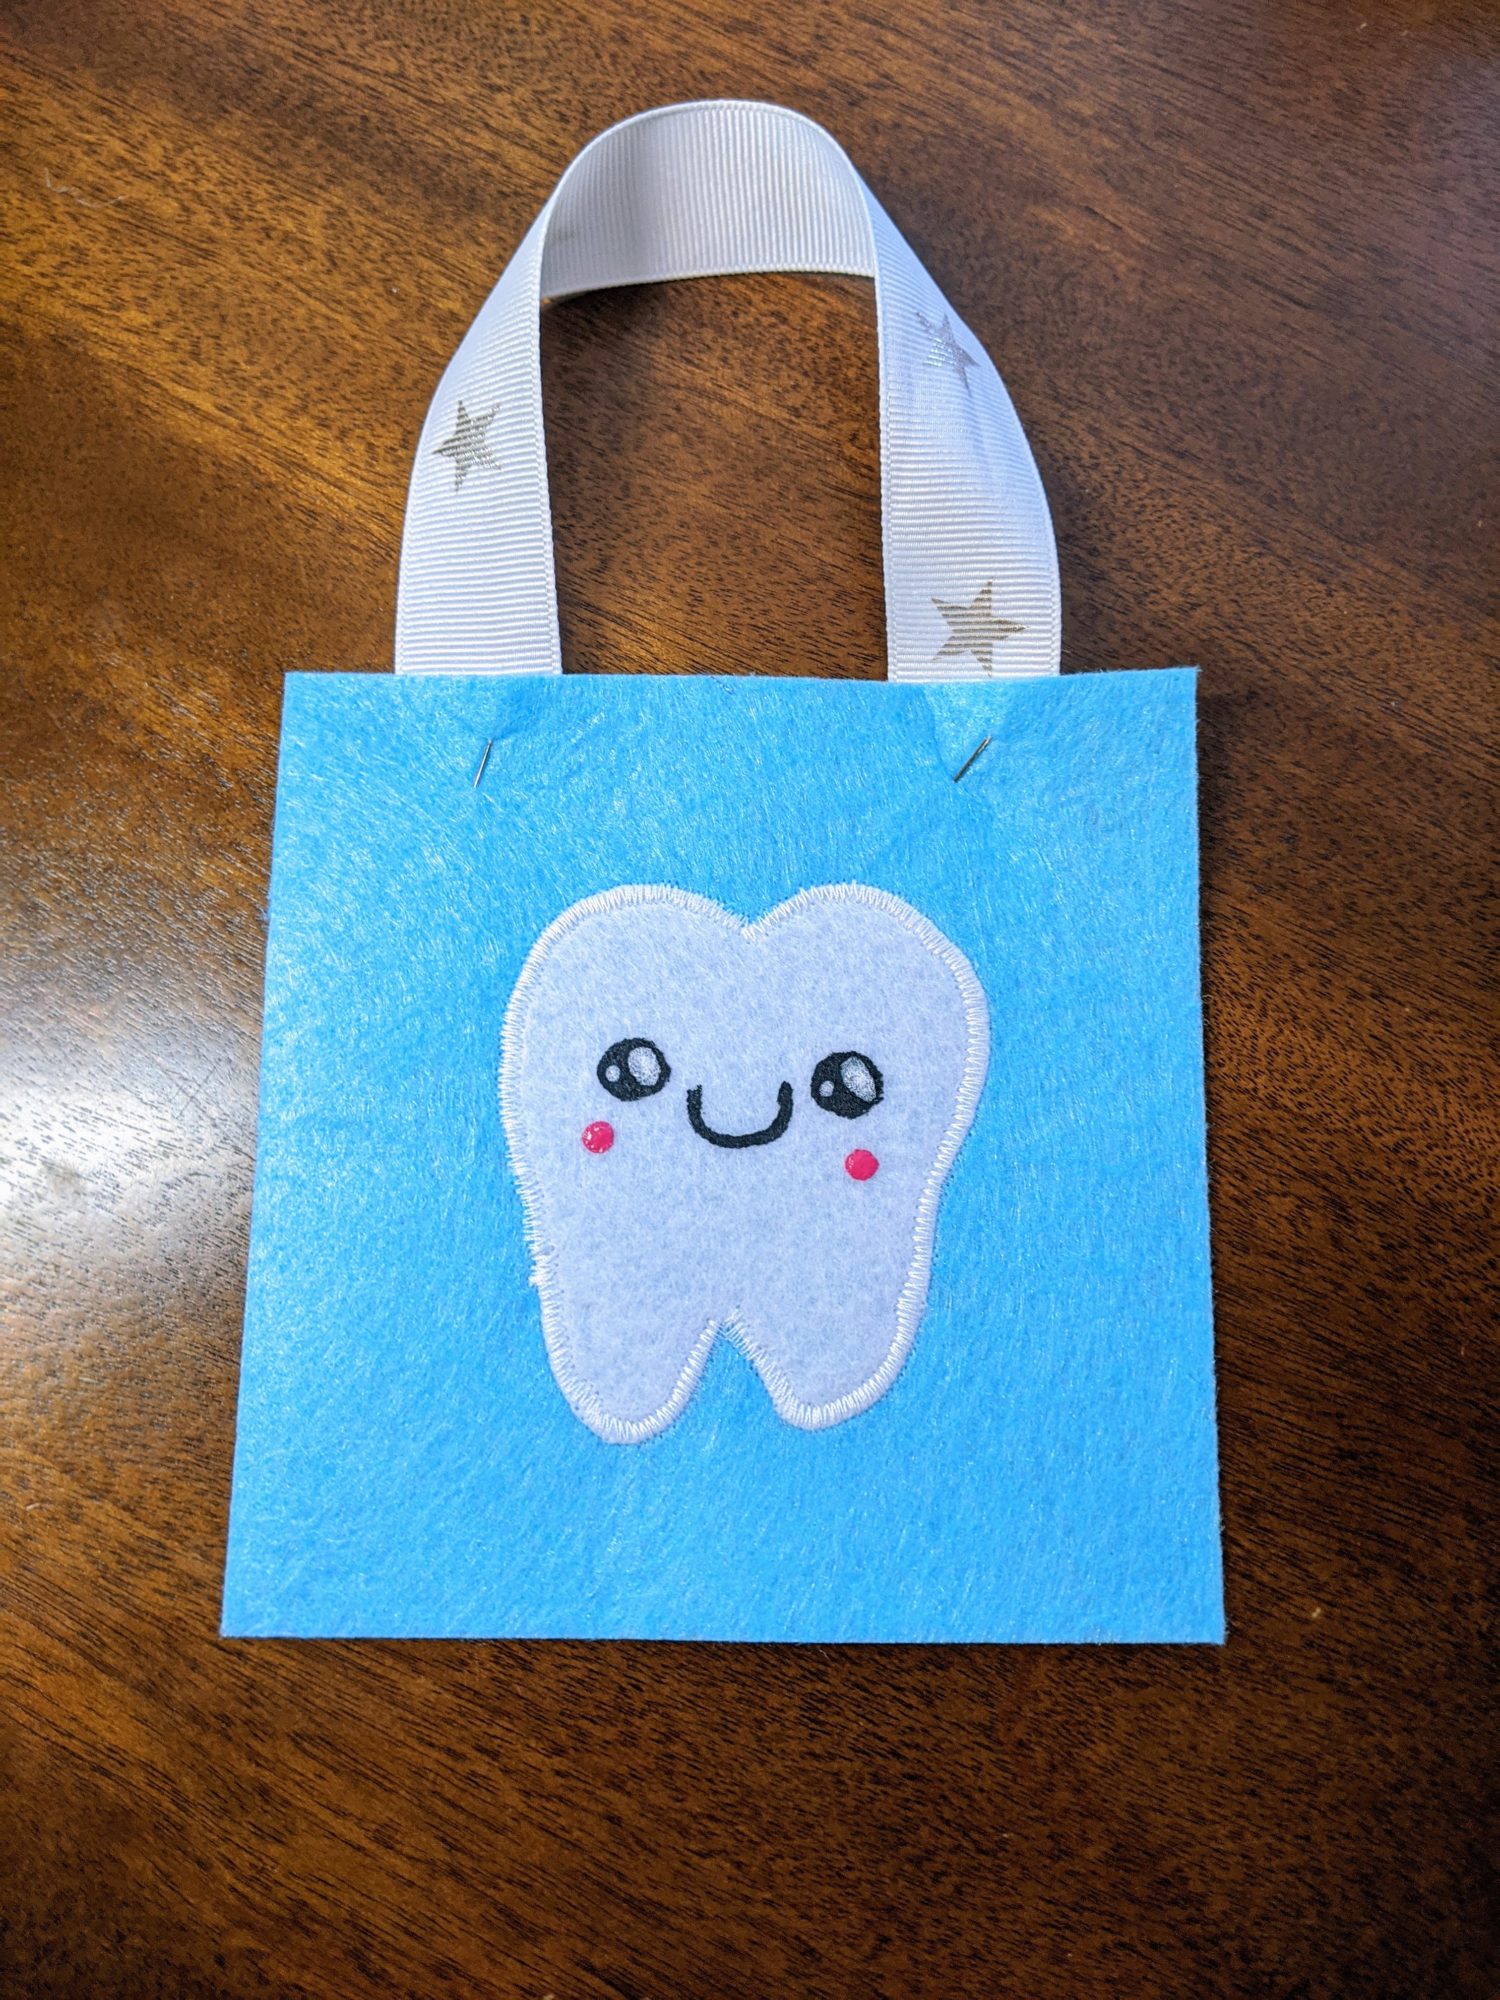
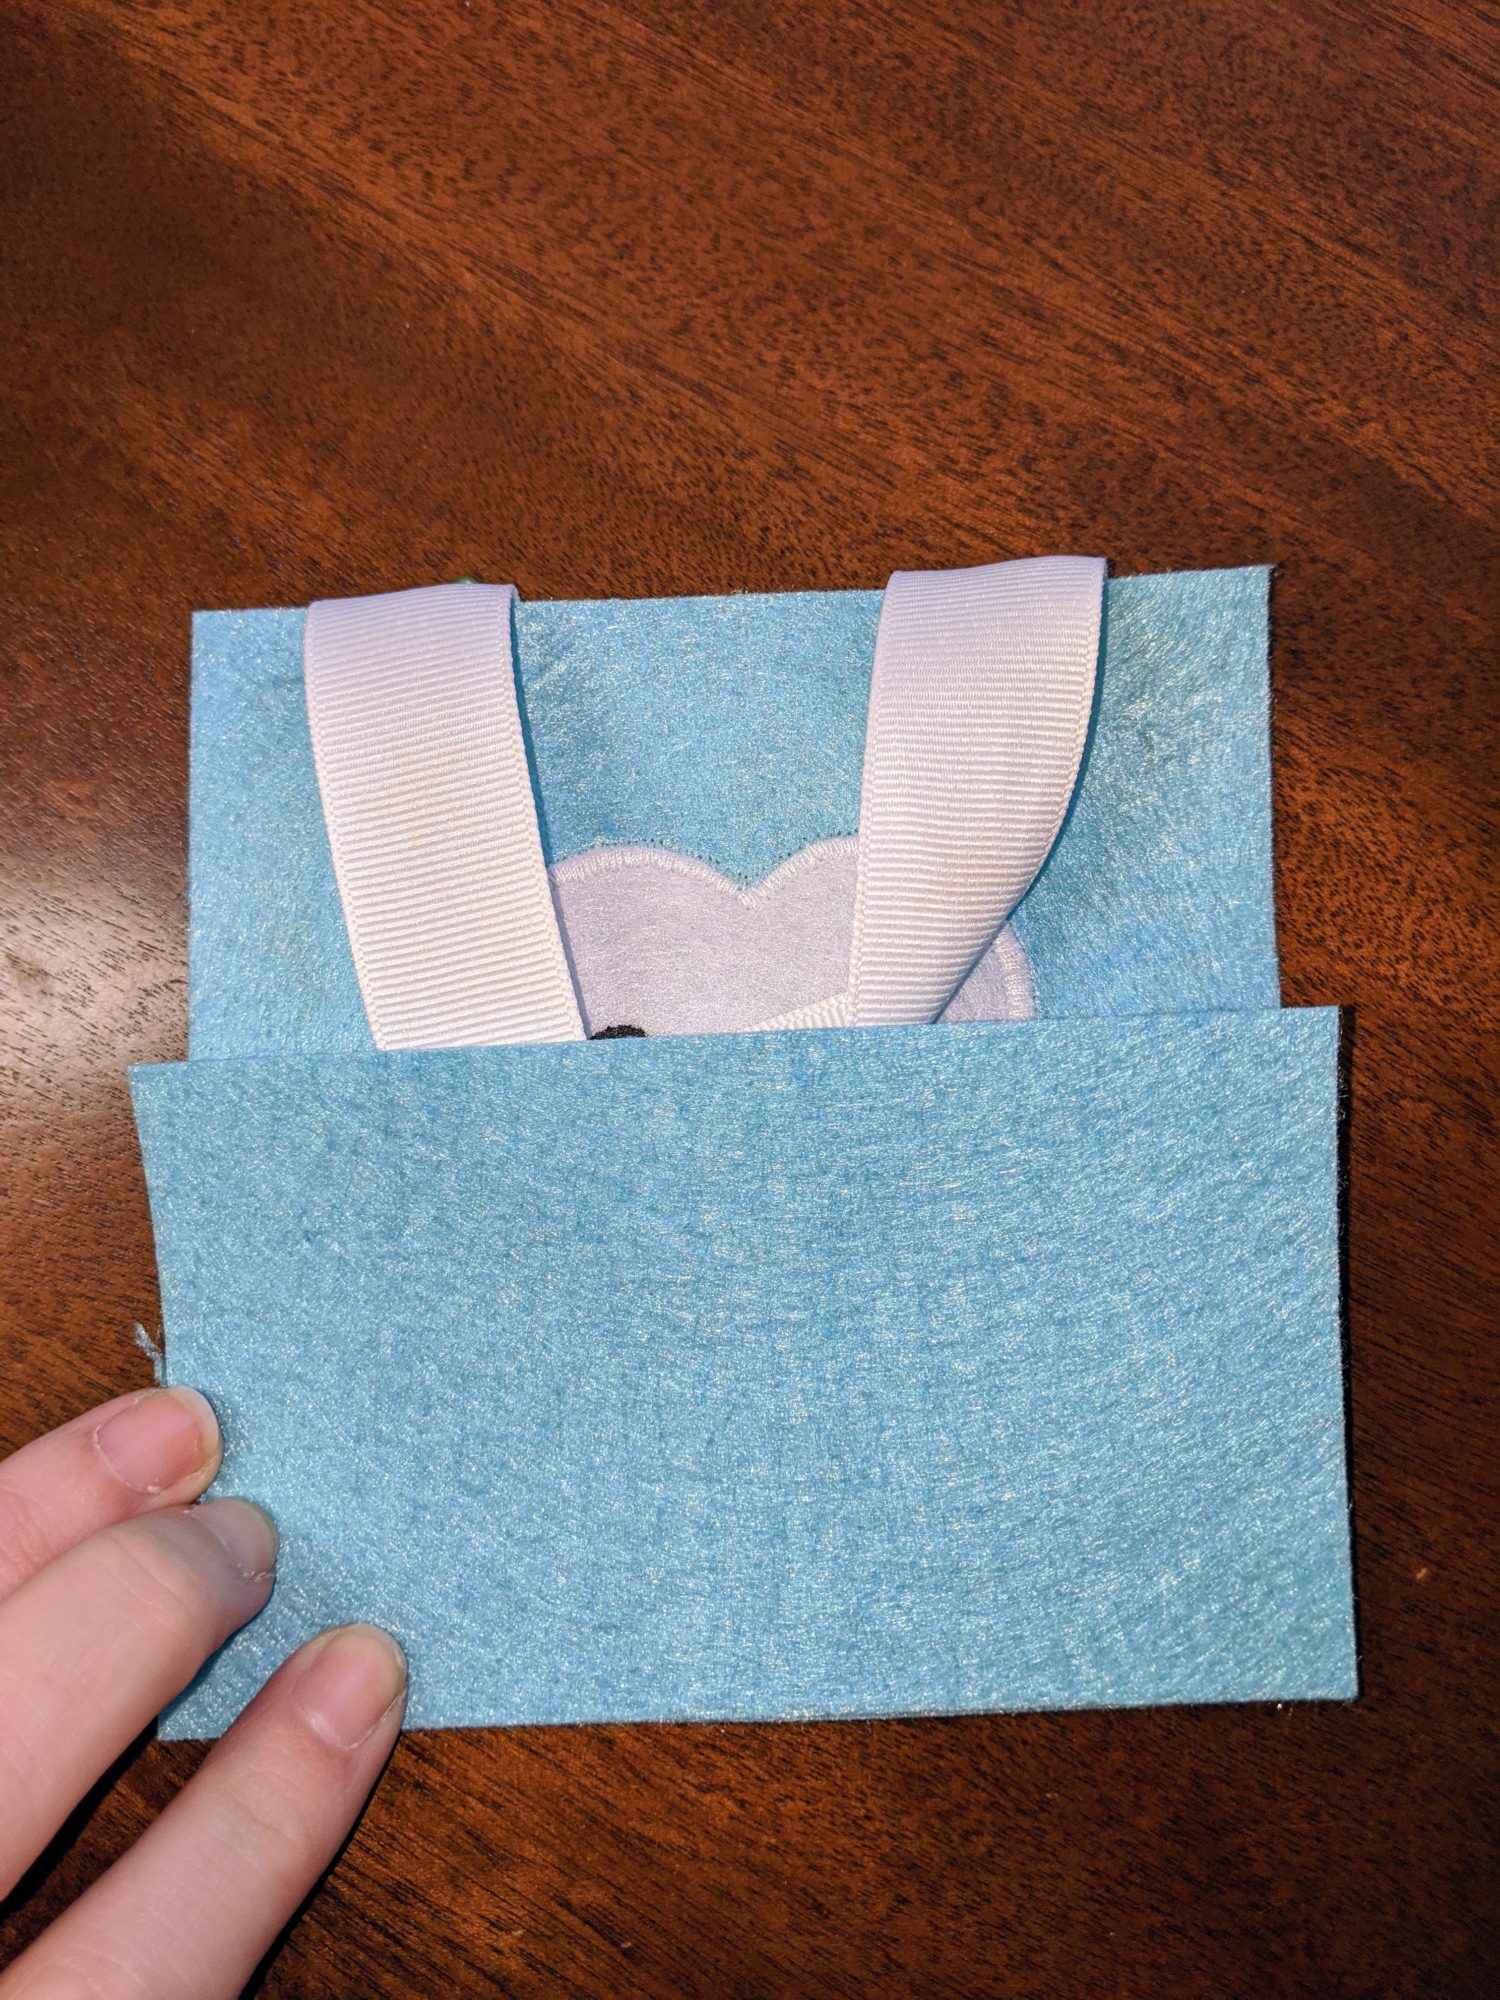
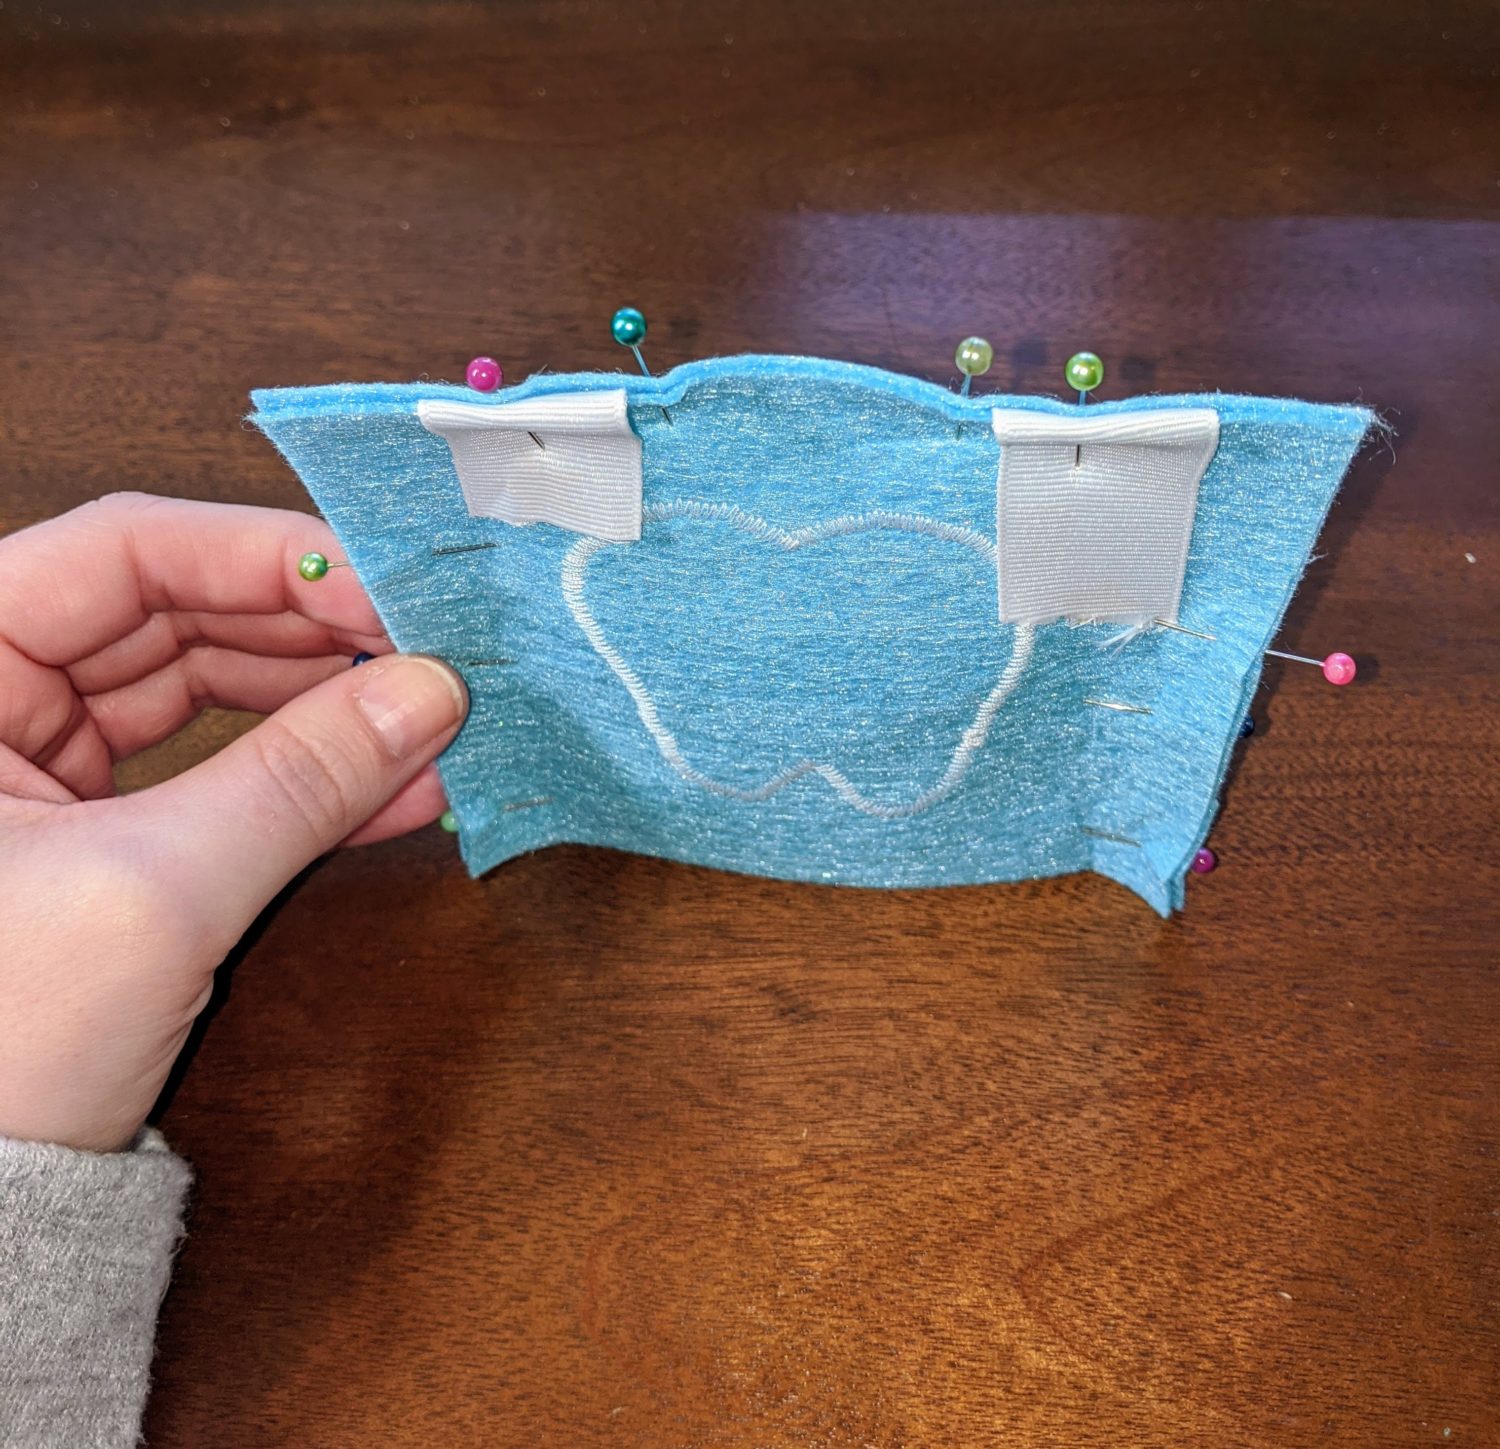
Sew all the way around the pillow using a straight stitch and making sure to leave an opening to turn it right side out. I left the opening at the top between the ribbons. Make sure to back stitch several times where you start and end to keep it from coming apart when you turn it. Now, turn it right side out and poke the corners out. Now you’re ready to stuff it! Use your stuffing (or fabric scraps if you don’t have stuffing) and get it filled to your liking.
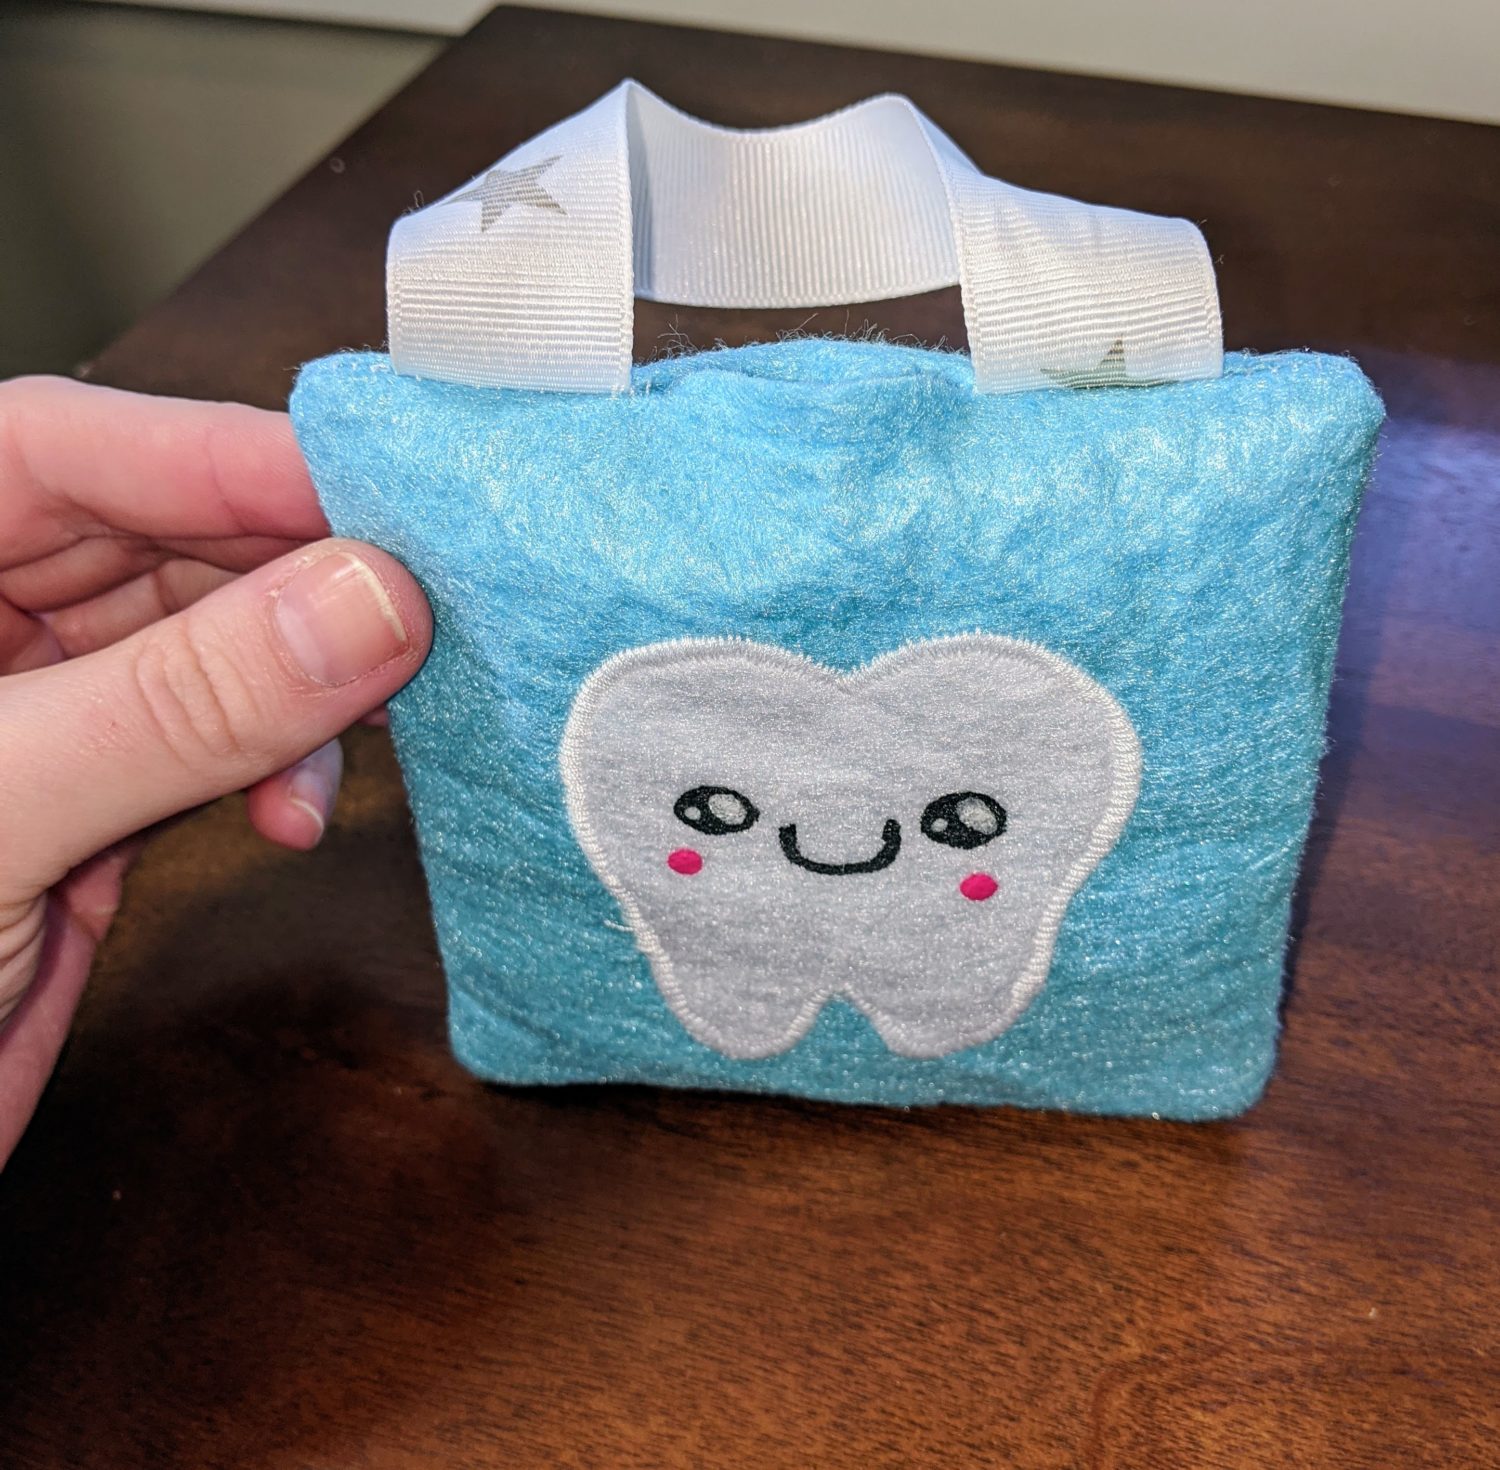
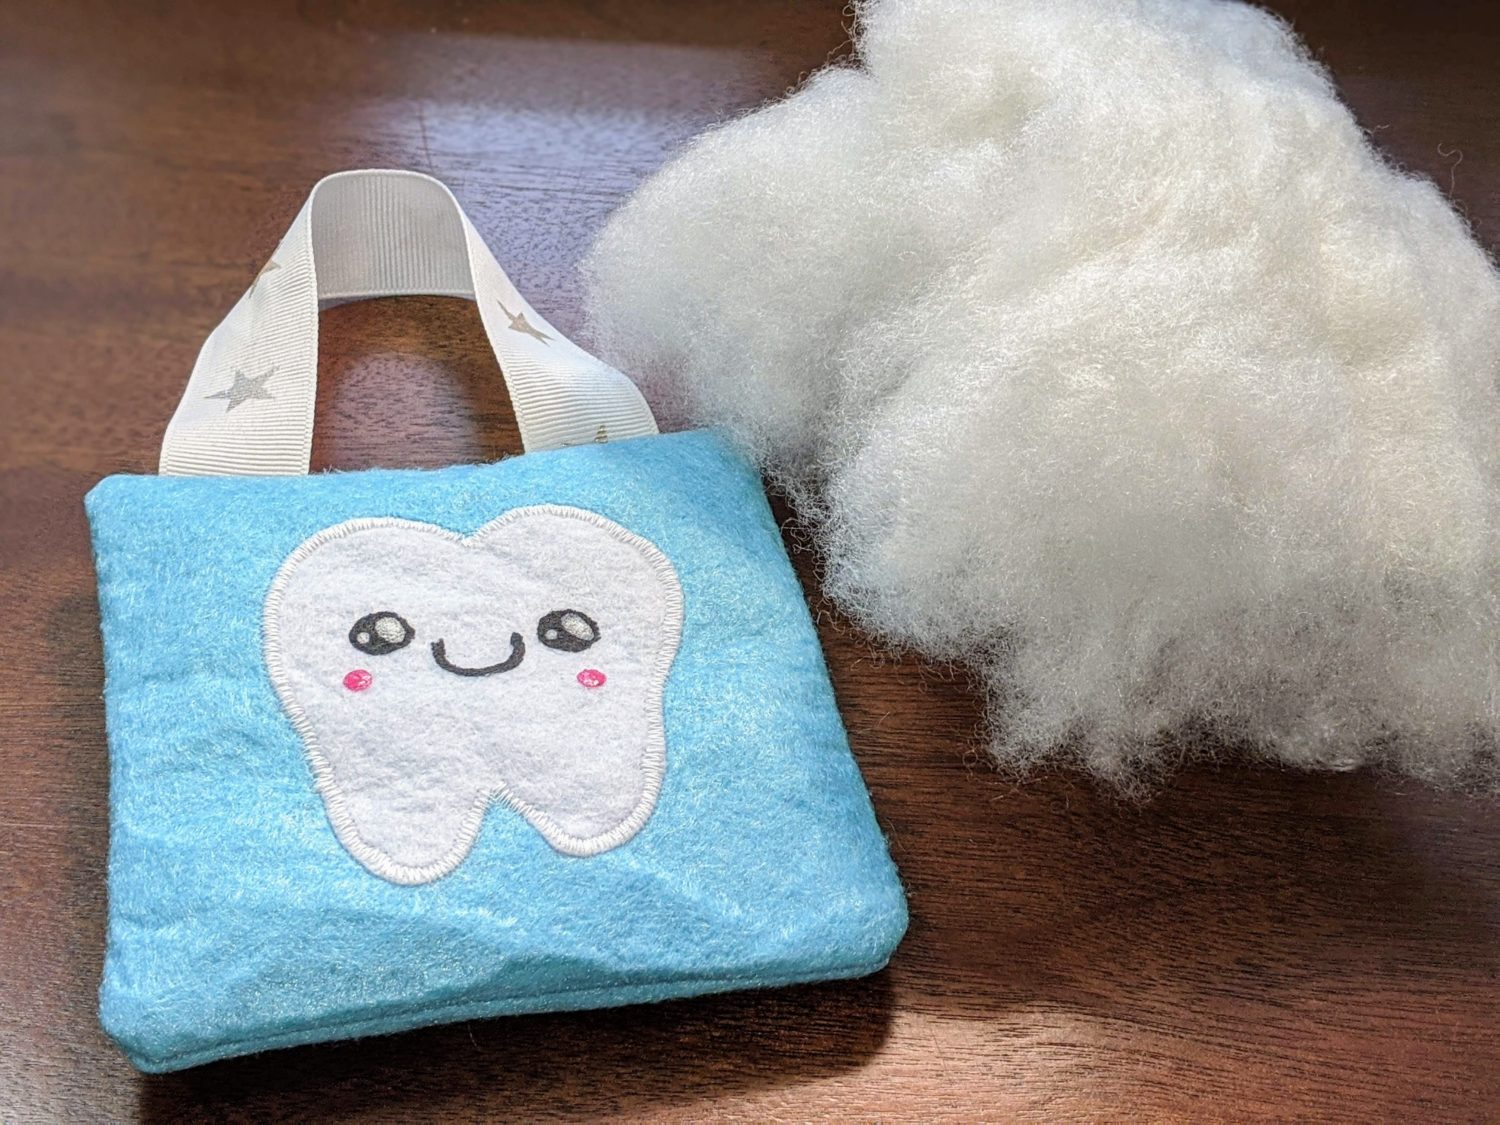
Once your pillow is all stuffed, use your needle and thread to sew a ladder stitch to close it up. If you need a refresh on how to do a ladder stitch there’s a sewing school video for that here. You’re done! Your super cute and personalized Tooth Fairy pillow is ready to go!

As always, we’re here to help if you need it! Join us HERE and on Facebook, Instagram, Twitter, Youtube, and Pinterest. We’re everywhere you are.
Great, I will definitely use this!
Making things for my great grandchildren. tooth fairy pillow looks cutie.
Such a cute idea. I made it and love the design. The little boy who got it was thrilled. Thanks for the pattern.