• Skip to primary navigation
  • Skip to main content
X

5 out of 4 Patterns5 out of 4 Patterns

Never stop sewing...never stop growing.

  • Shop
  • Get Started
  • Sales
  • Blog
  • Our Story
  • Membership
  • Login
  • Search
  • Courses
  • (0)
  • Shop
  • Get Started
  • Blog
  • Sales
  • Our Story
  • Search
  • Membership
  • Courses
  • (0)
  • Login
    View by Category:
  • Fitting
  • Freebies
  • Gift Guide
  • Hacks
  • Sew Alongs
  • Sewing School
  • More
    • Fabric
    • Gift Guide
    • Hacks
    • Maternity
    • Nursing
    • Swim
    • Tipsy Tuesday

Easy Tee Front Panel Hack

April 23, 2020 in Hacks by Tiffany Boushey

Easy Tee

For this hack you will need the Easy Tee pattern. This will work for several other patterns as well, including Michelle and Sheila.

Let’s get started!

First, you will need to assemble your pattern. Once that is ready to go, you will start with just the front bodice piece.

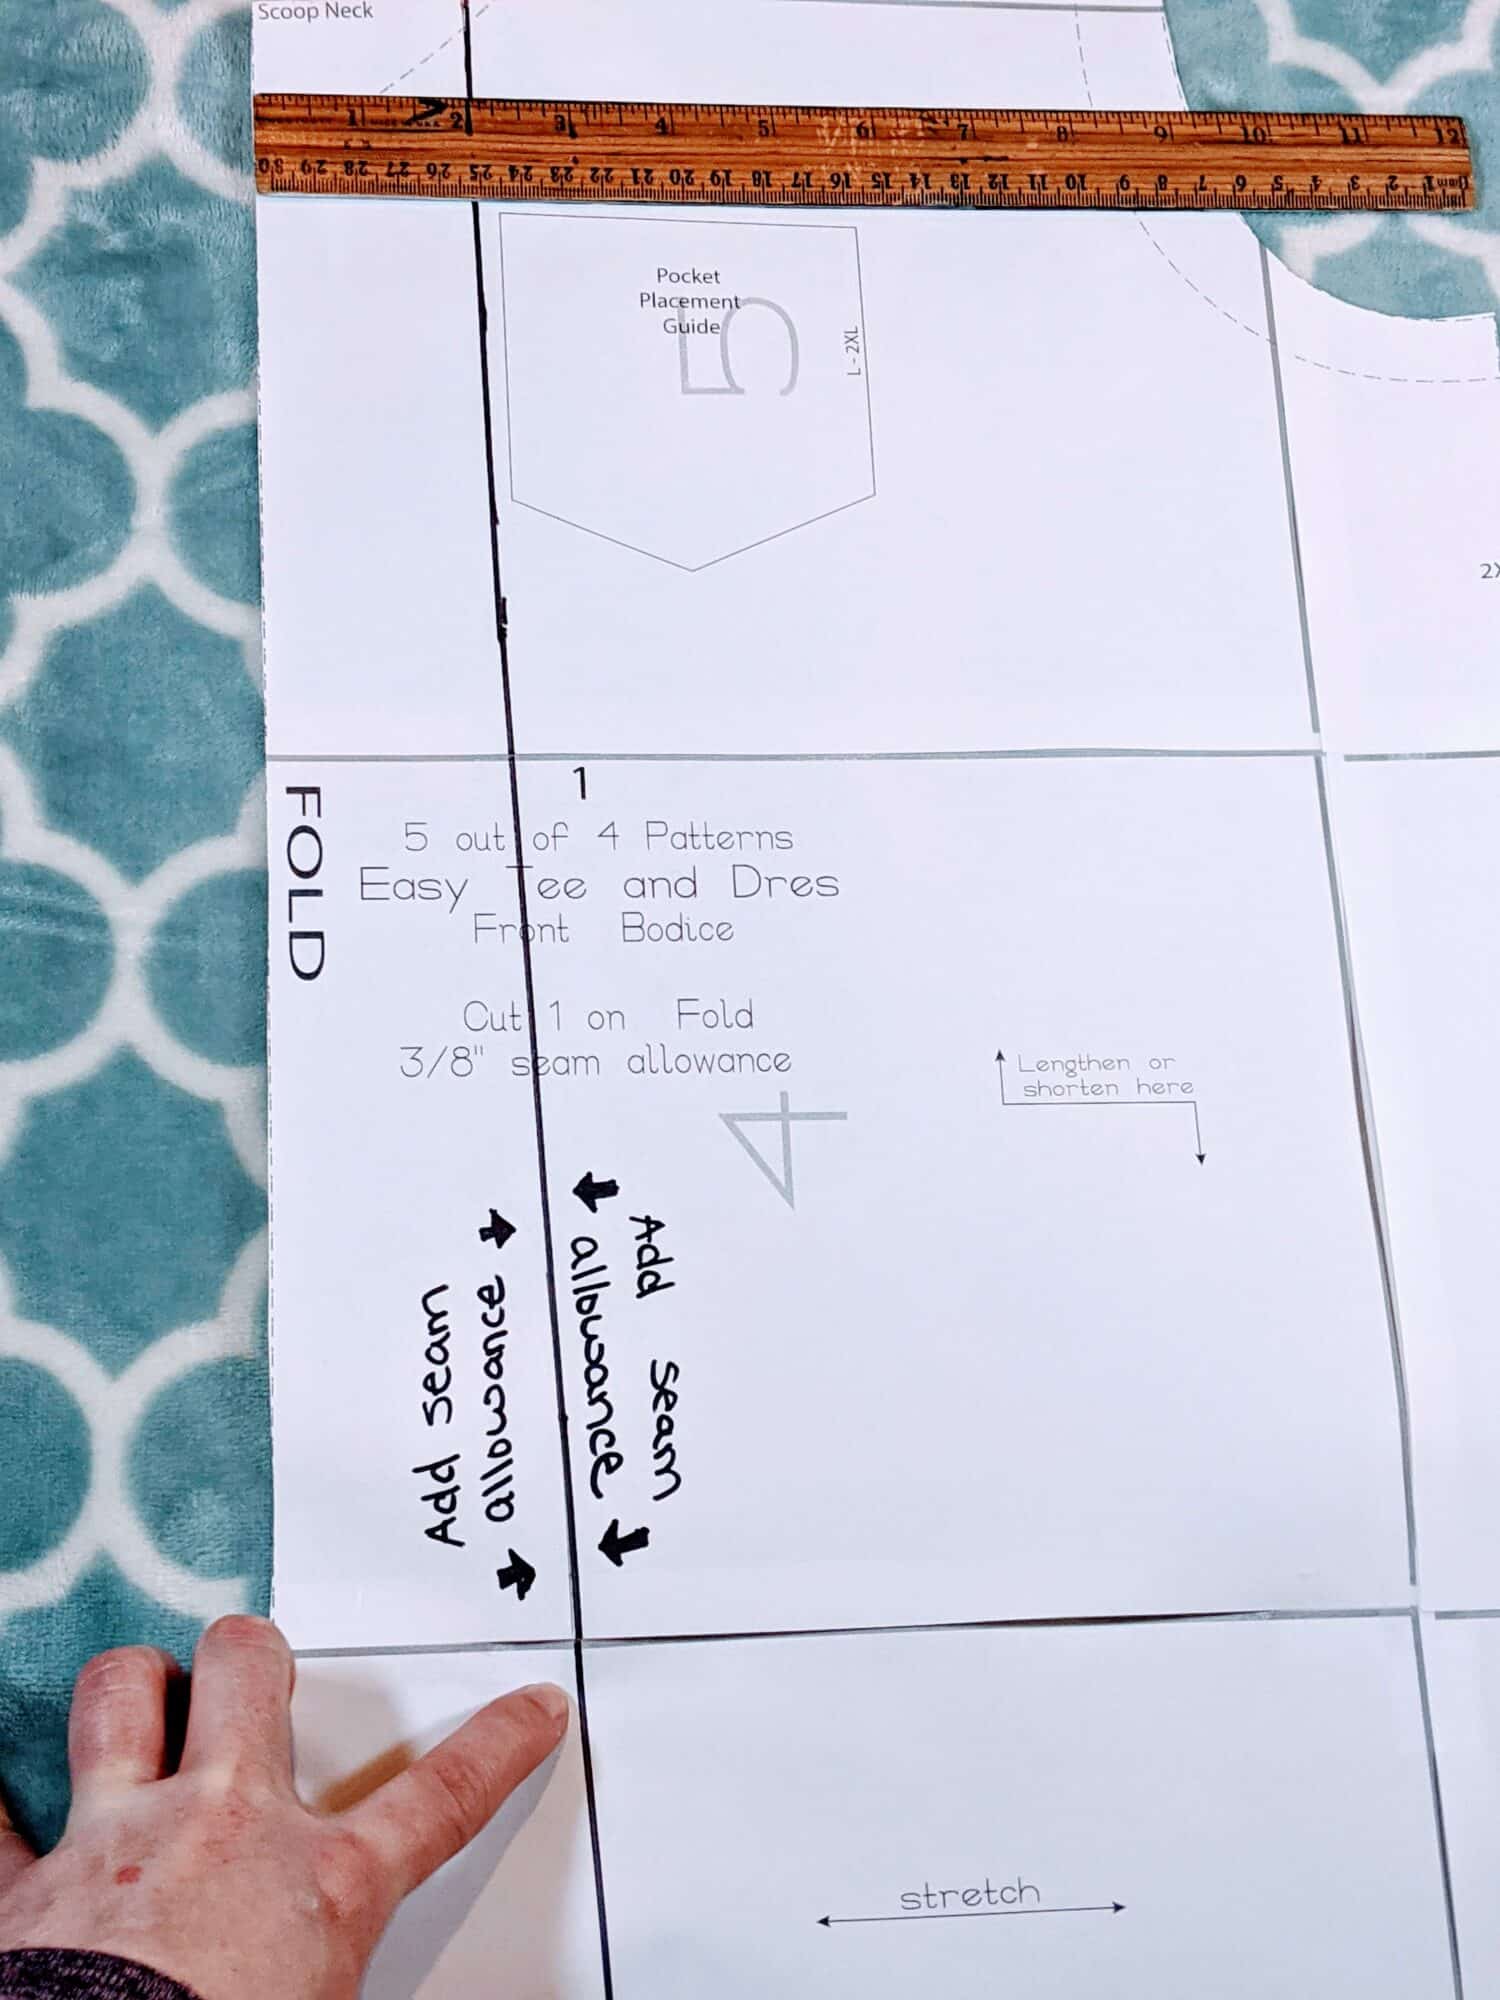
 I want my accent panel to be 5” wide at the top, and taper out slightly at the bottom ending at 6” wide. Since your front bodice piece is cut on the fold, measure over 2.5” at the top neckline and mark it. At the bottom, measure over 3”. Using a ruler, draw a line all the way from the top neckline to the bottom hem, angling your line out slightly so it matches up to the slightly wider bottom. 

Easy Tee Hack

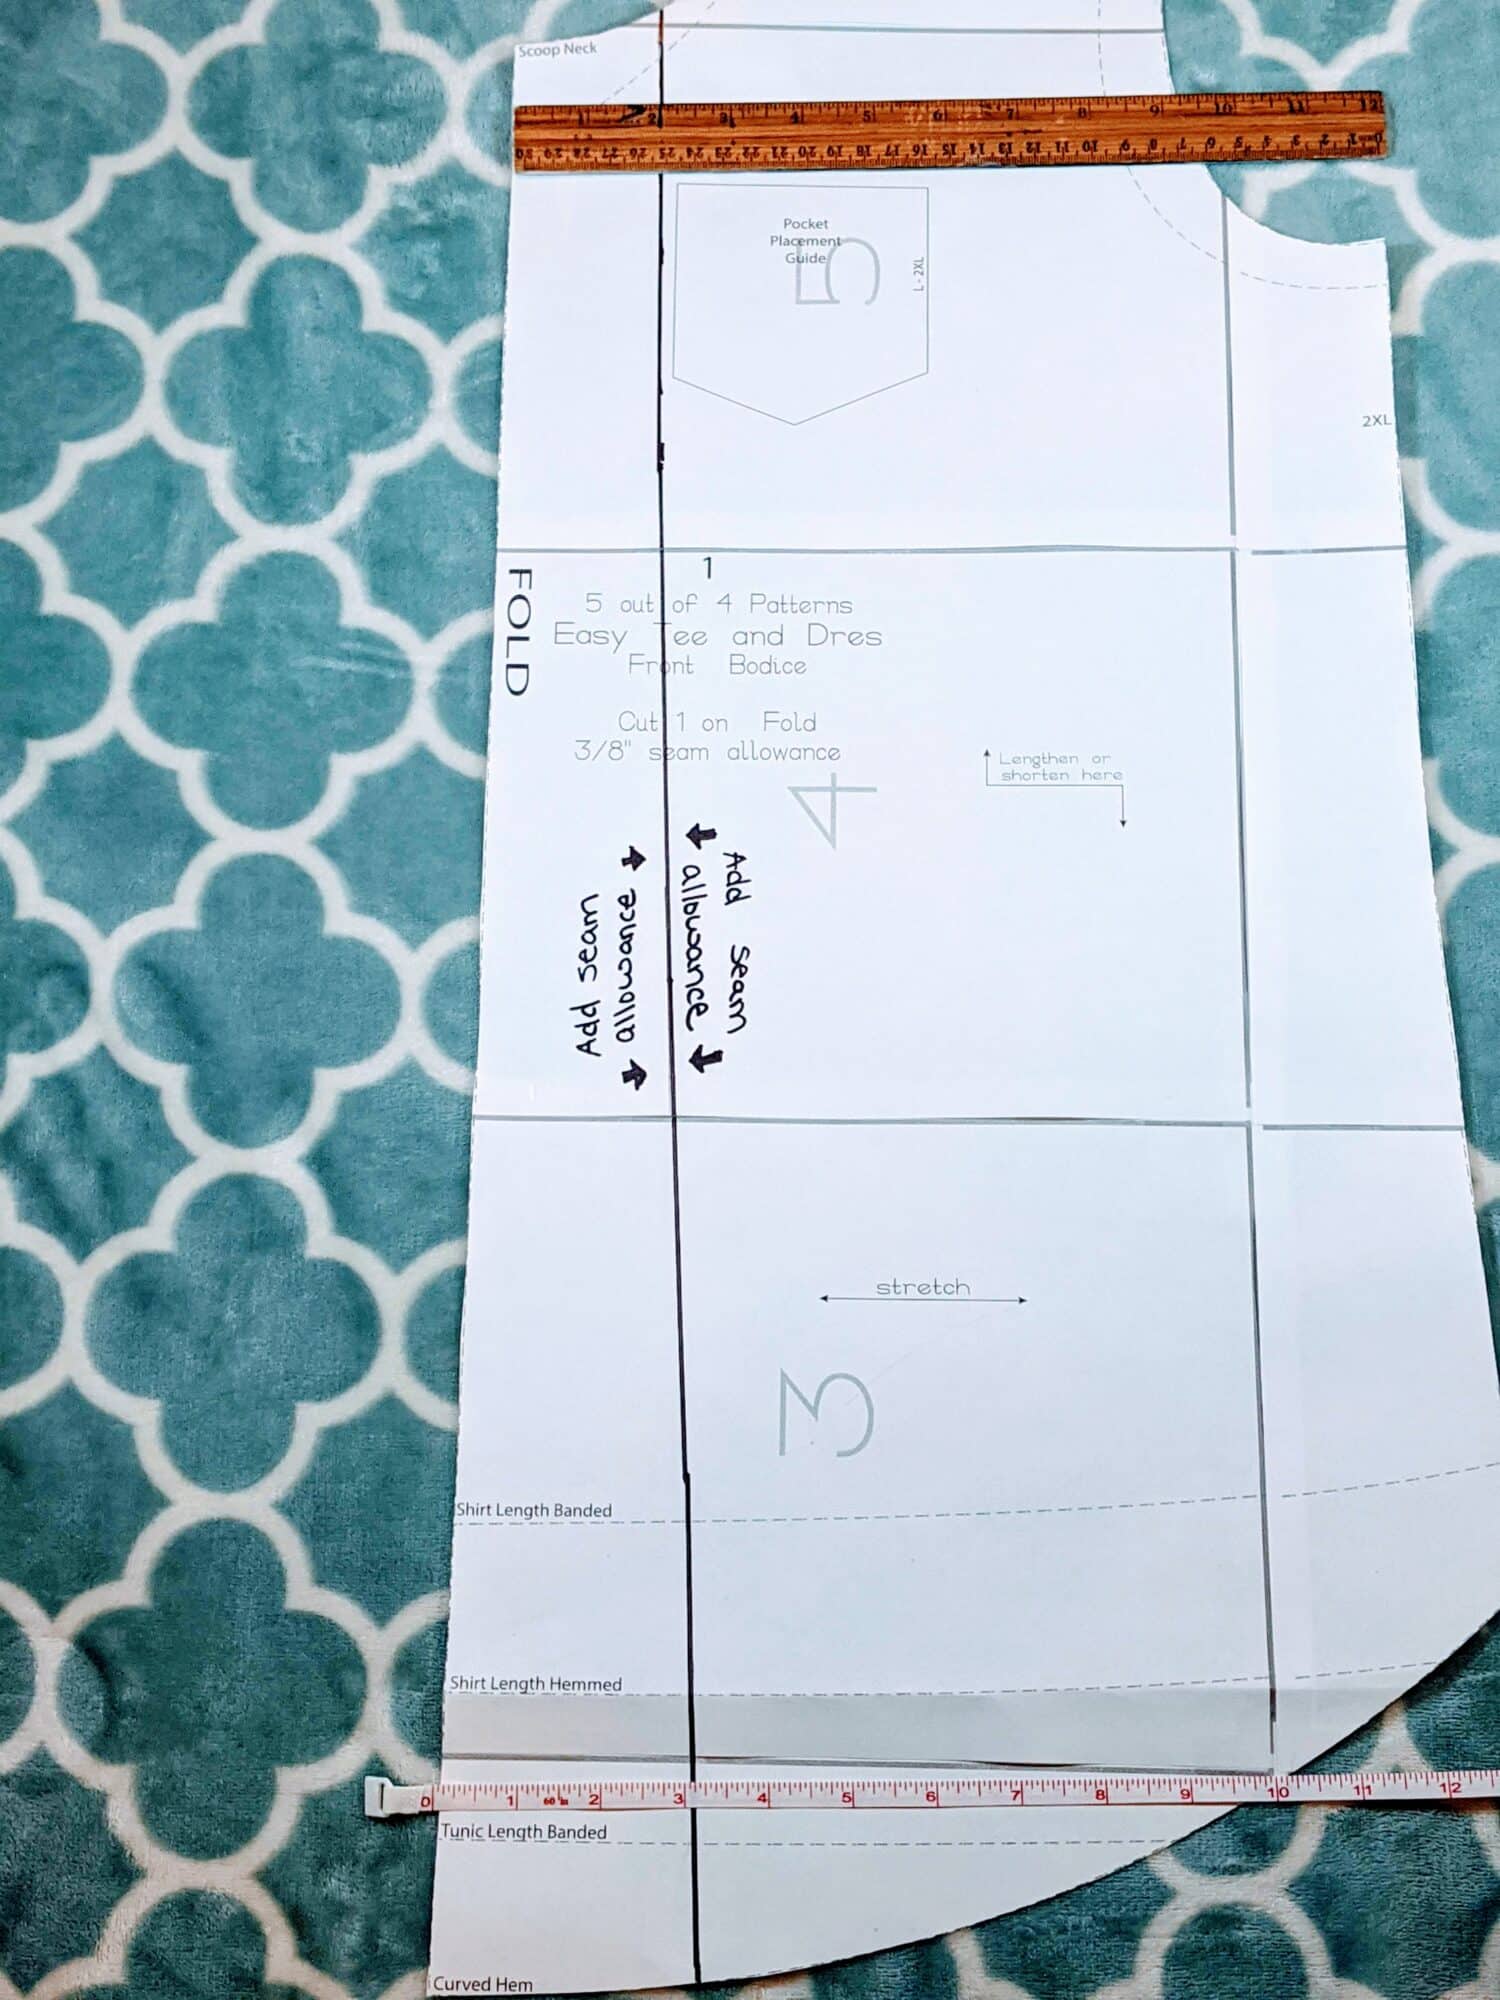
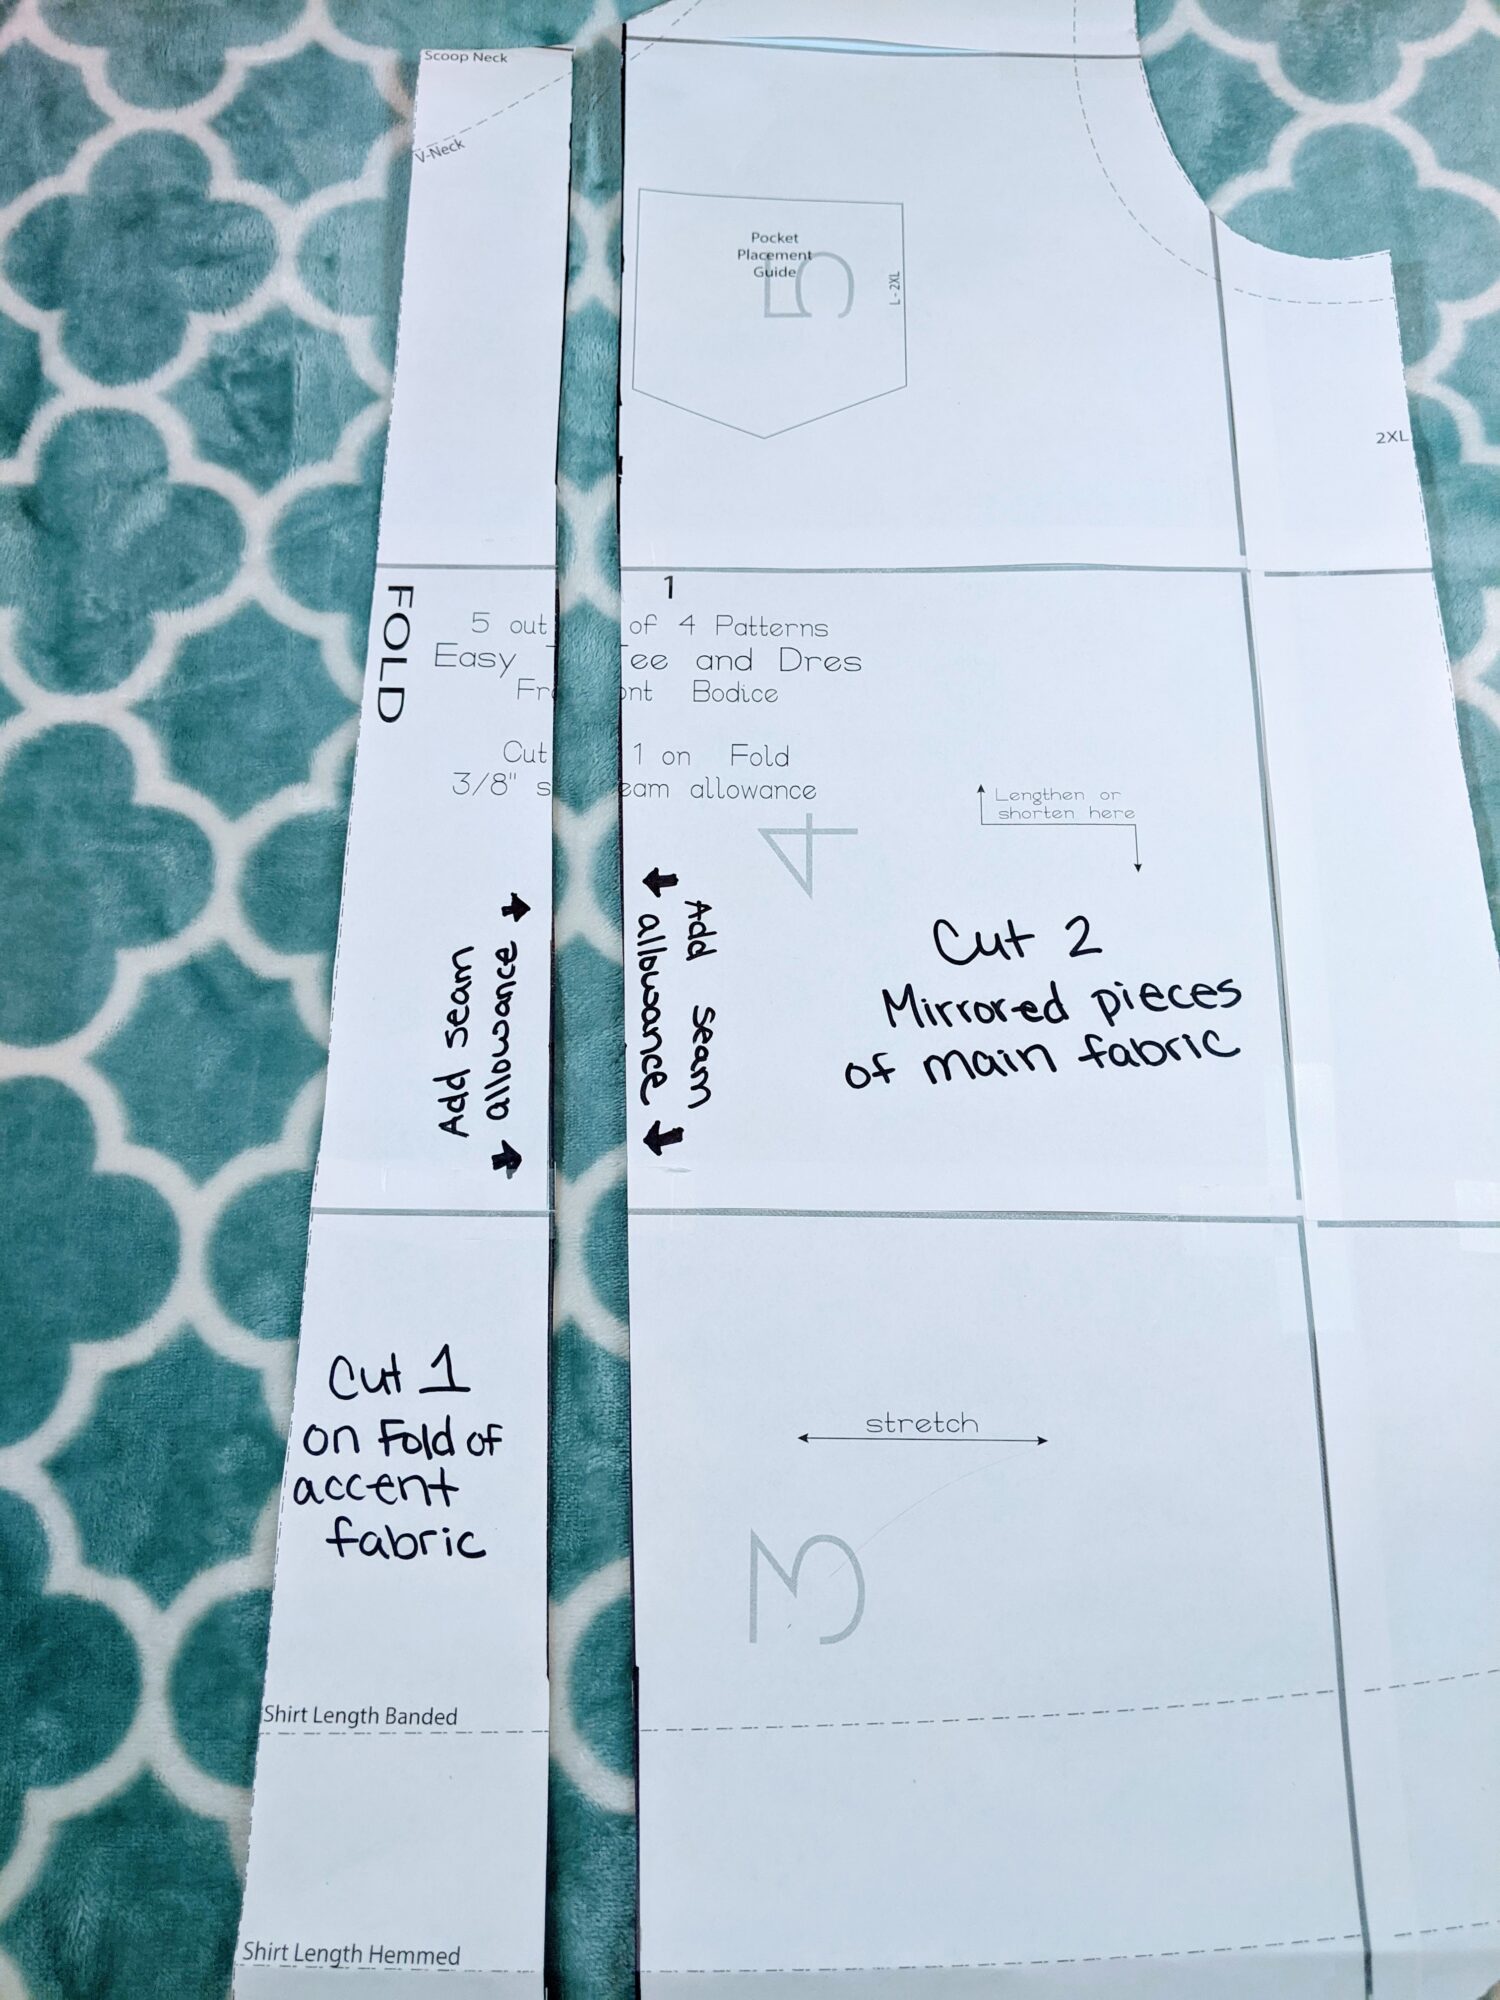
Cut your front bodice pattern piece down the line. When you cut your fabric, you will need to add your ⅜” seam allowance in, so clearly mark that on both pieces of your pattern so you don’t forget.

Time to cut out your fabulous fabric!

You will need to cut 1 of your fabric accent pieces on the fold, and 2 mirrored images of the main bodice fabric. Cut the rest of your pattern pieces out of the main fabric as well.

Easy Tee hack

Constructing the front bodice:

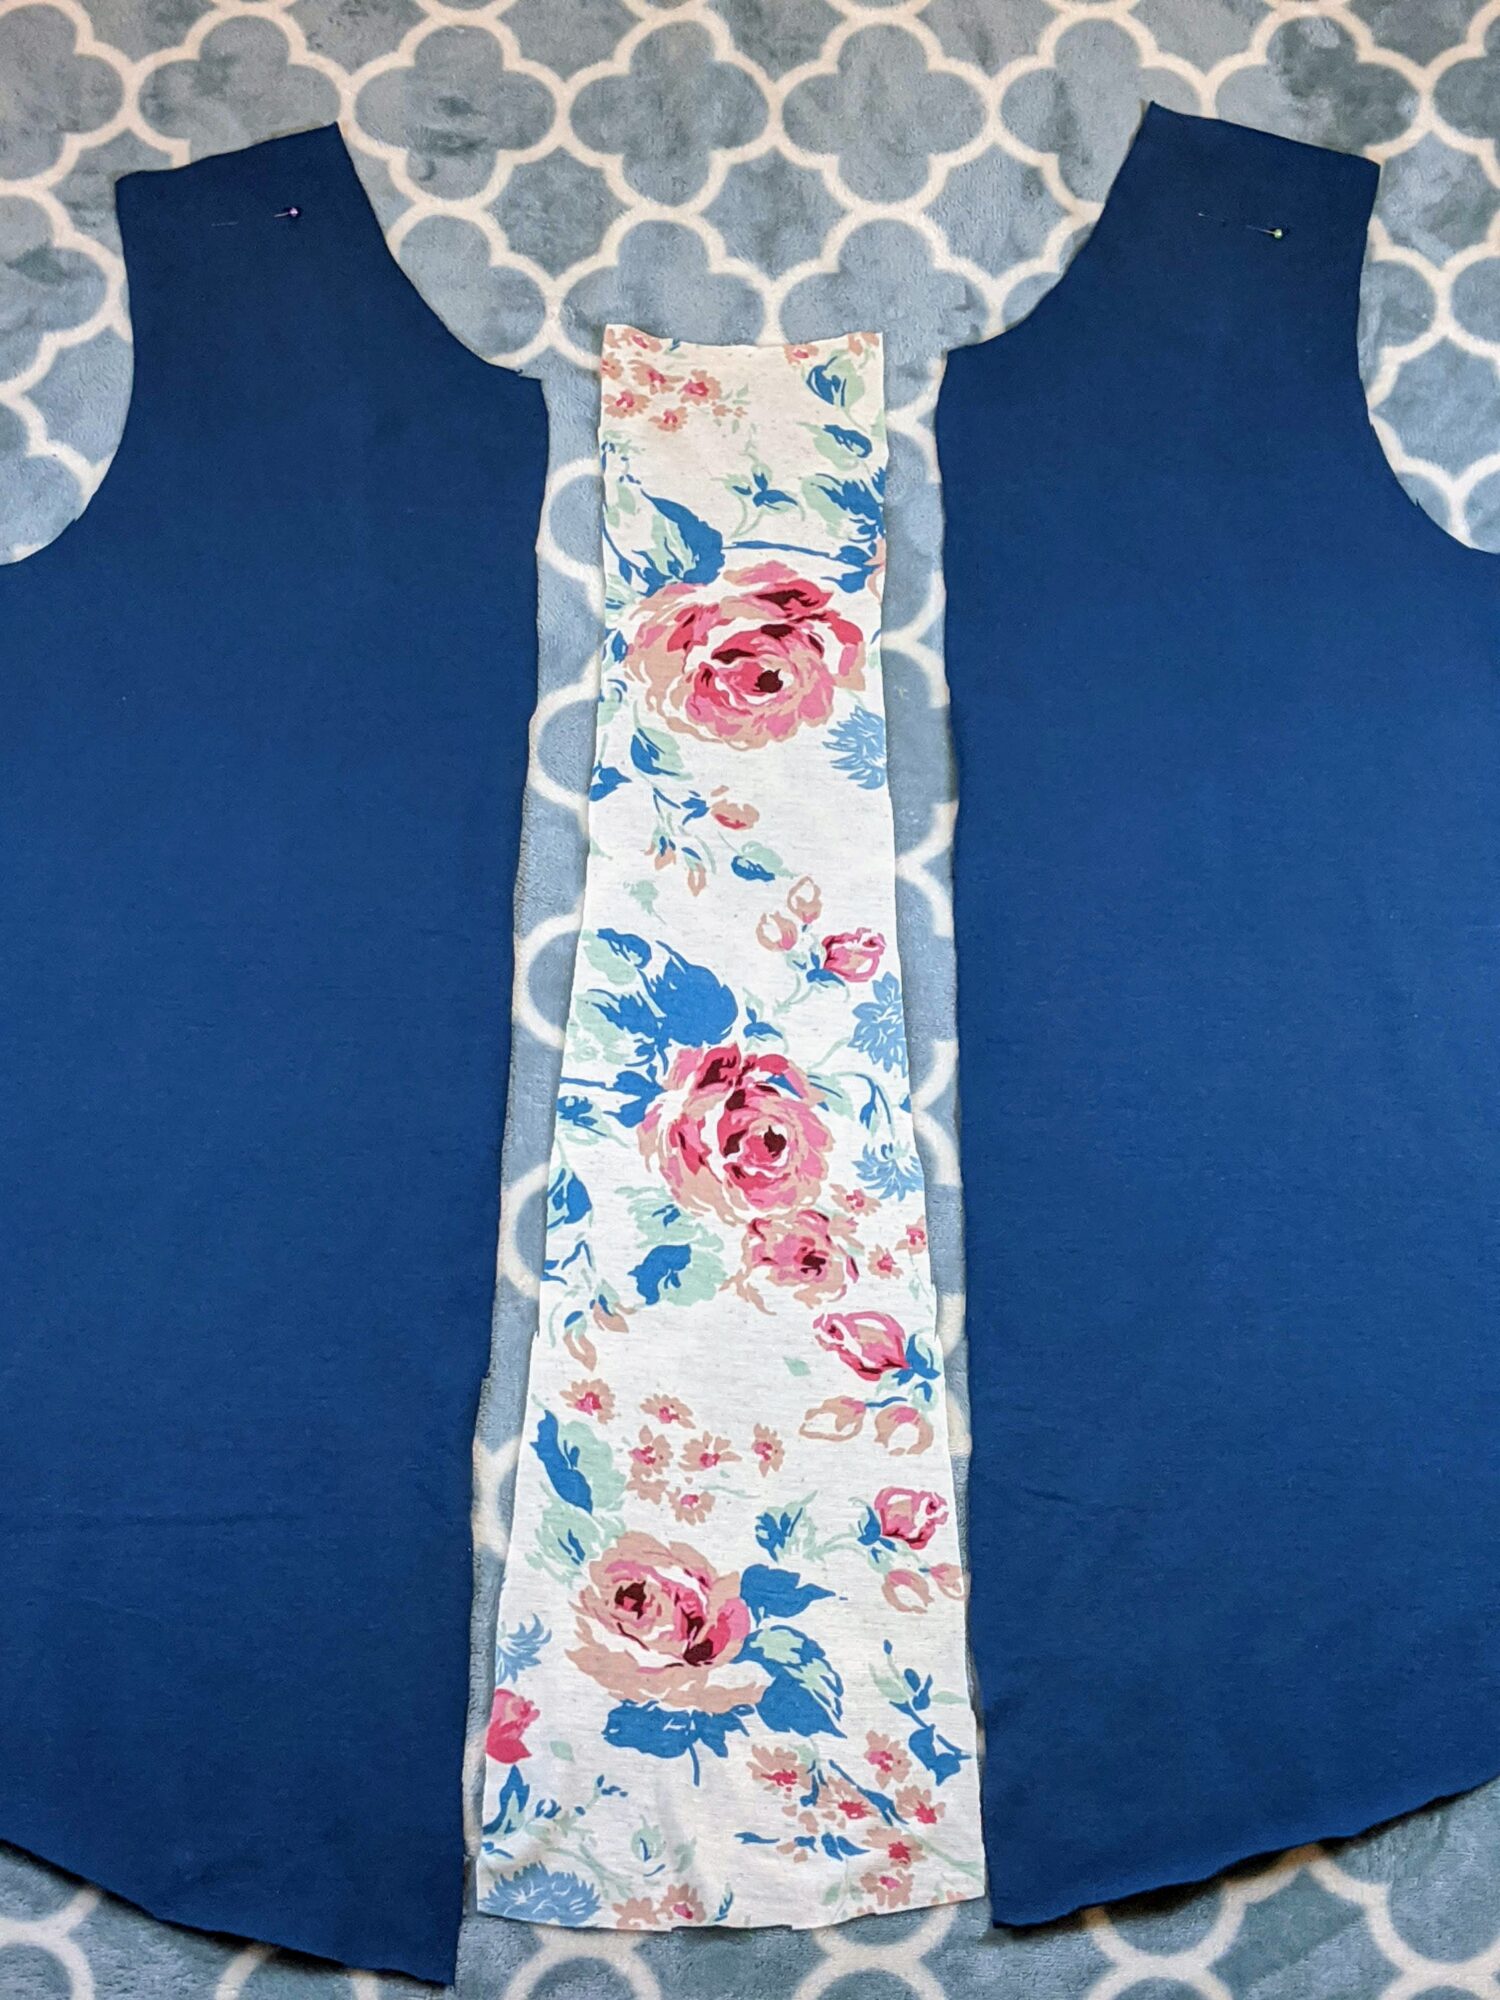
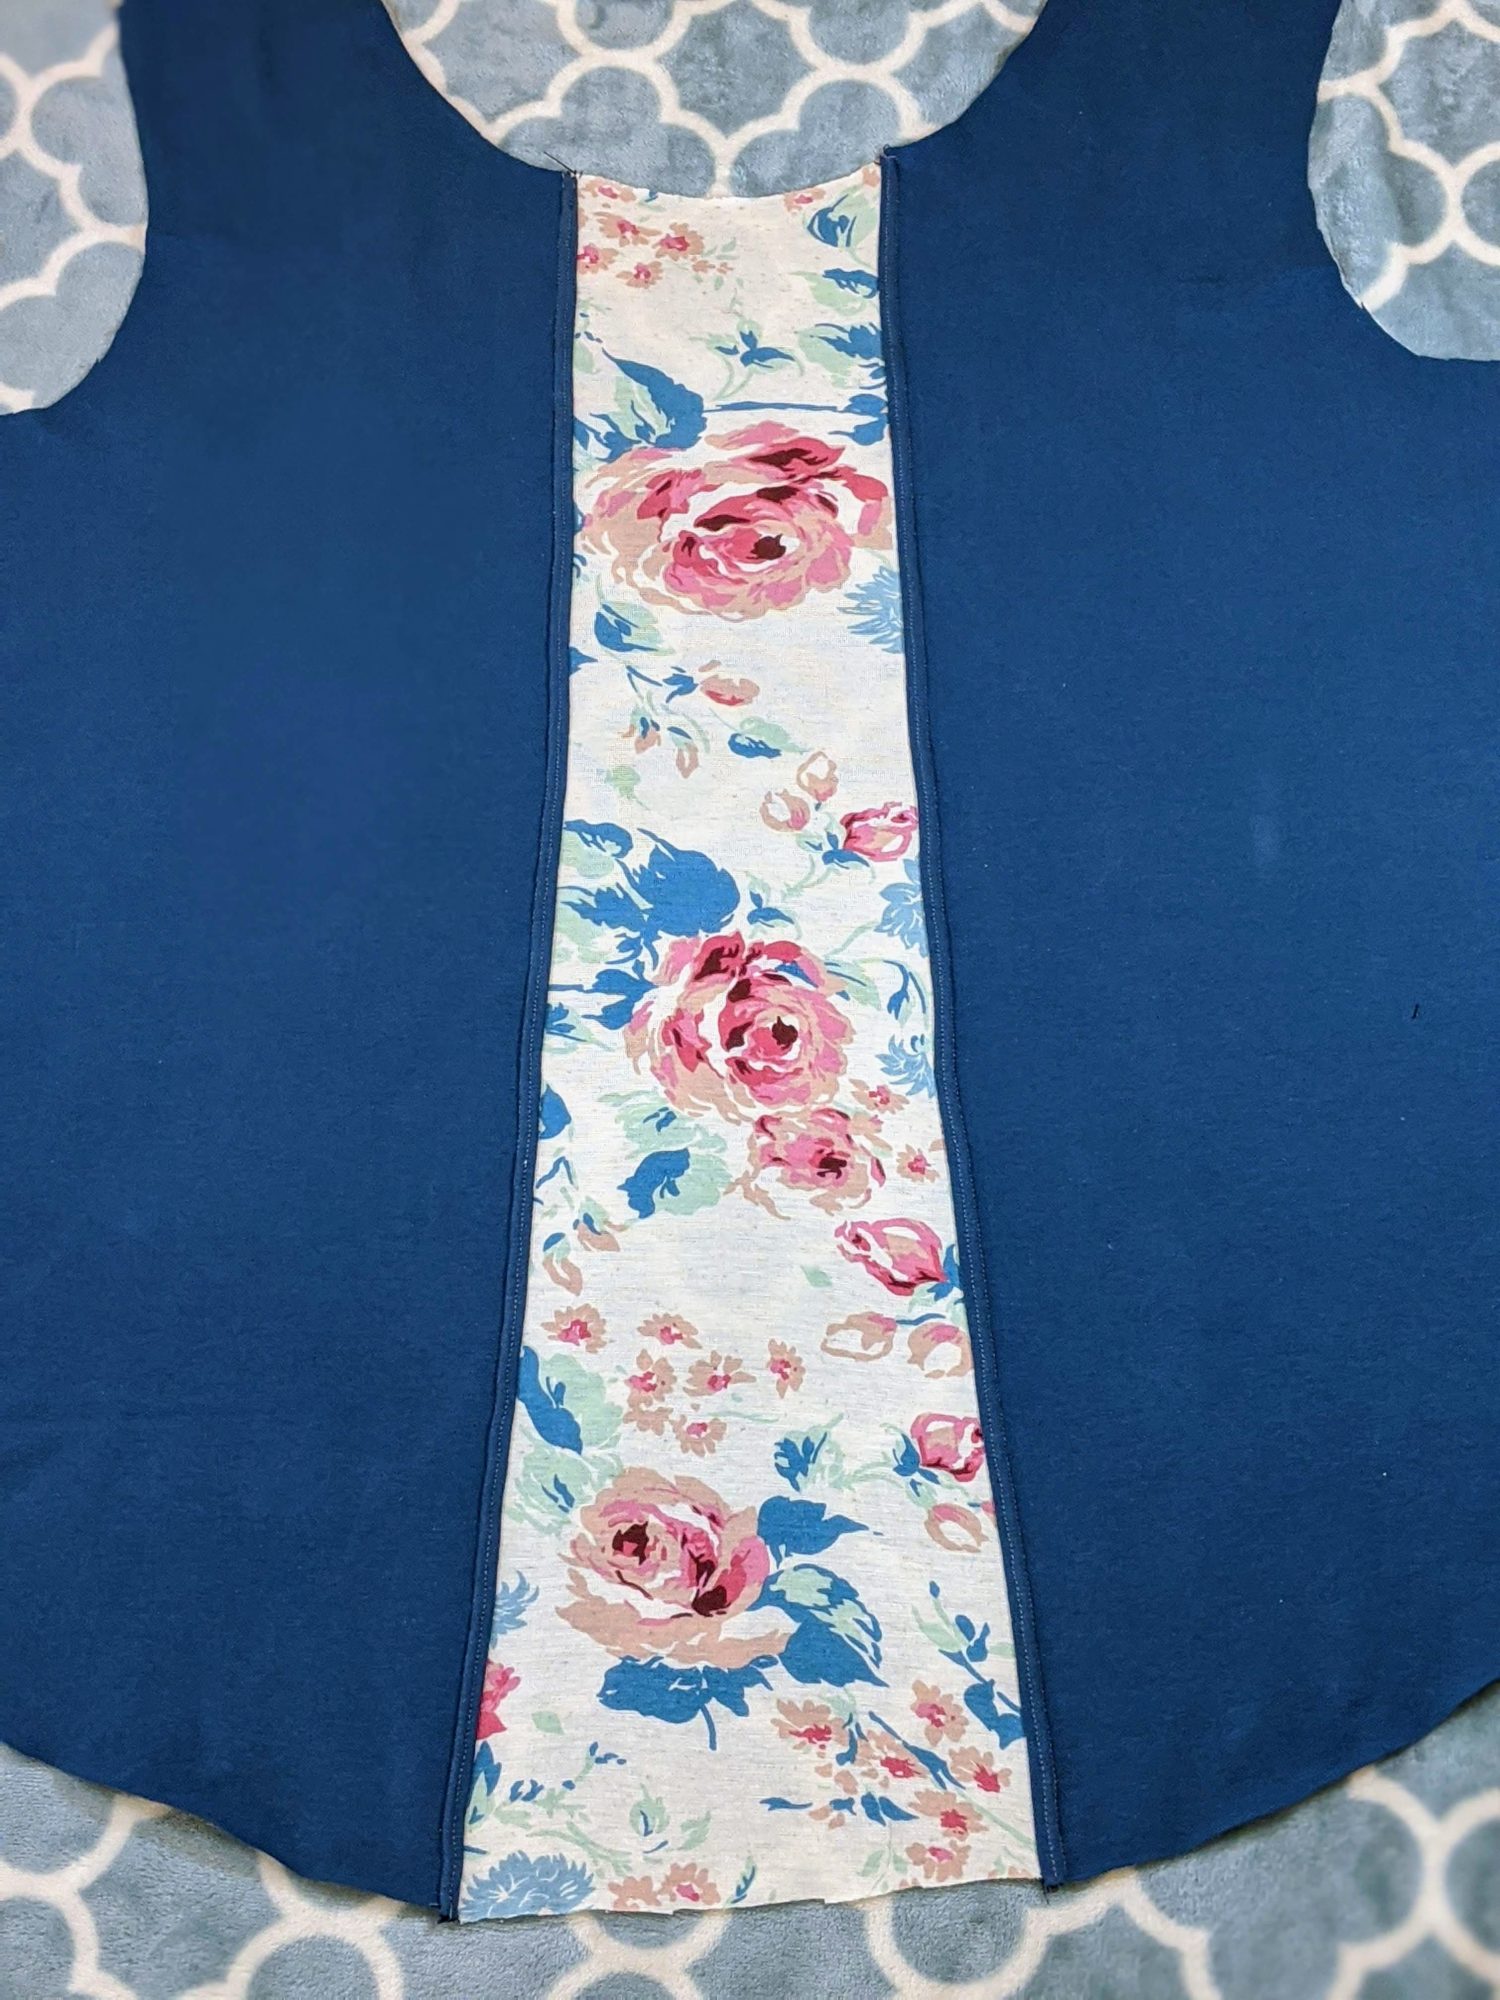
Lay one side of your main fabric bodice piece right side up. Lay the accent piece face down on top of that, right sides together and pin.

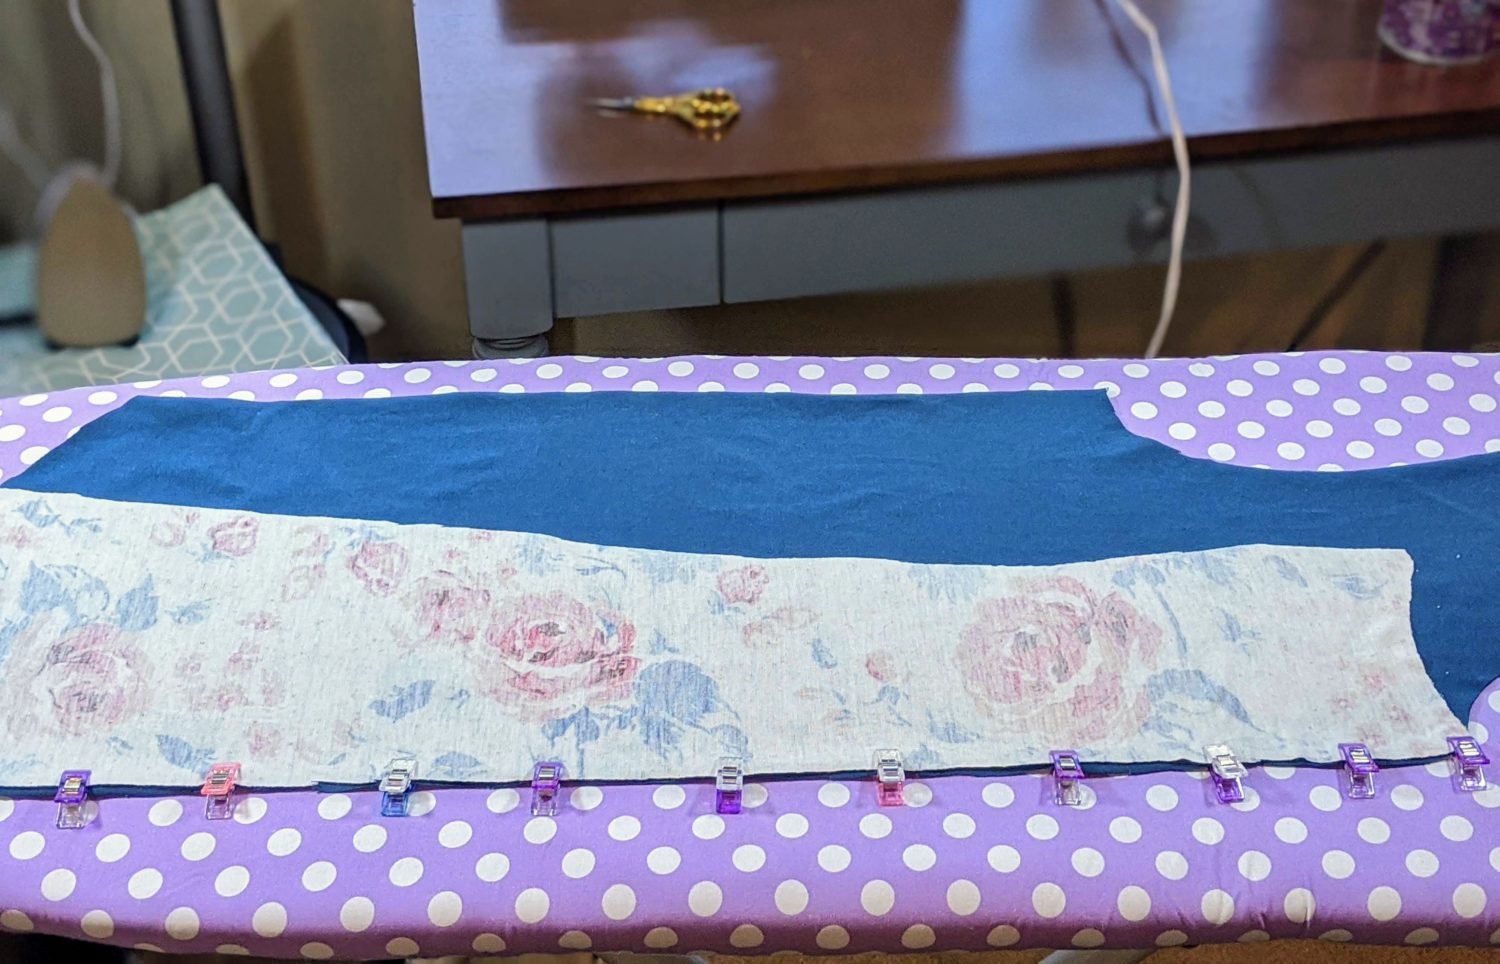
Use a serger or zigzag stitch to sew these two pieces together. Press the seam allowance away from the center panel. Repeat with the other side of the main bodice piece. Topstitch seam allowance if desired.

From here, you will continue to construct per your pattern instructions. Now go and enjoy your lovely new top!

As always, we’re here to help if you need it!  Join us HERE and on Facebook, Instagram, Twitter, Youtube, and Pinterest.  We’re everywhere you are.

Reader Interactions

Comments

  1. Ann M. says

    April 24, 2020 at 7:56 am

    Great hack! I love how this looks. Thank you for taking the time to show us how to do this.

    Reply

Leave a Reply Cancel reply

Your email address will not be published. Required fields are marked *

Previous
Next

Save 30% on your first pattern.

Join our newsletter and get a coupon code to save 30% off your first pattern. Then stick around for great sewing tips and seasonal specials. We promise not to annoy you with spam.

  • This field is for validation purposes and should be left unchanged.

Follow the 5 out of 4 Community!

  • Follow Us on Facebook
  • Follow Us on Instagram
  • Follow Us on Pinterest
  • Follow Our YouTube Channel

Need Some Help?

Let us help you get started with videos, commonly asked questions, and fitting guides.

Get Started
  • Shop
  • Our Story
  • Sales & Coupons
  • FAQs & Return Policy
  • Contact
  • Terms
  • Blog
  • Sew Alongs
  • Sewing School
  • Hacks
  • Fitting
  • Amazon Storefront
  • Member Area
  • Affiliate Area
5 out of 4 Patterns
© 2023 5 out of 4 Patterns
Created by Status Forward
Privacy Policy

Posts on this website may contain affiliate links. When you use them, you support this site. 5 out of 4 Patterns is a participant in the Amazon Services LLC Associates program.

Create a new list