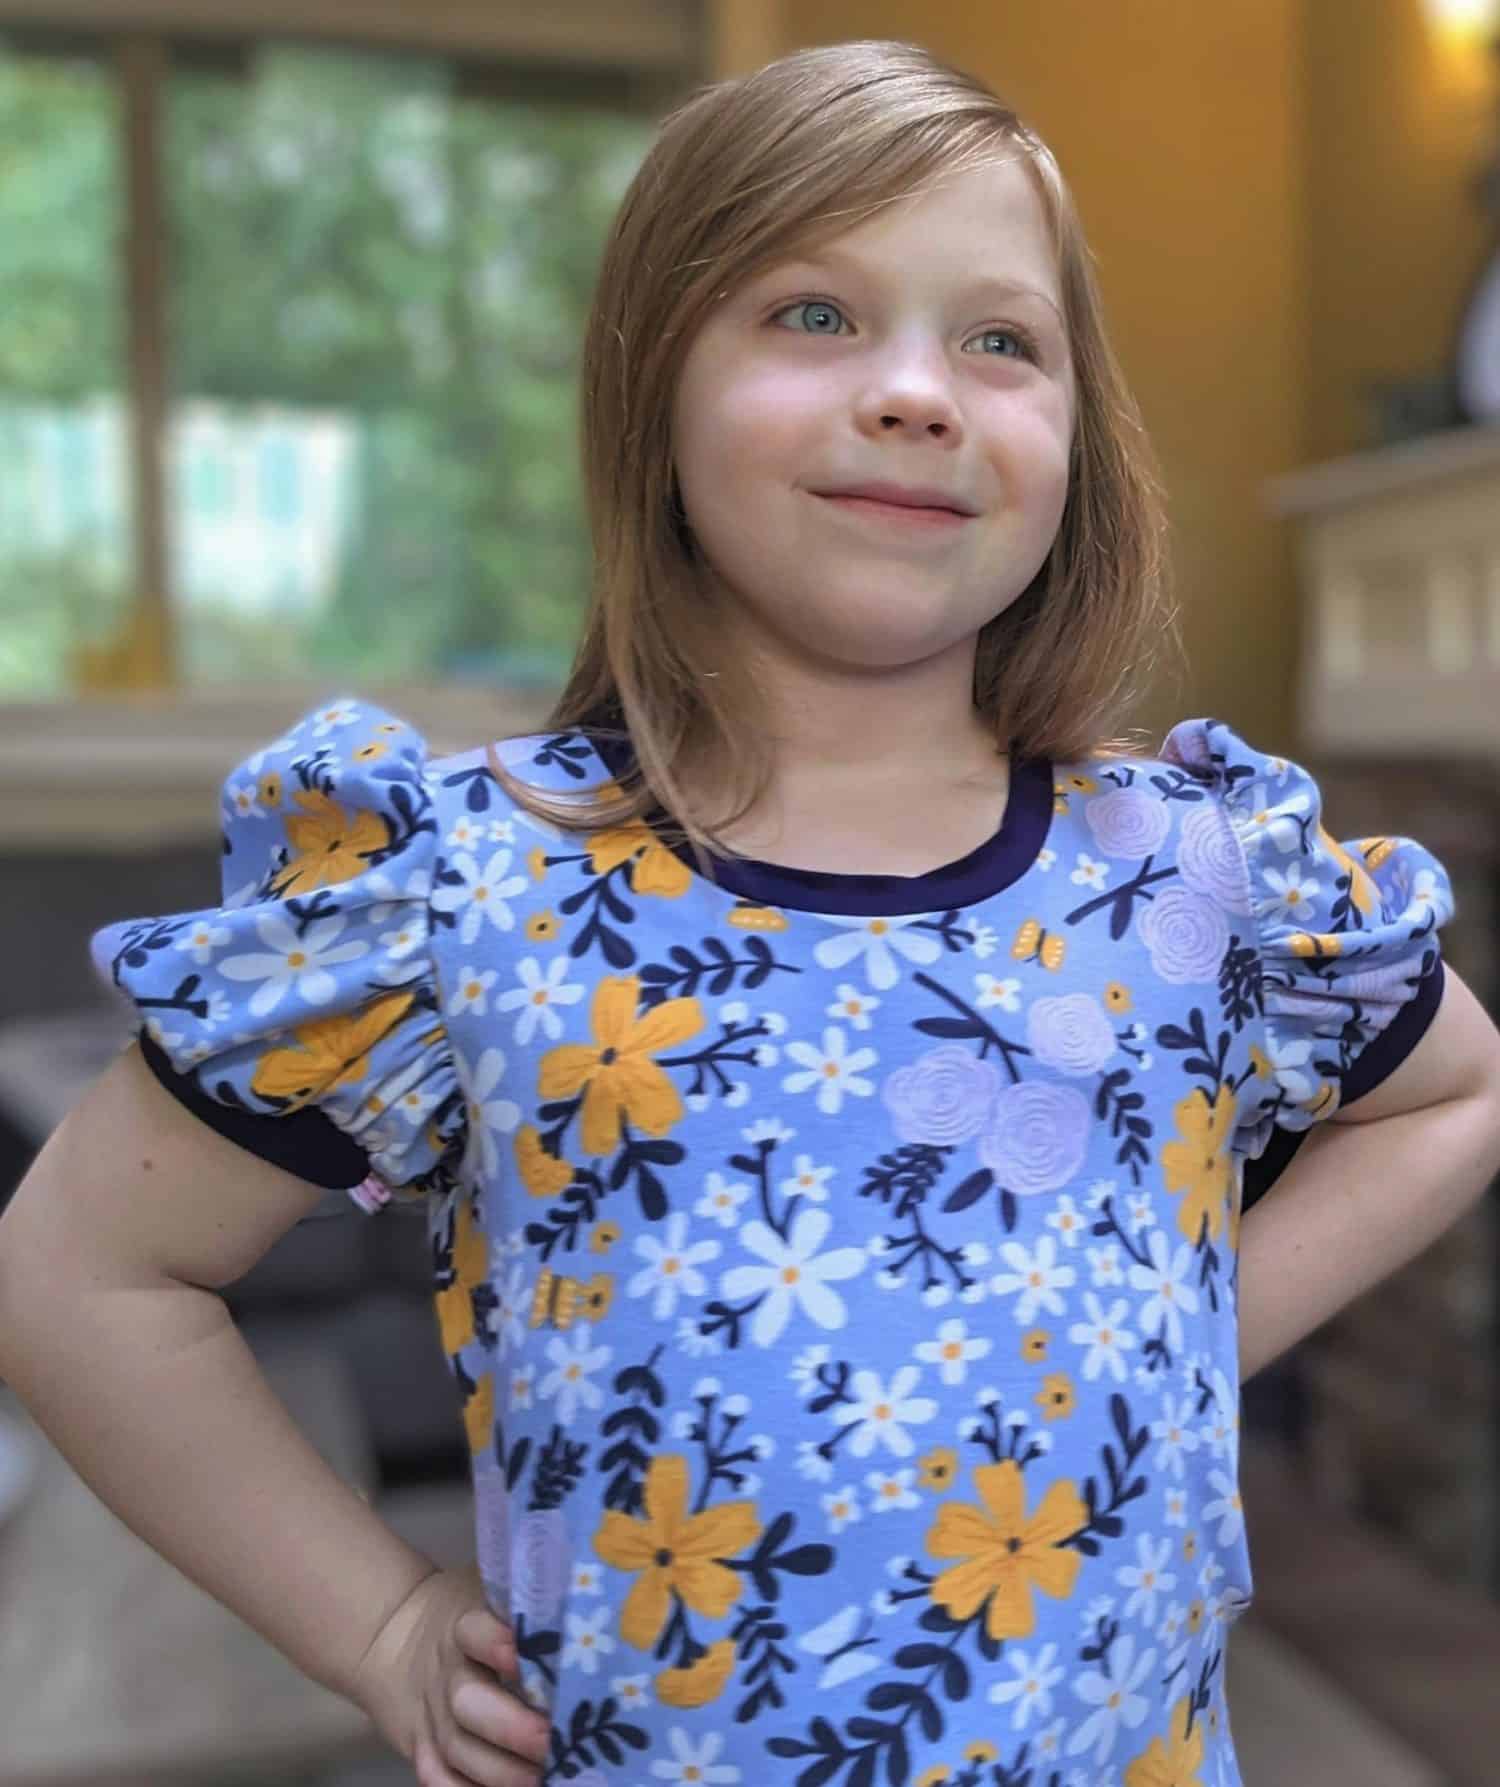
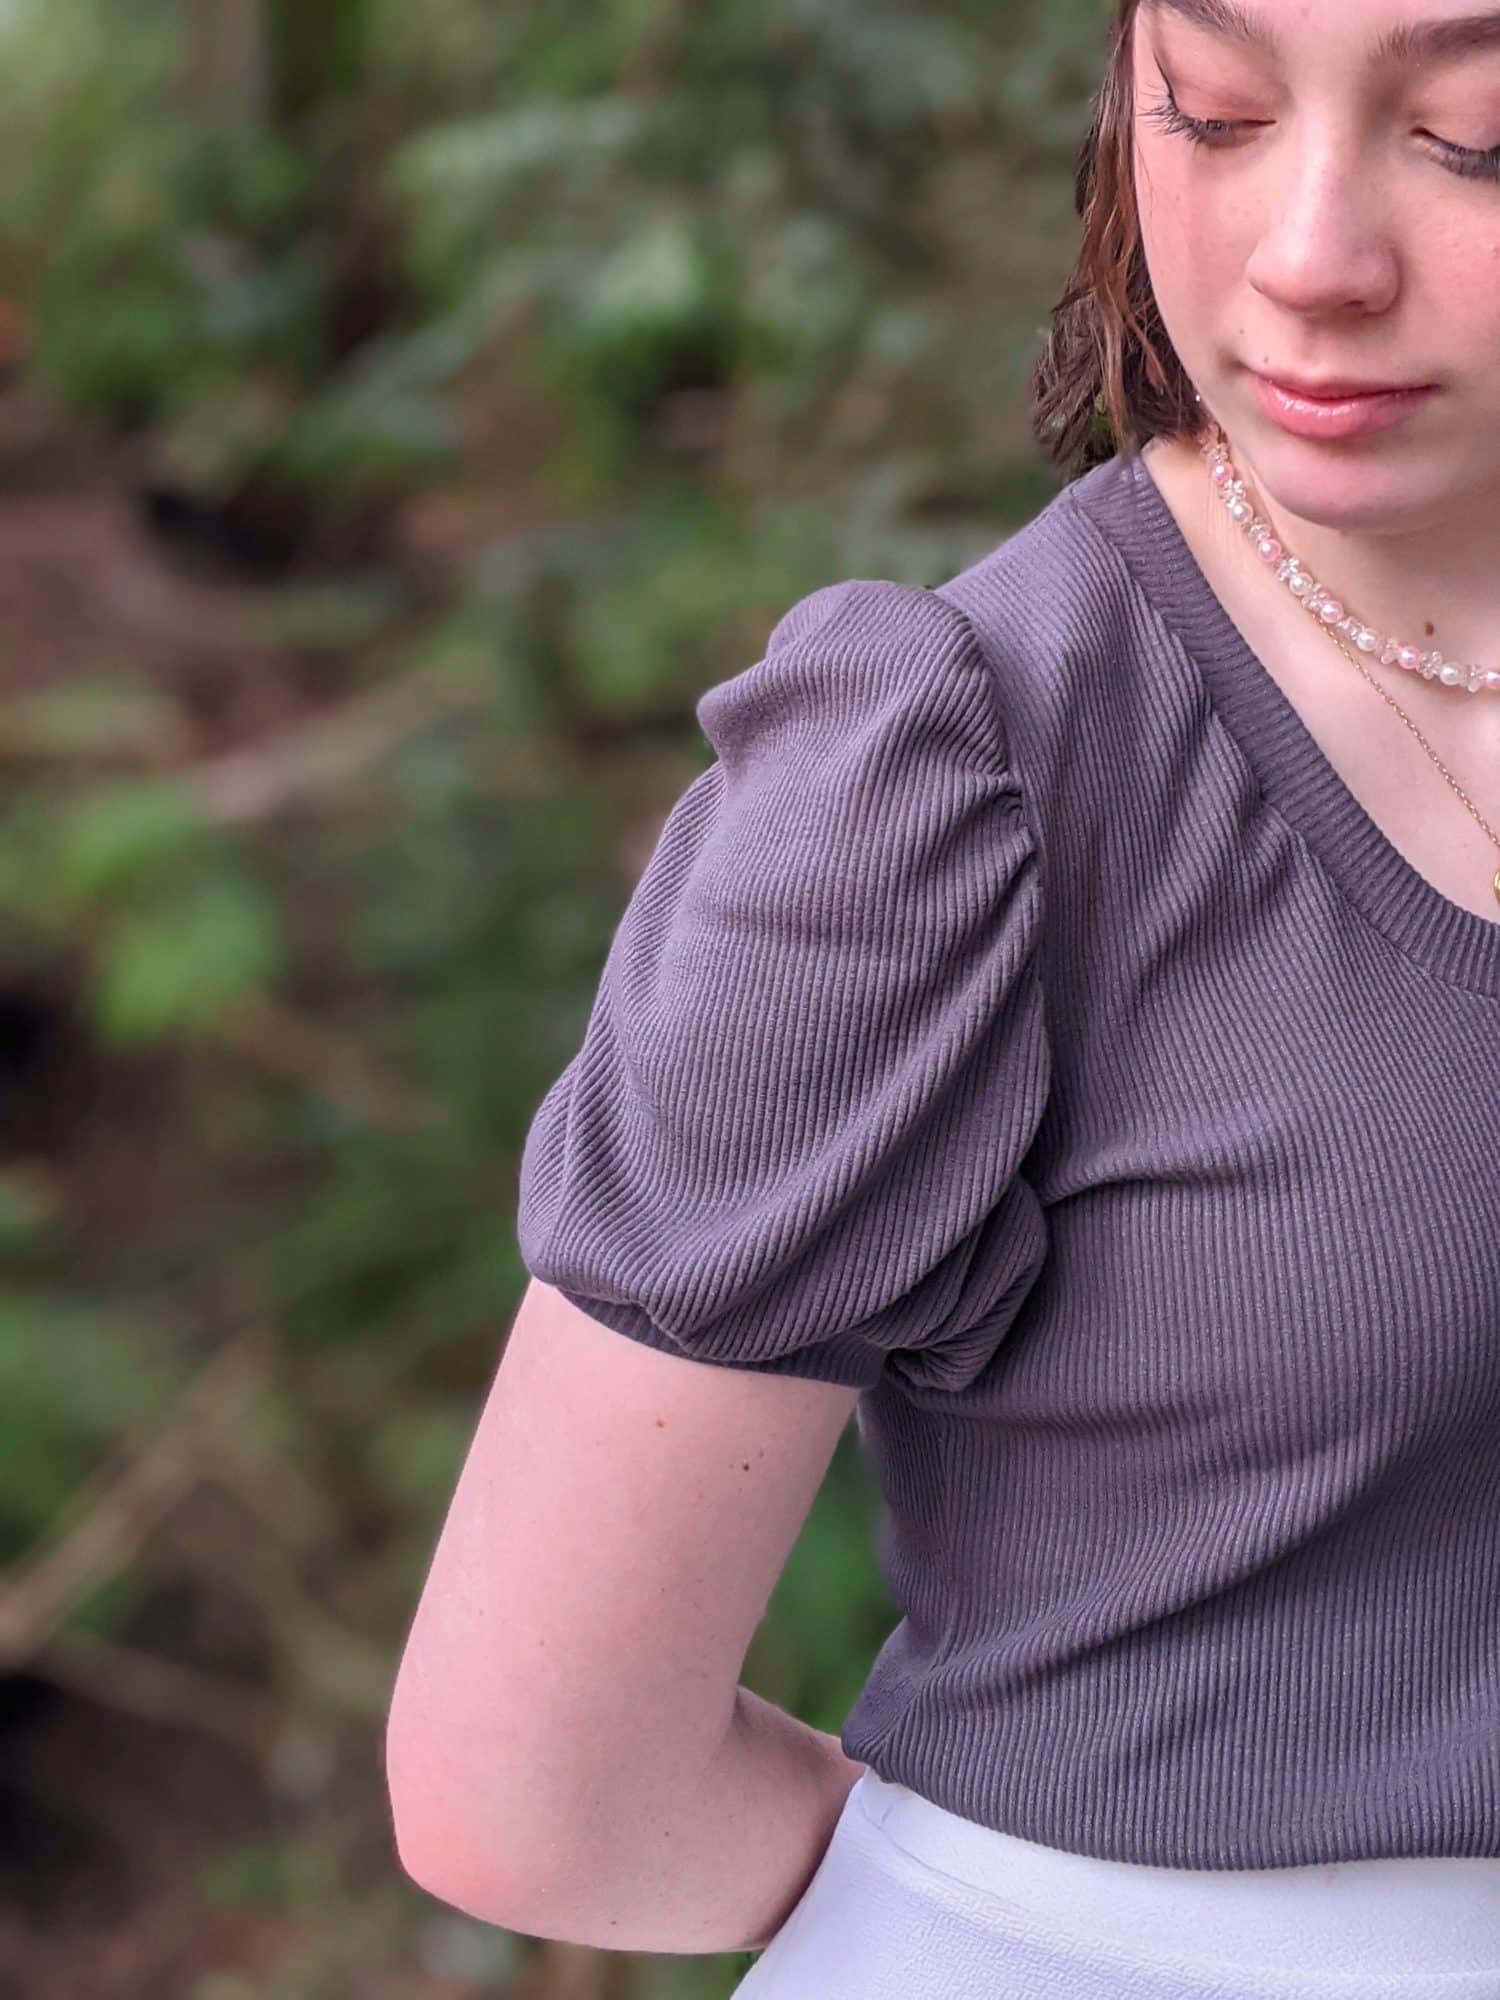
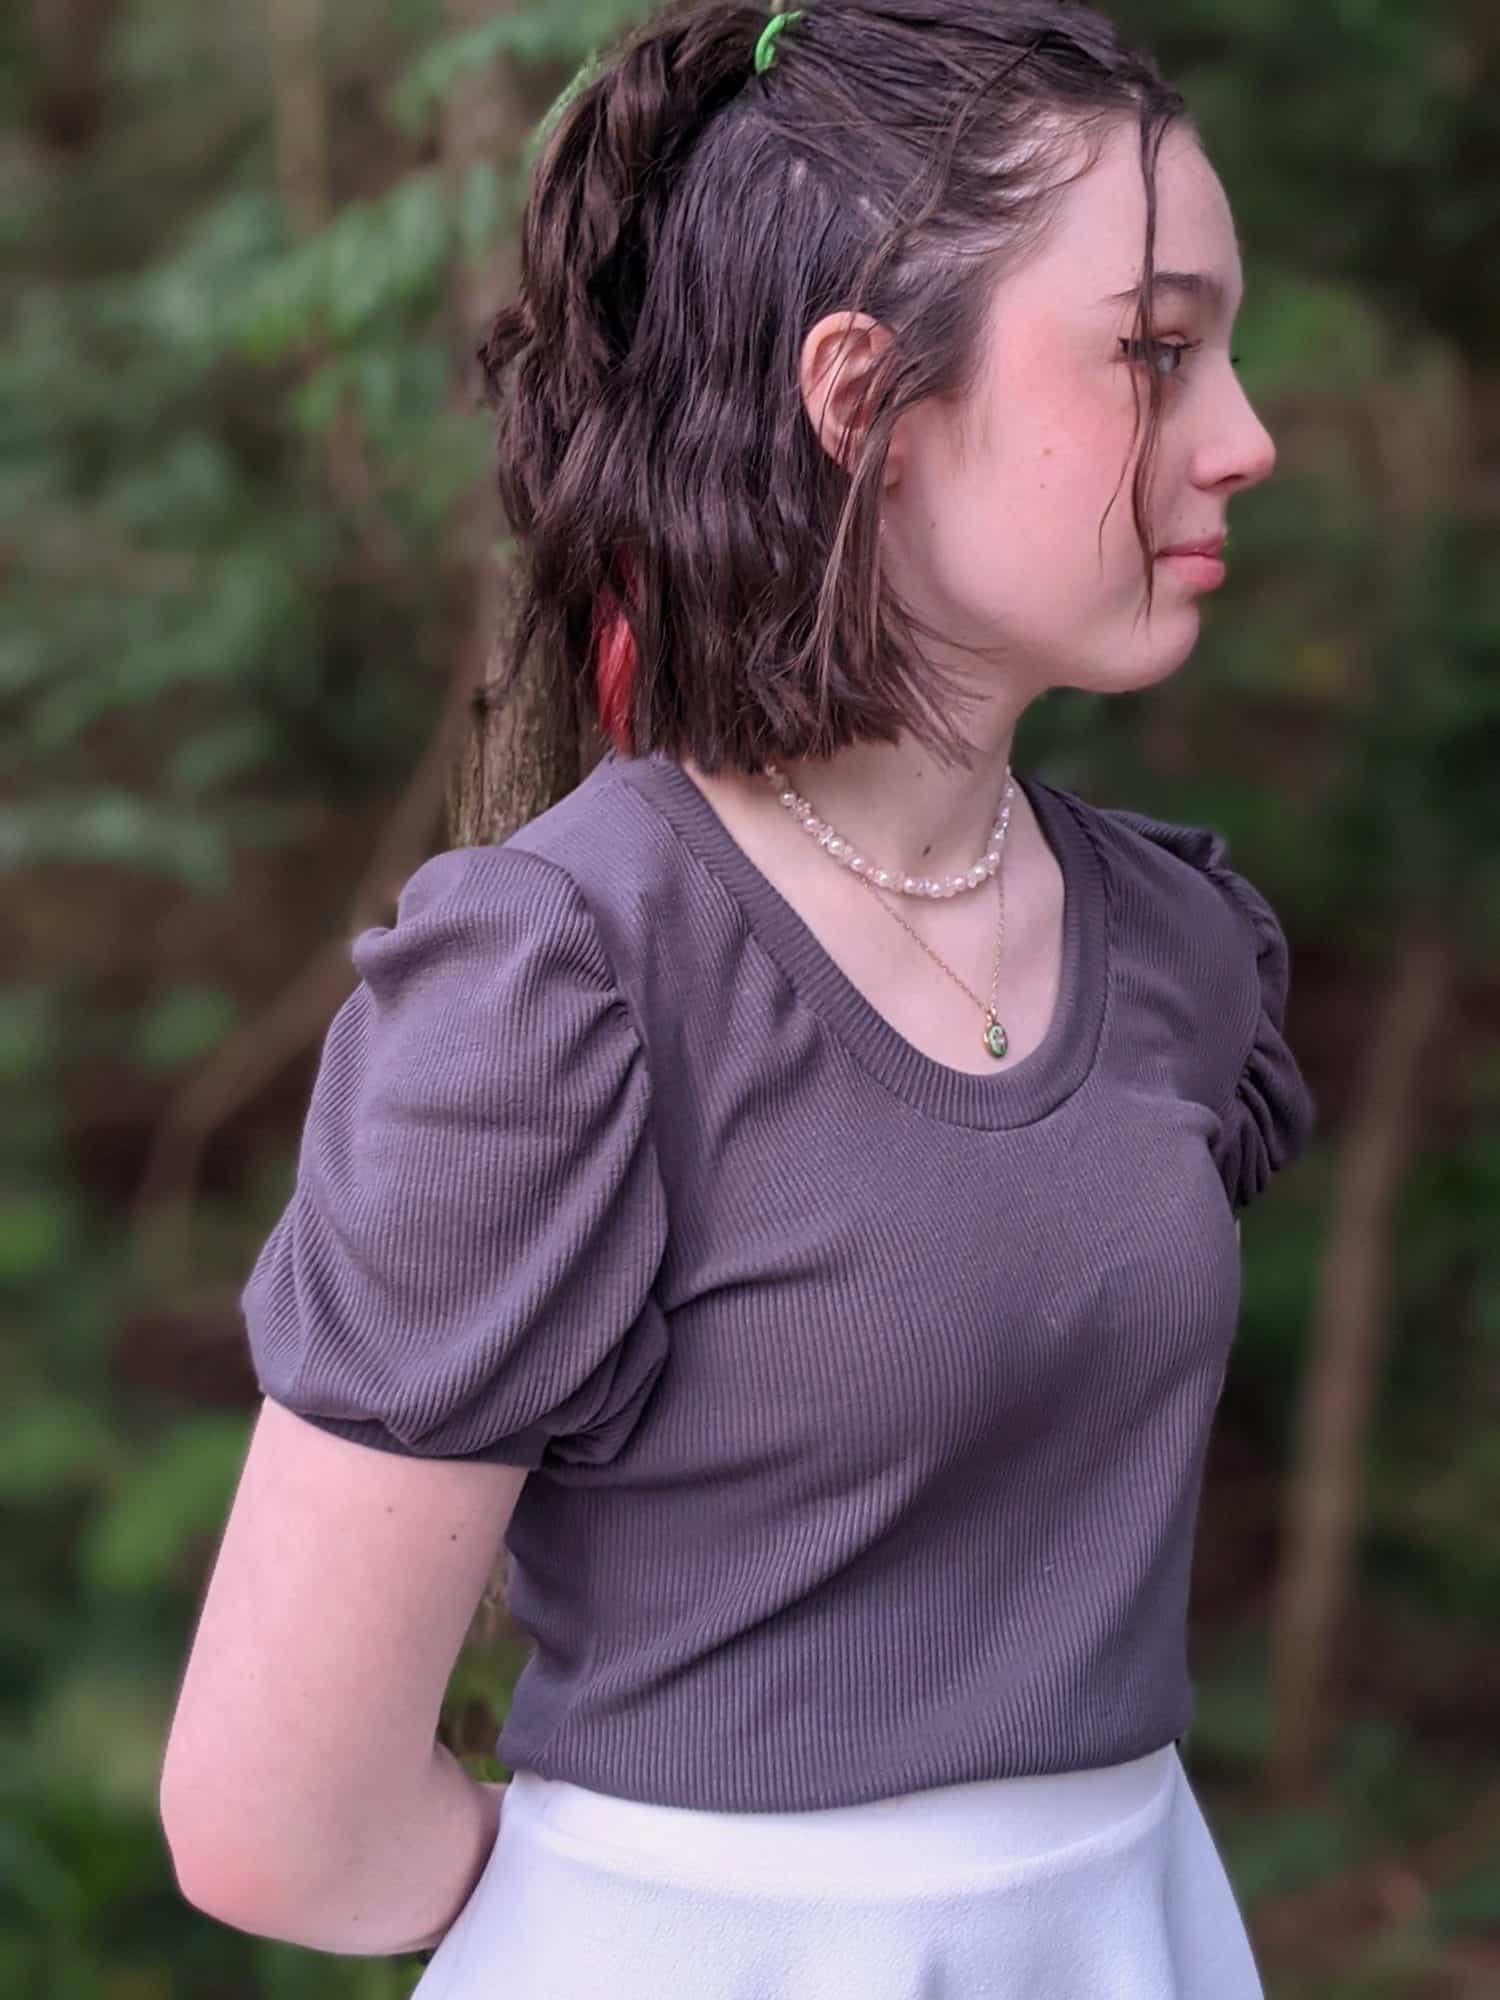
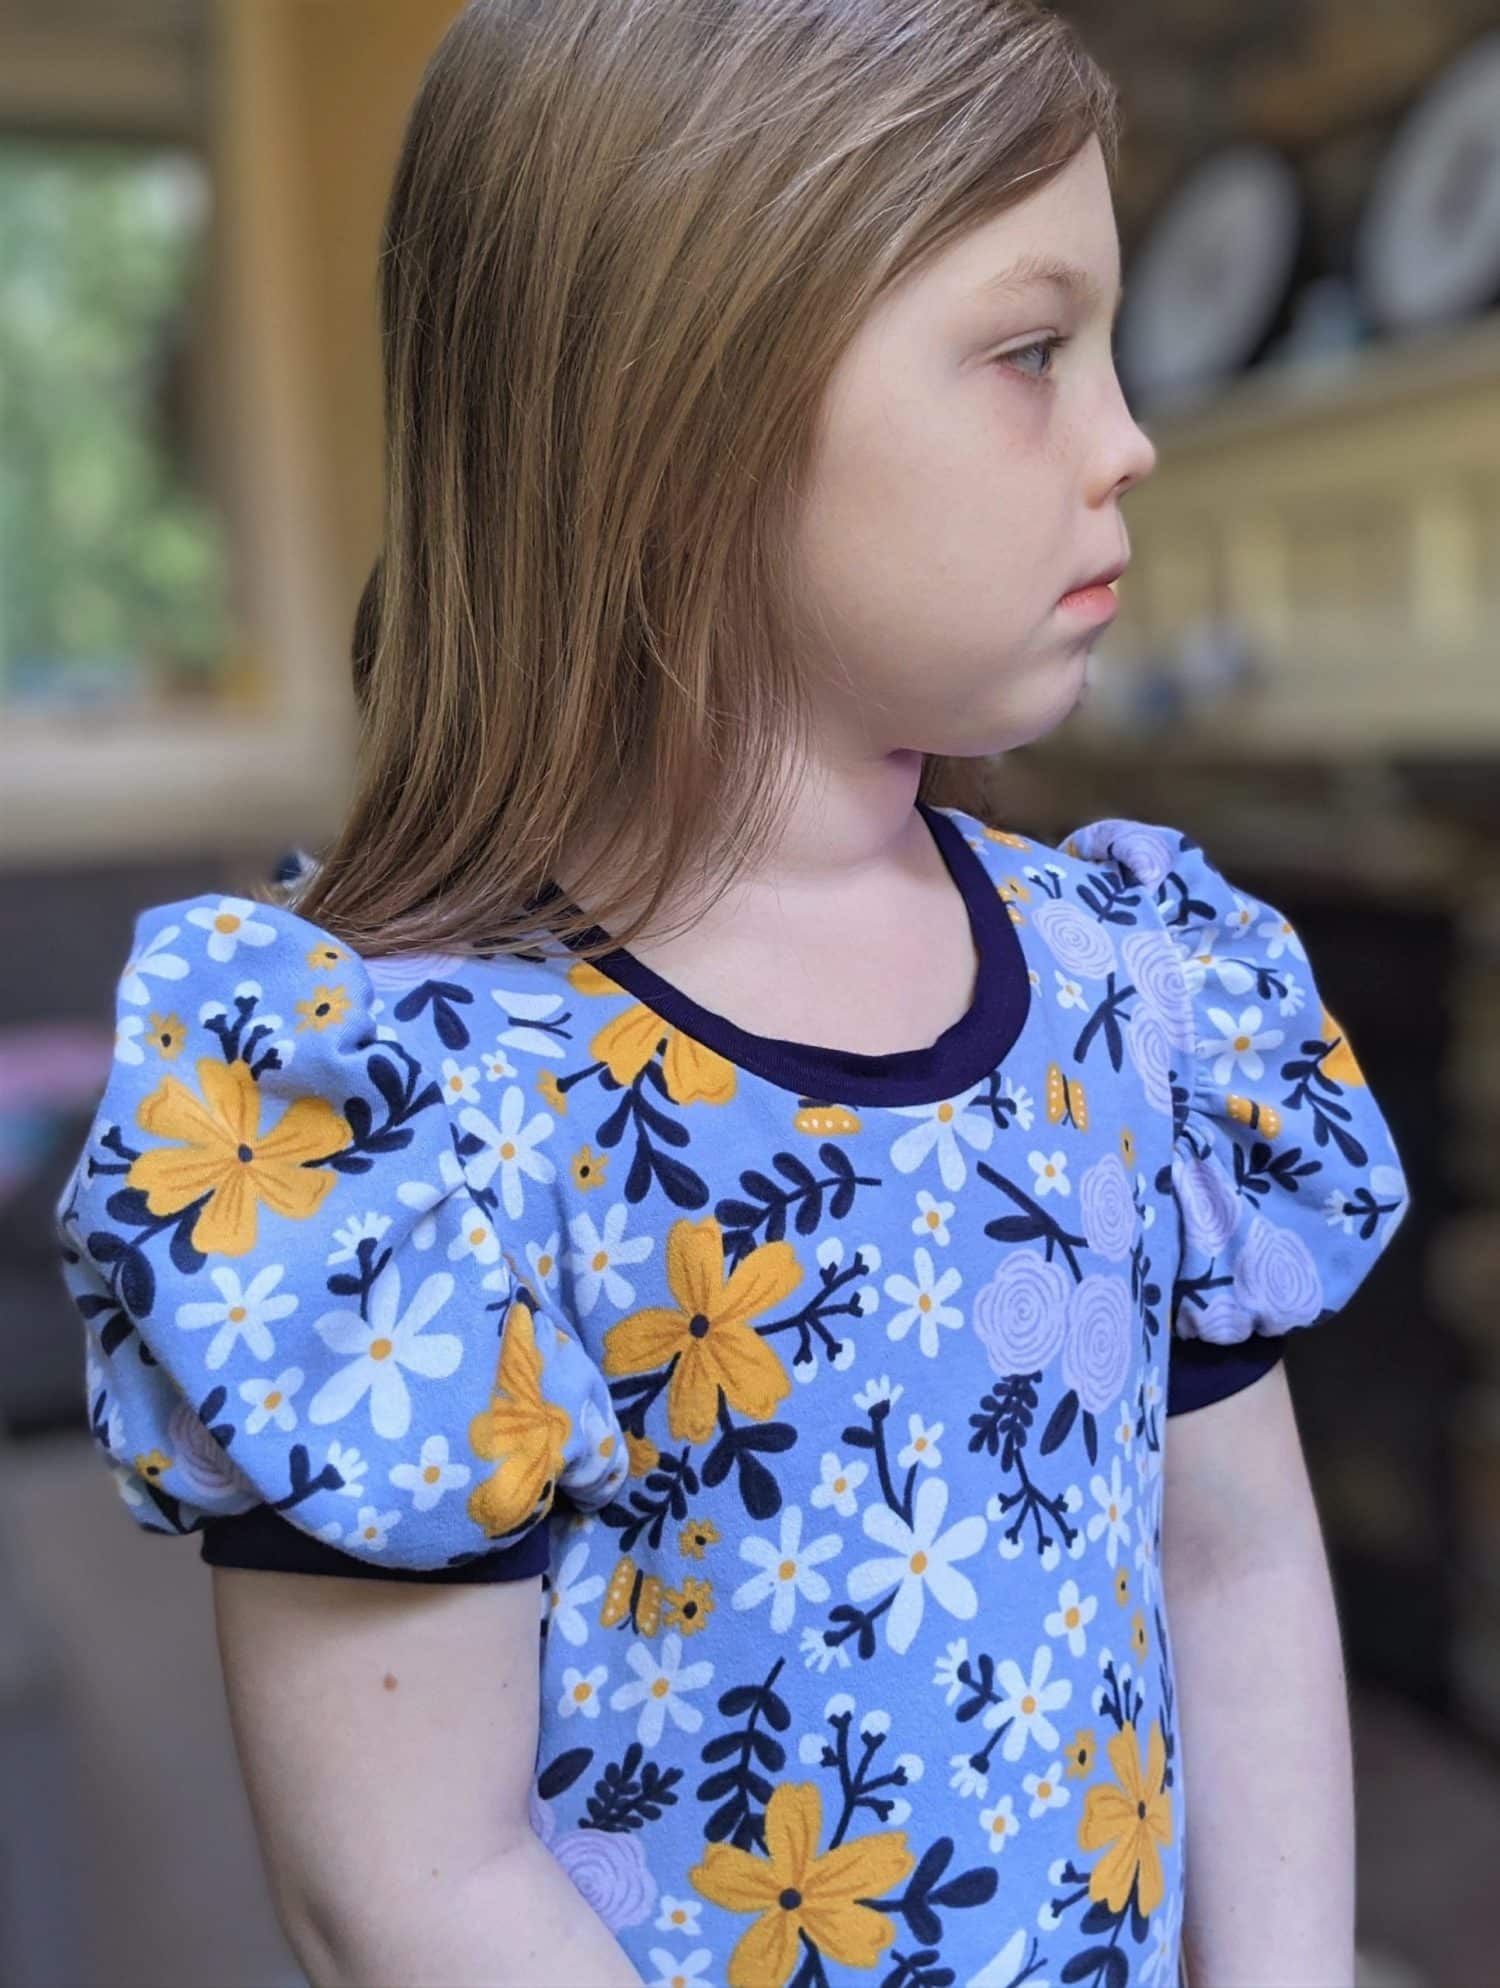
The Wanda Tee and Dress released this week and I am in love with the puffy sleeves. My girls asked for extra puffy sleeves, so I tried this on both the womens’ and kids’ versions as well as seeing how it looks in both a semi-stable fabric and a more drapey fabric. I think both outcomes are super cute and wanted to share how I did it. If you don’t have the Wanda Tee and Dress yet, you can pick up the Women’s Wanda HERE, the Kid’s Wanda HERE, or grab them both in the Womens’ and Kids’ Bundle HERE.
Making your pattern adjustments
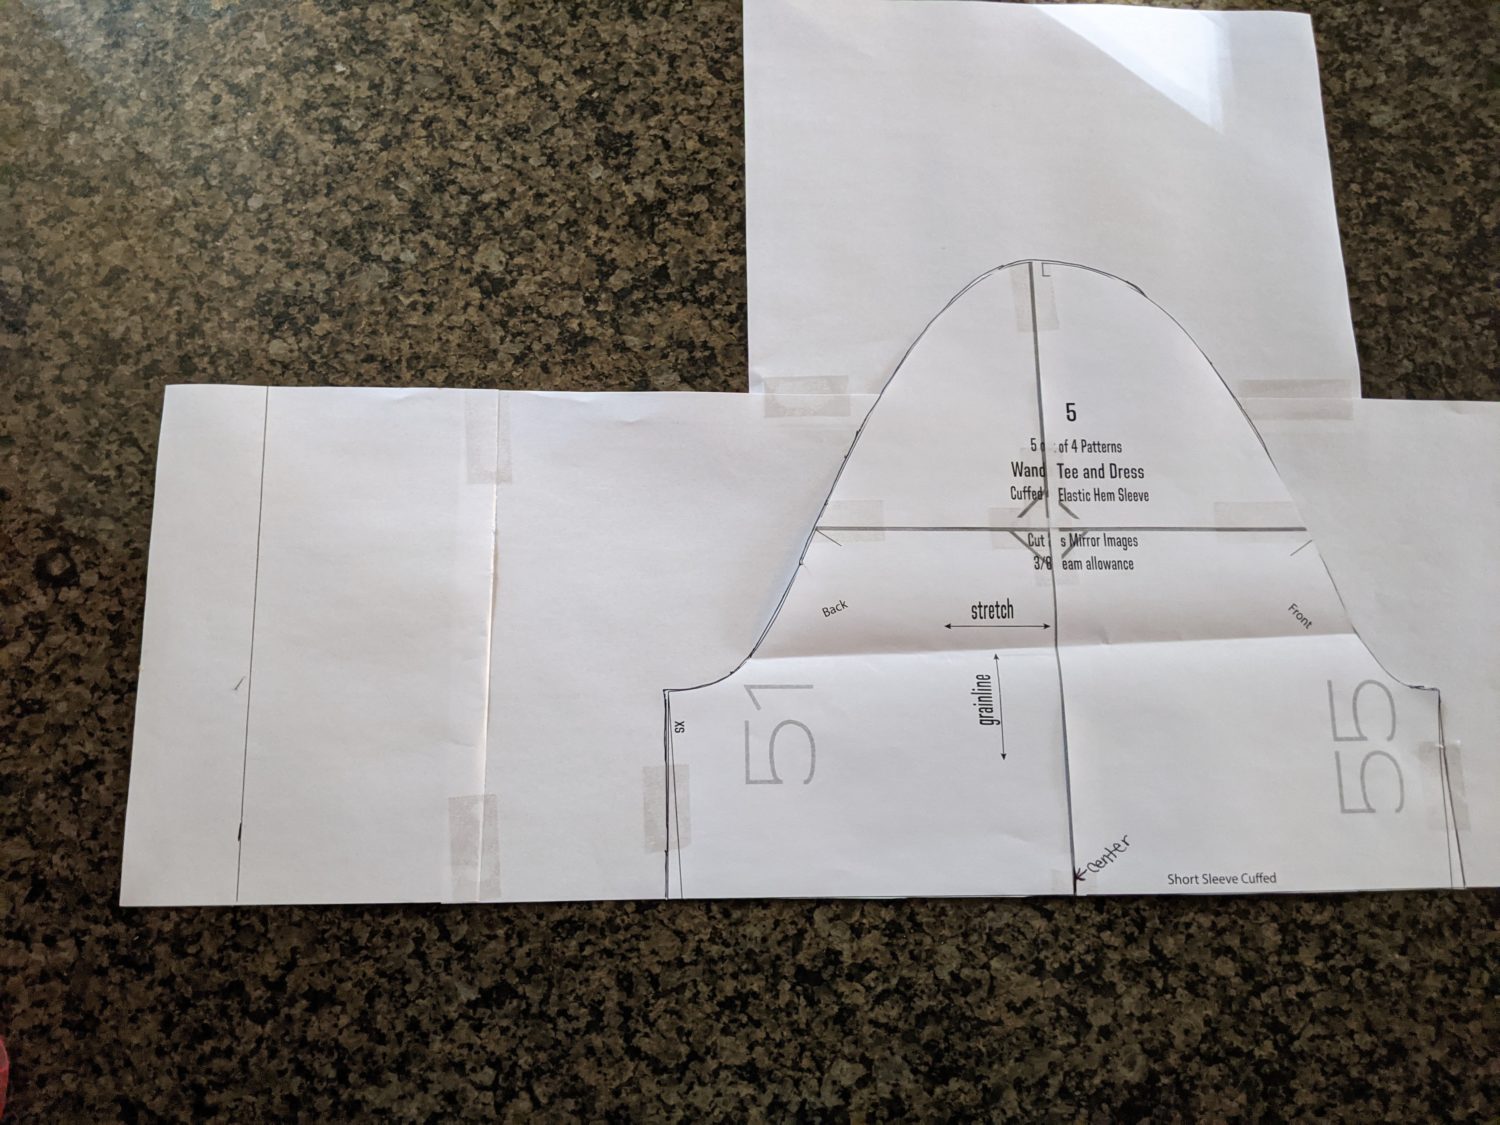
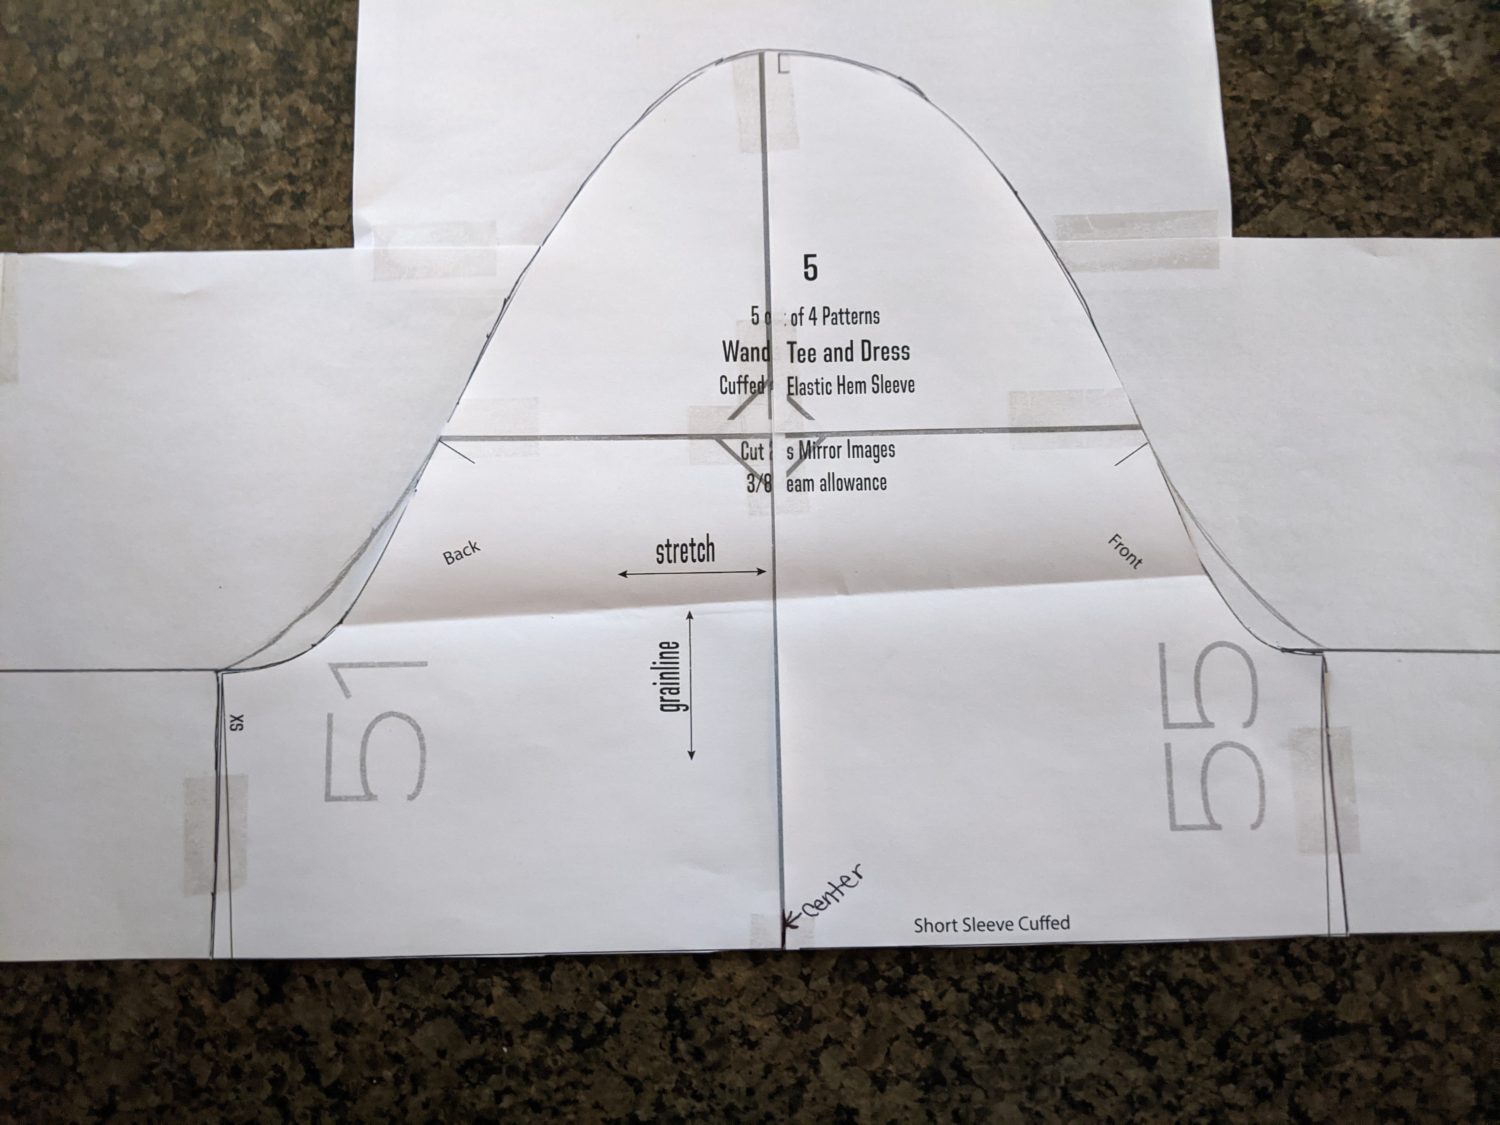
For this hack, you are just going to use the short sleeve cuffed length with the band. Any other options you choose are totally up to you.
- Find and mark the center of the sleeve along the bottom.
- Measure across the bottom edge of the short sleeve pattern piece.
- Lay the pattern piece face up on top of tracing paper or some taped-together pieces of paper.
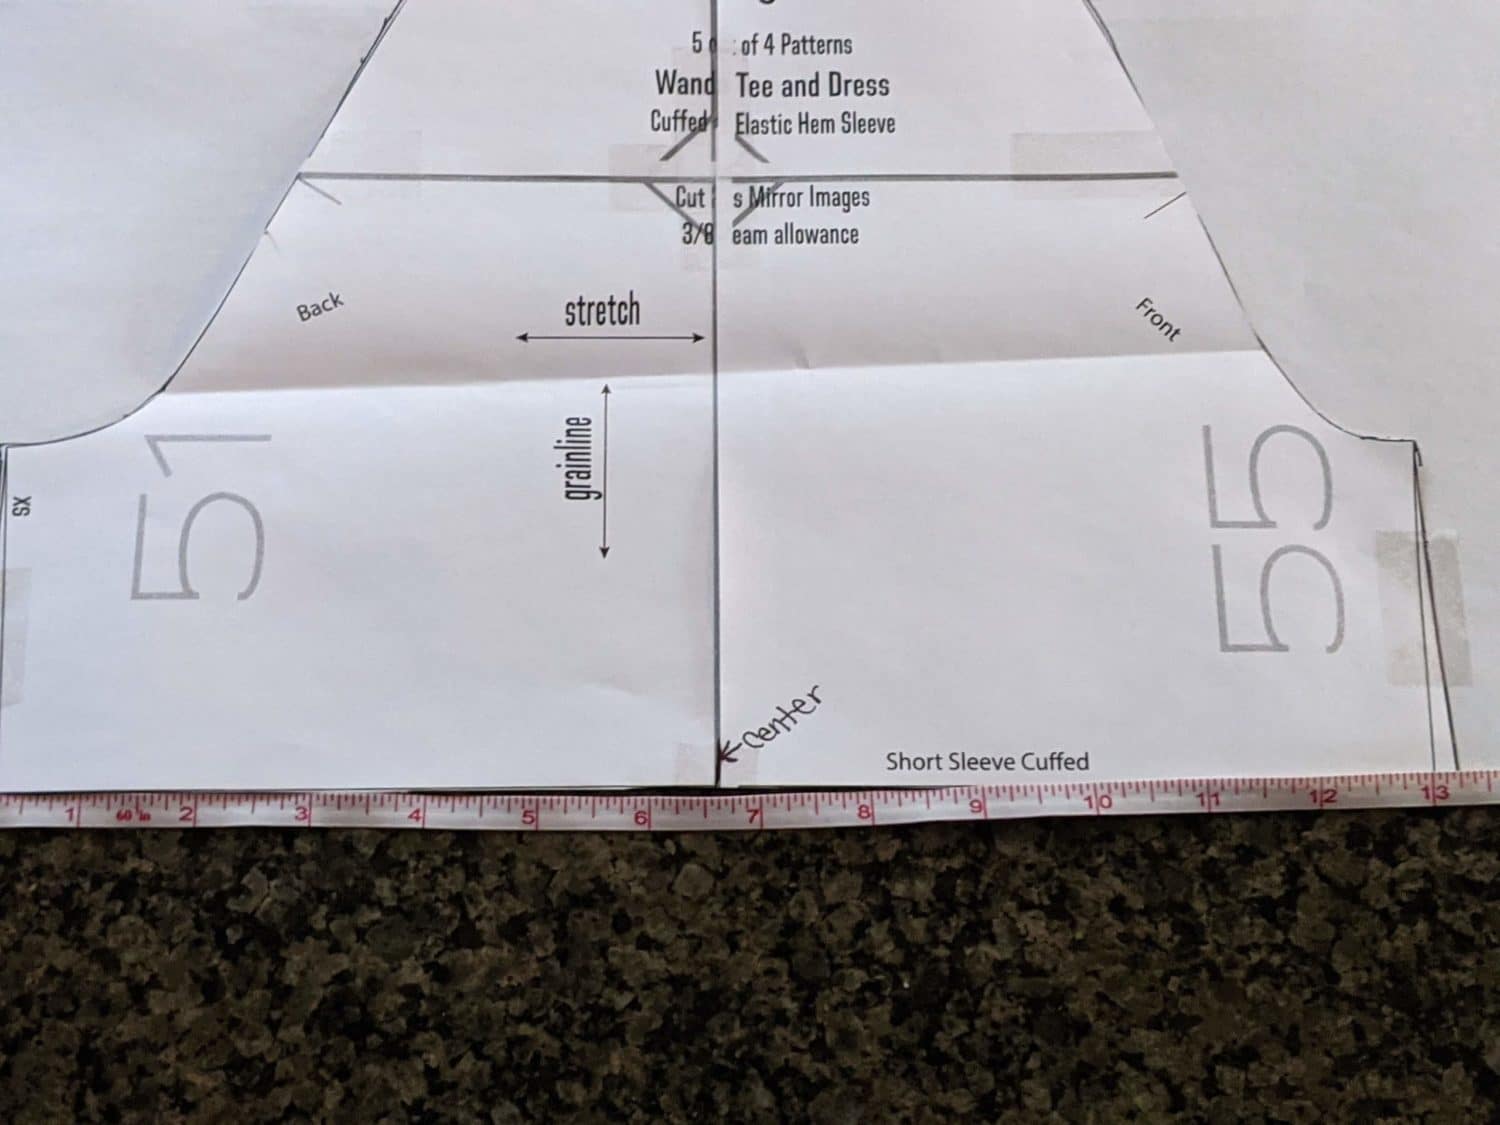
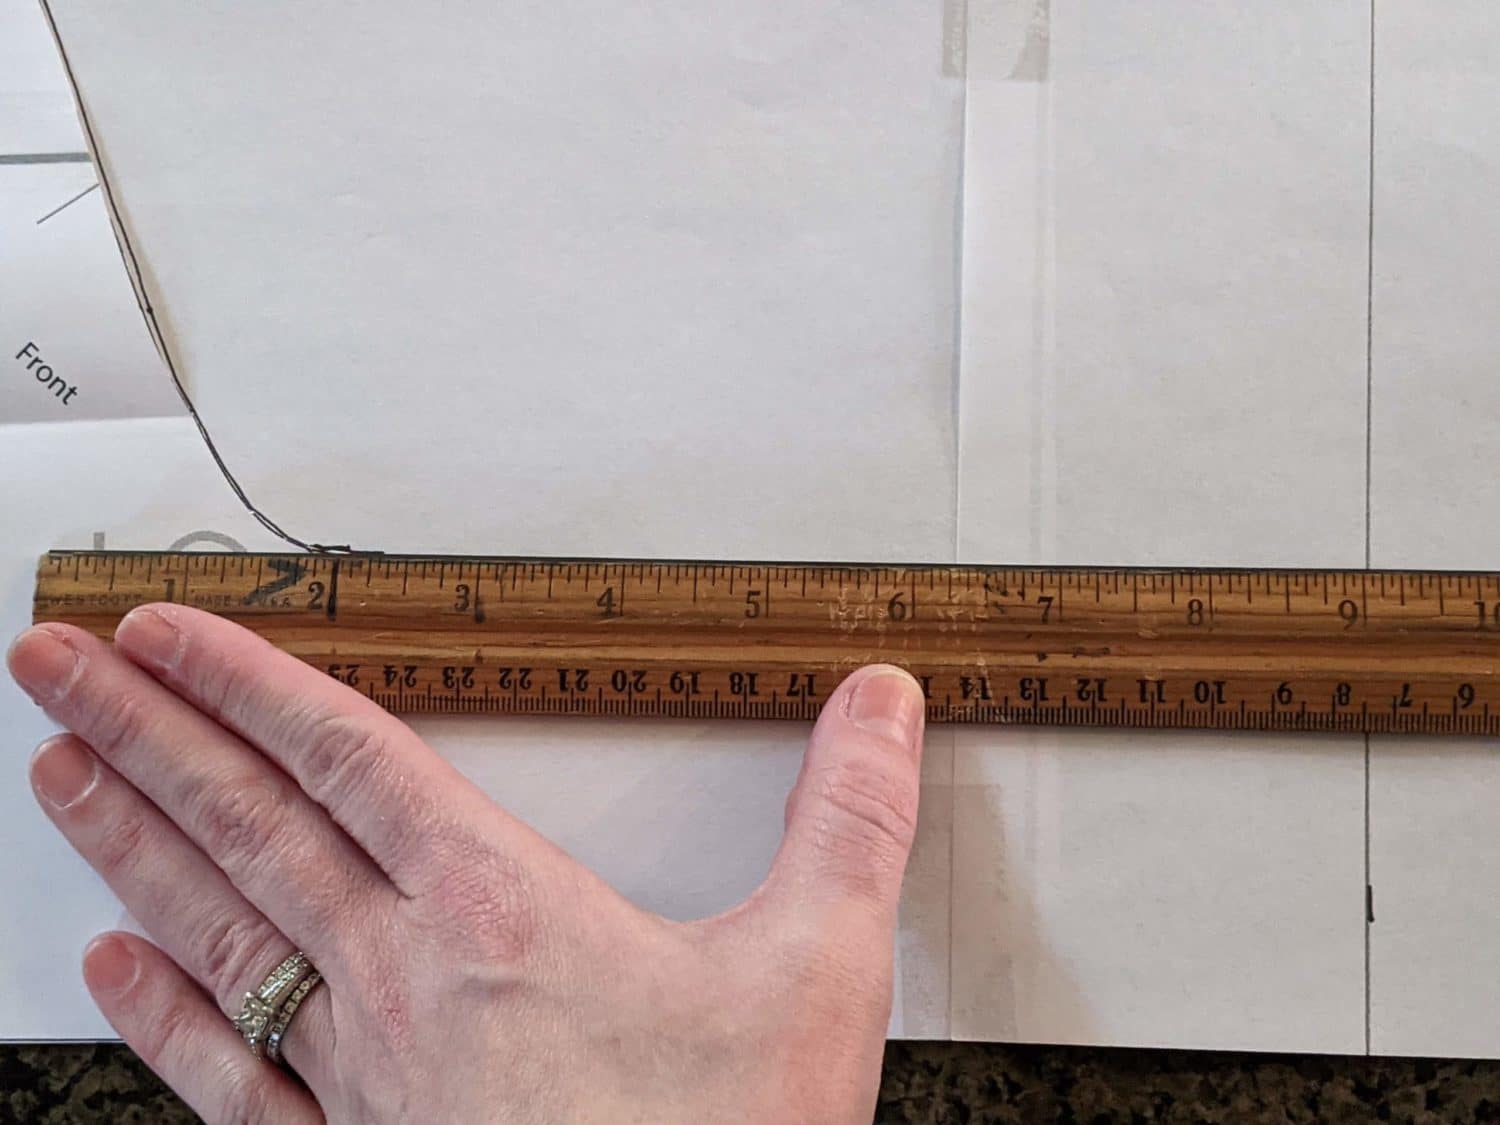
- We are going to double the width of the bottom edge of the sleeve:
- Starting at the center marking, measure over past the sleeve edge the length of the original sleeve measurement and draw a mark.
- Repeat on the other side of the sleeve.
- For example:
- The extra small bottom edge is 13.25″ across.
- Measure from the center mark over 13.25″ in each direction and mark.
- The total length across the bottom edge is now 26.5″

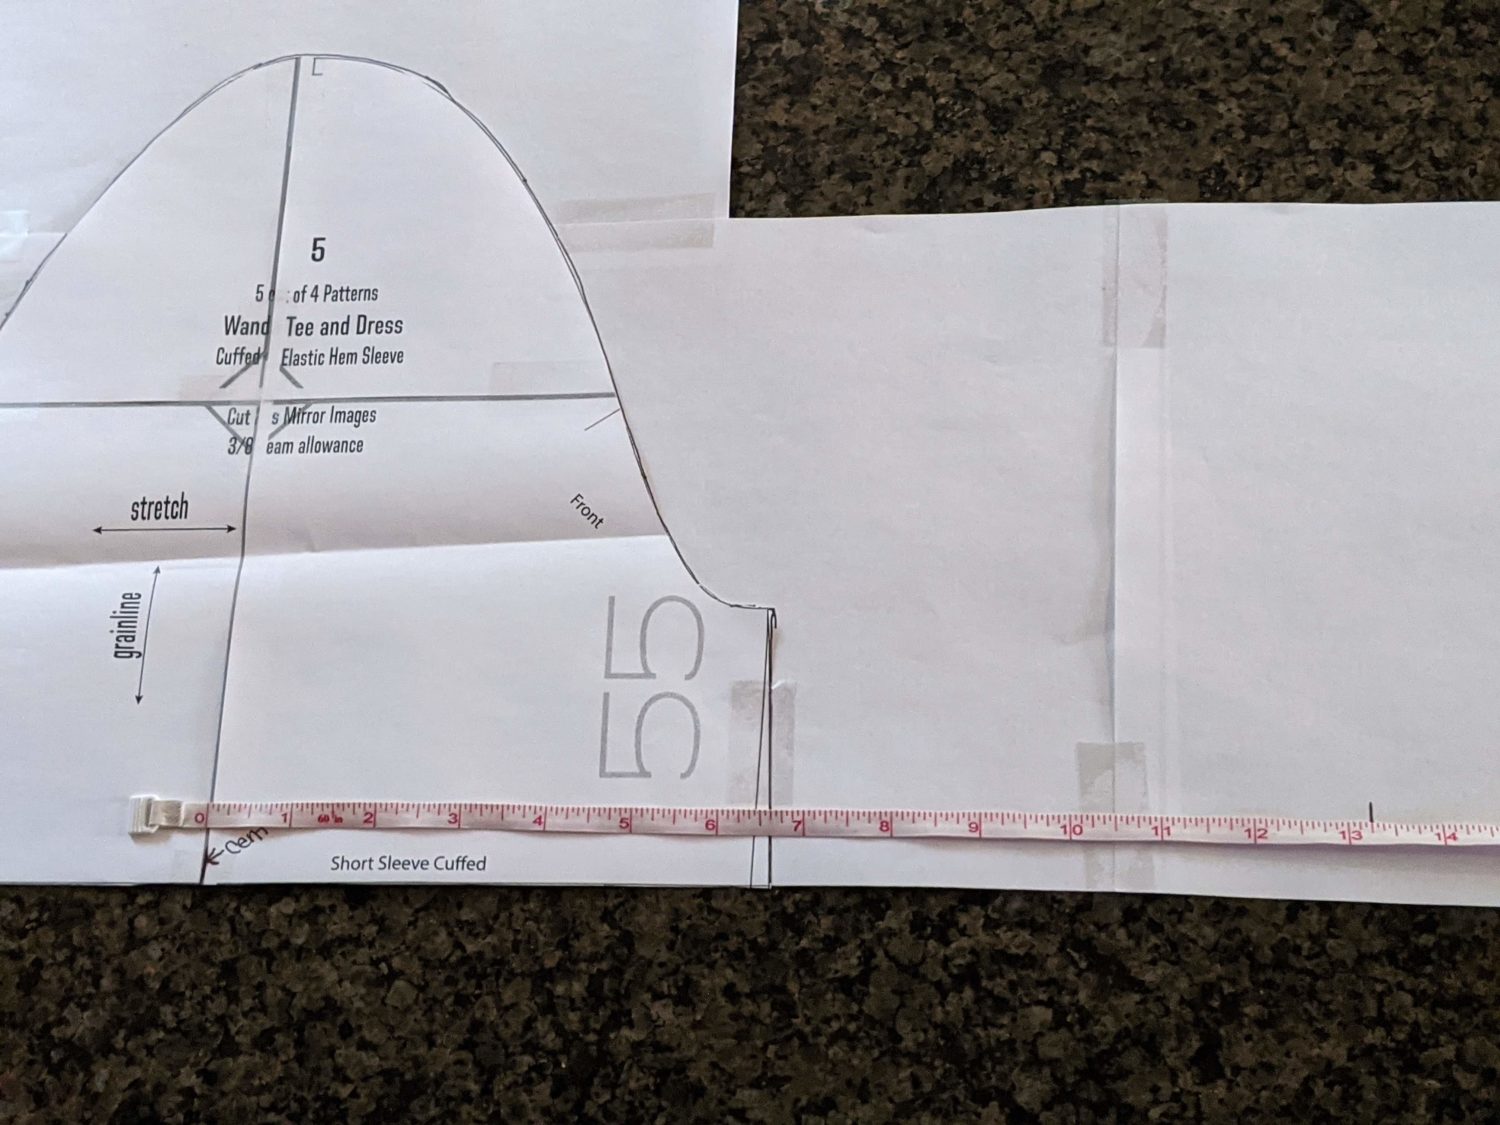
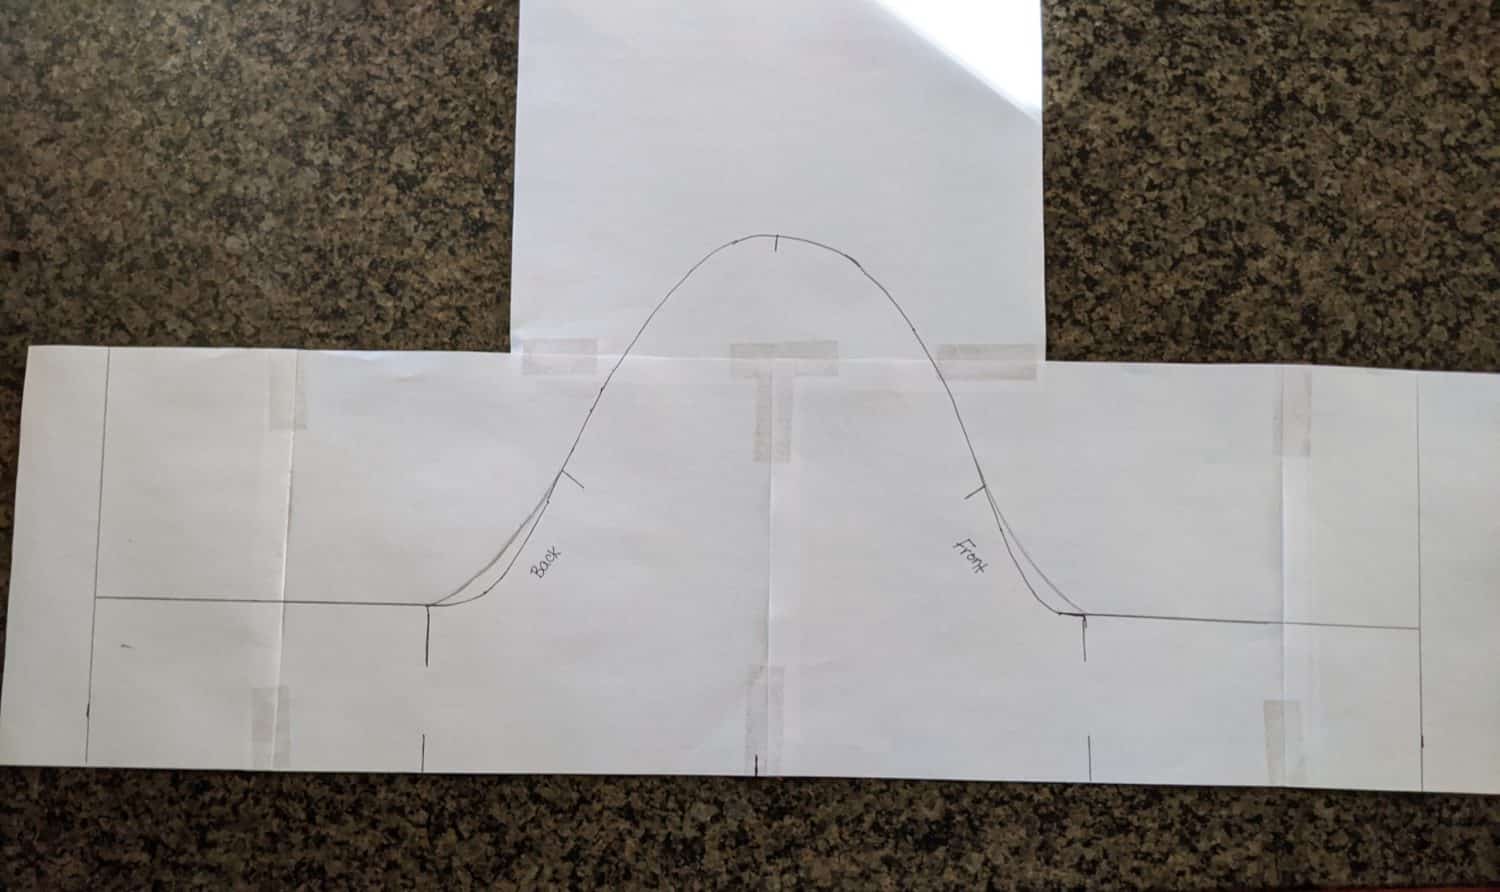
- Use a ruler to draw a vertical line on each side to extend those markings up.

- Using your ruler again, lay it horizontally across the top edge of the underarm part of the pattern.
- Extend that top sleeve edge all the way to meet with the vertical lines you just drew on each side.
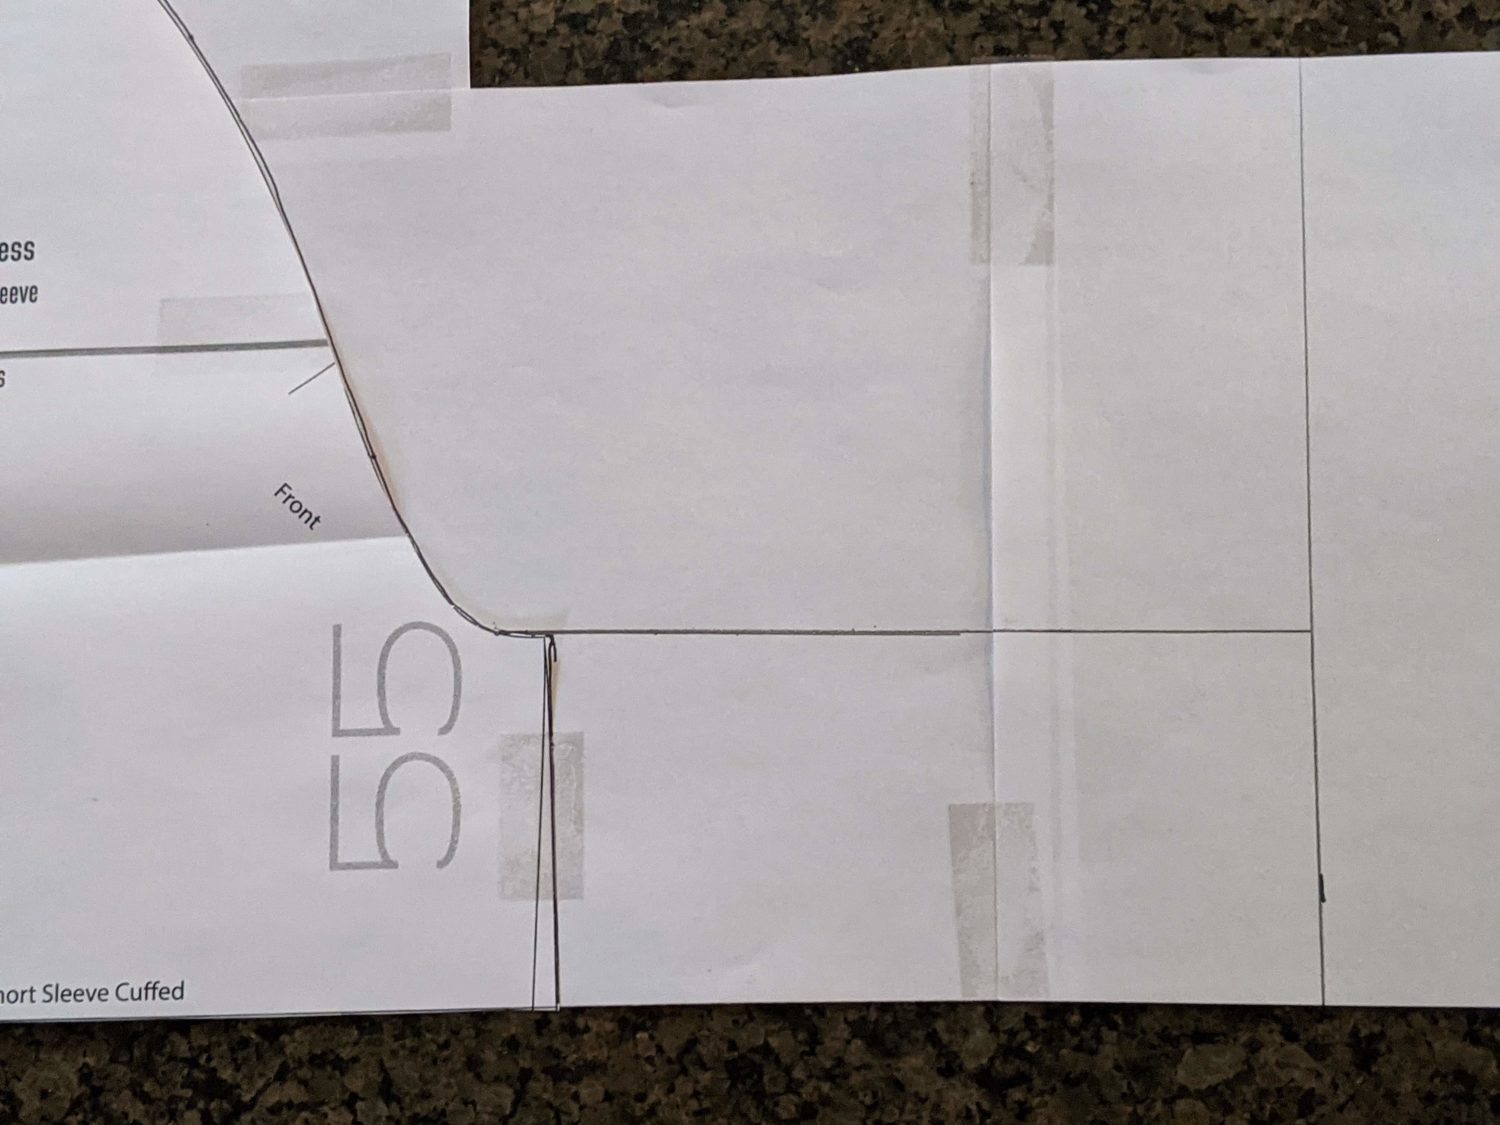
- Draw a slight curve from the gathering notch down to meet the top edge of the new pattern piece. This curve will help make the gathering a little smoother in that area.
- Transfer all markings on the original pattern piece to the new pattern.
- Cut out your new pattern piece.
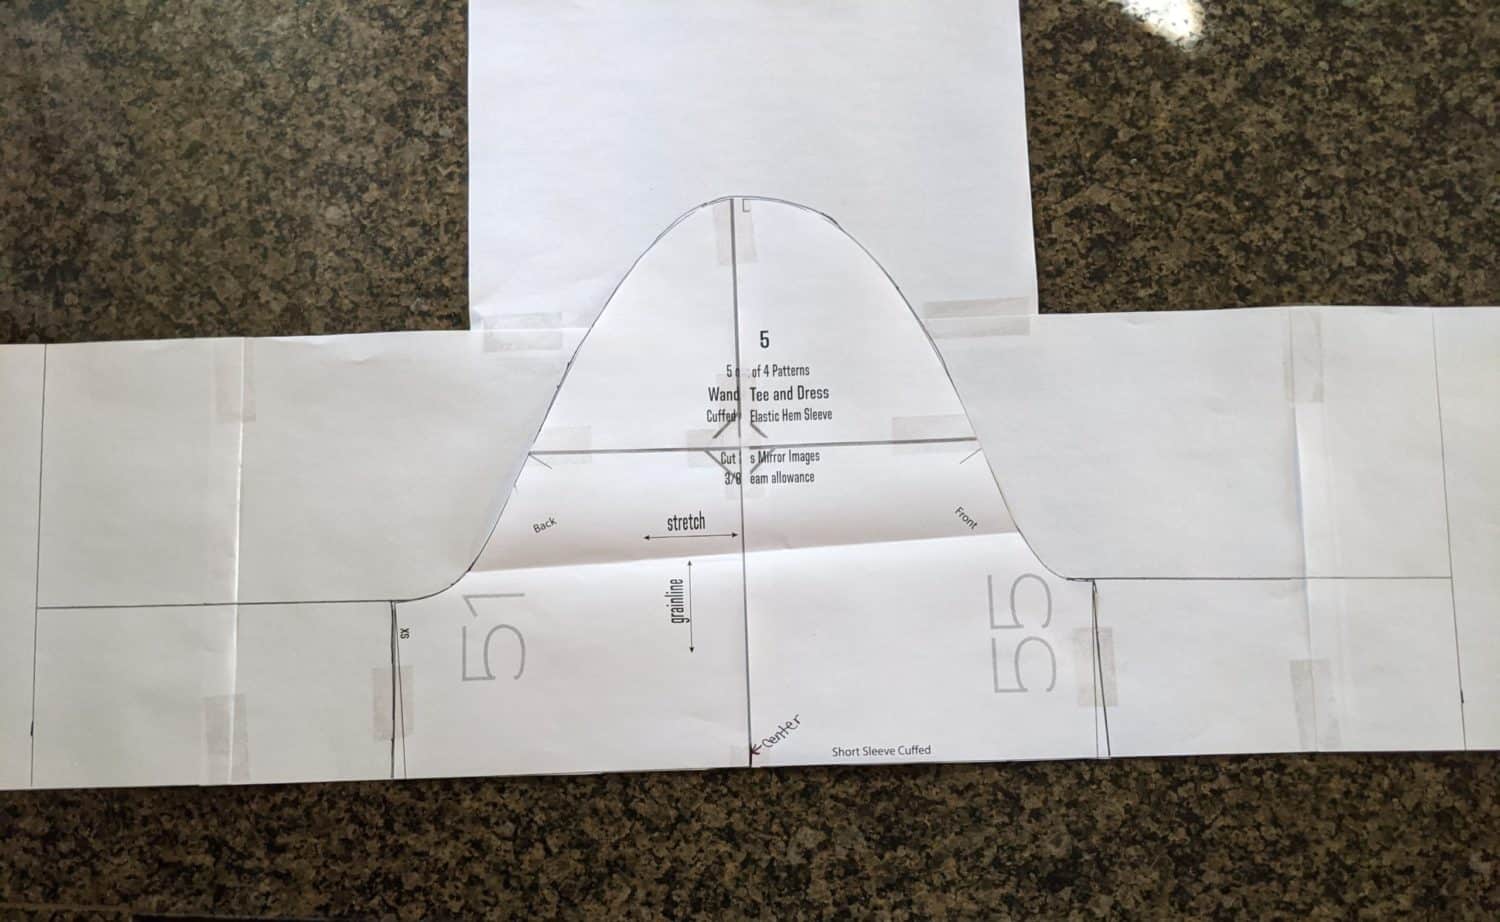
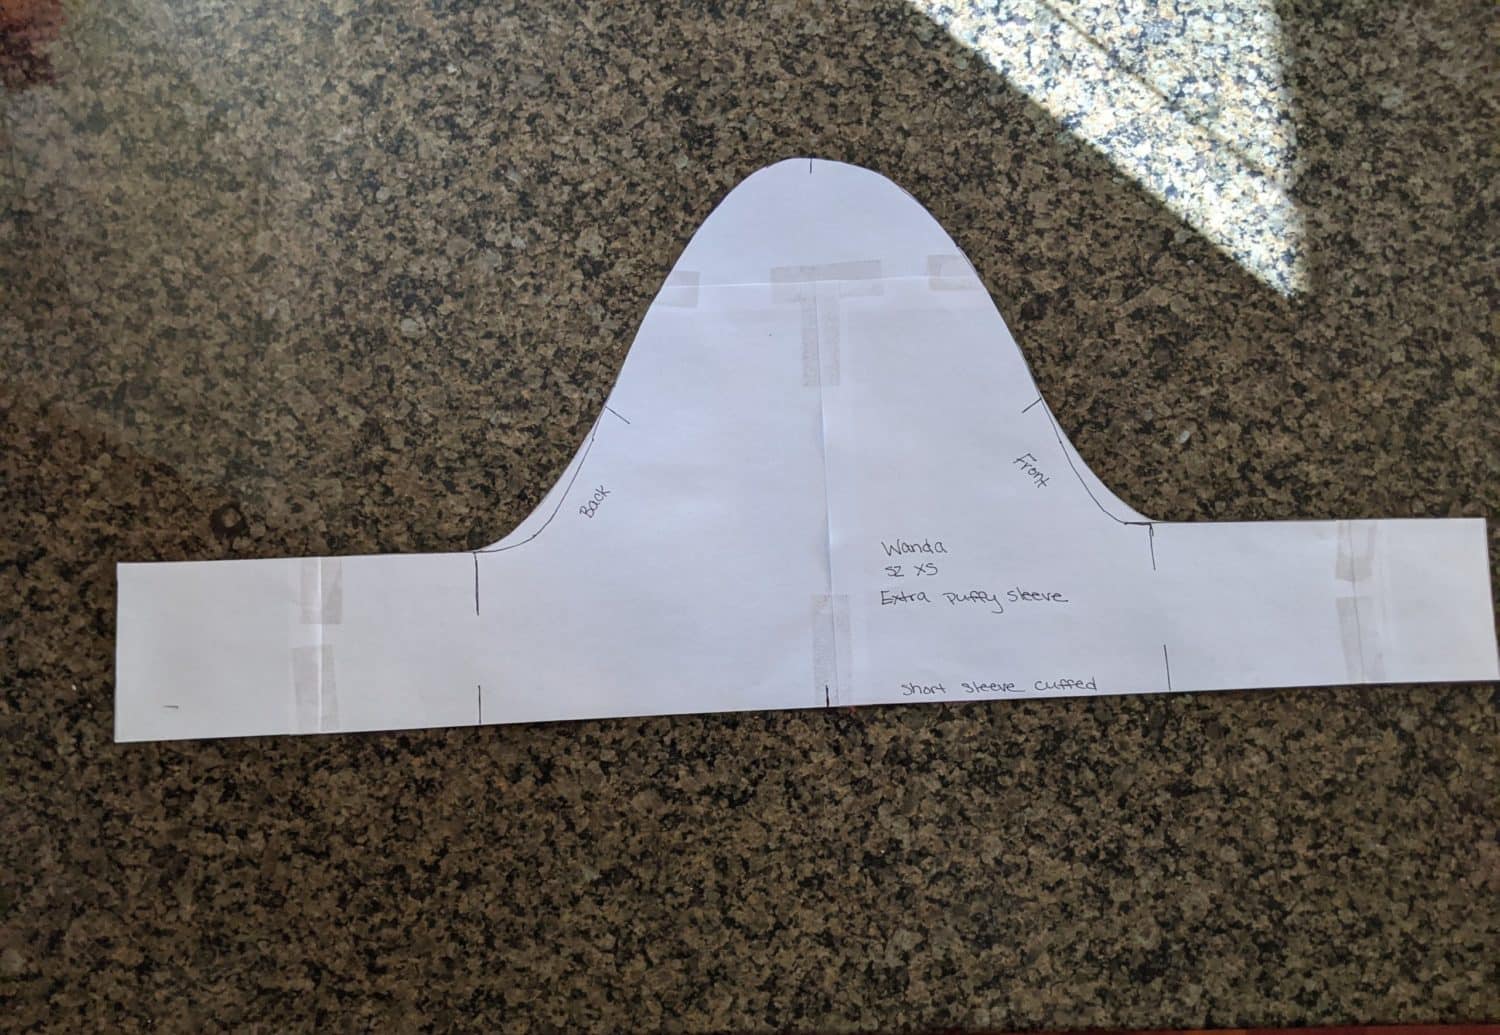
Make Those Sleeves Extra Puffy
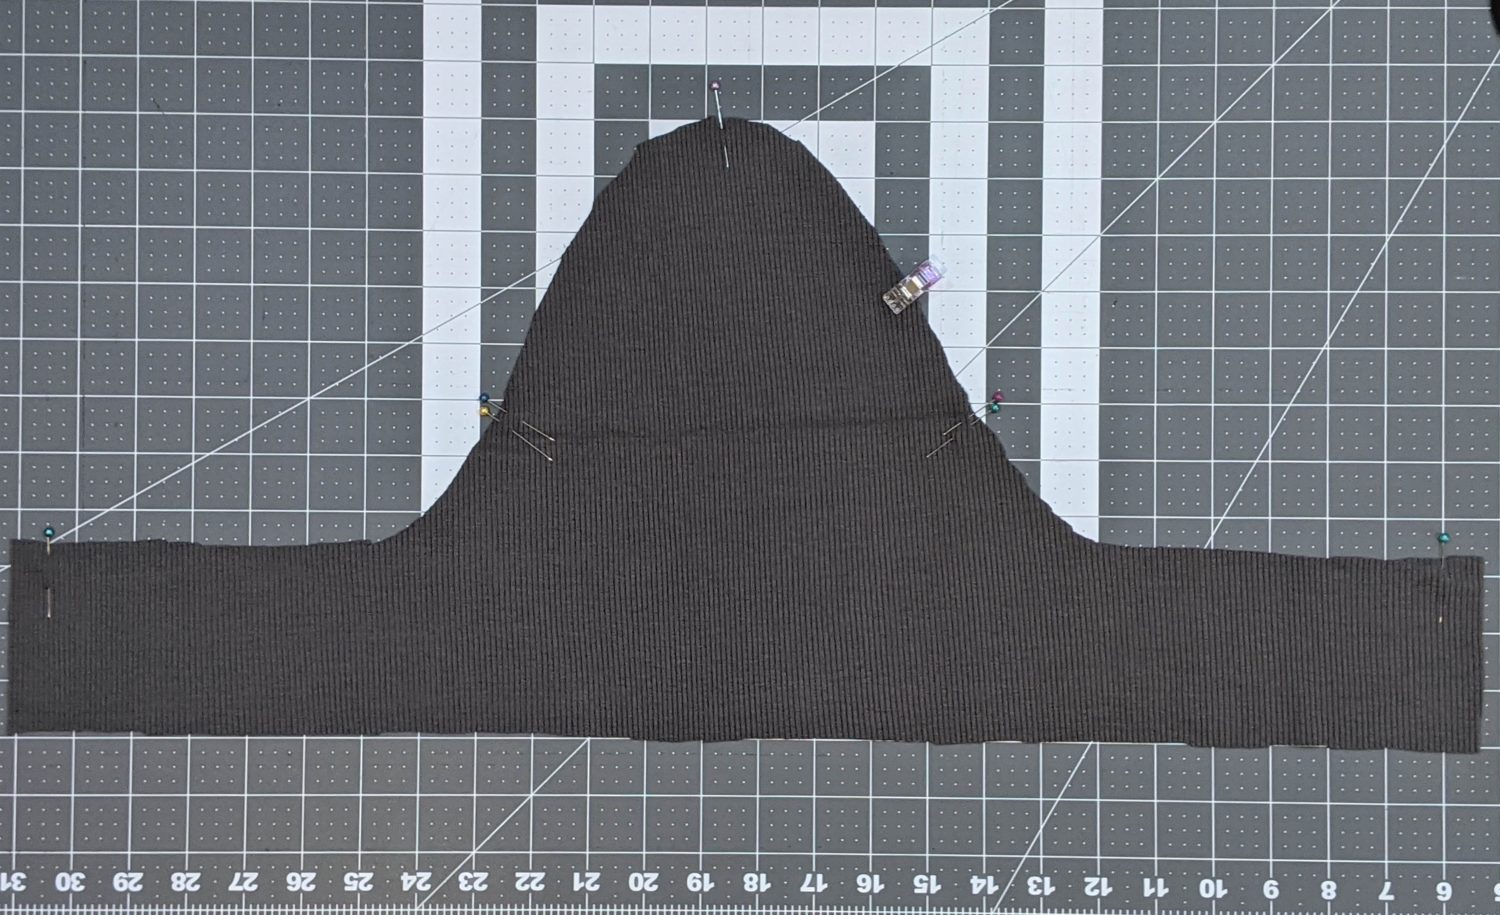
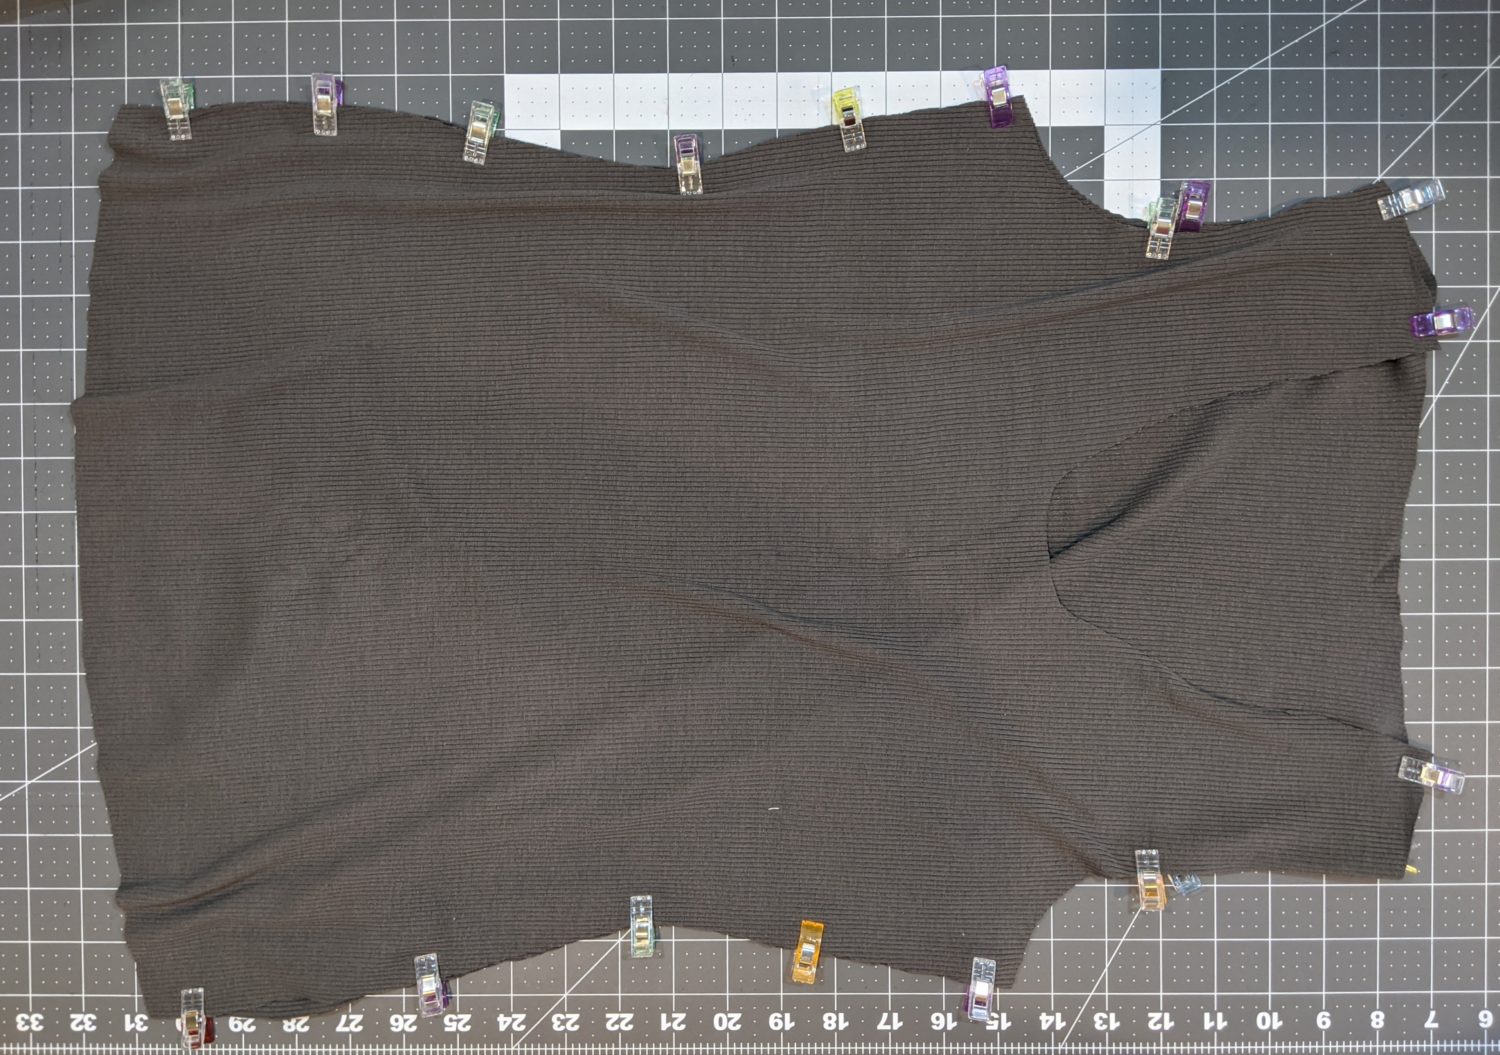
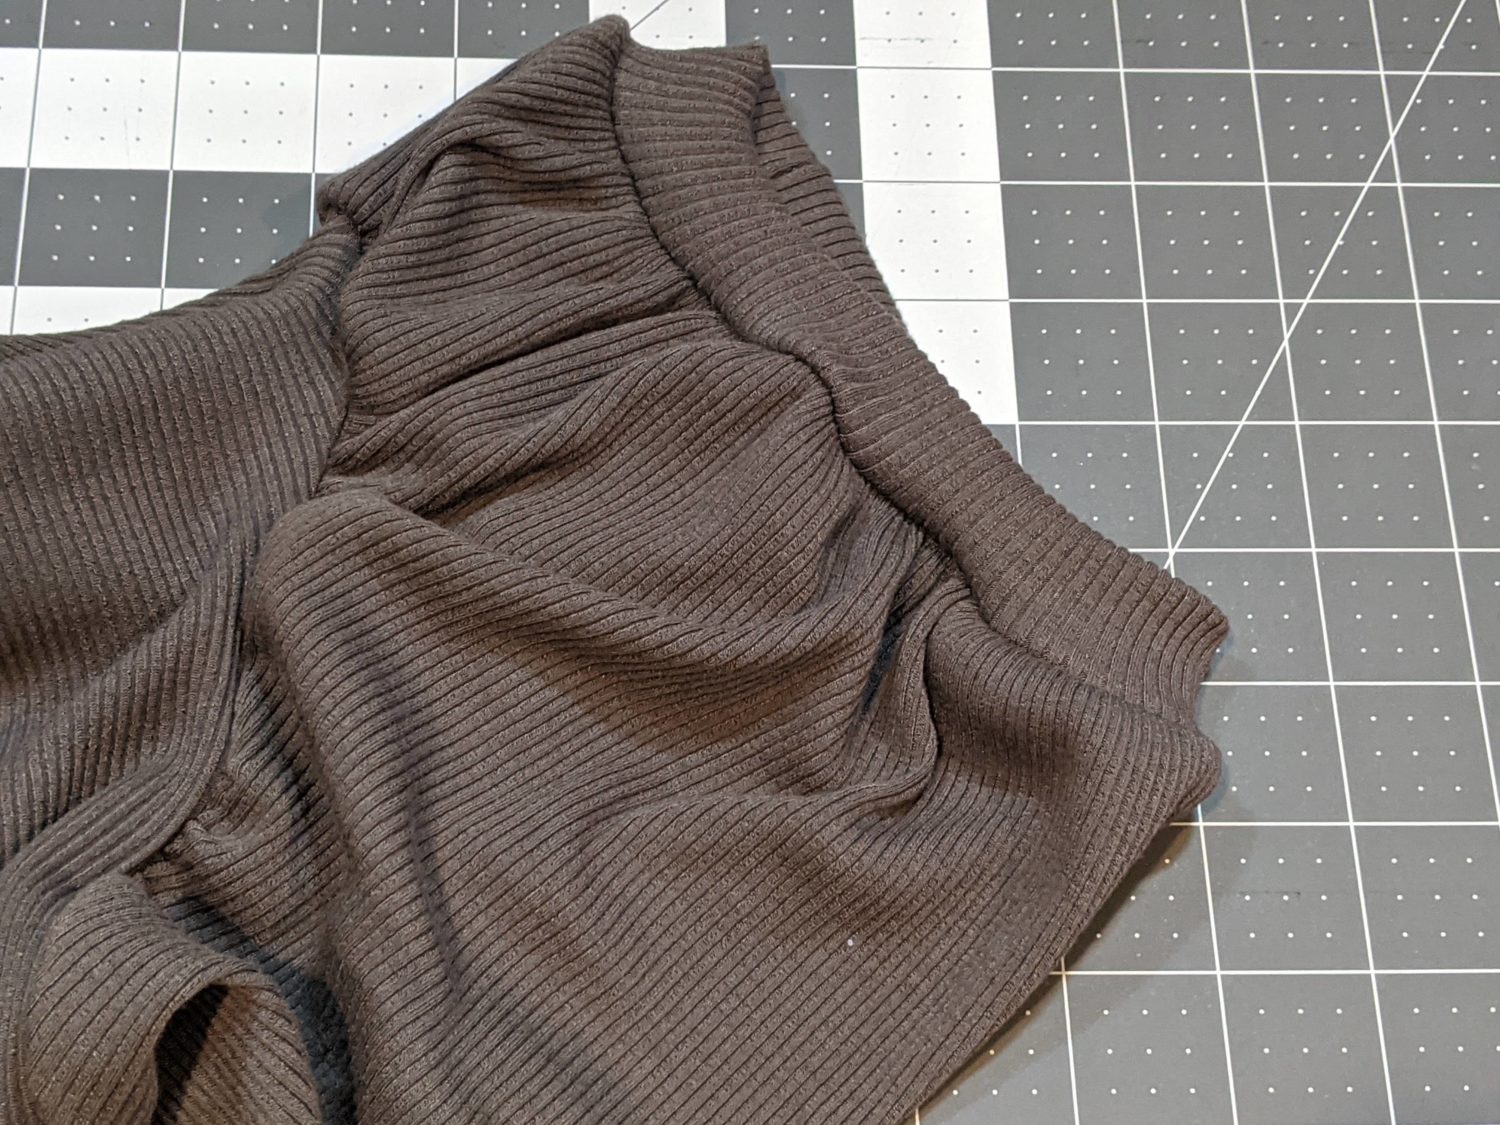
Cut out all of your pattern pieces as instructed in the tutorial. Use your newly-made sleeve pattern piece in place of the original and be sure you cut out the short sleeve bands as well.
- Follow the instructions in the tutorial to sew gathering stitches along the top section of the sleeve between the original two notches.
- Just below the top gathering stitches, sew another set of gathering stitches down the side of the sleeve and along the top edge of the sleeve. Stop 1/2″ away from the end.
- Repeat the same gathering on the opposite side as well as on the other sleeve.
- Sew the underarm seam of each sleeve using a stretch stitch or serger.
- Sew the shoulders and side seams of the front and back bodices right sides together. (If you are making a dress with pockets, be sure to follow those steps in the tutorial before attaching the bodice pieces.)
Sewing on the Sleeves
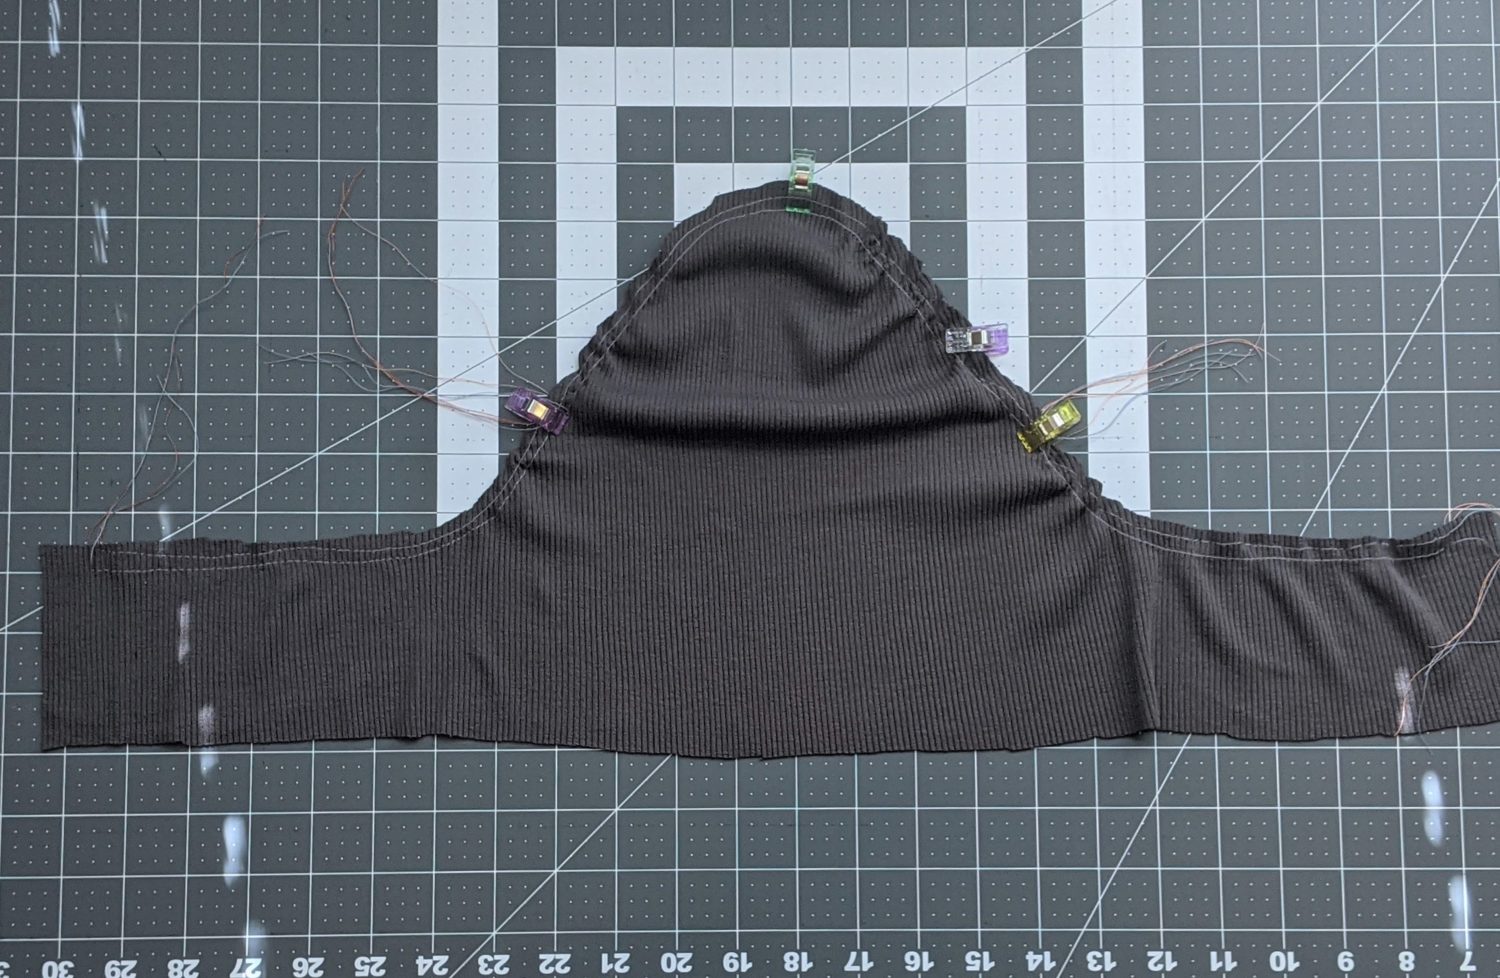
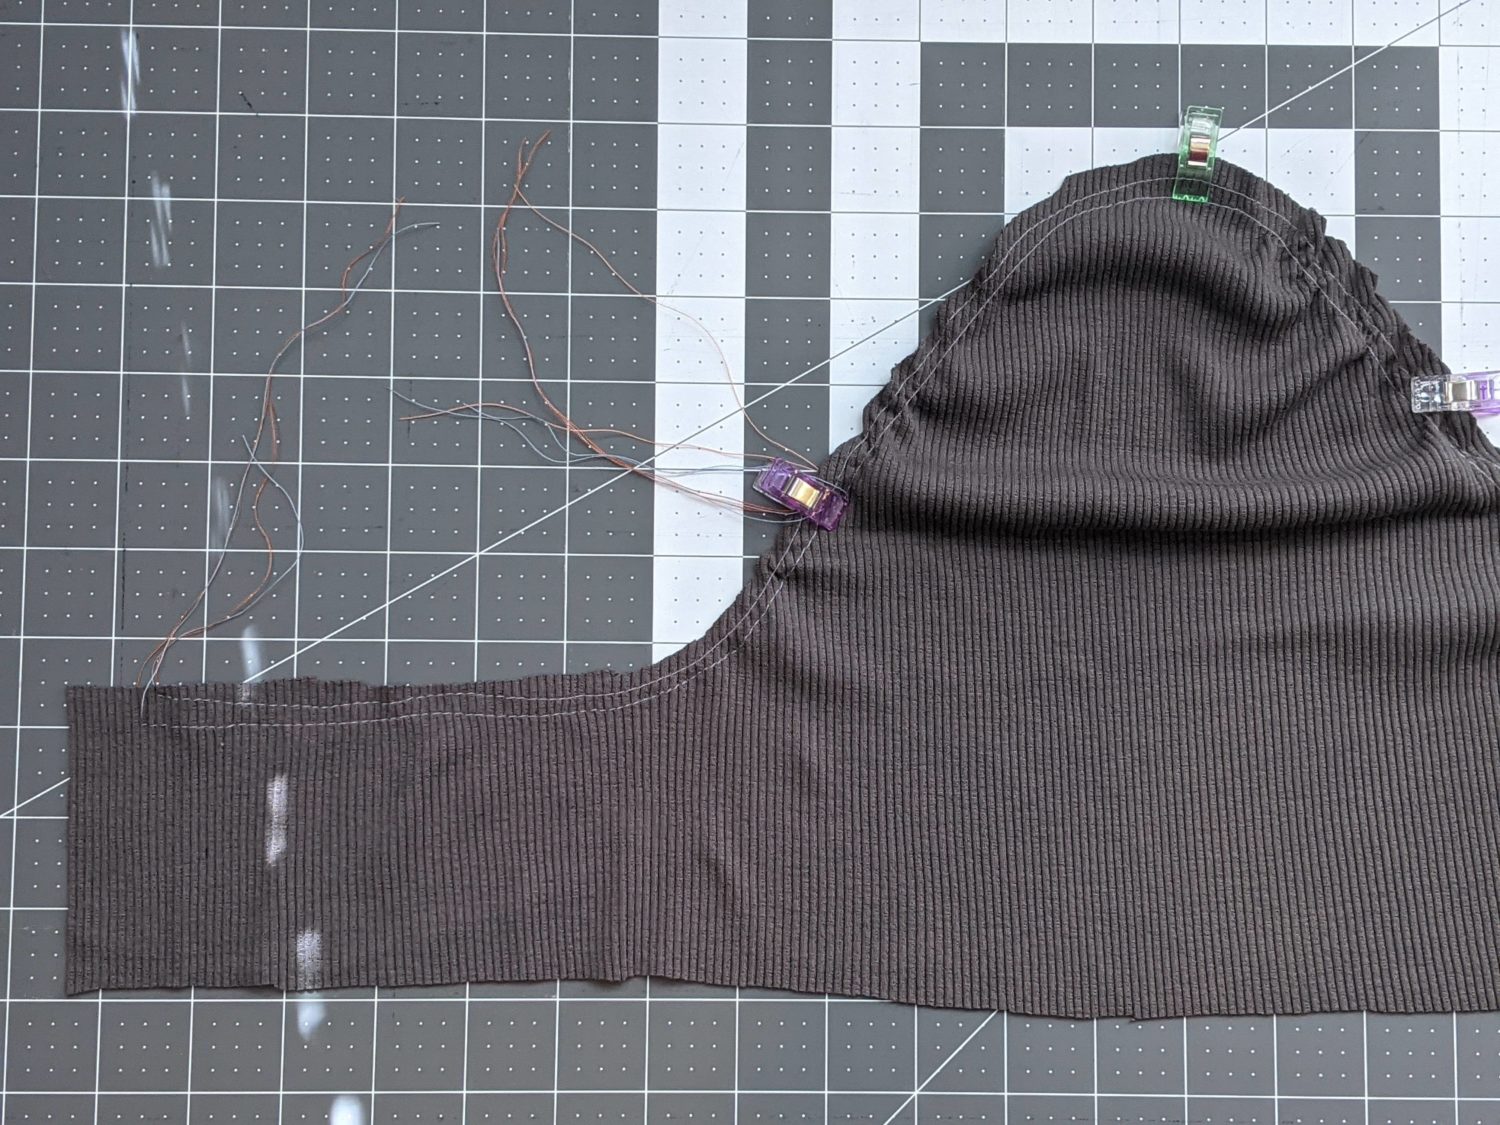
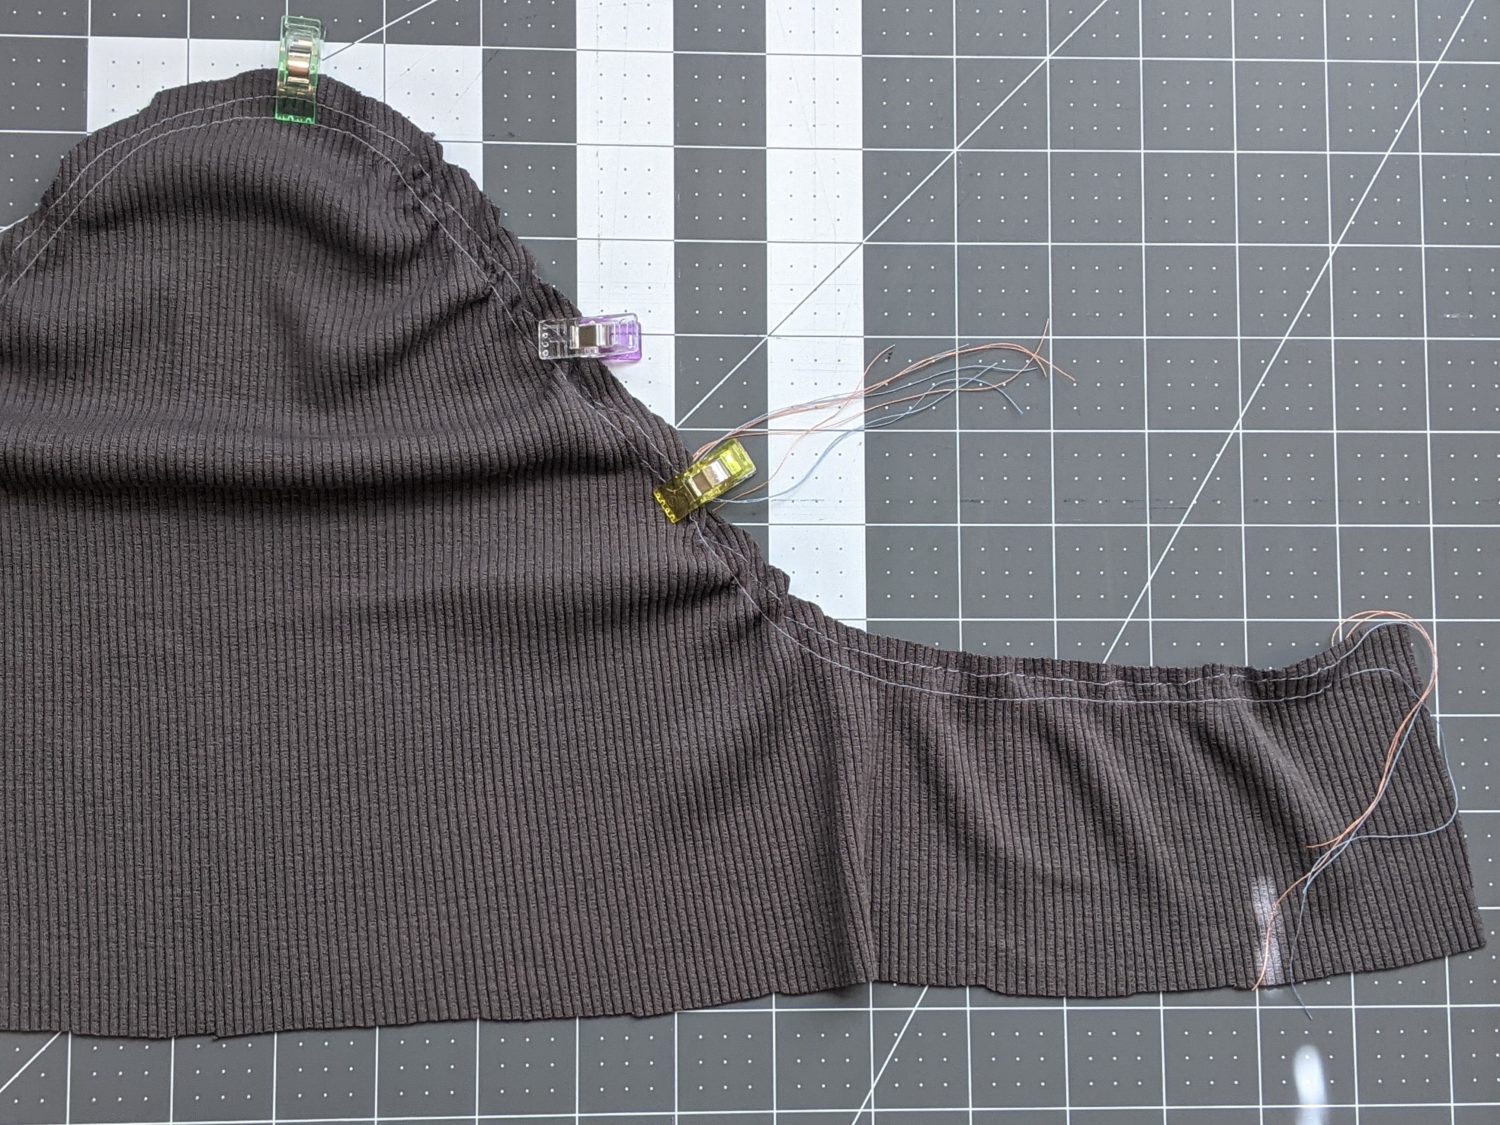
- Follow the tutorial for gathering the top of the sleeve cap and lining it up with the bodice.
- Line up the underarm seams of the sleeve and bodice and pin together.
- Pull the lower gathering stitches to bring the armscye in to match the bodice opening.
- Once the openings are the same size, pin all around the opening. (I struggle with gathering, so just pretend there are about half that amount of clips.)

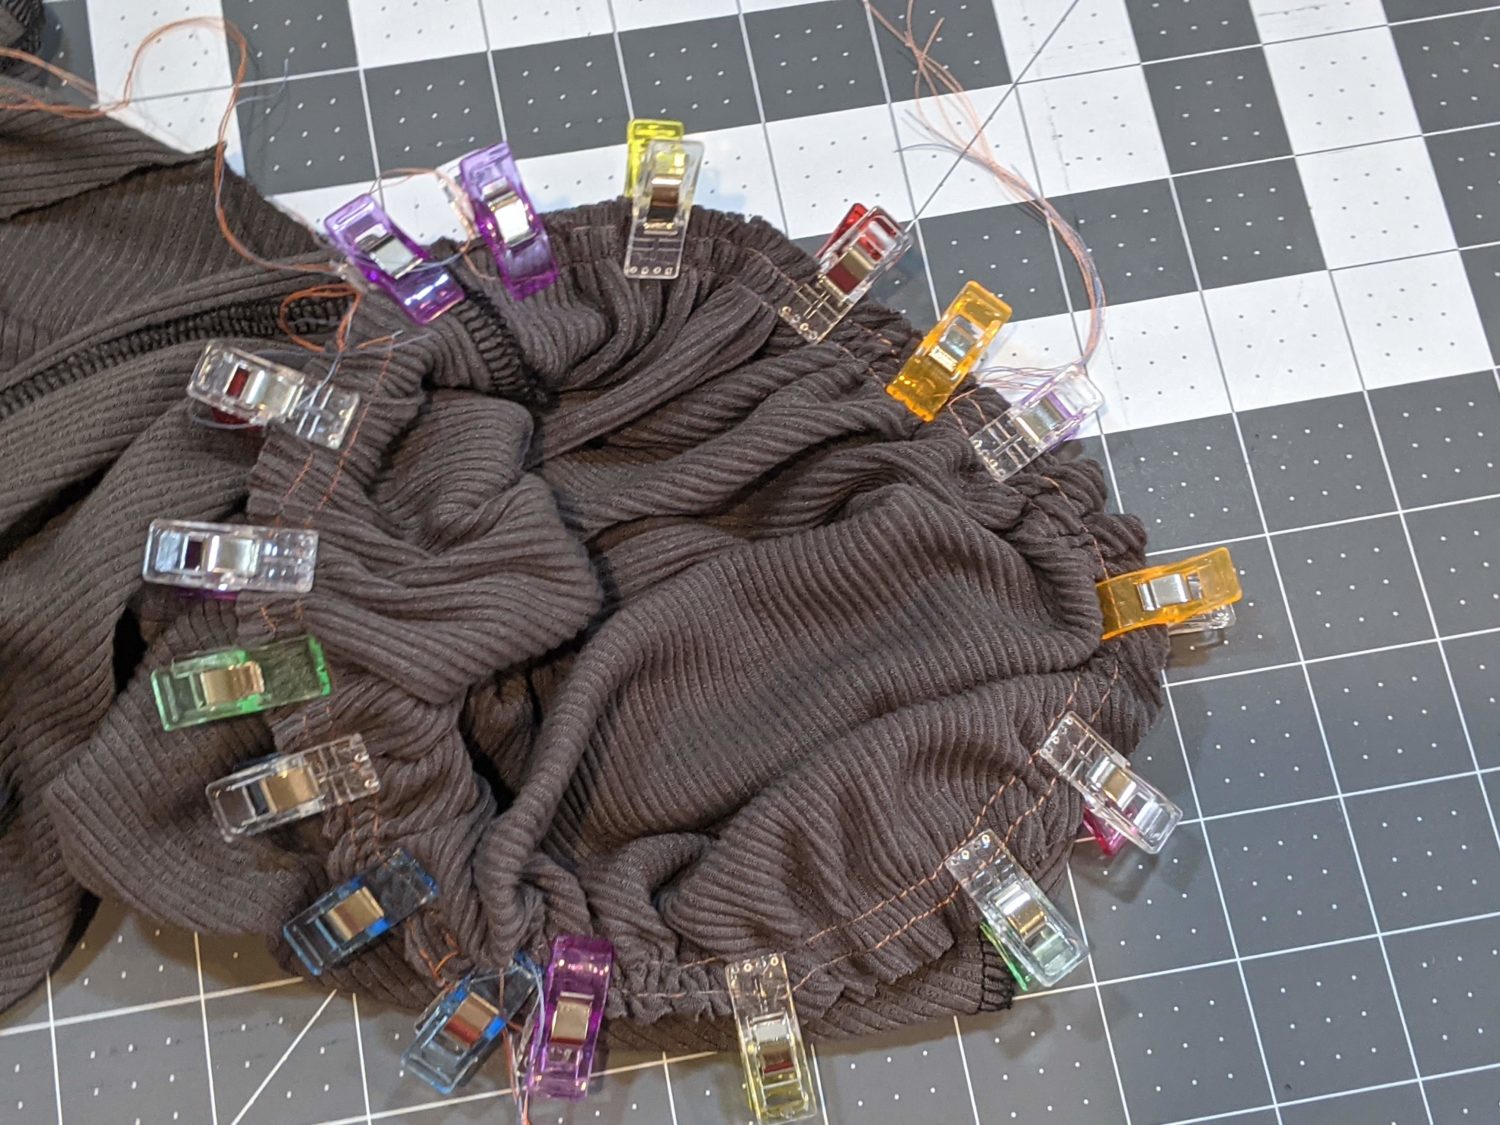
- Sew both sleeves on using a stretch stitch or serger.
- Turn your top right side out, and remove any visible basting or gathering stitches.
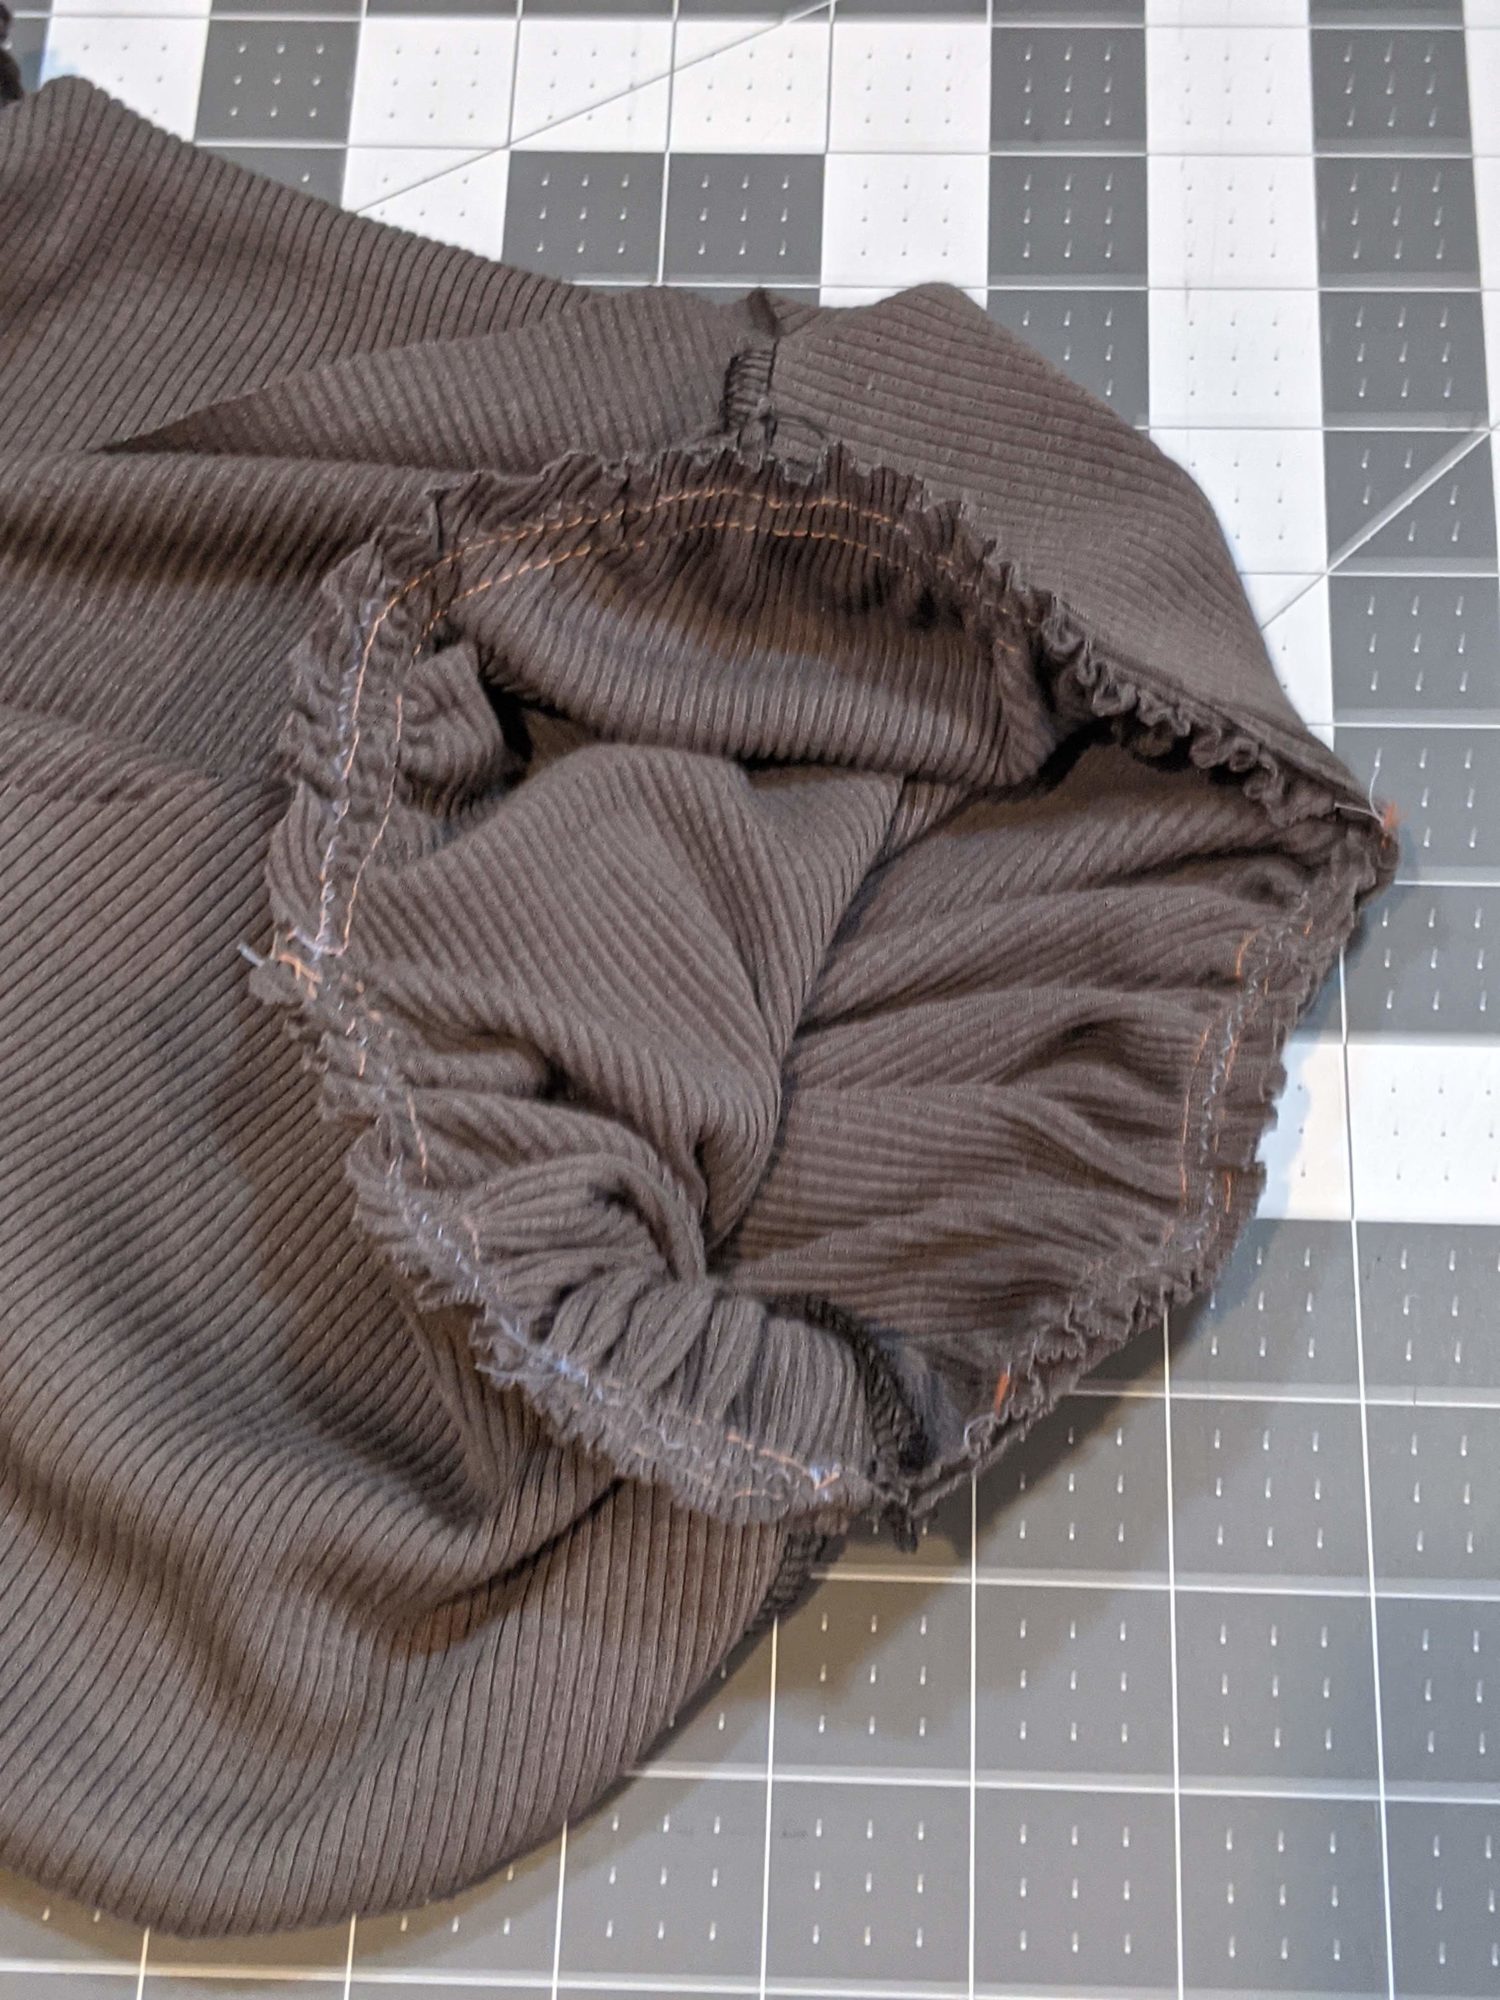
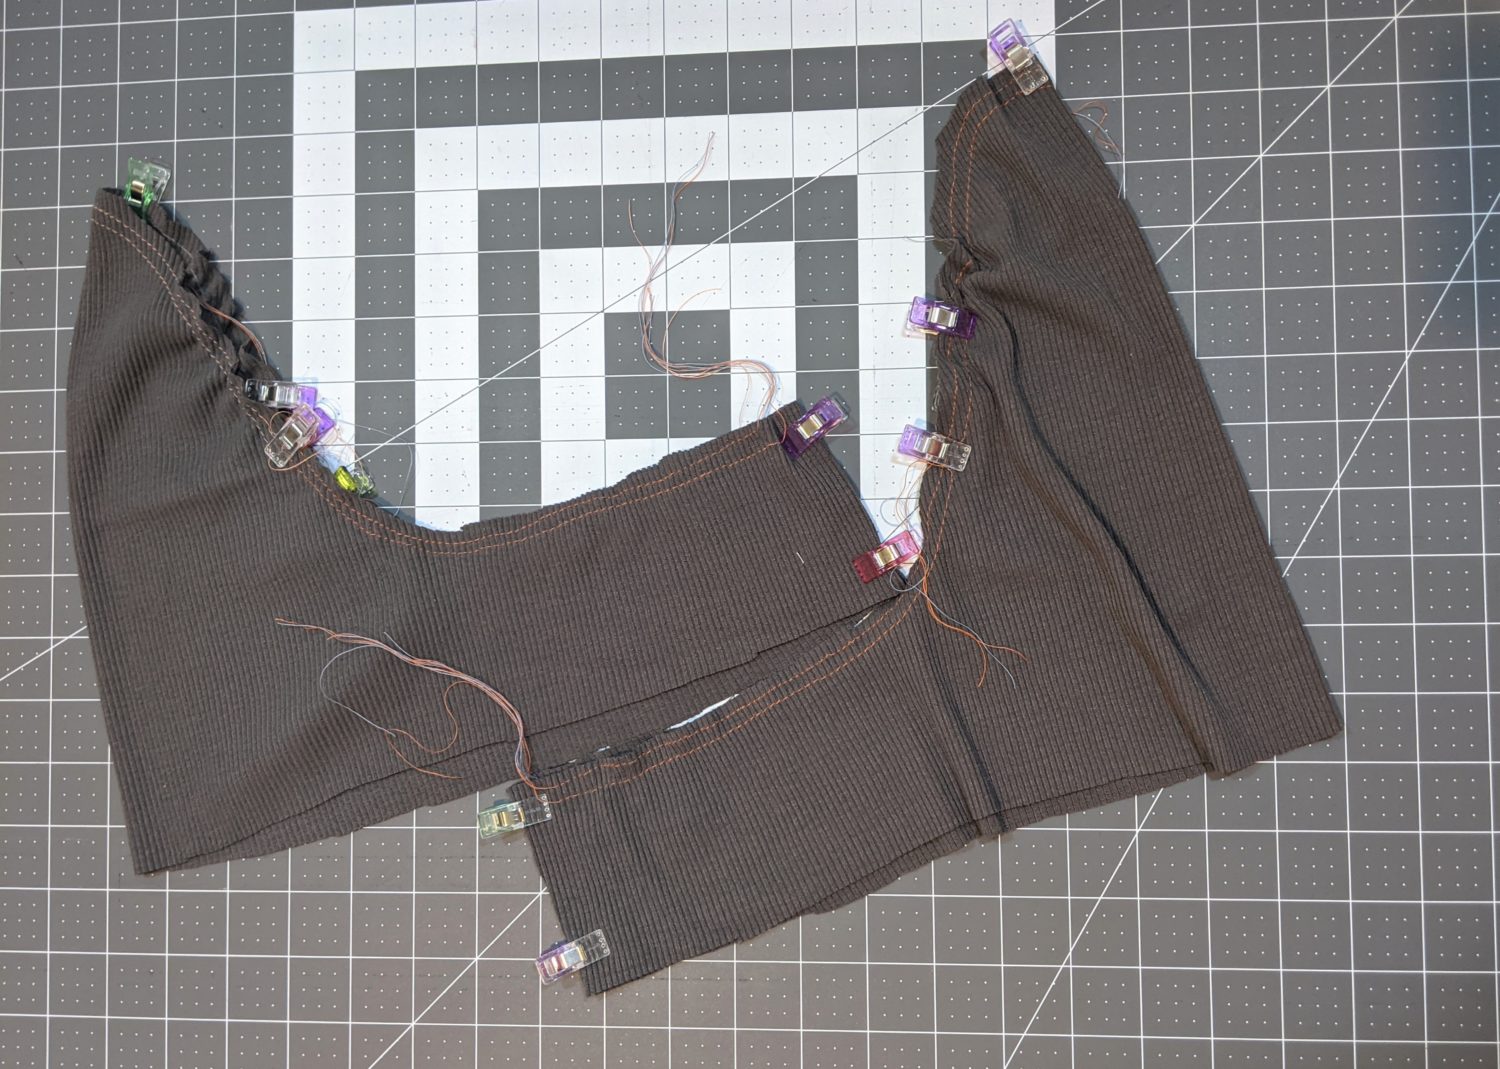
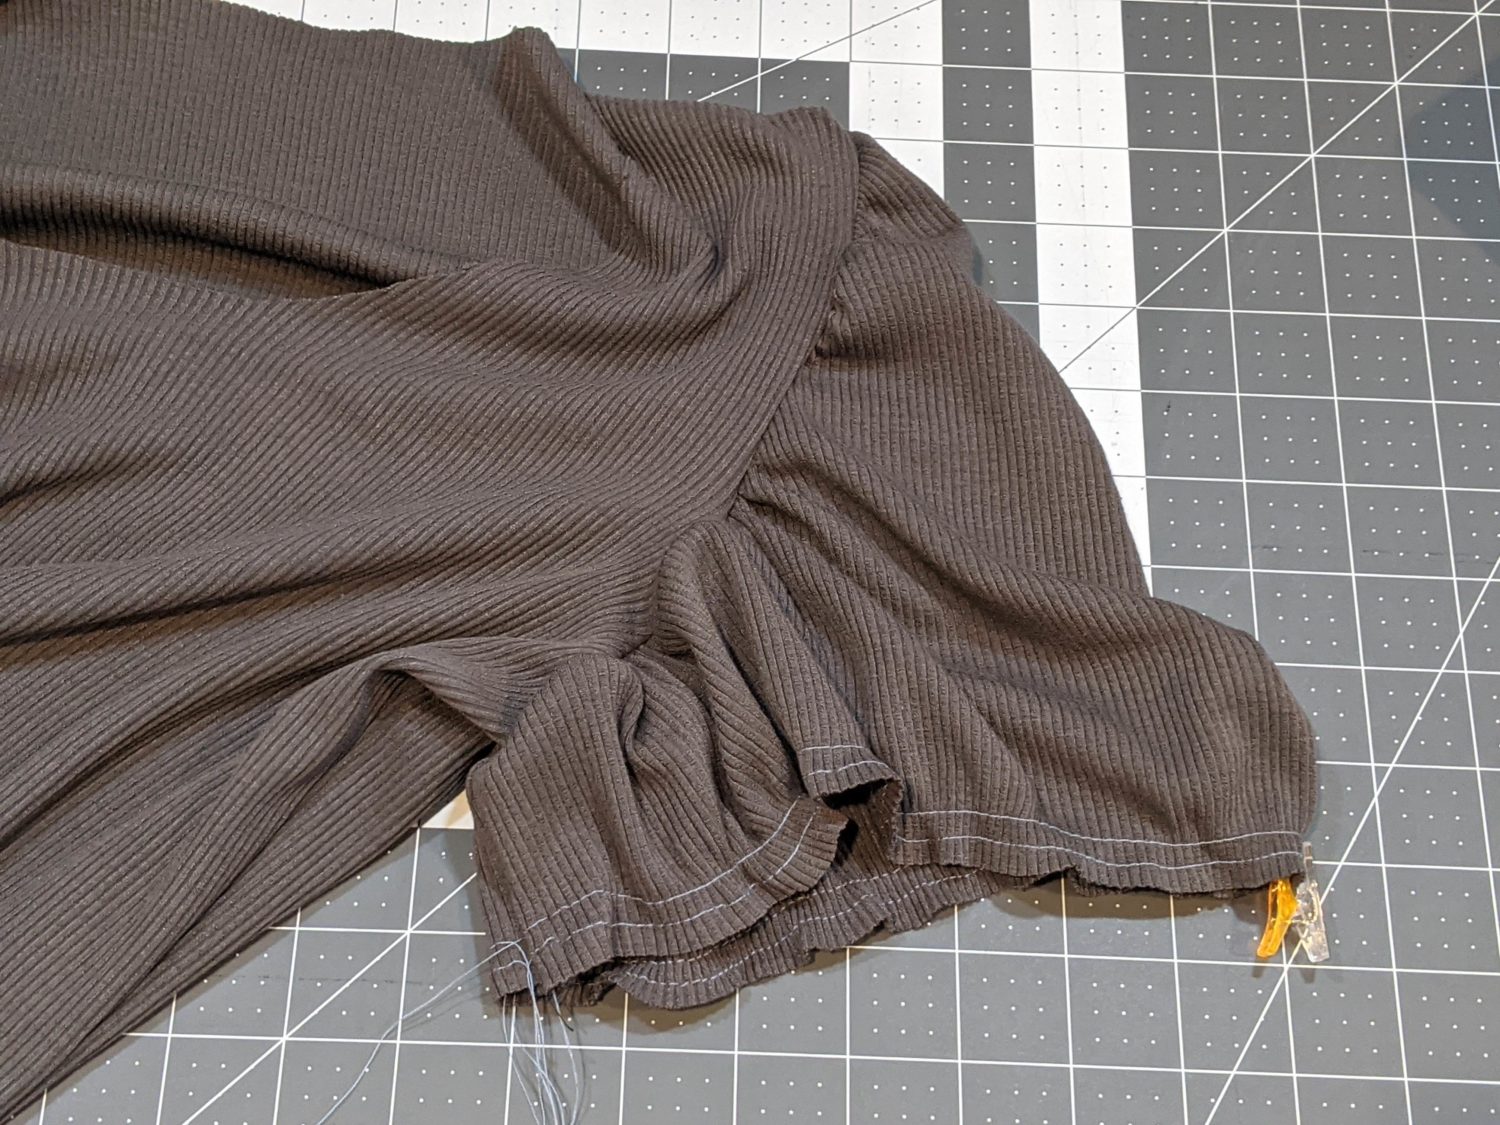
- Now it’s time to gather the bottom edge of the sleeve. Use the same method as before to sew gathering stitches along the sleeve edge.
- Sew your sleeve bands right sides together to create a loop for each sleeve.
- Mark the sleeve and band at the seams and halfway points.
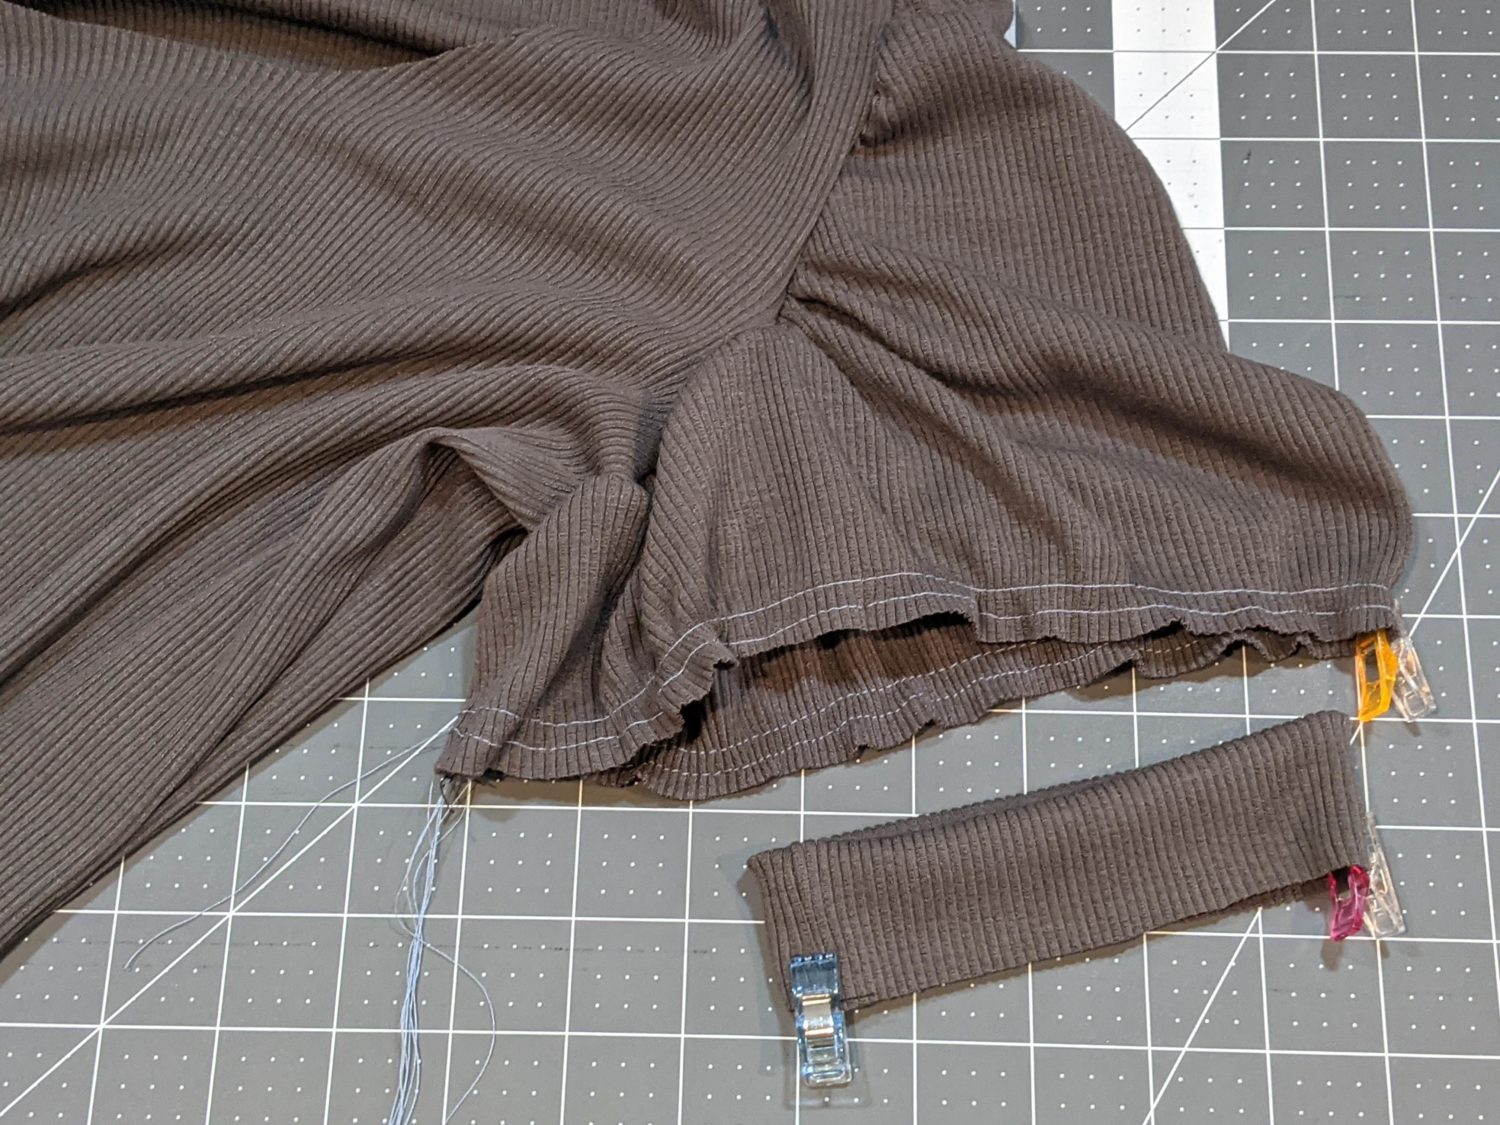
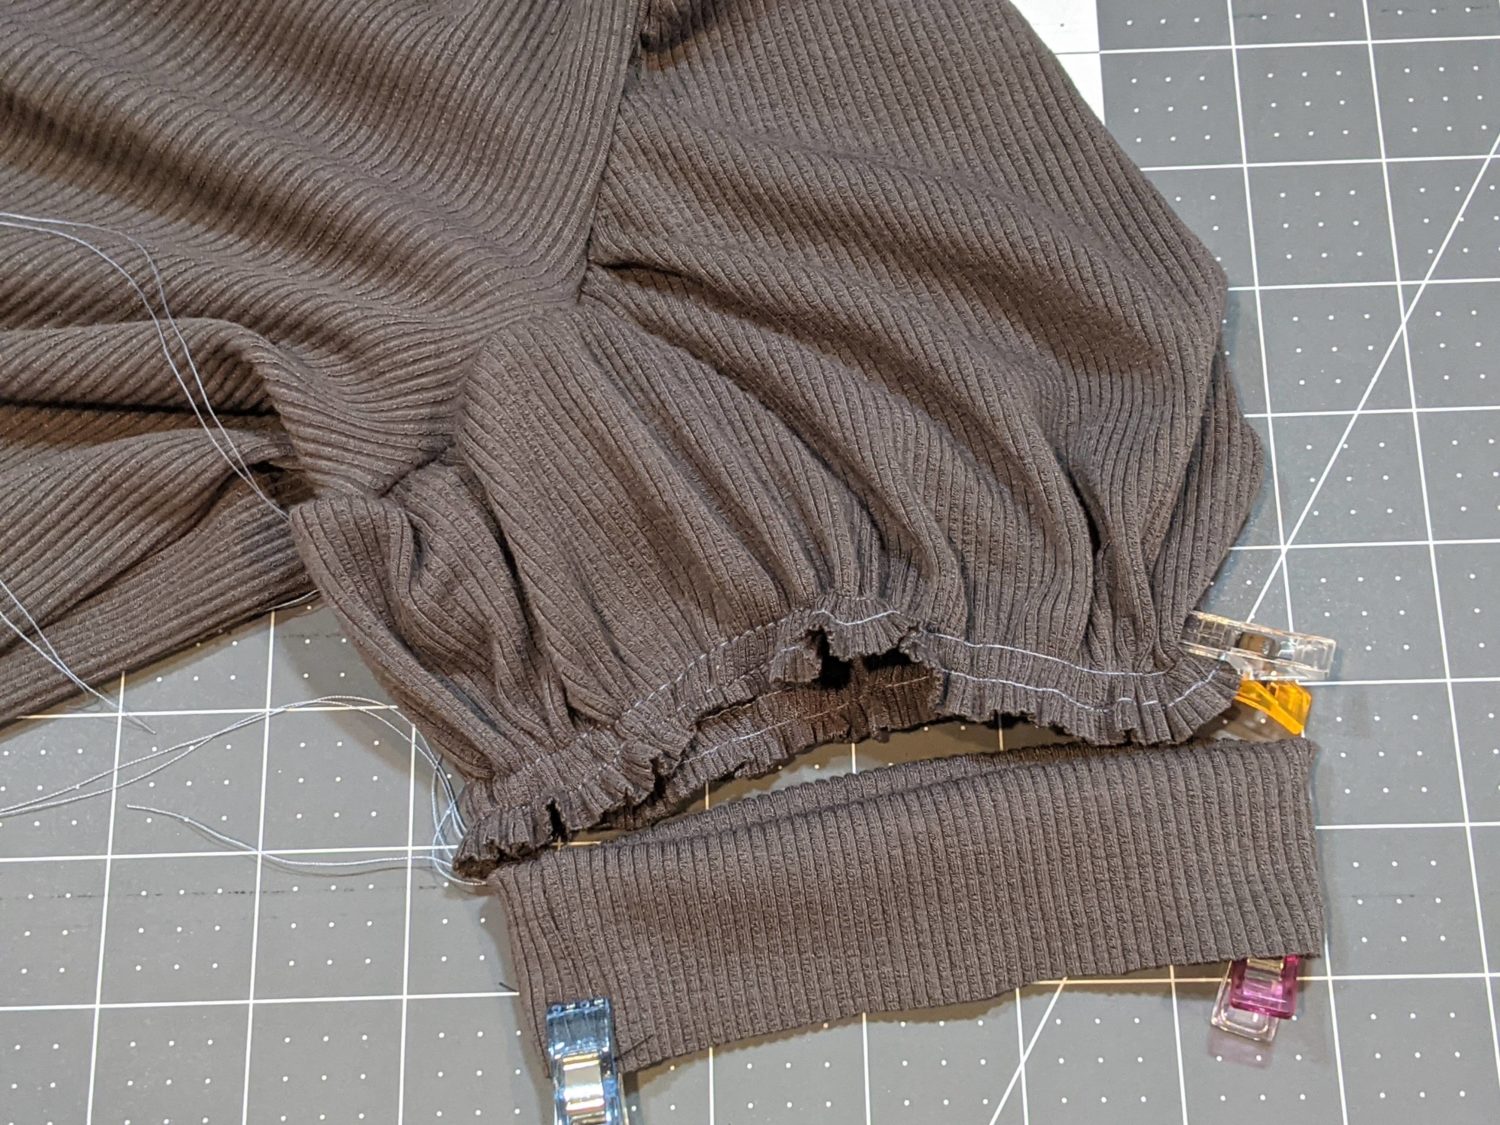
- Lay the band along the sleeve edge then pull the gathering stitches to match the opening to the band length.
- Pin the band and the sleeve at the seams and halfway marks.
- Pin around the rest of the sleeve to keep the gathers from shifting.
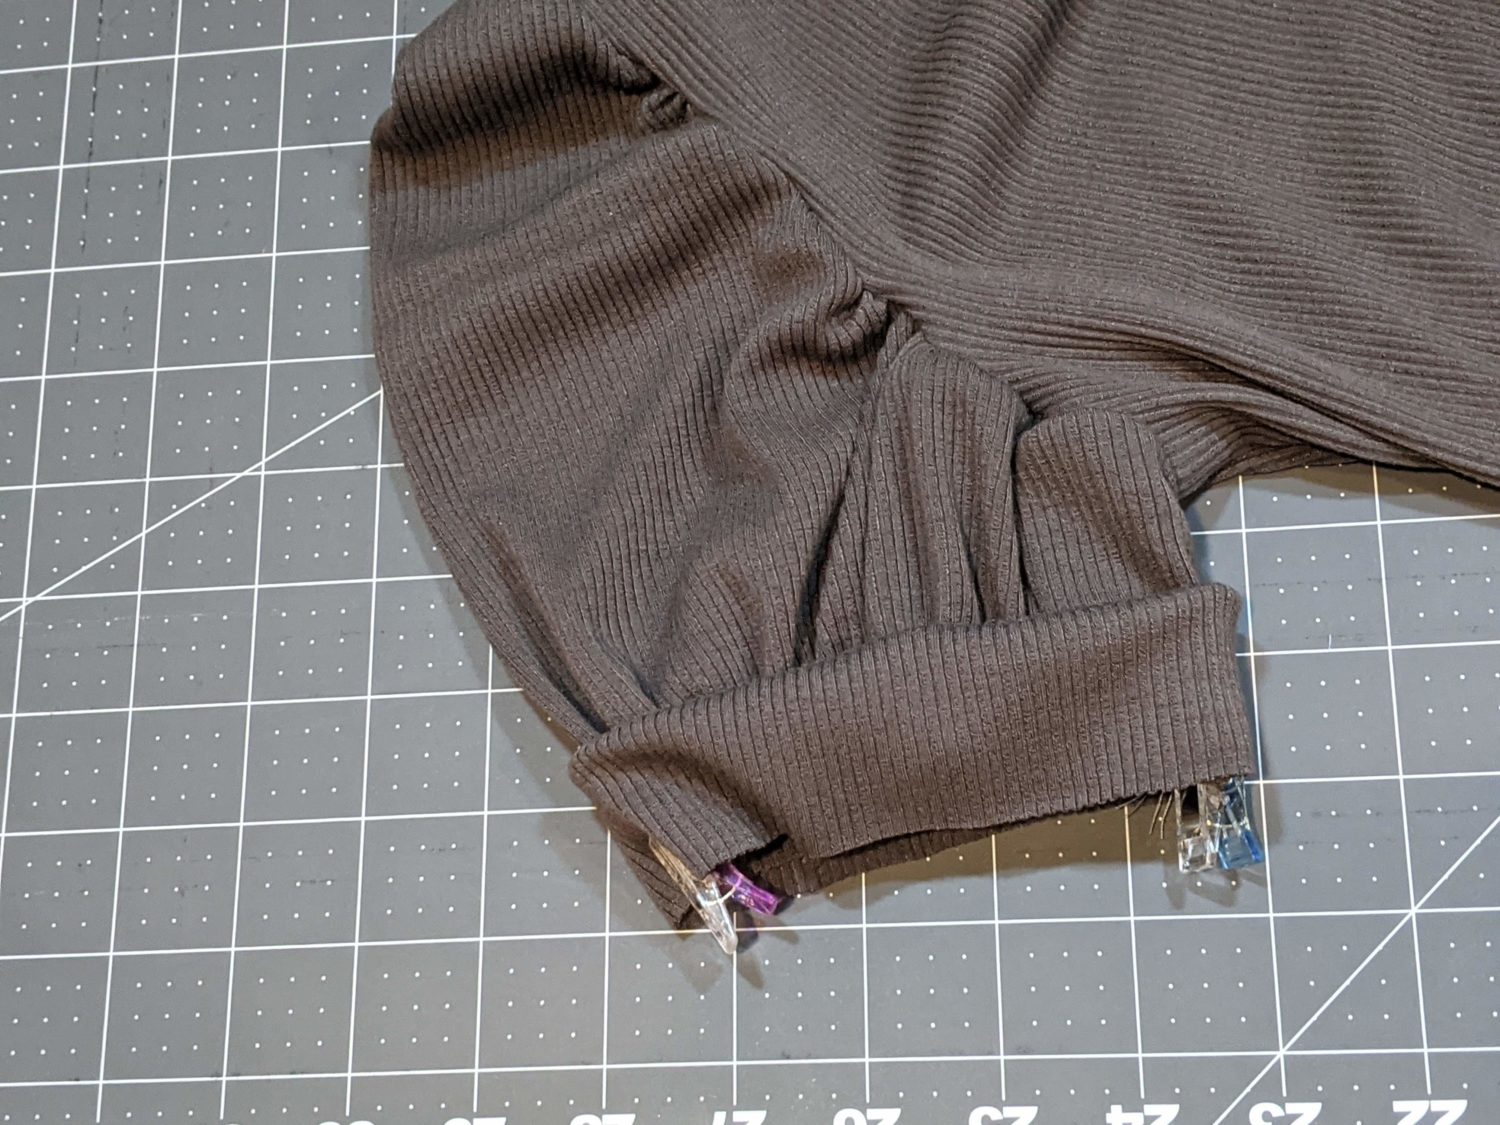
- Sew with a stretch stitch or serger.
- Turn the top right side out and remove any visible basting stitches.
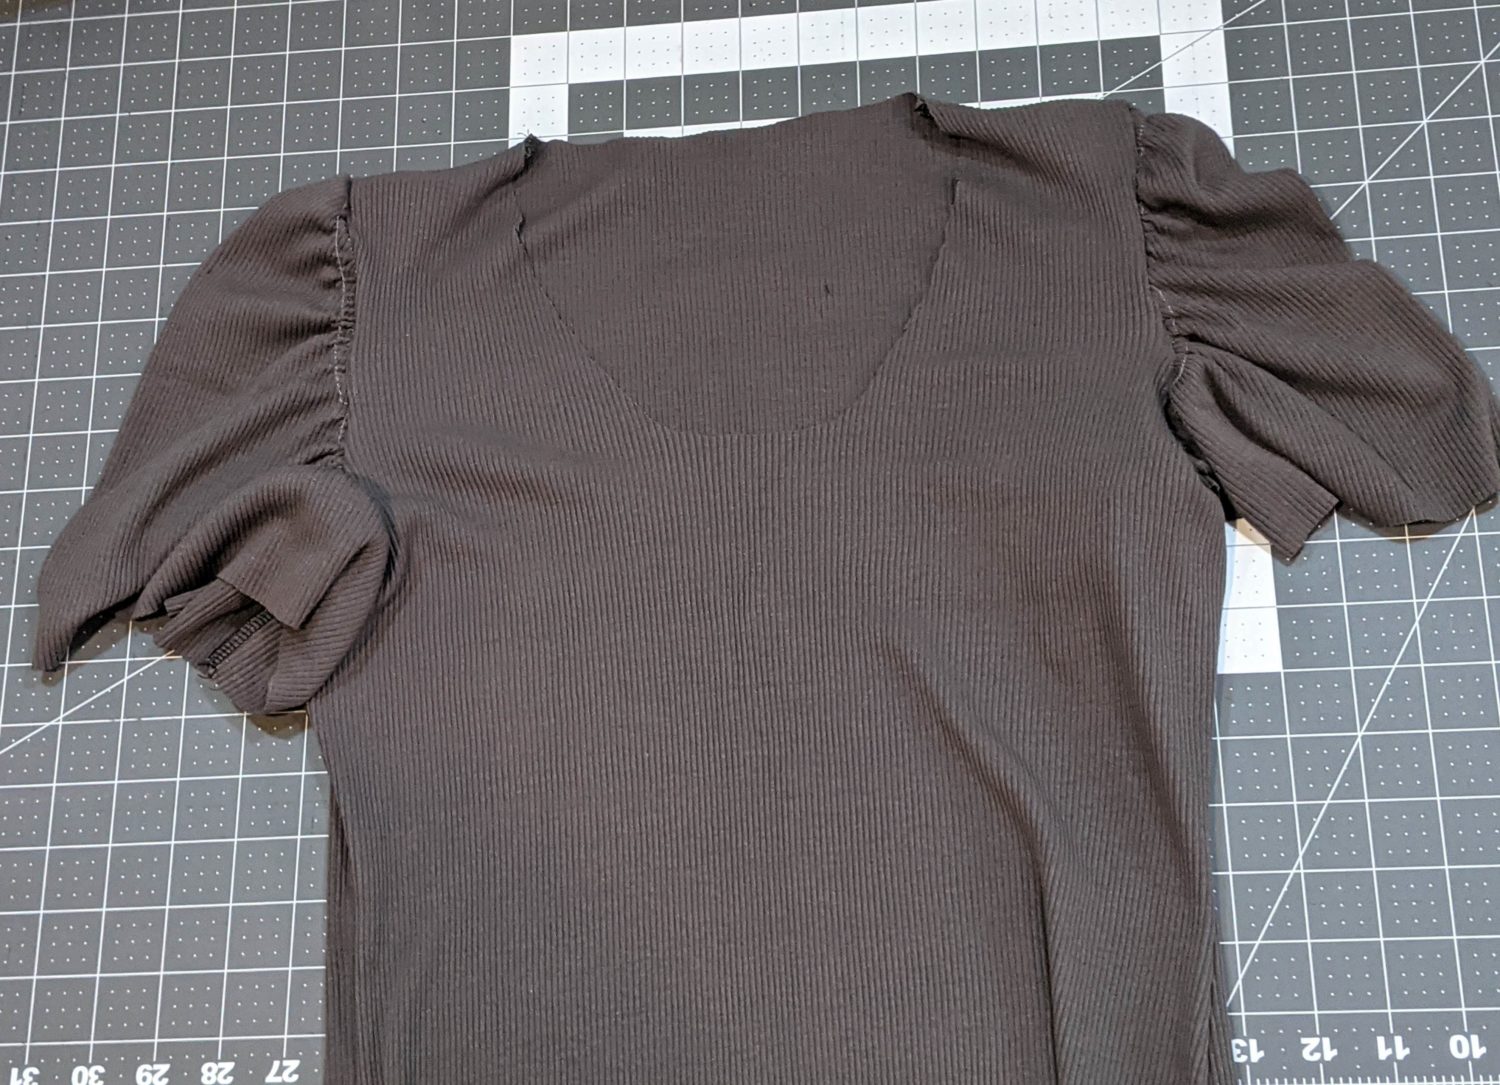
- Finish sewing any remaining pieces per the tutorial.
Look how cute those super duper puffy sleeves are!

Want more FUN DIY Freebies? Check out the FREEBIE TUTORIALS and the FREEBIE PATTERNS!
As always, we’re here to help if you need it! Join us HERE and on Facebook, Instagram, Twitter, Youtube, and Pinterest. We’re everywhere you are.
I’m getting ready to make my first Wanda and I’m going to give this a try. So exciting. Thank you for sharing and making the directions easy to follow.