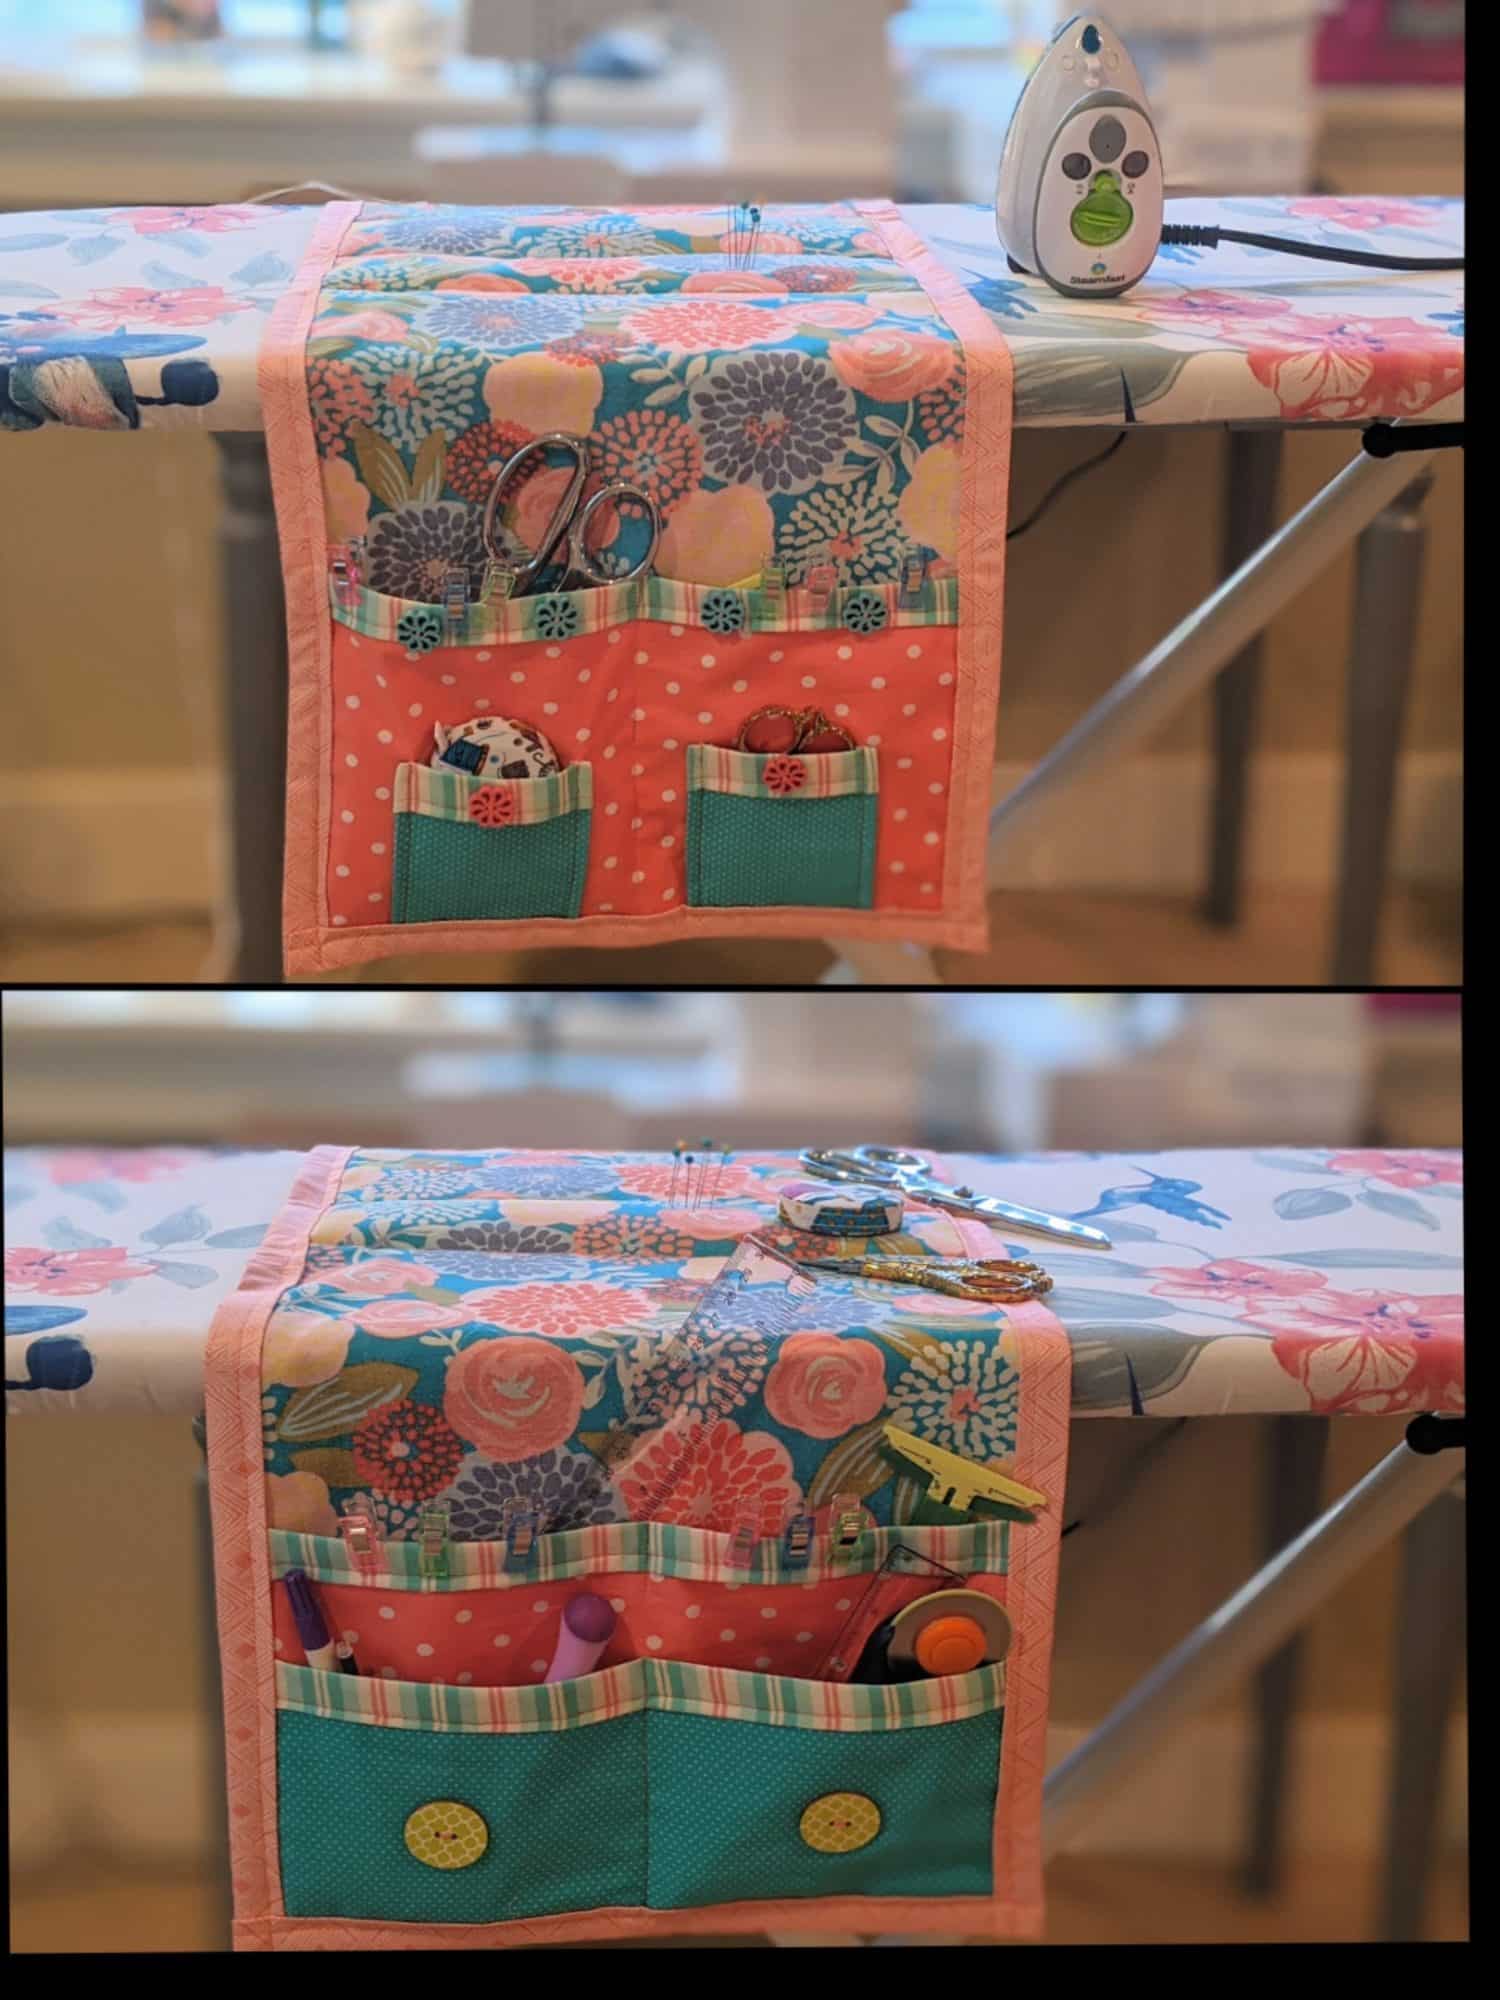
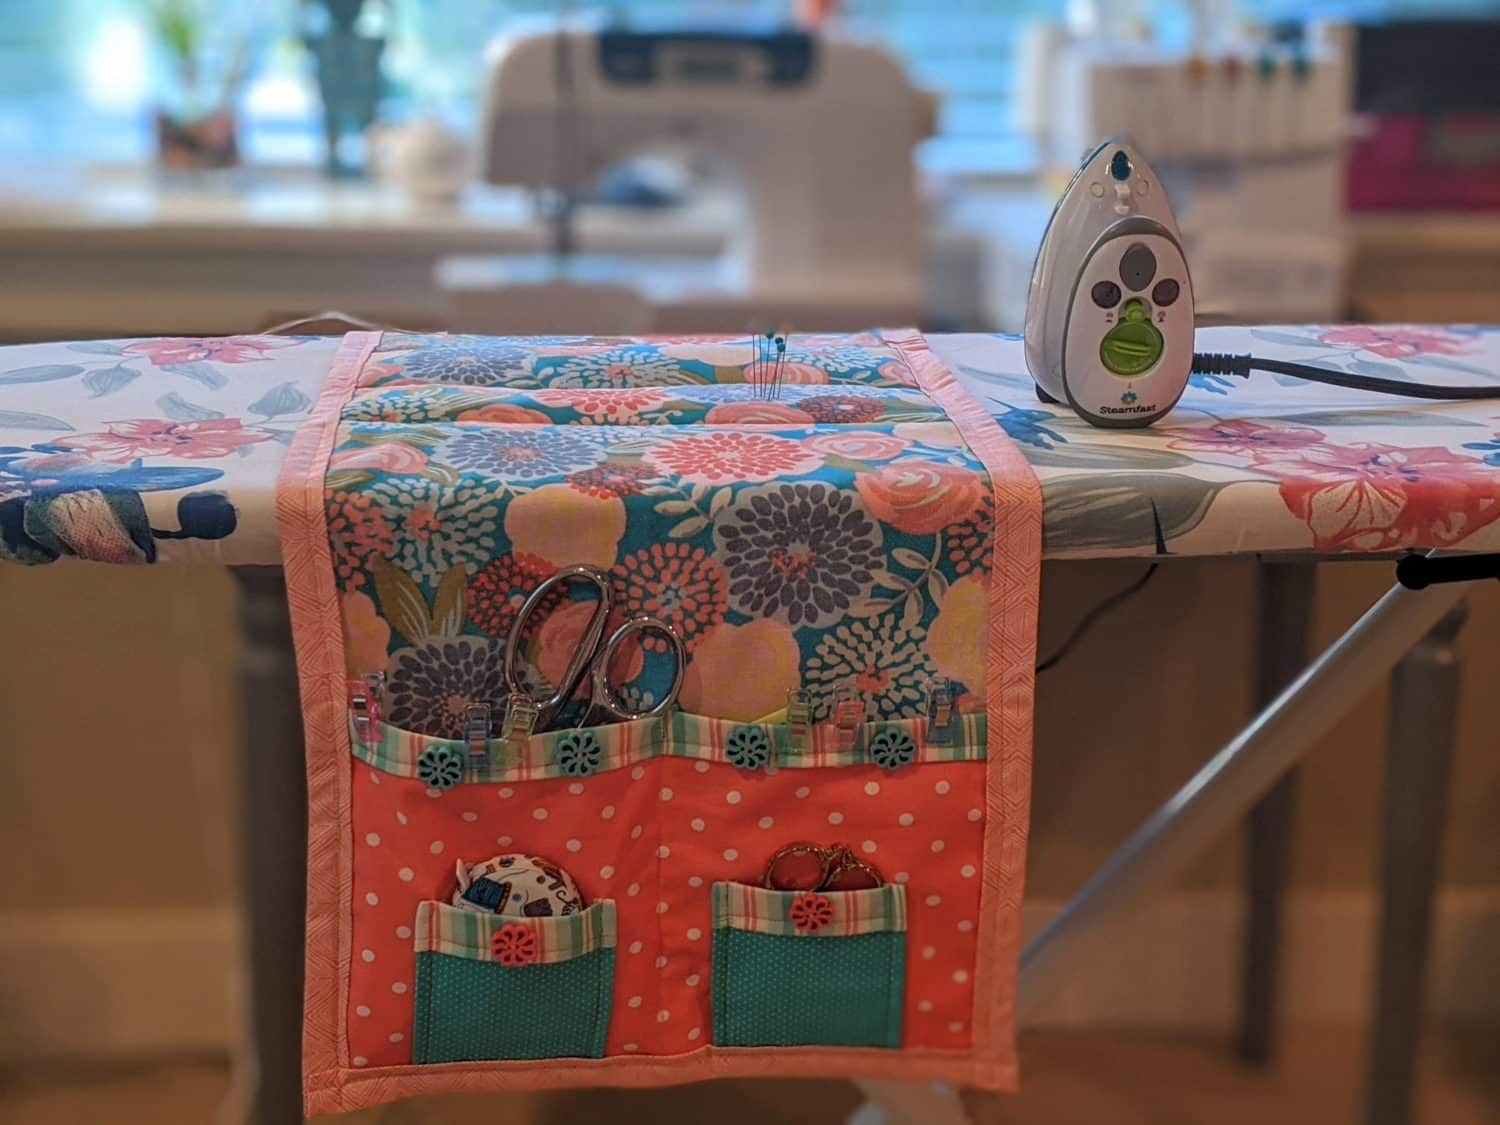
This summer I worked on cleaning out and reorganizing my sewing room to make it easier to share the space with my husband who has been working from home. It’s been a slow process. Now that it’s mostly cleaned out, I wanted to make a few things to make it a little more organized and pretty. This week I made an organizer for my ironing board. It has a lot of pockets to hold all the things, the middle section can be used as a pincushion, and I think it’s pretty cute. I’ll take you step by step to show you how you can recreate this on your own.
Organizer Materials Needed:
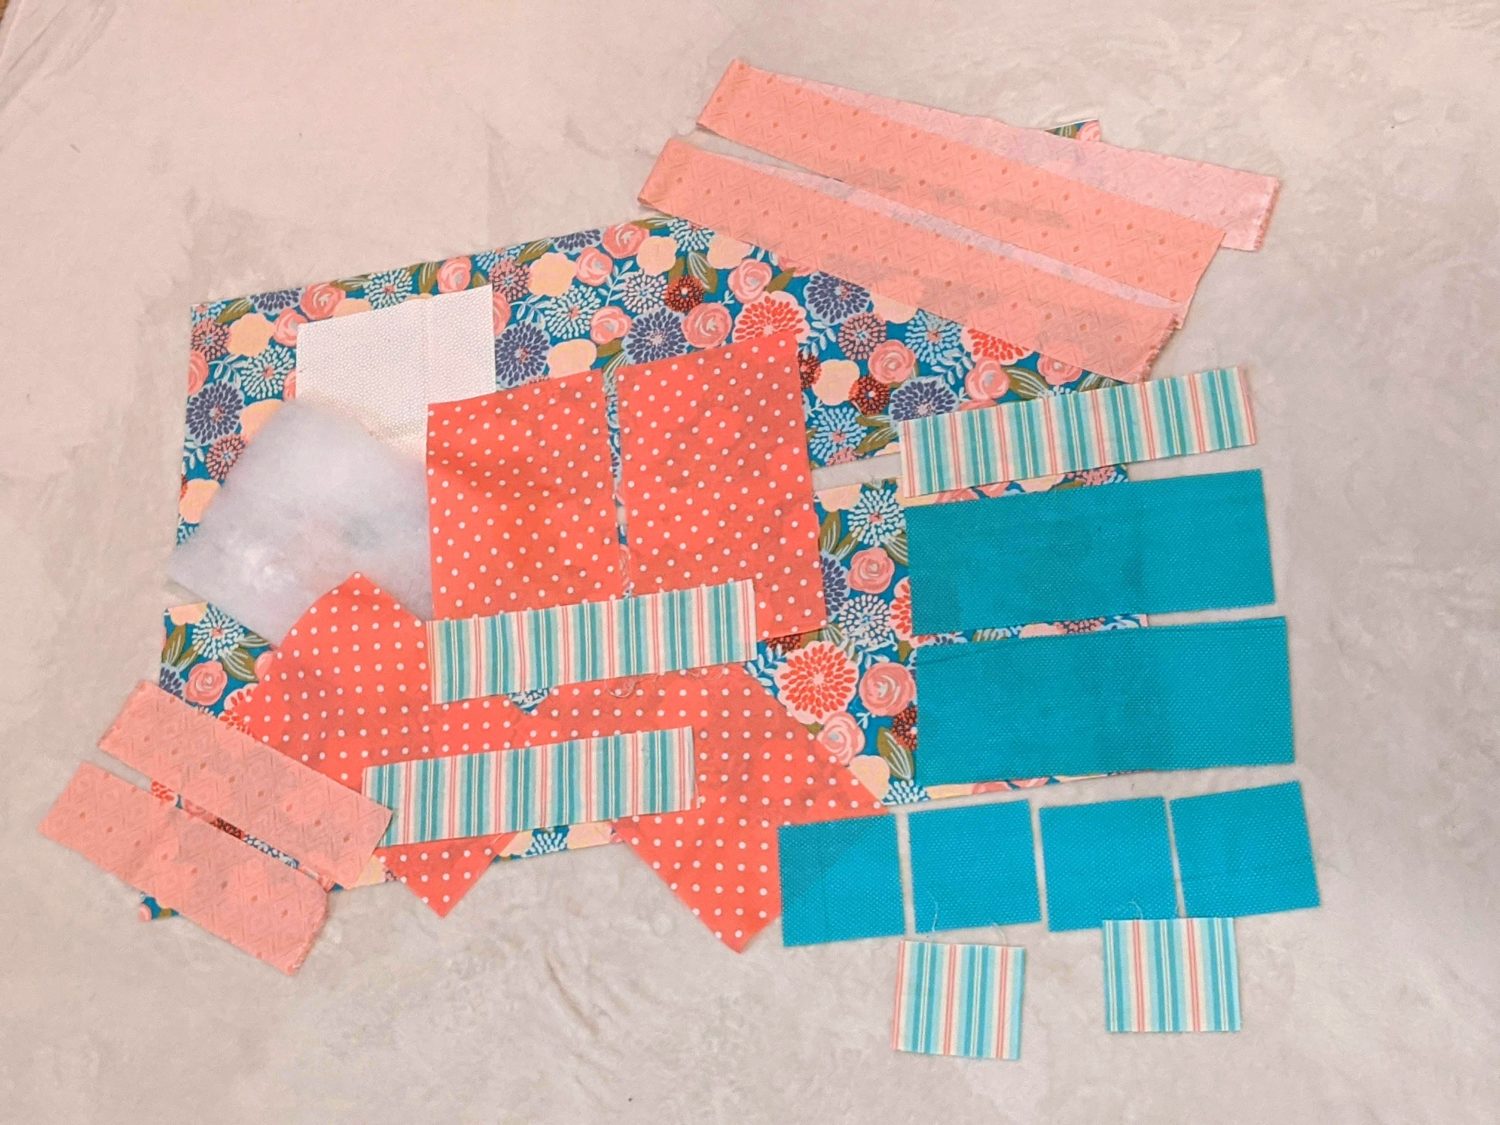
- Woven fabric in coordinating colors (I used quilters cotton)
- Coordinating thread
- Sewing machine
- Iron
- Quilt batting
- Gripper fabric or non-slip pad
- Optional: fusible interfacing if you don’t think your fabric will be sturdy enough
- Optional: Buttons or other embellishments
Cutting Your Organizer Pieces:
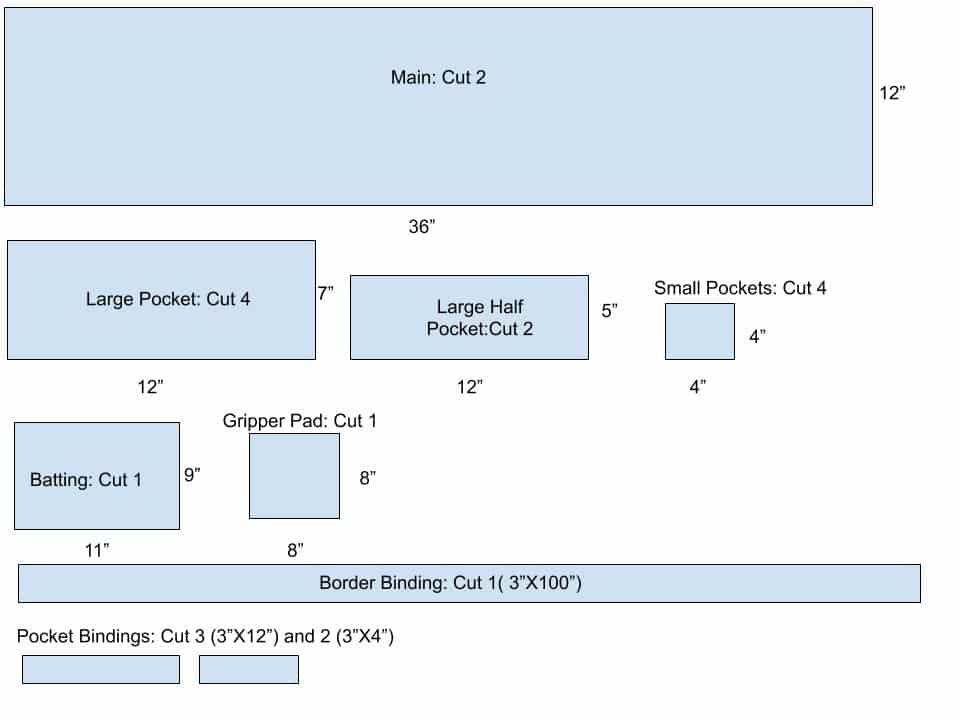
You will need to cut the following pieces to make the same design as what I made. You may also choose to do different size, height, or number of pockets. Adjust your pocket pieces accordingly.
- Main fabric: (2) 36″X12″
- Large pockets: (4) 7″X12″
- Large half pocket: (2) 5″X12″
- Small pockets: (4) 4″X4″
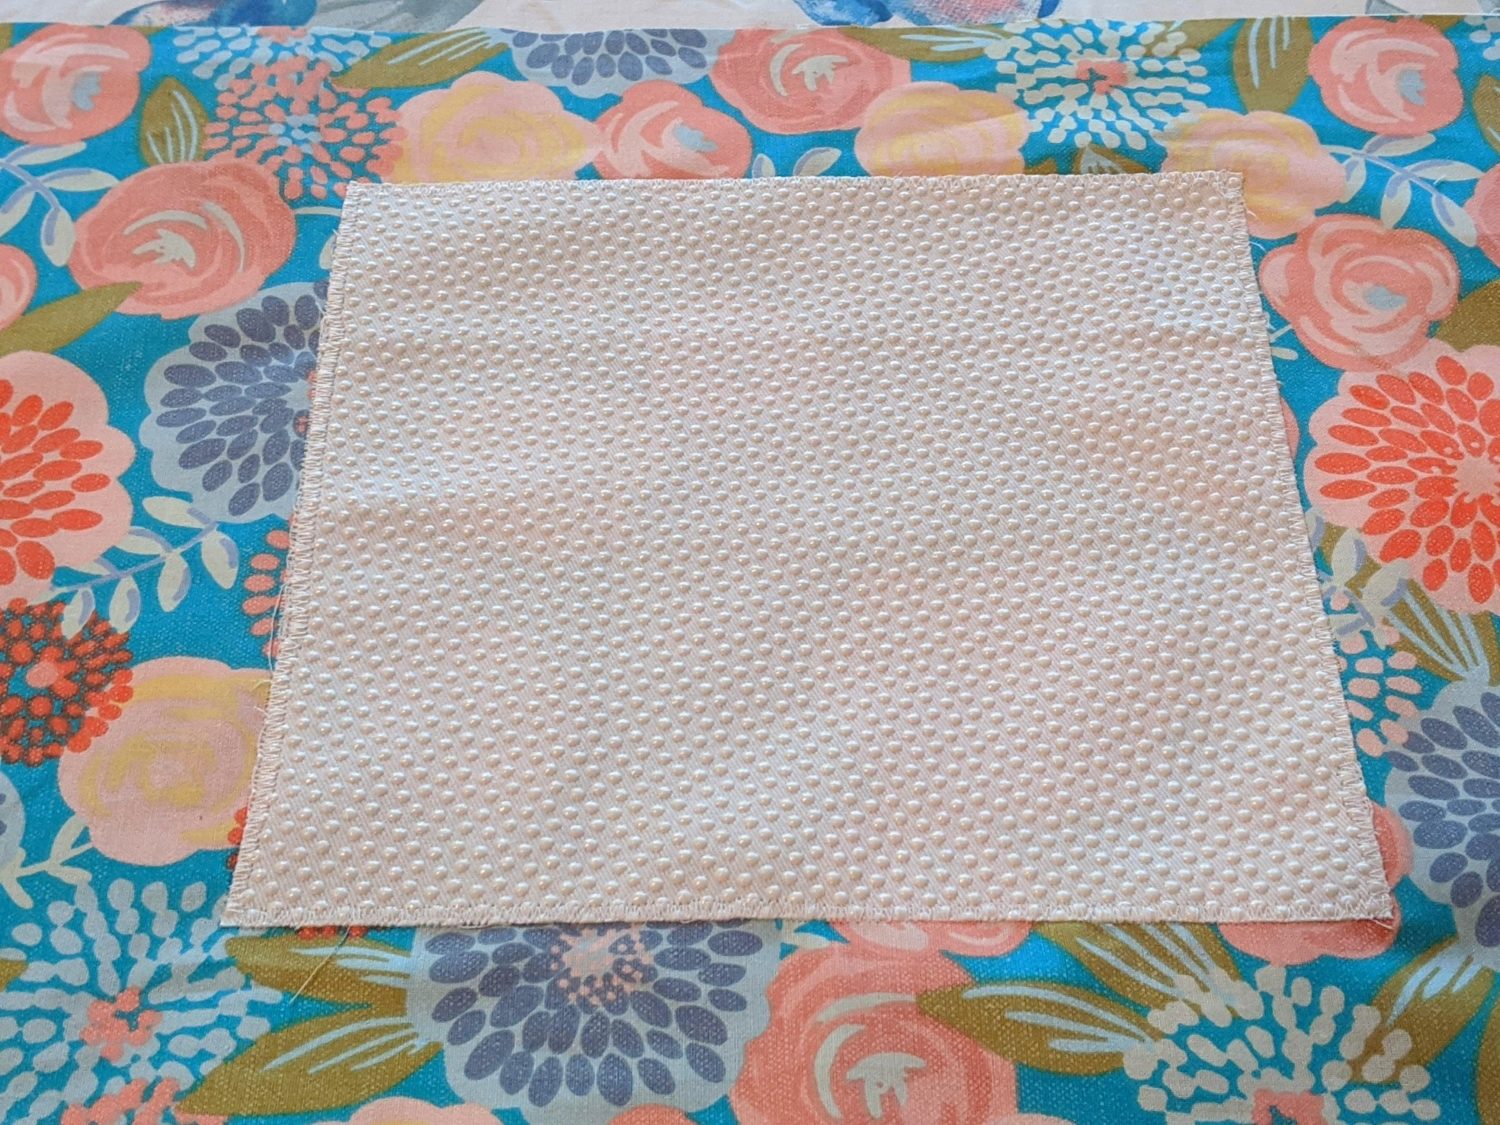
- Gripper fabric: (1) 8″X8″
- Quilt batting: (1) 11″X9″
- Binding pieces:
- Pockets: (3) 3″X12″ and (2) 3″X4″
- Perimeter: (1) 3″X100″ (You can cut this into smaller sections and sew ends together. This is a little longer than what you’ll need, but I like to give myself some wiggle room)
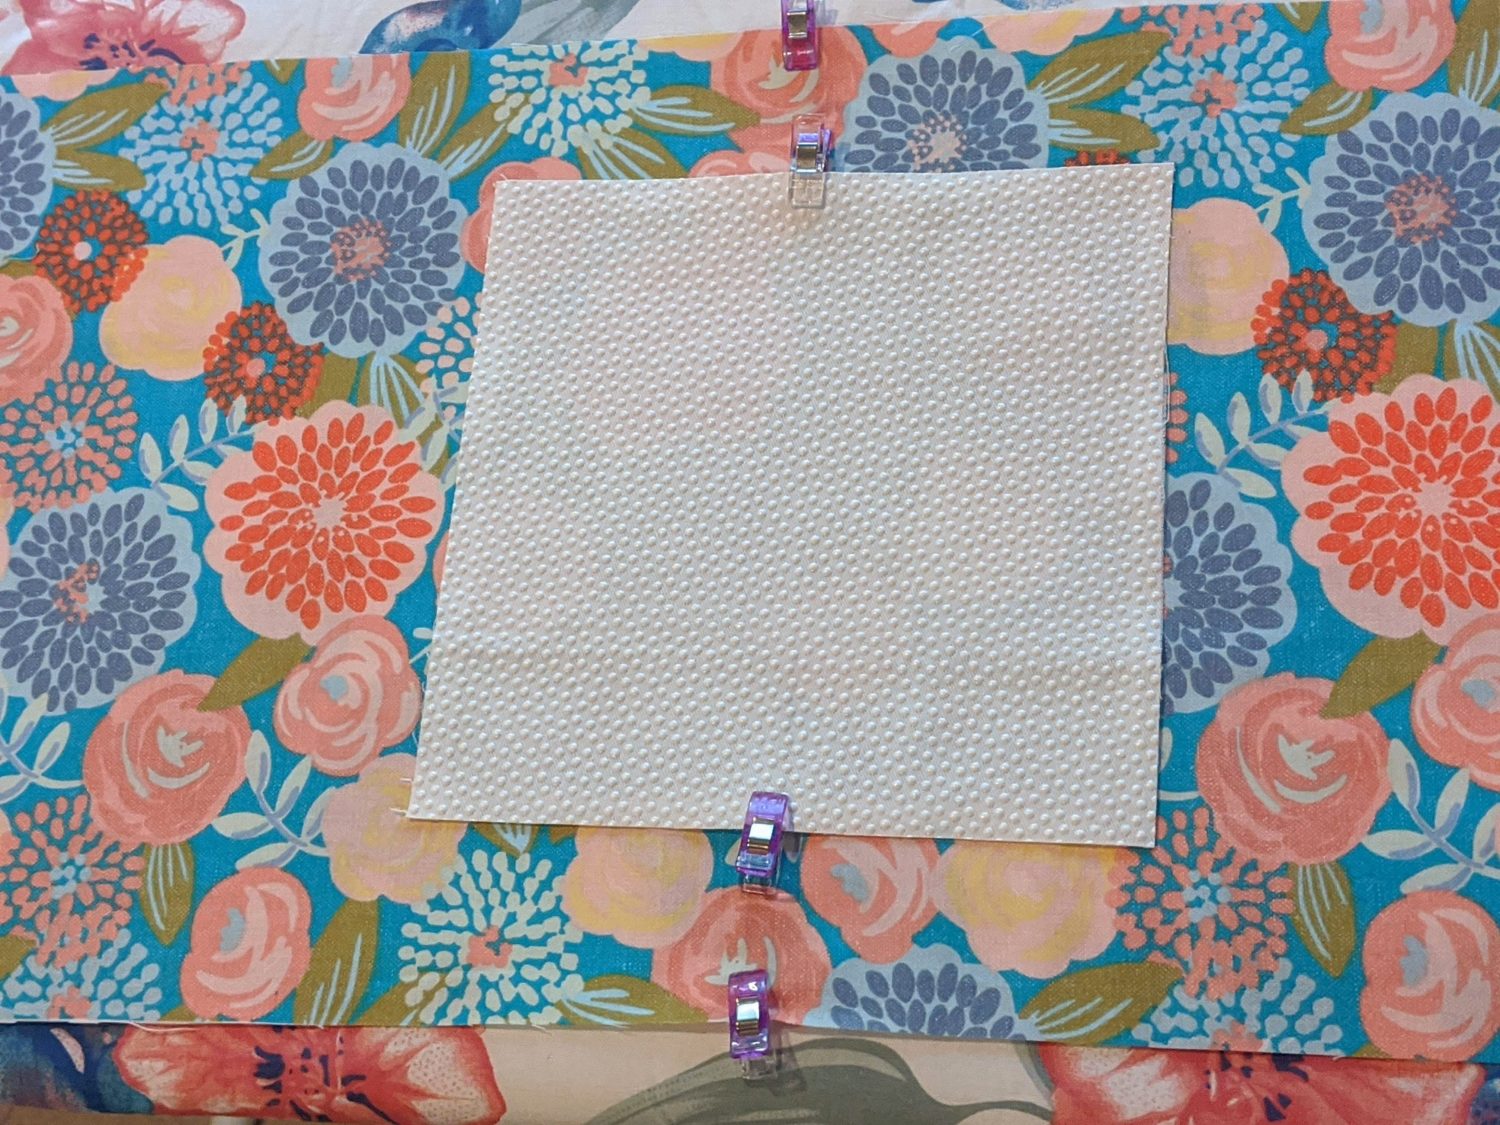
Starting With the Back:
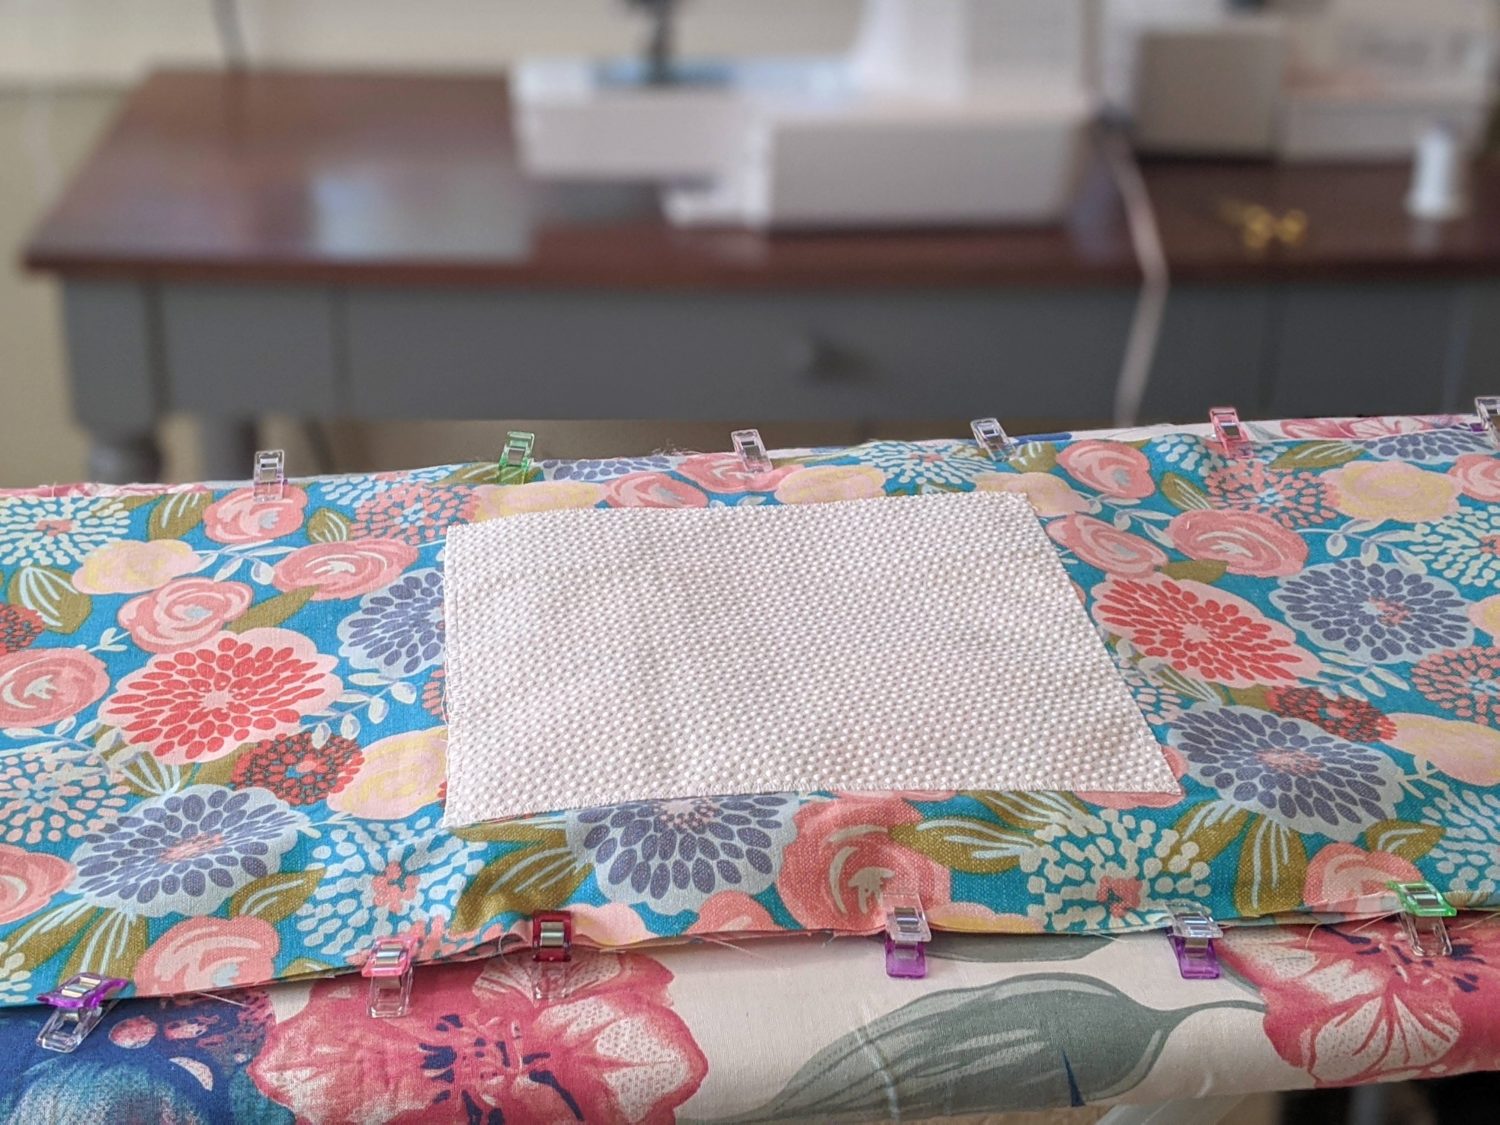
- Take your main fabric back piece and your gripper fabric pieces and find the center of each and mark
- Line up the marked centers of your two pieces with both sides facing up, and your gripper fabric on top
- Pin the gripper fabric on and sew around the edge
Onto the Front
Creating the pockets:
- Taking two of each of the pocket pieces, stack them wrong sides together (You will end up with 2 large pockets, 1 large half pocket, and 2 small square pockets)
- If you are choosing to put in fusible interfacing, you will do that before stacking your pocket pieces
- Pin and baste around the edges of each pocket
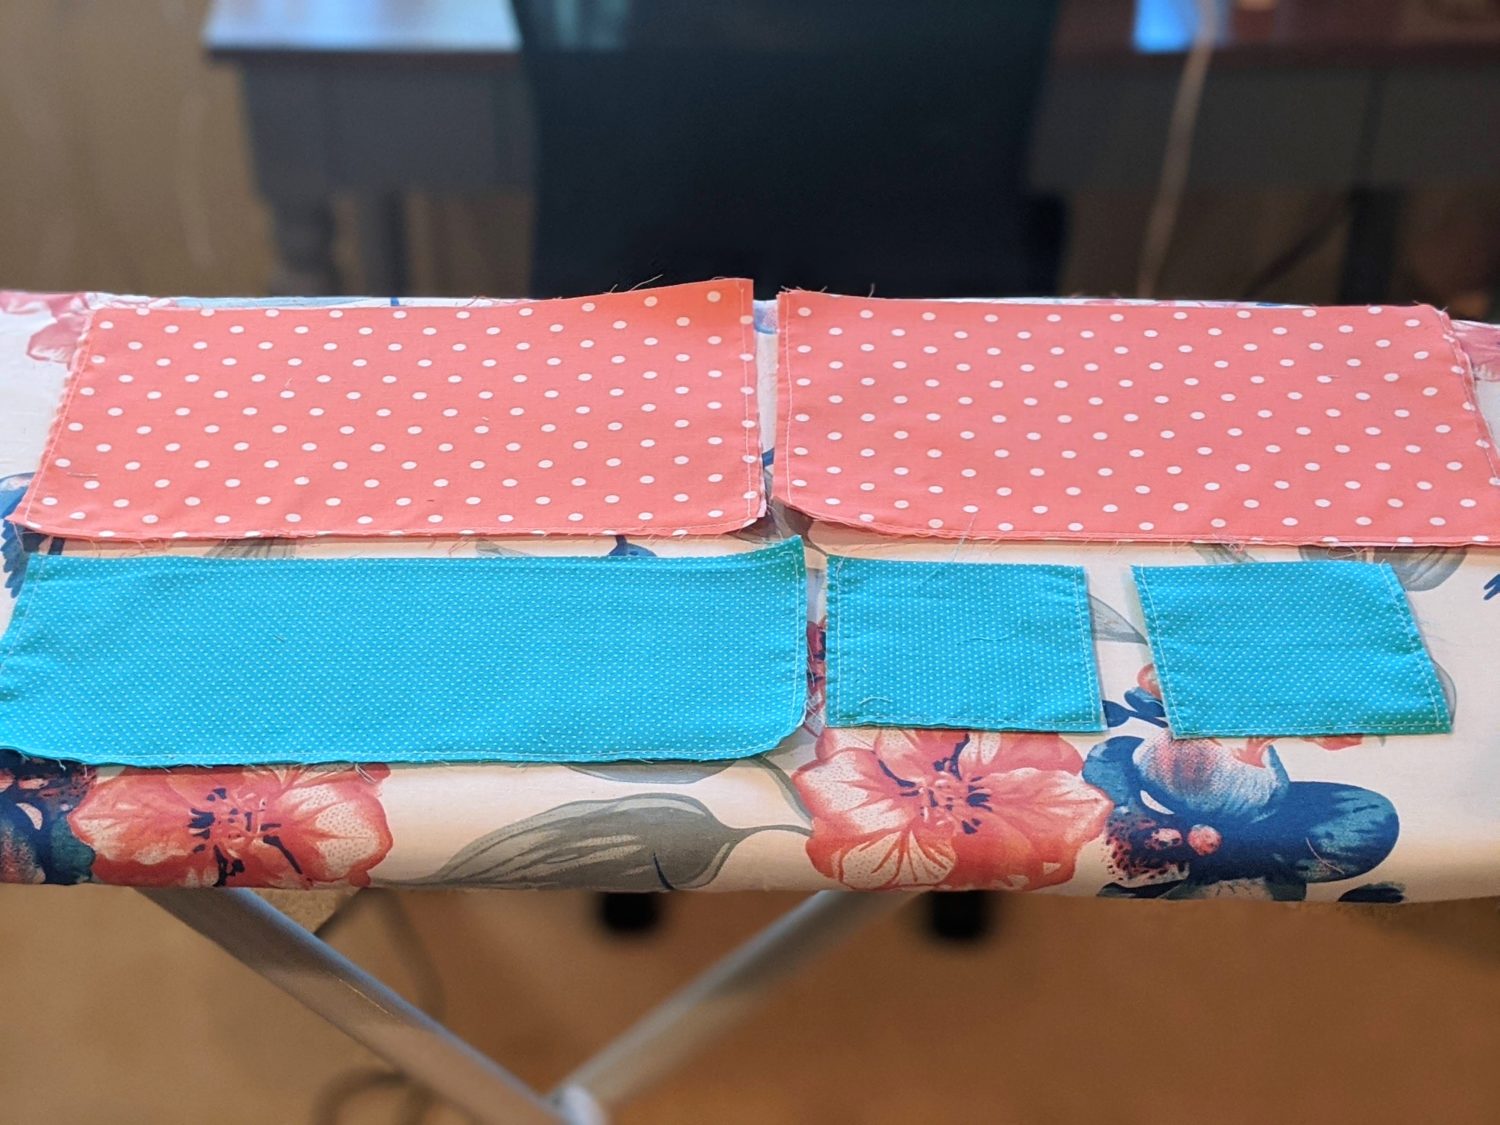
Creating the pocket binding:
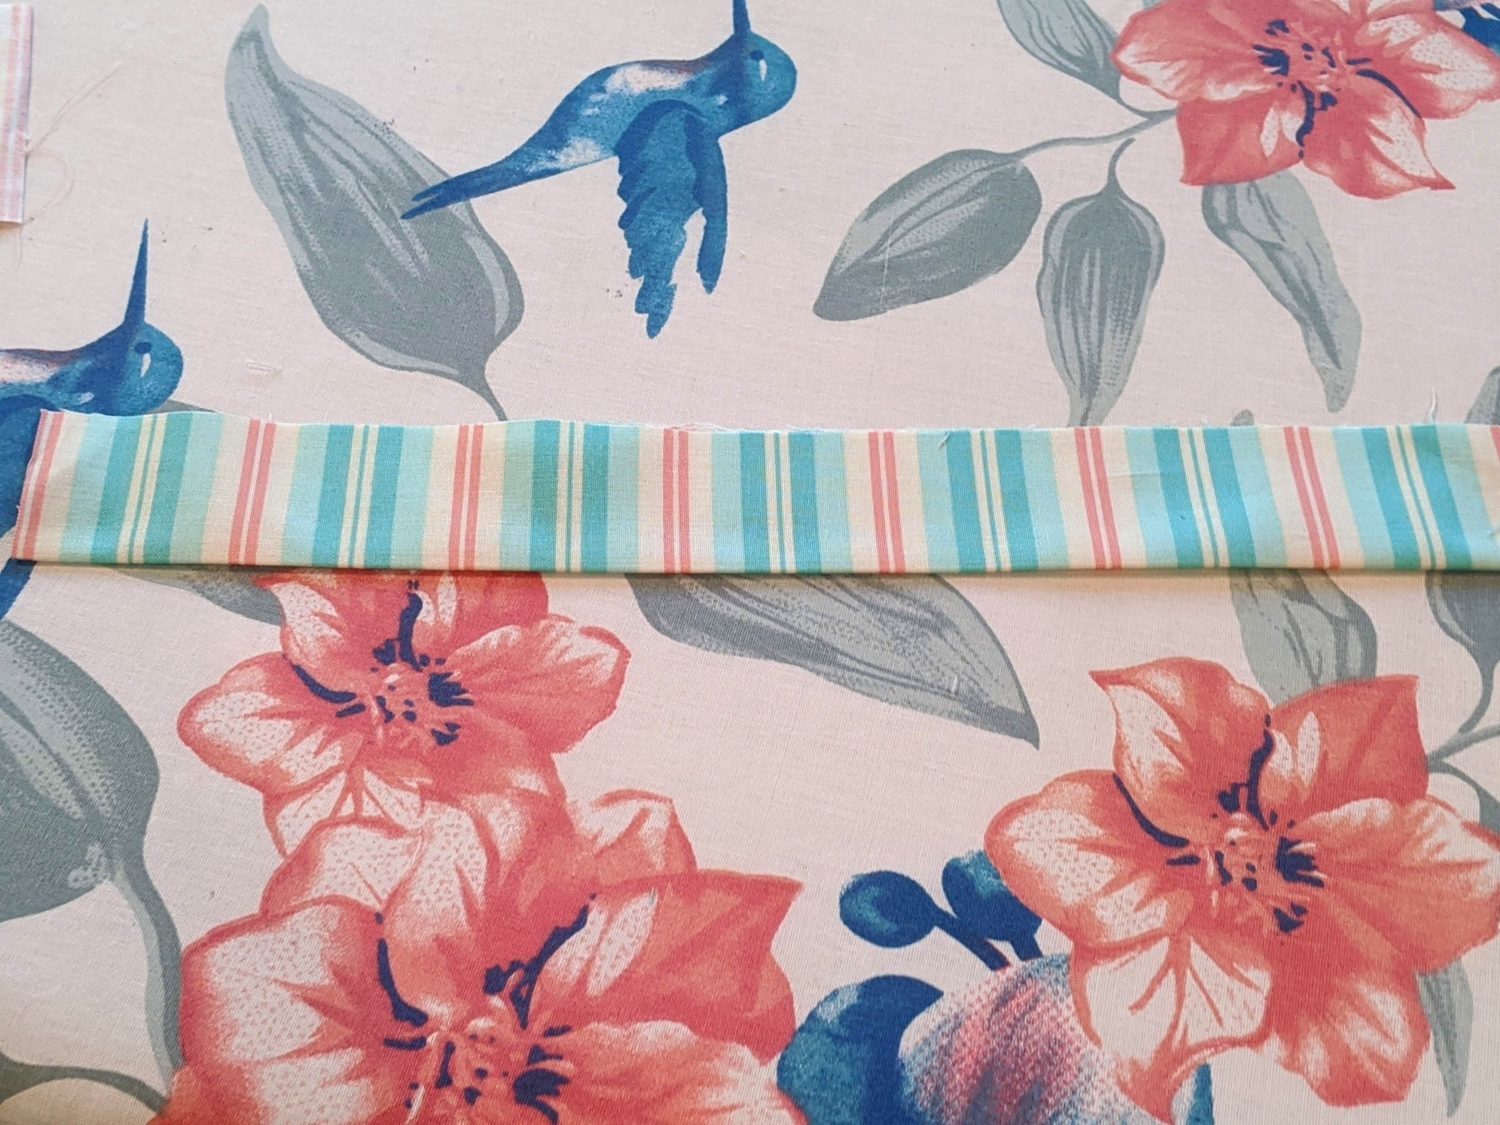
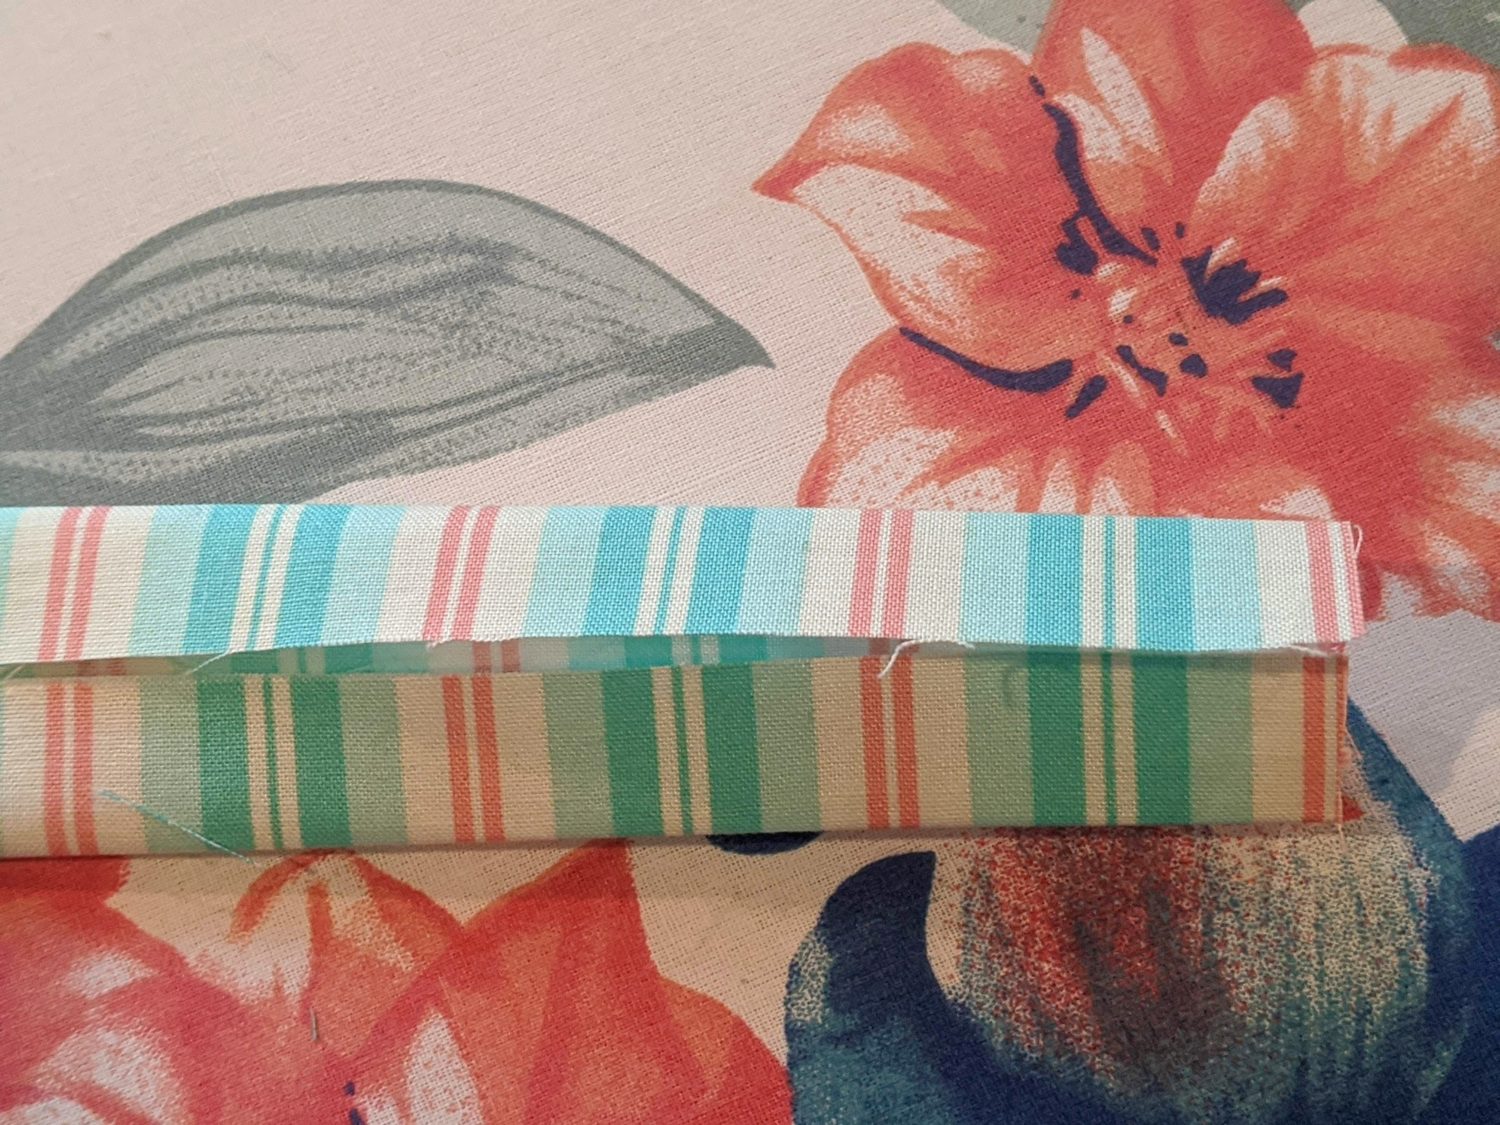
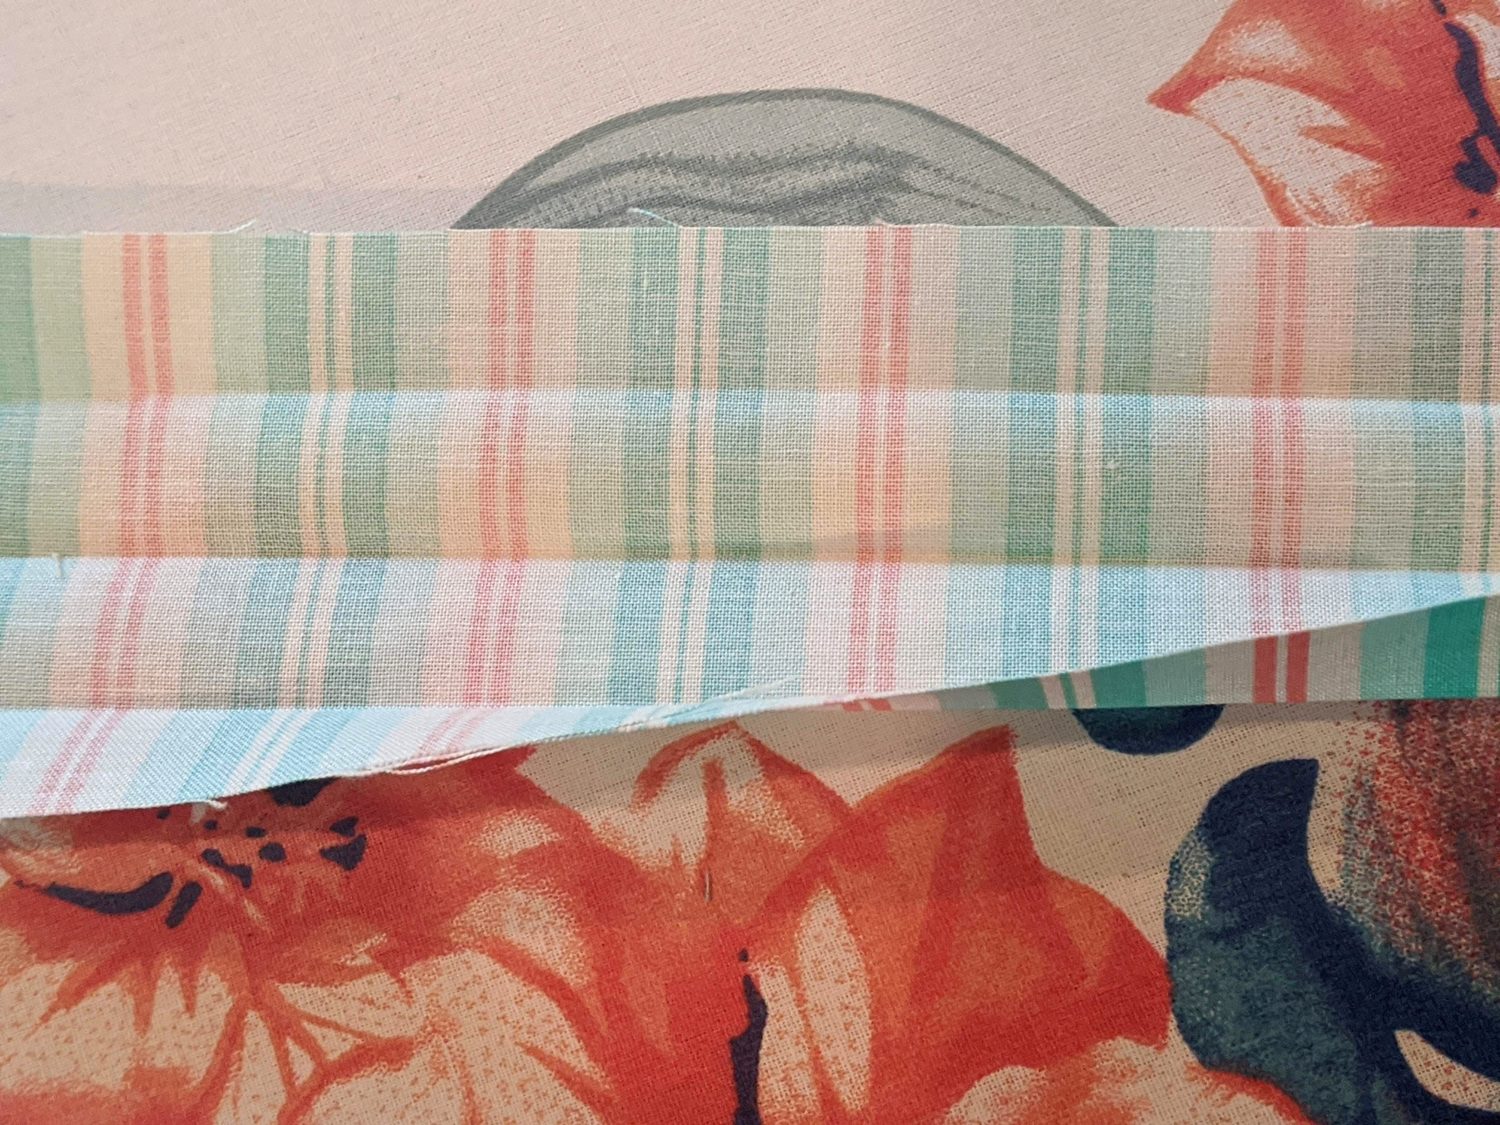
- Take one of your binding pieces and fold it in half hot dog way and press
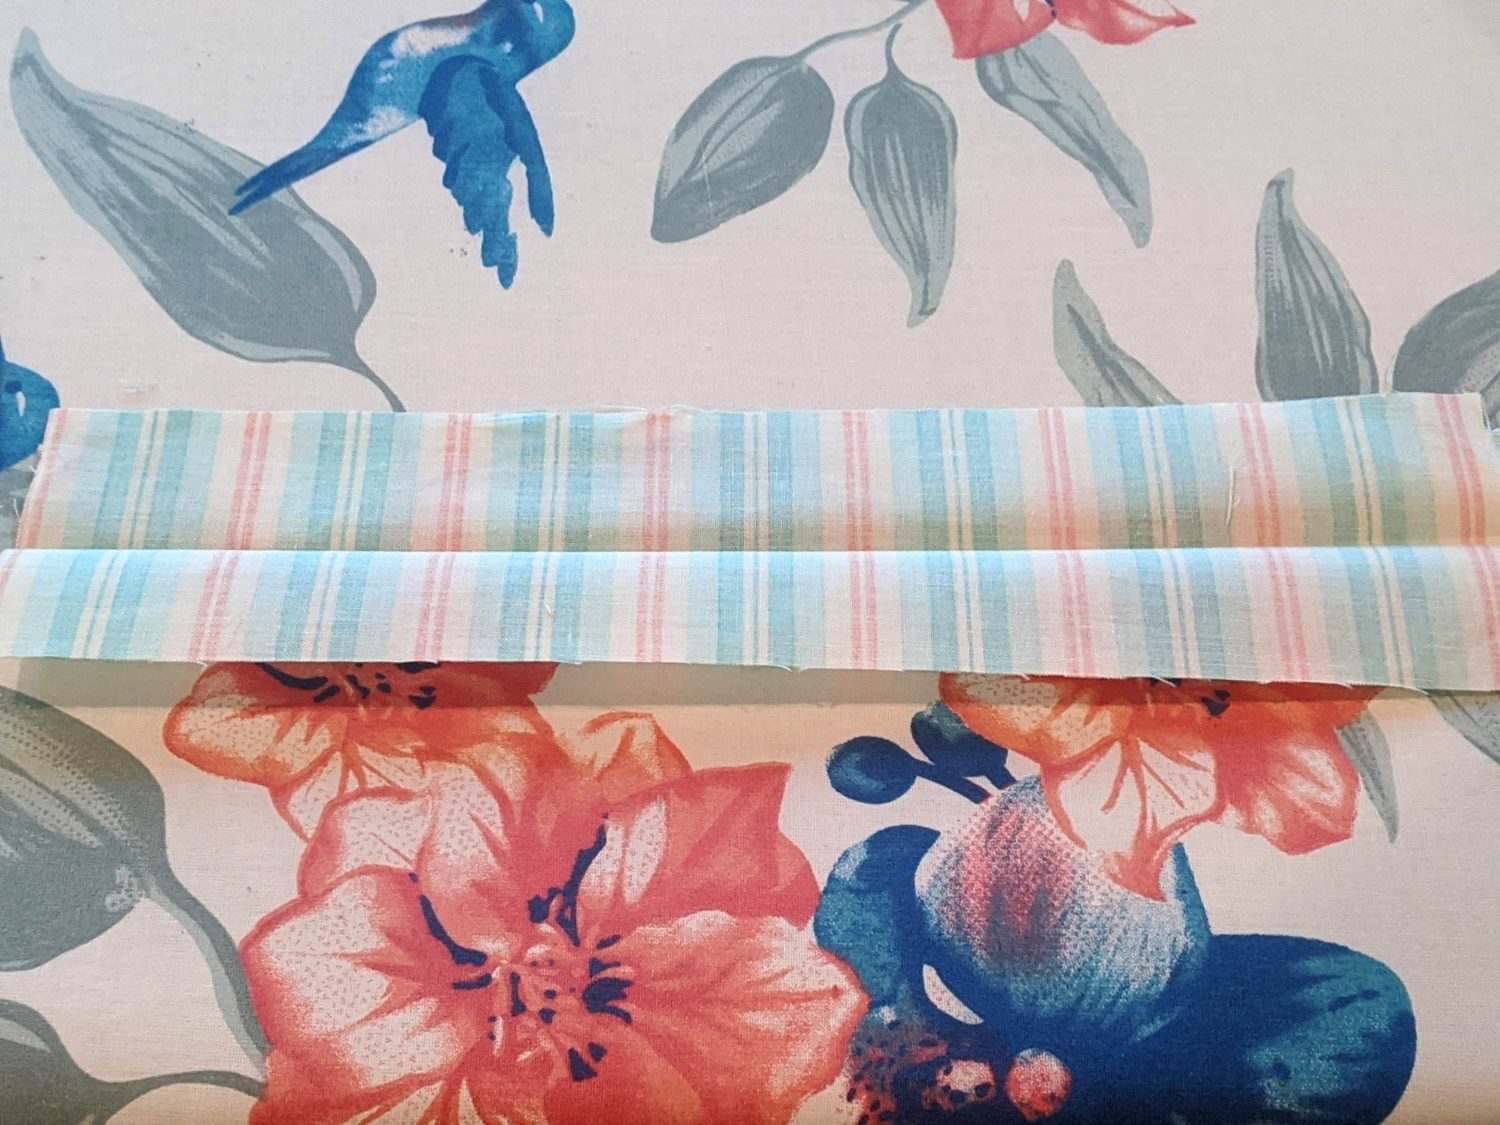
- Open it up, and fold each side in towards the middle fold line and press
- Refold down the center with both sides still folded in towards the center and press
- Repeat the same steps for all your pocket binding
Attaching the Binding:
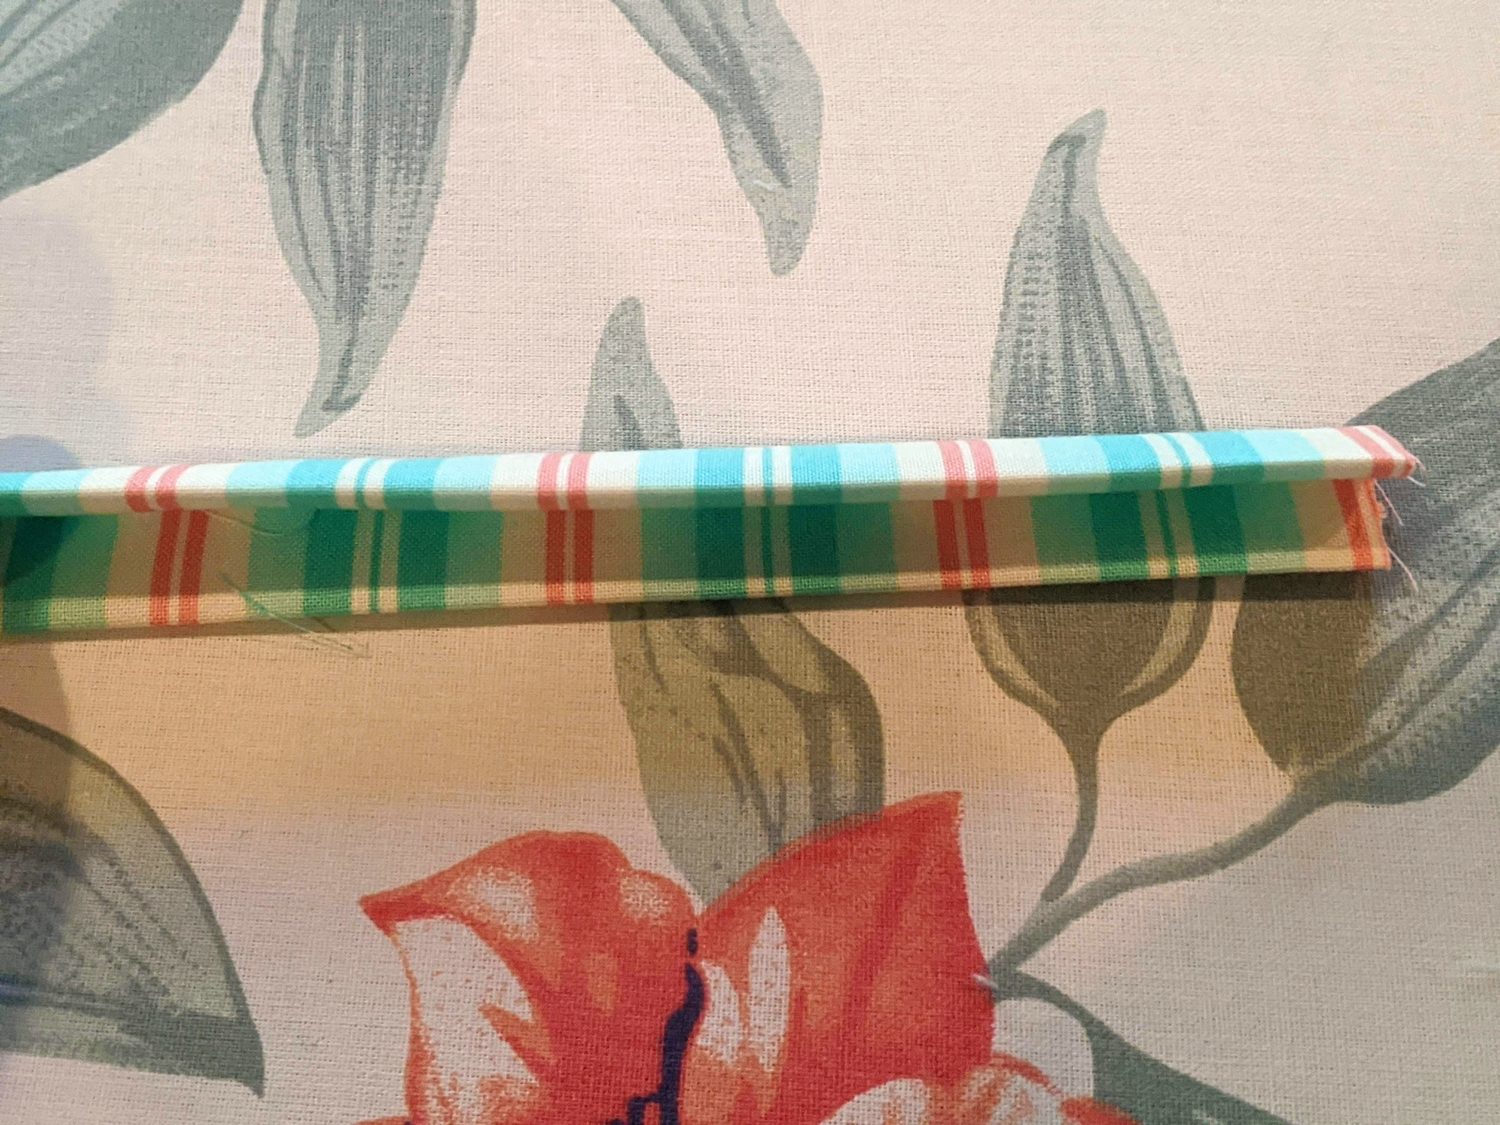
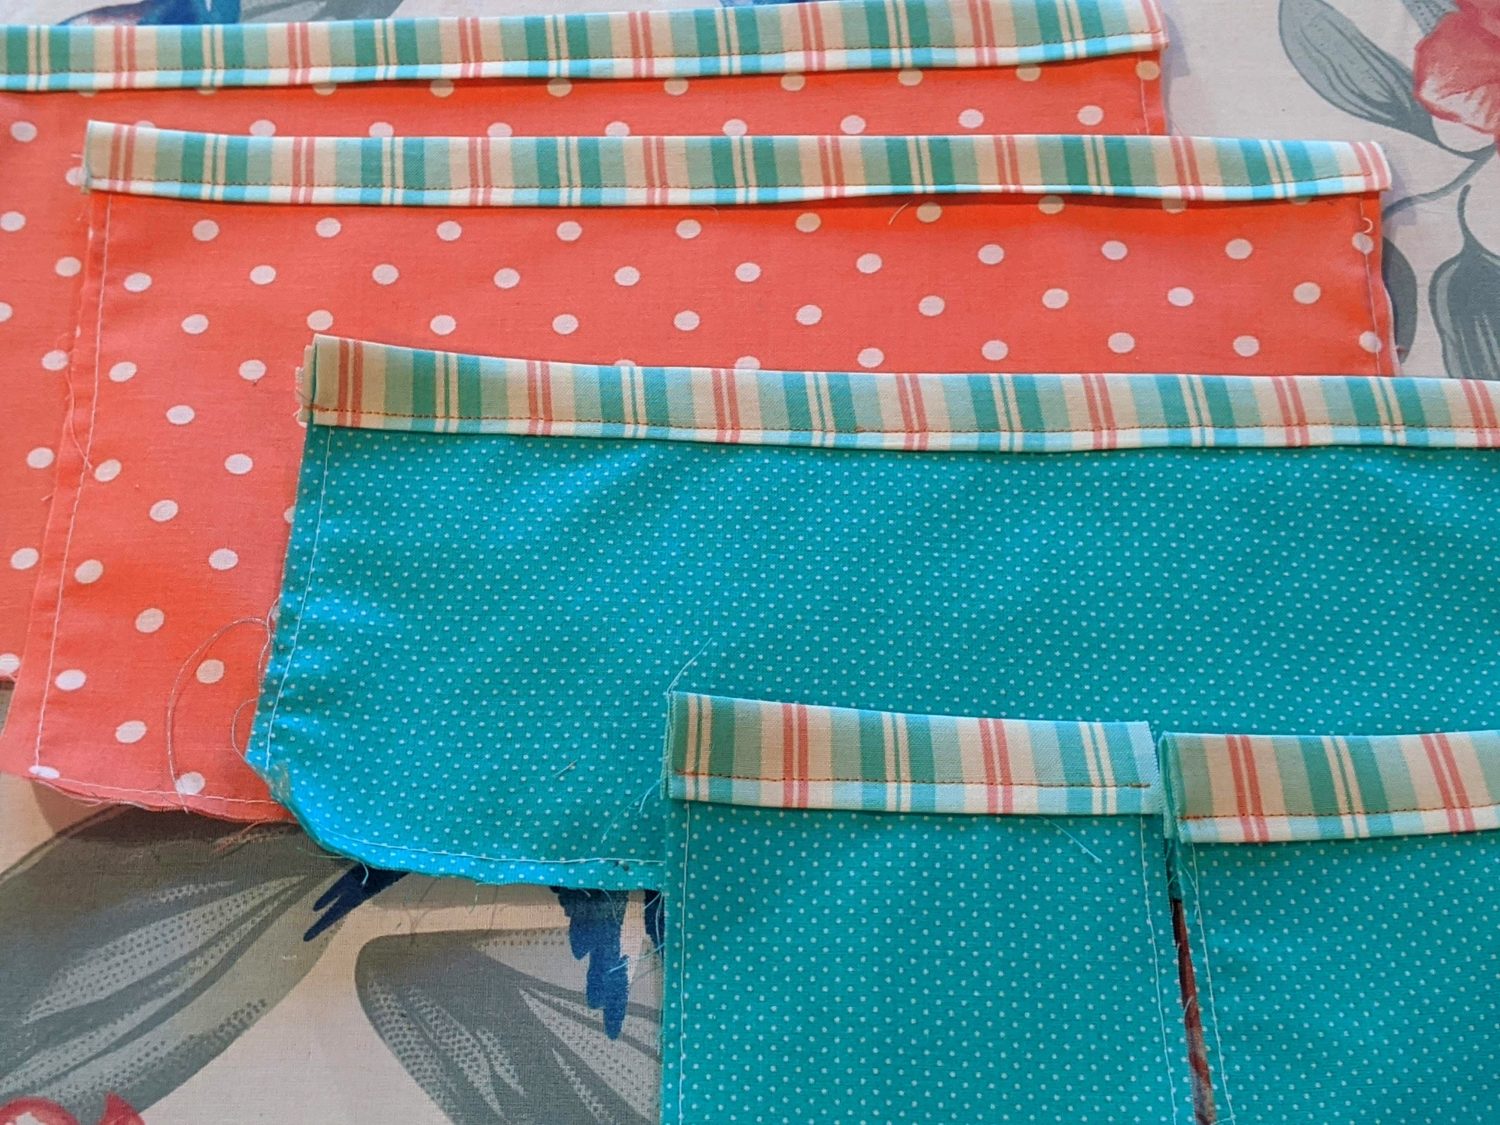
- Take one pocket and it’s matching biding piece, sandwich the top edge of your pocket between the fold in your binding
- Clip binding in place and topstitch near the bottom edge of the binding
- Repeat binding steps for all pockets
Continuing the Pocket Prep
- Take your two square pocket pieces, and using wonder tape, fold the two vertical sides to the back 1/8″
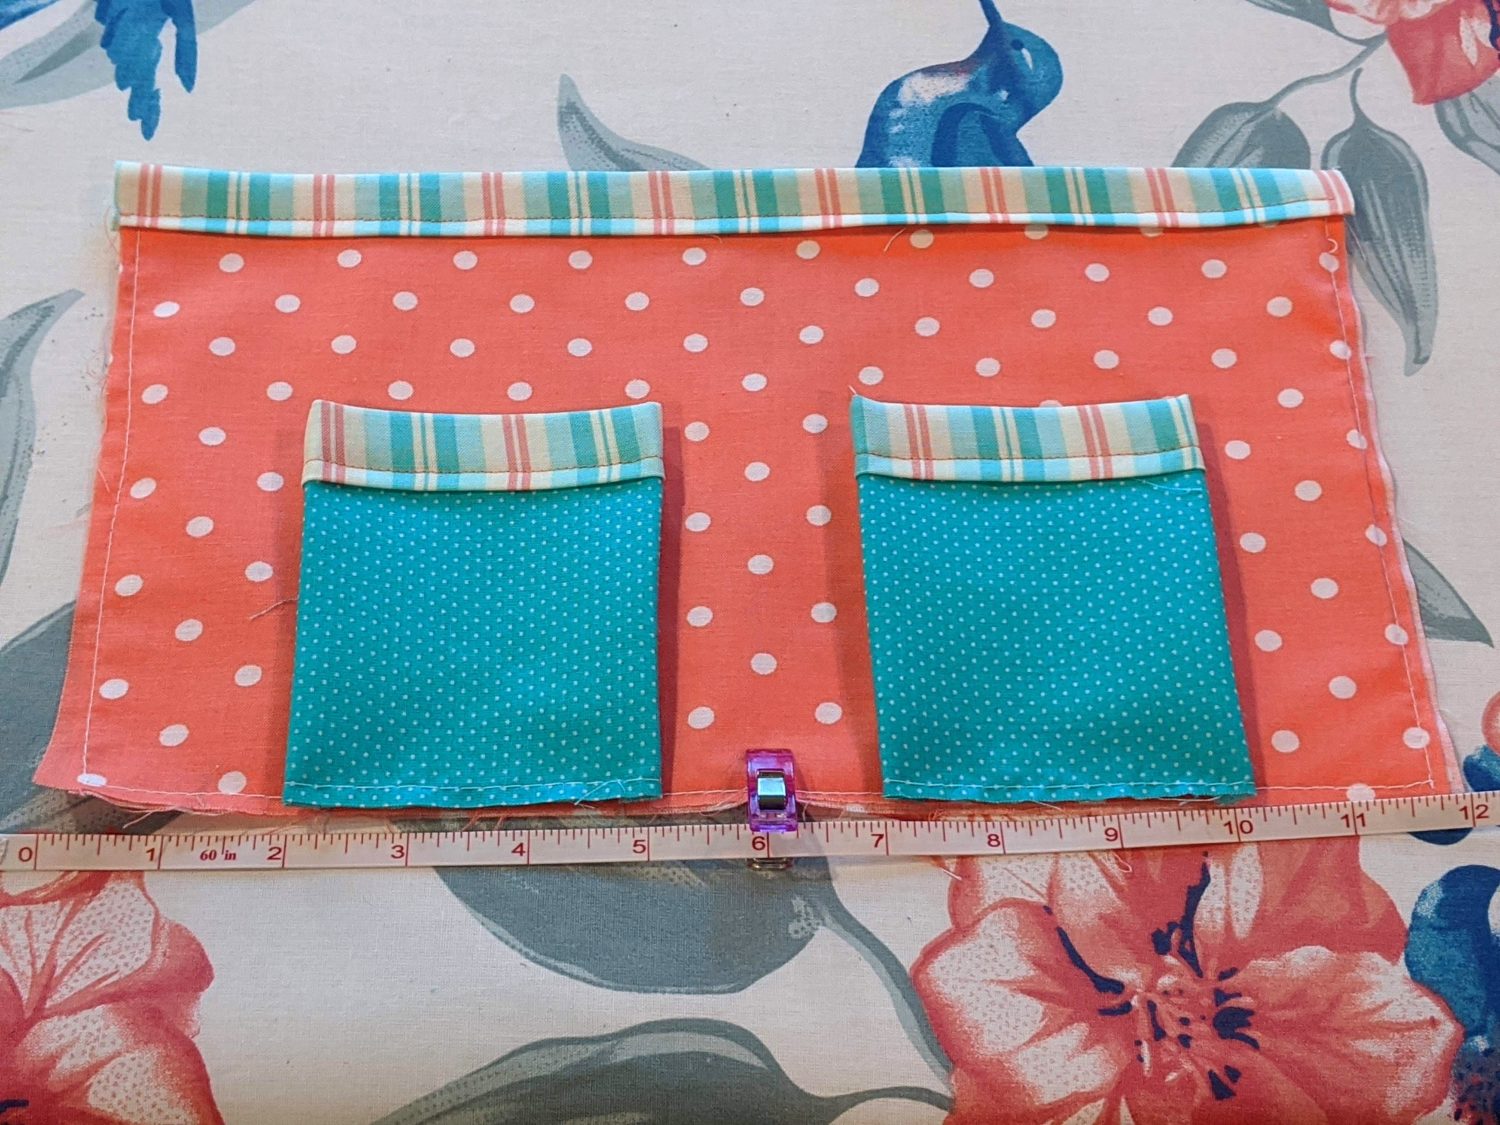
- Take one of your large pocket pieces and find the bottom center and mark it
- Measure over 1″ on either side of your center mark and line up the edges of your pockets at that point, and the bottoms of the small pockets will line up with the bottom of the large pocket (use wonder tape to hold in place)
- Topstitch the two vertical sides to attach
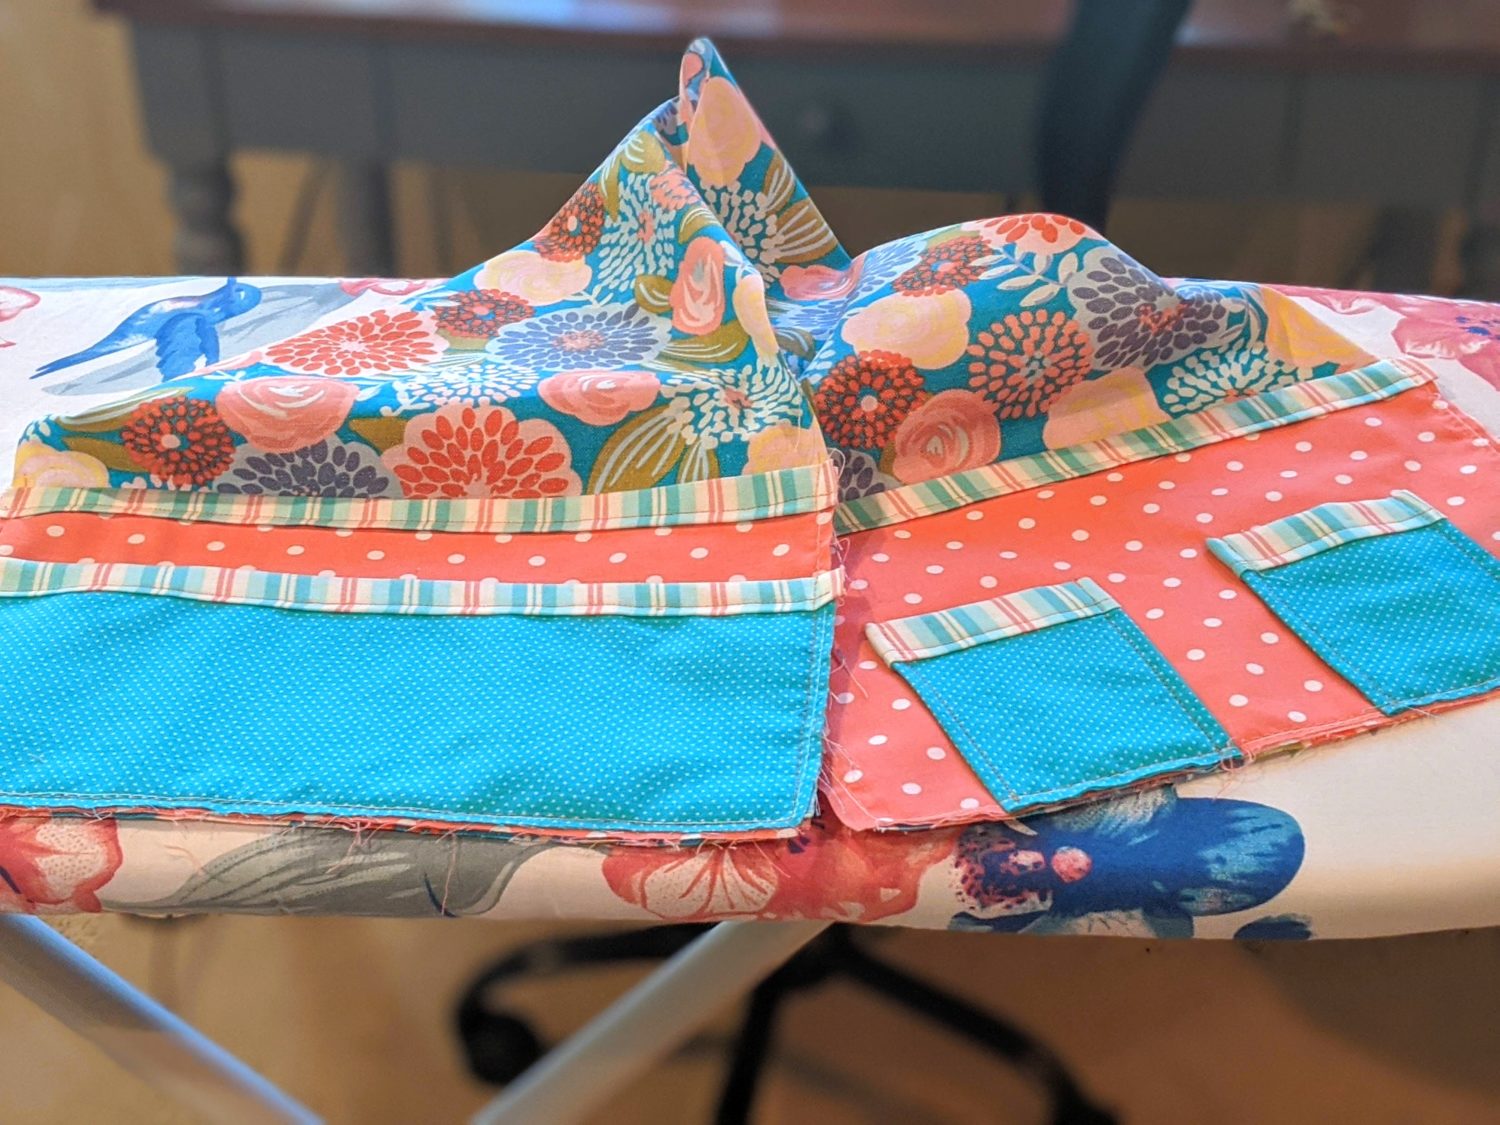
Attaching all Pockets:
- On one short end of your main piece, take the pocket with the two small pockets and line up the bottom and side edges with the main piece and clip in place
- Baste around bottom and side edges
- On the other short end of the main piece, lay your large pocket down first, lining up the sides and bottom
- Take your large half pocket piece and lay that on top of the large pocket lining up edges and clip in place
- Baste around bottom and side edges
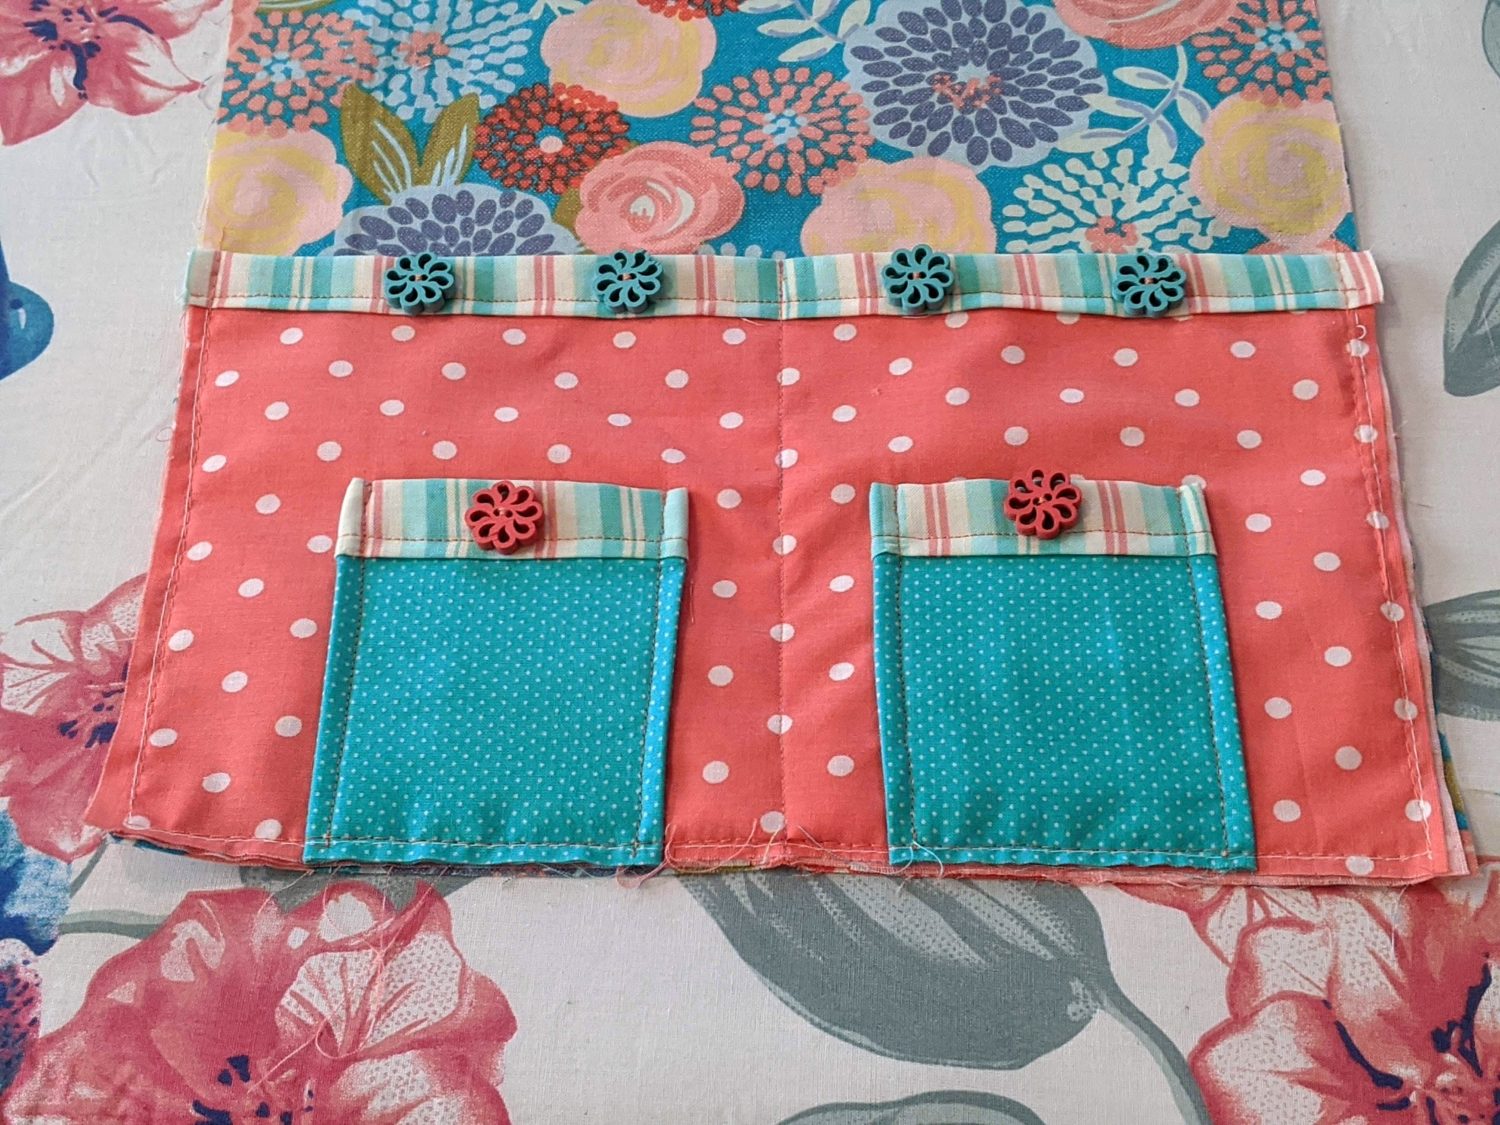
Finishing Up the Pockets
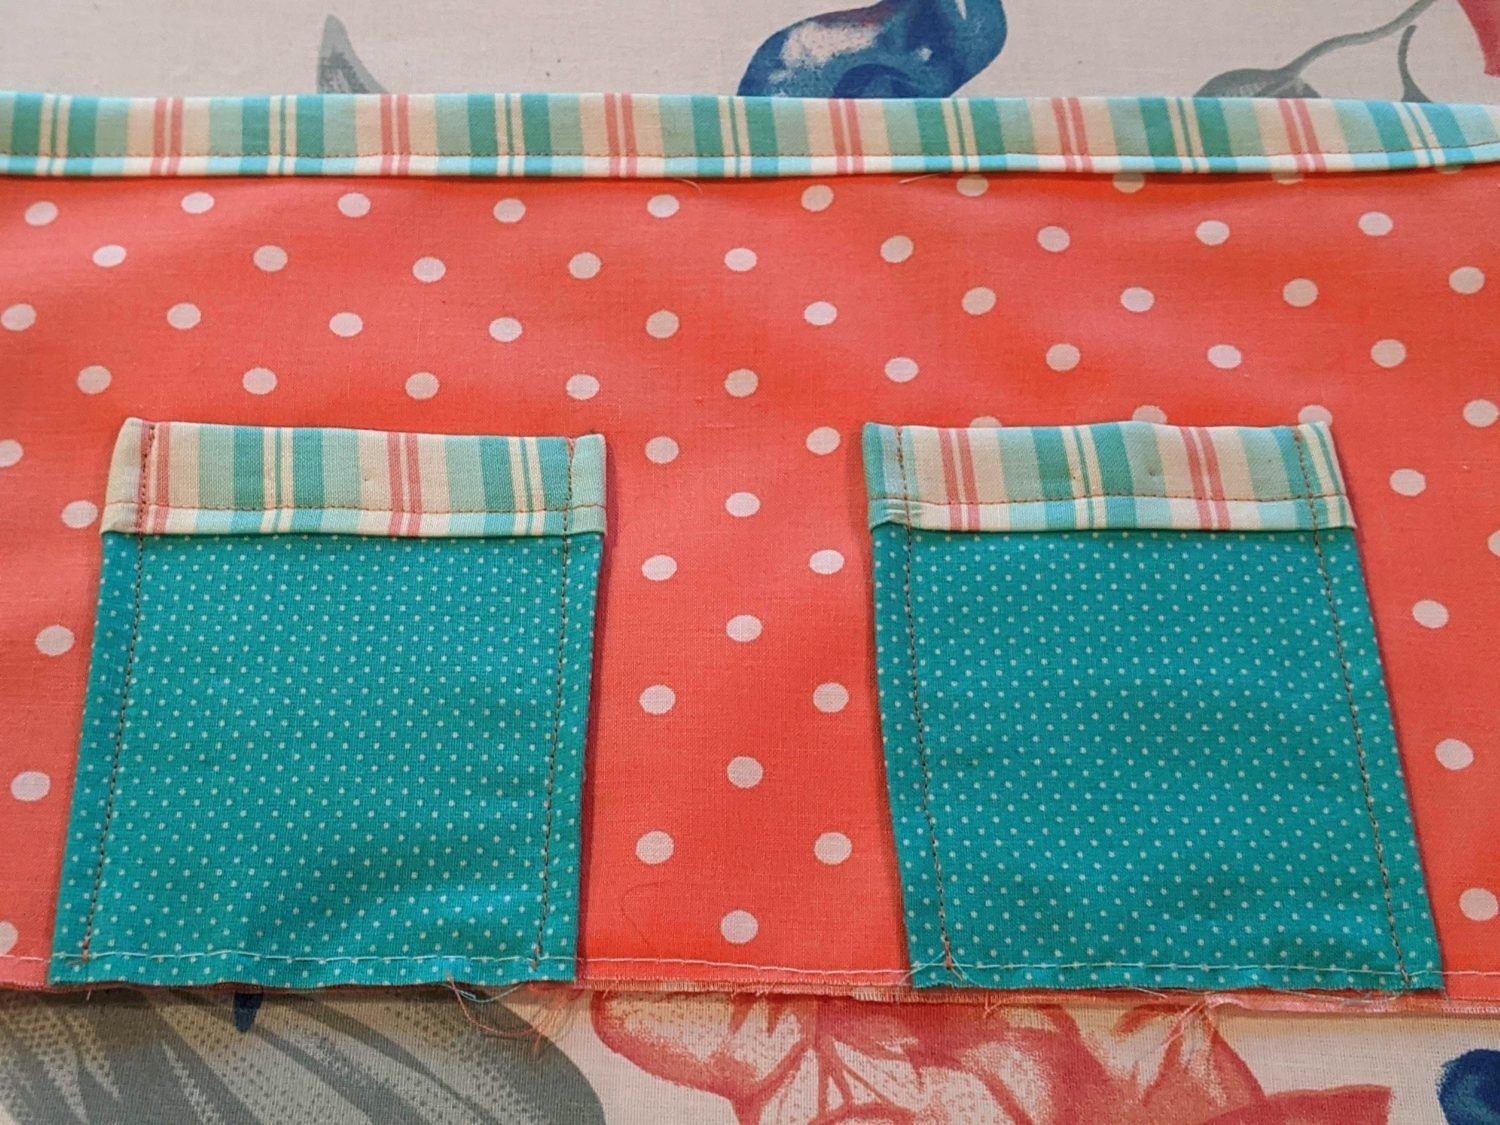
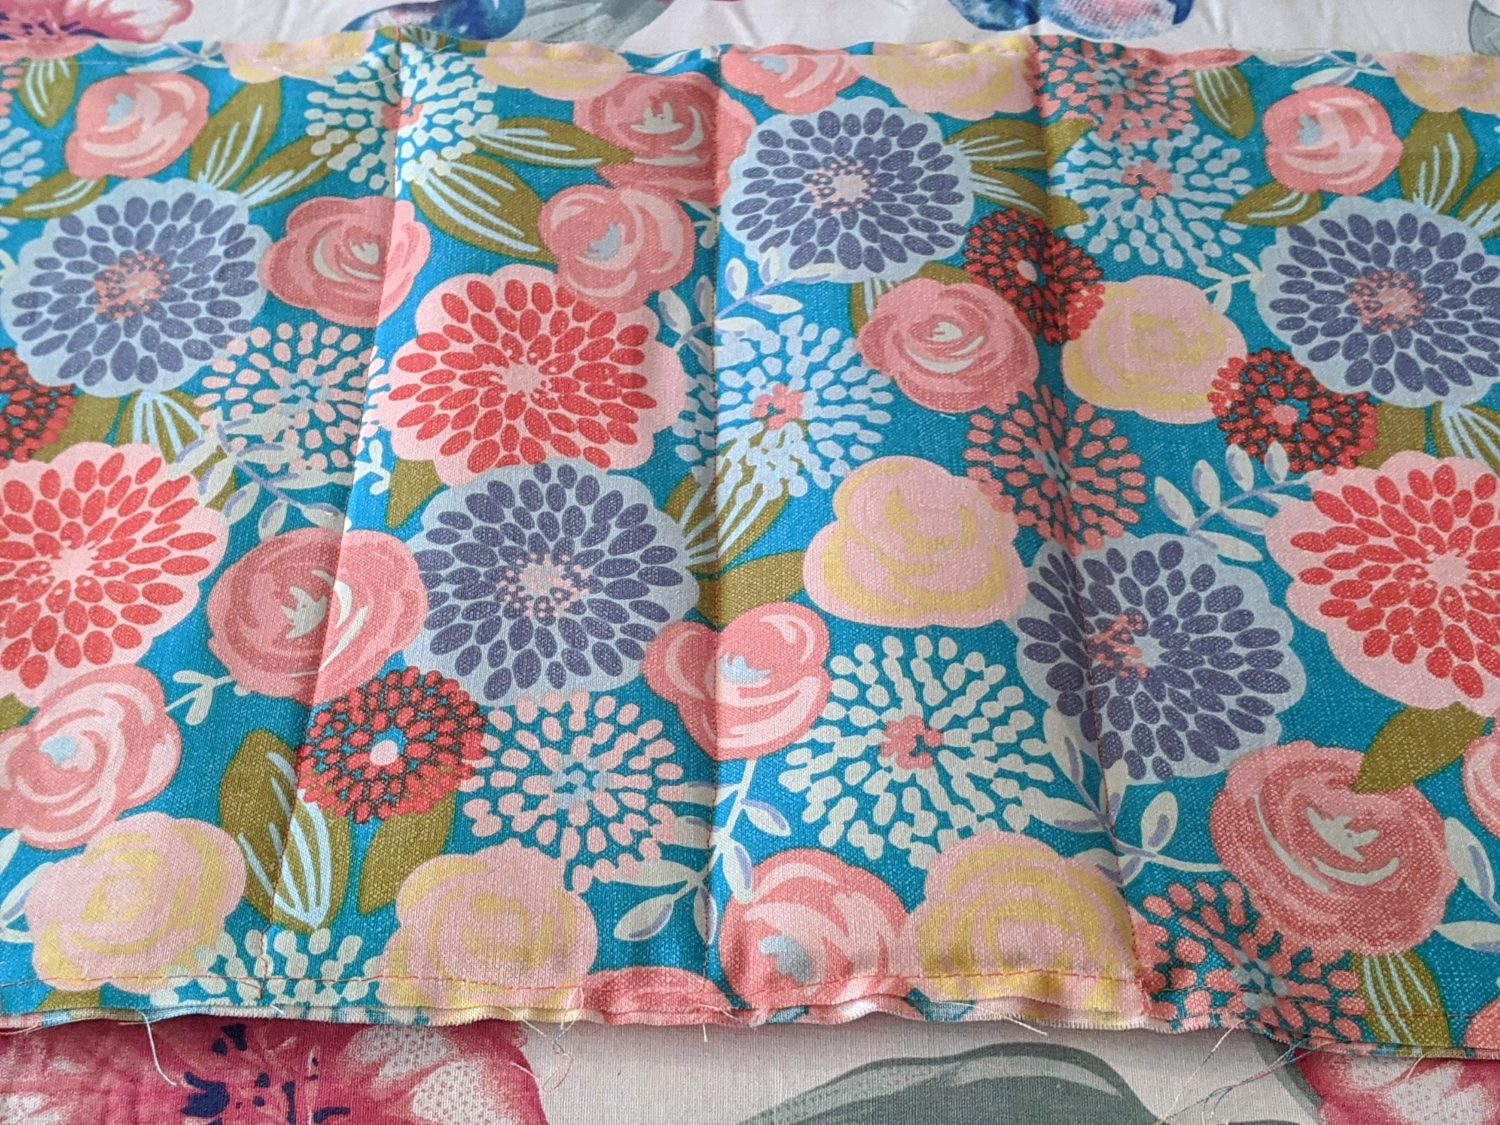
- Using a ruler and some kid of disappearing fabric marker or chalk, draw a line down the center of each section of pockets
- Topstitch over your marked line to create smaller pocket sections
- Optional: add buttons or other embellishments to your pockets


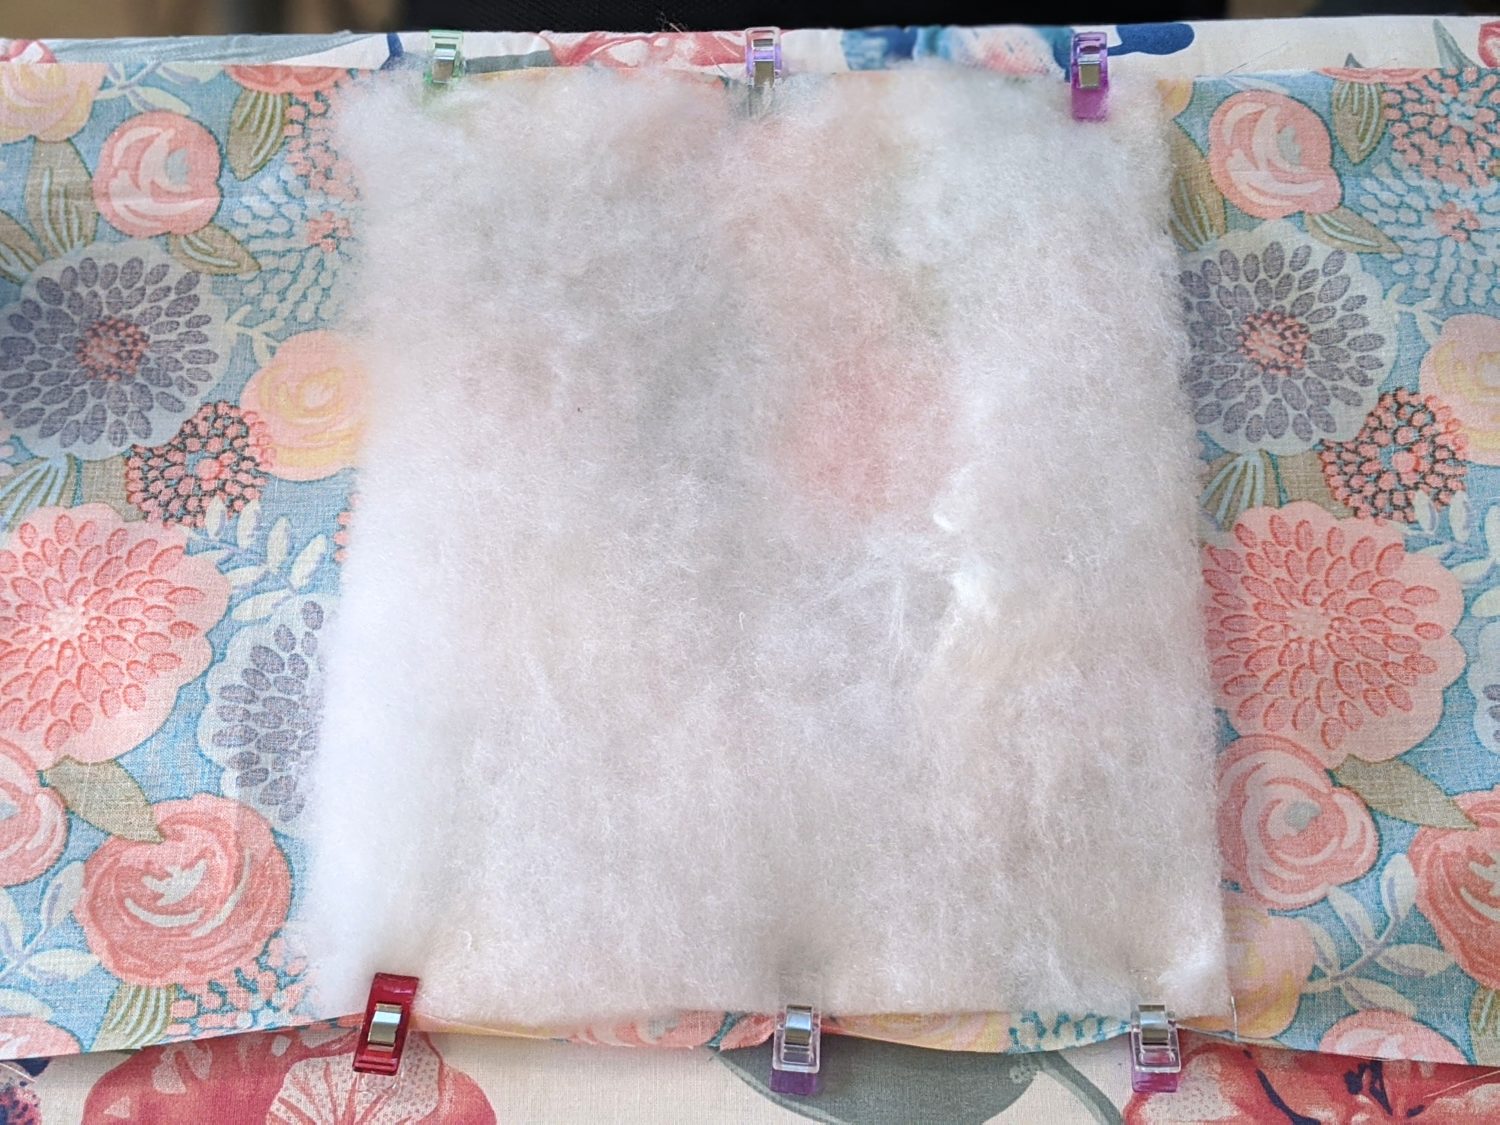
Time to Add the Batting
- Take your front main piece, flip it the wrong side up, find the center and mark it
- Grab your piece of batting, line it up with marked center on the back and clip in place
- Flip the top piece with the batting right side up and use pins to secure it to make sure it doesn’t slip around while basting later
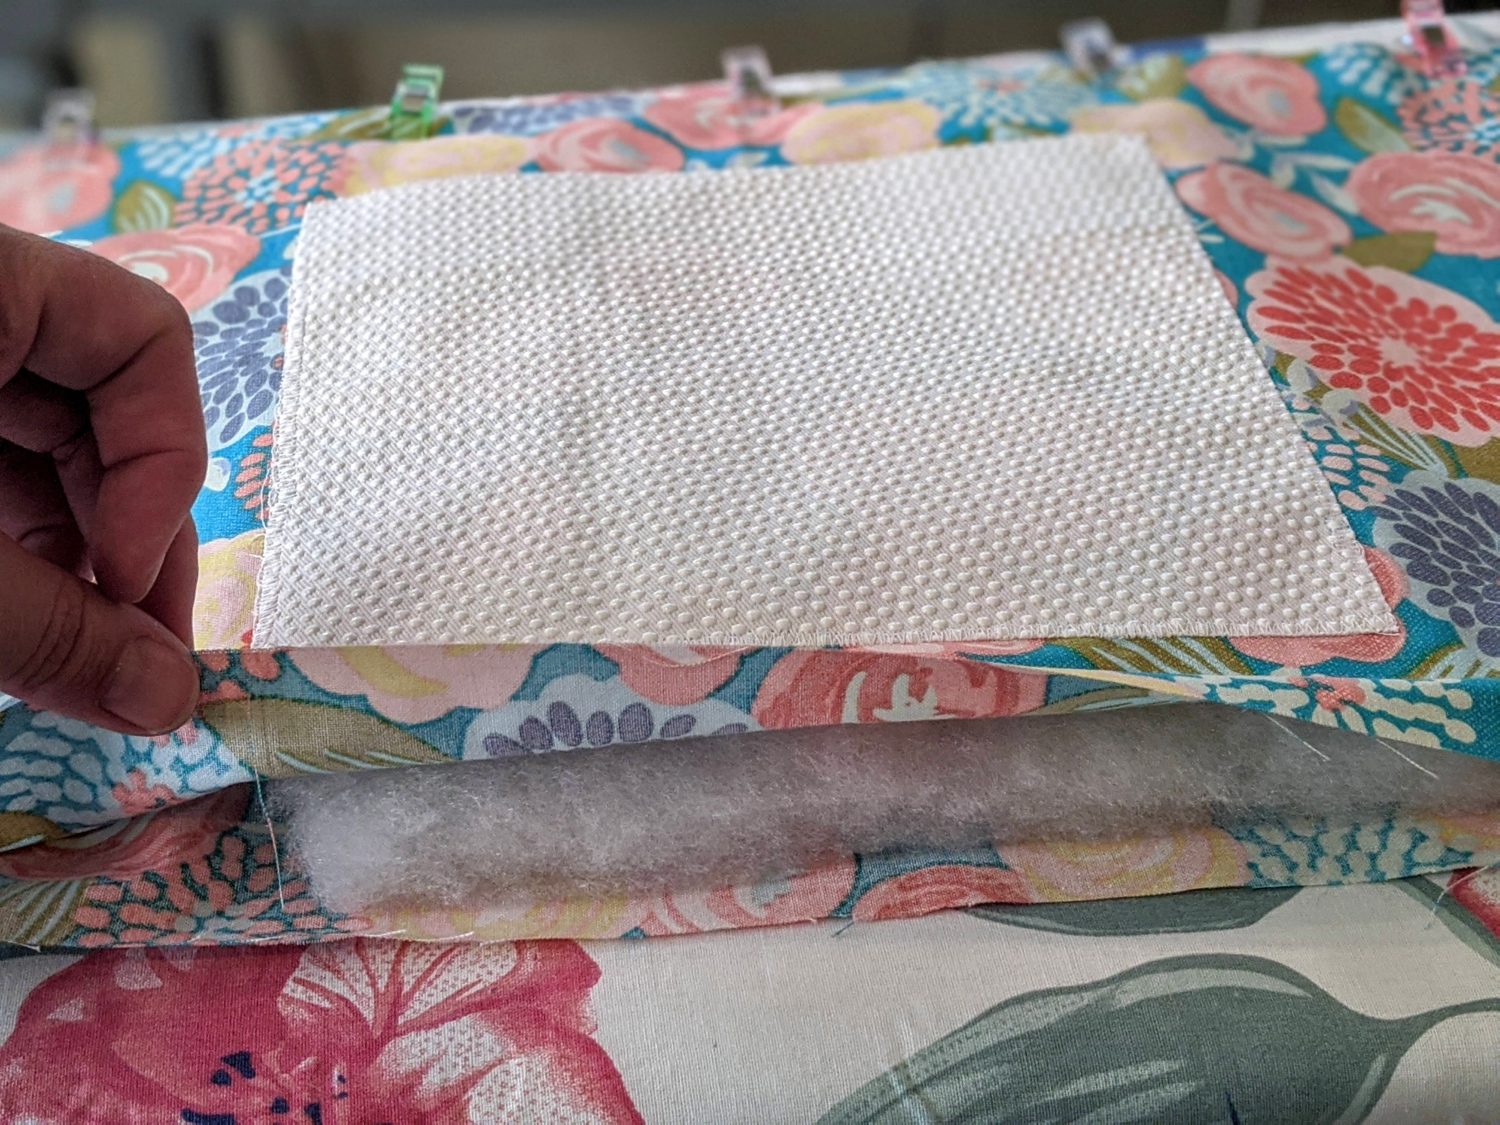
Putting Your Organizer All Together
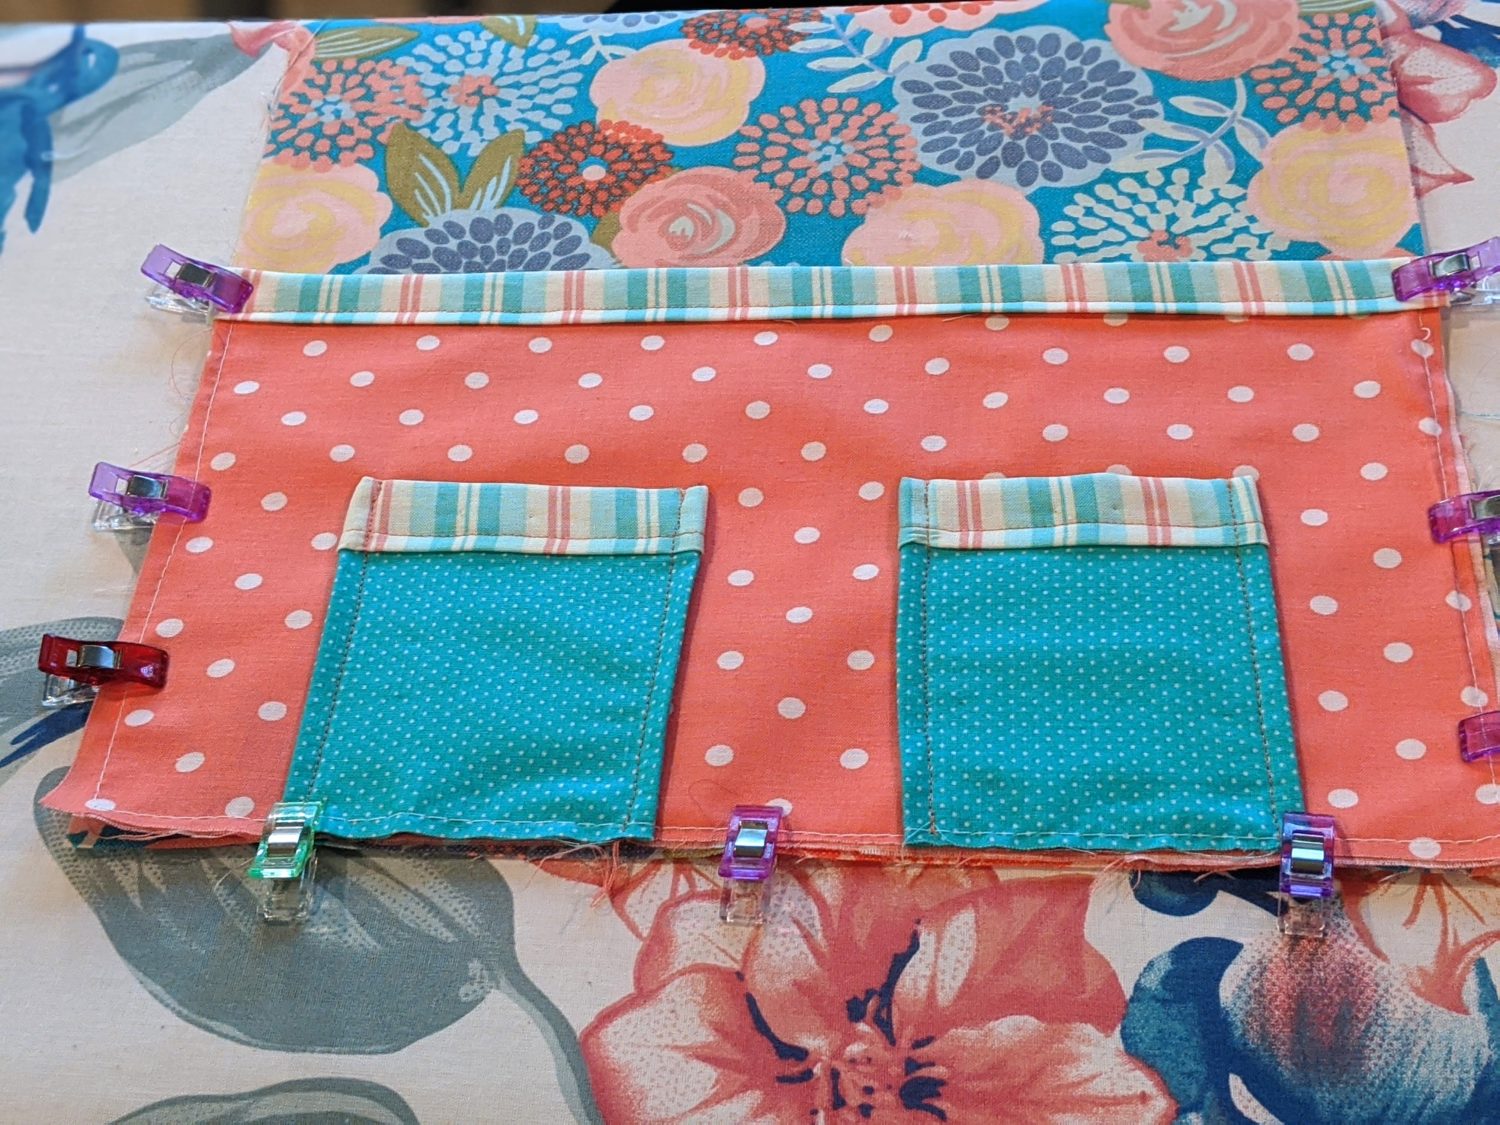
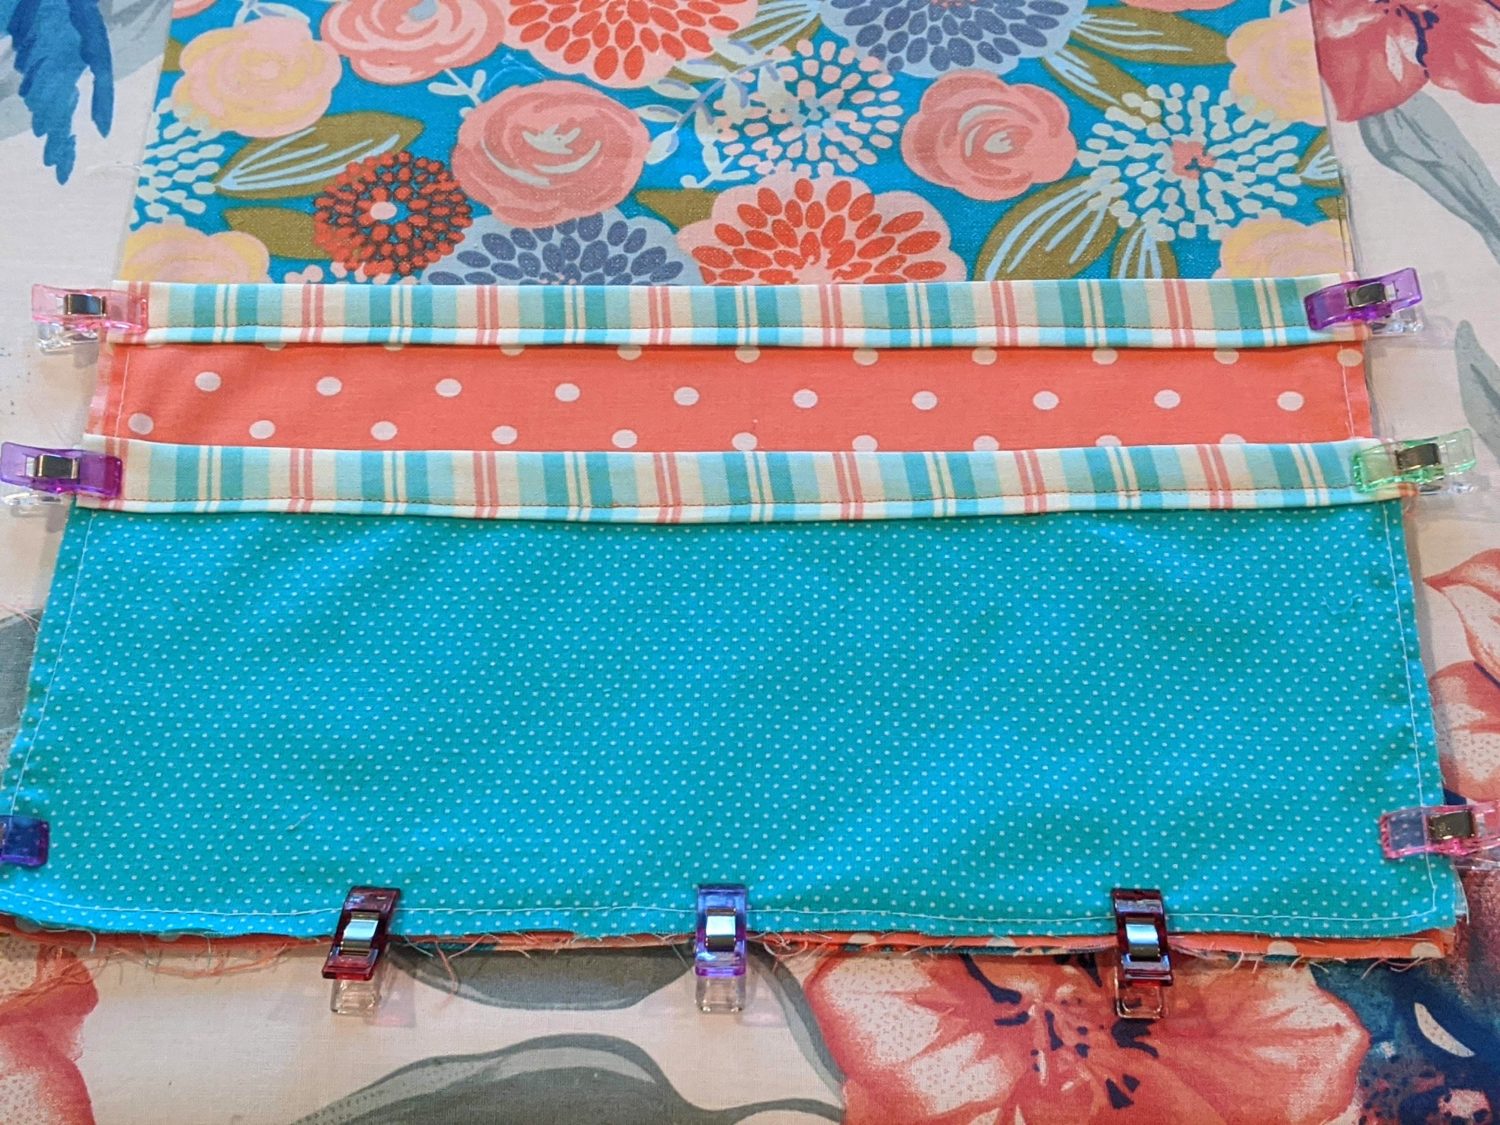
- Take your front piece and lay it wrong side up
- Lay your back piece on top with the right side up
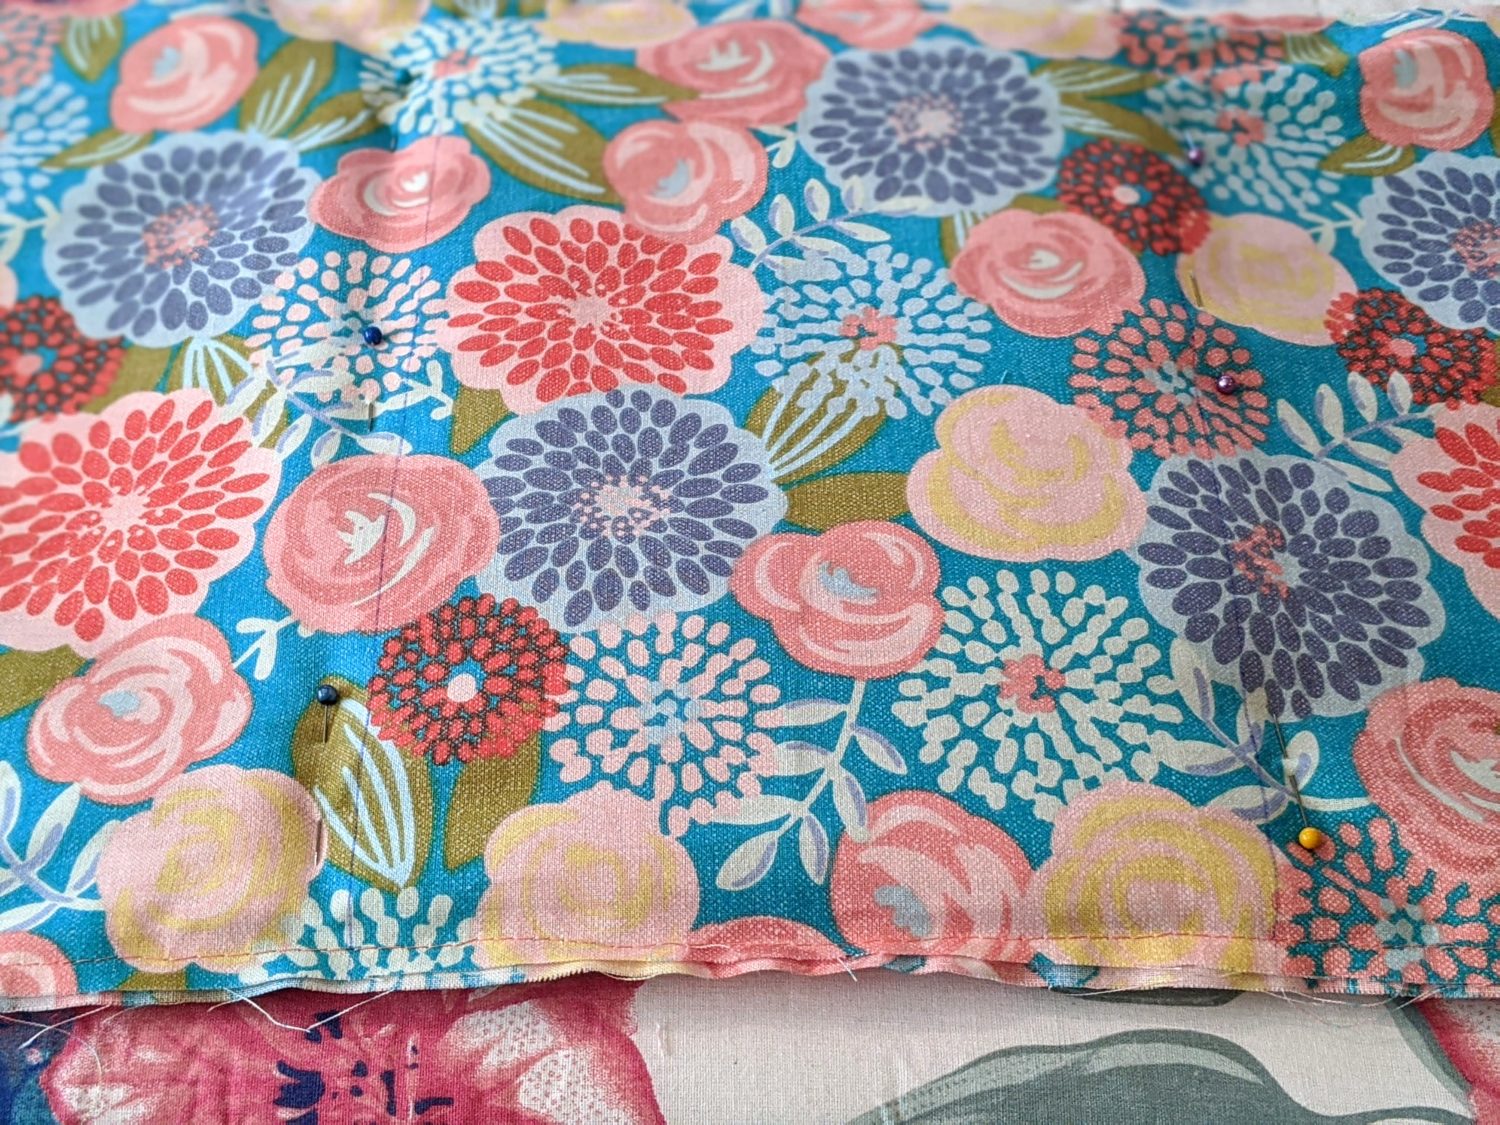
- Clip all the way around the edges and baste them together
- After your organizer is basted, find your section of batting in the middle and mark just inside the edges of the batting
- Topstitch along where you marked
- Optional: You can find the center of your batting and sew another row of topstitching

You’re almost there!
- Prepare your perimeter binding the same as your pocket binding (If you have multiple shorter pieces, sew the short ends together to create one long piece)
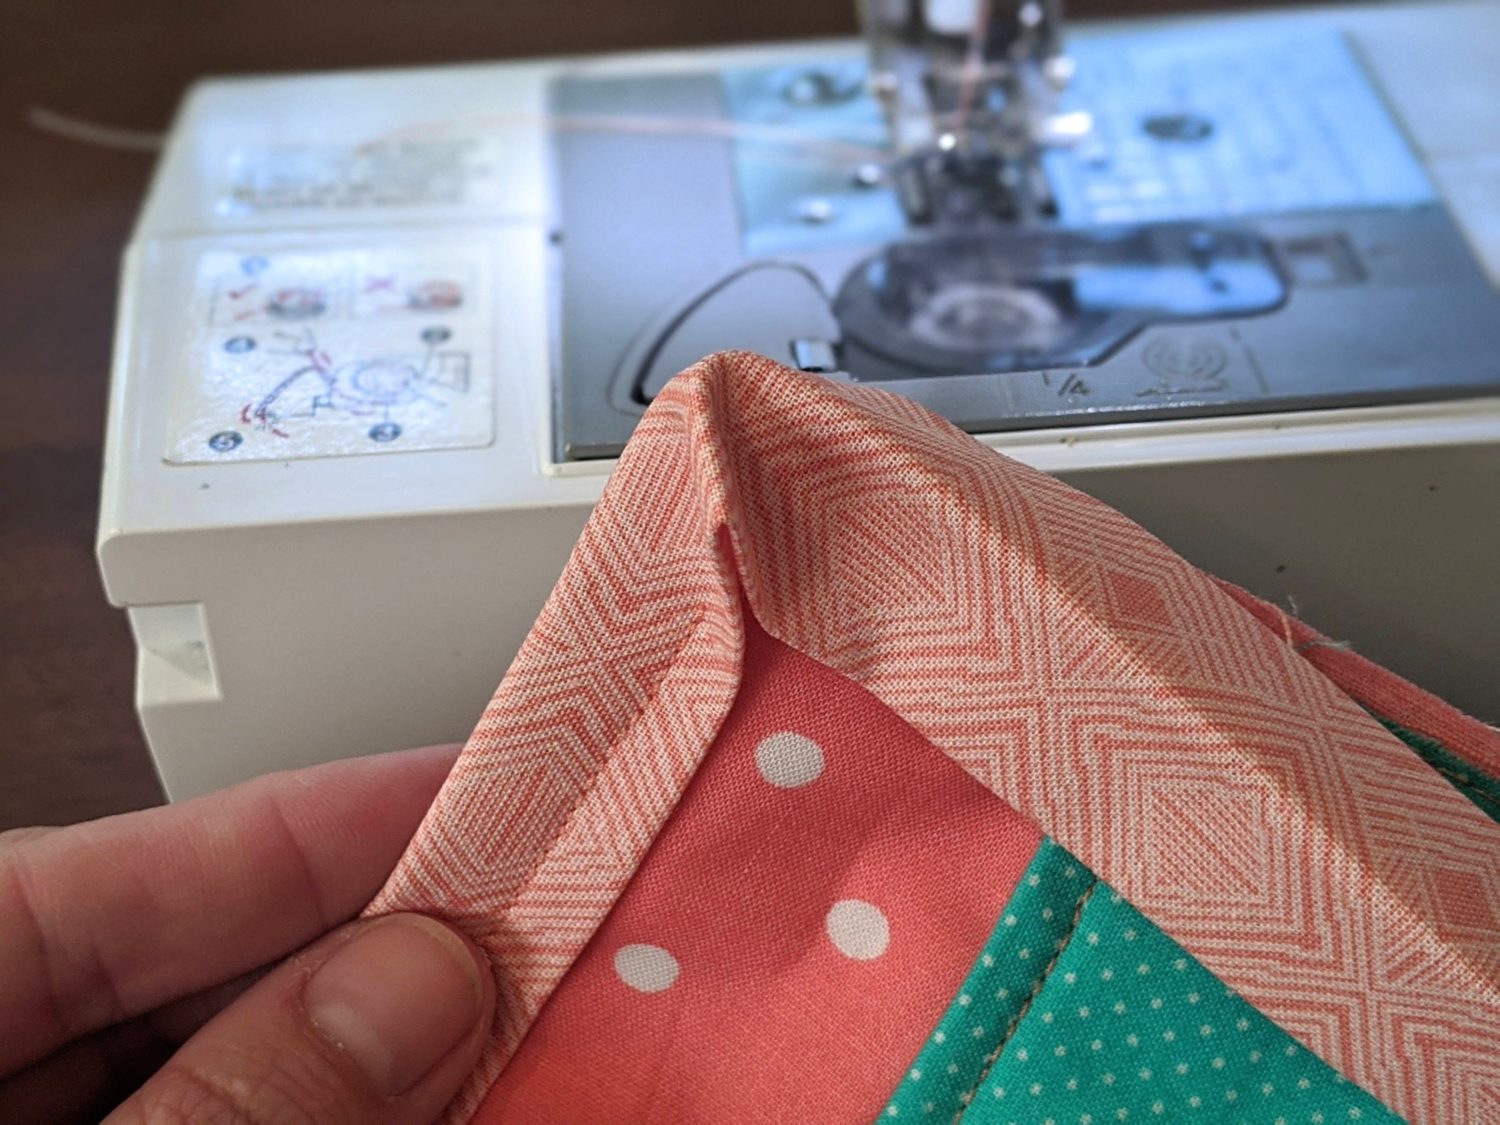
- Attaching your binding will be the same process and the pocket binding. Fold over the edge and clip in place down one side up to about 1″ away from your first corner
- Topstitch along where you’ve clipped
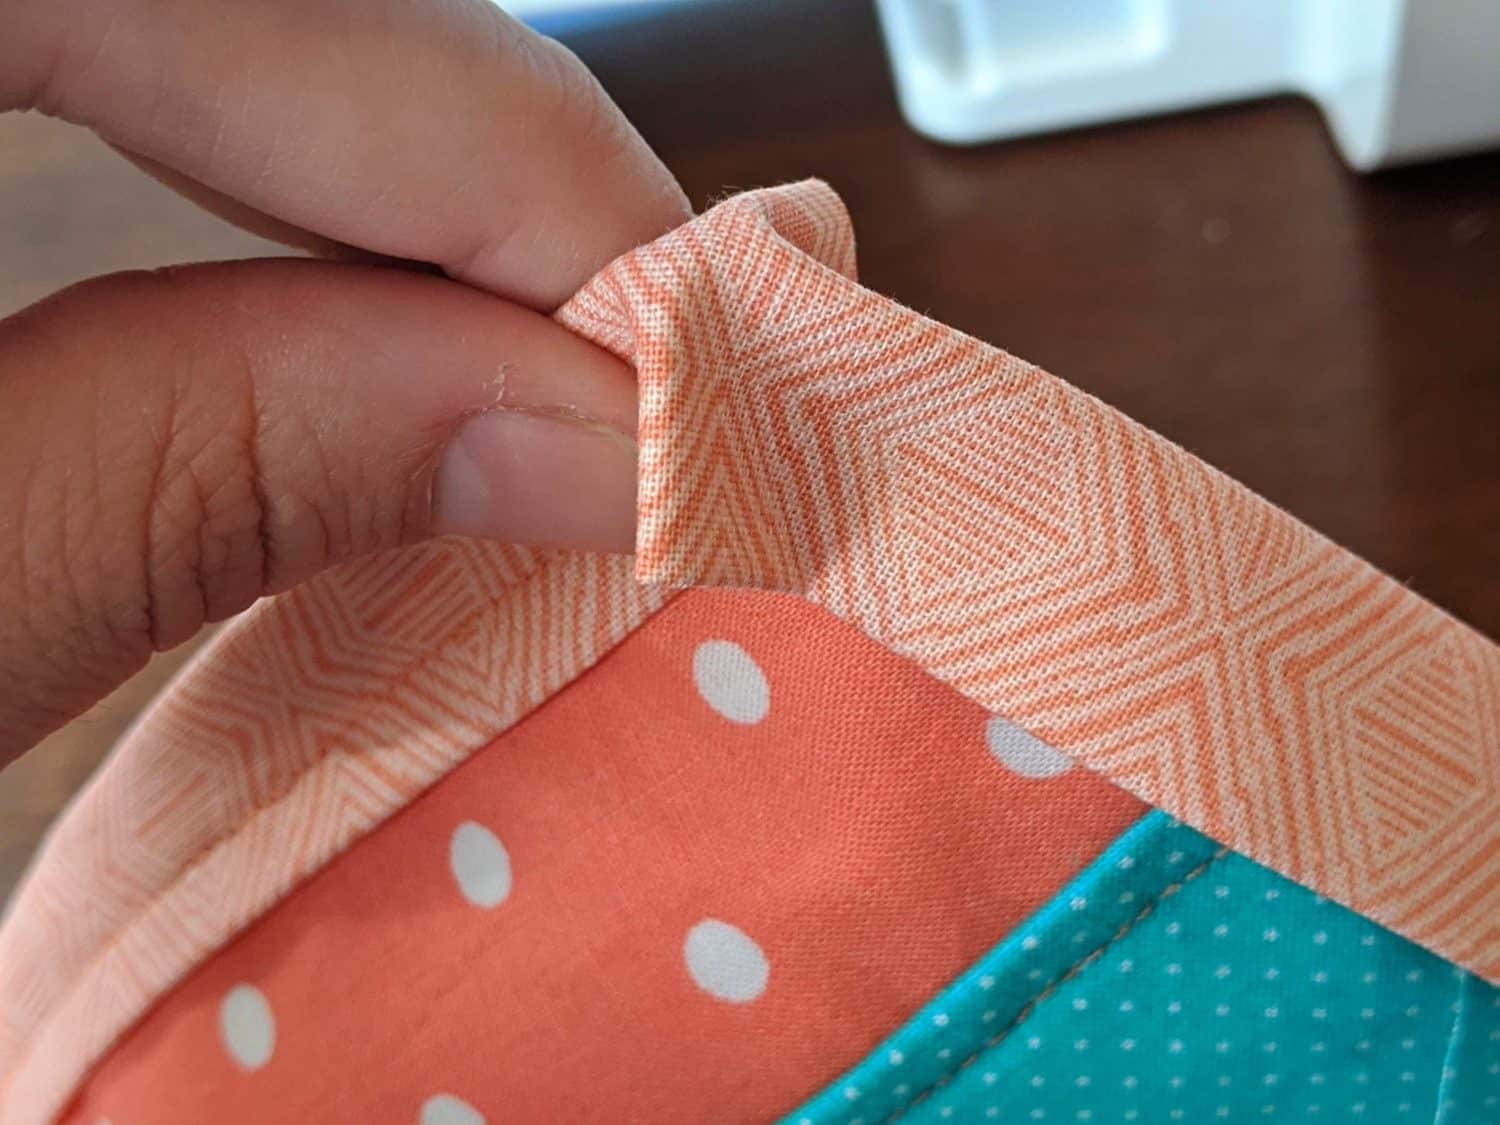
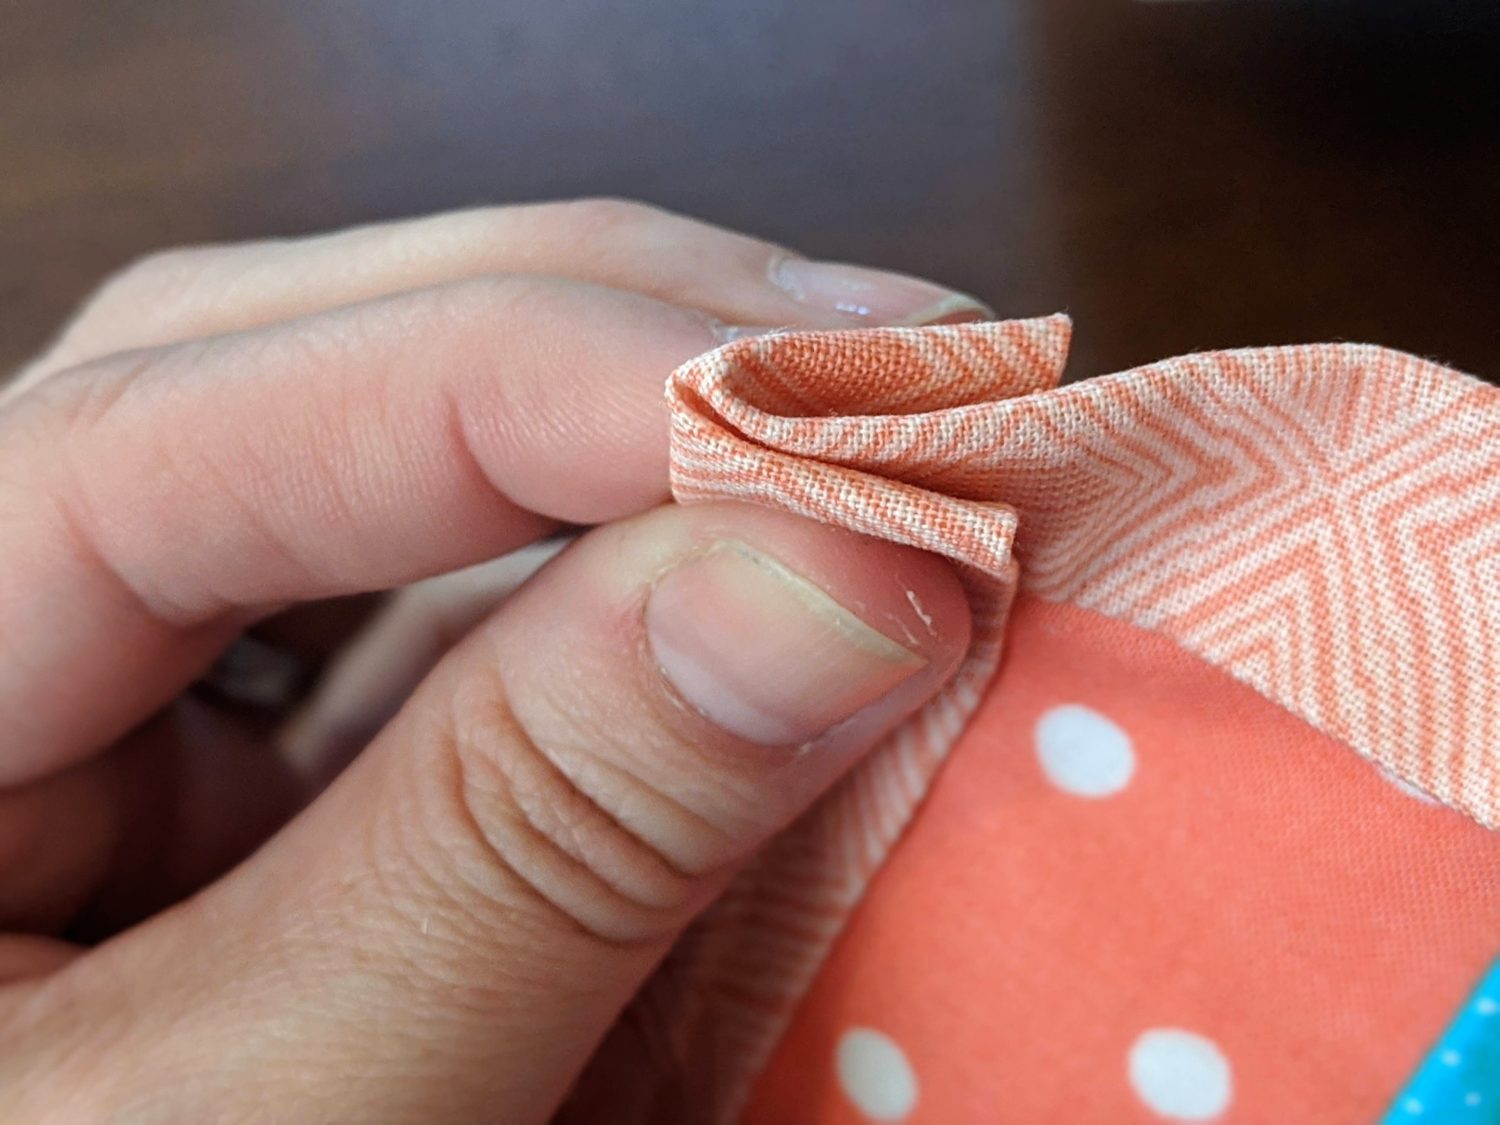
- When you get to a corner, you will push the binding that is hanging down into the corner and fold the side you were topstitching over it (see pictures below, it is hard to explain in writing)
- Continue the same process around all edges and corners until you get back to where you started
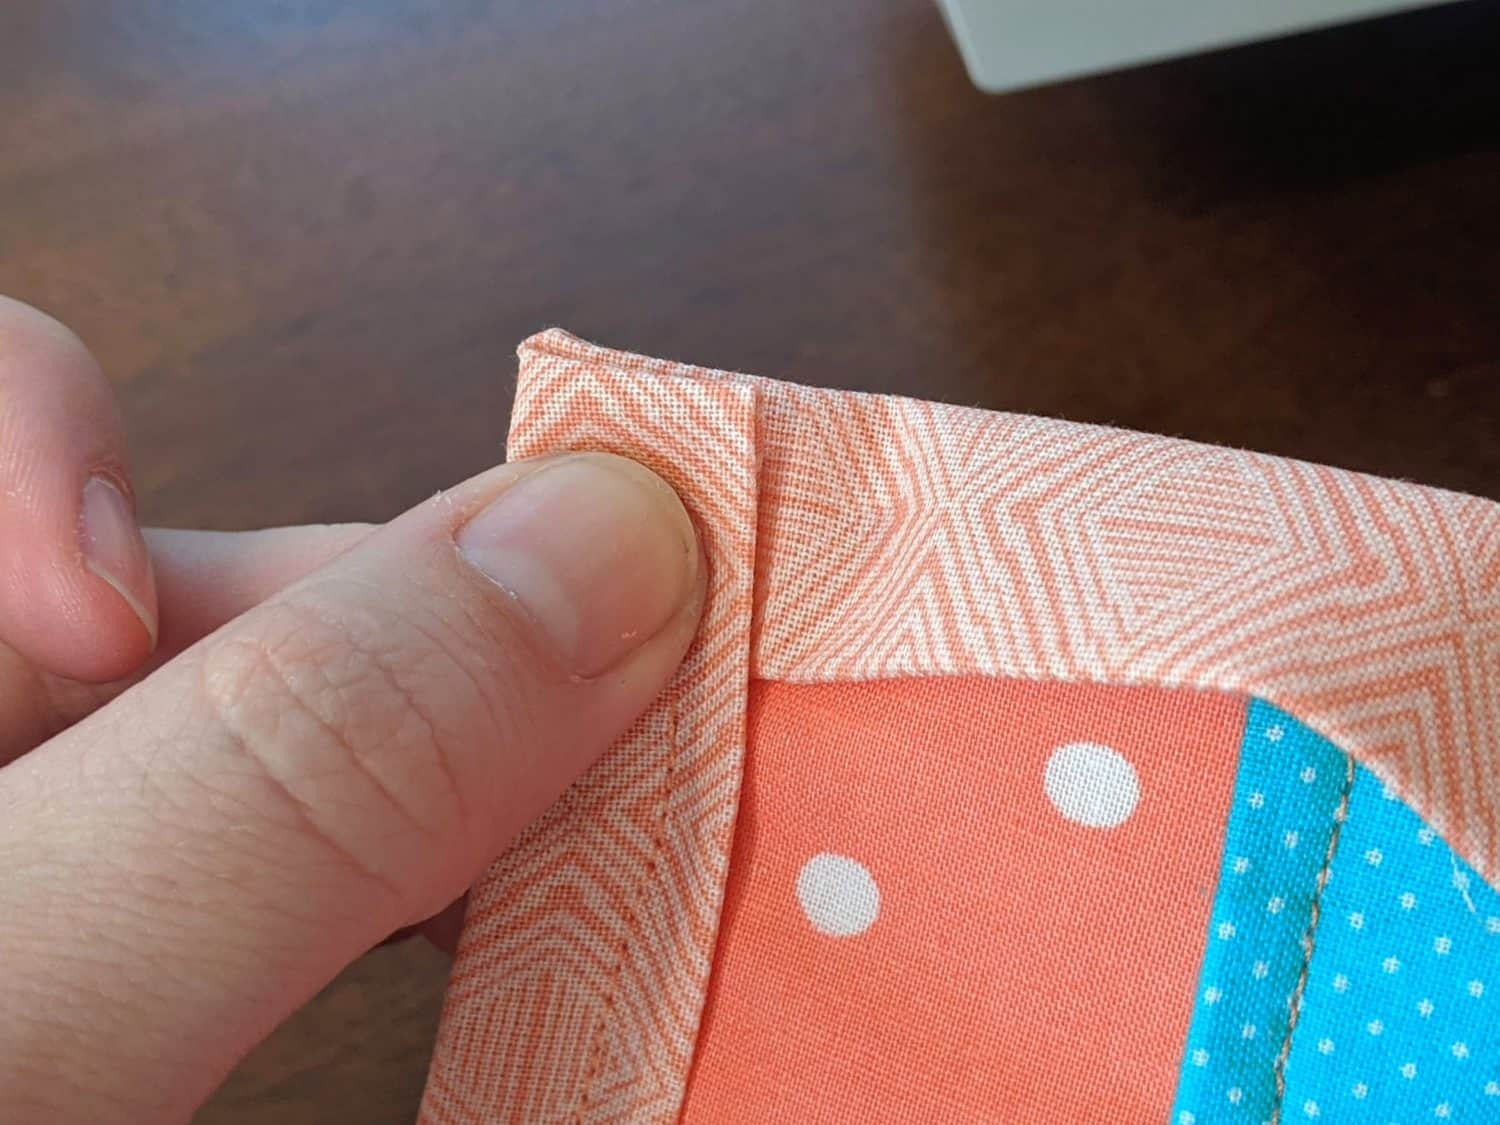
- Cut off any excess binding you have making sure you have about 1/2″ of overlap
- Fold the binding end in 1/4″ so there are no raw edges when you’re done and finish off your topstitching
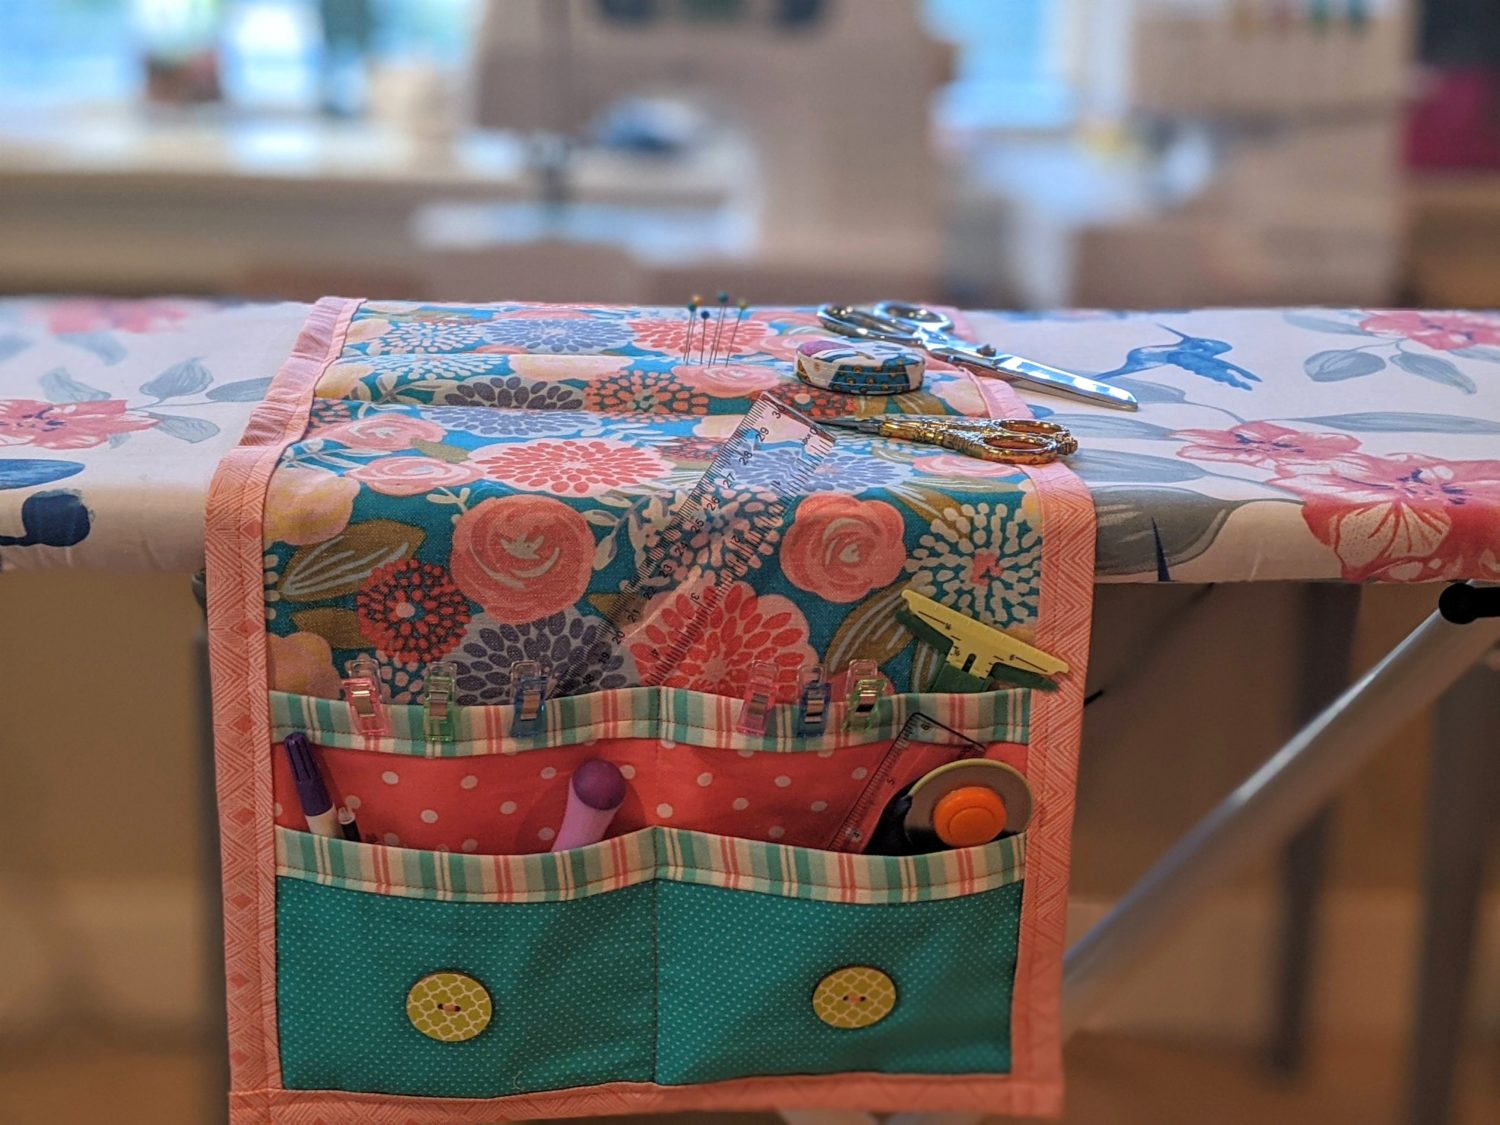
Tada! You made an Ironing Board Organizer!
Lay your organizer over your ironing board, put all the wonderful things you use regularly into the pockets and you’re ready to go! I use mine to hold my scissors, snips, hem guide, measuring tape, disappearing markers, seam ripper and wonderclips. It’s a great way to keep everything handy right where I need them!
As always, we’re here to help if you need it! Join us HERE and on Facebook, Instagram, Twitter, Youtube, and Pinterest. We’re everywhere you are.
My husband’s grandmother made something like this for me about 30 yers ago. But I wrapped it round my sewing machine. 😉 I’m not sure if I still have it…Now I have to go look!
This looks like fun! I will be looking for the perfect fabrics to make my own. Thank you for sharing such lovely ideas!