 I’m pregnant! Maybe you hadn’t heard the news quite yet, so there you have it. 🙂 I’m due in late May, but since this is my sixth child, the belly has a way of making itself shown early. ha! That also means that all of the maternity clothes I gave away after the twins were born are sorely missed right now. Before I get into my post, I want to make sure you all know about the 5 out of 4 10k giveaway that is happening right now in the 5oo4 Patterns Group on Facebook! We have daily giveaways, an awesome grand prize, and all patterns on sale for 30% off with the code 10kgiveaway through January 15th!
 So, I thought I would share with you some of my favorite 5oo4 Maternity mods. I LOVE our patterns that already include maternity modifications. Did you know that 12 out of 16 of our women’s patterns already have maternity modifications included in them and there is even a section JUST to focus on maternity patterns? Of the 4 that don’t include it, one is the free woven pajama pants pattern. While it’s not technically “maternity”–I wear mine every week. I cut it on the low waist option and don’t have any issues. The others than don’t include maternity options are the Resolution Bra and Tank, Weekender Tunic, and the Women’s Ascent Fleece Pullover. I honestly believe that all of those can be easily modified to be maternity if you wanted them to be and the Women’s Weekender Tunic has enough ease in it to where you don’t even need to make that many mods until the 3rd trimester.
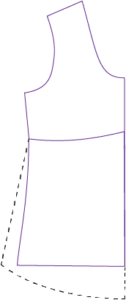
The drawing above shows a typical maternity modification (the dotted lines). I add about 4-5″ onto the length of the front and about an inch tapering to 0″ at the side seams of the front. If I’ve dropped just the center front, then the side seams are still the same length. However, lately I’ve preferred to drop the side seams 4-5″ as well. Then I gather the sides of the front to equal the side seams of the back. That’s it.
Maternity Mod for the Women’s Ascent Fleece Pullover
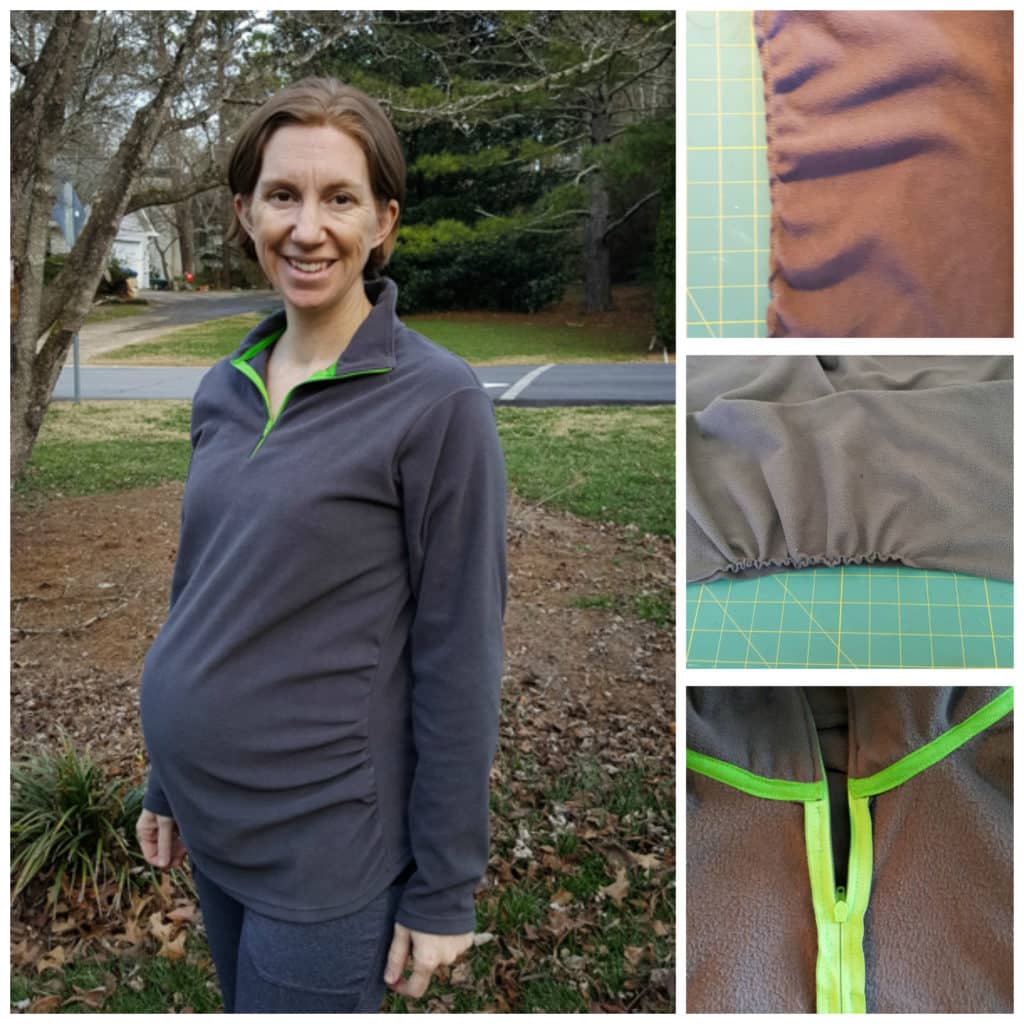
I’ll show you how I did it with the Women’s Ascent Fleece Pullover. I LIVE in fleece pullovers during the winter when I’m not pregnant, so I really wanted to make myself at least one of these that was maternity friendly.
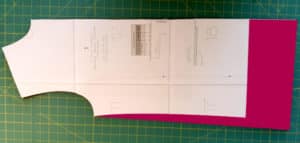
The first thing I did with my Ascent pattern was lengthen the front bodice by 5″ and taper the side seam like I showed in the drawing. I tend to carry BIG babies, so I like to alter the side seam to try and keep it straight.
Then I sew a basting stitch on my side seam from right below my bust to about 2″ above the hem. I pull the threads to gather the front side seams to match the back side seams, pin, and then sew the side seams together. After that, I just sew up the rest of the pattern as written. The only other change I made was using twill tape to cover up the seam at the neckline. This is about the most tedious thing I’ve ever bothered to do, but I love the pop of color with the zipper and the twill tape.
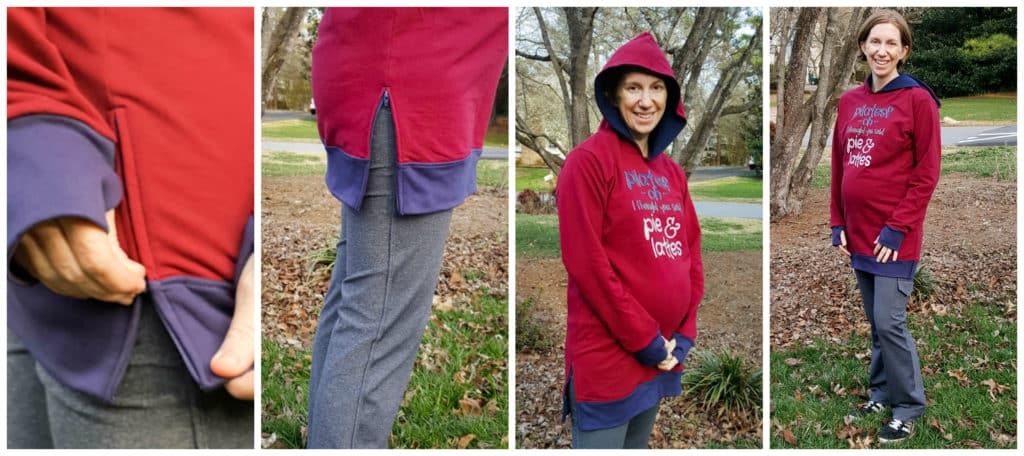
Maternity Mod for the Men’s Halftime Hoodie
For my second maternity mod, I played with an idea my husband had for the Halftime Hoodie. I used to coach basketball, so I have a lot of hooded sweatshirts. I don’t mind the oversized look, but when I’m pregnant, I like to show off my baby bump. 🙂 That’s hard to do in a men’s hoodie. I had a vision of using zippers on the side seams of the Halftime Hoodie so that it was a little more maternity friendly (instead of just making a larger size to cover my belly). I picked my size based on my bust (size small) and then lengthened the front AND back 5″ and didn’t alter the side seam at all because the Halftime Hoodie has quite a bit of ease in it. I went ahead and ironed the front and back band in half to get a crease. Then, I opened it back up and attached it to the front and back separately (and left the bottom of the band open instead of folded the way it’s typically done). I did this so I could sandwich my zipper in the band. After attaching the bottom band, I sewed up the side seams of the bodice with a basting stitch and ironed the seam allowance open. I ironed lightweight fusible interfacing to either side of the seam allowance so that it was on the inside of the sweatshirt and the seam allowance on both sides of the seam. I wanted it on the bodice material (and not just the side seam) because I was going to be using my zipper foot instead of my walking foot, and I didn’t want the fabric to stretch as I was topstitching my zipper.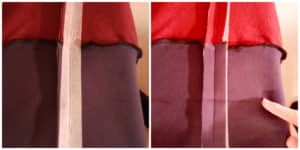 I love Washaway Wonder Tape for installing zippers. Instead of basting my zipper to the seam allowance, I line both sides of the zipper with Wonder Tape.

Then I center the zipper over the seam. I stopped the zipper where the bottom band would fold (I’m pointing to the crease). Then I used Wonder Tape on the seam allowance to fold the band up and sandwich the zipper in the band. I use a few pins just to really make sure that everything stays put. I also like to use a 1/2″ piece of clear tape on the right side of my seam as a stitch guide. It’s just another way my perfectionism slows me down. 😉 If you center the tape on the seam, it’s the perfect stitch guide for sewing in your zipper.
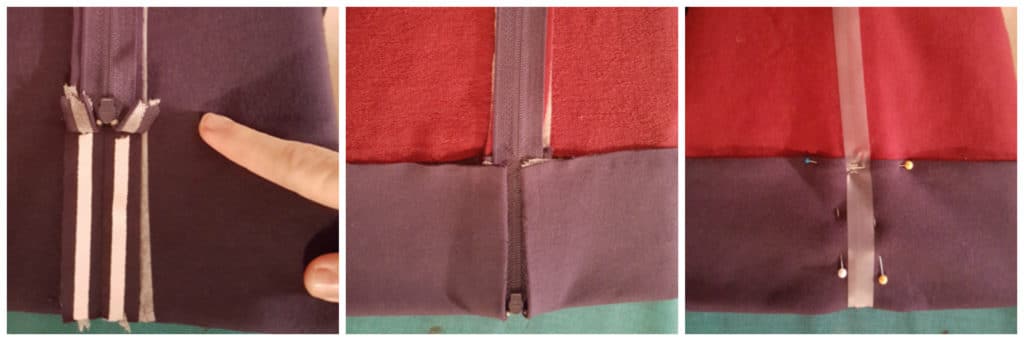
 After topstitching the zipper, I remove the basting stitches over the zipper and re-sew the side seams. Try and get close to the bottom of the zipper. Then I used wonder tape again on the inside of the band to tape it over the hem between the bodice and the band. I
 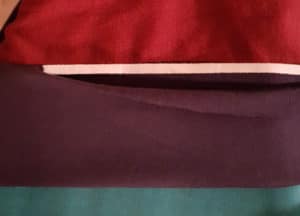 topstitched with my coverstitch machine (or you can use a zig-zag or stretch stitch here).
So, a couple of thoughts on this. It didn’t really turn out the way I was envisioning. I shouldn’t have lengthened it. I think in my head, I was picturing a sweatshirt getting a little too tight and then the zippers creating vents for more room in the late stages of pregnancy. What I ended up with was a tunic that is still a little too tight in the abdomen and the zippers are cute, but non-functional! I think if I shortened it, I could get it to work. Or I could embrace the funky sweatshirt dress with zip vents…for at least a few weeks before it’s too tight?!
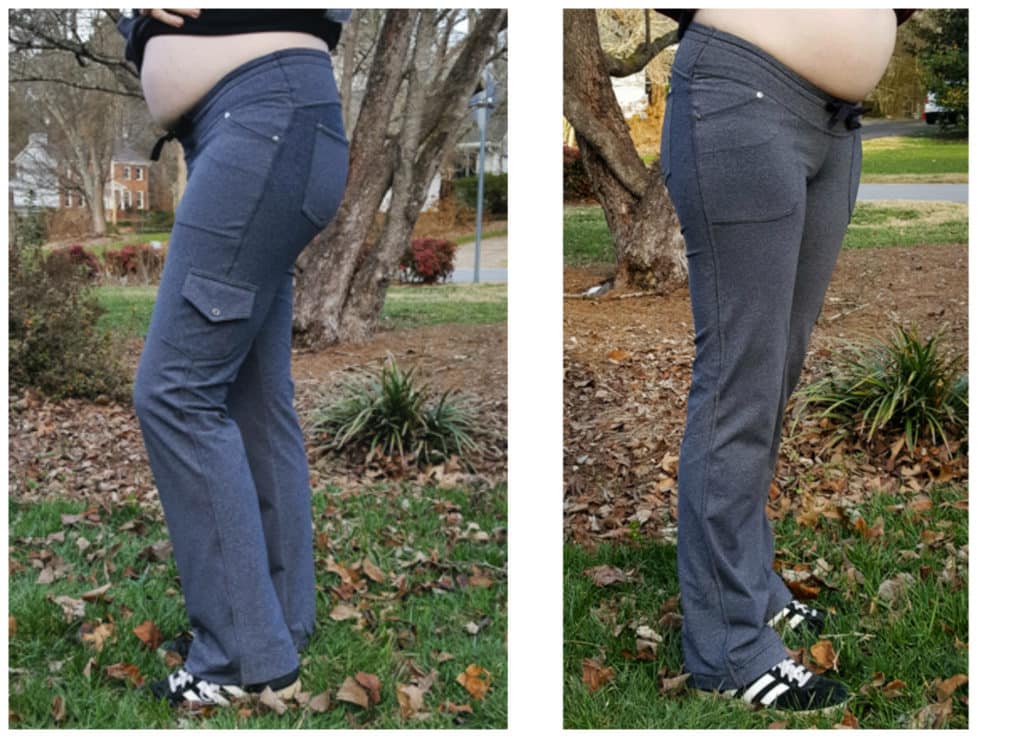
As for the pants I’m wearing in these pictures, these are a NEW pattern that should go into testing some time in the next few weeks! They have structure, look like real pants, but feel like yoga pants. I LOVE THEM. This is (obviously?) ONE of the maternity options. I’m hoping to include high, mid, and low rises and then the maternity option can look like this OR have an over the belly panel! WOOT! The non-maternity versions will sport a contoured waistband with both elastic and a drawstring for a perfect fit.
And here’s an image of the real me. I loathe modeling. It’s just hard for me to stand still and smile. So…I end up looking like an idiot. 😉

This blog post has been part of the Watcha Wearin’ January blog tour! Here is the schedule for this week:
Sunday, January 8th: Sewing By Ti, Embrace Everyday, Doodle Number 5
Monday, January 9th: Sewing By Ti, Tenille’s Thread
Tuesday, January 10th: Robynne and the Bobbin, Harper+Lu
Wednesday, January 11th: 5 out of 4 Patterns, Sewingly Michelle
Thursday, January 12th: Crafty Like A Rox, SewSophieLynn
Friday, January 13th: Creative Counselor, Sewing By Ti
Saturday, January 14th: Wild & Wanderful
Here is the information for the giveaways:
 Prize pack #1: 28 patterns, $100 in store credit to Raspberry Creek Fabrics and a $20 gift card to Mummykins and me.
Prize pack #2: 28 patterns, $30 credit to posh prints, $25 credit to You made something, $20 credit to P4P AND 2 yards art gallery fabric +1 coordinate from NR fabrics.
And now, here are the details for the incredible prizes!
To enter for Prize Pack #1, click on this link to the Rafflecopter page and follow the links to gain entries in the Rafflecopter draw.
Prize pack #1 includes:
2 patterns from 5 out of 4
2 patterns from A Sparkly Baby
1 pattern from Blank Slate
1 pattern from Closet Case Patterns
3 patterns from Create Kids Couture
2 patterns from Daydream Patterns
2 patterns from Duck Butt Designs
3 patterns from Everything Your Mama Made and More
1 pattern from Gracious Threads
1 pattern from Greenstyle Creations
1 pattern from Itch to Stitch
$20 store credit for Mummykins and me
2 patterns from New Horizons Designs
1 pattern from Laela Jeyne Patterns
1 pattern from Rad Patterns
3 patterns from Sew A Little Seam
2 patterns from Sew By Pattern Pieces
1 pattern from Street Style Patterns
1 pattern from Stitch Upon A Time
2 patterns from Winter Wear Designs
AND
$100 store credit to Raspberry Creek Fabrics to buy fabric to start sewing up your new patterns!
To enter for Prize Pack #2, head on over here and share a link to a picture of you wearing one of your me-made creations! You can link up once per day so that gives you 31 possible entries!!!
Prize pack #2 includes:
2 patterns from A Sparkly Baby
3 patterns from Bella Sunshine Designs
1 pattern from Closet Case Patterns
3 patterns from Create Kids Couture
2 patterns from Daydream Patterns
2 patterns from Duck Butt Designs
3 patterns from George and Ginger
1 pattern from Greenstyle Creations
1 pattern from Love Notions
2 patterns from New Horizons Designs
$20 Store Credit to Patterns for Pirates
1 pattern from Rad Patterns
2 patterns from Sew By Pattern Pieces
1 pattern from Sew Straight and Gather
1 pattern from Sis Boom
1 pattern from Stitch Upon A Time
1 Pattern from Street Style
3 patterns from Wardrobe By Me (Akinori Kimono, Urban Joggers and Ziggy Zipper Hoodie)
2 patterns from Winter Wear Designs
And of course more fabric to sew up your new patterns!
$30 Store Credit to Pretty Posh Prints
$25 Store Credit to You Made Something
AND
2 yards of Art Gallery Fabric and a Solid Coordinate from NR Fabrics
Excited for the pant pattern, I’ve been looking for something like that ????
I’m sure a lot of pregnant mamas will appreciate these maternity mods. Congrats on the newest little one.
Thank you!
Cute maternity mods although I’m long past the maternity stage.
You have amazing maternity patterns!