 As you may know, I have five children under the age of nine. I used to have a pretty strong type-A personality. I’ve relaxed (a lot) since having kids, but I still like to go above and beyond
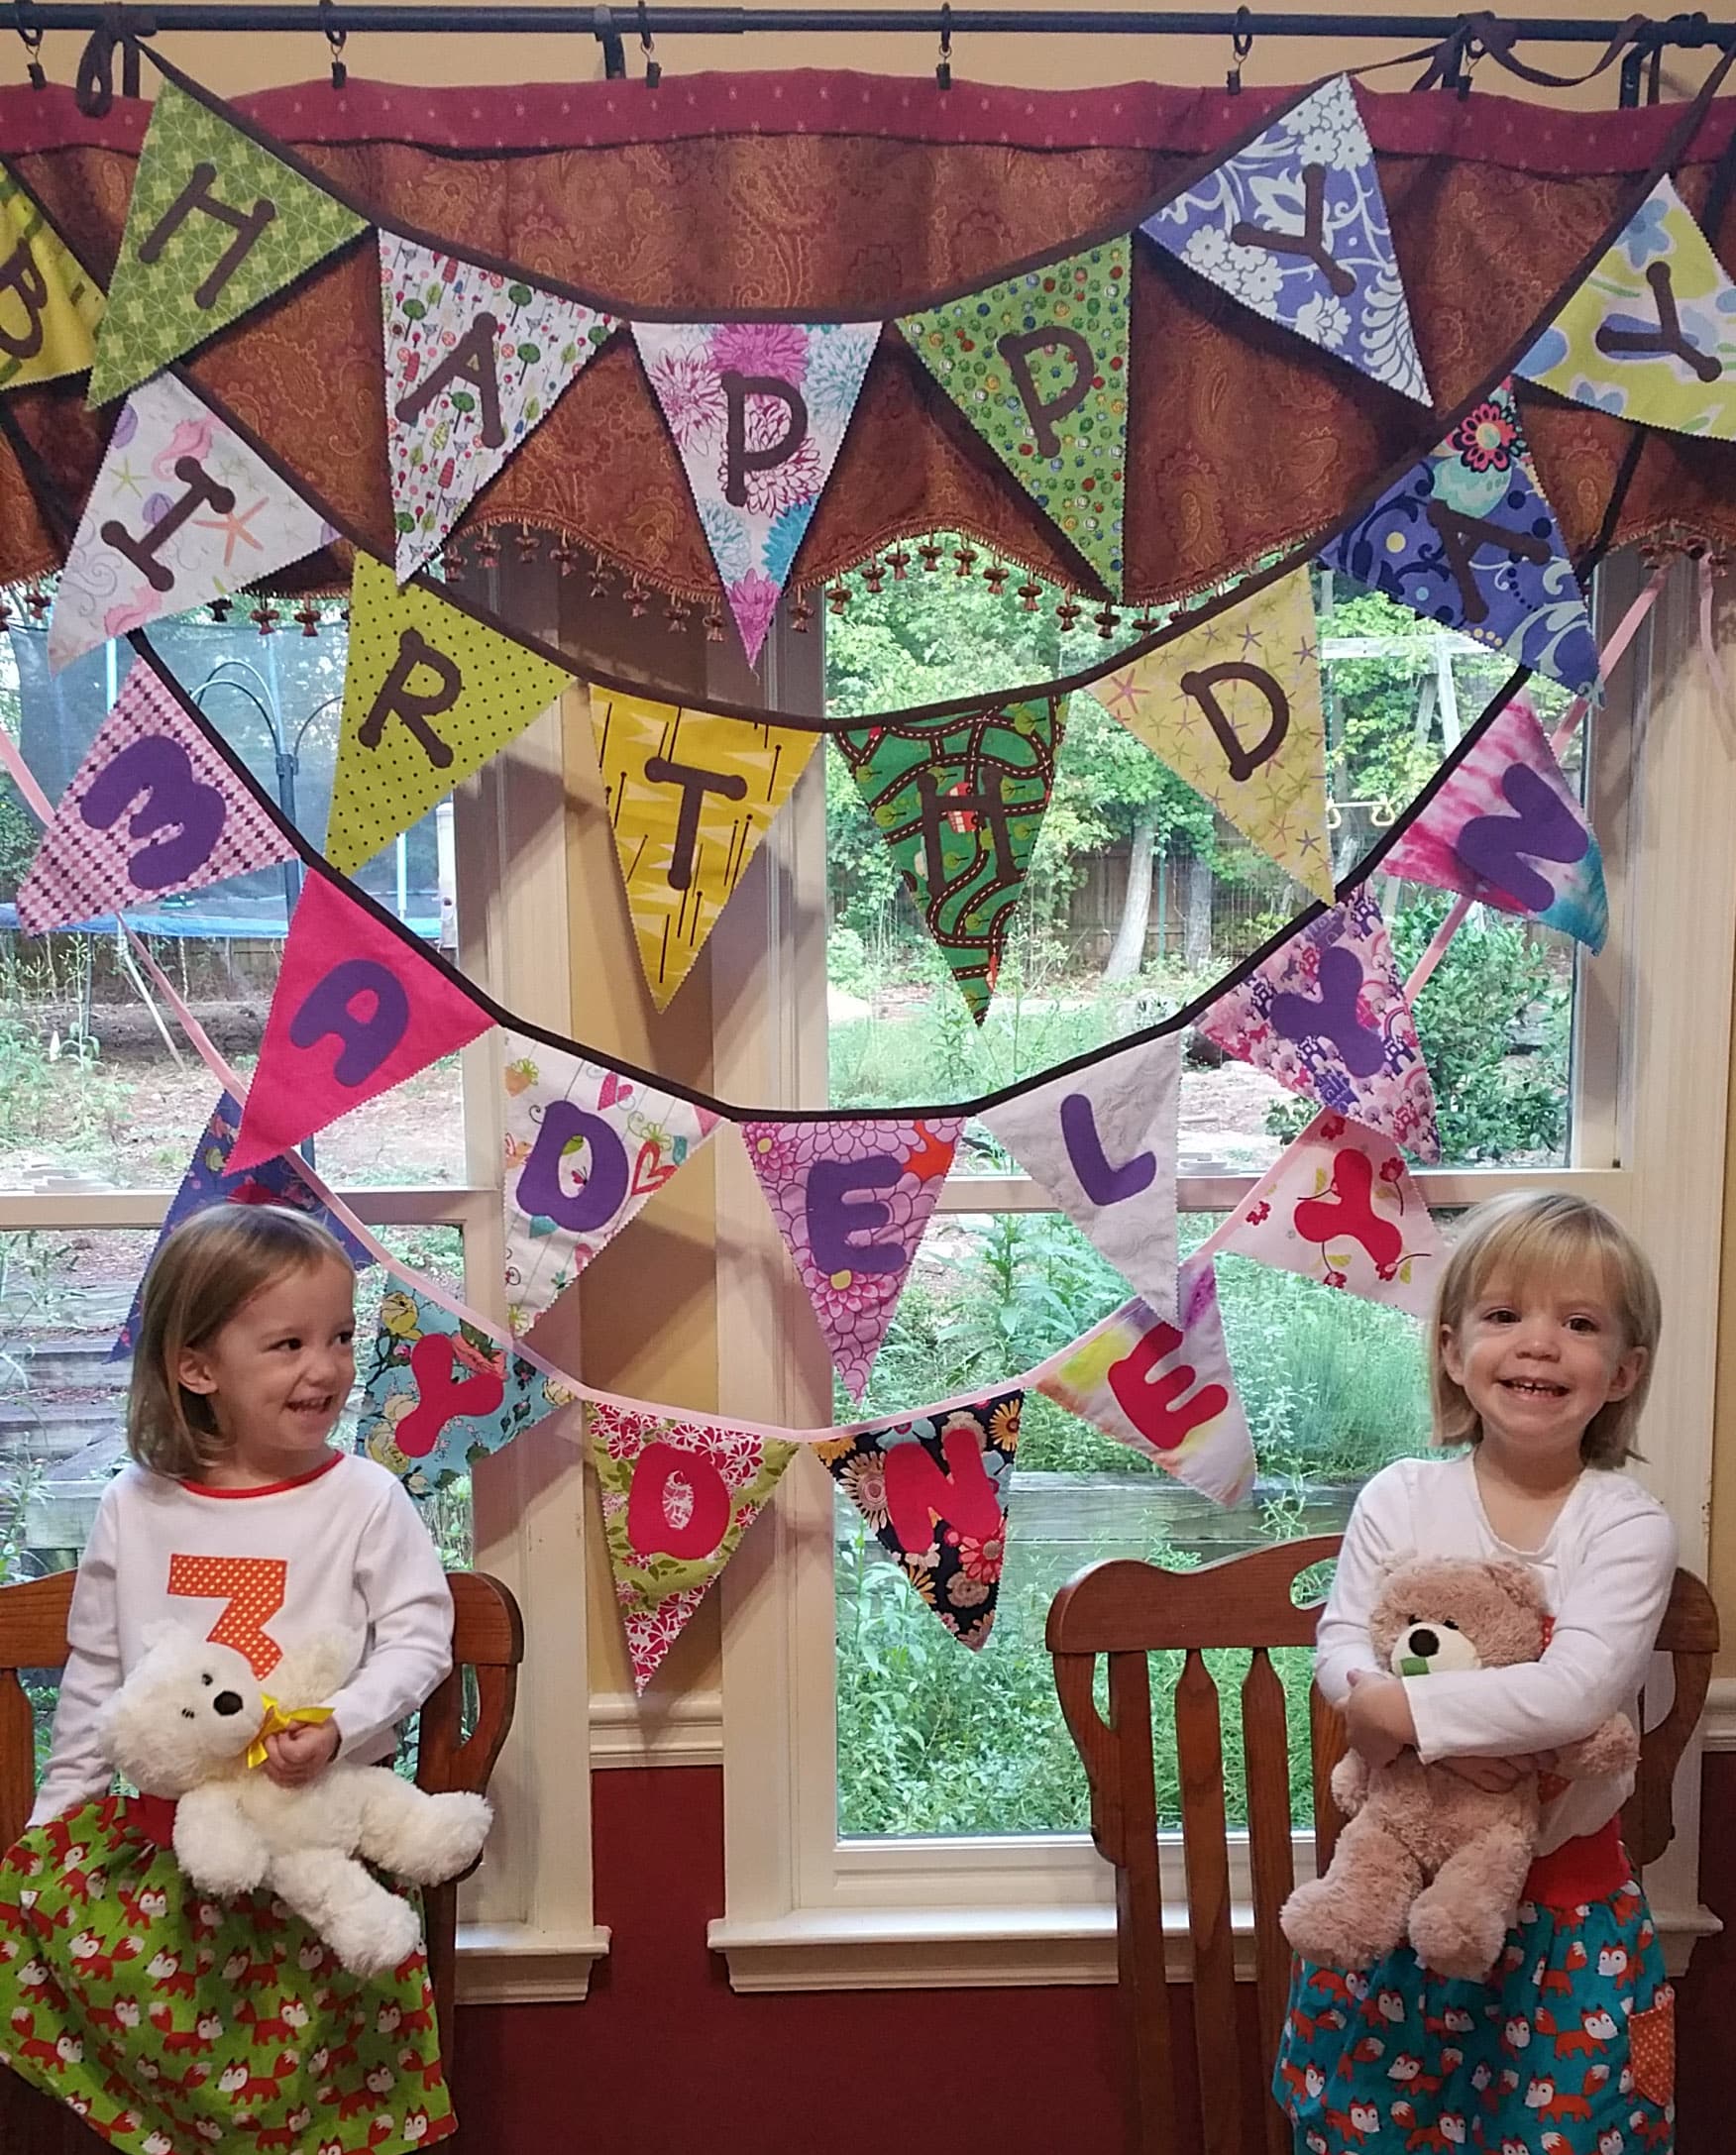
 too often occasionally. 😉 While I don’t enjoy decorating for birthday parties, I do have one tradition that I started when my oldest turned four. I made a decorative birthday bunting that reads “Happy Birthday,” and I made a separate banner with each child’s name on it. Well, here we are with the twins turning three this year and I still hadn’t gotten around to putting their names up! My kids know I don’t decorate a lot for birthdays, but they know this sign will be up to greet them on the morning of their birthday. I love that. I love the joy on their faces when they see it (or maybe it’s the pile of presents next to it, but still!). I like taking their picture next to it every year too. And, now I’m happy to announce that I have finished everyone’s banners! I thought this would provide an easy tutorial in case anyone else is interested. I find this a great way to use up hand-me-down fabrics or scraps. Let’s get started~
Gather up your supplies:
- Pattern piece. If you don’t want to use the “pattern,” you can take an 8.5″x11″ piece of paper and fold it in half lengthwise (like a hot dog bun!). Mark the middle on one short edge. Open your piece of paper up and draw lines, connecting the two bottom corners up to your marked middle on the opposite side, forming a triangle. Voila! (Obviously, you can make the pieces whatever size you’d like!)
- Scraps big enough for your pattern. I used all woven, but you can use whatever you have!
- Pinking shears
- Thread
- Sewing machine
- Wonder clips or pins
- 1 package of extra-wide, double fold bias tape in your preferred color
- Steam-a-Seam 2 or Heat ‘n Bond Ultra Hold (or other no-sew fusible web)
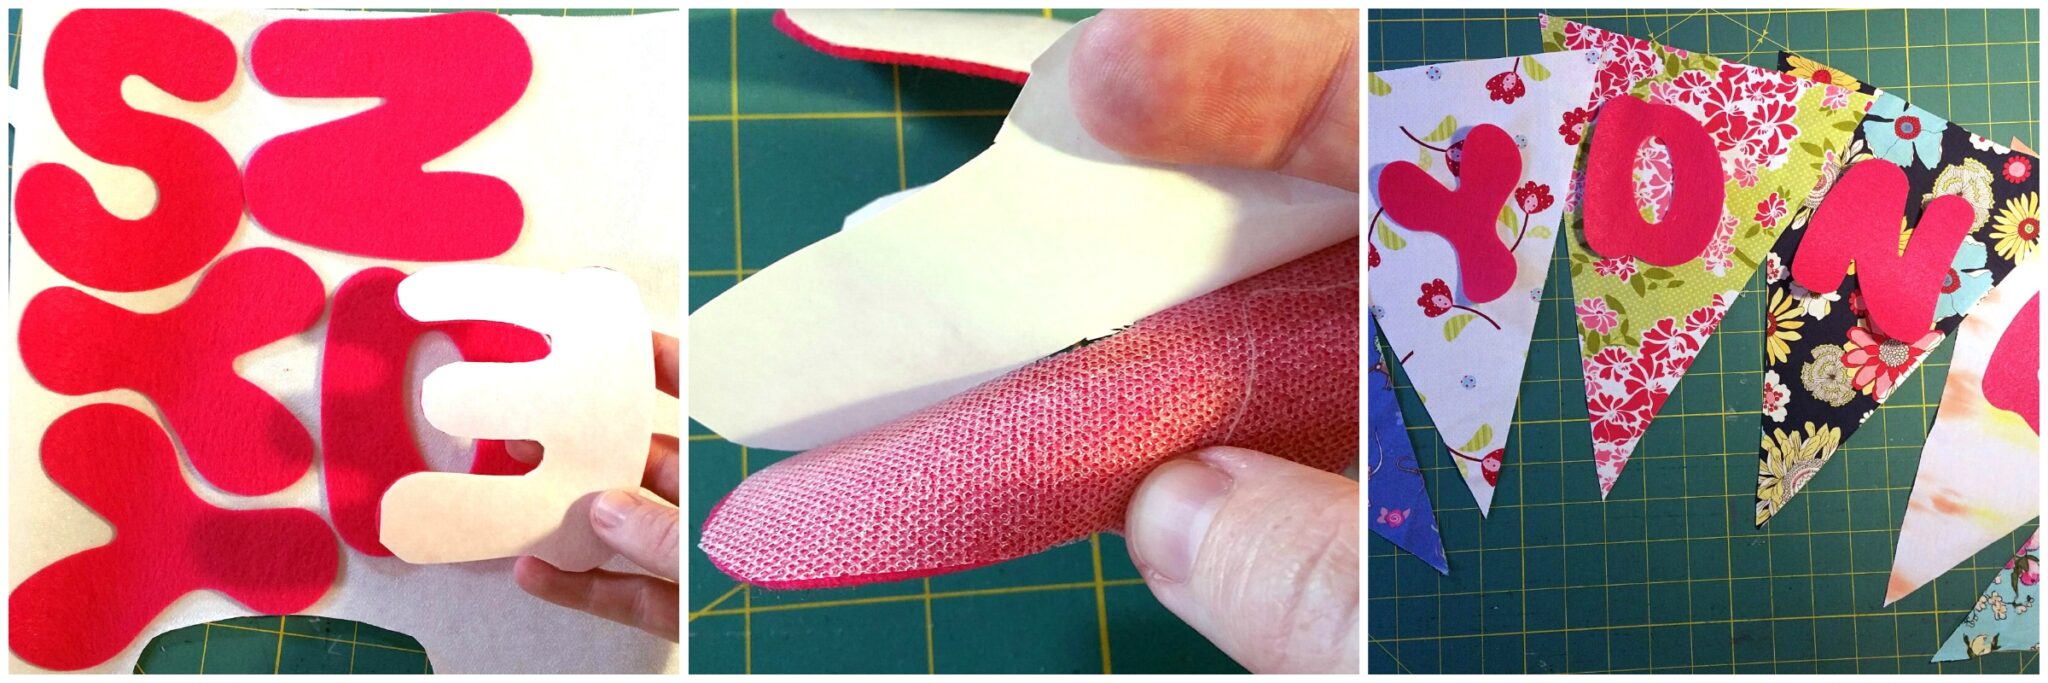
- Letters pre-cut (I bought mine from Sunshine Annie Die Cuts on Etsy because I really didn’t want to make my own!)
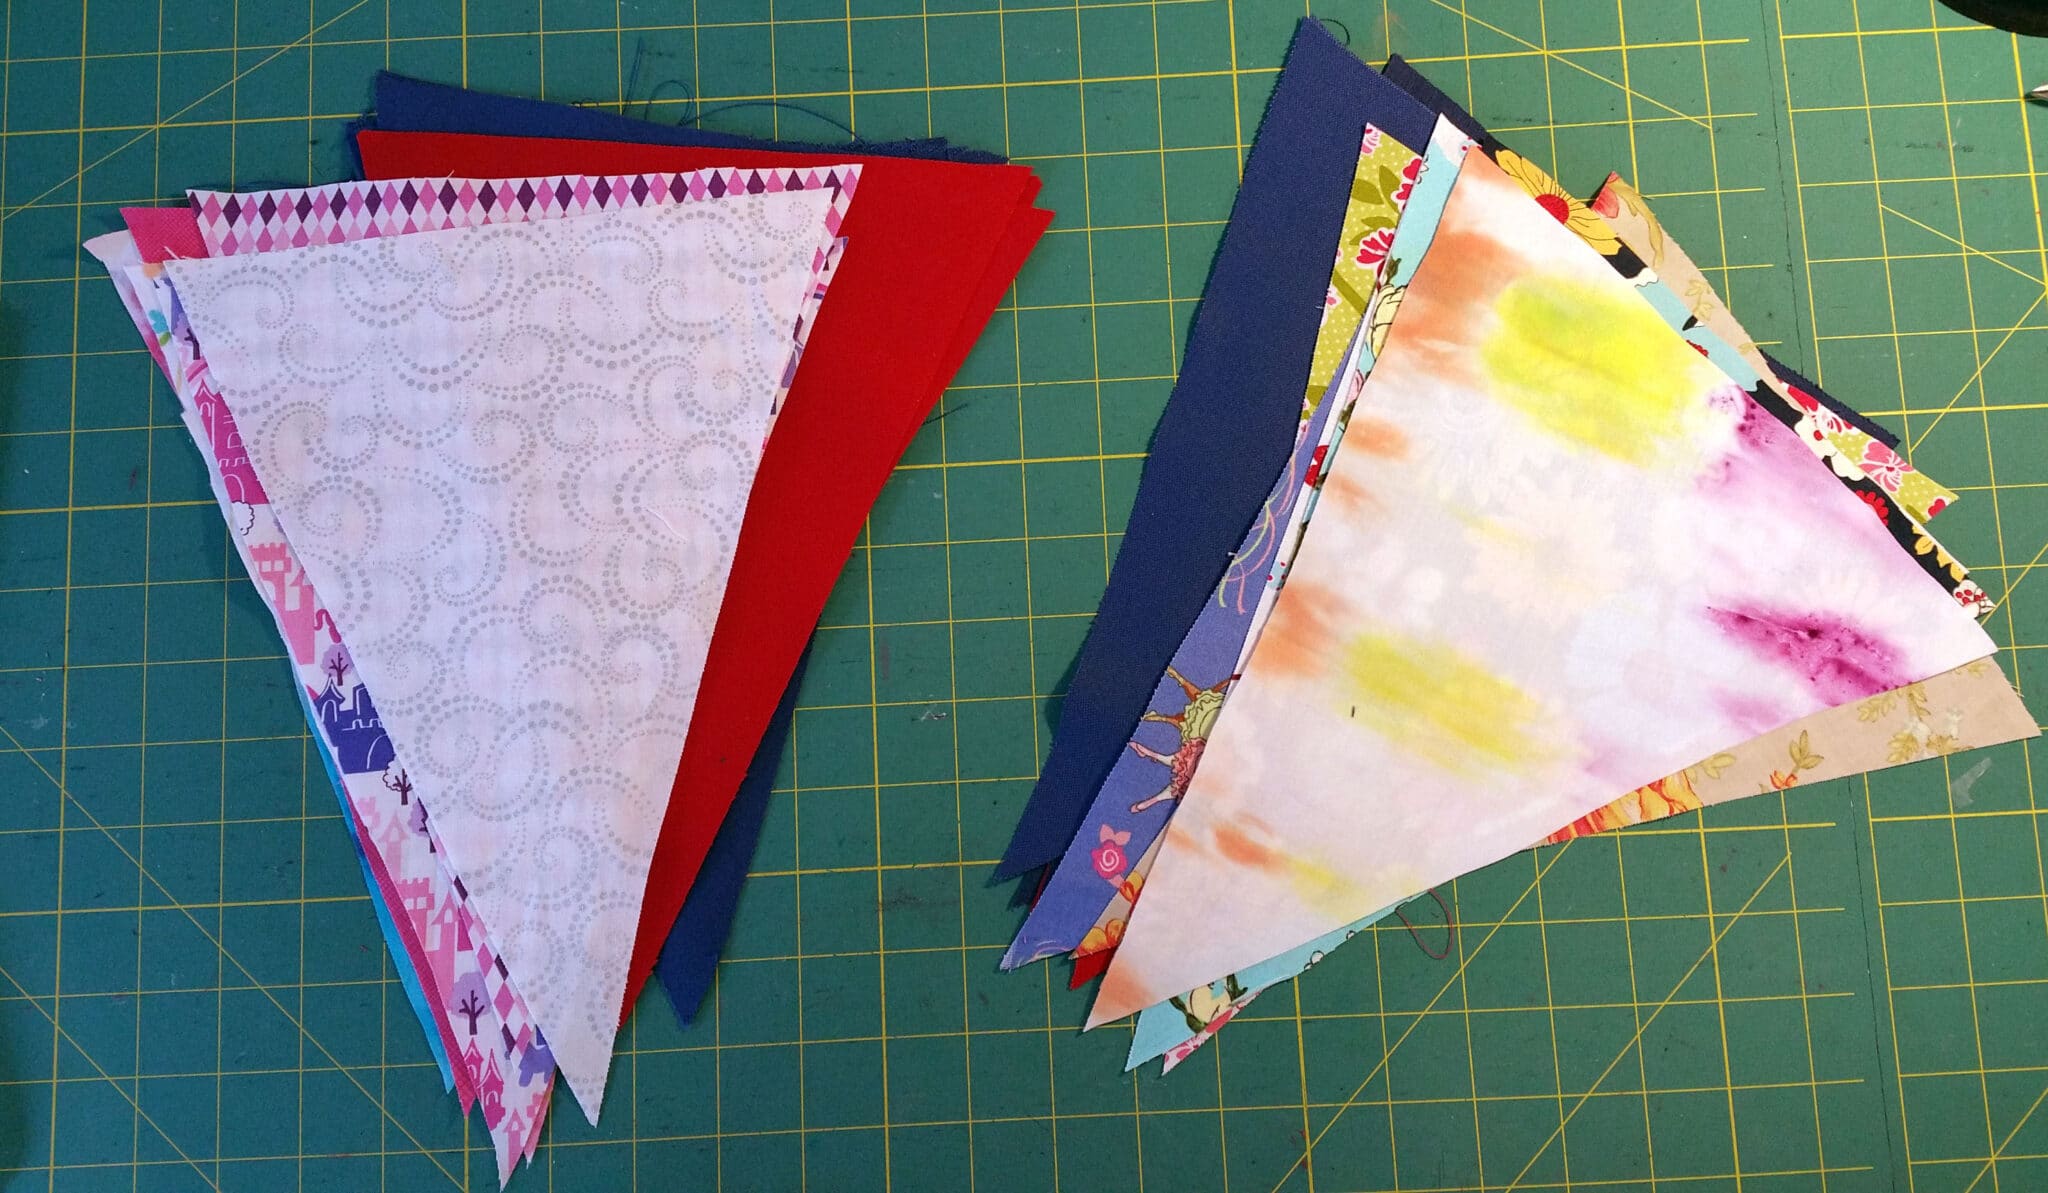
- Figure out how many triangles you need. You’ll need 26 for “Happy Birthday” plus more for each name you’d like to do if you want them to be double sided. Using the pattern piece, cut out your triangles. I happen to have a lot of kids with the same number of letters in their names, so I was able to put one child’s name on one side and pair it with another child’s name on the other. Obviously, I didn’t do this with the twins! However, I still used a cheap solid fabric for the back of my triangles because my banner is hung up in a window in the kitchen typically. You don’t have to back your triangles if you don’t want to do it!

- Iron each letter to each triangle. Steam a seam has one side that is slightly sticky and the other side has paper on it. You can place your letters on the sticky side and then cut out each letter. Peel the paper backing off each letter and place the letters on each triangle (approximately where you’d like them to go) and determine the layout of your fabrics. I like to alternate light/dark or floral/different….basically, just take a look and pick a combination that you like. Heat and Bond works slightly differently. You iron it onto one side and then peel the paper off to iron the letter to the triangle. Follow the instructions included with your adhesive for the best results.

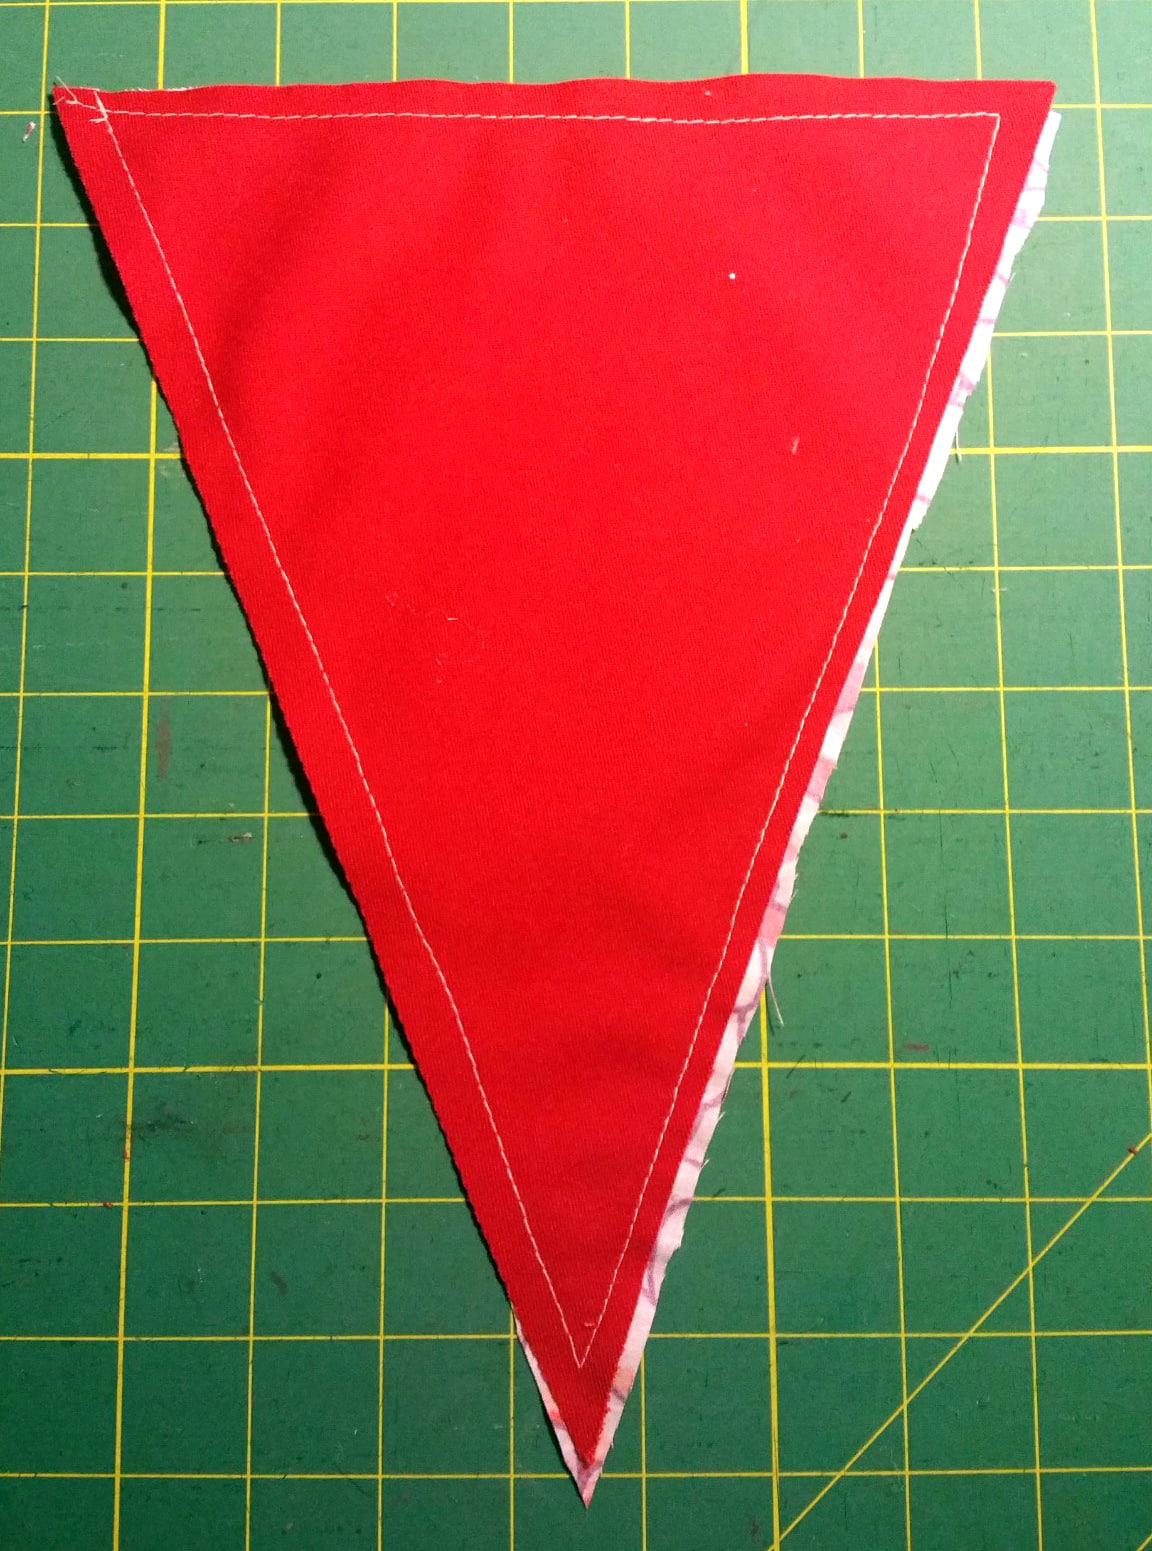
- If you’re doubling up on names or putting fabric on the back of your triangles, go ahead and pair up the triangles now. For doubling up on names, make sure you put the letters in the correct order on each side! For example, if you have DADDY on one side, the back will be YMMOM so that when you flip it over, it will read MOMMY. Sew around each edge of the triangle with a straight stitch, about 3/8″ from the edge. (Picture shows back of triangle with plain fabric I had in my stash.) Don’t worry if the triangle shifts a little as you’re sewing. The next step will hide that.
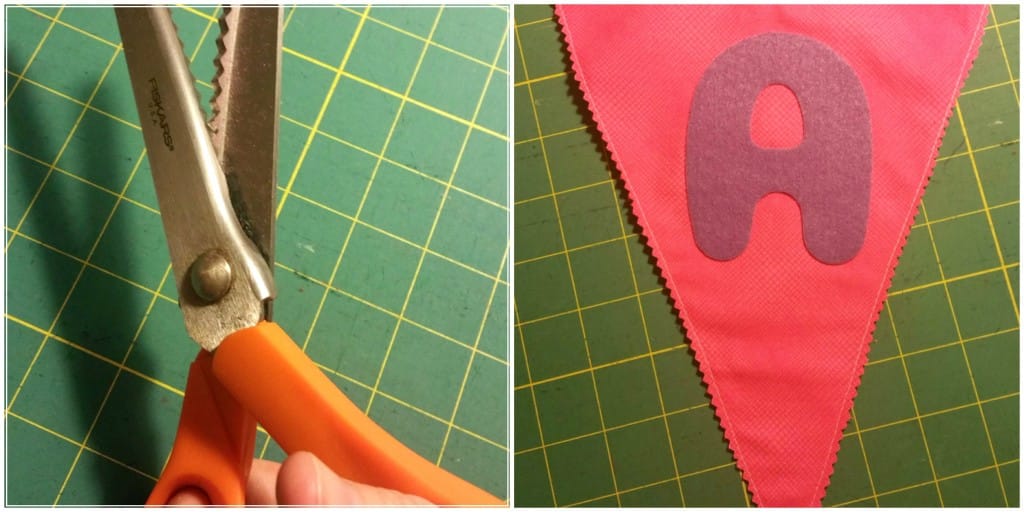
- Pink the two bottom edges of each triangle. Pinking shears will make a saw-toothed border, which will keep the edges from fraying.
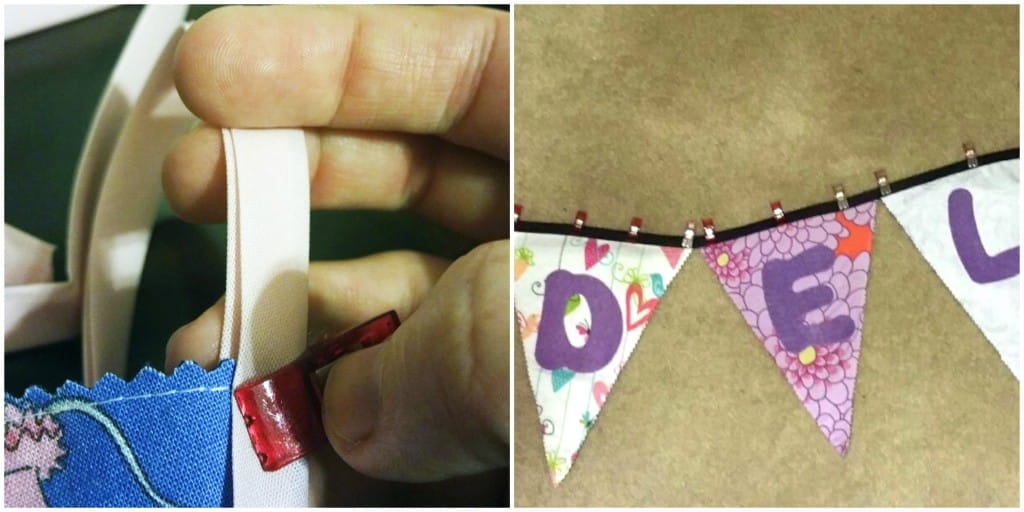
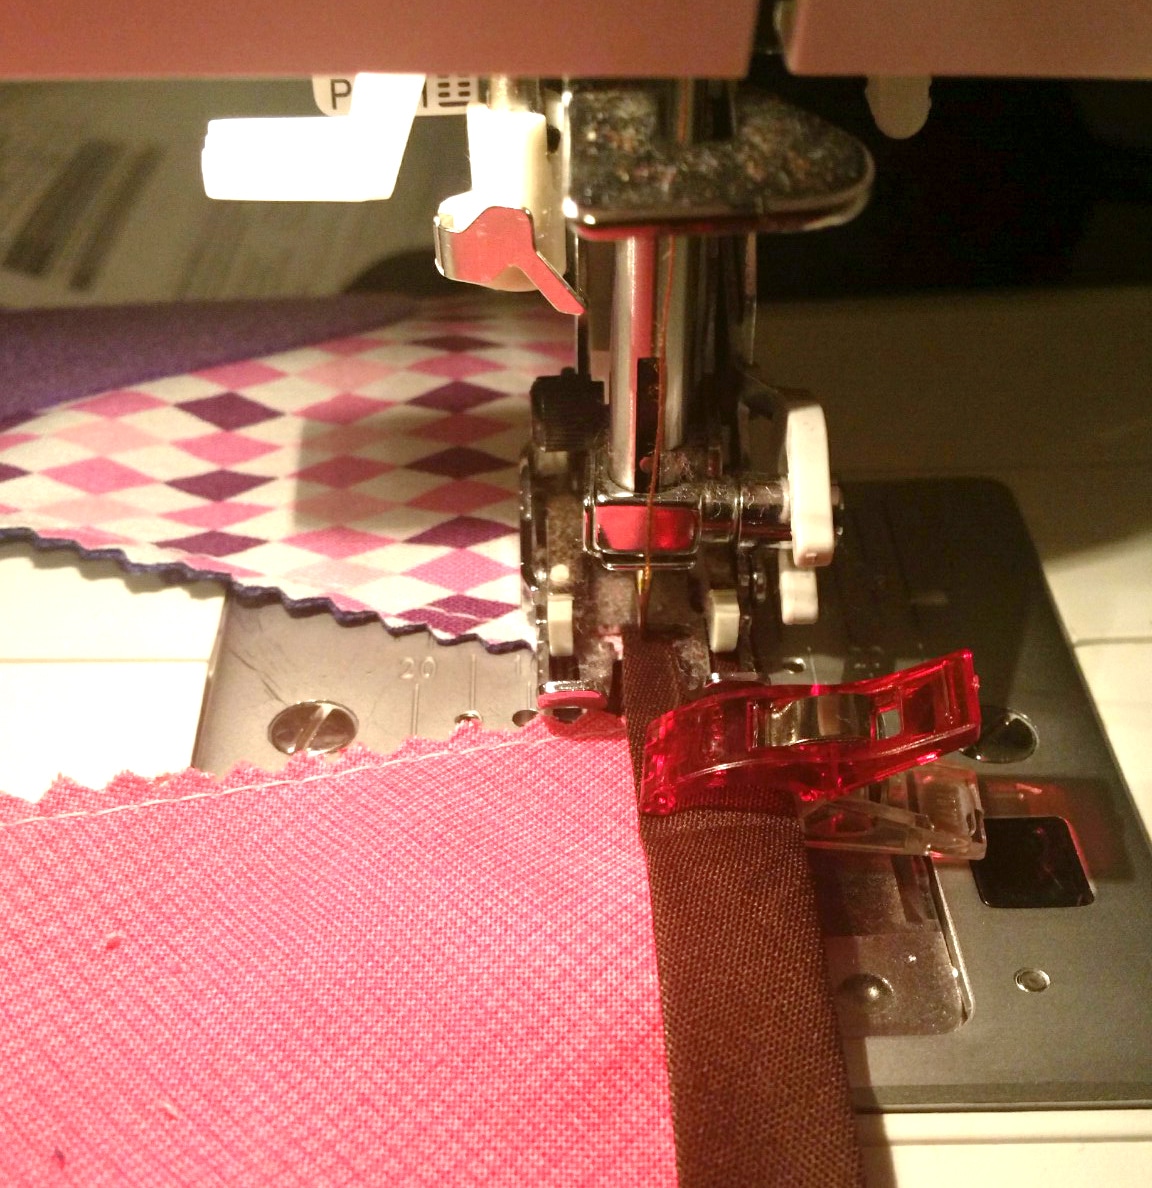
- Unravel your bias tape and find the middle. Match the middle of the tape with the middle letter (if an odd number of letters in your word) or between two letters (if an even number of letters in your word). I like to use clips for this step because it’s quicker and easier than pinning. Clip/Pin all of your triangles into place. Bias tape has one edge that is slightly shorter than the other. If you place this edge right side up, it ensures that you catch the back edge when you’re sewing the binding onto your triangles.
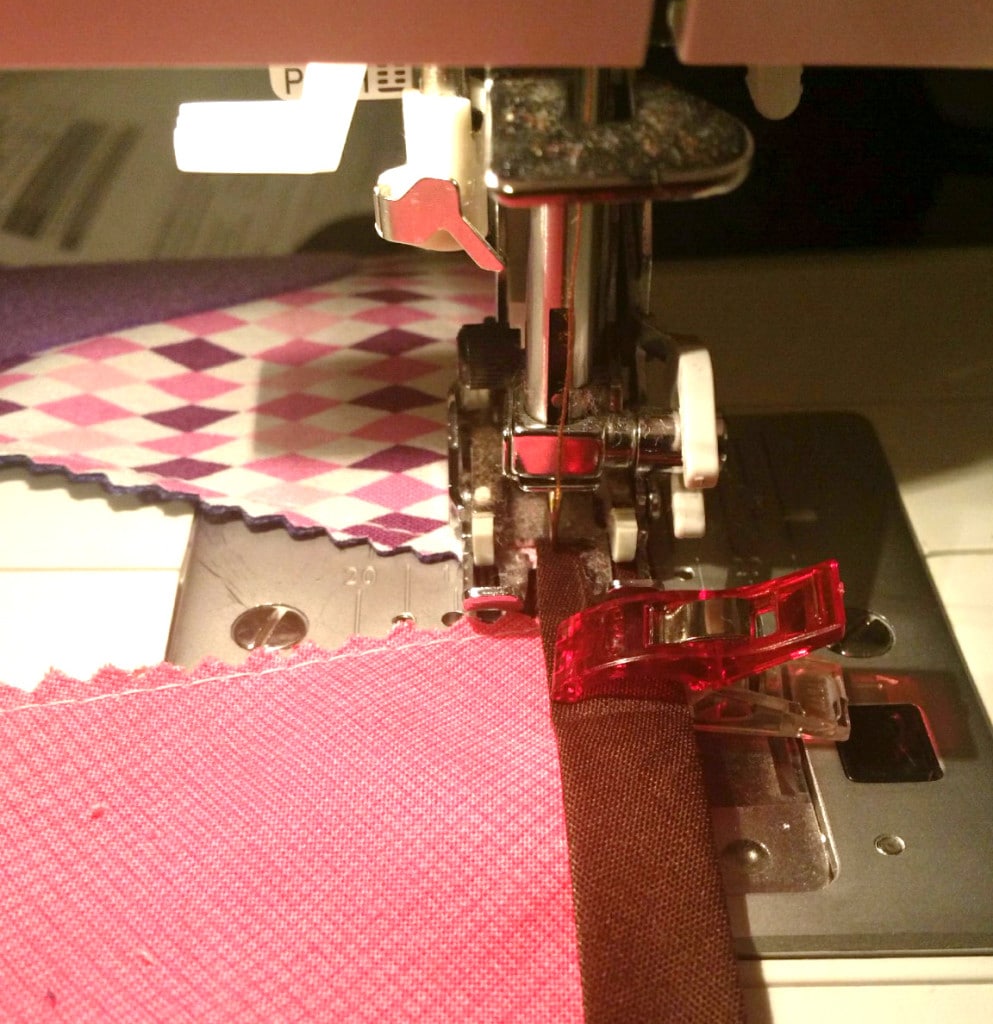
- Start at one end of the binding and sew the binding to the triangles, using a straight stitch along the edge of the binding.
- Voila! Come share your creation in the 5 out of 4 Patterns Group on Facebook!


**This post contains affiliate links. When you use the affiliate link, you help support this site! Thank you!**
absolutely! I LOOOVE these clips and they would definitely be put to good use here 🙂 Thanks for the bunting tutorial – I actually didn’t know that bias tape has one side slightly shorter than the other!
We having birthdays coming up (ok, a few months… but it takes me a while with allmy projects!) & I can’t wait to do this!!
Love wonder clips, Thx for the giveaway and cute tutorial! Love the bunting being personalized!
just bought some of these and i love them!
Wonder clips are so useful! I could use this idea for bunting in so many ways: graduations, baby showers, etc.
I love the longevity of a fabric banner. We usually print paper ones then feel sad when they go into the recycling. Might be time to make beautiful birthday bunting!
Winner, winner! I used Random.org to select a winner and you are it! Send me an email at [email protected] with your address and I’ll send you the clips. Thanks for reading the blog and playing along!
As a side note–I totally understand about the paper!
Yay!!! Thank you so much!! I will put the clips to good use making birthday banners!!
I will have to show this to my SIL. We have first birthdays coming up!
I have always wanted to try these clips out! Thank you for the giveaway and for the tutorial!