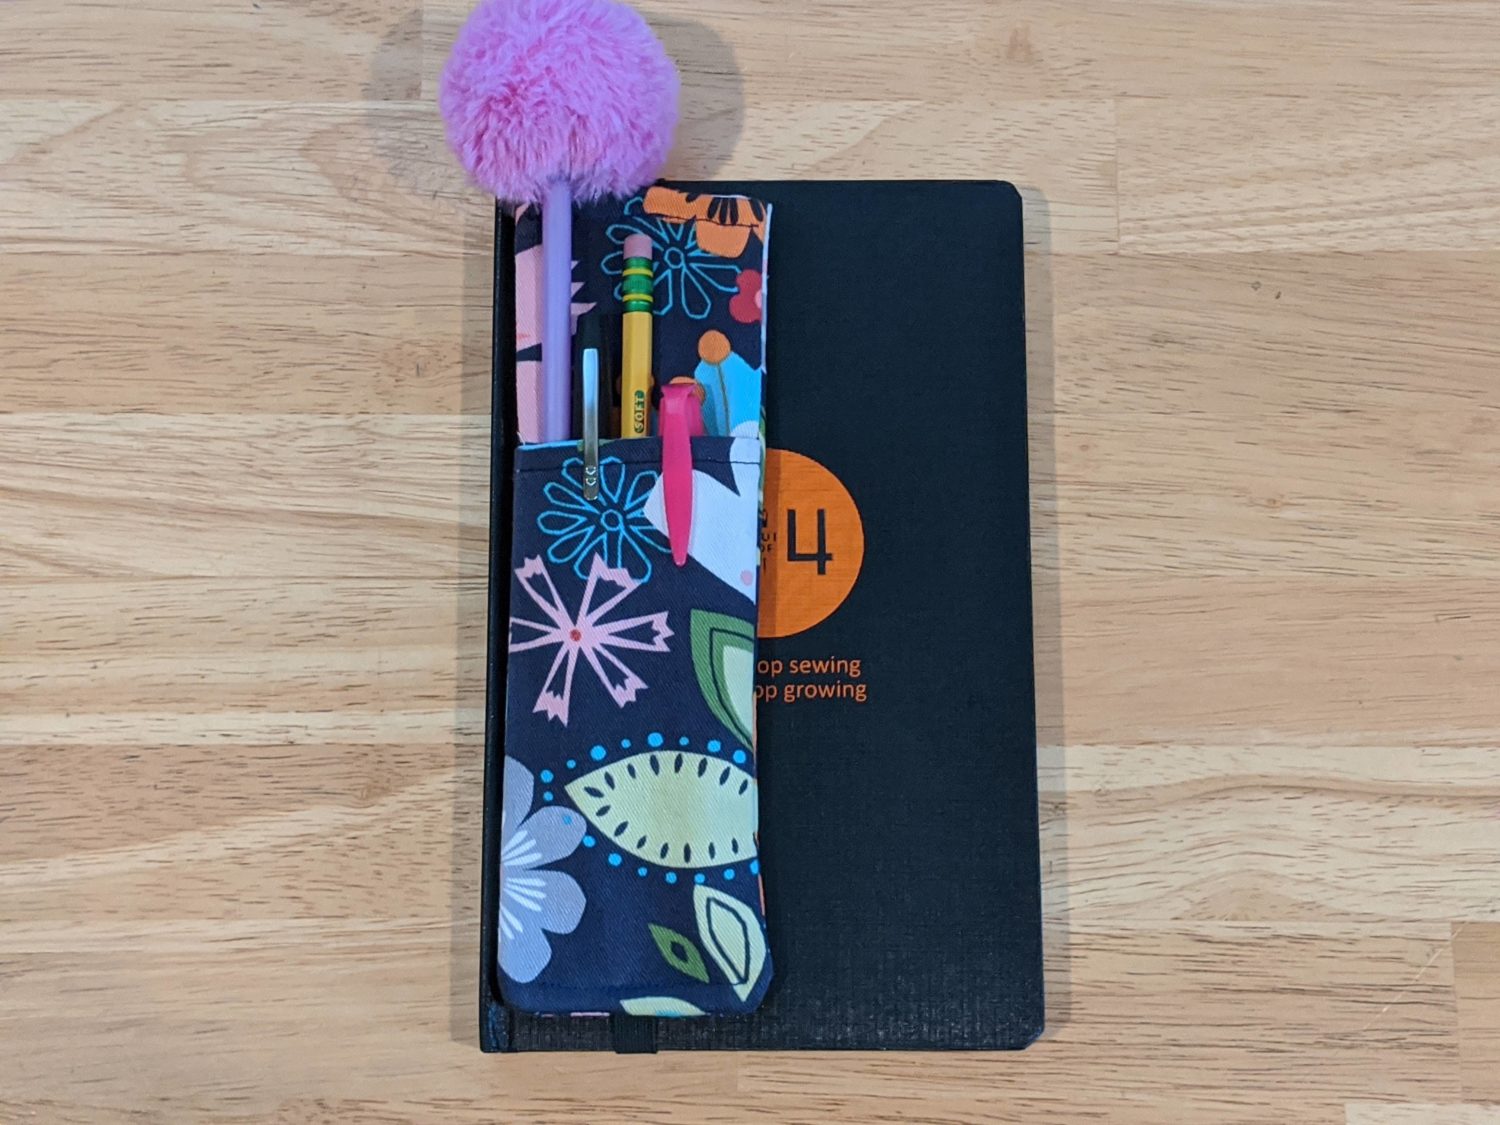
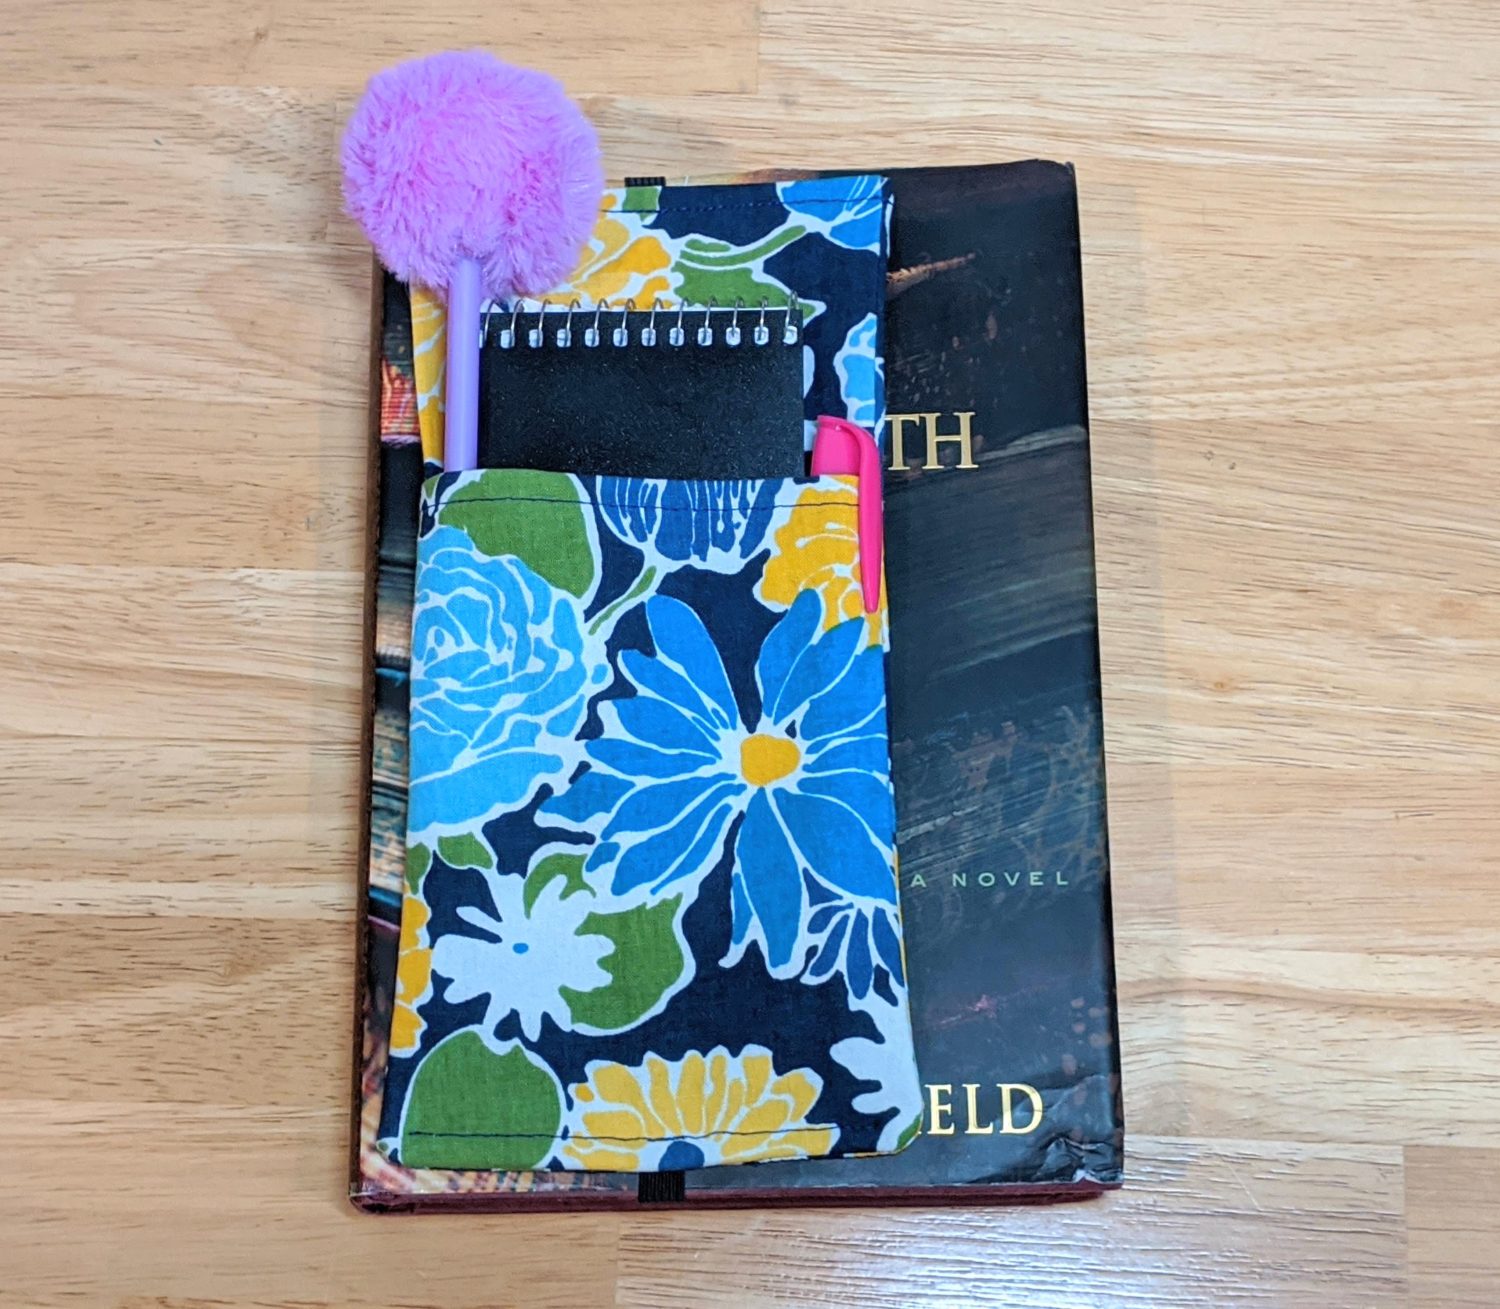
I have an issue with going to write in my notebook or journal and not having anything to write with. Then, I have to go find where I left off. I also like to take notes while I read, especially if it’s for a book club. I made these handy dandy bookmark/pencil holders that solve both of these problems at the same time!
Materials:
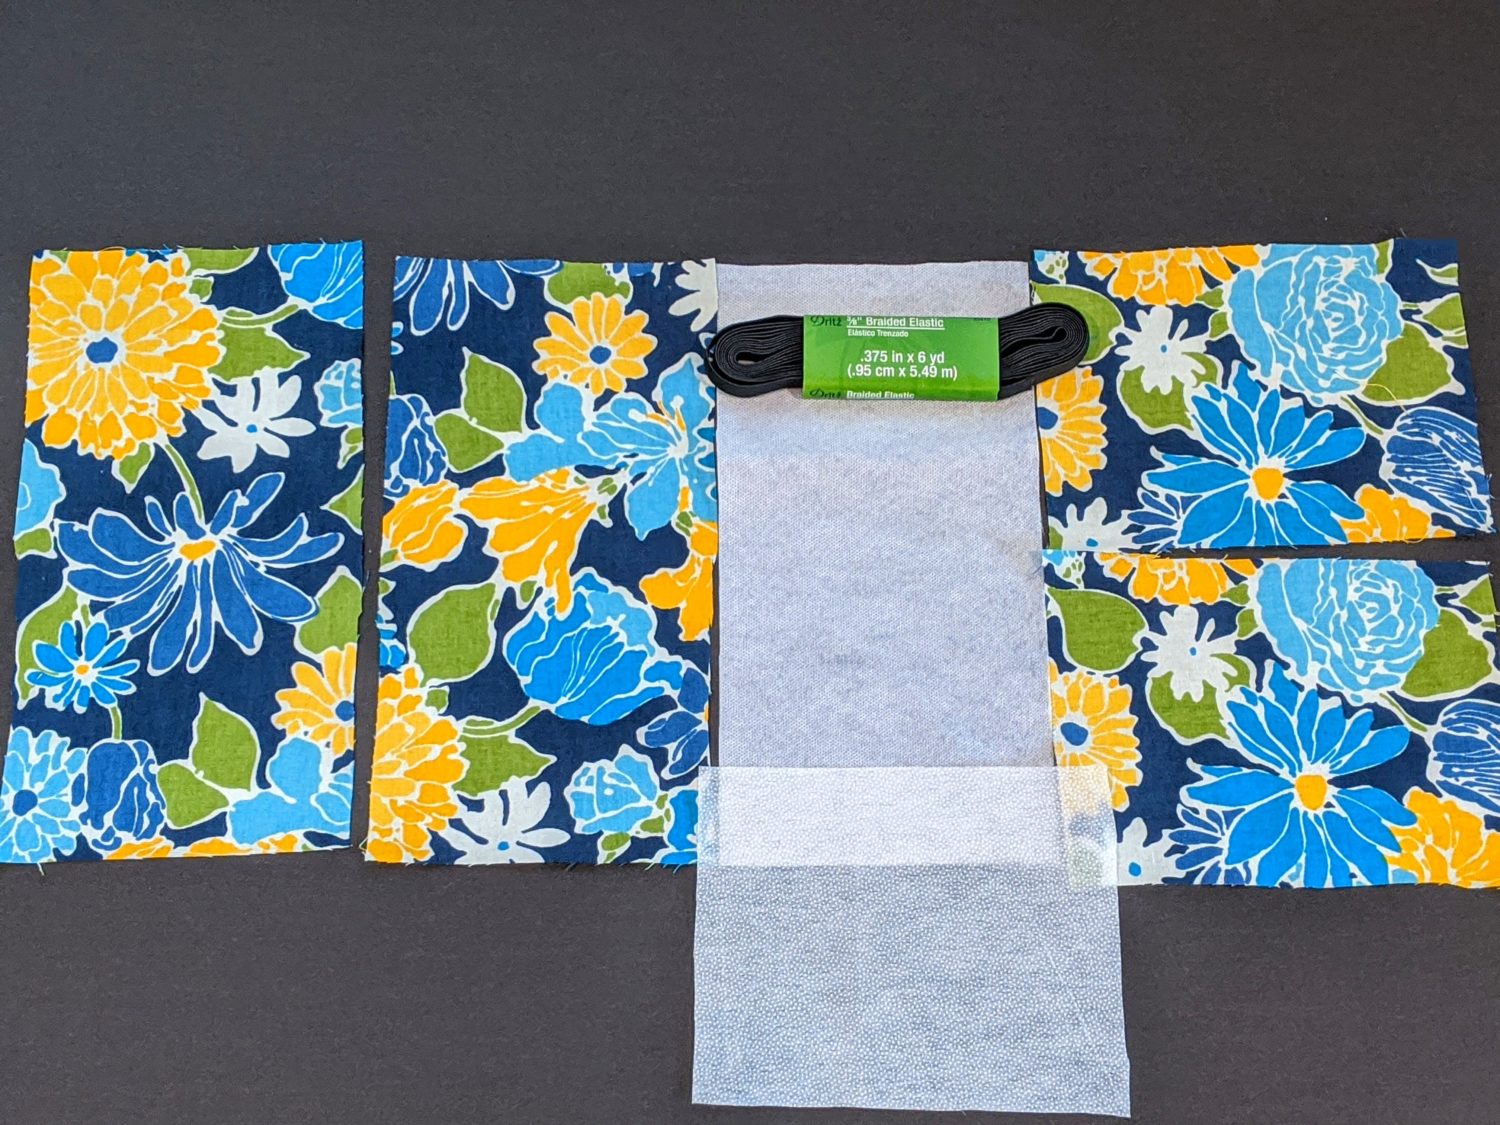
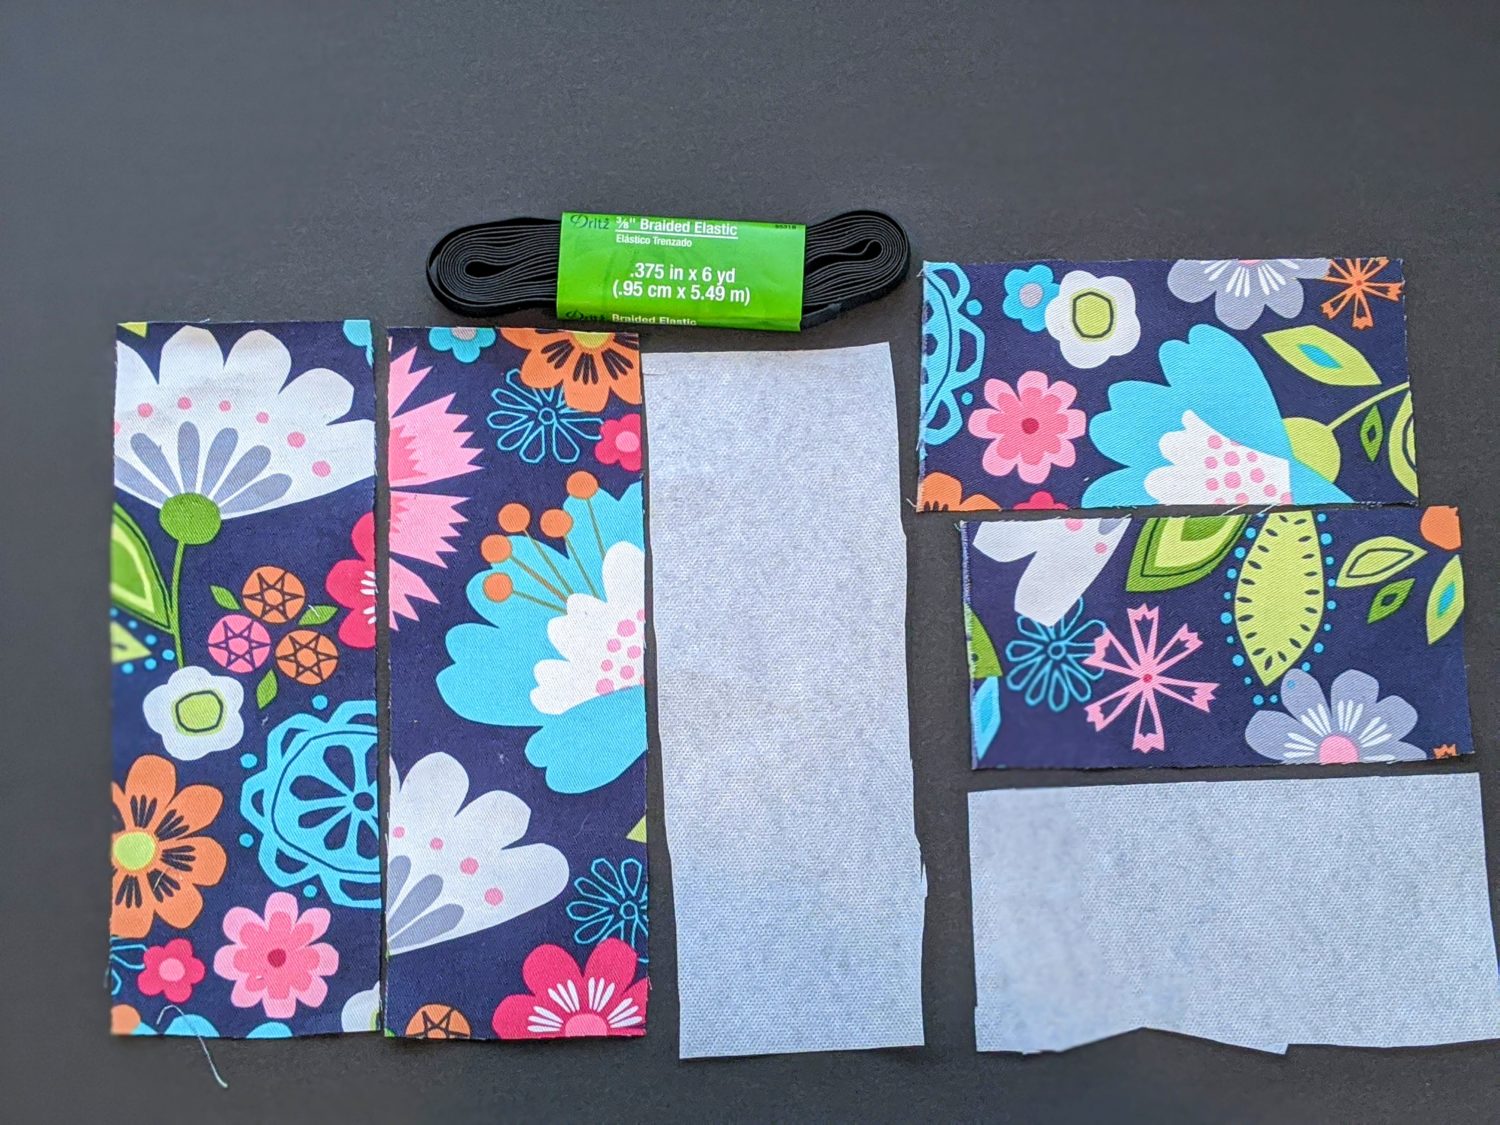
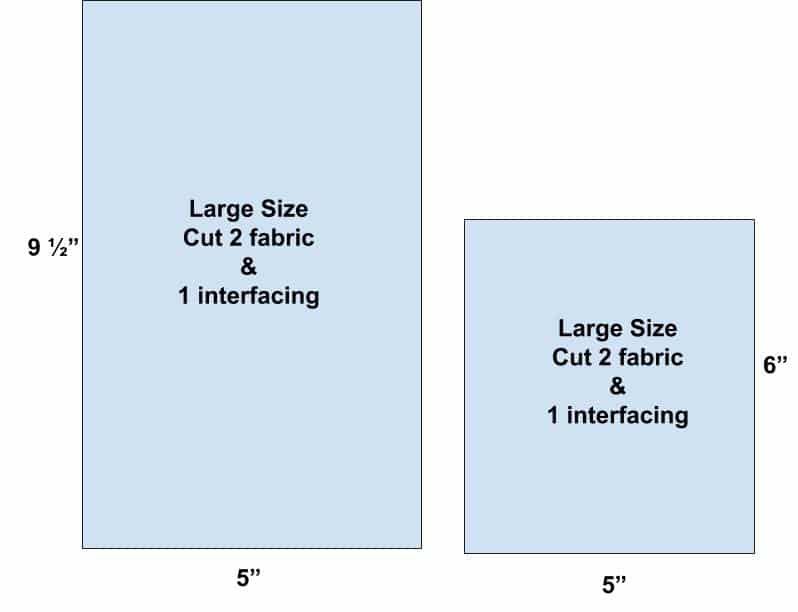
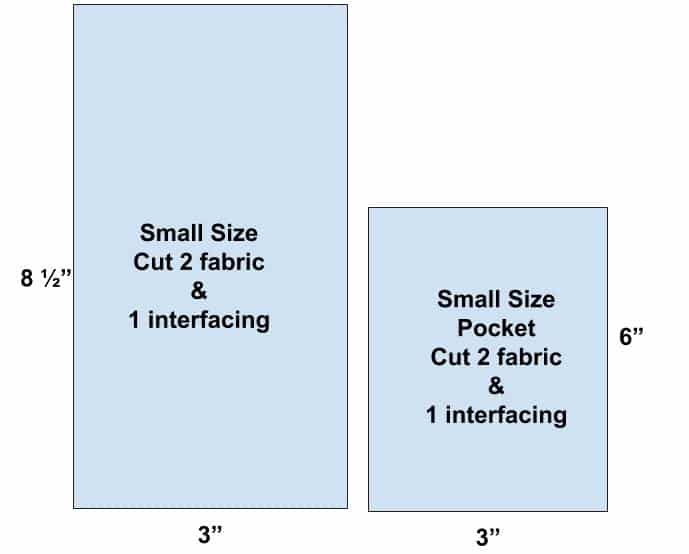
- Fabric: Cut 2 main and 2 pocket pieces: Large Size Measurements: Main: 9 1/2″ X 5″ Pocket: 6″ X 5″ Small Size Measurements: Main: 8 1/2″ X 3″ Pocket: 6″ X 3″ (see size chart pictures below)
- Interfacing: Cut 1 main and 1 pocket piece
- Elastic: 9″-10″ long (I used 3/8″ because that’s what I happened to have)
- Iron
- Sewing machine
Sizes
I made two different sizes, both are constructed in the exact same way. The smaller one is just for holding a pen and pencil, and the larger one can also hold a small notebook in it.
Let’s get sewing!
After your fabric and interfacing are cut out, lay one main fabric piece and one pocket piece down with wrong sides up. You will then follow the instructions for your particular interfacing to iron them onto the backsides.
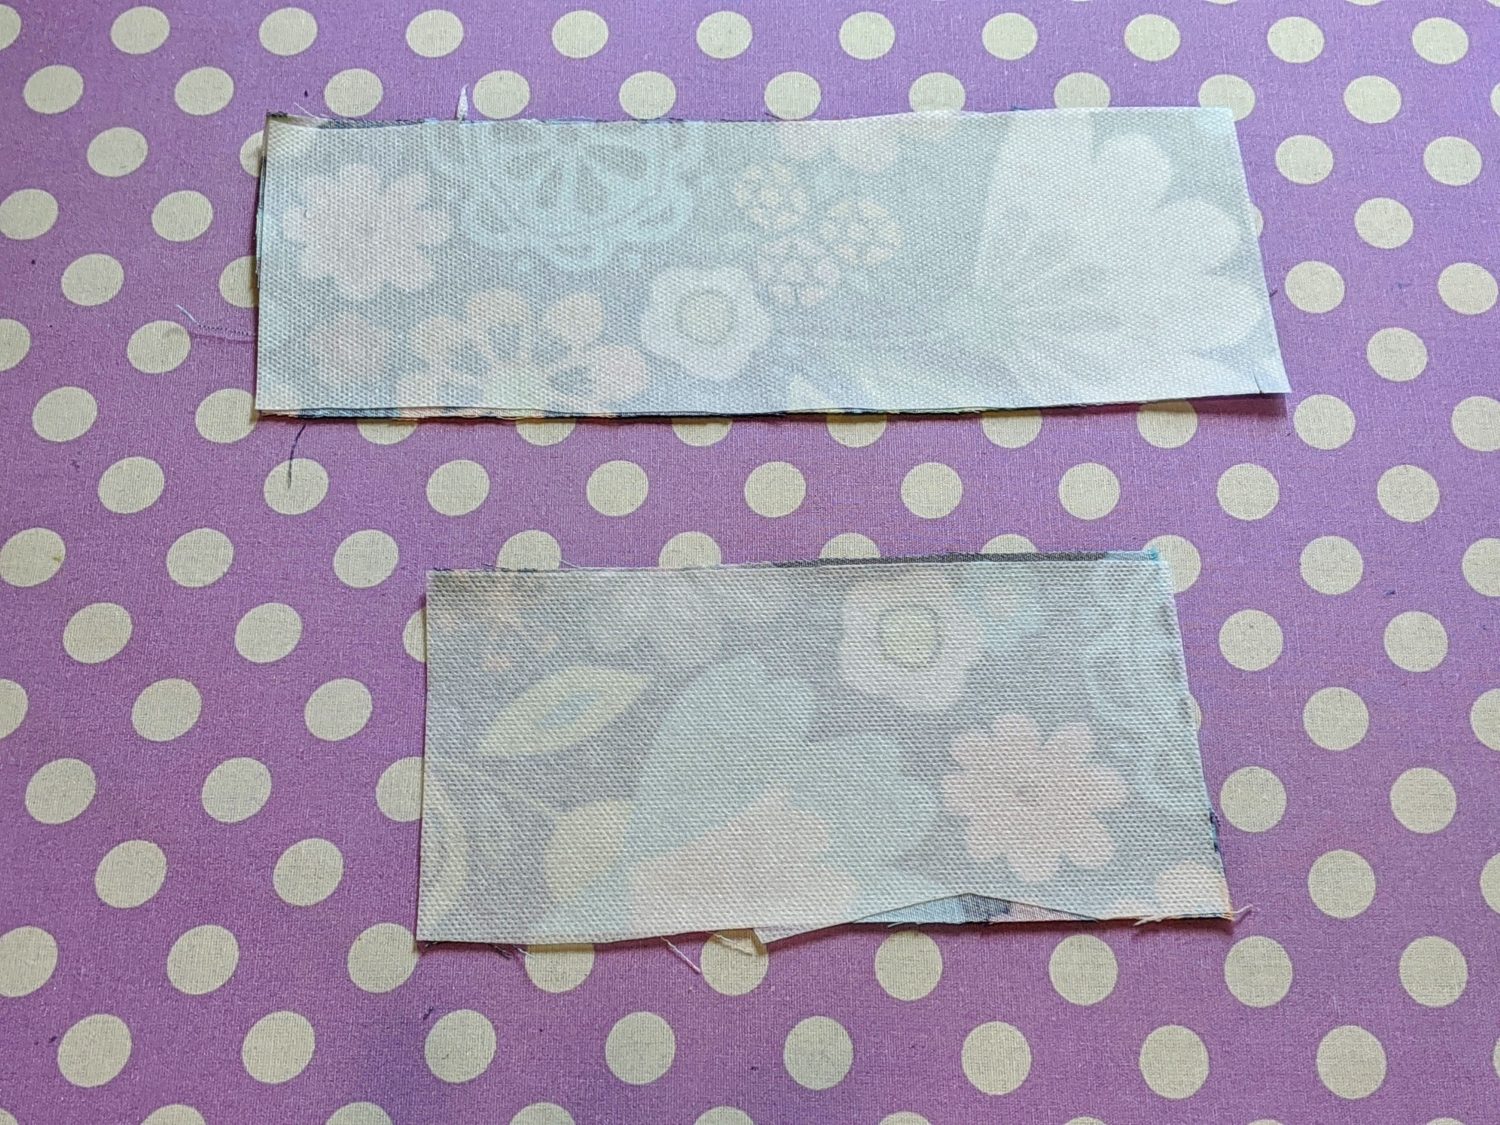
Starting with the pocket:
Seam allowances are 1/4″
- Place both pocket pieces right sides together
- Sew along one of the short ends
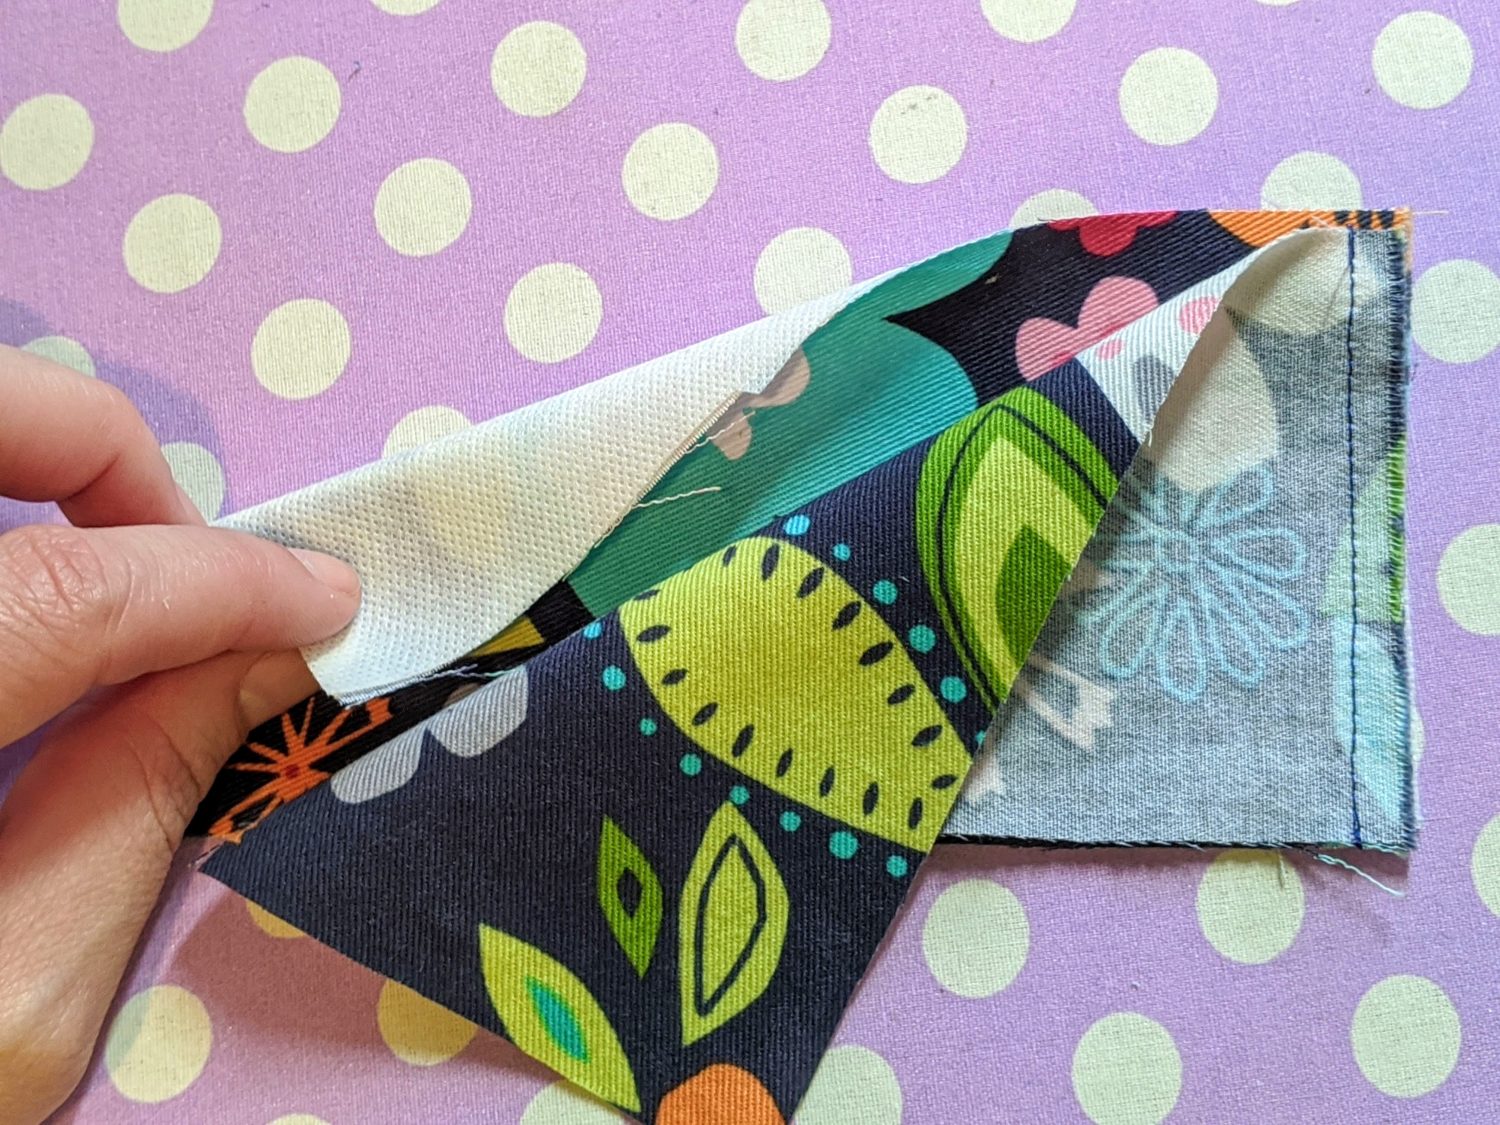
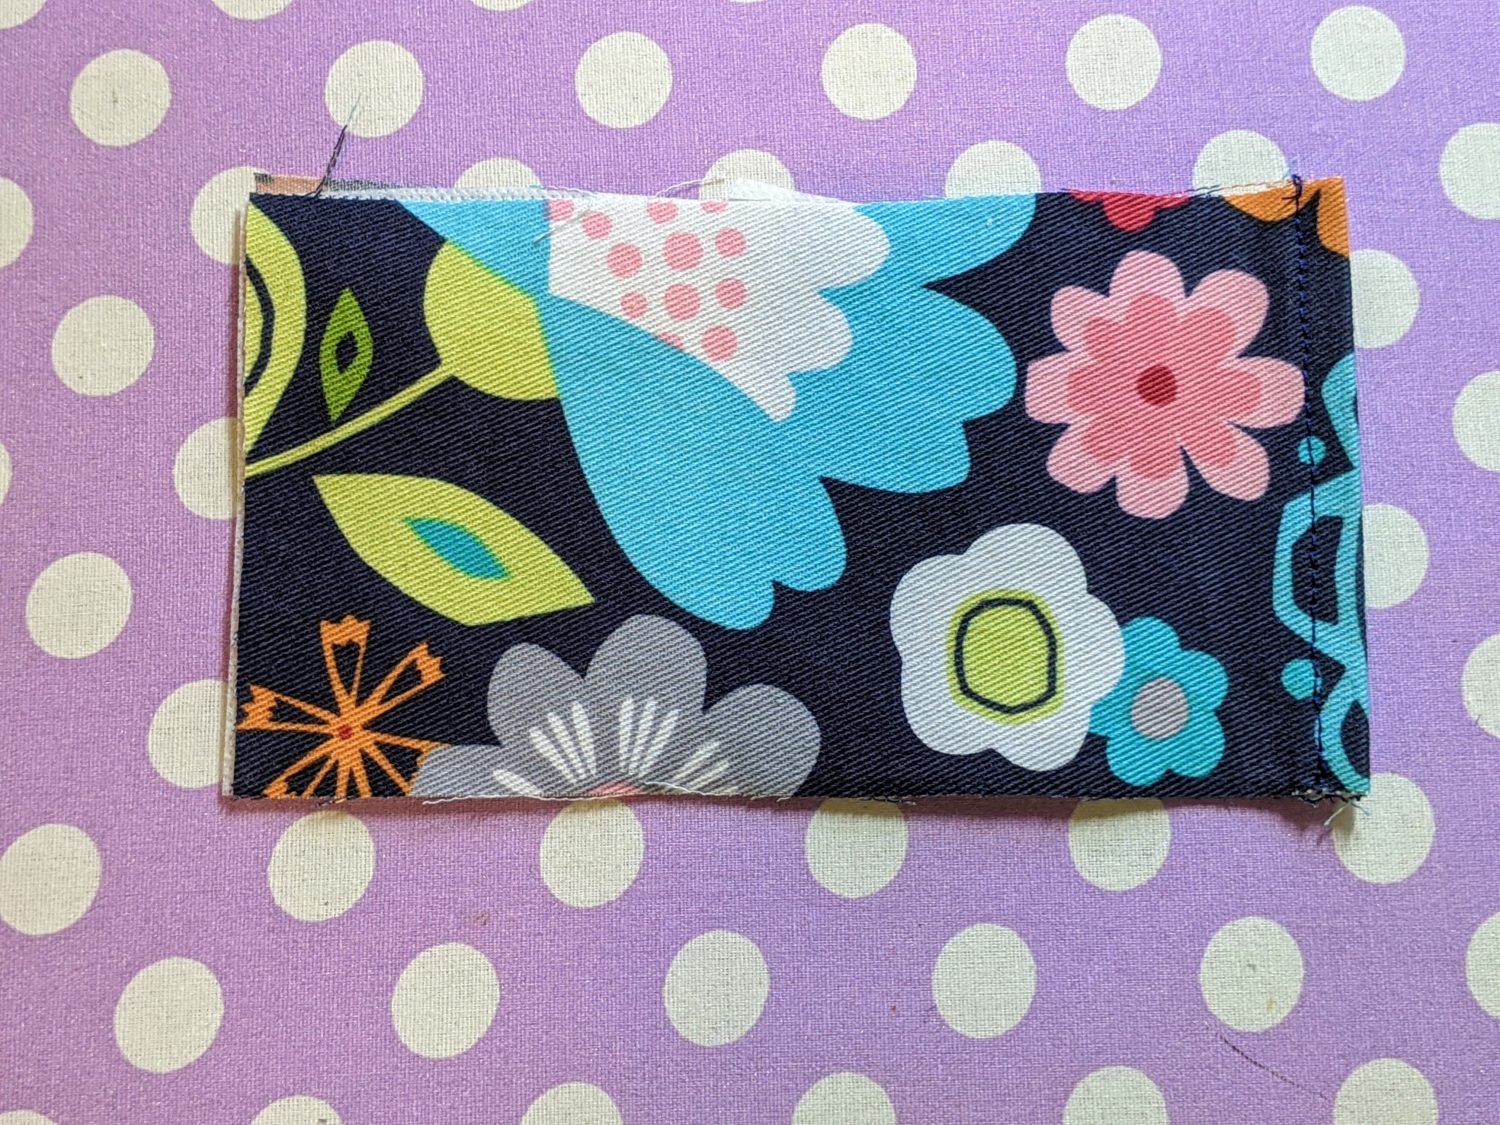
- Flip the pocket with wrong sides together and press
- Topstitch along the sewn end
Moving on…
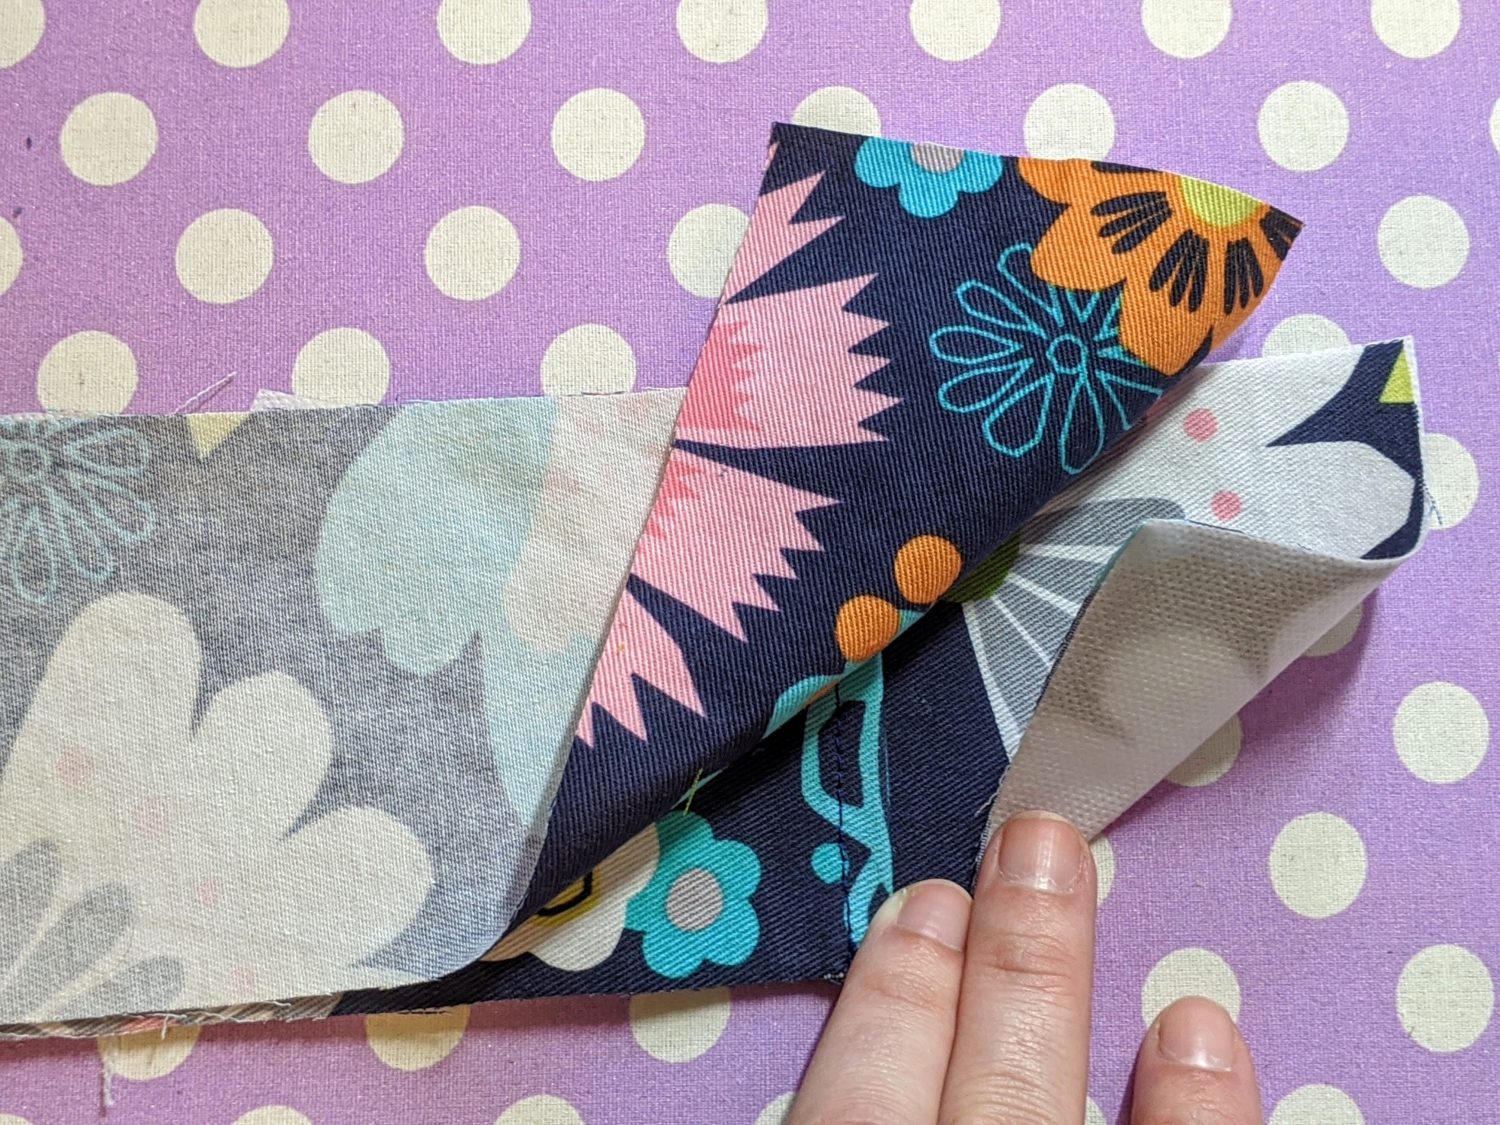
- Lay down the main piece (with the interfacing) interfacing pointing down
- Stack the pocket piece on top, with the side with interfacing on the bottom
- Take the other main piece and set it on top with right side down
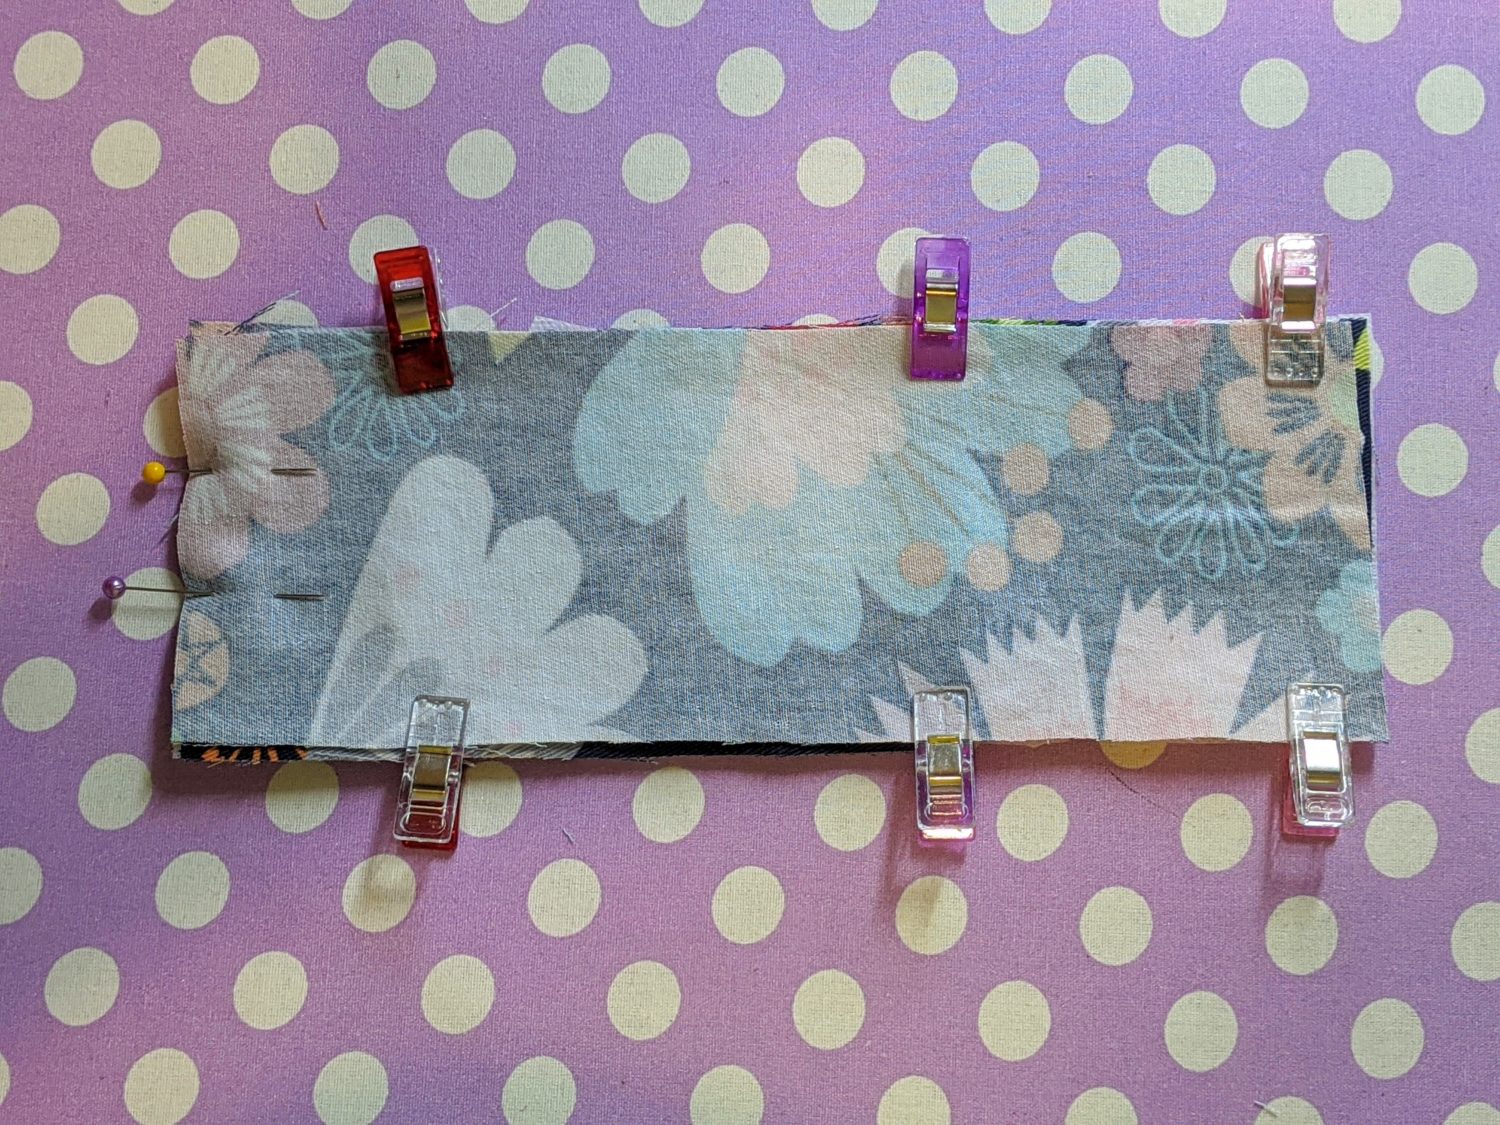
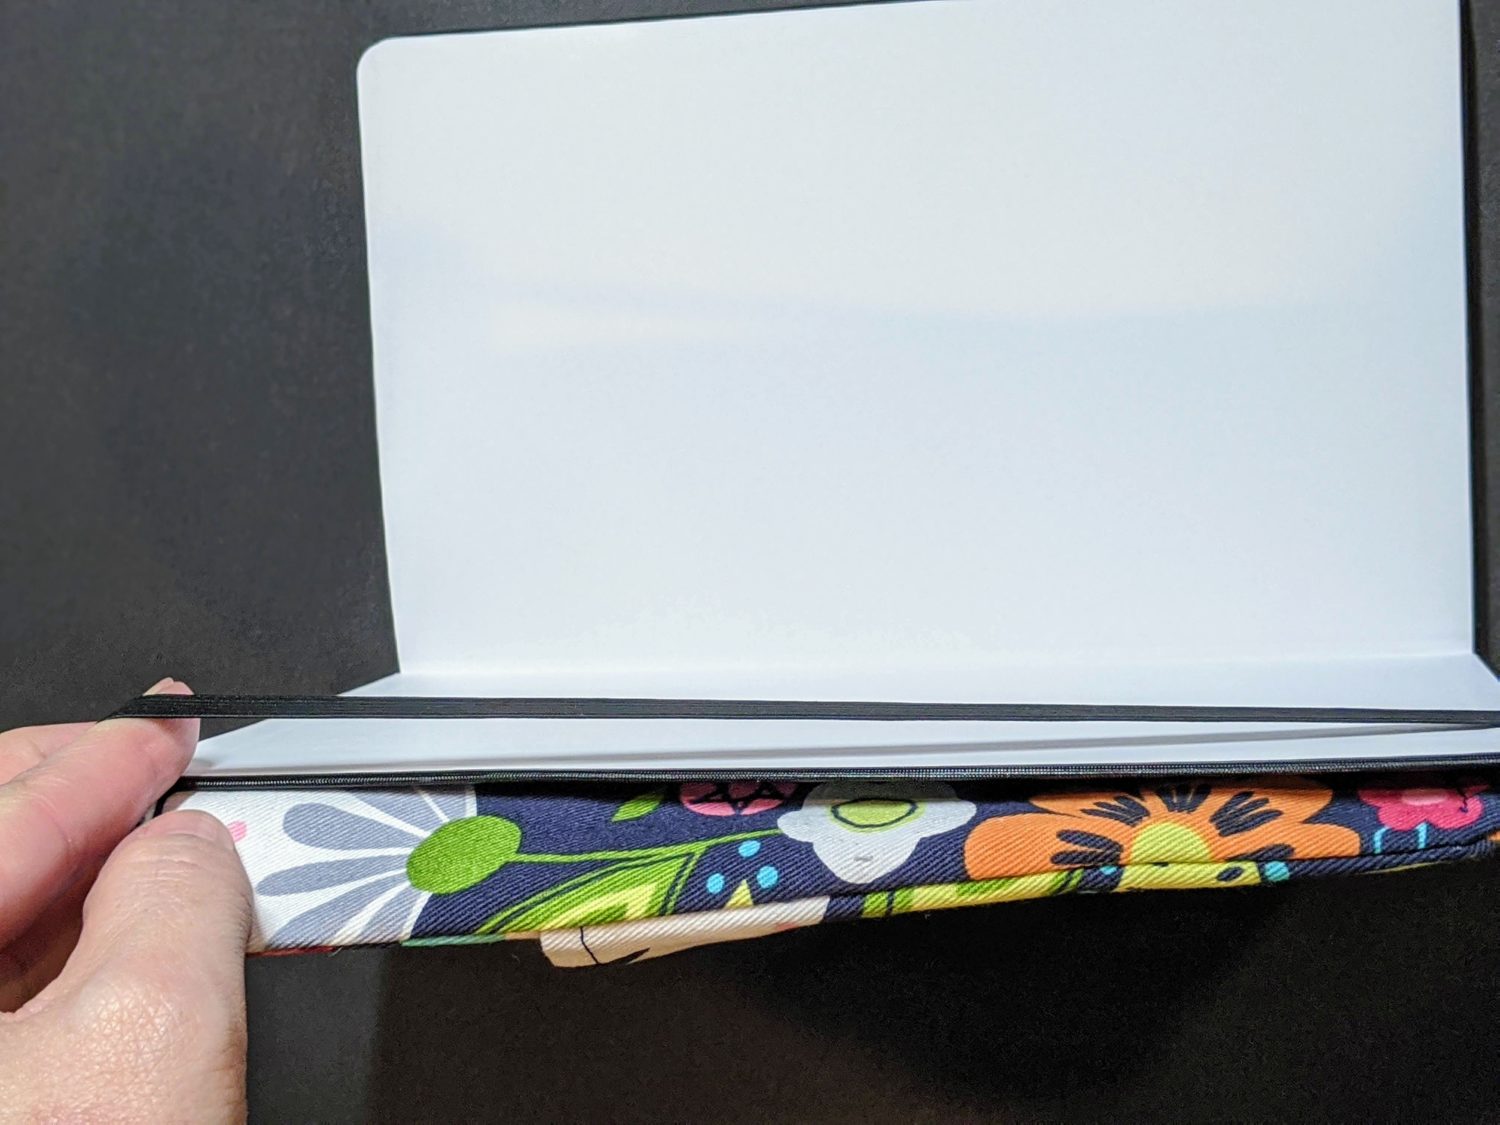
- Pin all along both of the long sides
- Leave one short end open for turning and leave a small opening for inserting the elastic at the other short end
- Sew along both long sides and over a small amount of one of the short sides (see pictures)
- Clip corners of the sewn end
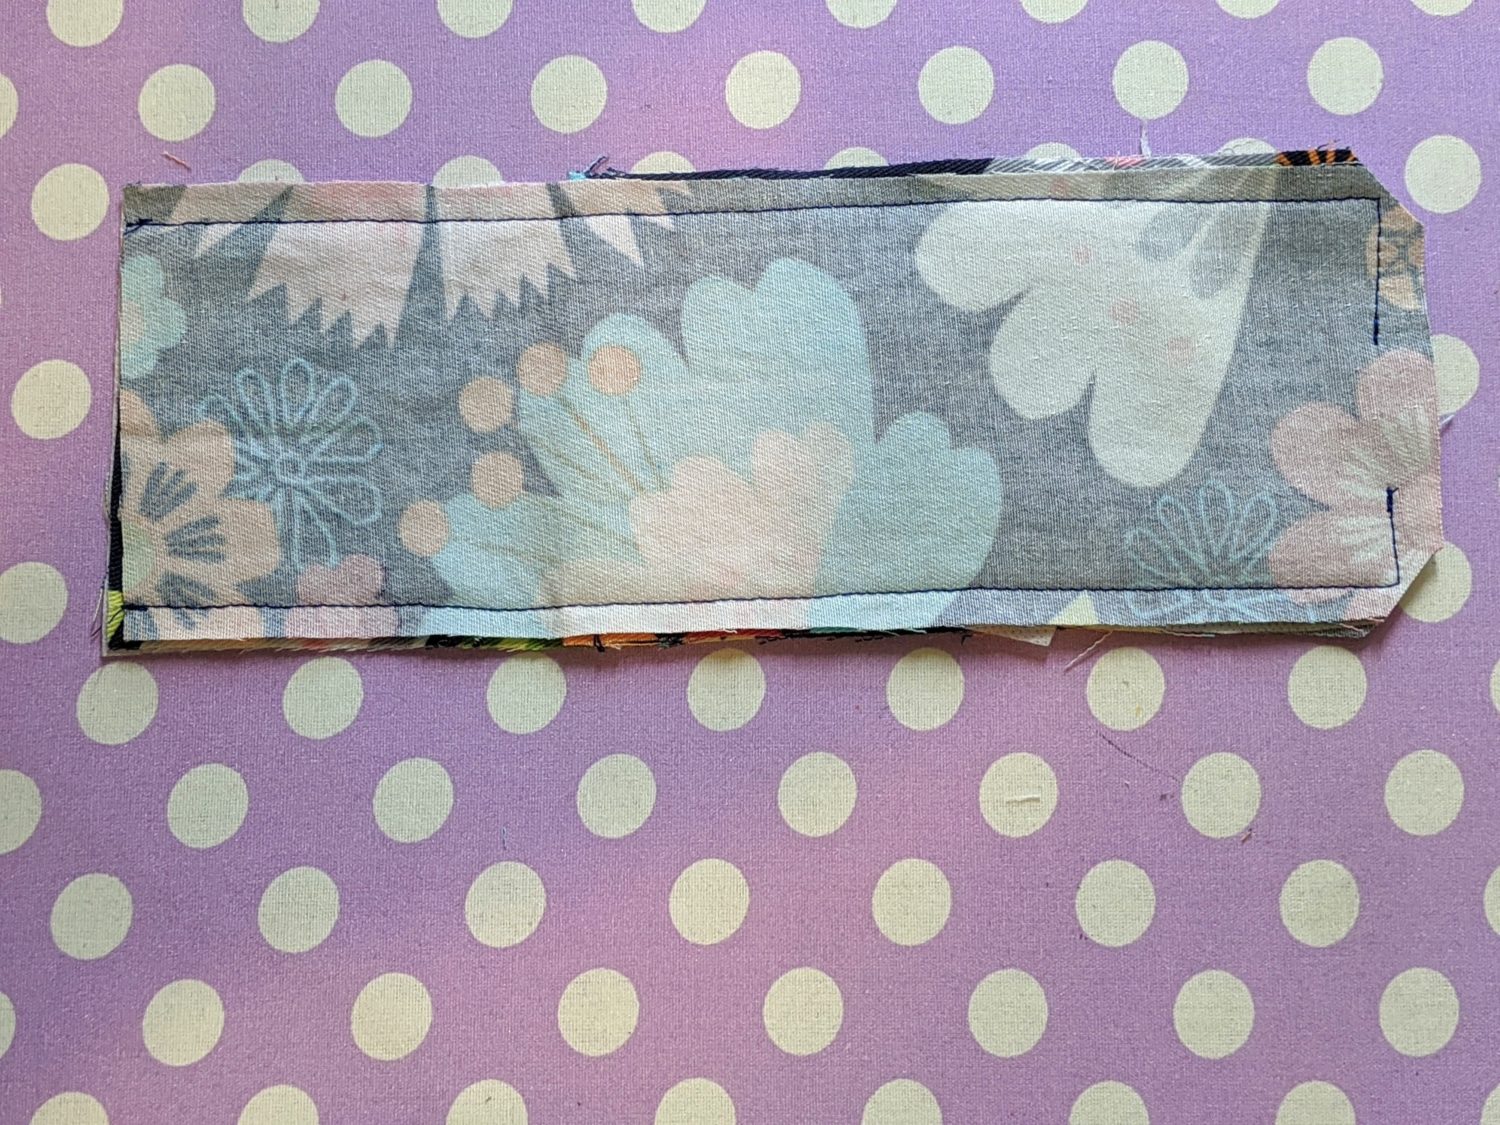
- Turn your fabric right side out
- Push out corners, turn the openings in, and press
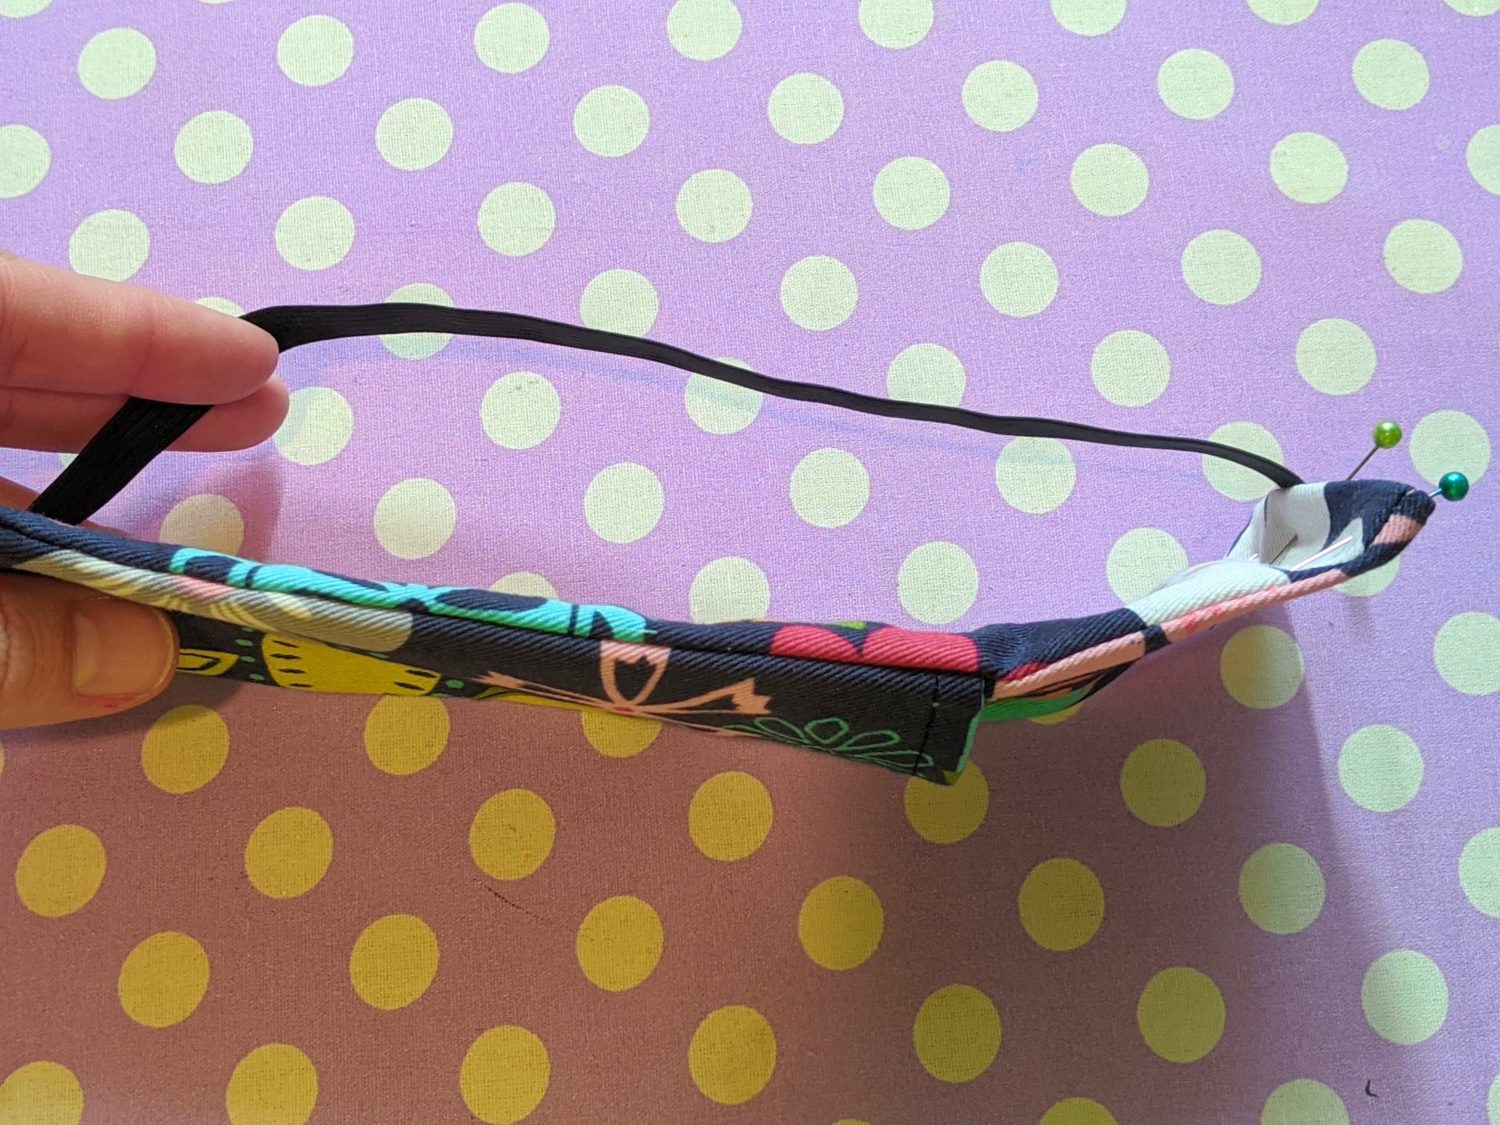
- Take the side the has the smaller opening and insert one end of the elastic
- Pin along the edge, securing the elastic, and topstitch
- Insert the other end of the elastic into the other open end
- Pin and topstitch
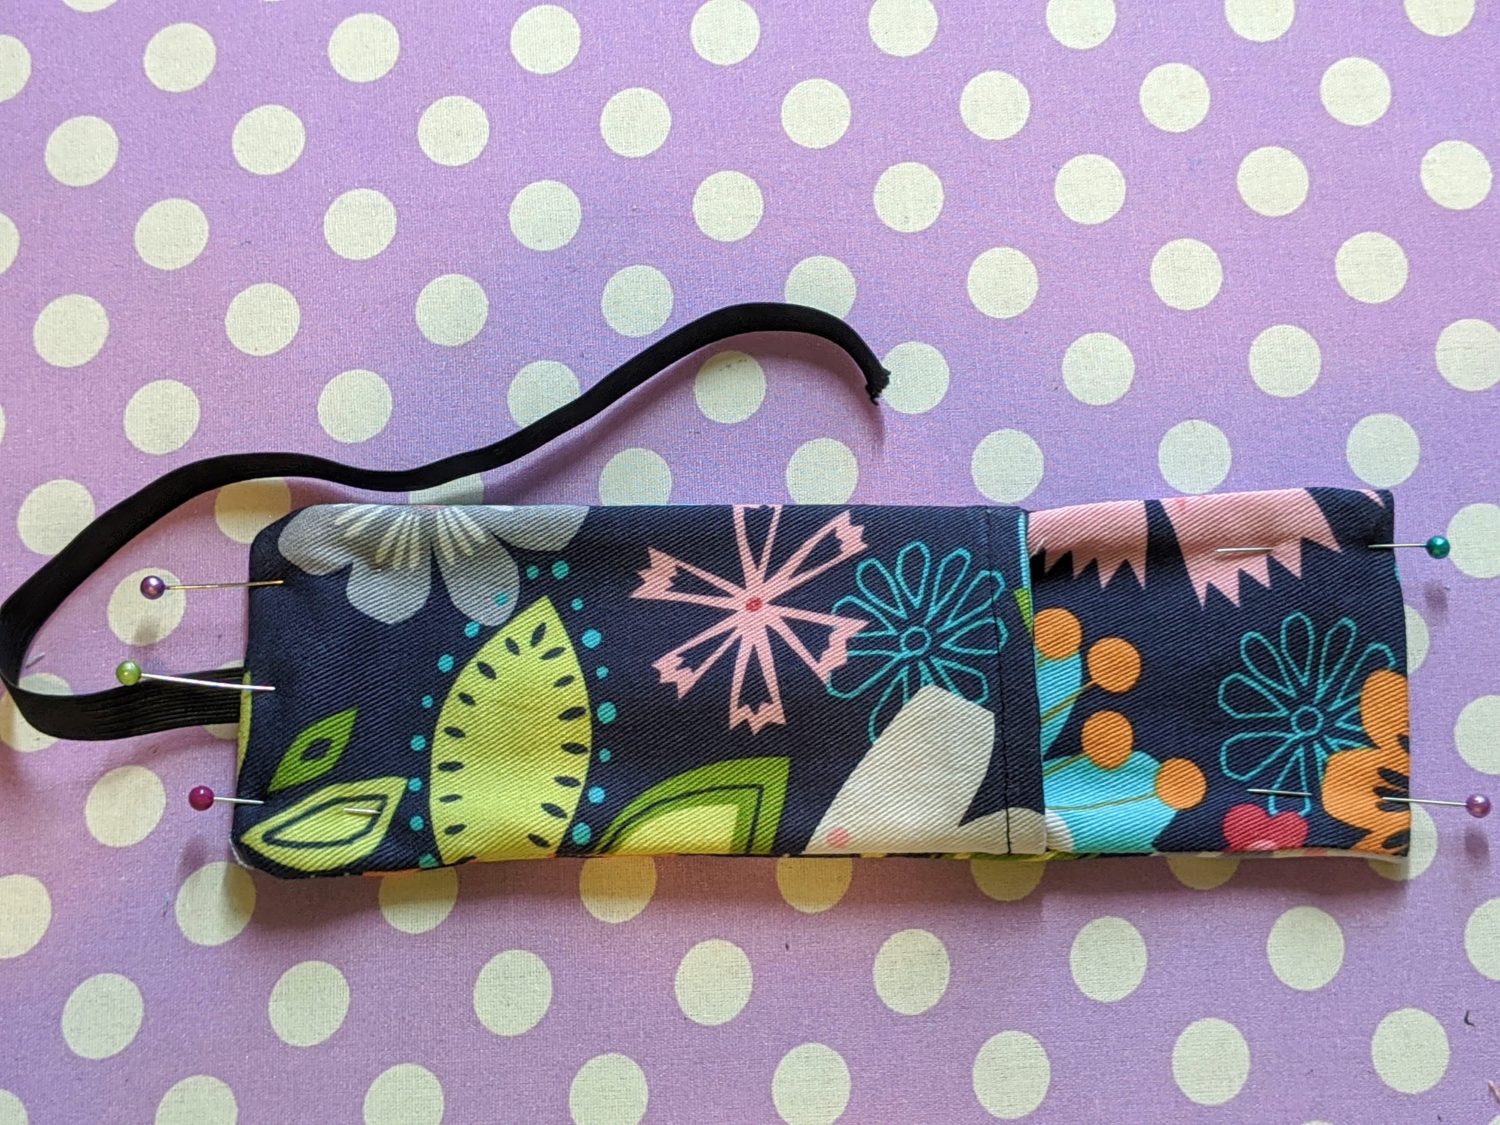
Ready to go!
All that’s left to do is slide the elastic over your favorite book or journal and put your pen, pencil, and notebooks in! When you are done reading or writing, just slide the elastic over the page to hold your spot for next time!
As always, we’re here to help if you need it! Join us HERE and on Facebook, Instagram, Twitter, Youtube, and Pinterest. We’re everywhere you are.
This simple sew is a perfect addition to book and journal gifts! I’m planning a couple for now and I think this will be great at Christma time.
Thank you!
These will be great stocking stuffers! Tiffany, what are the height measurements on the large size pieces?
The height is 9 1/2″ for the main piece and 6″ for the pocket piece. I didn’t realize those were cut off, thanks for letting me know! I’ll go in and fix that.
great tutorial and great item. Thanks so much. Should make some for my grandchildren for back to school
Love this!
What seam allowance did you use?
I used 1/4″ seam allowance. I’ll be sure to go in and add that info into the tutorial!