
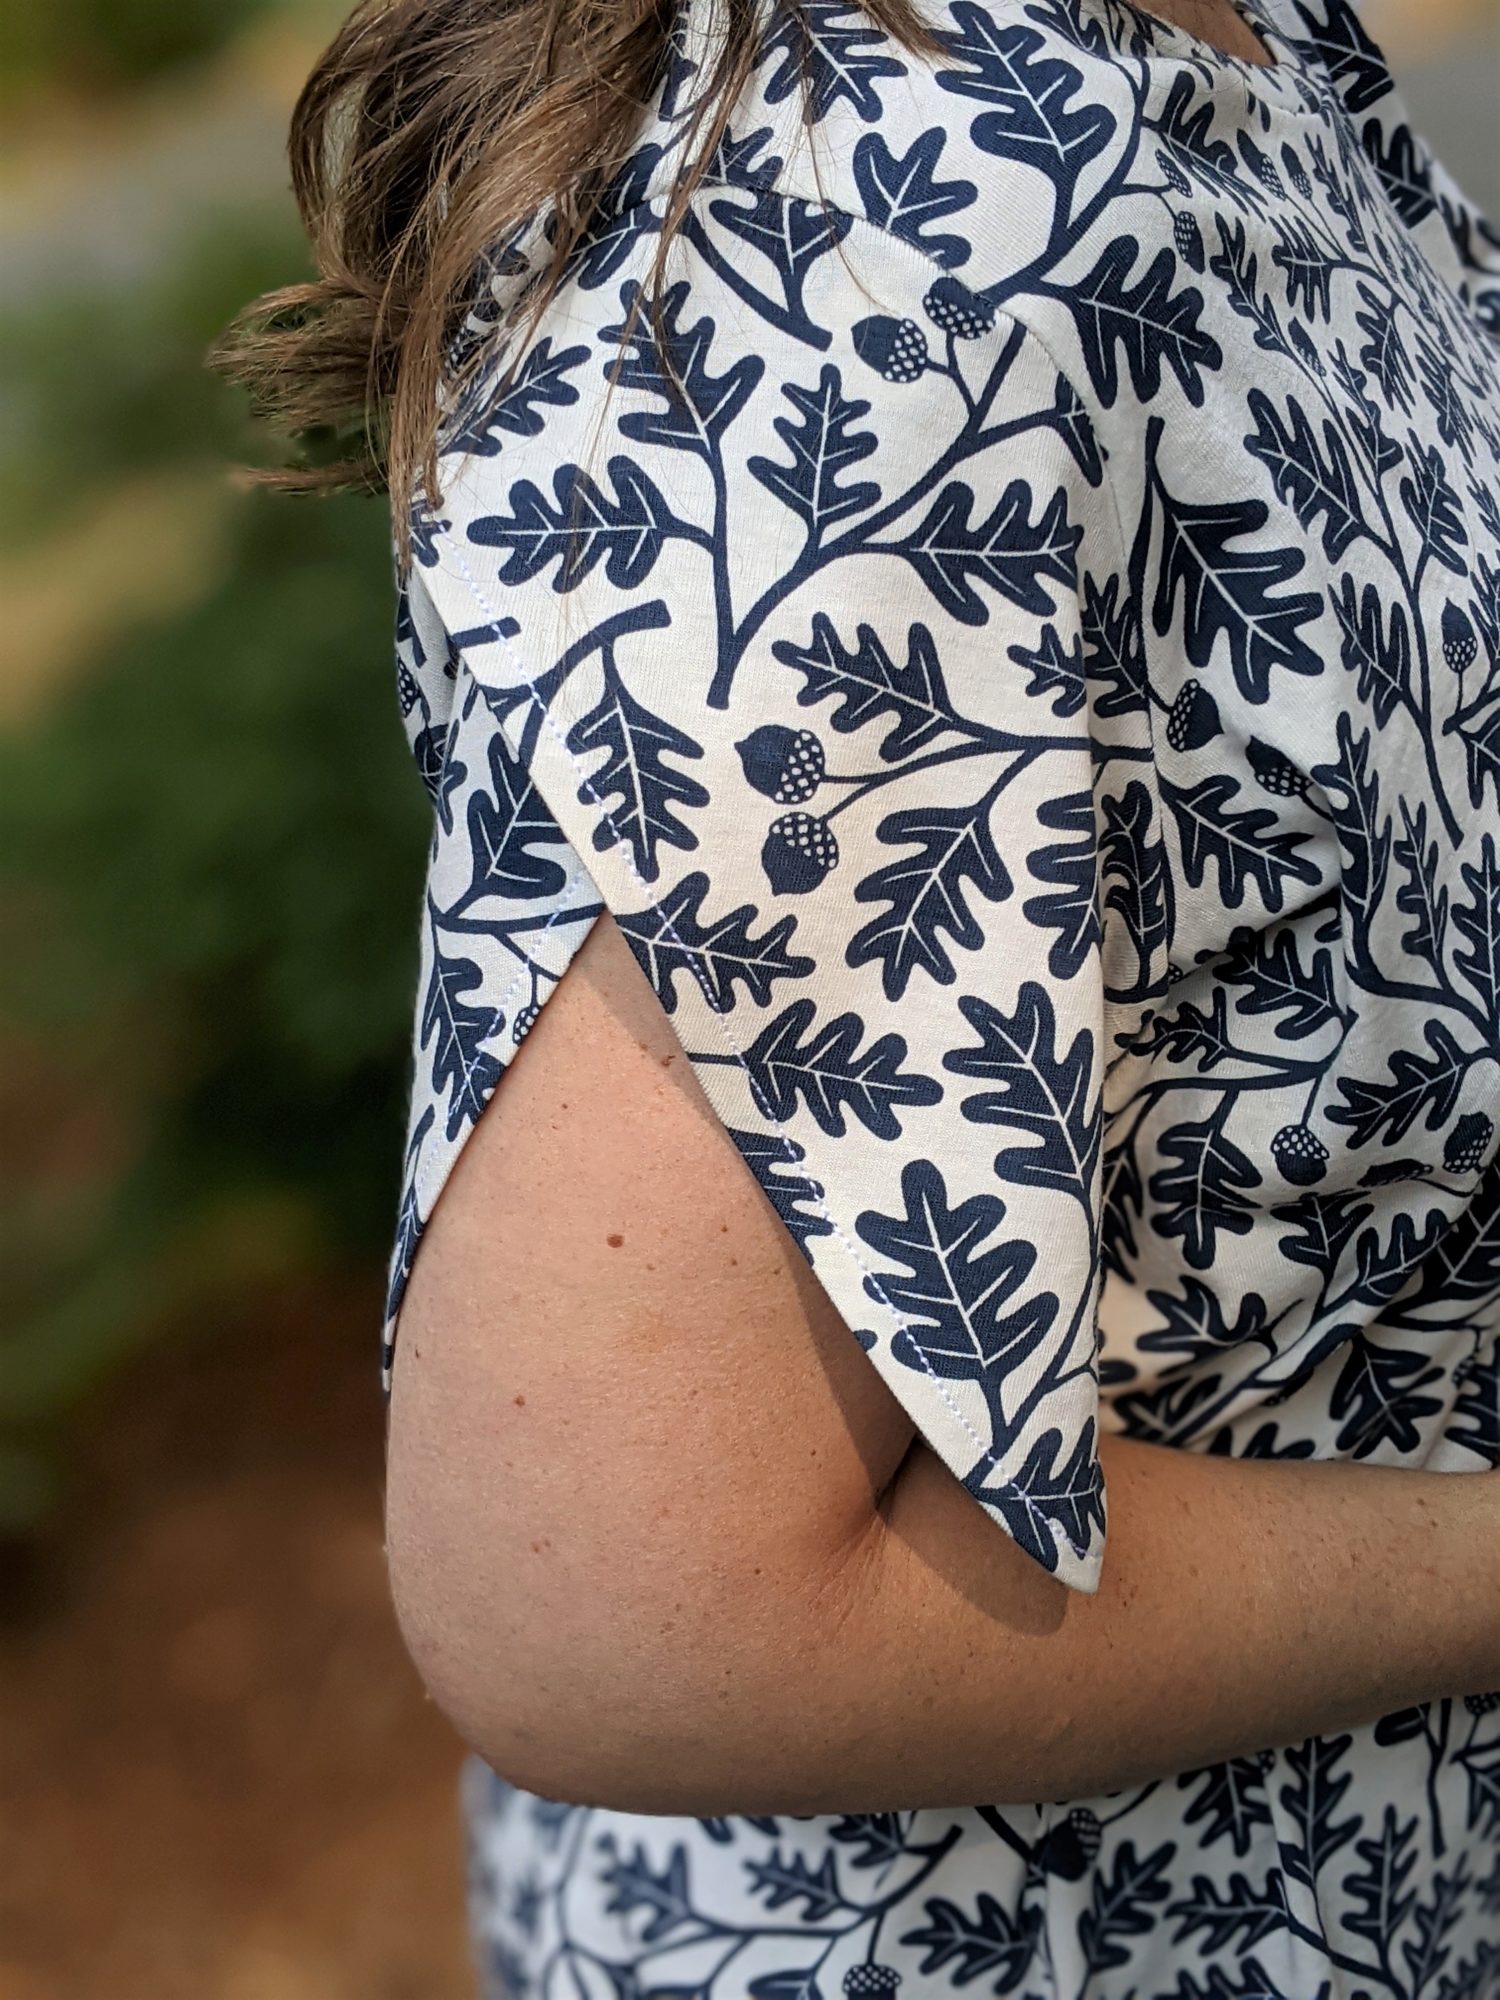
I used the Sheila Everyday Tee and Dress from our Basics line to create a tulip sleeve in two different lengths. I love the simplicity of it while bringing that personal touch of style to a basic tee. It only takes a few extra minutes to add this beautiful detail to your top.
Pattern Prep
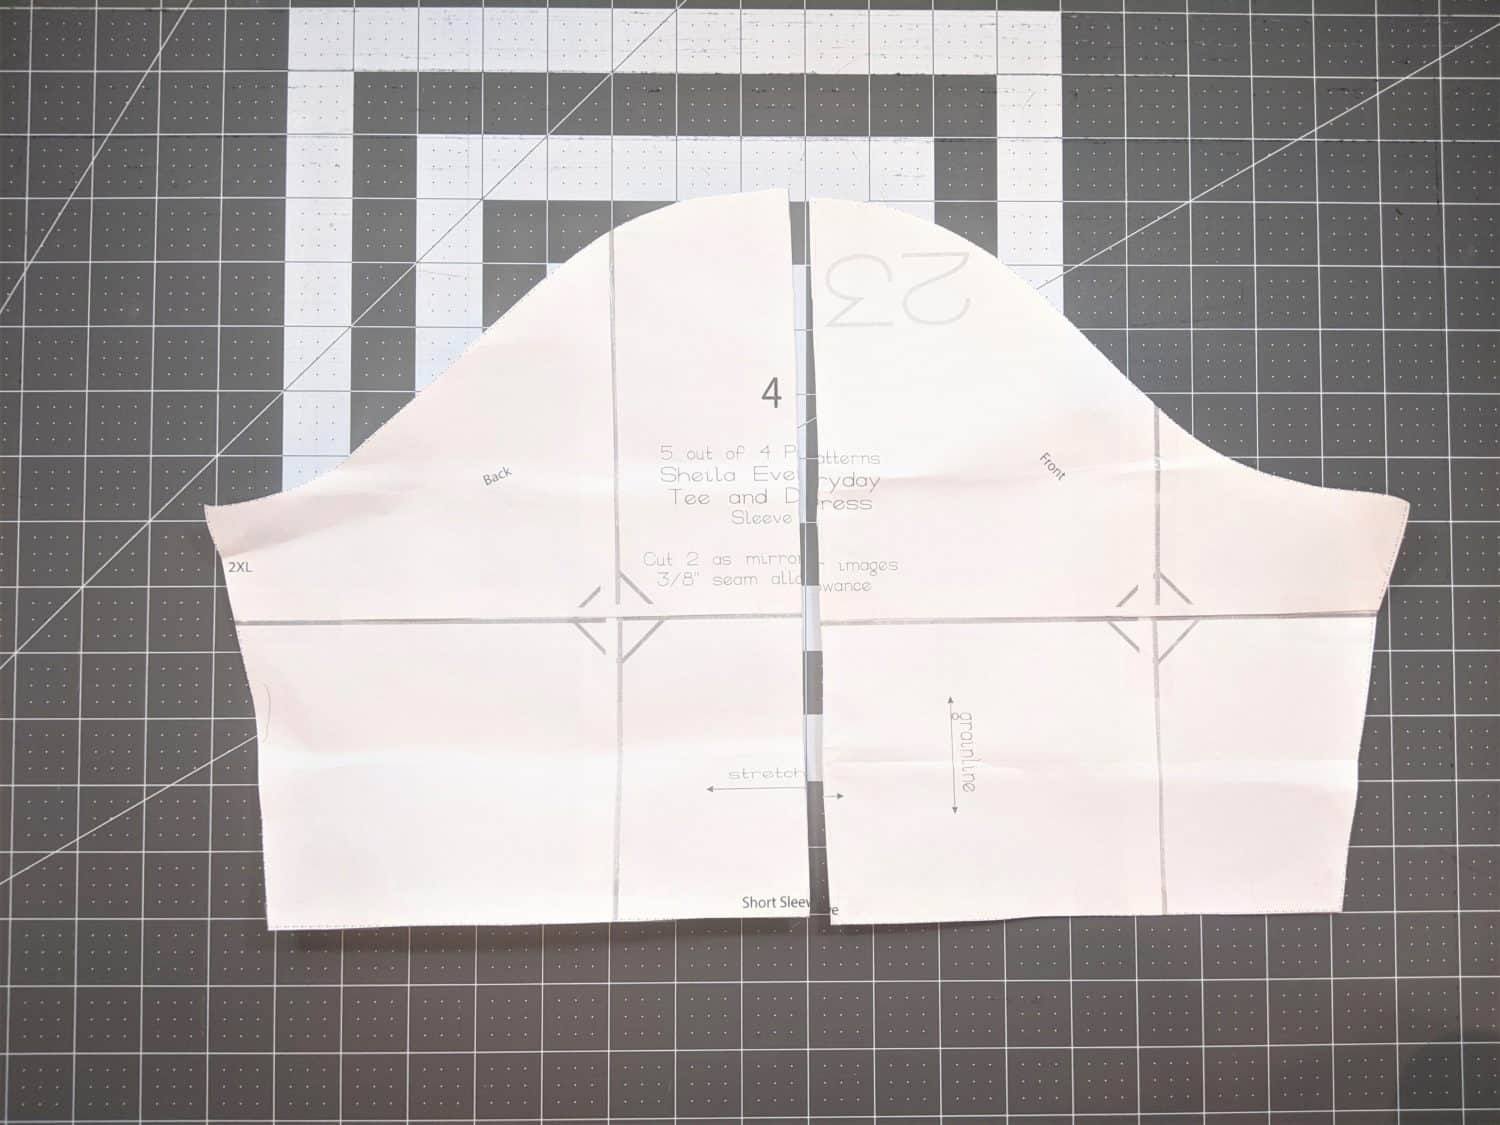
The only pattern piece you will need to alter is the short sleeve piece. The instructions for both the long version and short version are almost the same. I will show you how to adjust the pattern for both options as we go as well as include pictures showing both lengths.
Adjustments For Both Long and Short Versions:
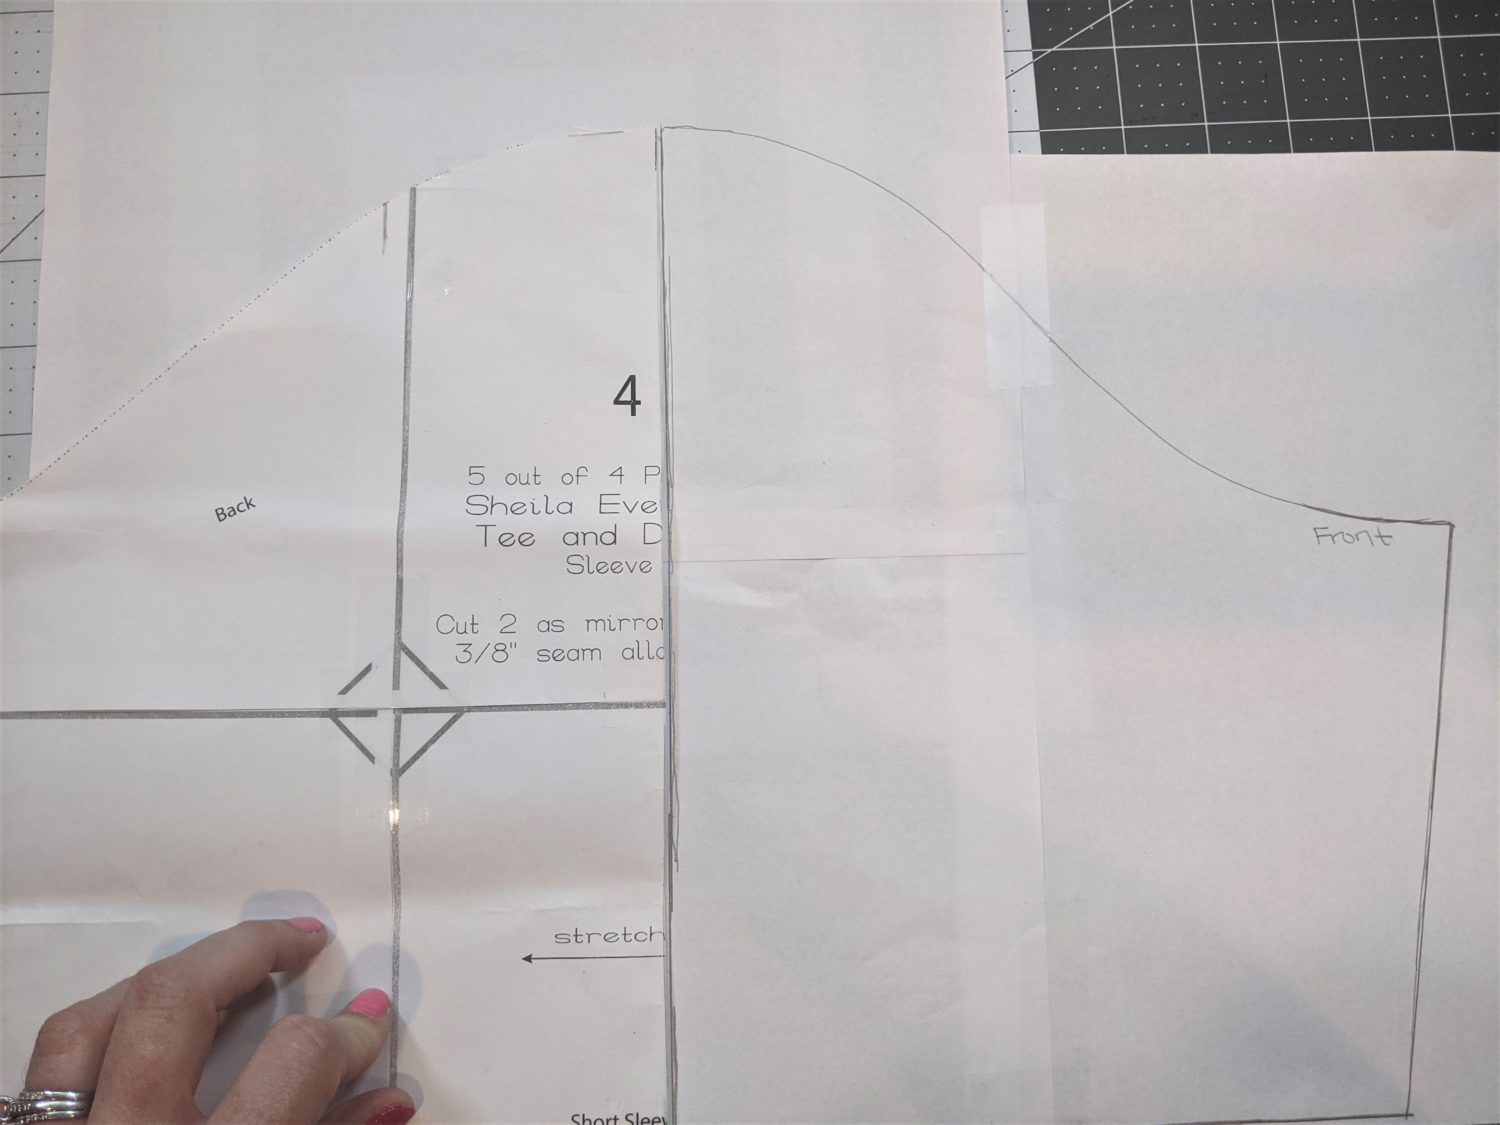
Front half:
- Fold your pattern piece in half vertically (there is a marking at the top of the shoulder for the center) then cut the piece in half.
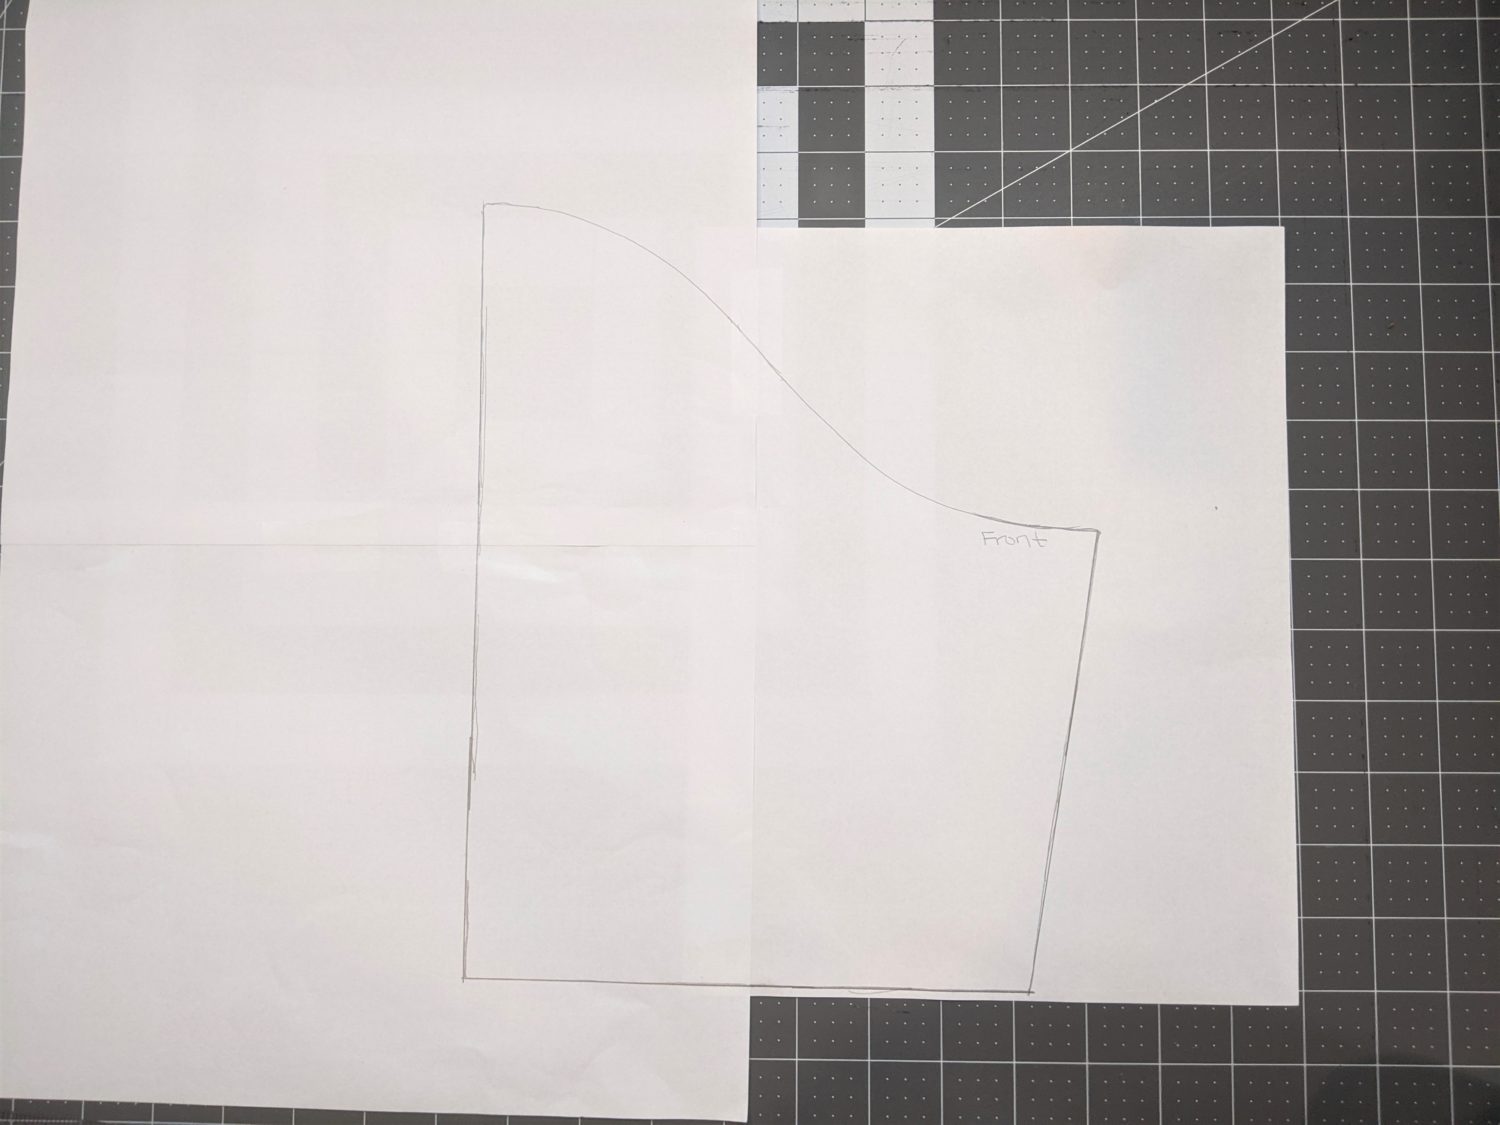
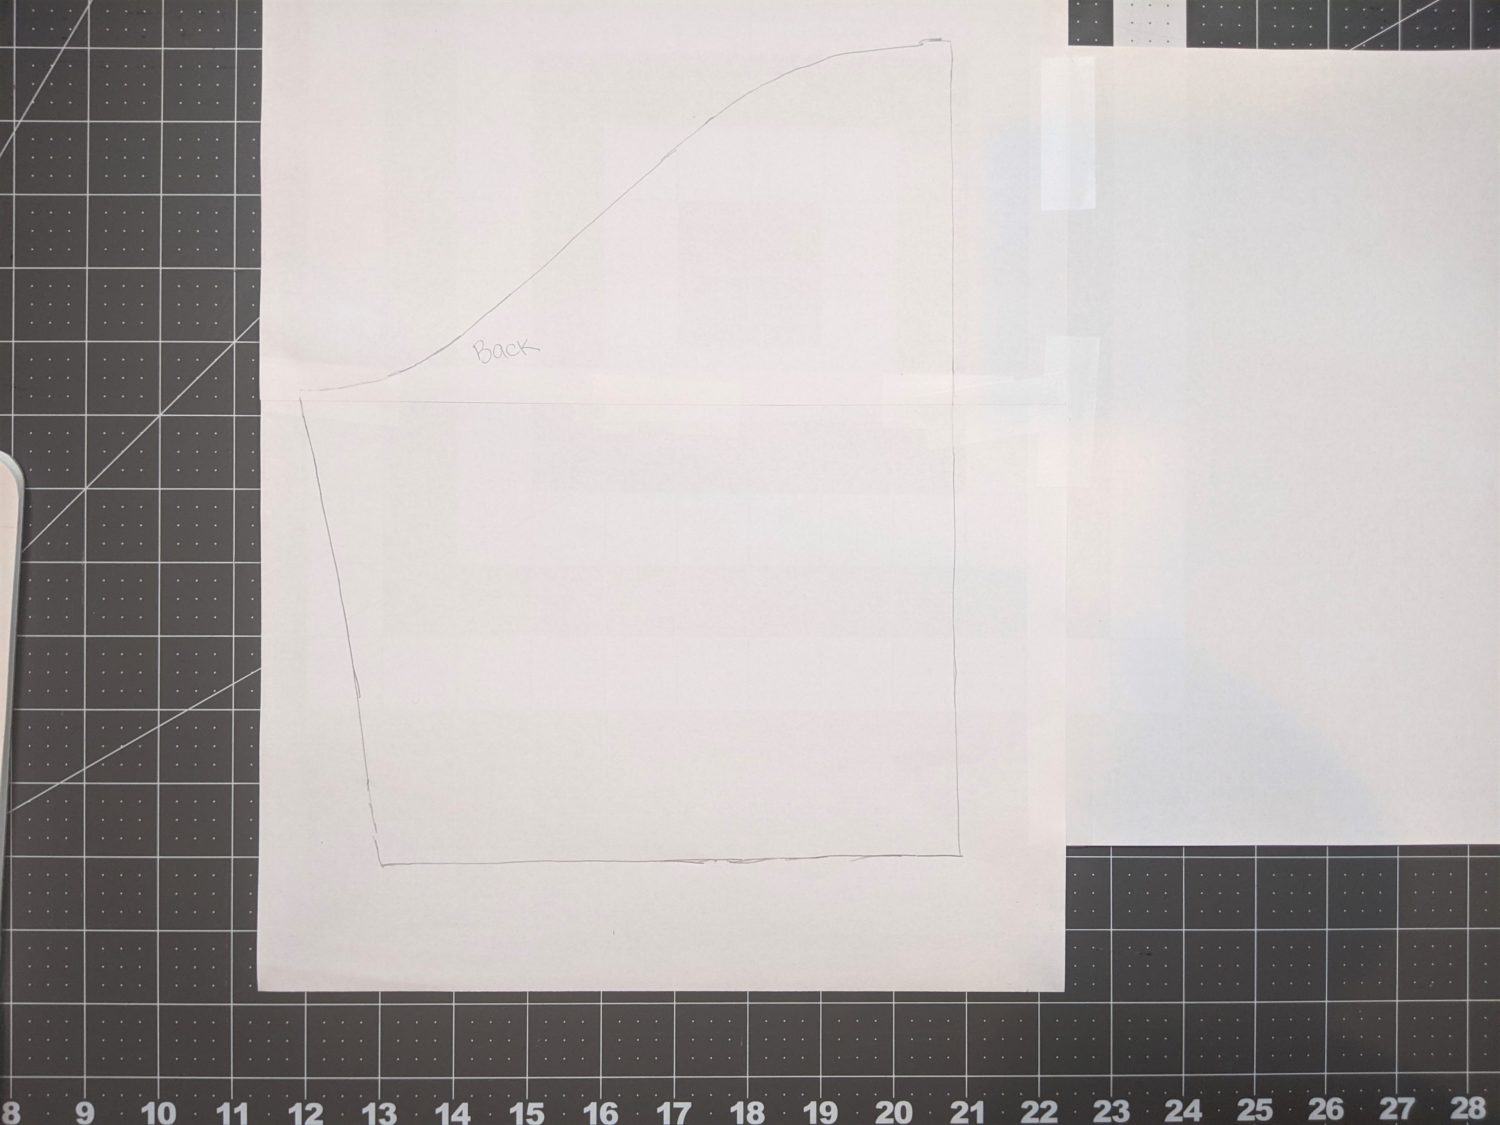
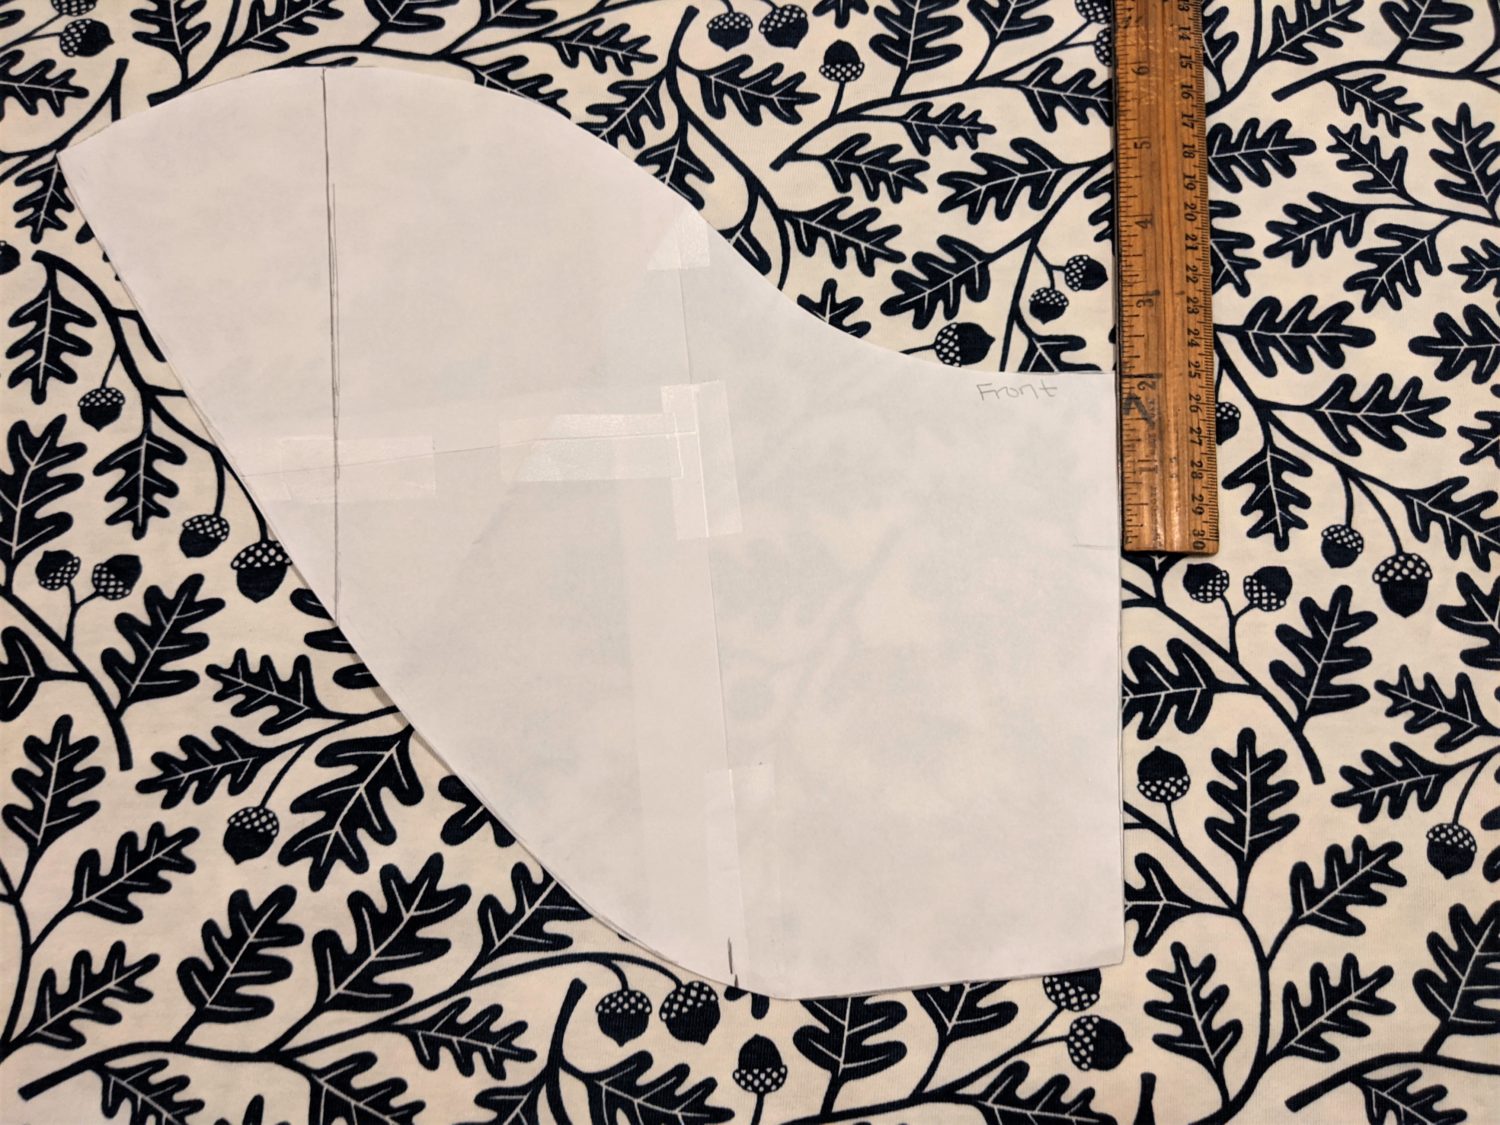
- Layout paper for tracing the new pieces and lay the front half on the pattern on the paper leaving room to extend the back.
- Trace around the pattern piece.
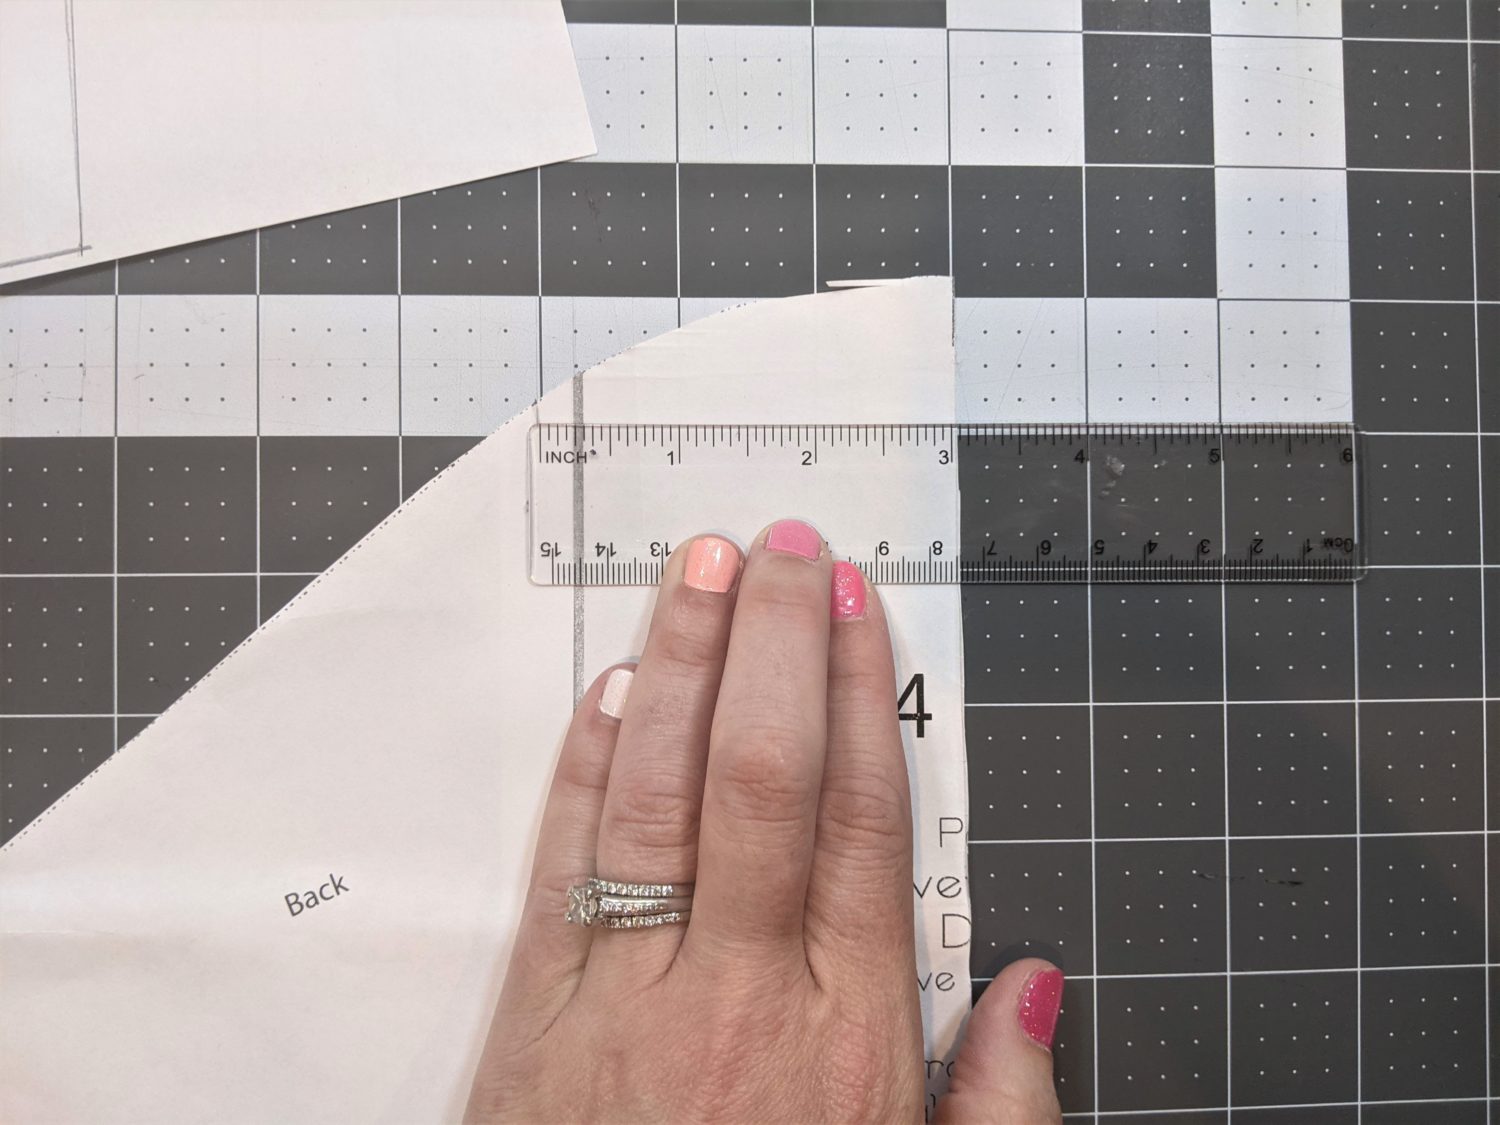
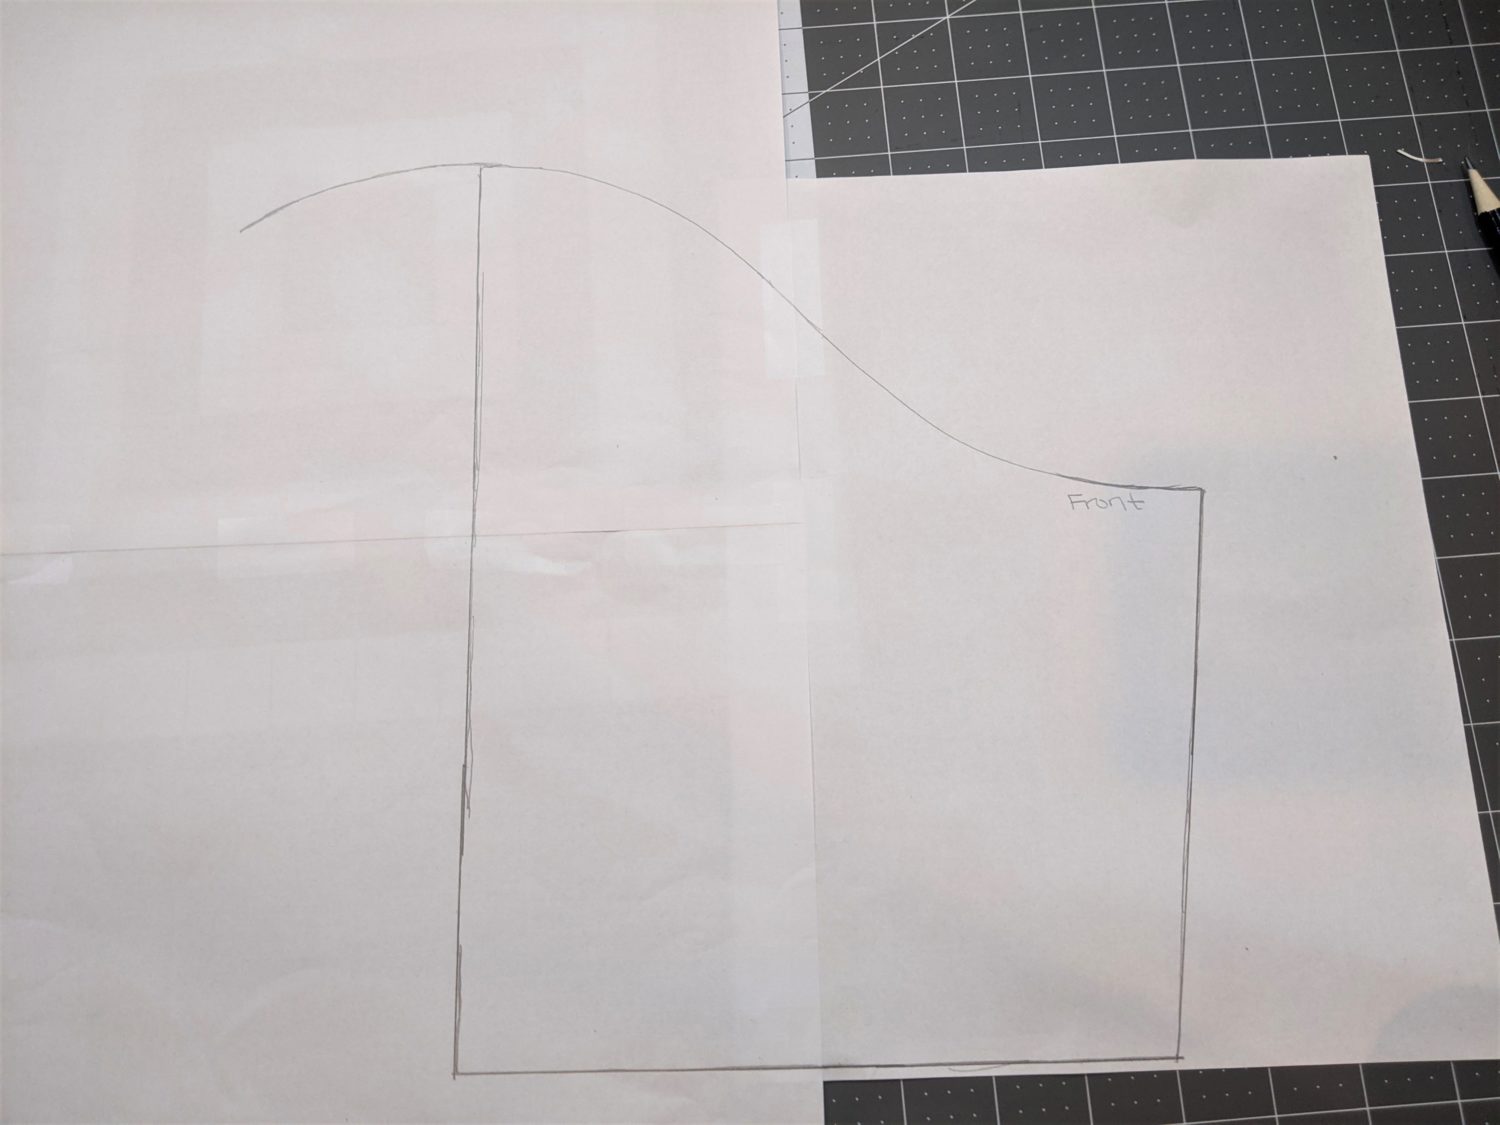
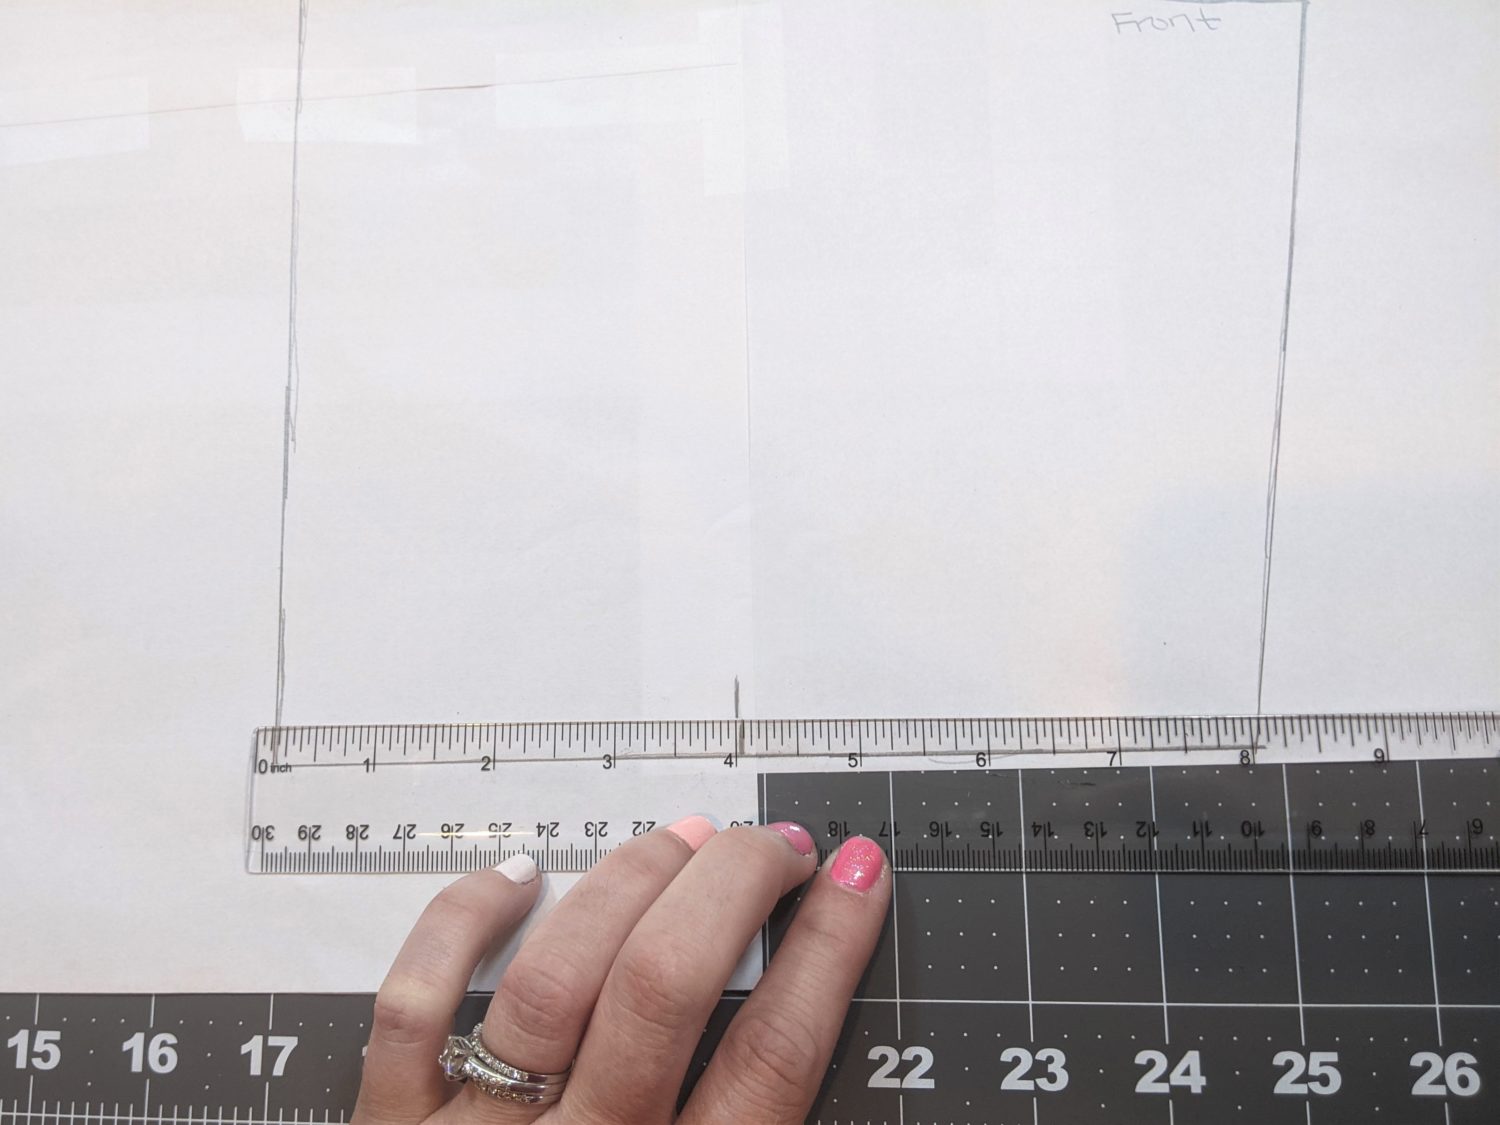
- Decide how much you want the front and back to overlap at the shoulder to create the tulip. For reference, I chose to overlap mine by 3″ but you can do more or less.
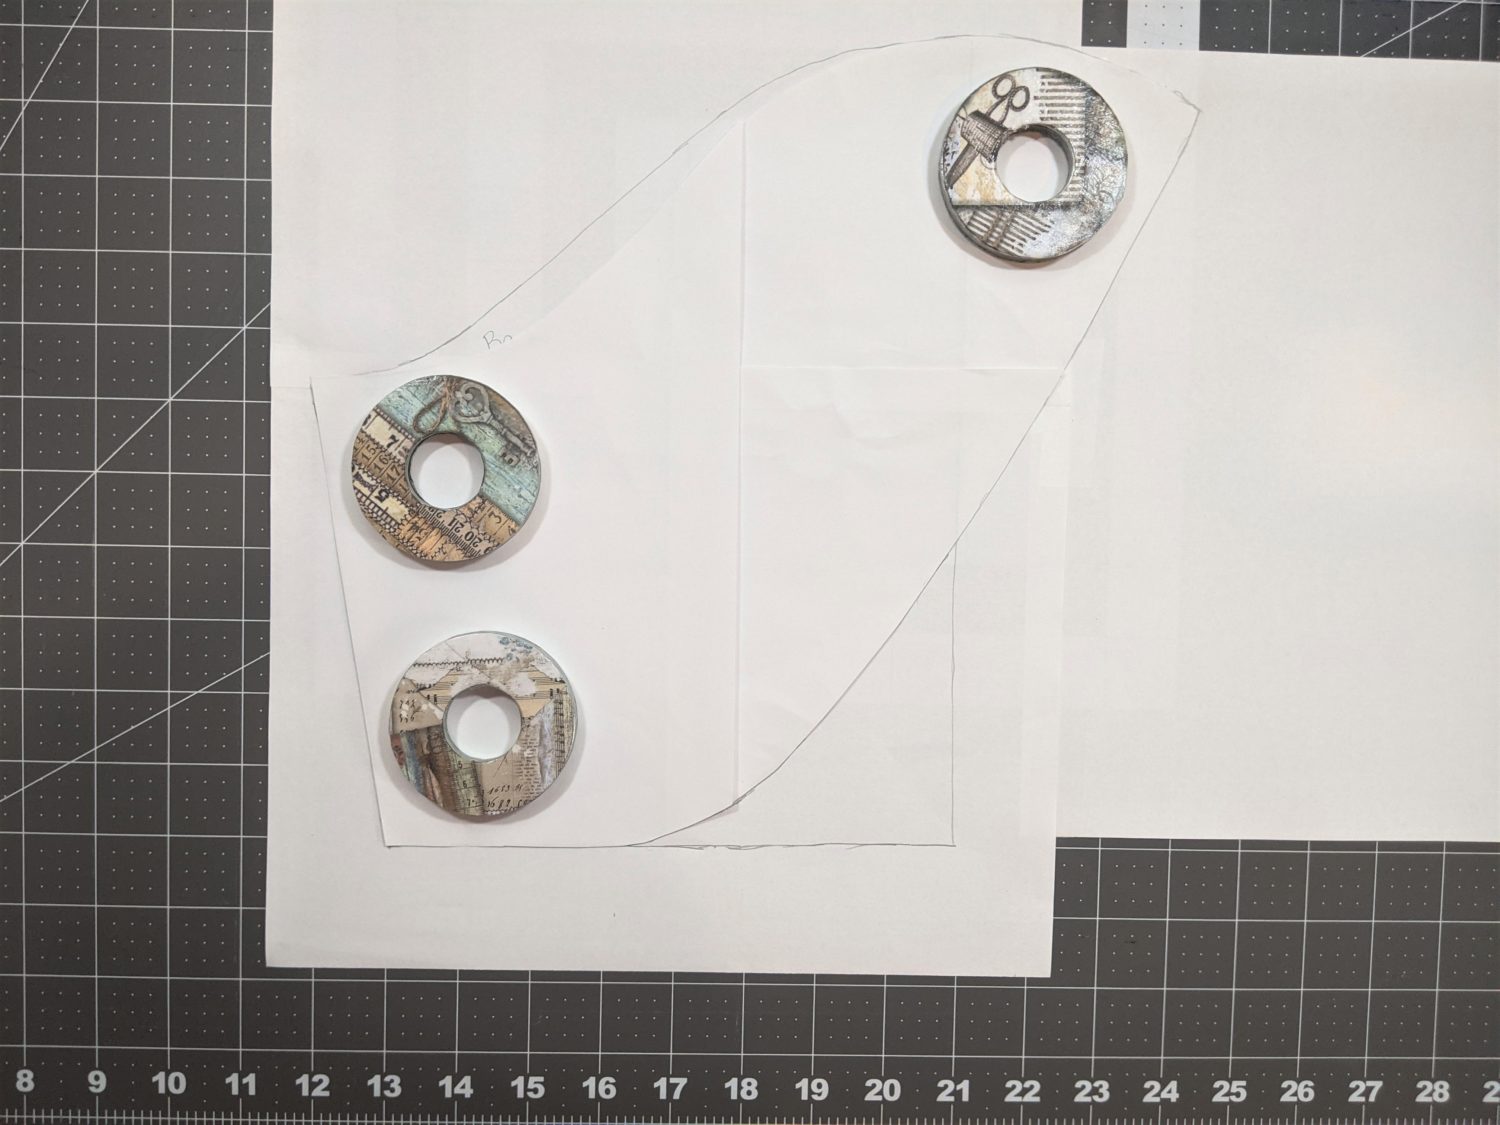
- Take the back portion of your pattern piece, and measure over your determined overlap amount at the top of the shoulder and draw a line to mark it.
- Line up the center of your back piece along the traced front piece.
- Trace along the top of the back sleeve piece from your overlap marking to the front piece.
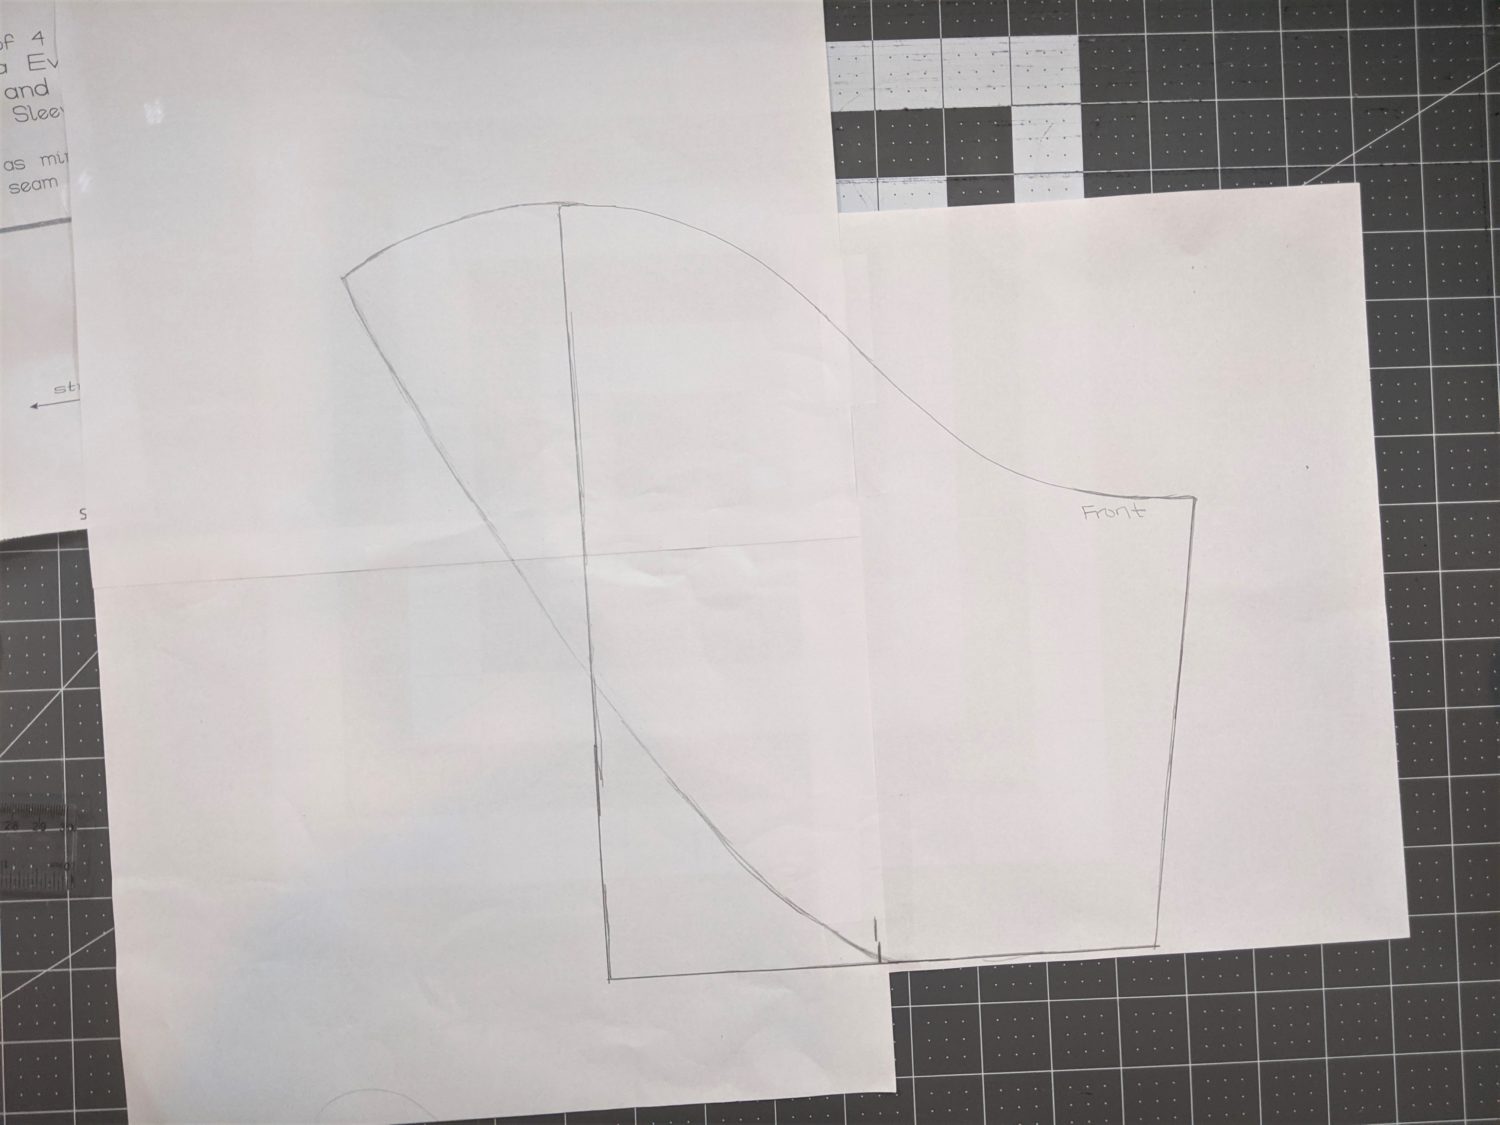
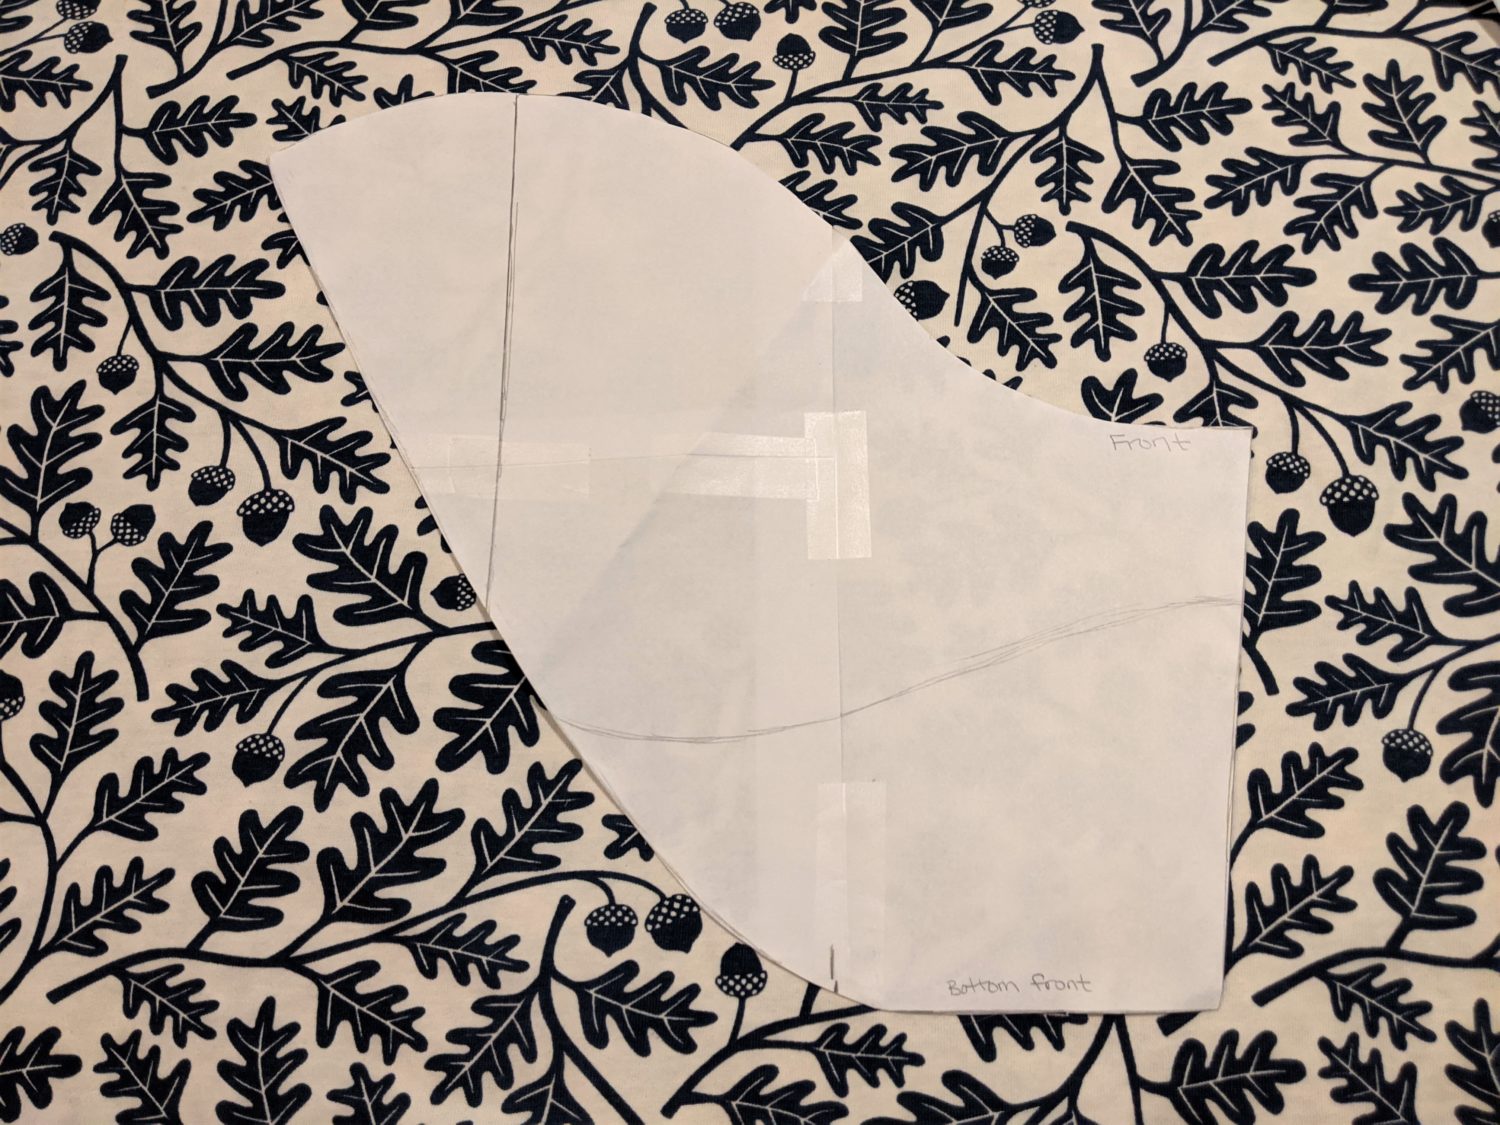
- Along the bottom of the front portion, (that is the sleeve opening) measure and mark the center.
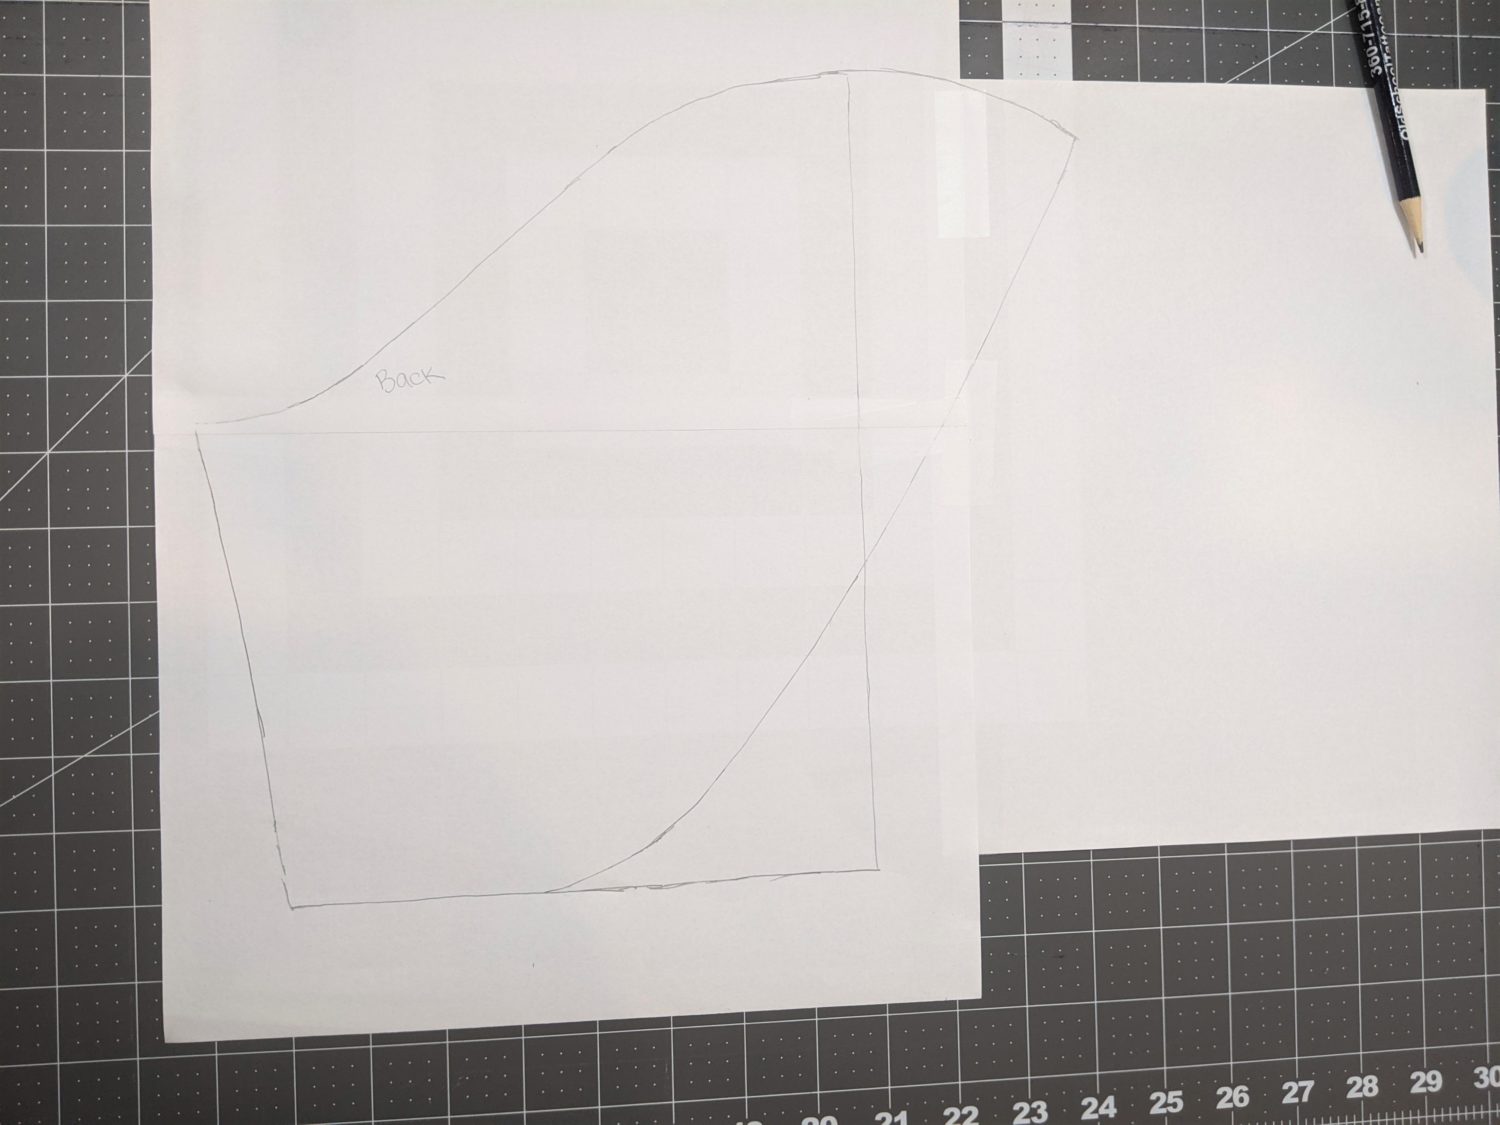
- Sketch a swooping line that connects the inner shoulder edge to the midpoint of the sleeve opening.
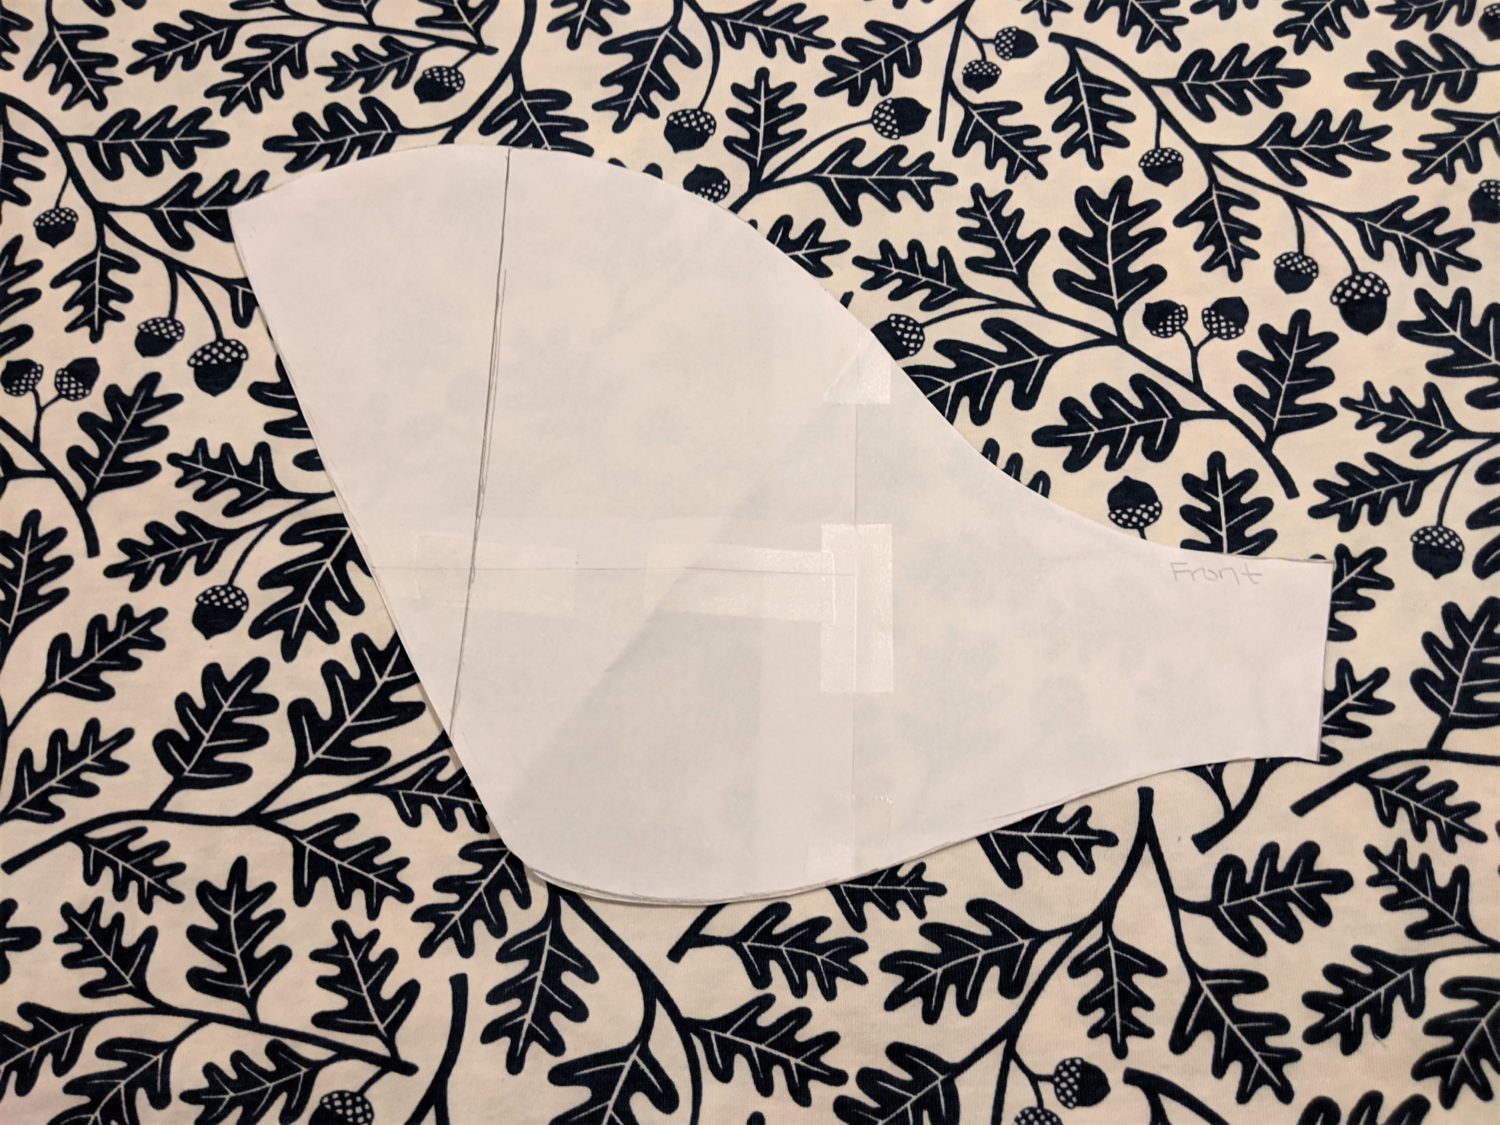
- Cut out the new front half of your pattern piece.
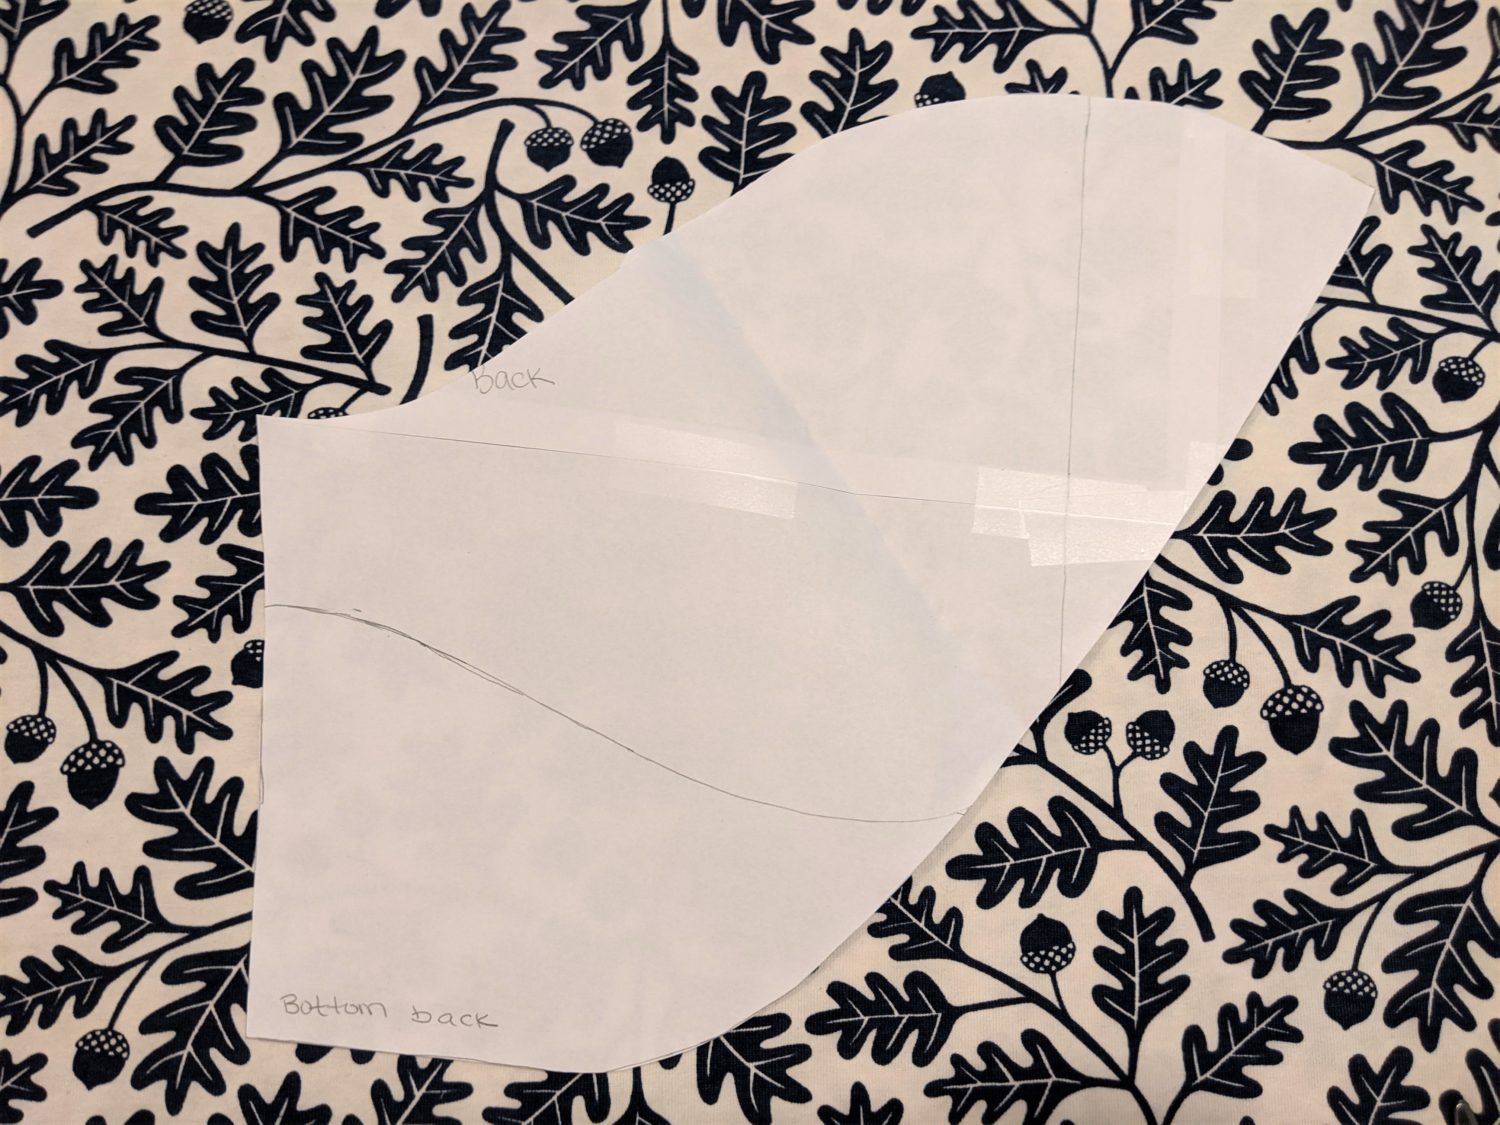
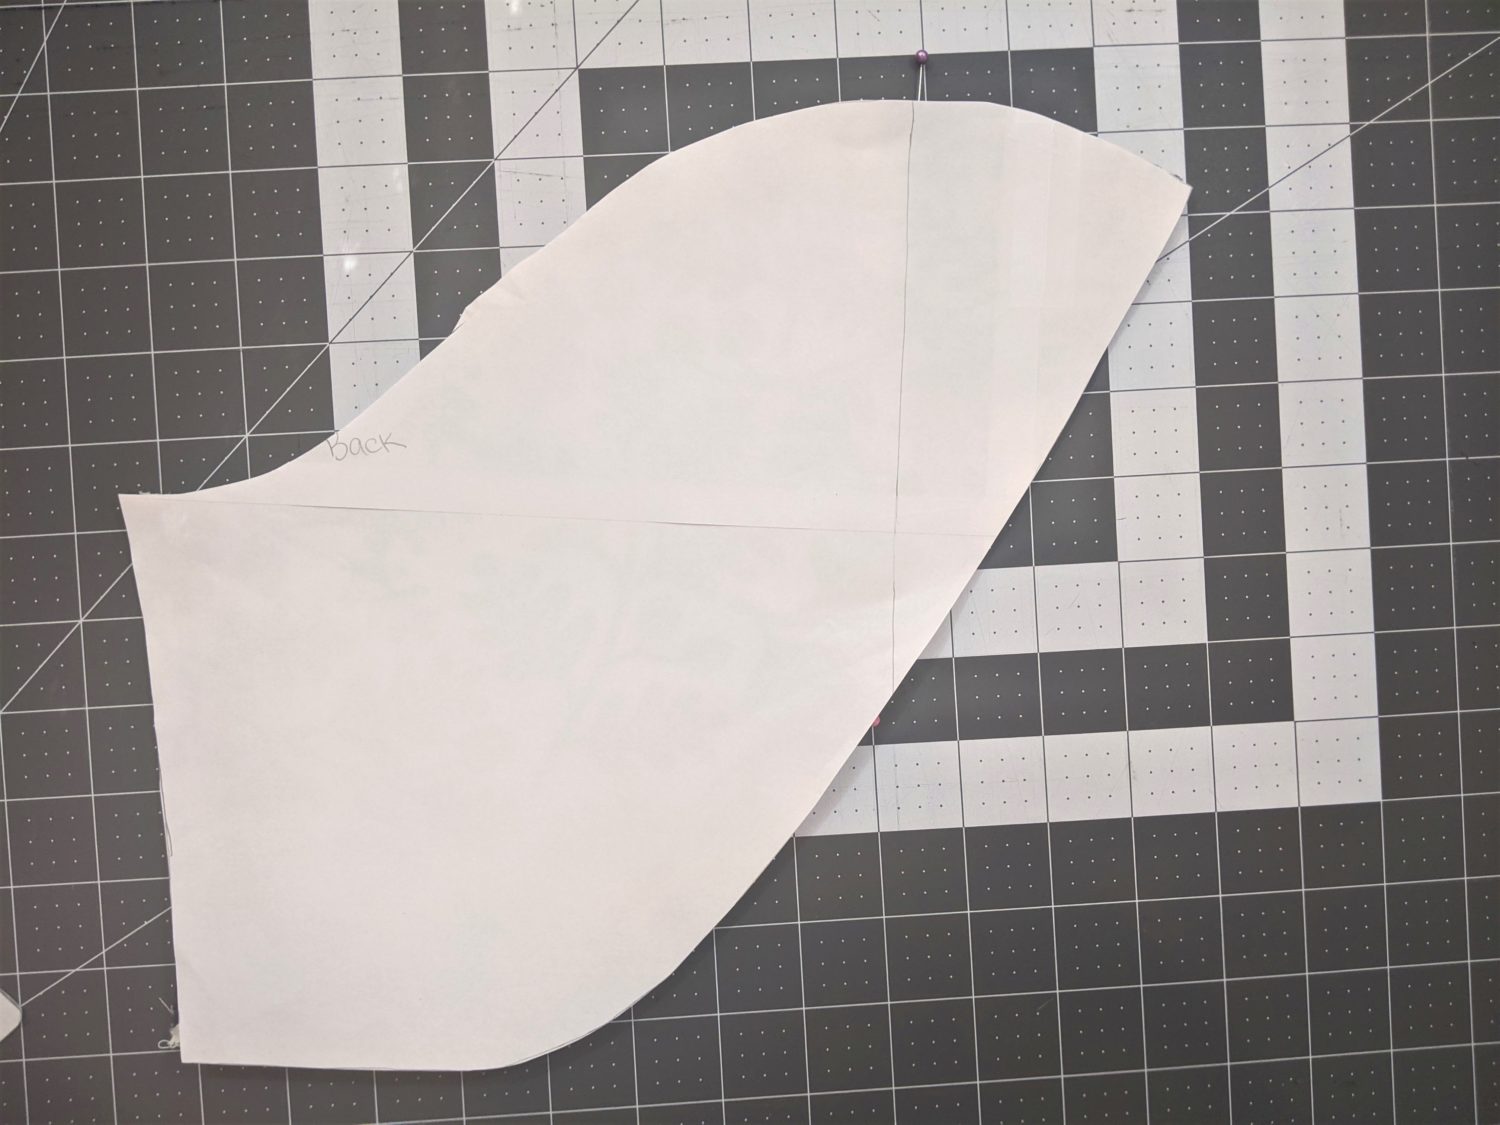
Back Half:
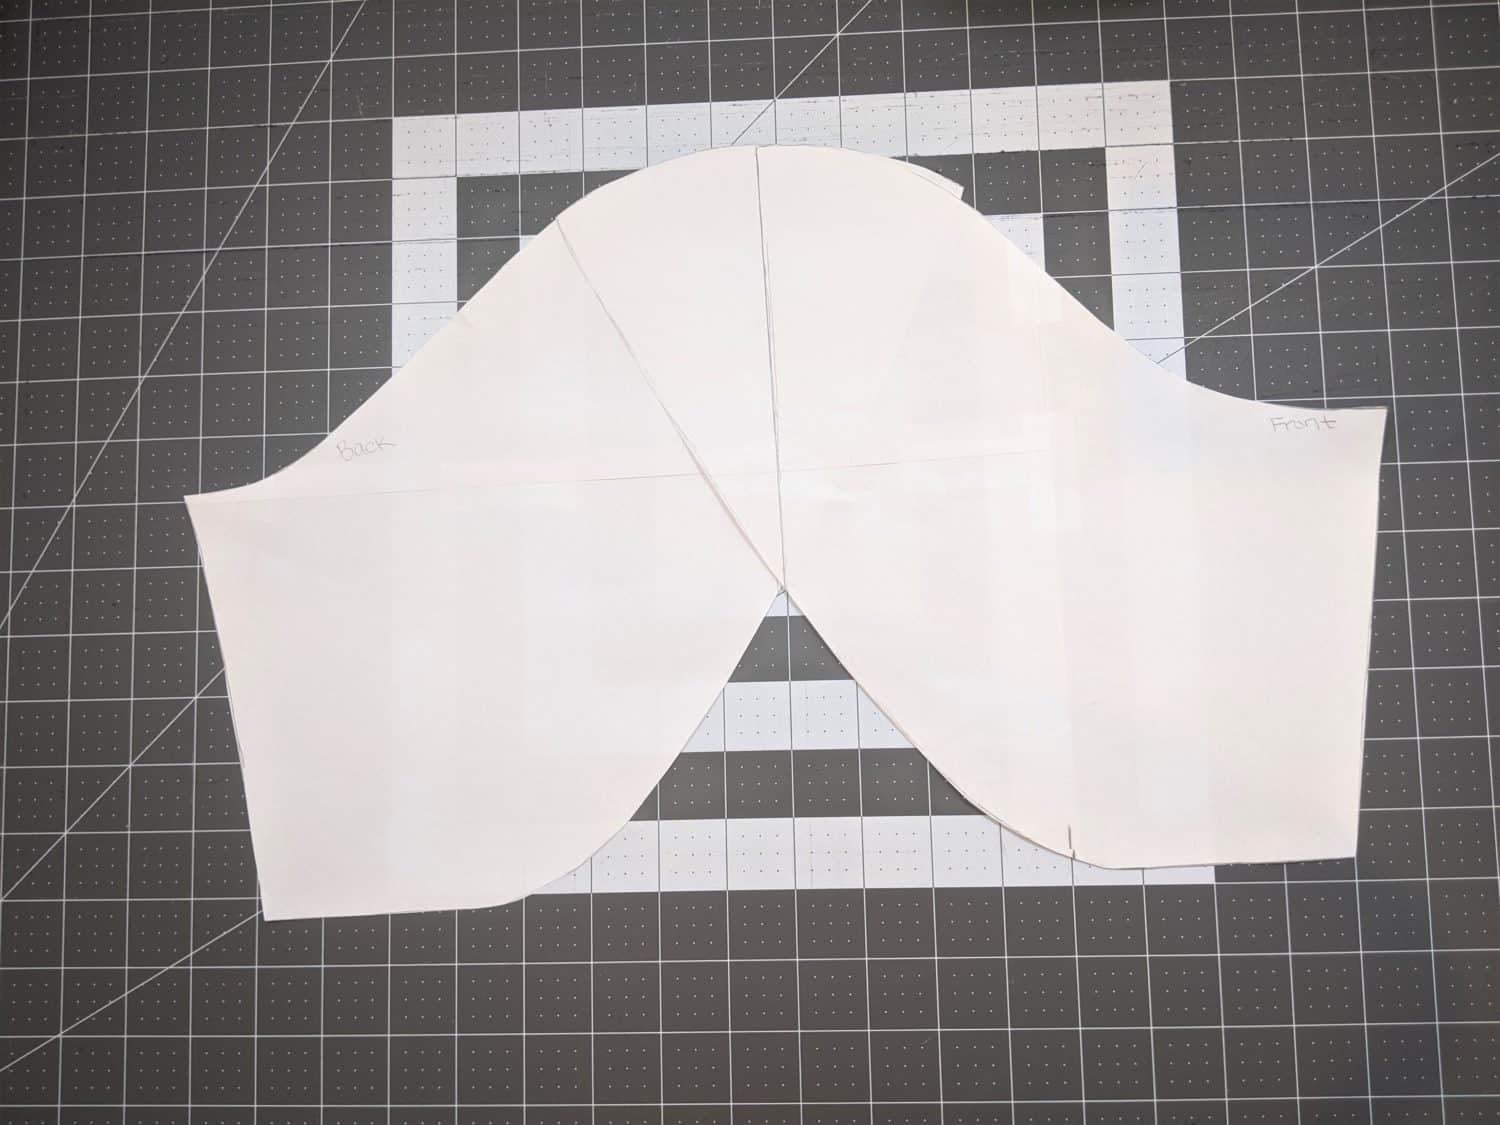
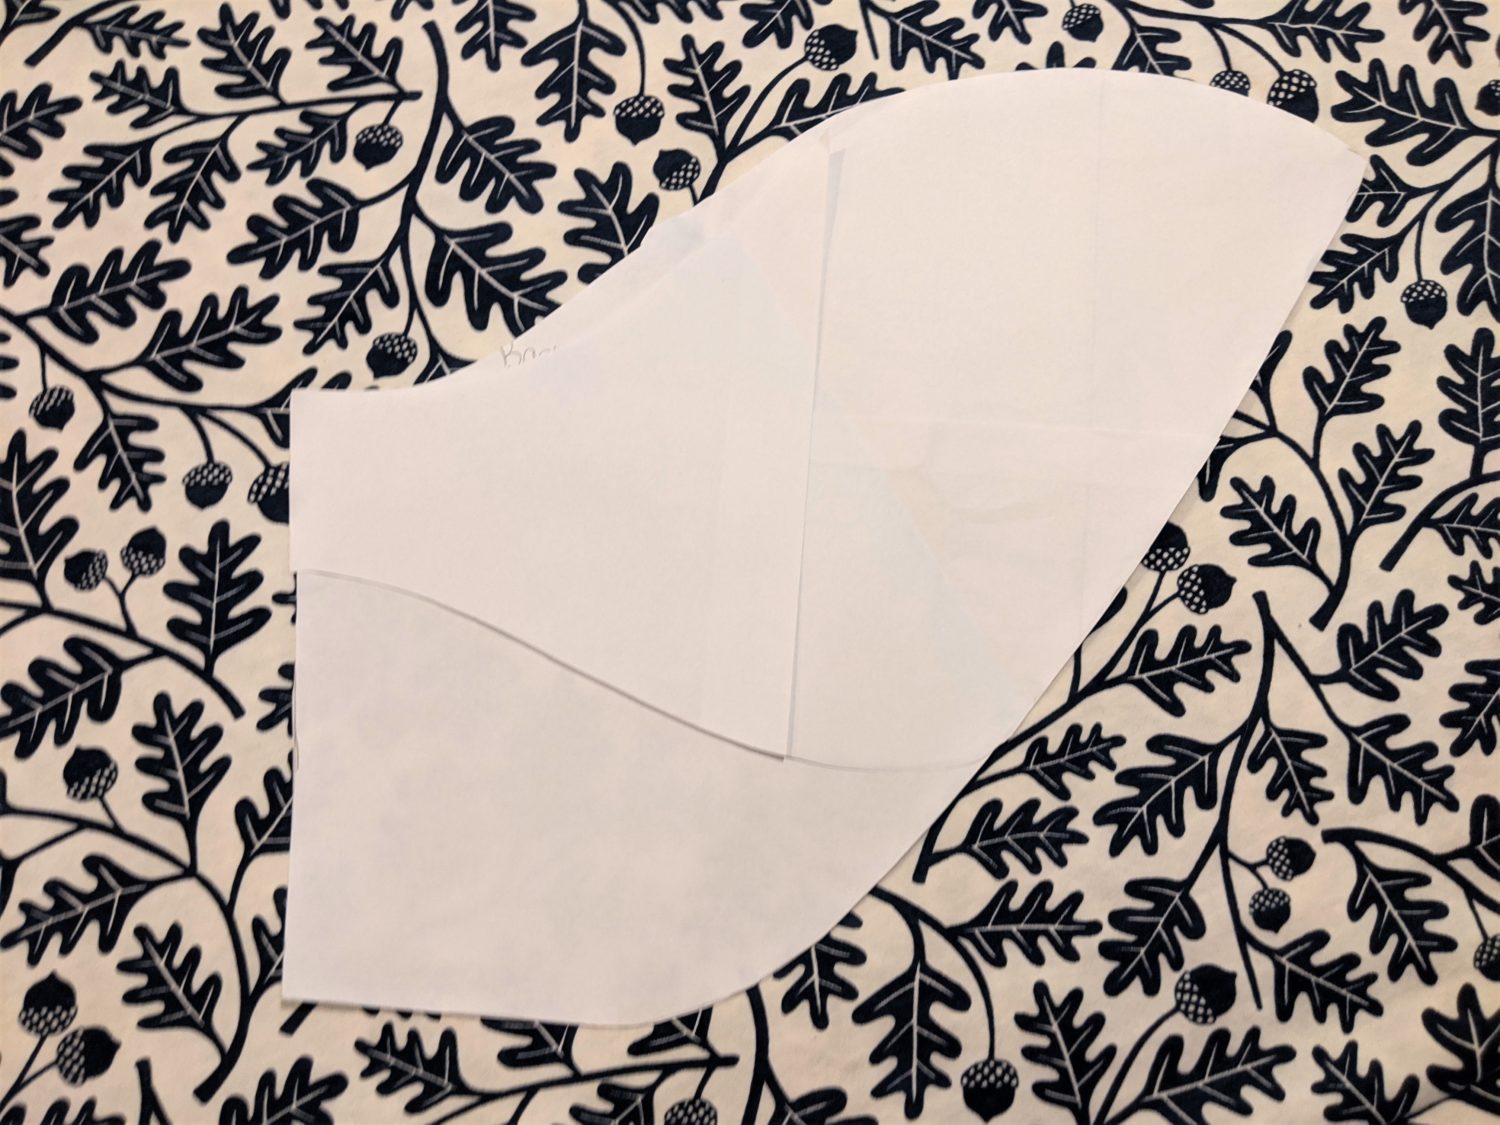
- Lay the back half of the sleeve piece on tracing paper leaving room to extrend the front, and trace all the way around it.
- Set the new front piece face down on top of the traced back sleeve.
- Line up the underarm, sleeve opening, and top of the shoulder of the front and back pieces.
- Trace the top of the shoulder and bottom curve onto the back piece.
- Cut out the new back sleeve half.
Shorter Option Only:
Front Half:
- At the straight edge of the armscye, measure down 2″ from the top. (Or any length you want your sleeve to be.)
- Trace from the curved inner edge over to meet the new armscye length marking.
- Cut off the lower portion.
Back Half:
- Lay the shortened front piece on top of the back piece face down and line up the top of the armscyes.
- Trace the new front curve onto the back piece.
- Trim off the lower portion.
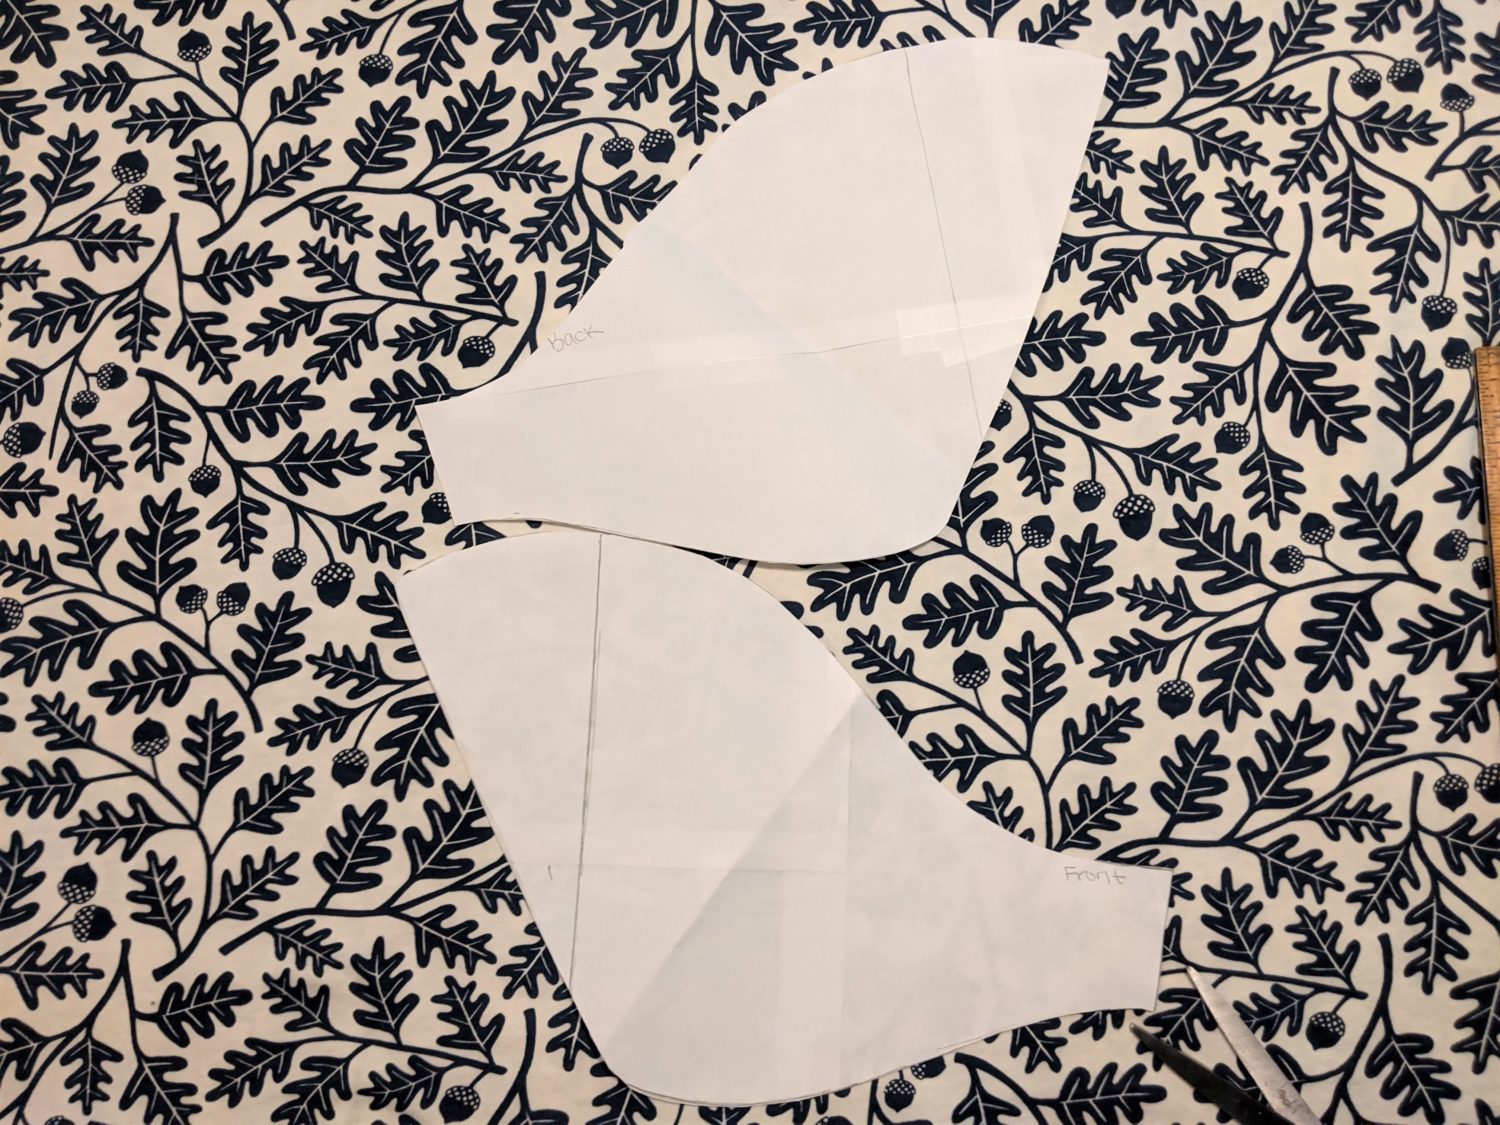
Cut out your Pieces
- Cut our your front and back bodices pieces as well as your neckband as instructed in the tutorial.
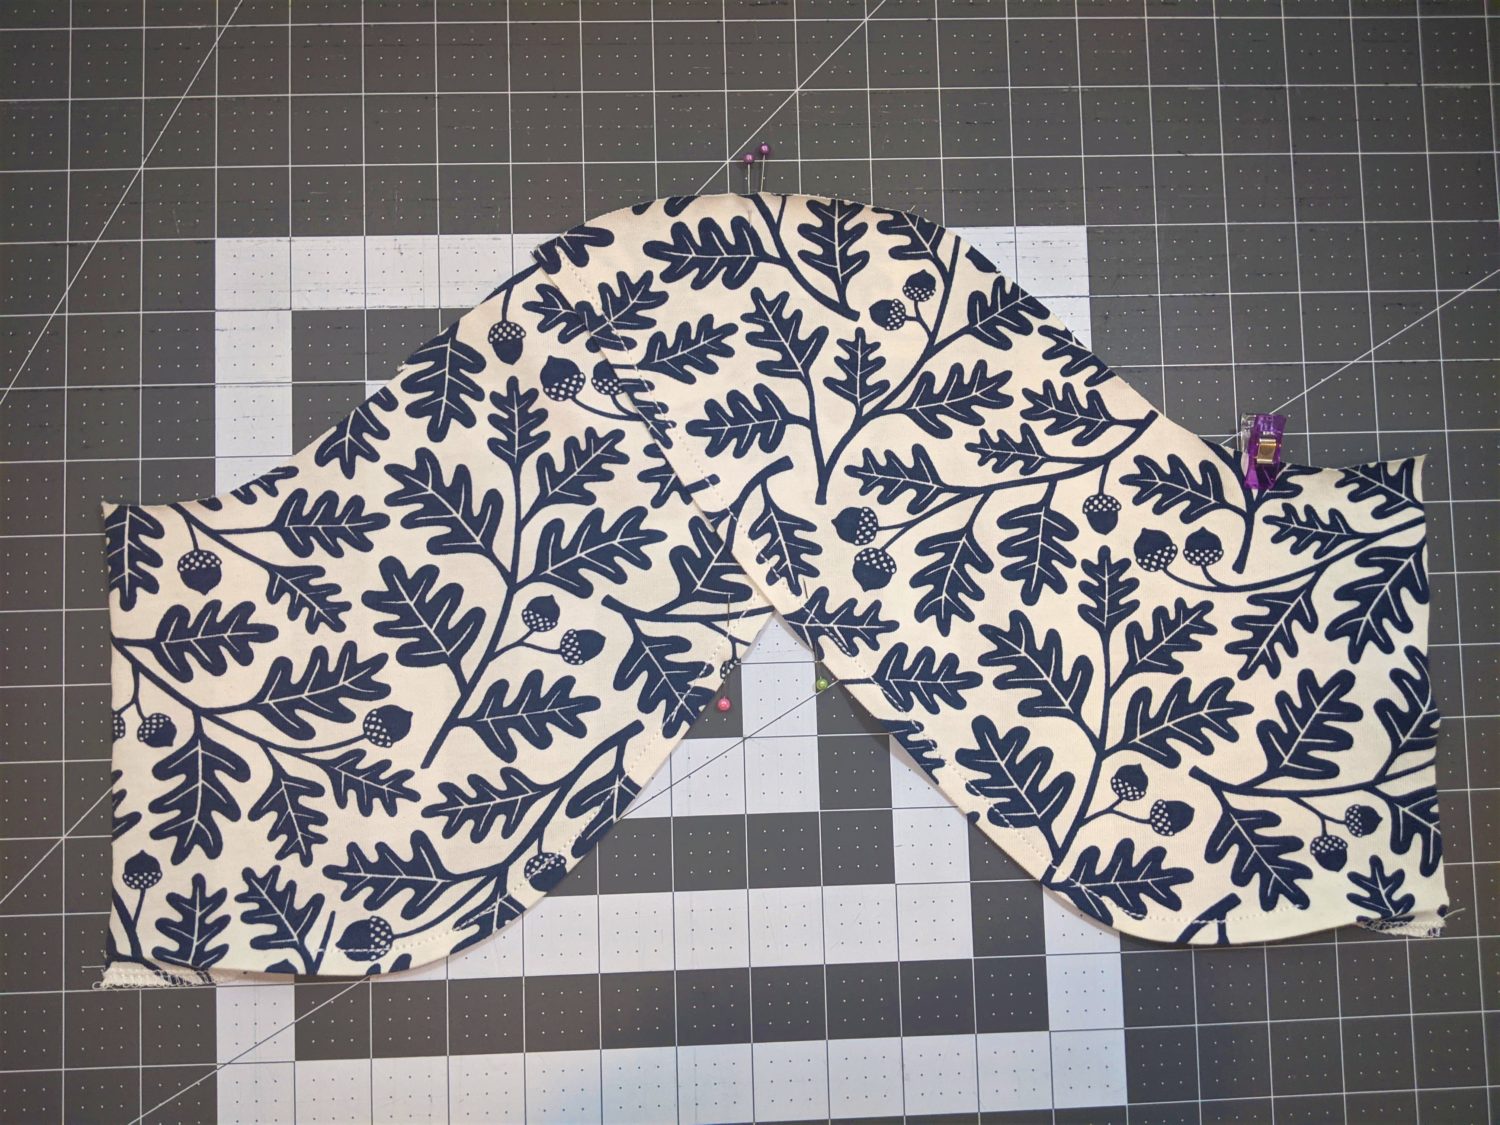
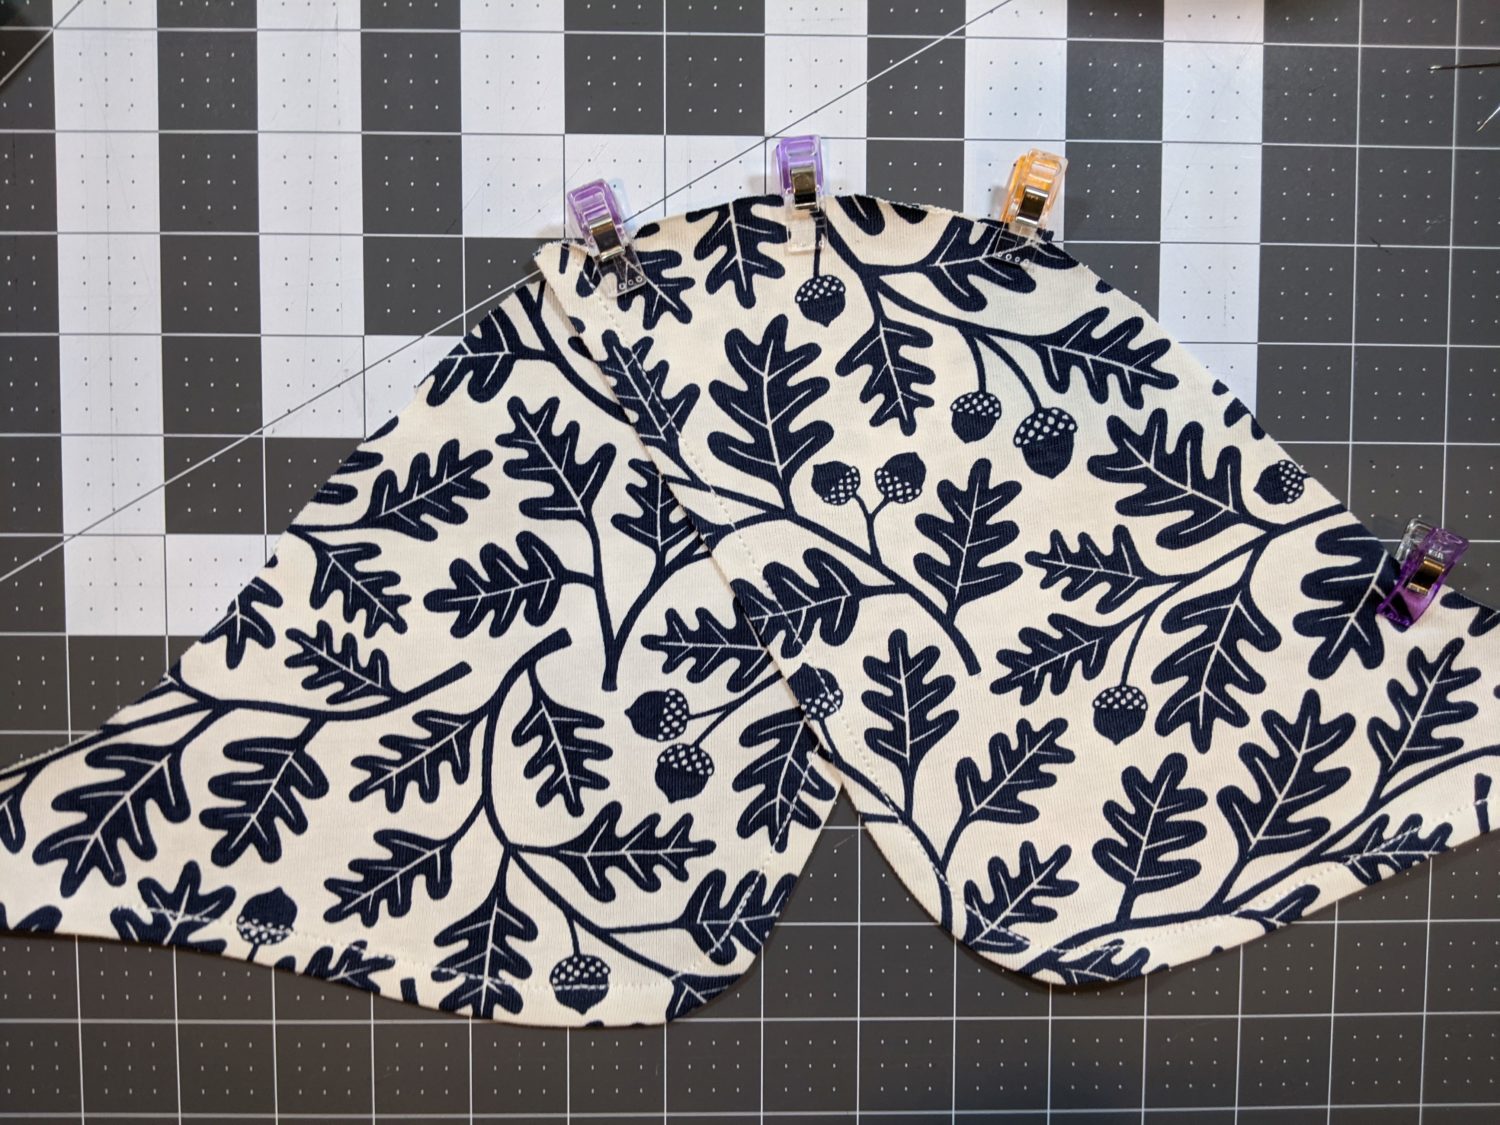
- For your new sleeve pieces, cut out two mirrored sets.
- Mark both of the front pieces with a pin or clip, it’s really easy to get them mixed up with the back pieces. (Ask me how I know…)
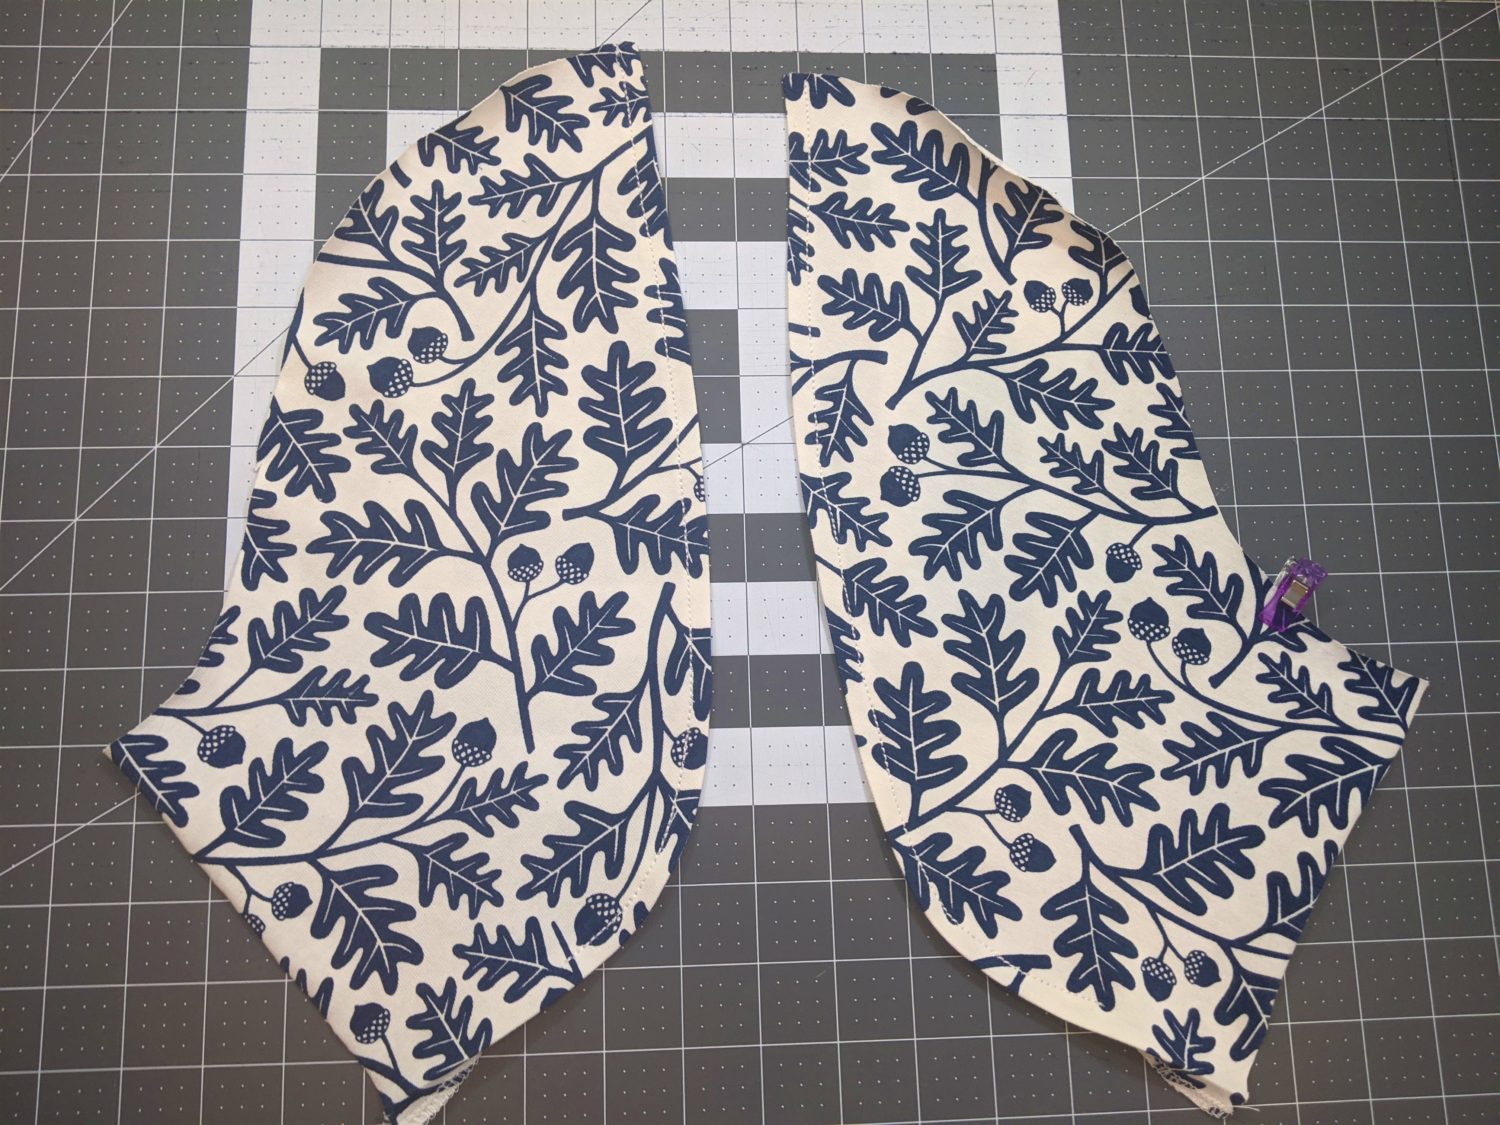
Longer Version 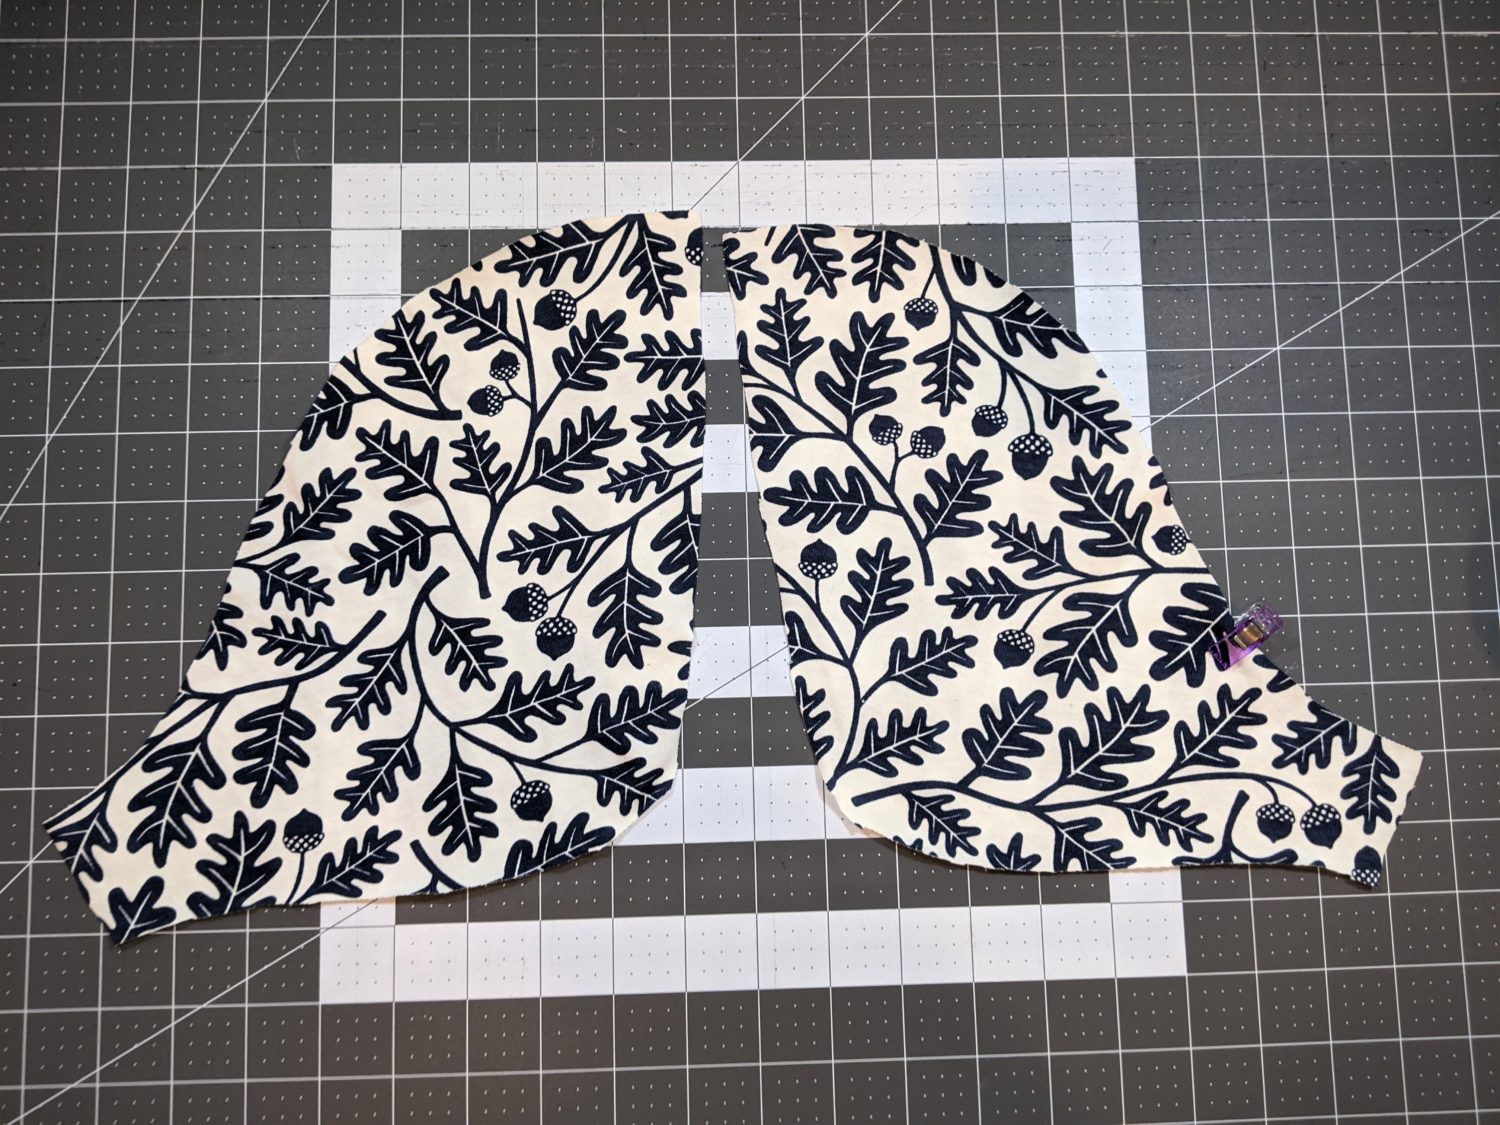
Shorter Version
Constructing the Sleeve
The steps are the same for any length of sleeve you make. Pictures will be a combination of both lengths.
- Hem the inner edge of each piece up to 2″ from the underarm seam. (You can go all the way to the end, this is just my personal preference for hemming.)
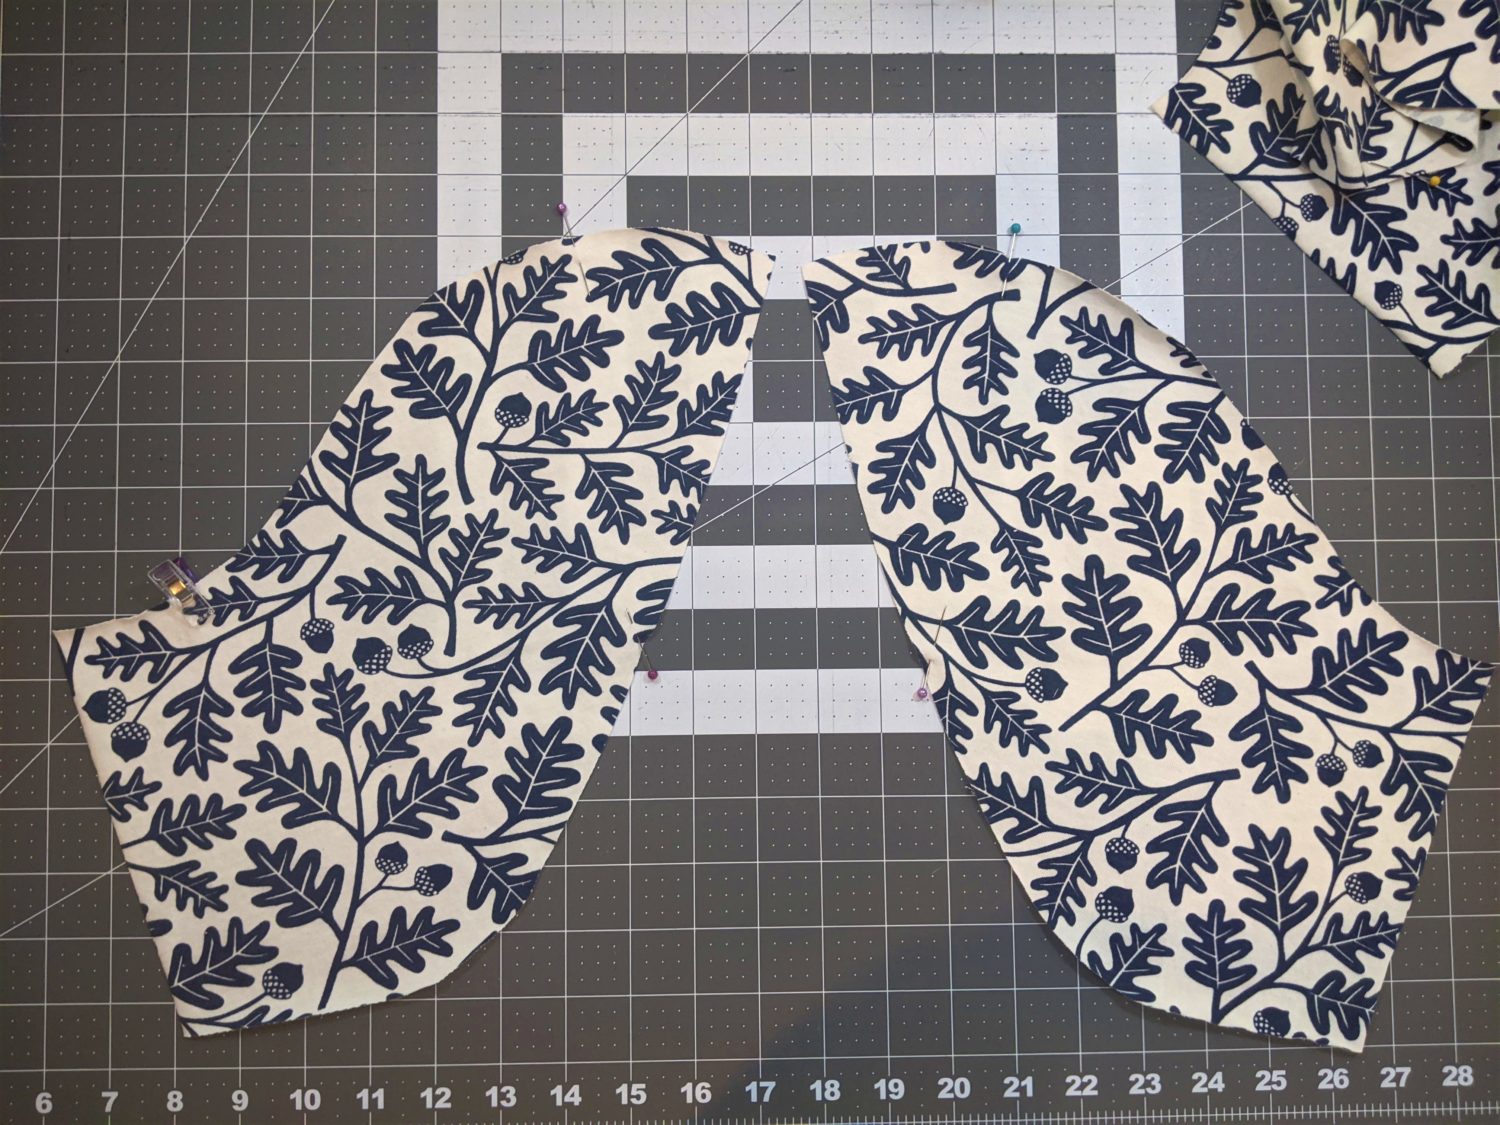
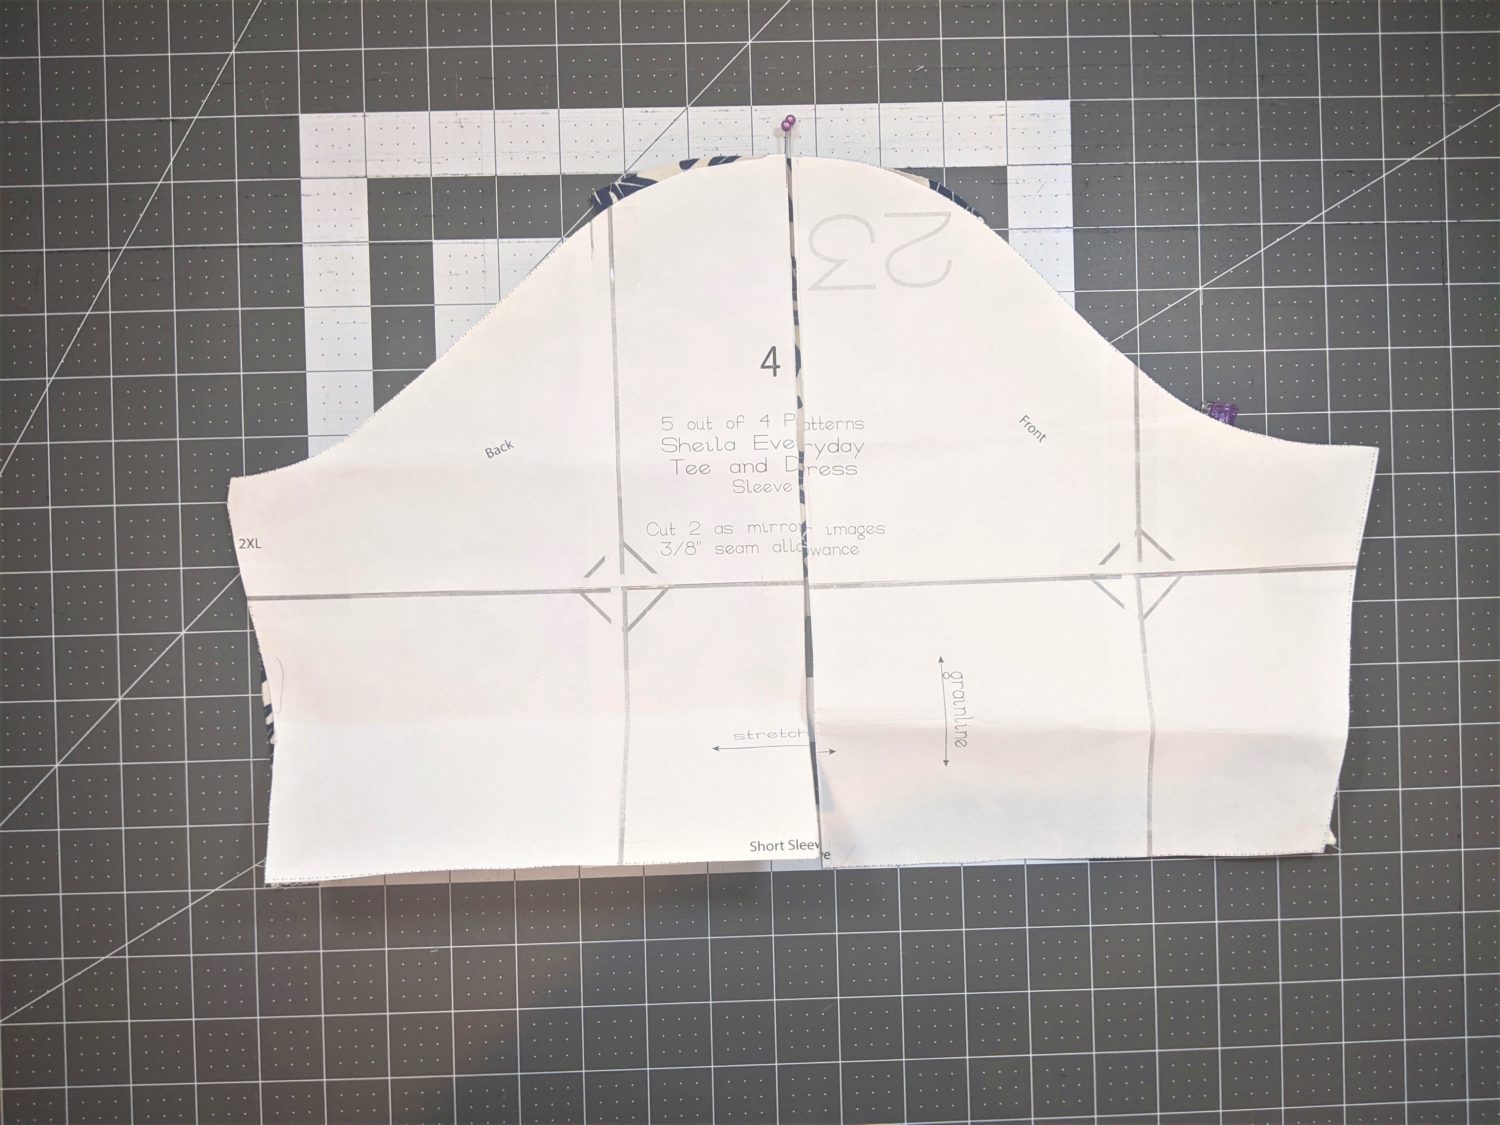
- Set the paper pattern pieces on top of the fabric pieces and mark the original centerline of each piece with a pin at the shoulder.
- Mark both of the front and both of the back pieces.
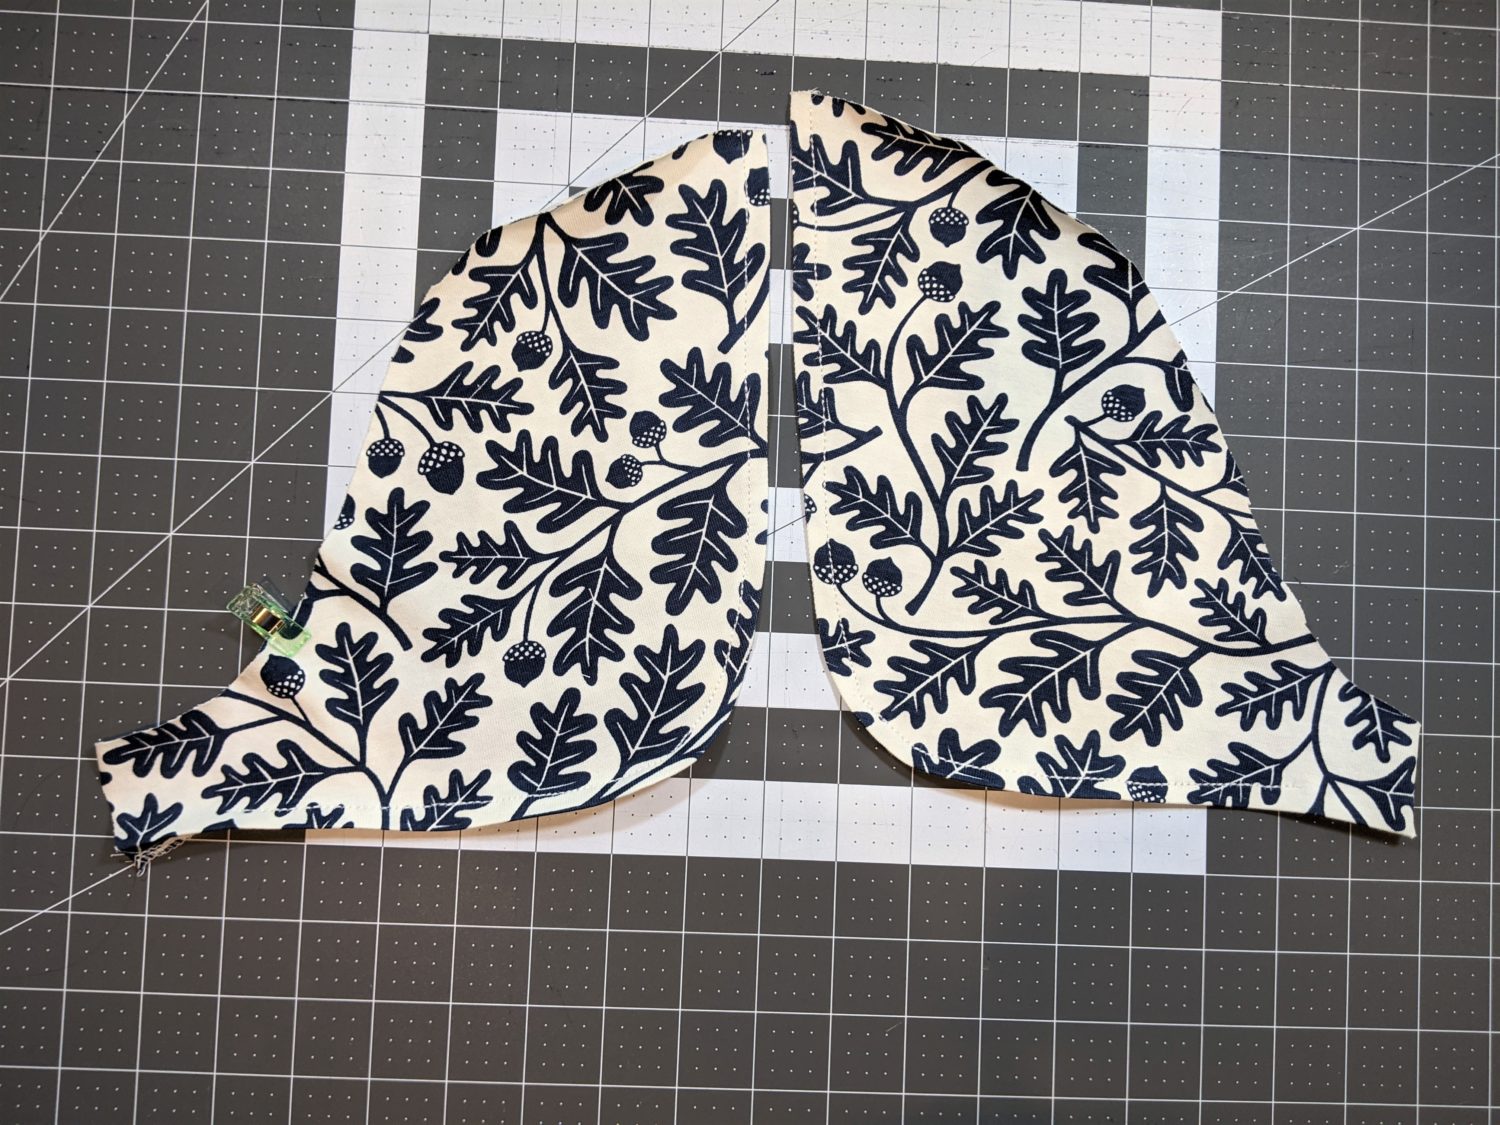
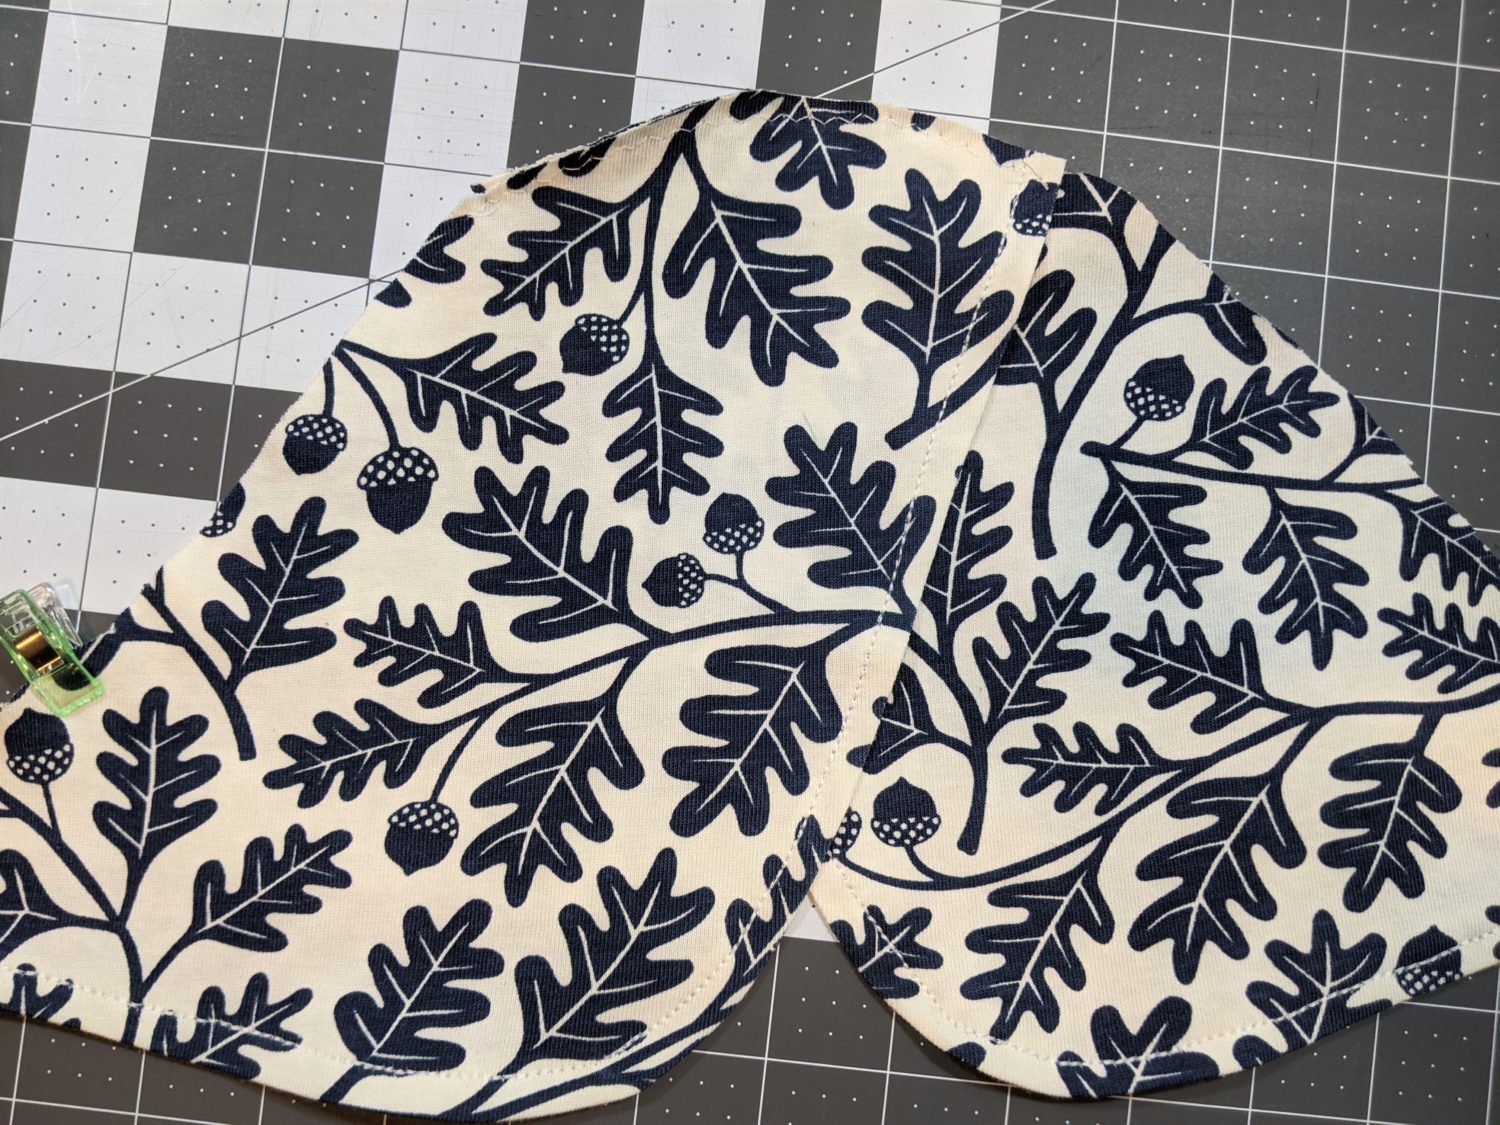
- Lay the front piece on top of the back piece lining up the pins marking the original center.
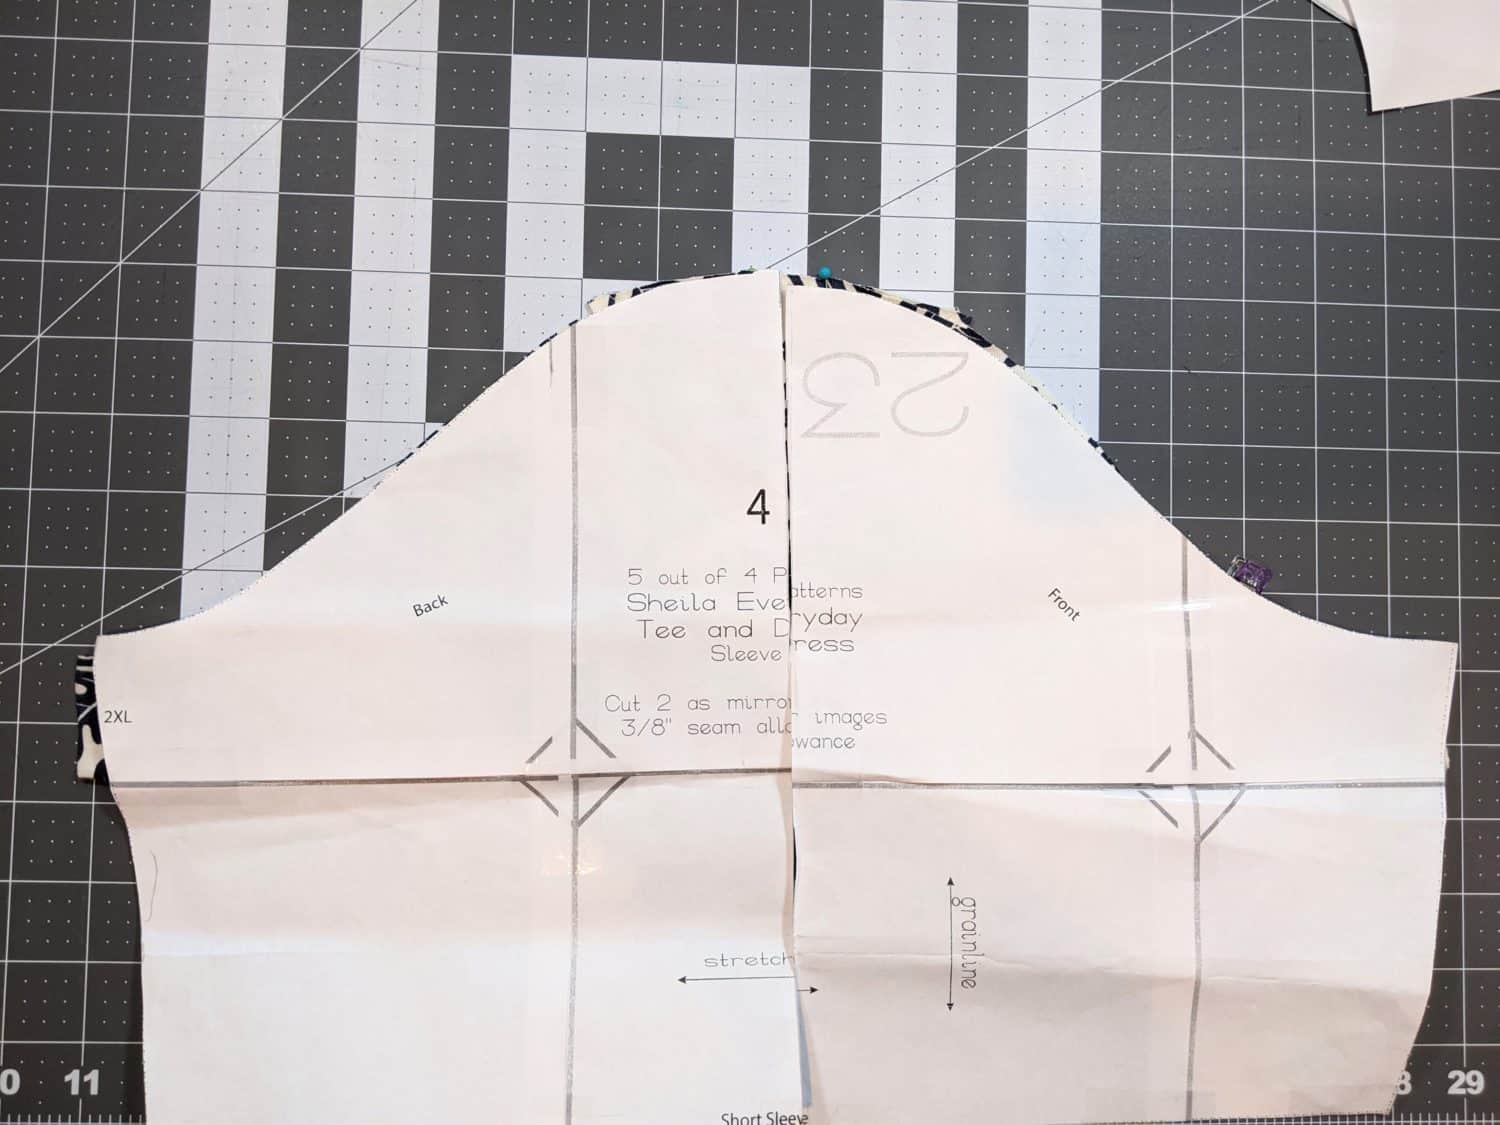
- Use your original pattern piece to set on top to make sure the armscyes are still the same as the original.
- Adjust the sleeves if needed to match up with the original pattern.
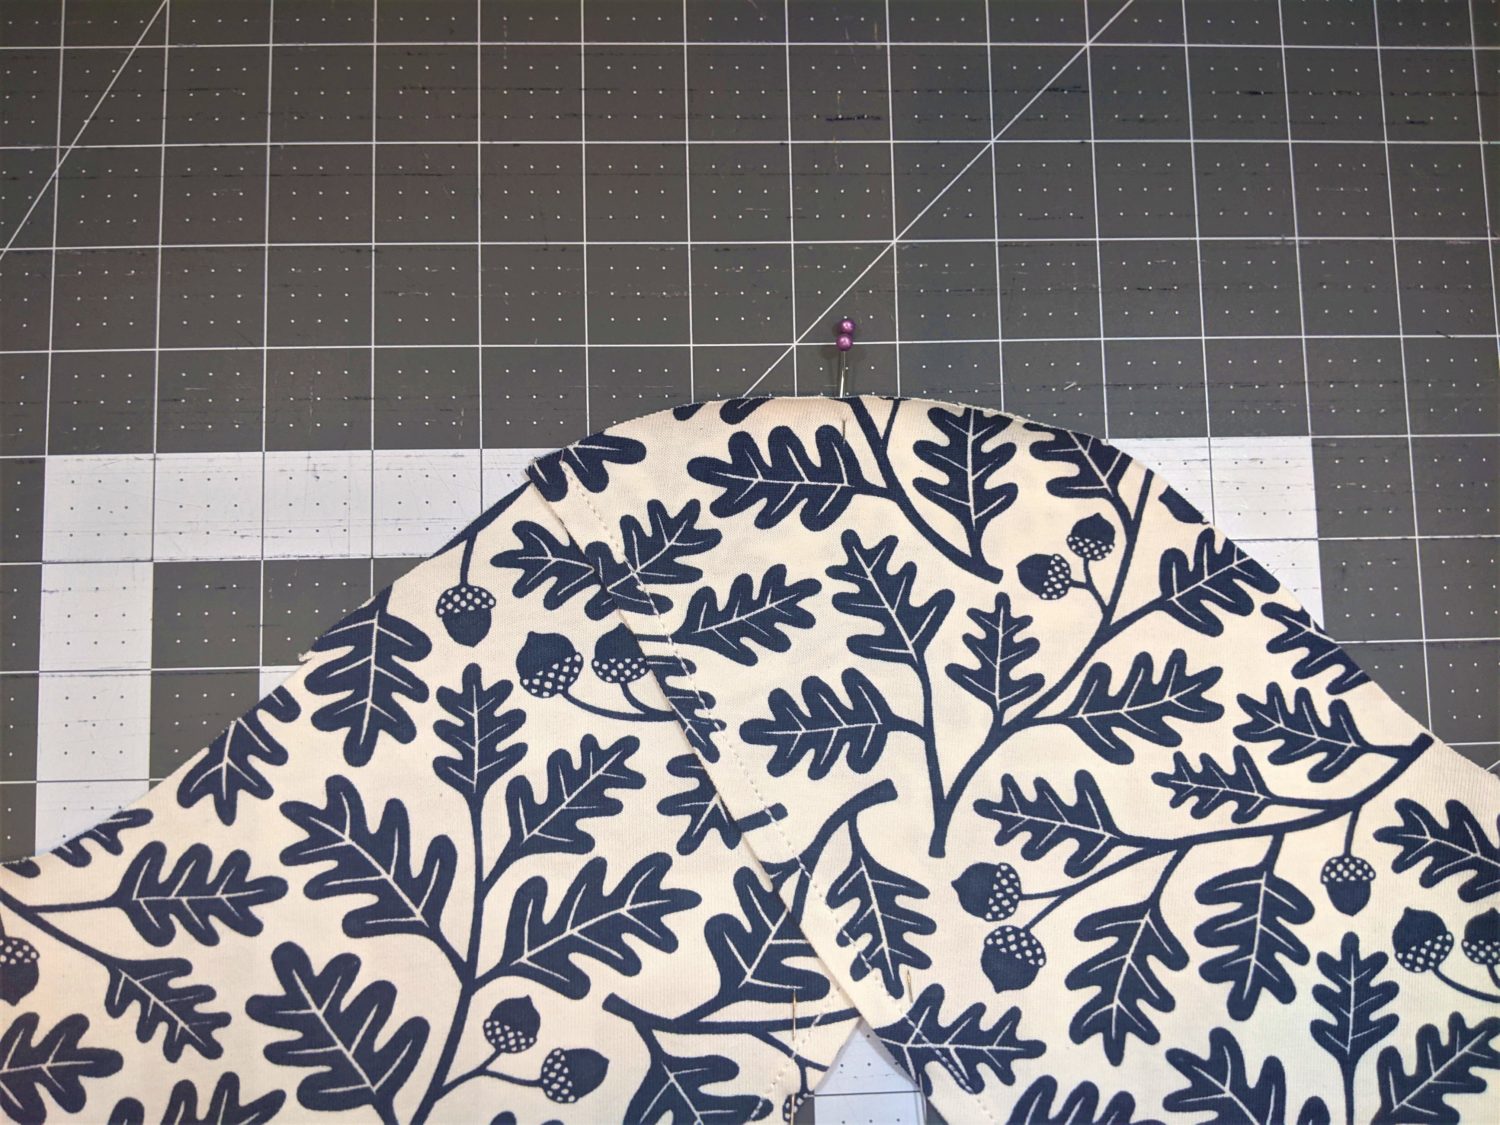
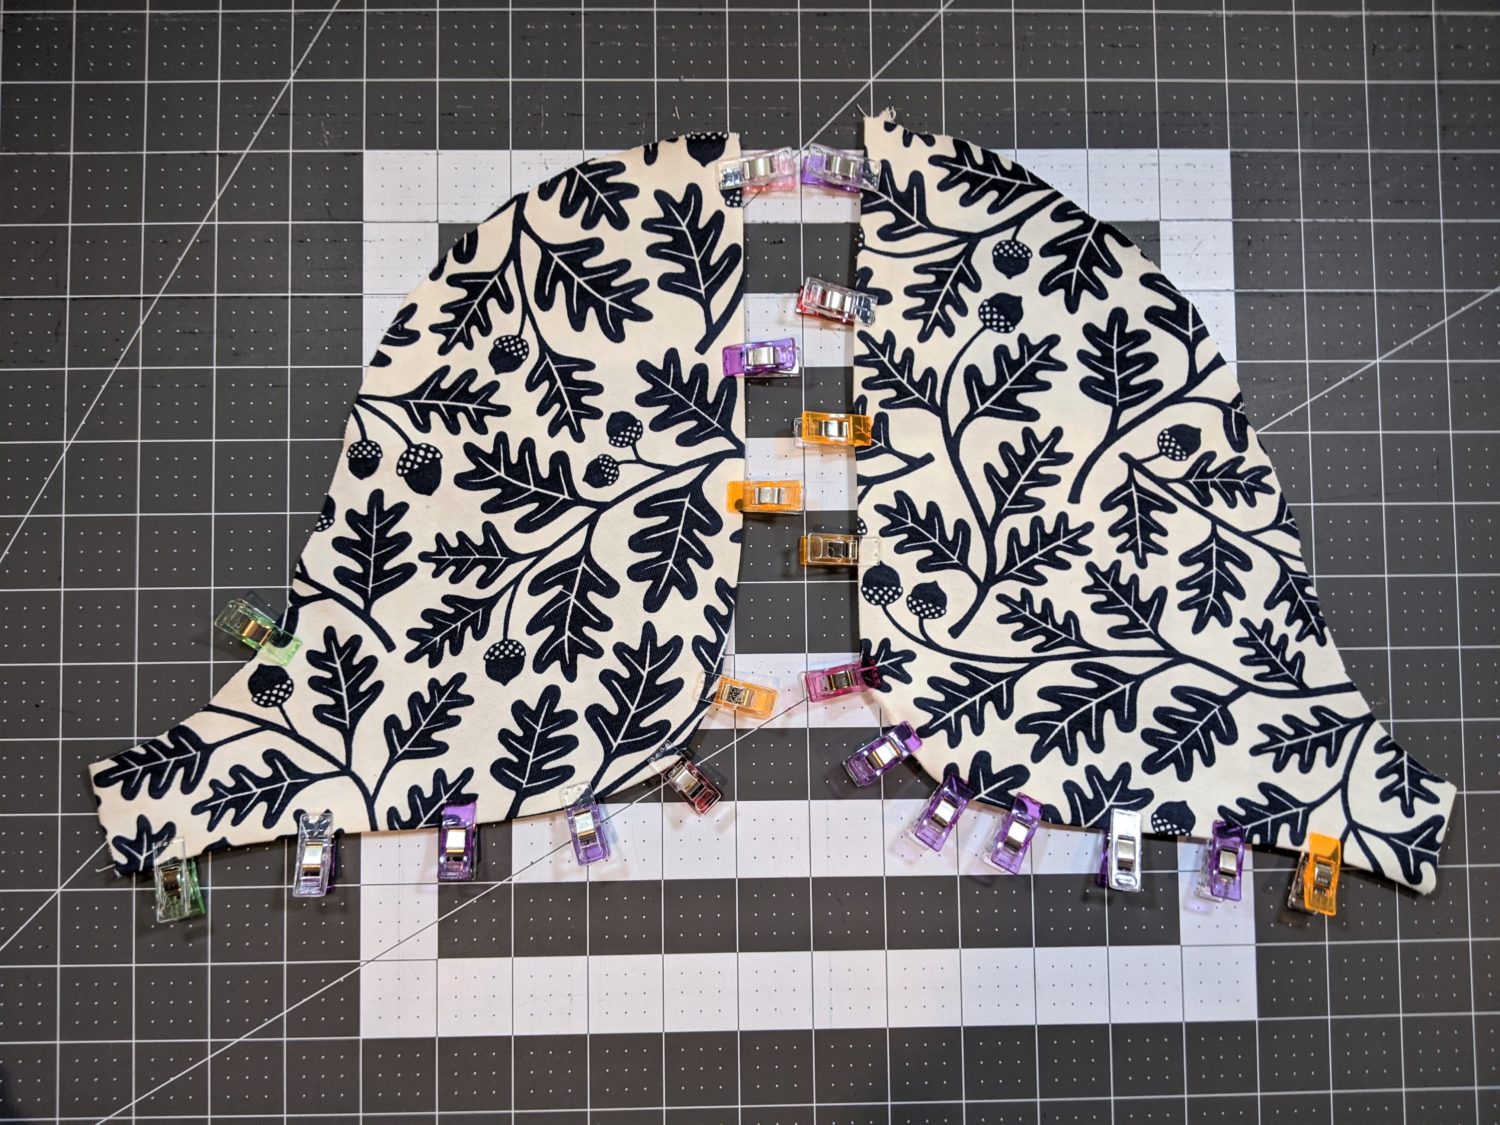
- Pin along the top of the sleeve where the pieces overlap and baste together with a long, narrow zigzag stitch.
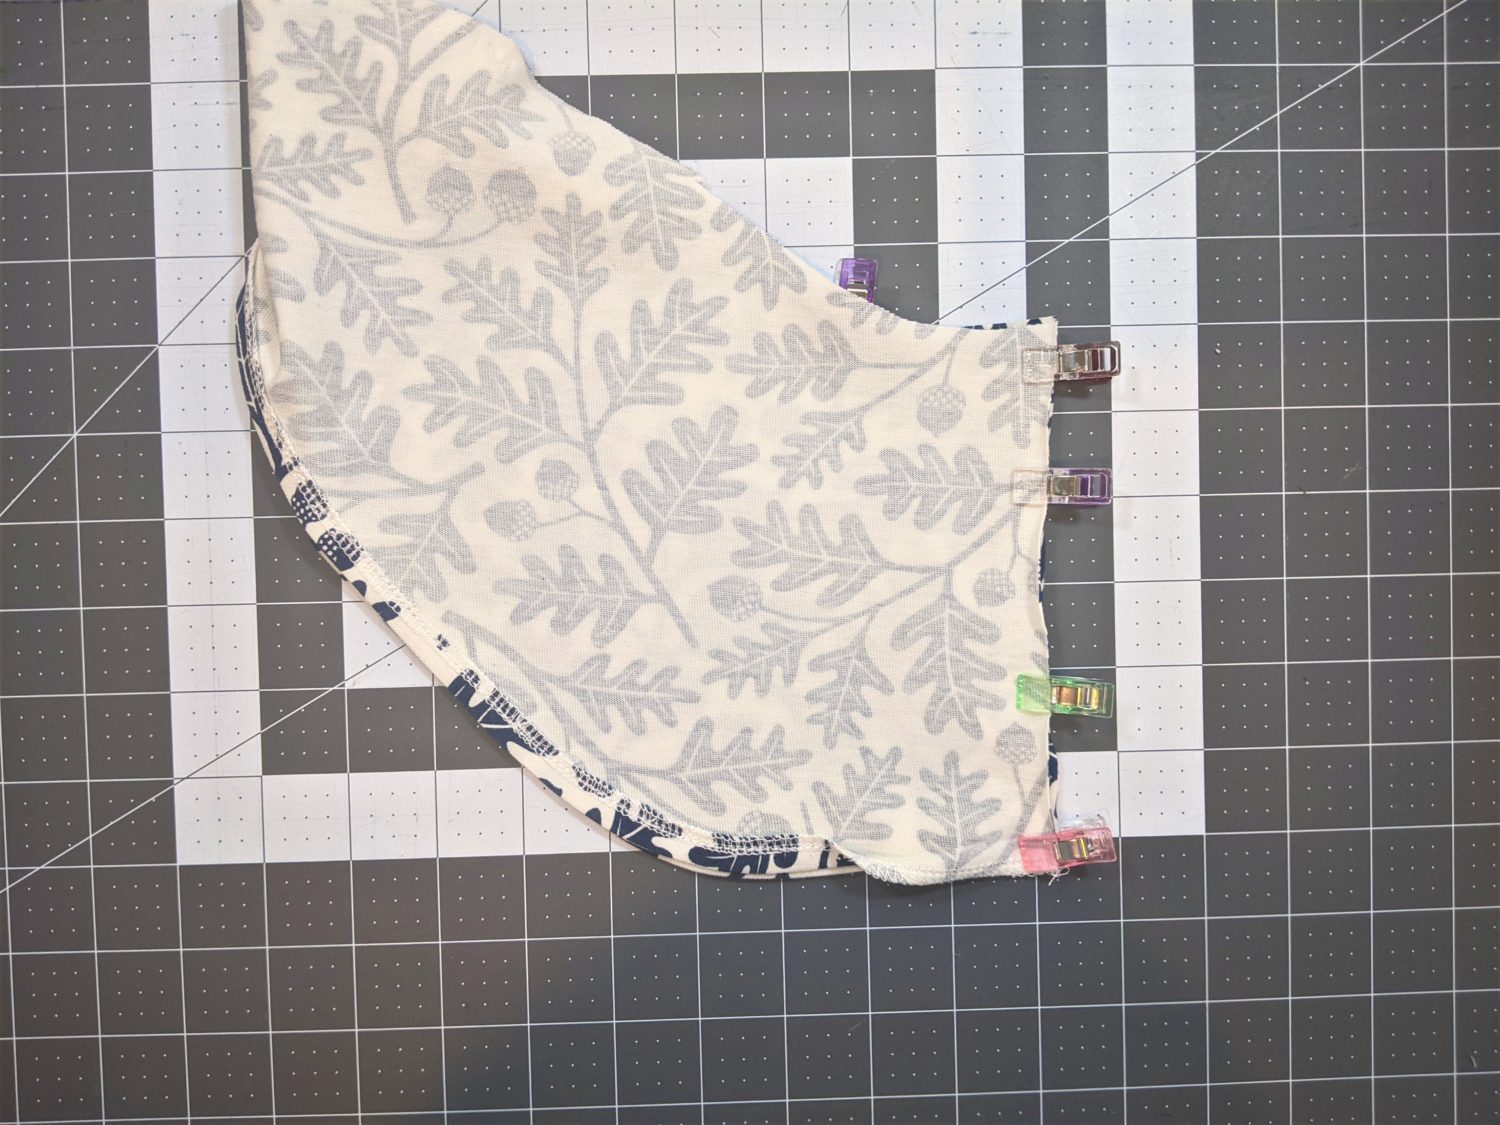
- Fold each sleeve in half right sides together and match up the underarm seam.
- Sew with a stretch stitch or serger.
- If you left the last 2″ of the hem unsewn earlier, sew the unhemmed section to finish the sleeve edge.
- Sew your bodice pieces together following the tutorial.
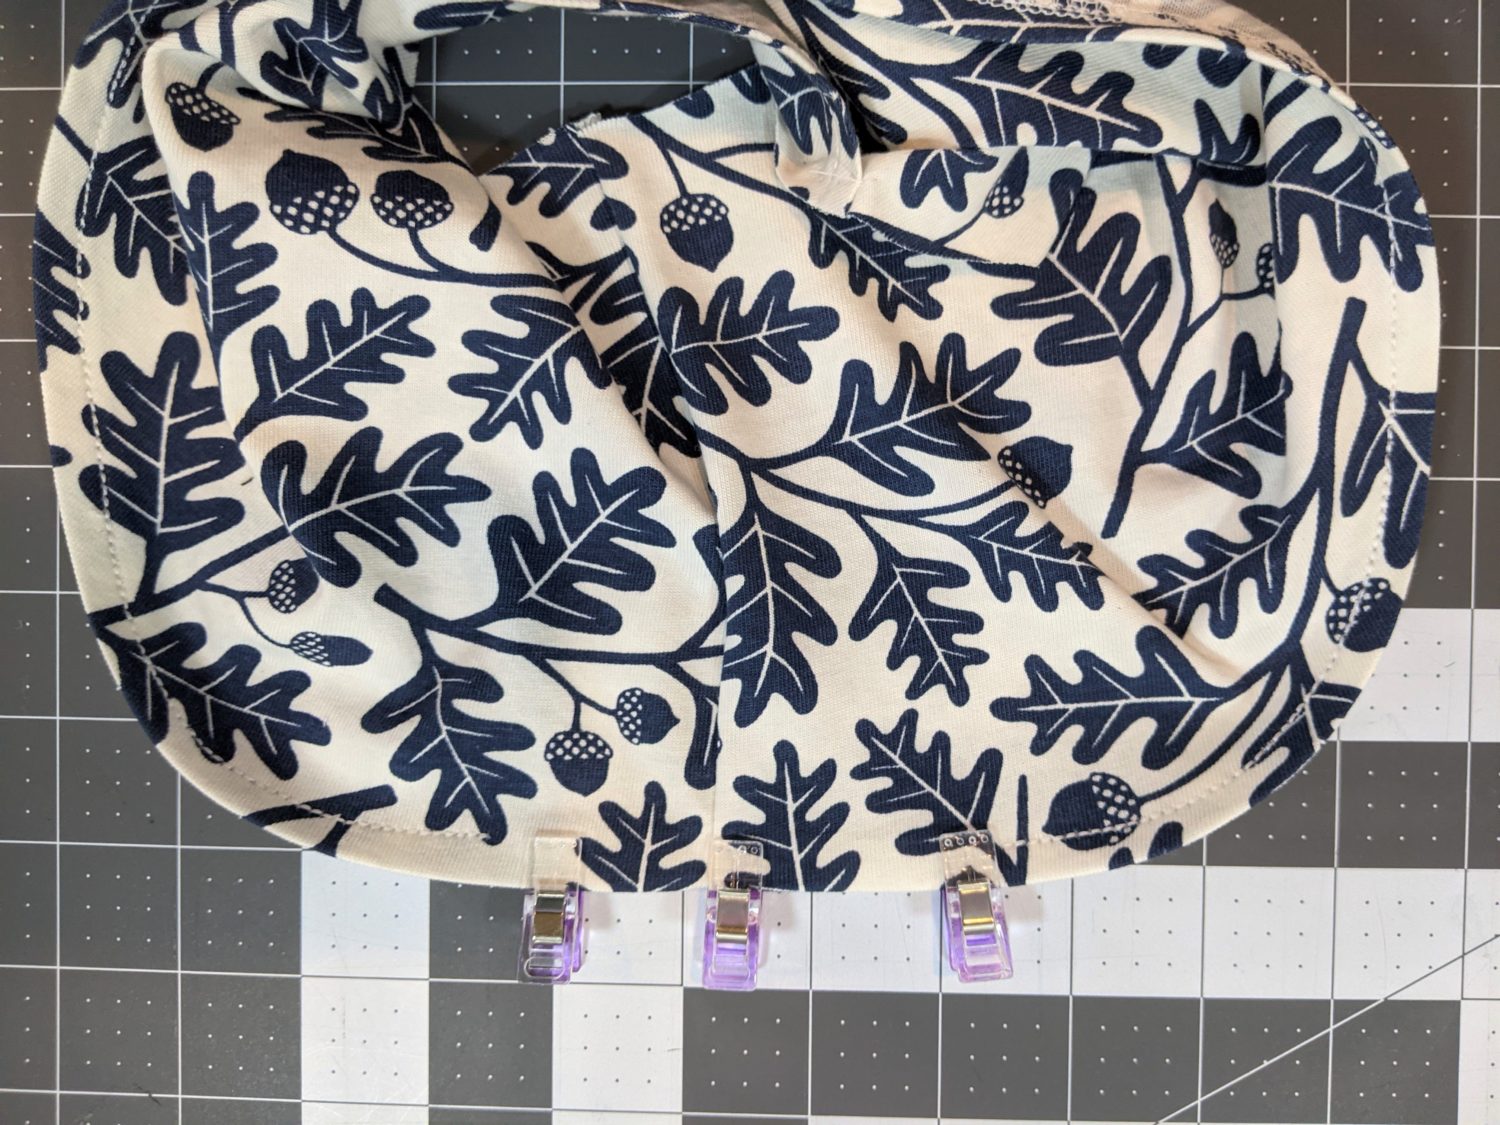
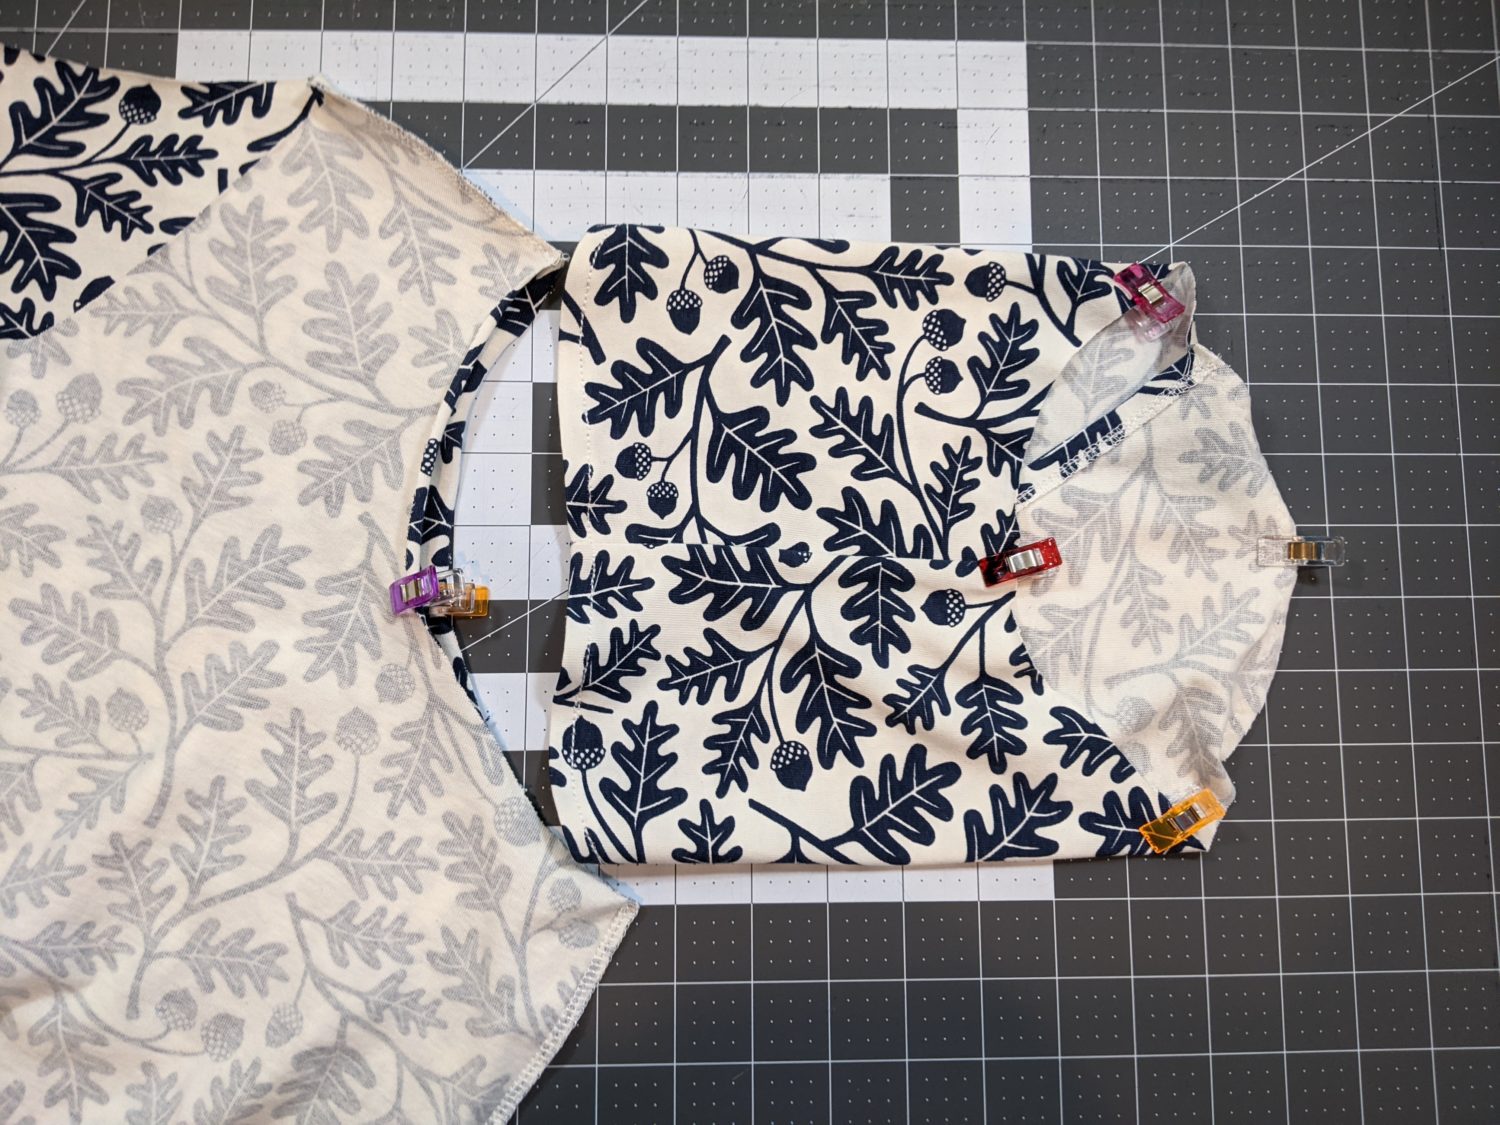
- Quarter and pin both sleeves and bodice.
- Turn the bodice wrong side out and the sleeve right side out, then slide the sleeve into the bodice right sides together. Make sure the front of the sleeves are along the front bodice.
- Pin together at quarter marks and sew with a stretch stitch or serger.
- Finish your top with the neckband and hem.

Simple and Beautiful!

Shorter Version 
Longer Version
Want more FUN DIY Freebies? Check out the FREEBIE TUTORIALS and the FREEBIE PATTERNS!
As always, we’re here to help if you need it! Join us HERE and on Facebook, Instagram, Twitter, Youtube, and Pinterest. We’re everywhere you are.
I had a dress with this sleeve. Didn’t know the name. I really liked it because it wasn’t tight and allowed me to move.