
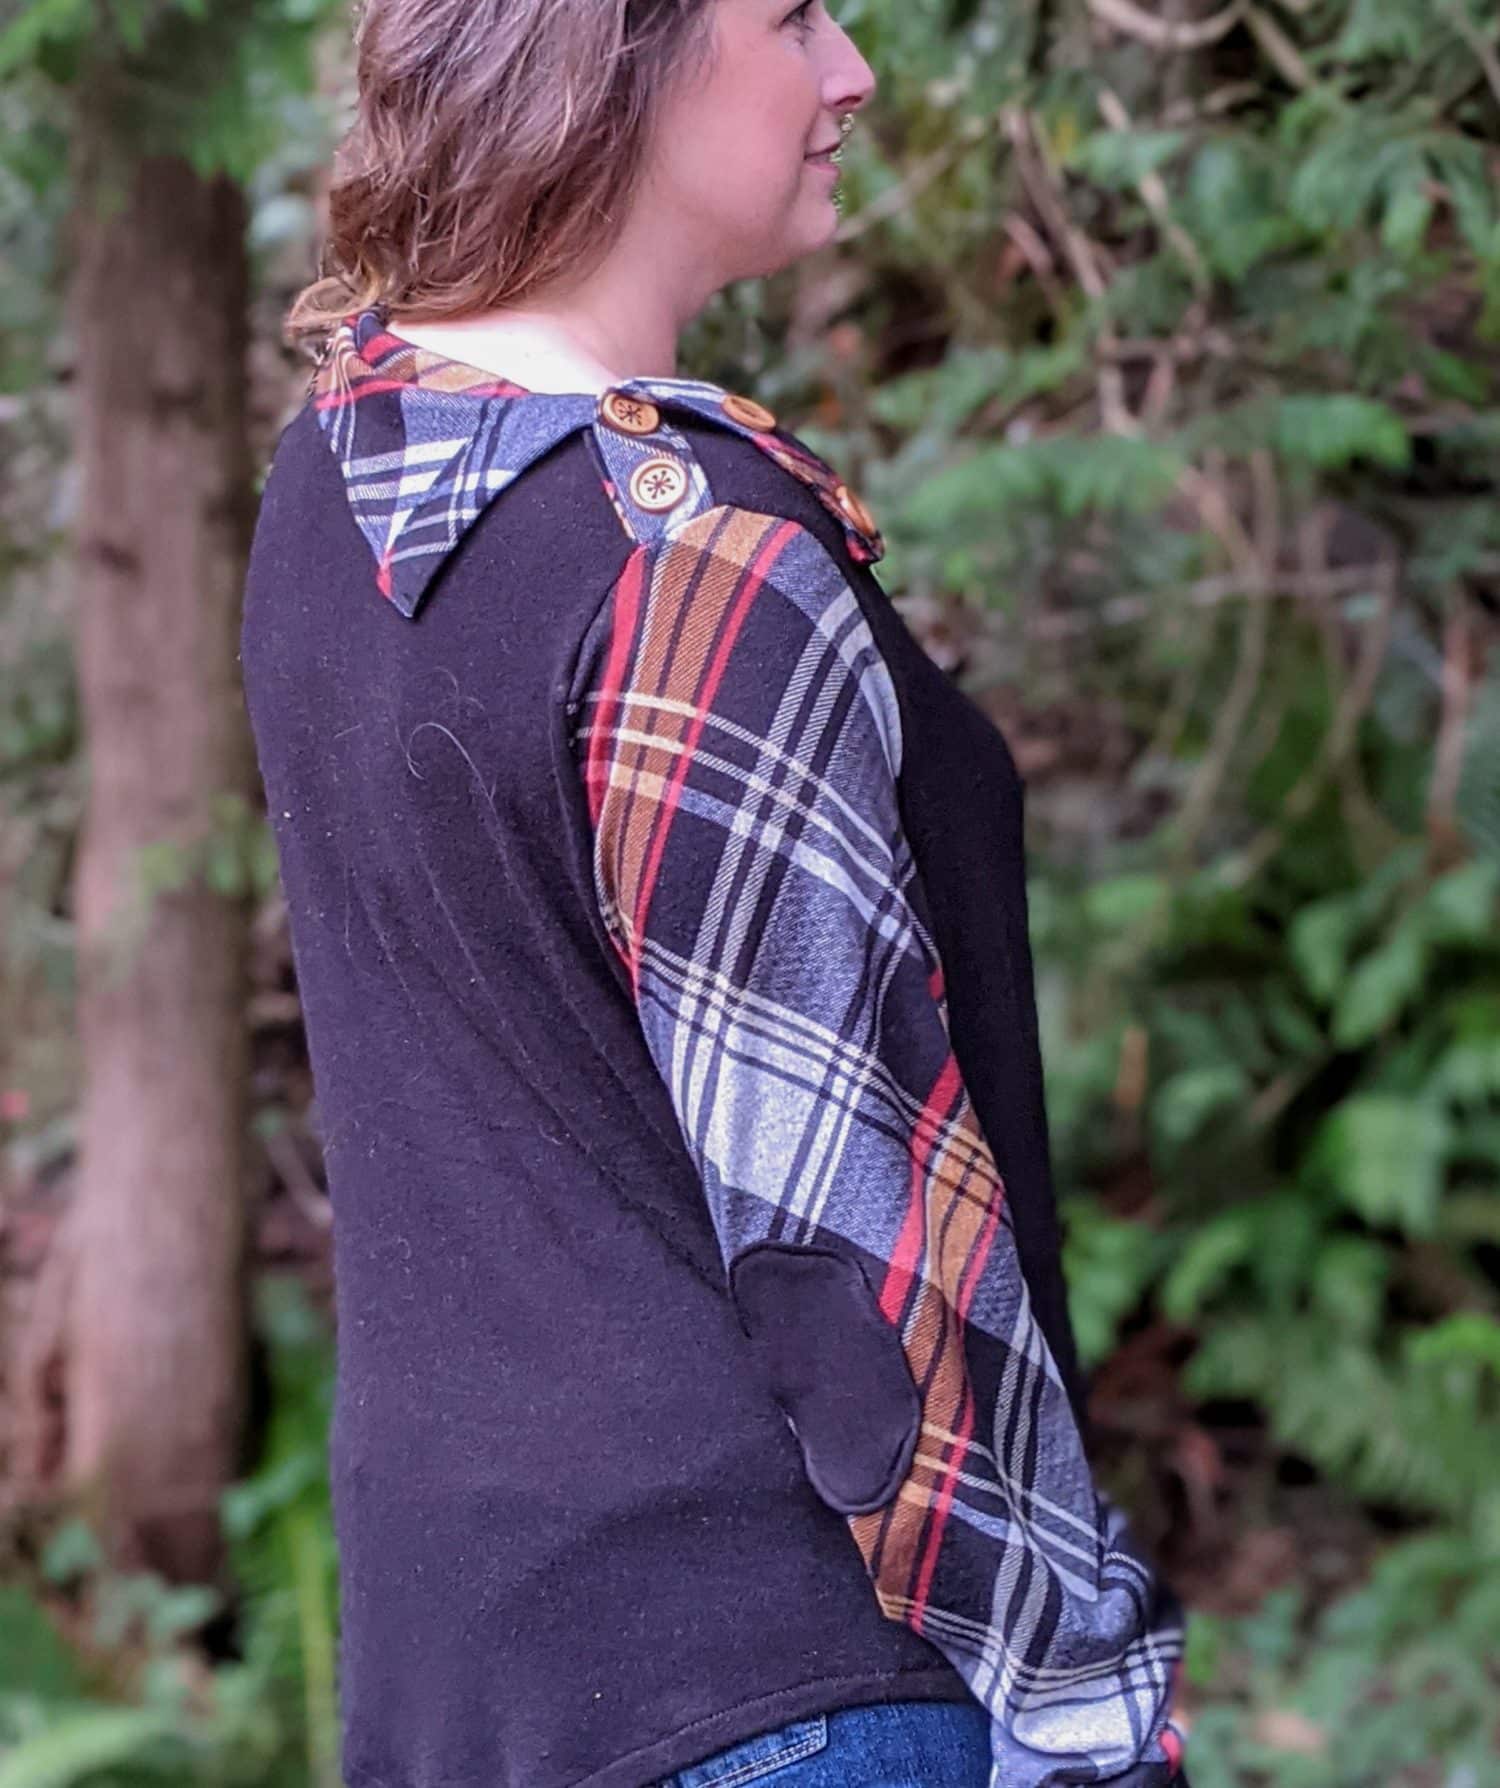
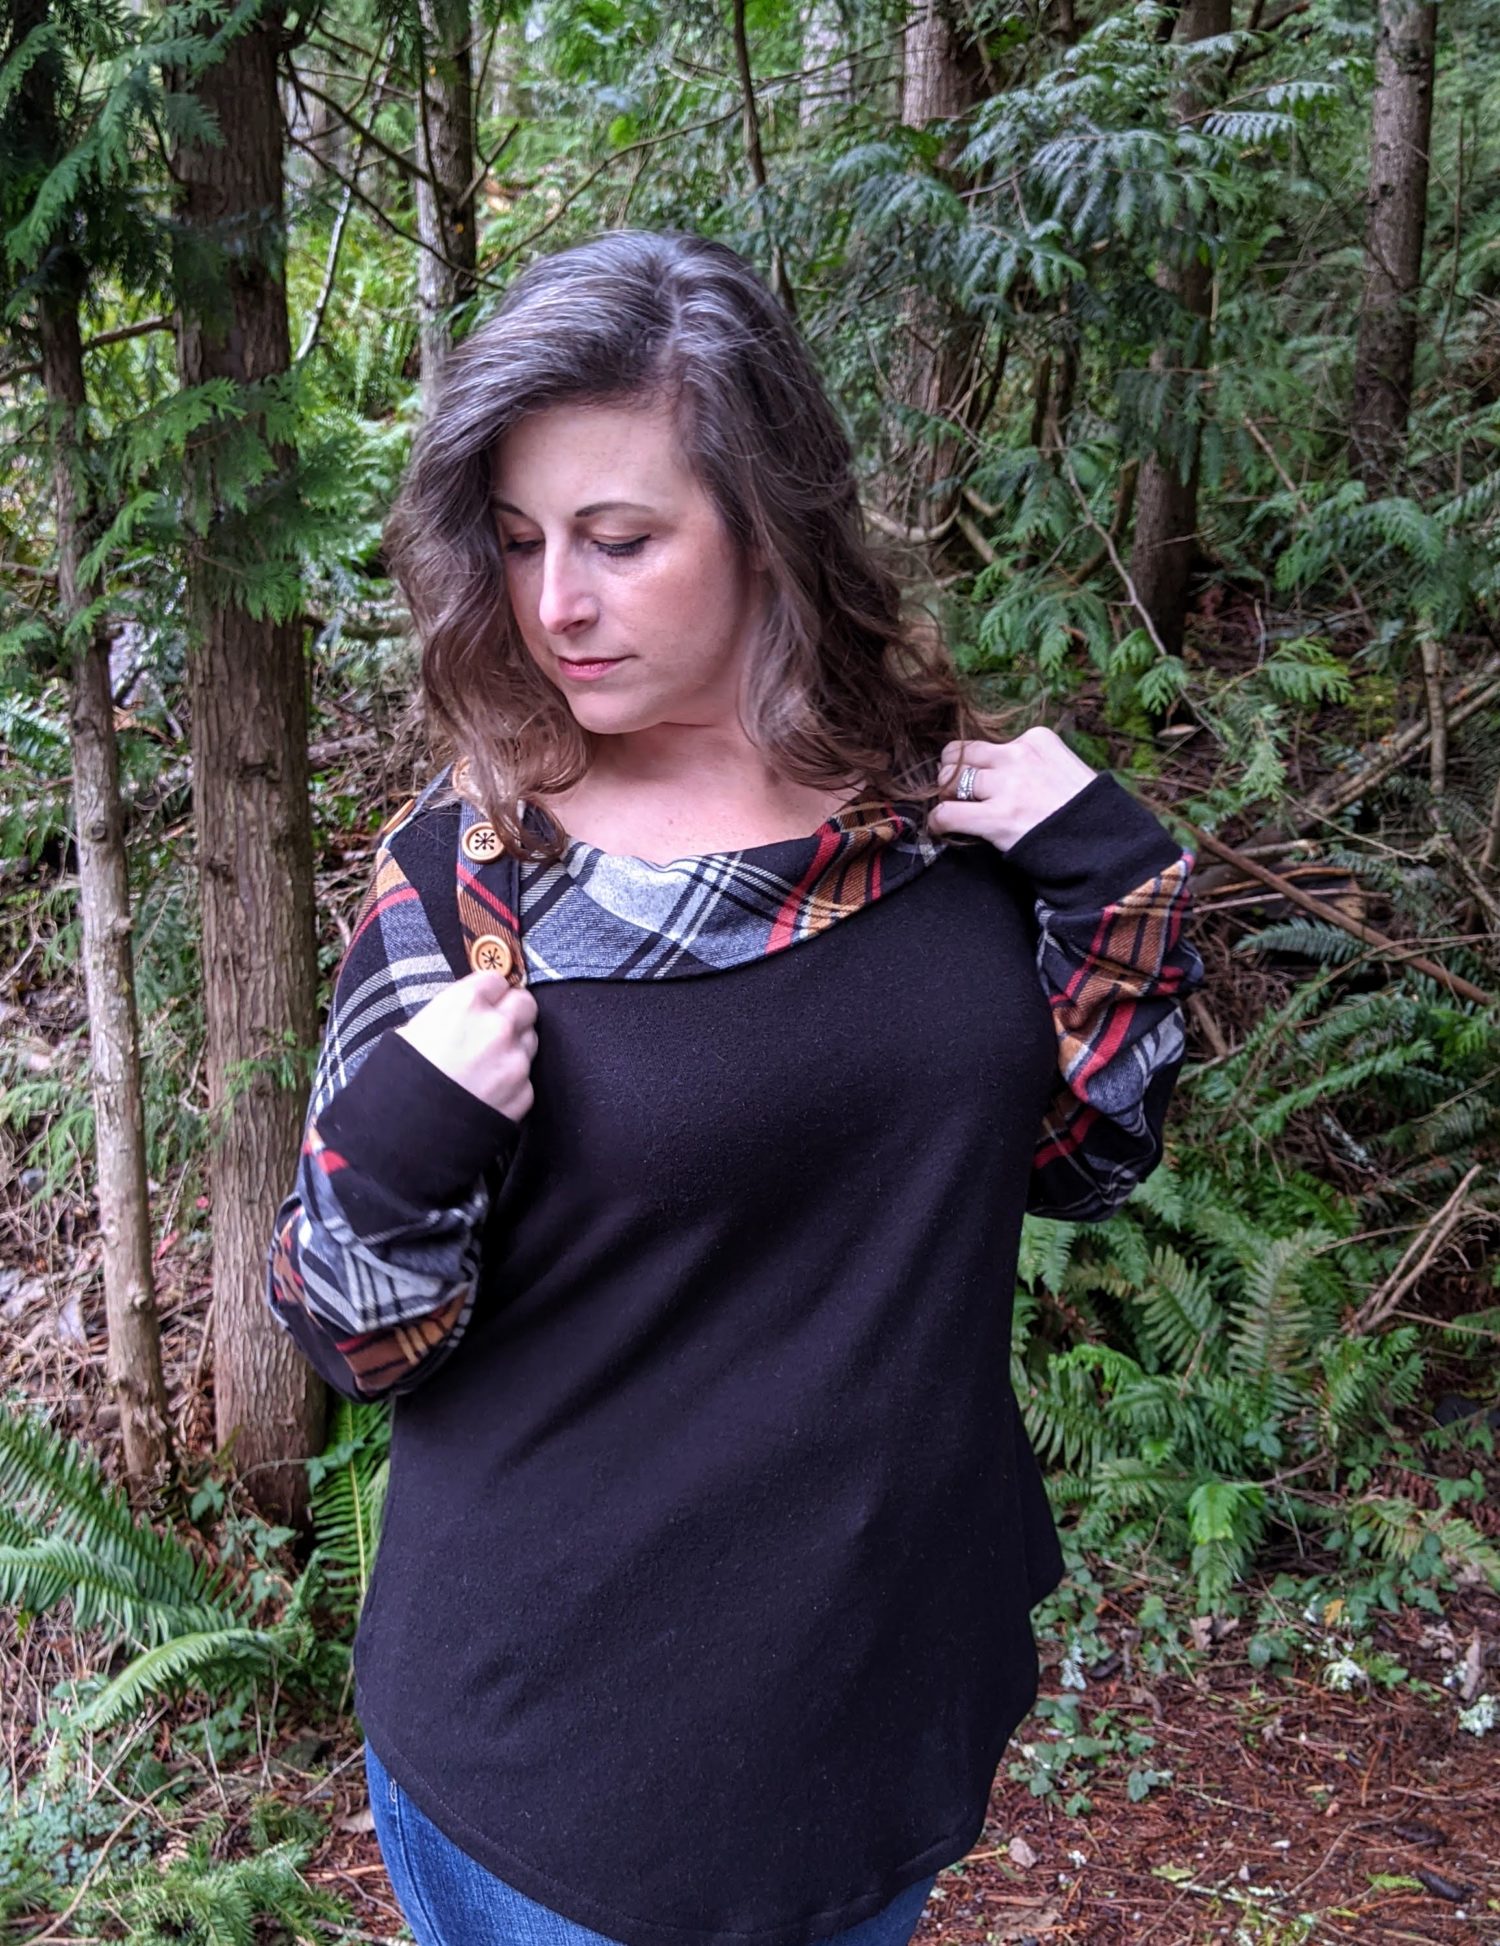
Who’s ready to spruce up a basic tee? For this hack, I used the Sheila Everyday Tee from our basics line, but this will work for any top with set-in sleeves. Some other great options are the Michelle Fitted Tee, and the Women’s Easy Tee, This is a loose-fitting collar with decorative buttons and is a fun way to add a little extra to that basic tee pattern!
Supplies:
- Pattern: cut and assembled
- Supply list from the pattern being used
- Fabric for the collar (about 3/4 of a yard)
- Decorative buttons
- Interfacing
Finding Your Collar Size:
We are going to start by measuring the total length of the neckline of your pattern to find the length you will need the collar to be for your particular pattern and size. Measure your paper pattern, not your fabric since it’s easy to stretch fabric and measure incorrectly.
- Starting with the front bodice pattern piece, measure from the top inner edge of the shoulder along the neckline to the other edge of the pattern. (Mine is 8 1/4″) Multiply your measurement by two to get the total length for the front. (Mine is 16 1/2″)
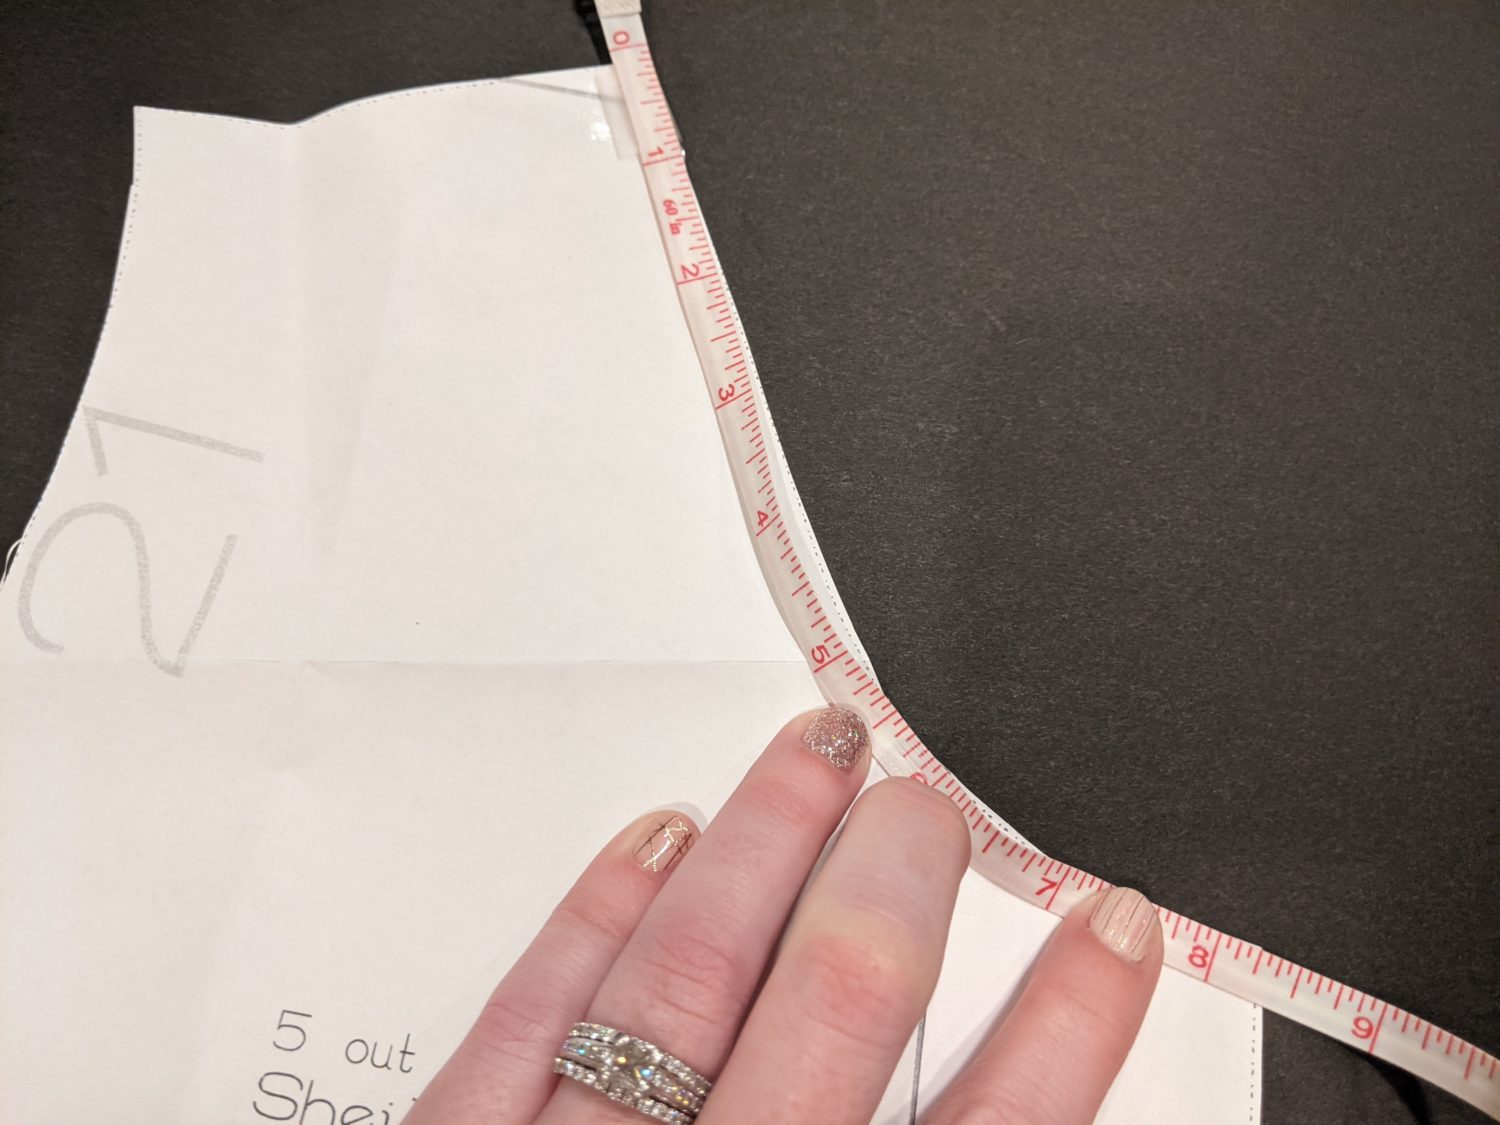
Front Bodice
- You will measure the same way on the back bodice piece. (Mine is 5 1/2″) Again, multiply by two to get the full length. (Mine is 11″)
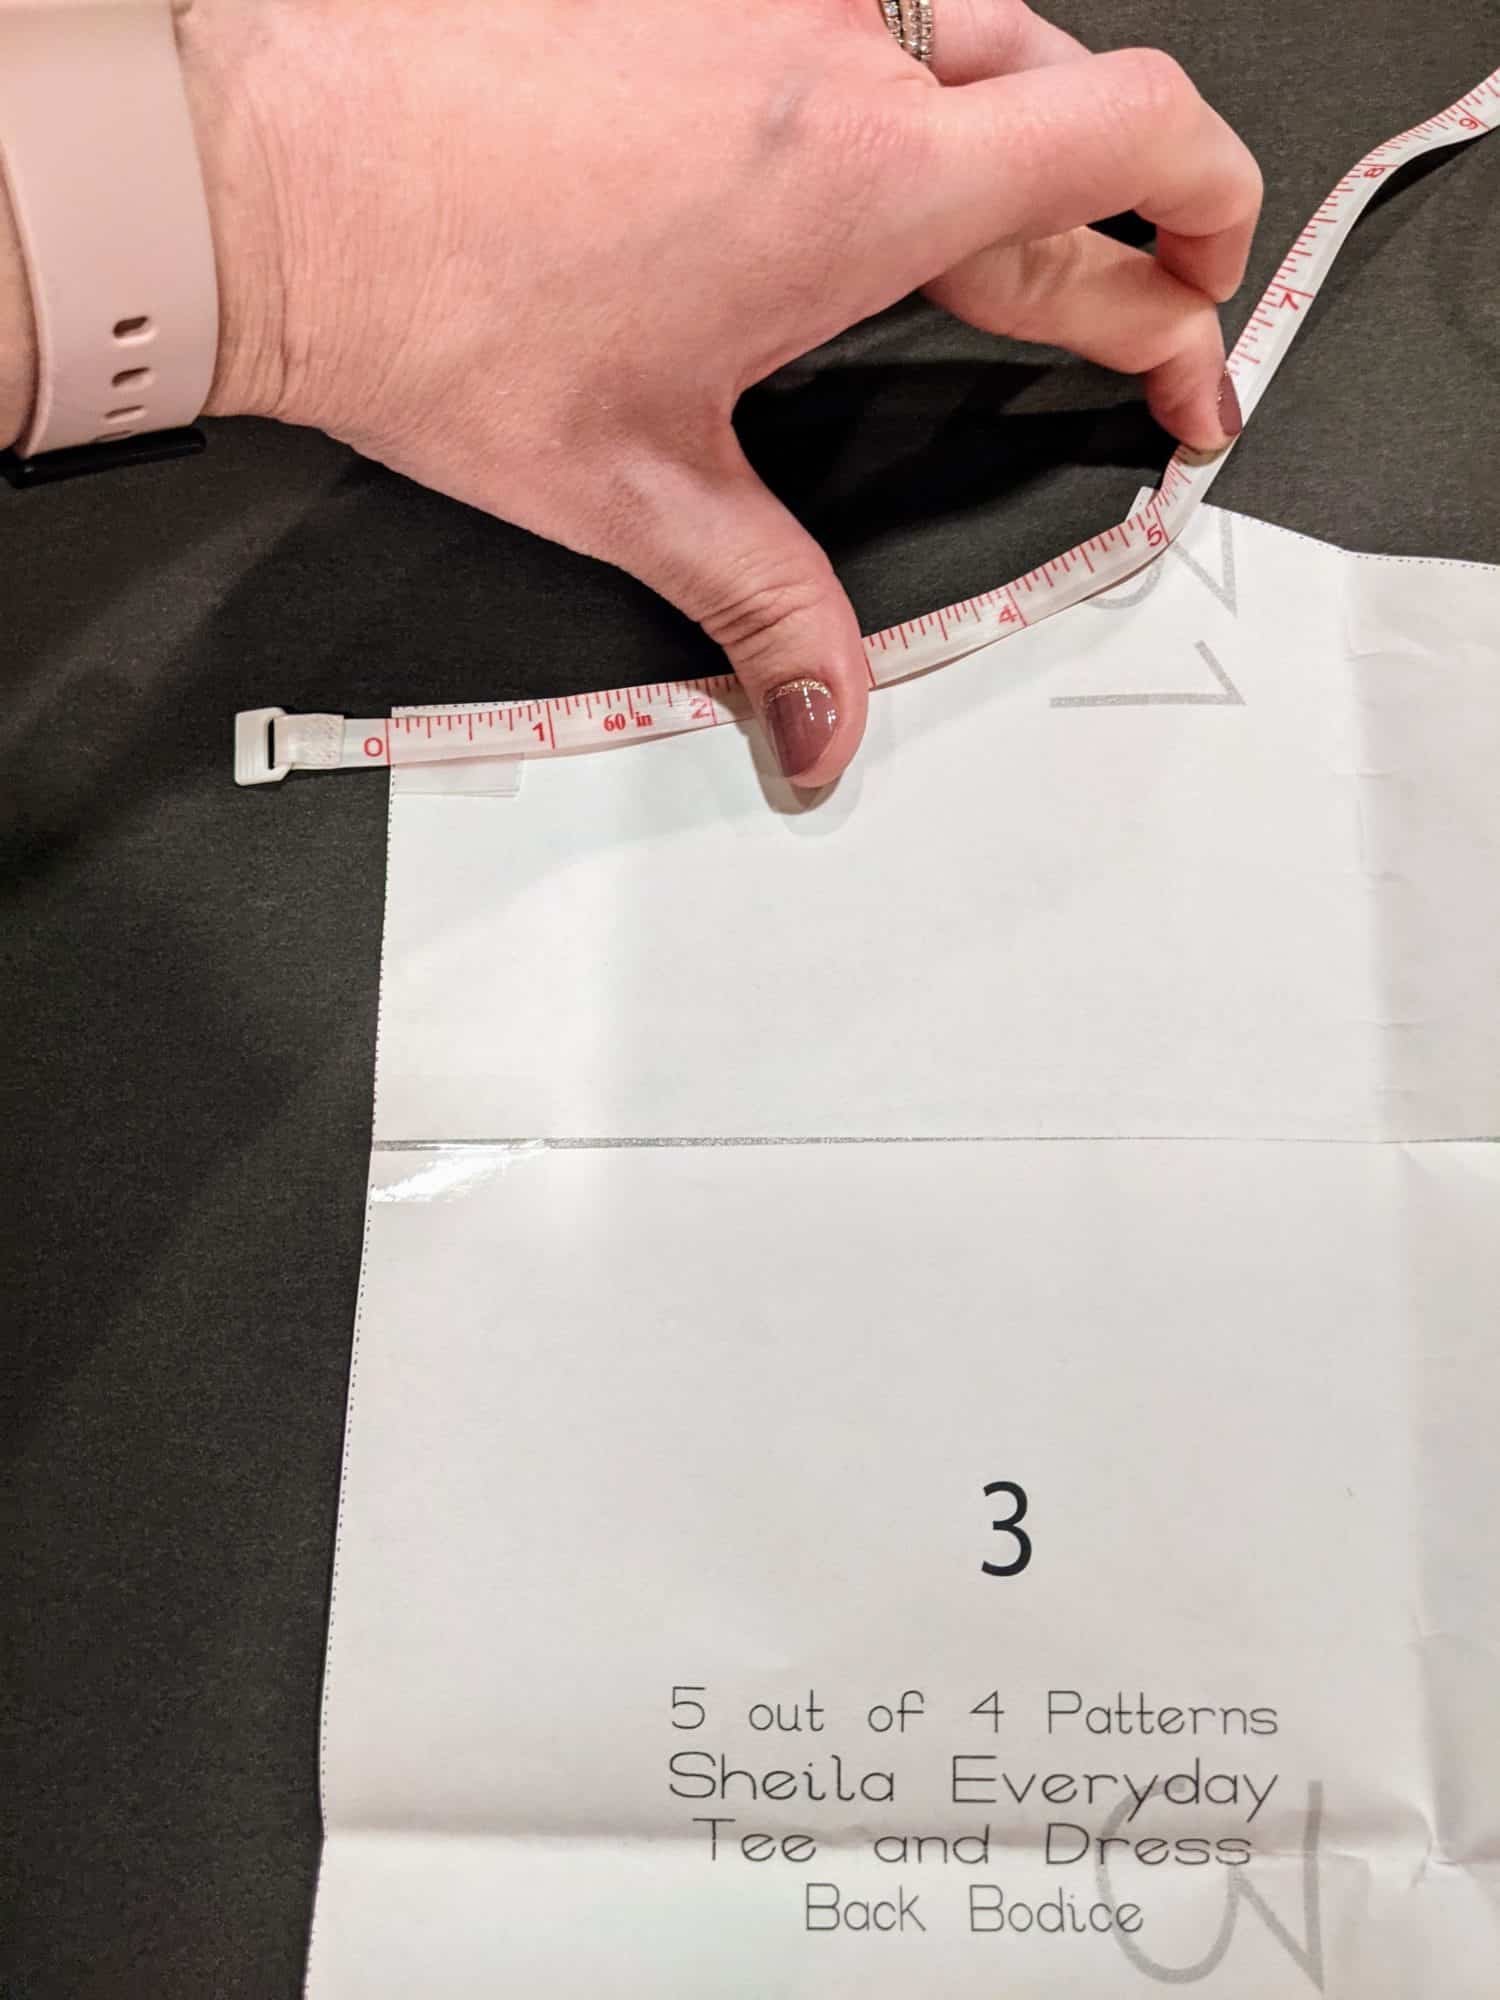
Back Bodice
- Add both your front and back neckline measurements together to get the total length of the collar. My finished length is 27 1/2″ long (16 1/2″ front + 11″ back)
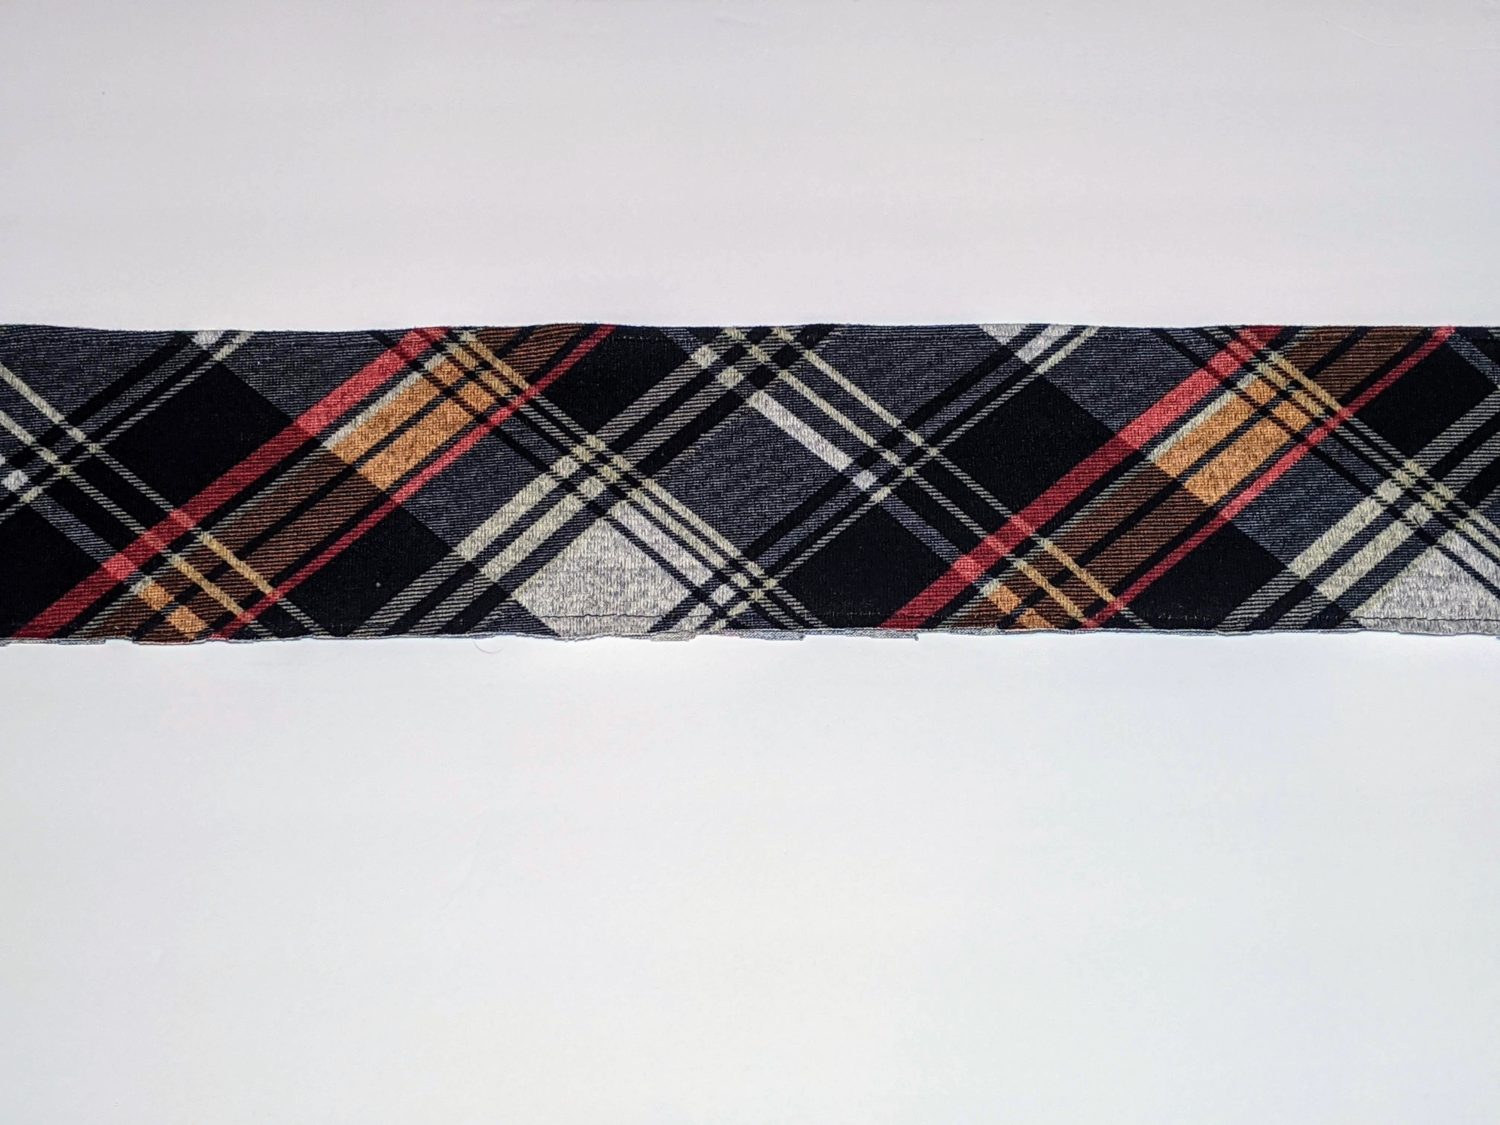
- The collar piece is 27 1/2″ long by 6″ wide for my particular pattern. (I chose the 6″ width to give it enough room to fold over and drape.)
Measuring For Shoulder and Collar Binding
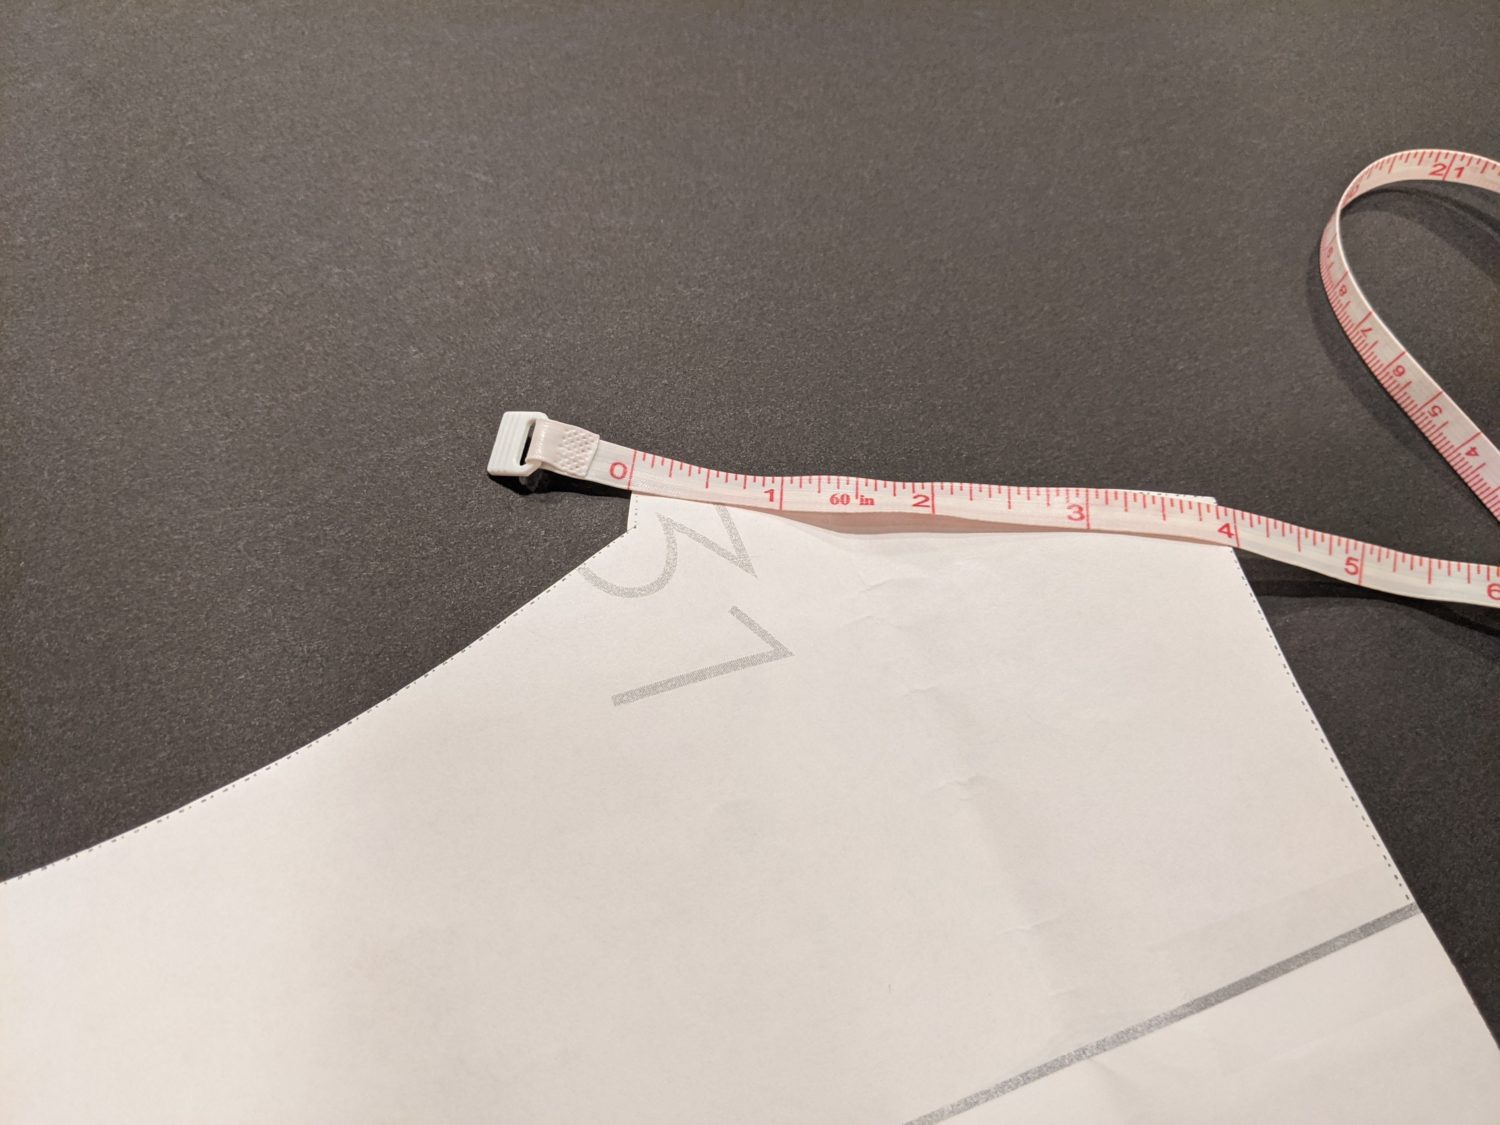
- Measure across the top edge of the shoulder on the pattern piece. The length will be the same for both the front and back bodice. (Mine are 4″ long)
- Add the width of your collar piece that you previously measured ( 6″) to the width of your shoulder (4″ for mine) Mine is a total of 10″ long. You will also need to add 1/2″ to that for your seam allowance. My binding piece is 10 1/2″ long by 6″ wide.
Cut Out The Pieces
- Cut out the front and back bodice pieces and sleeves as you normally would.
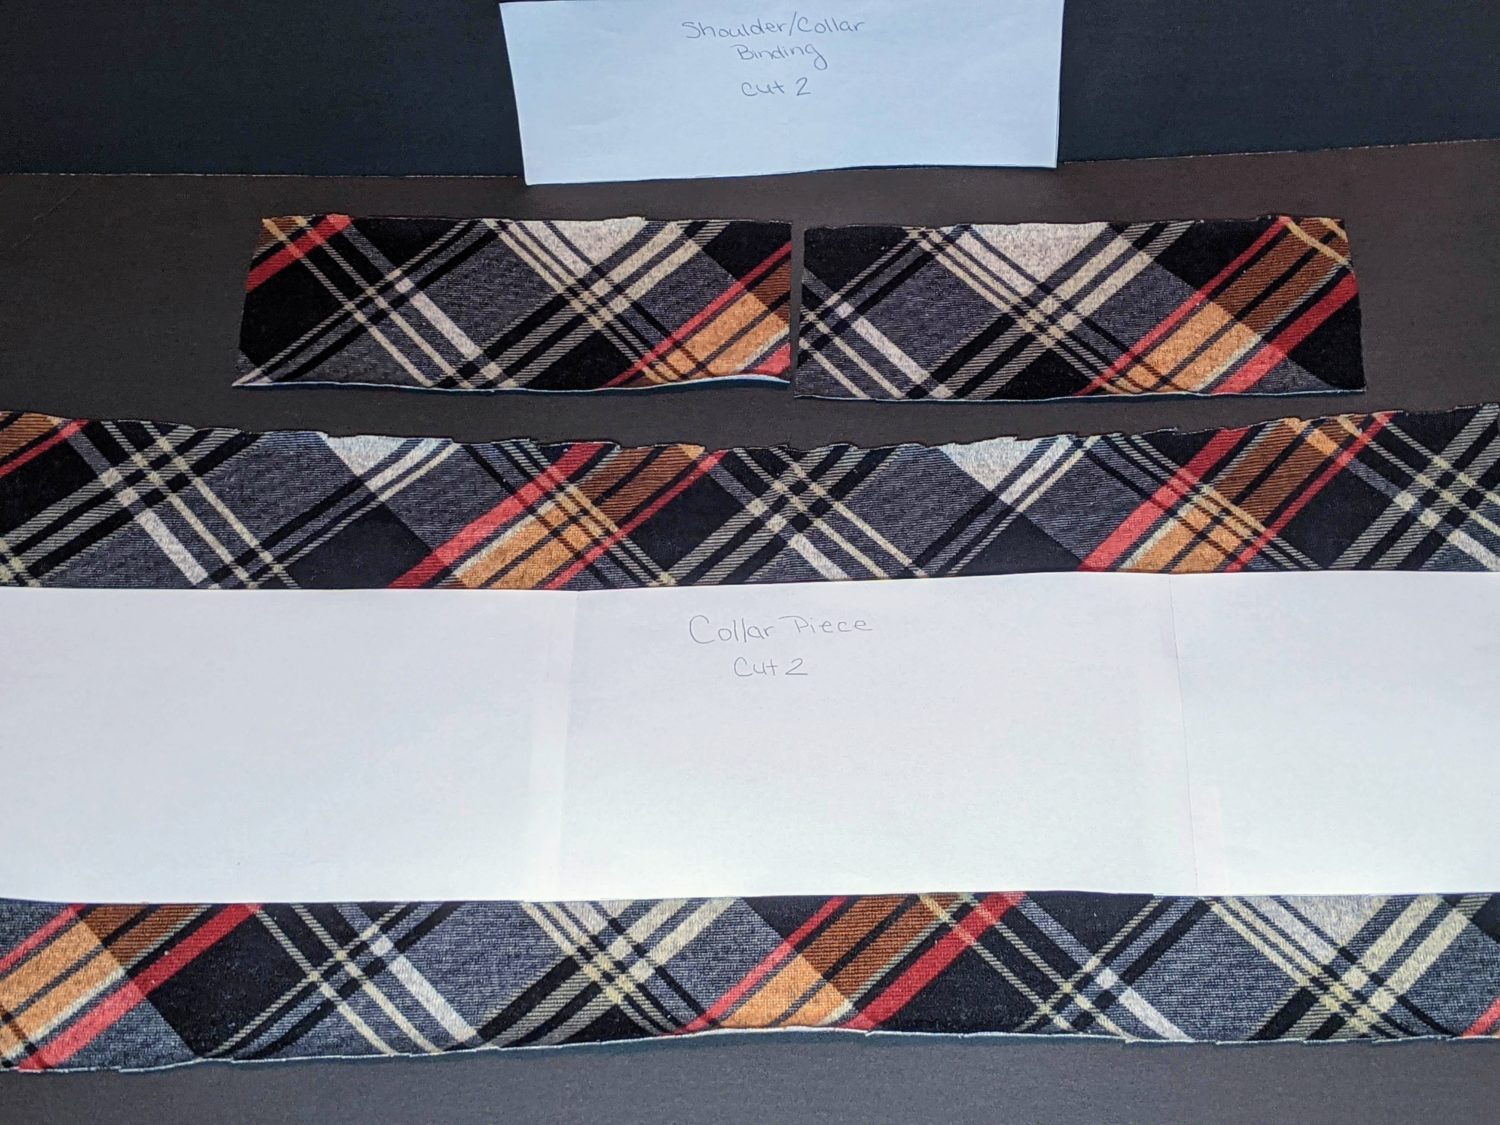
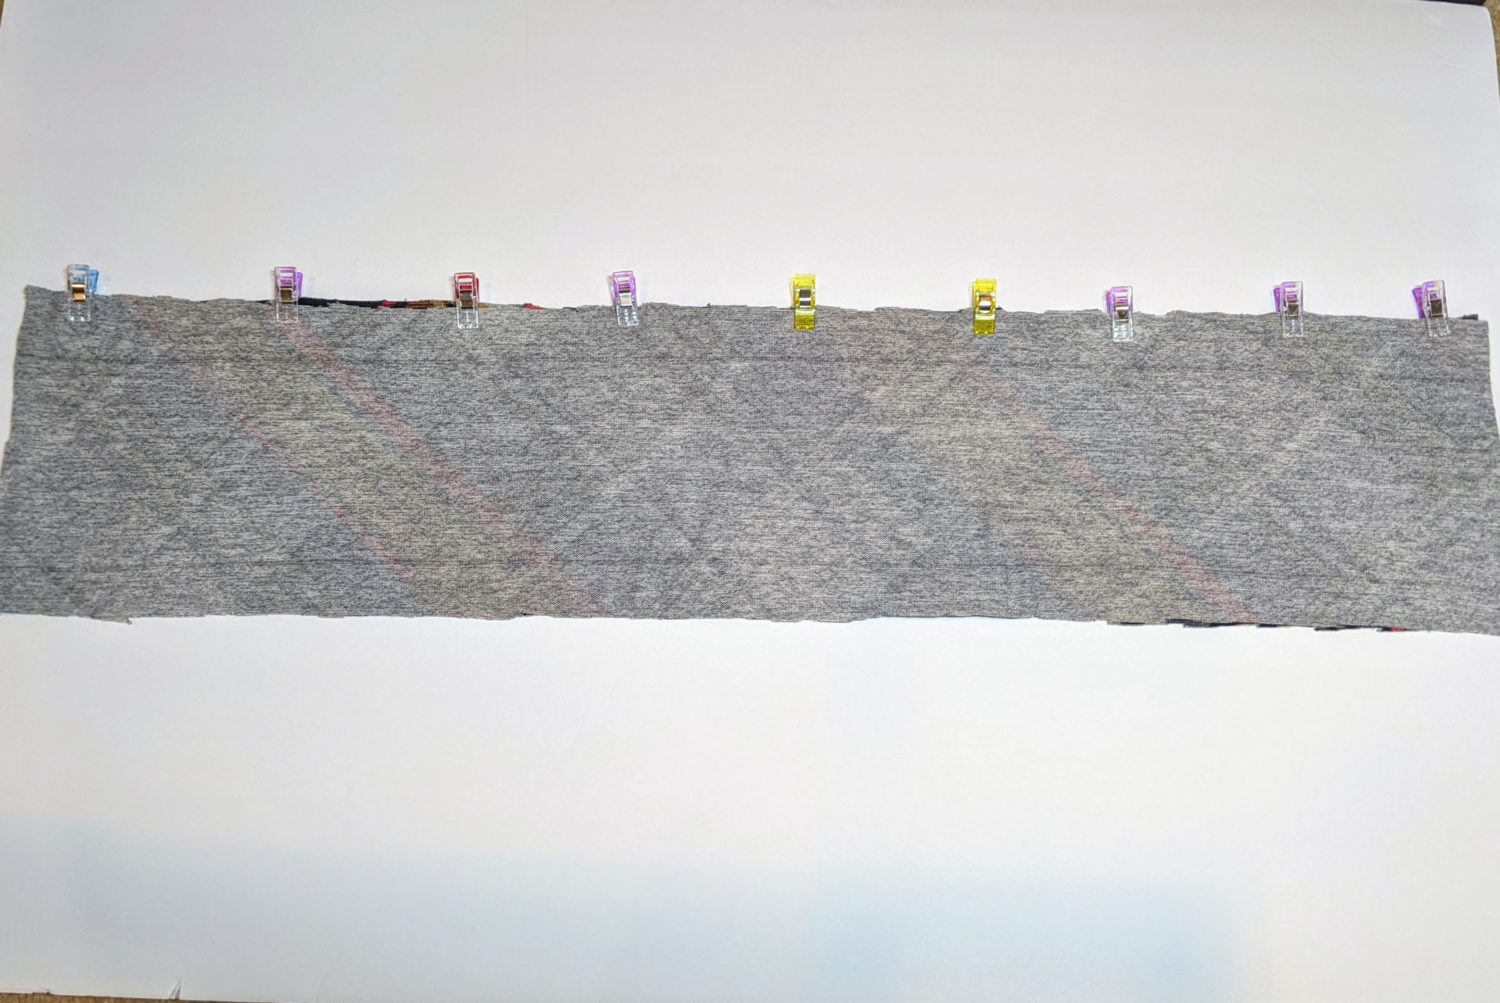
- You will need to cut out two collar pieces and two binding pieces.
- Lastly, cut two pieces of interfacing that are 1/2″ shorter than the binding pieces.
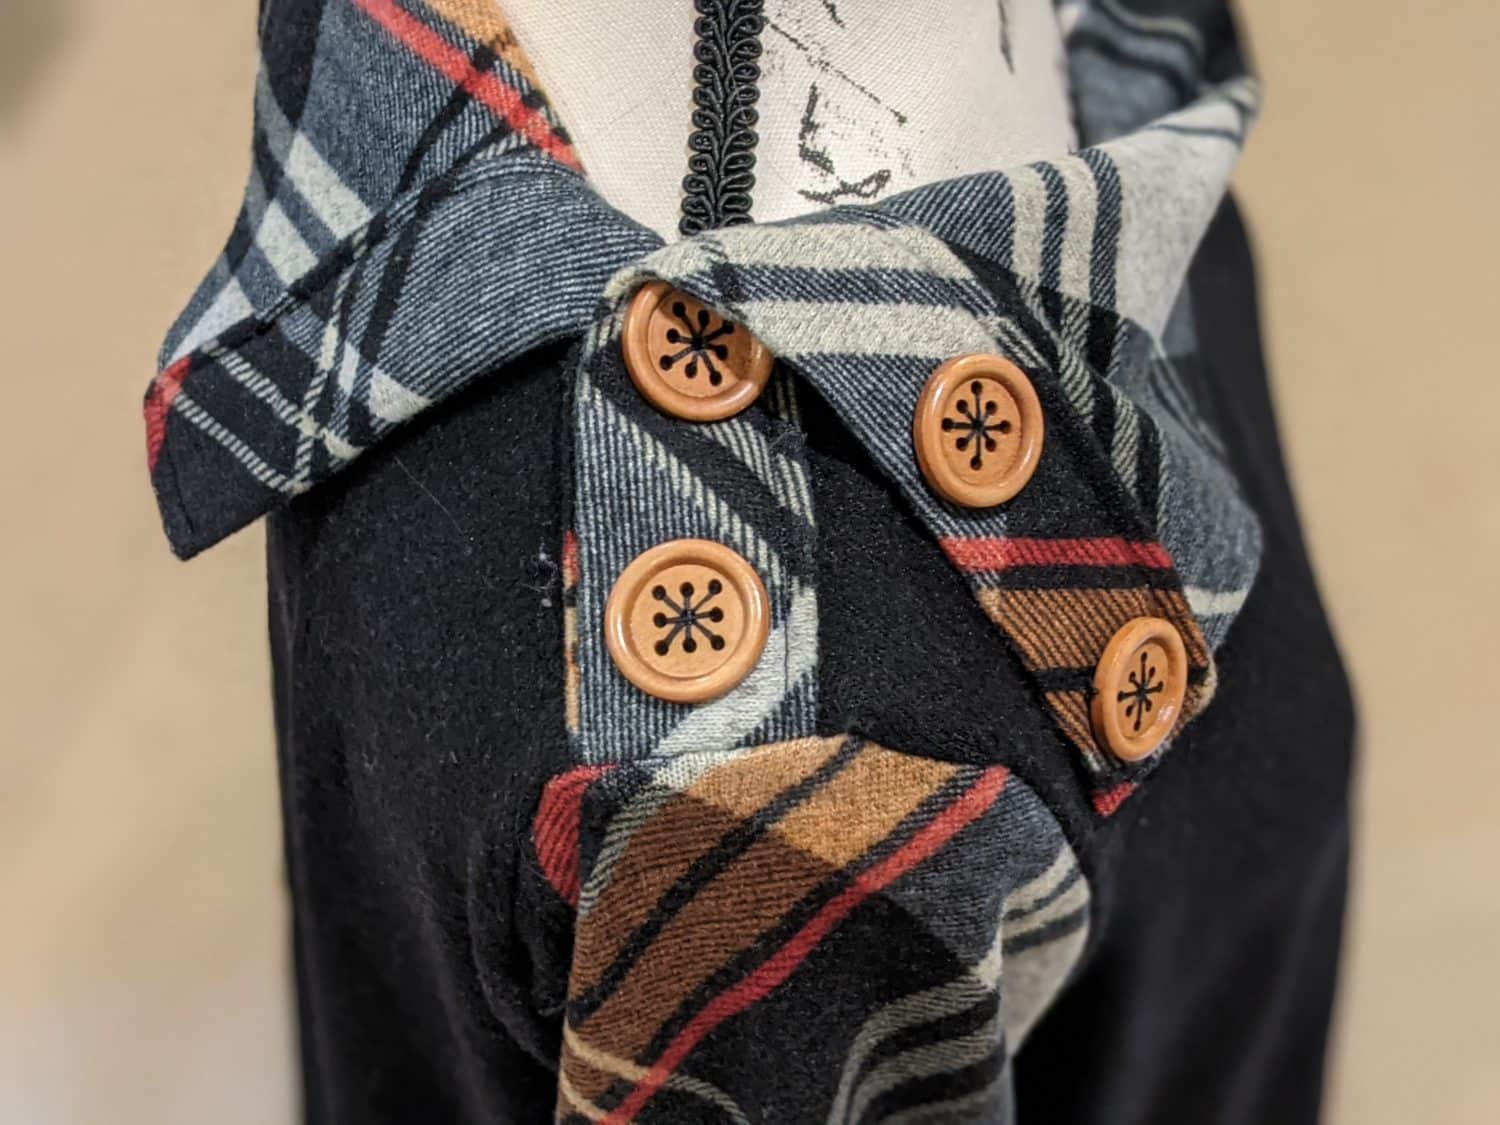
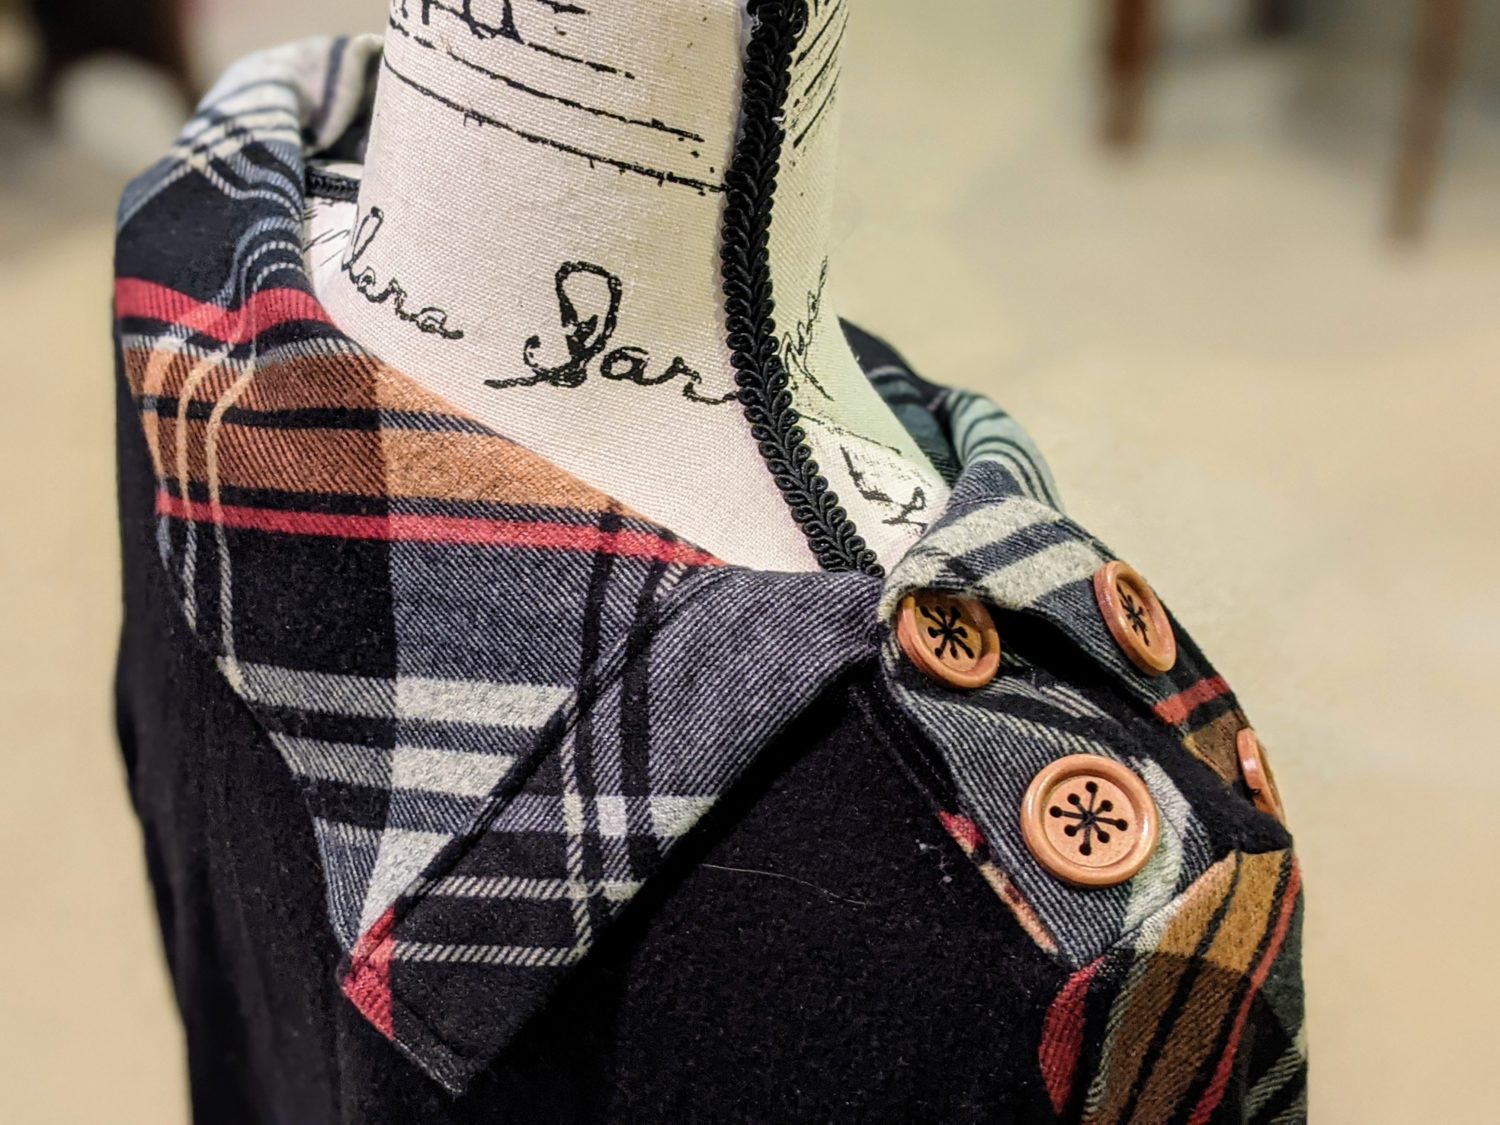
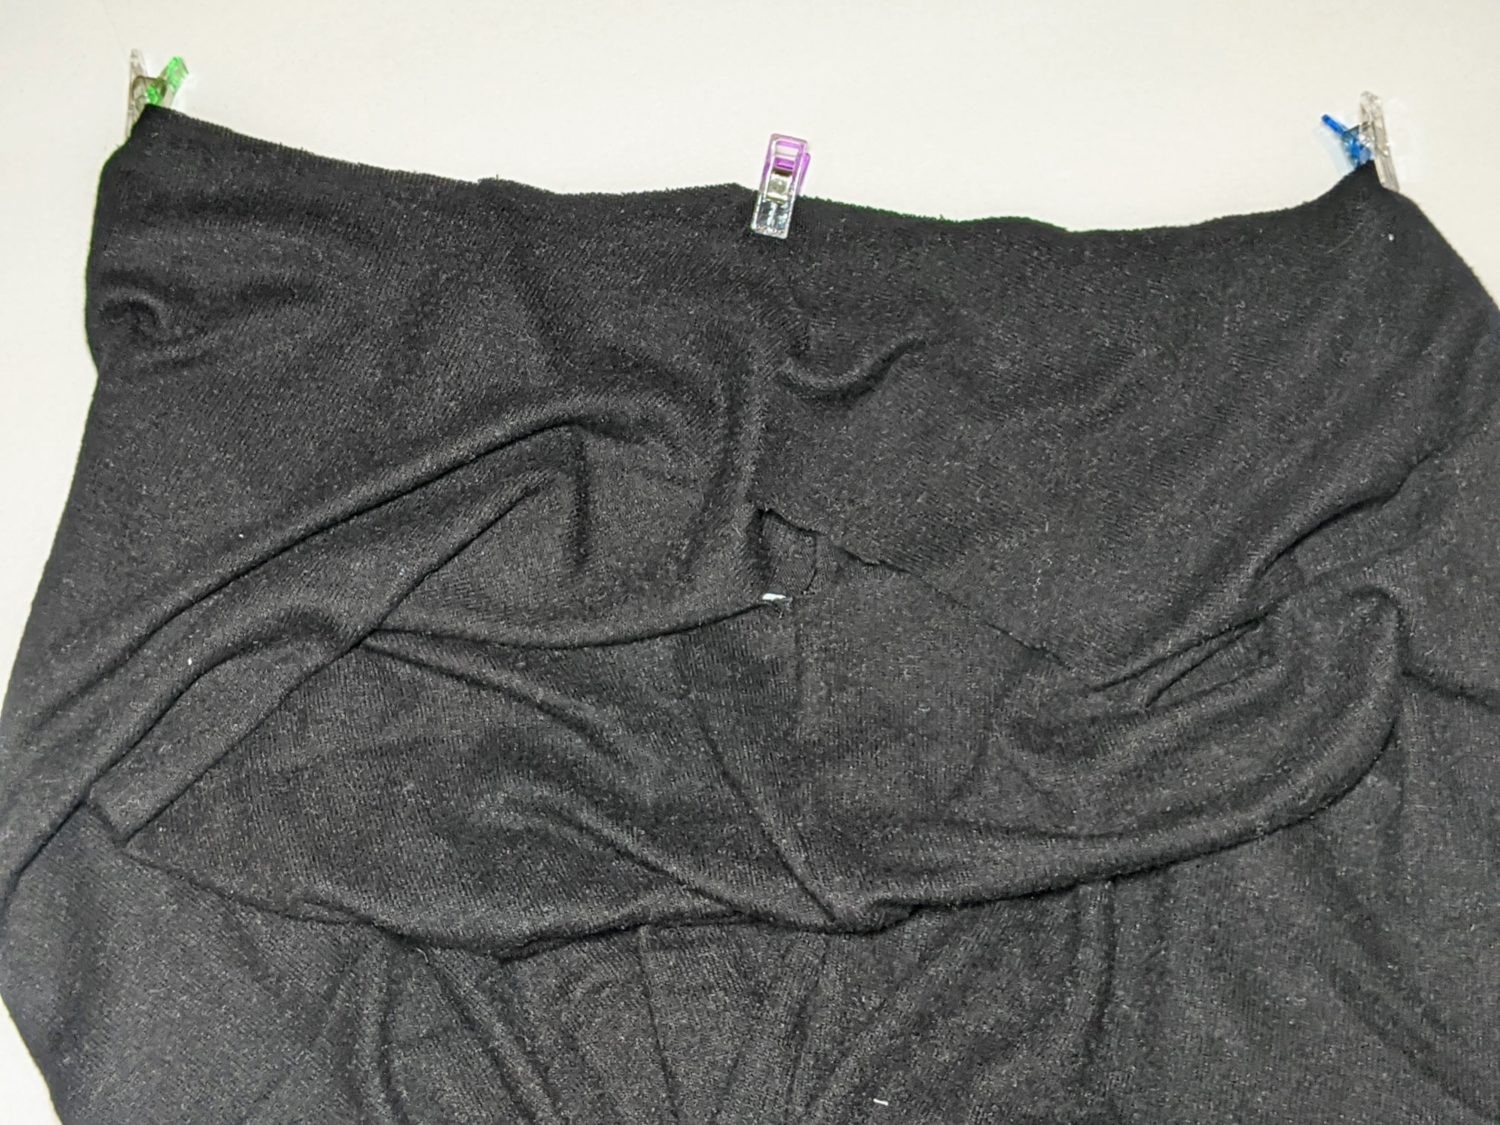
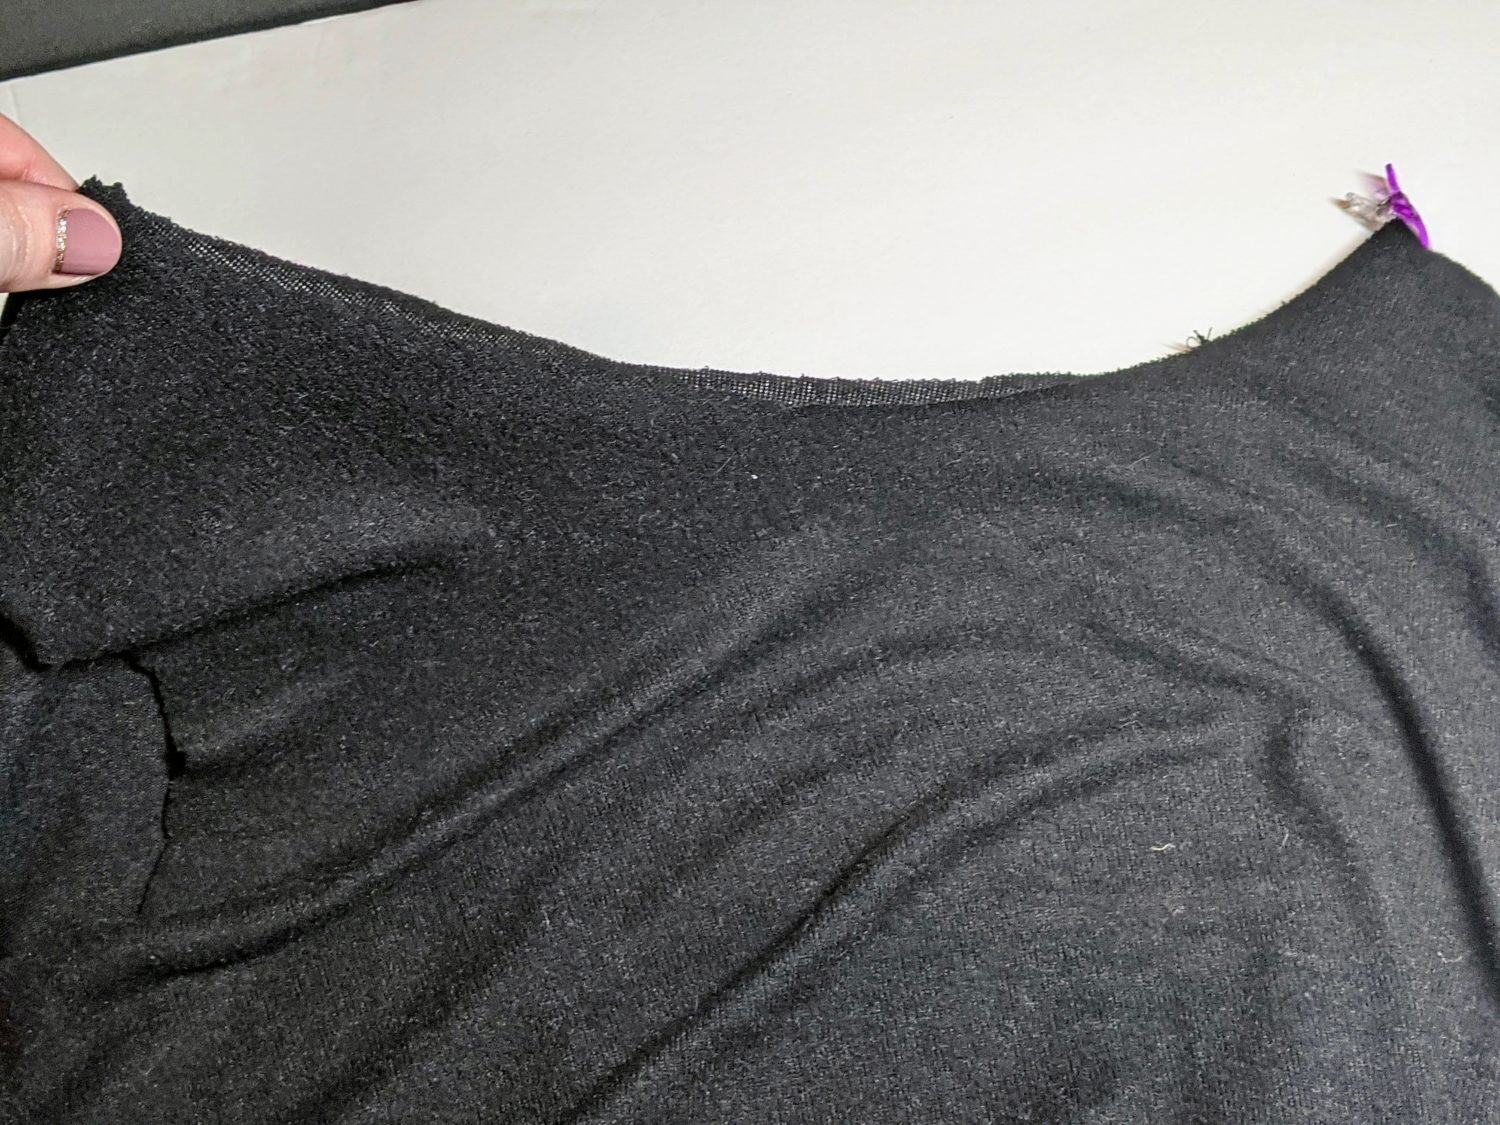
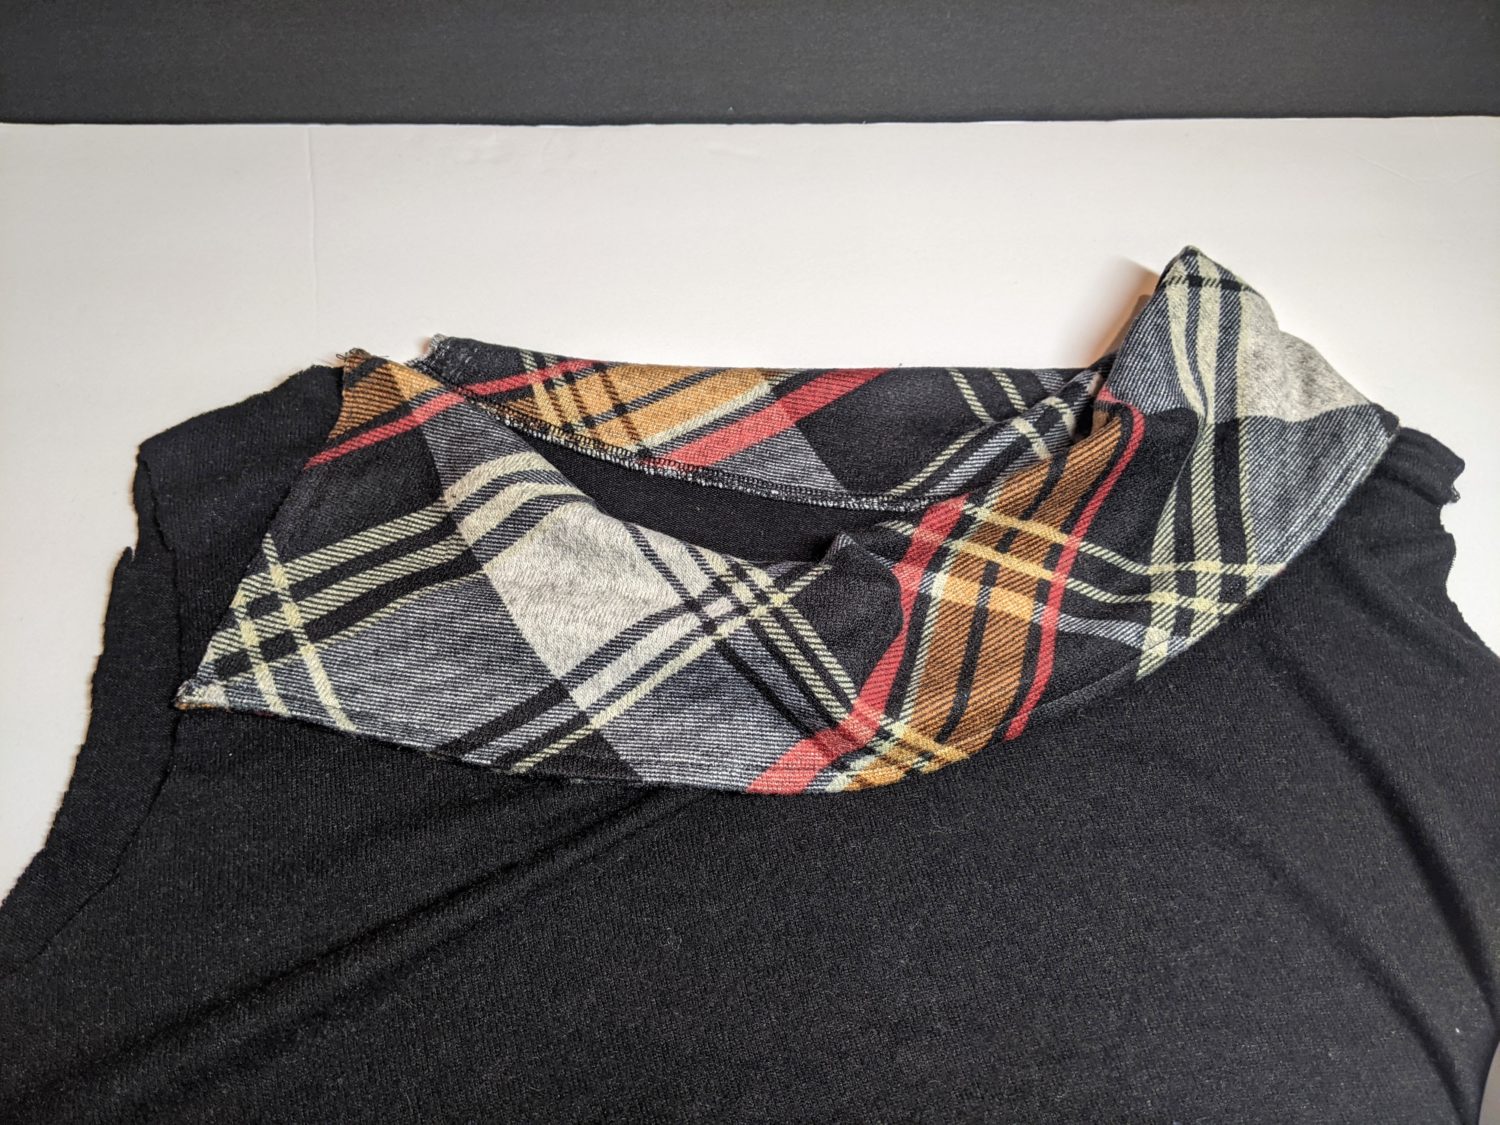
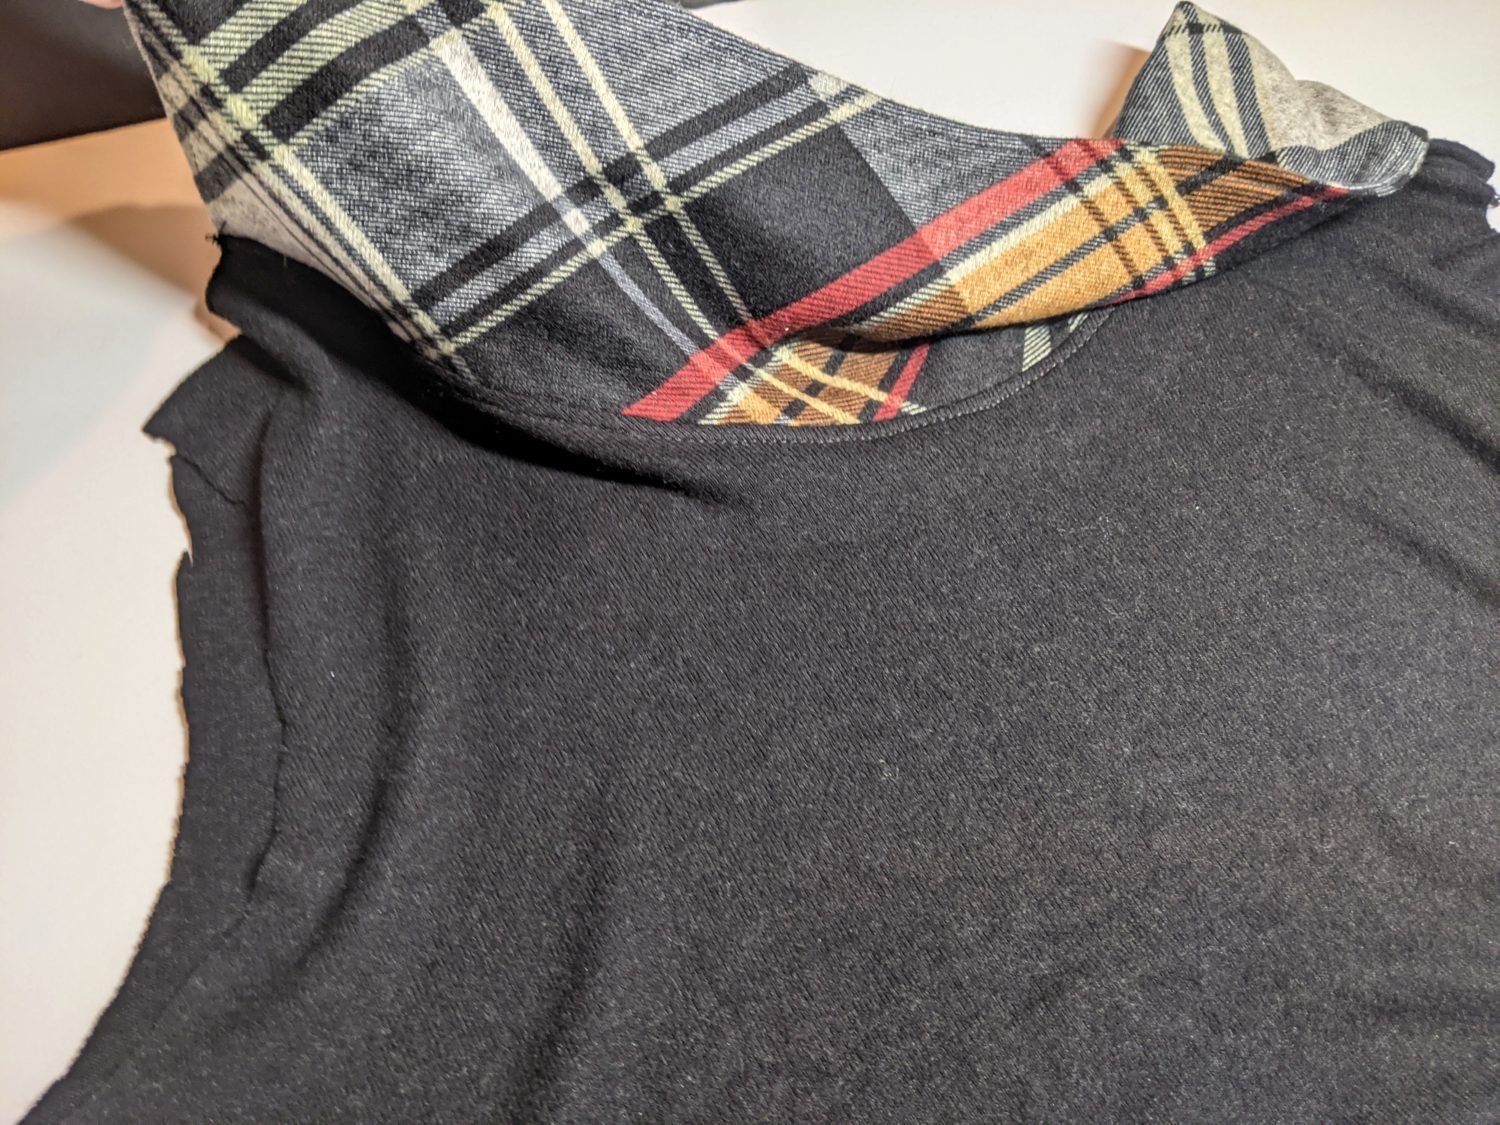
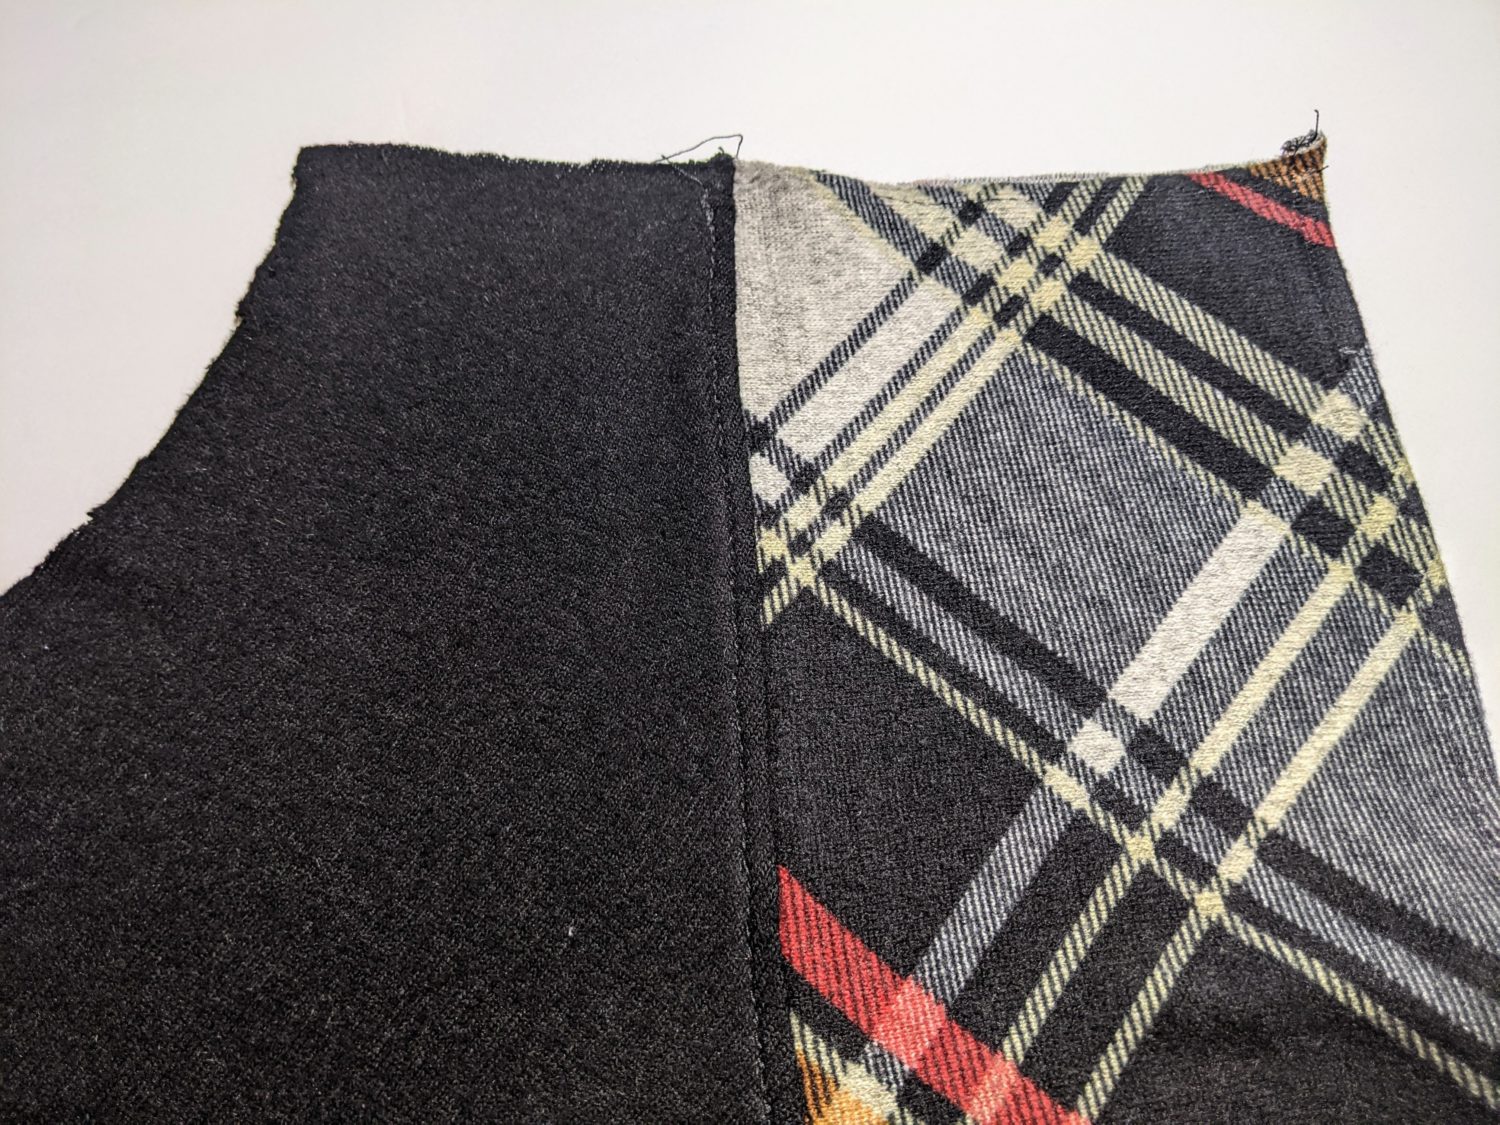
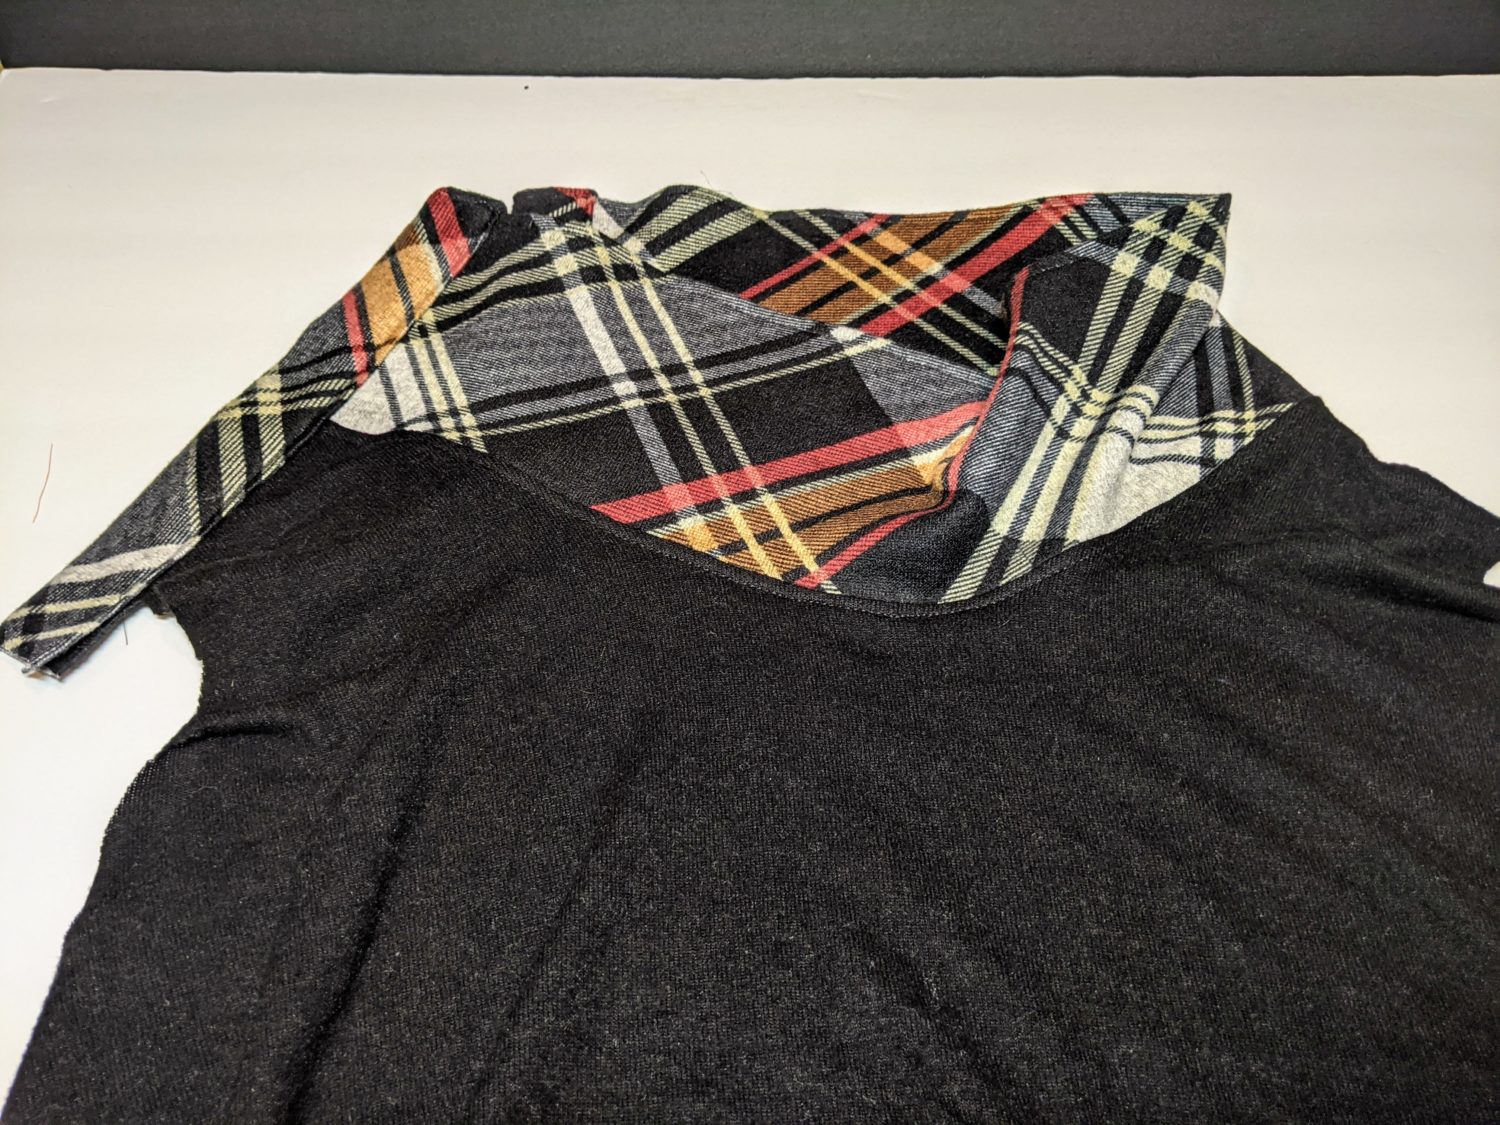
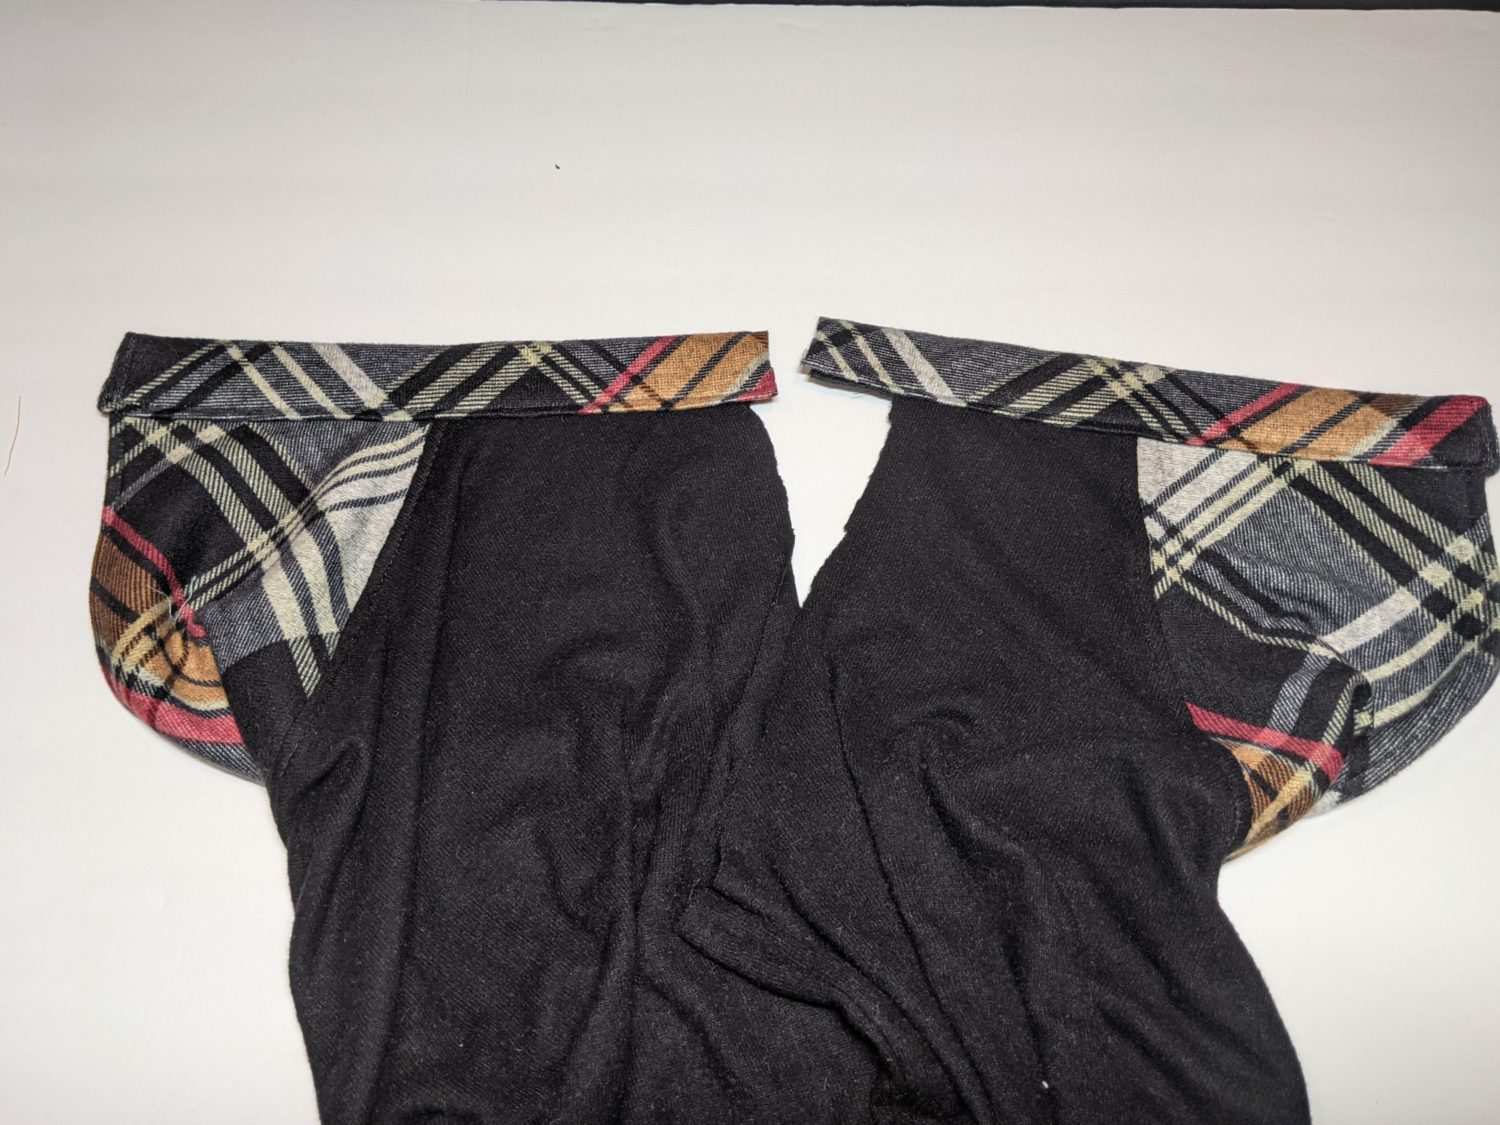
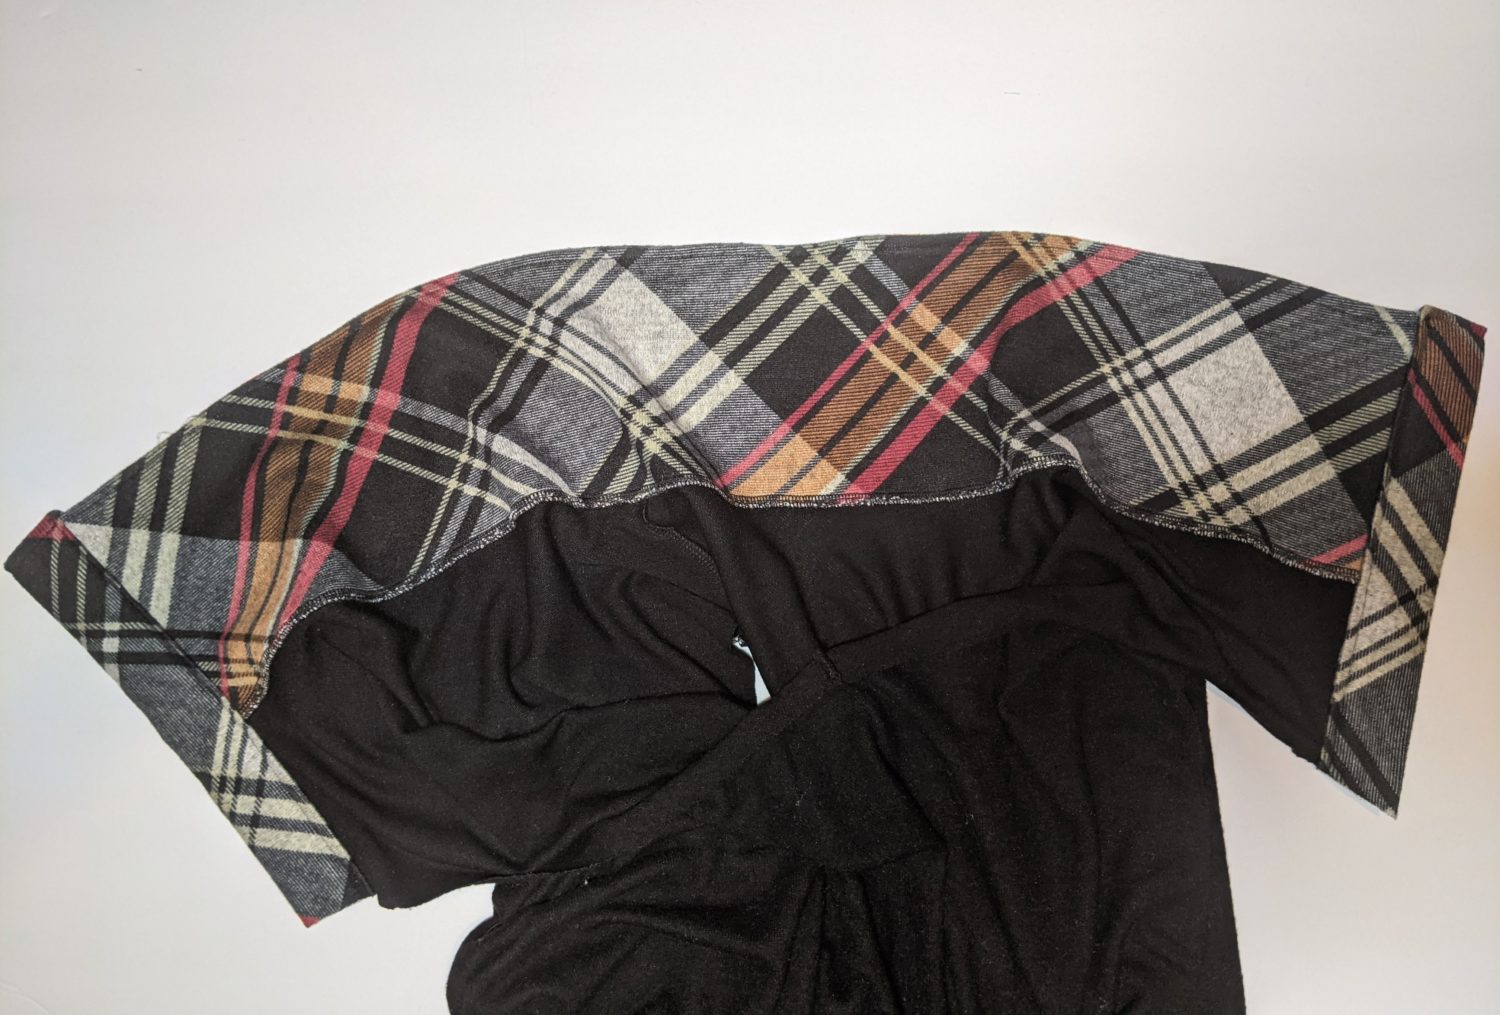
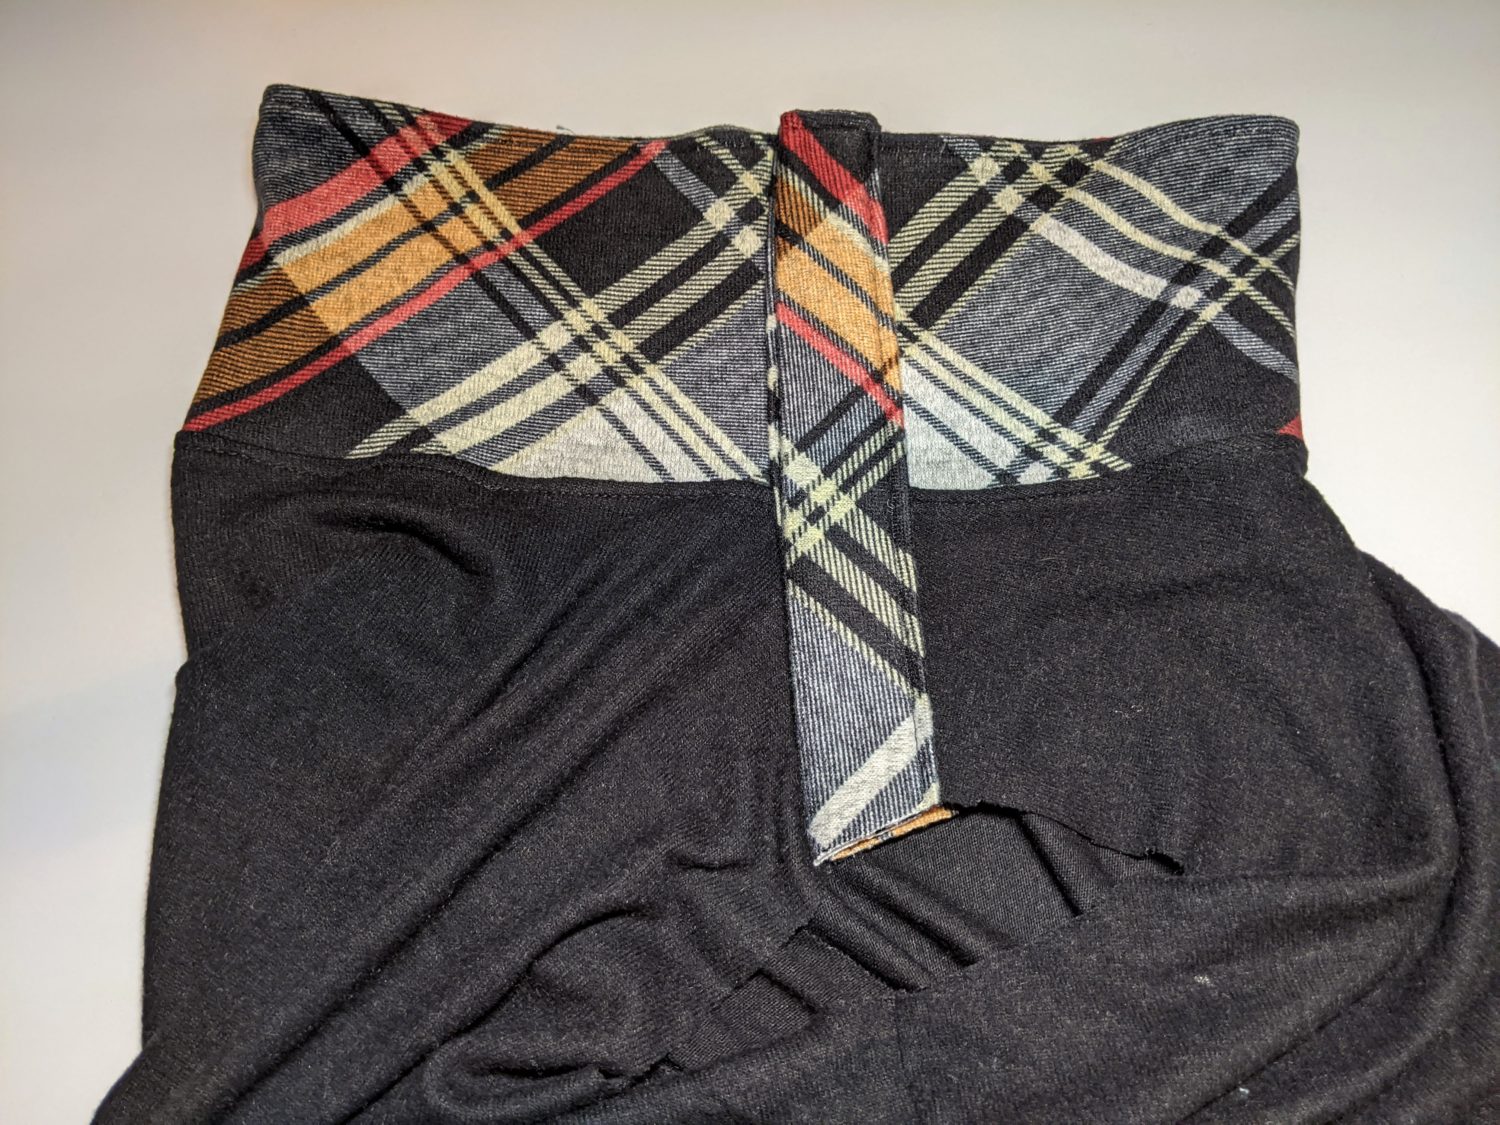
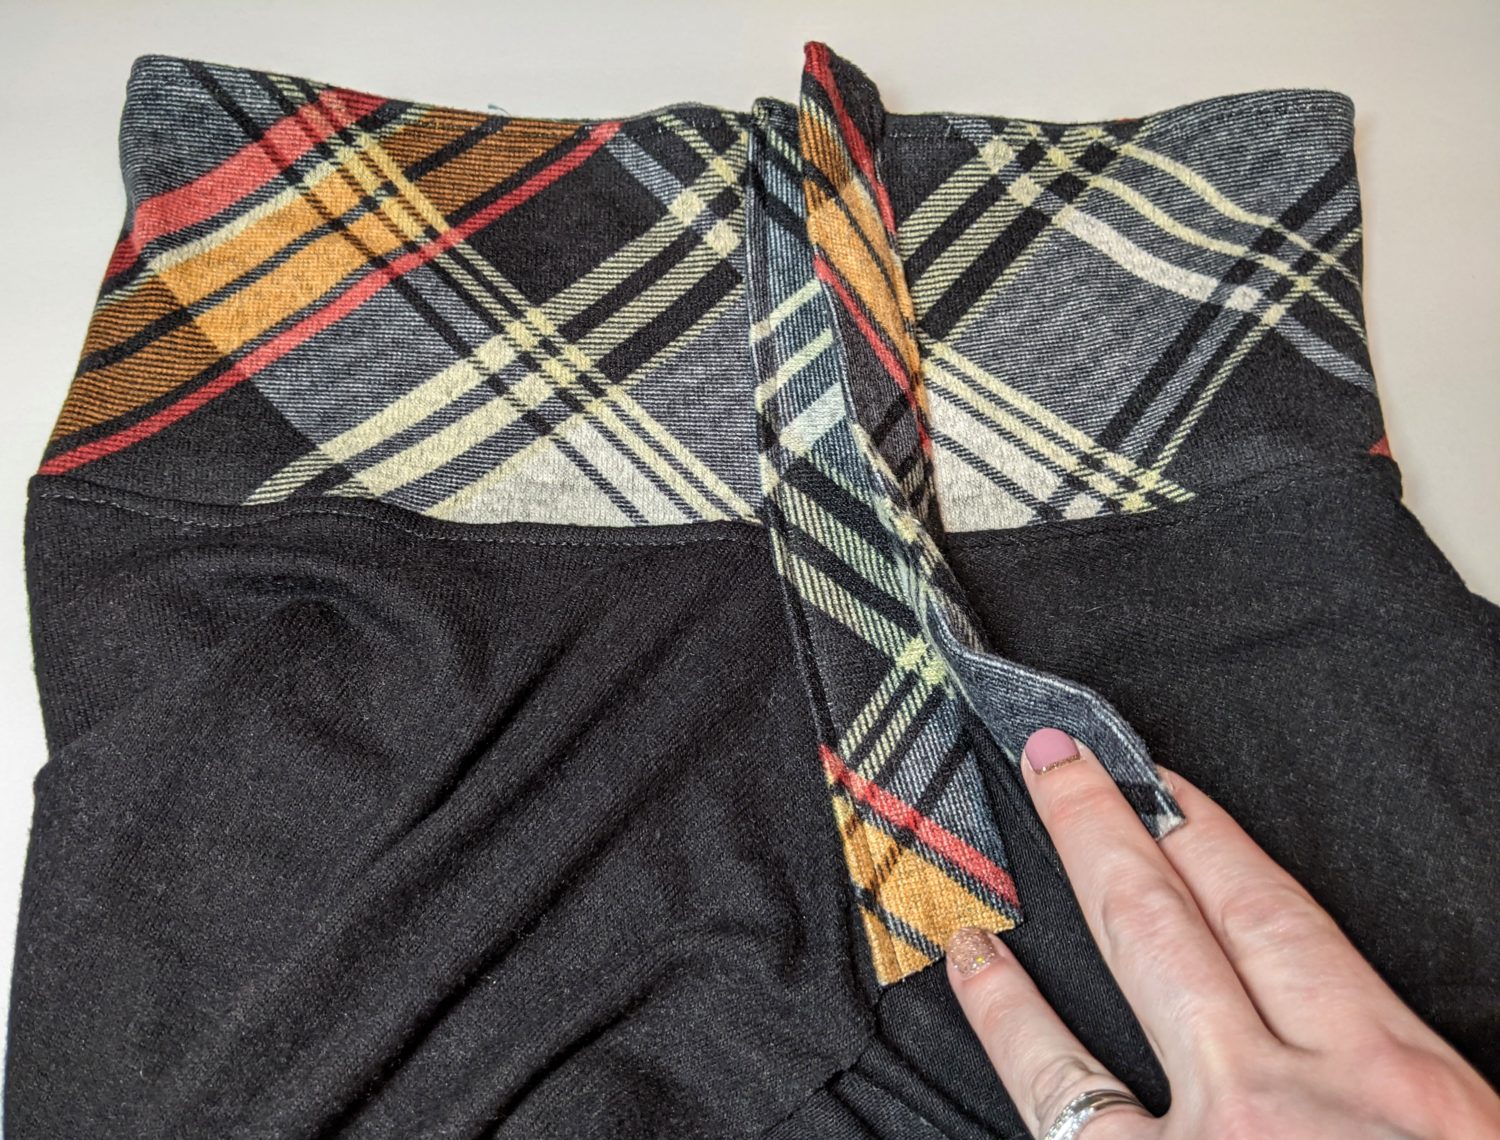
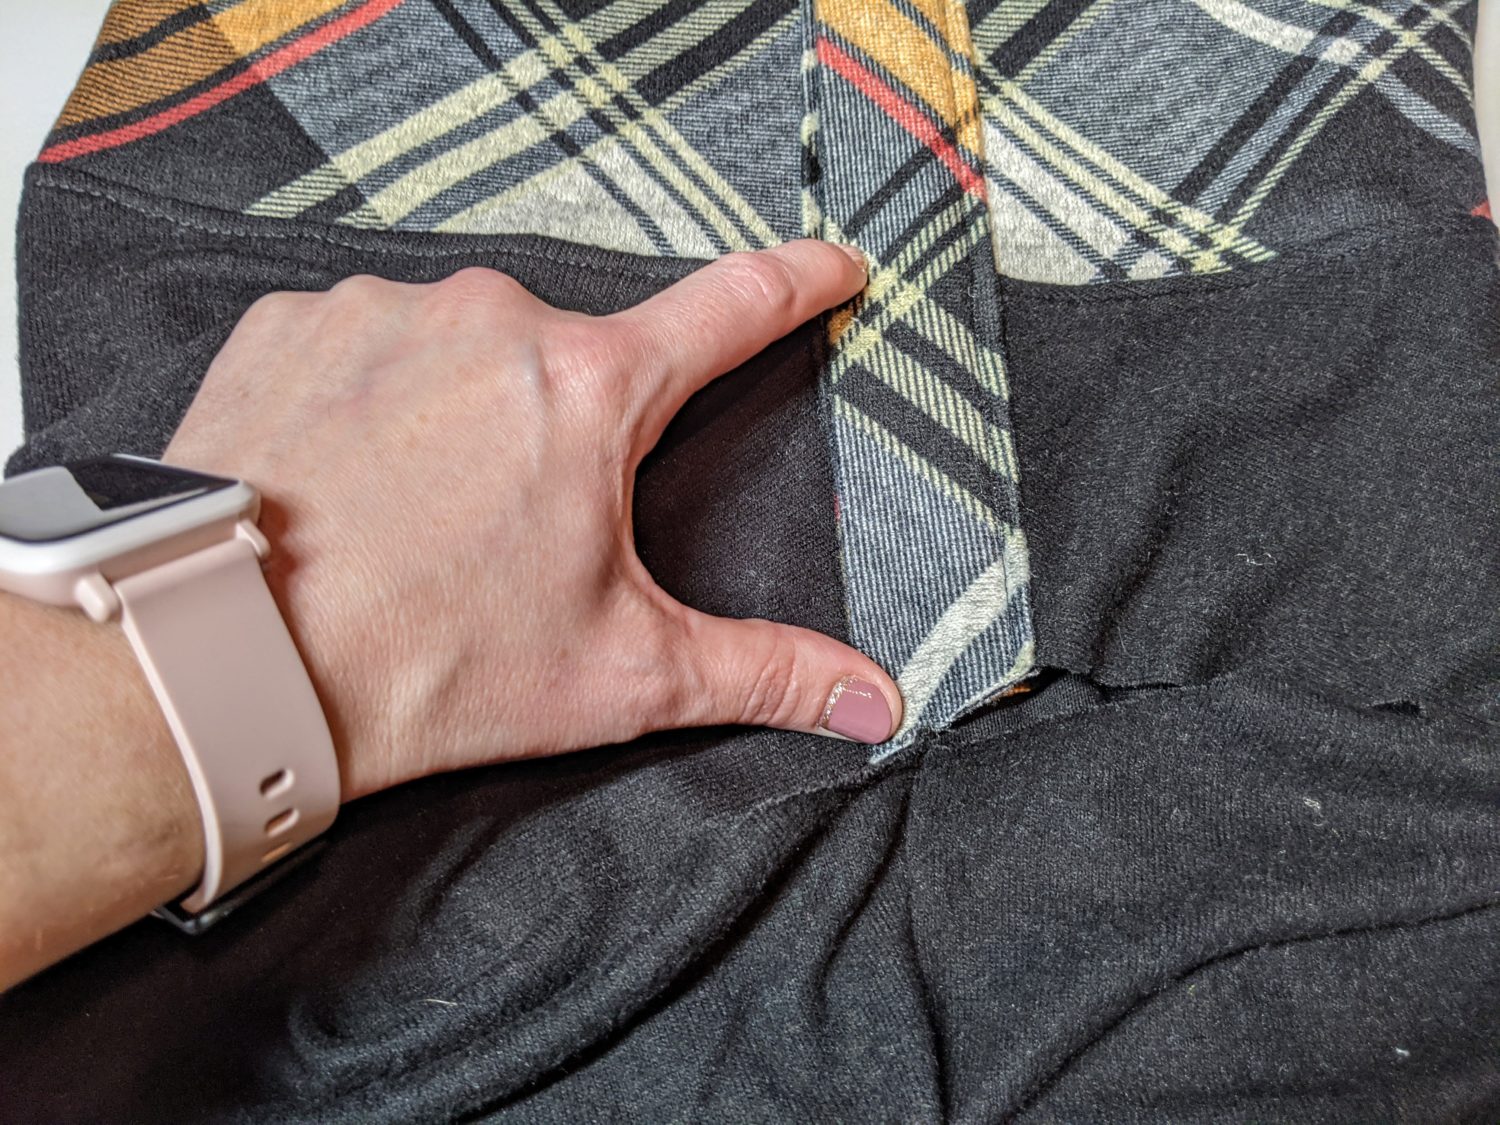
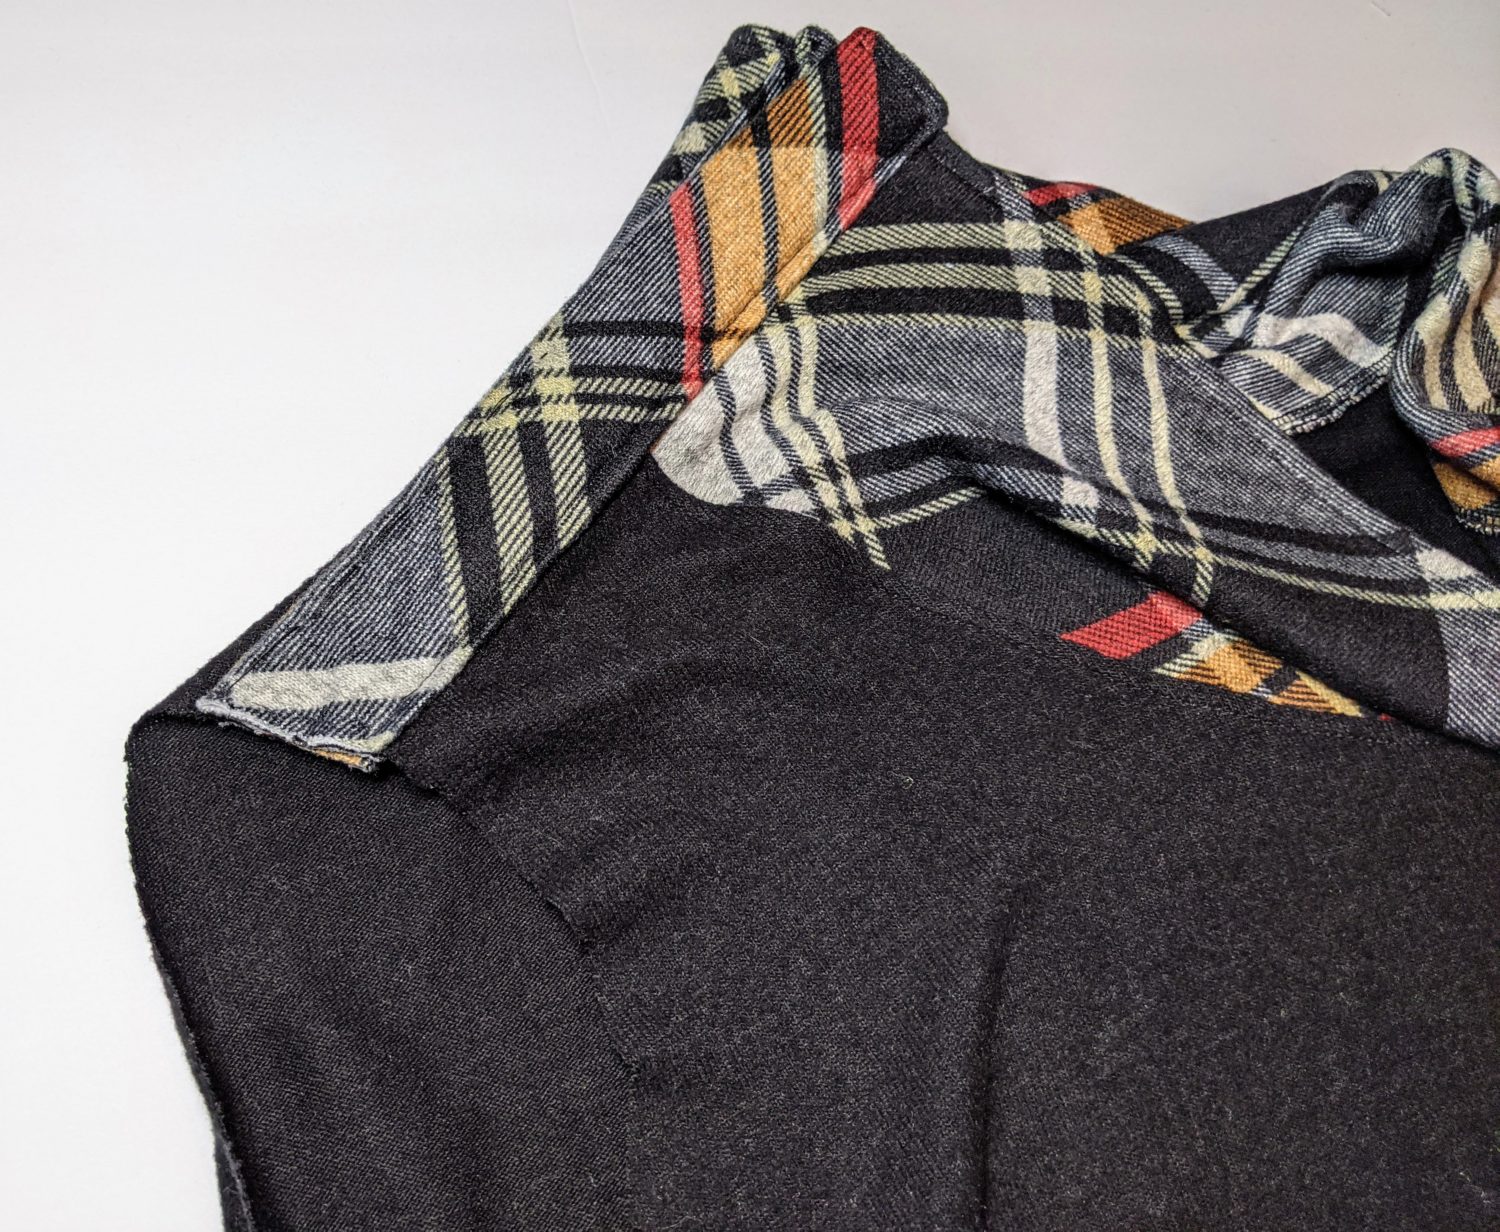
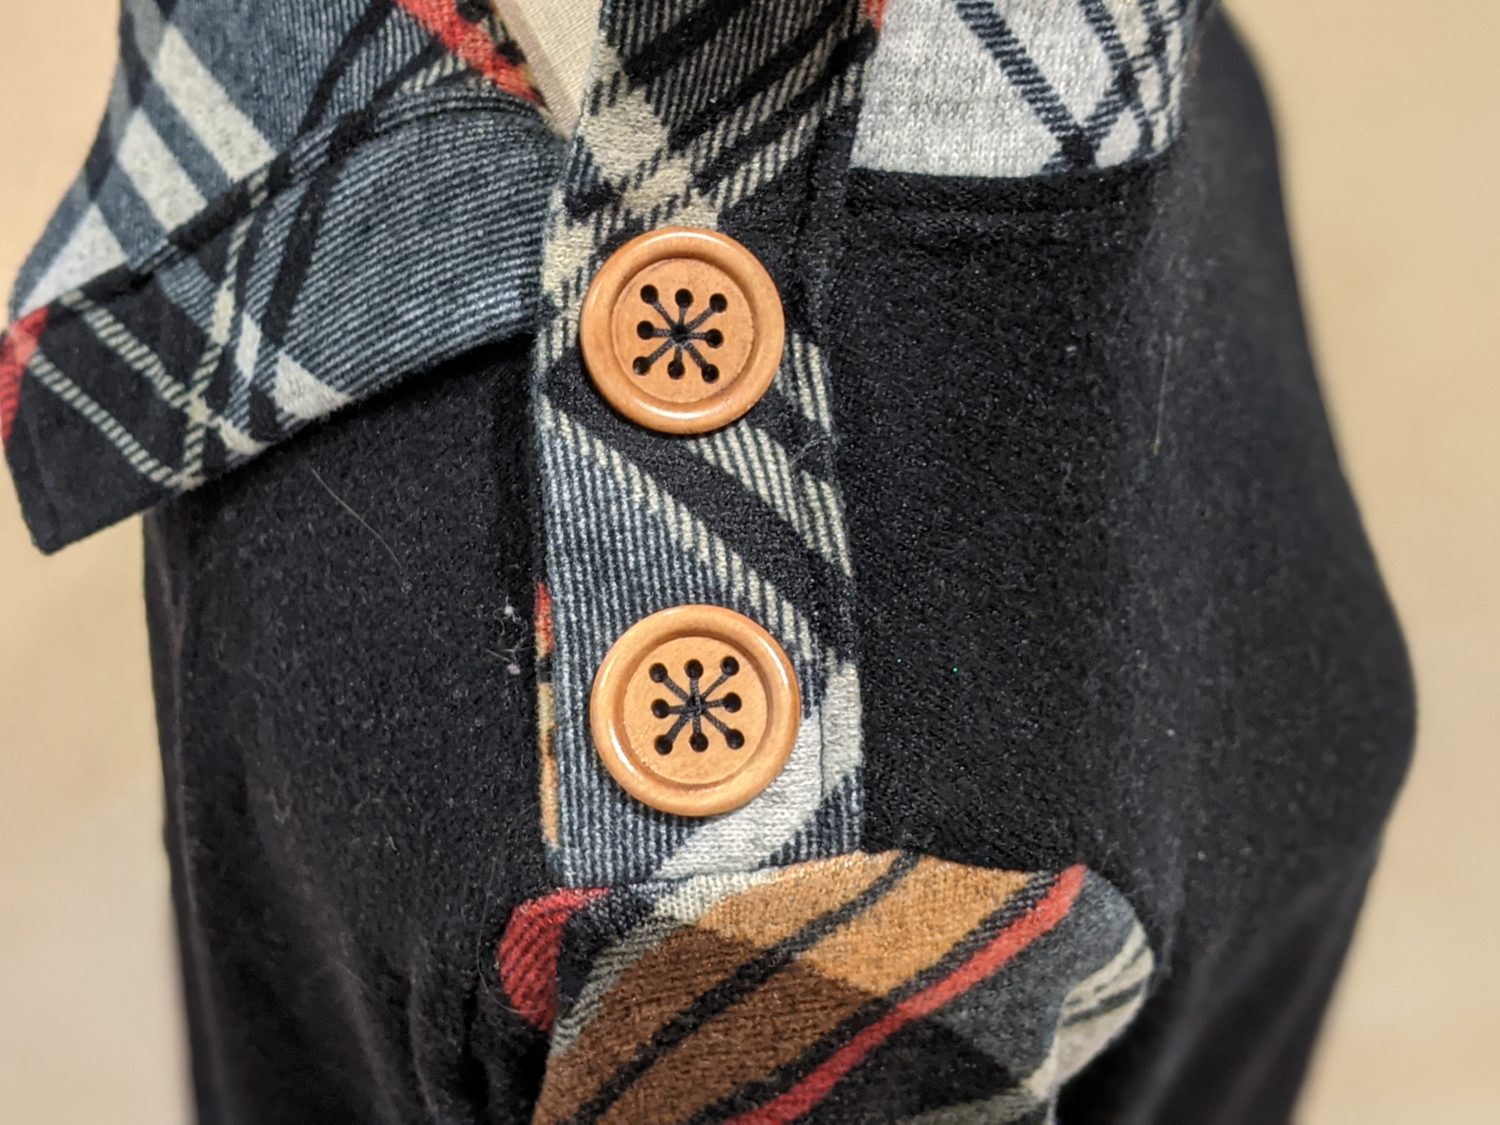
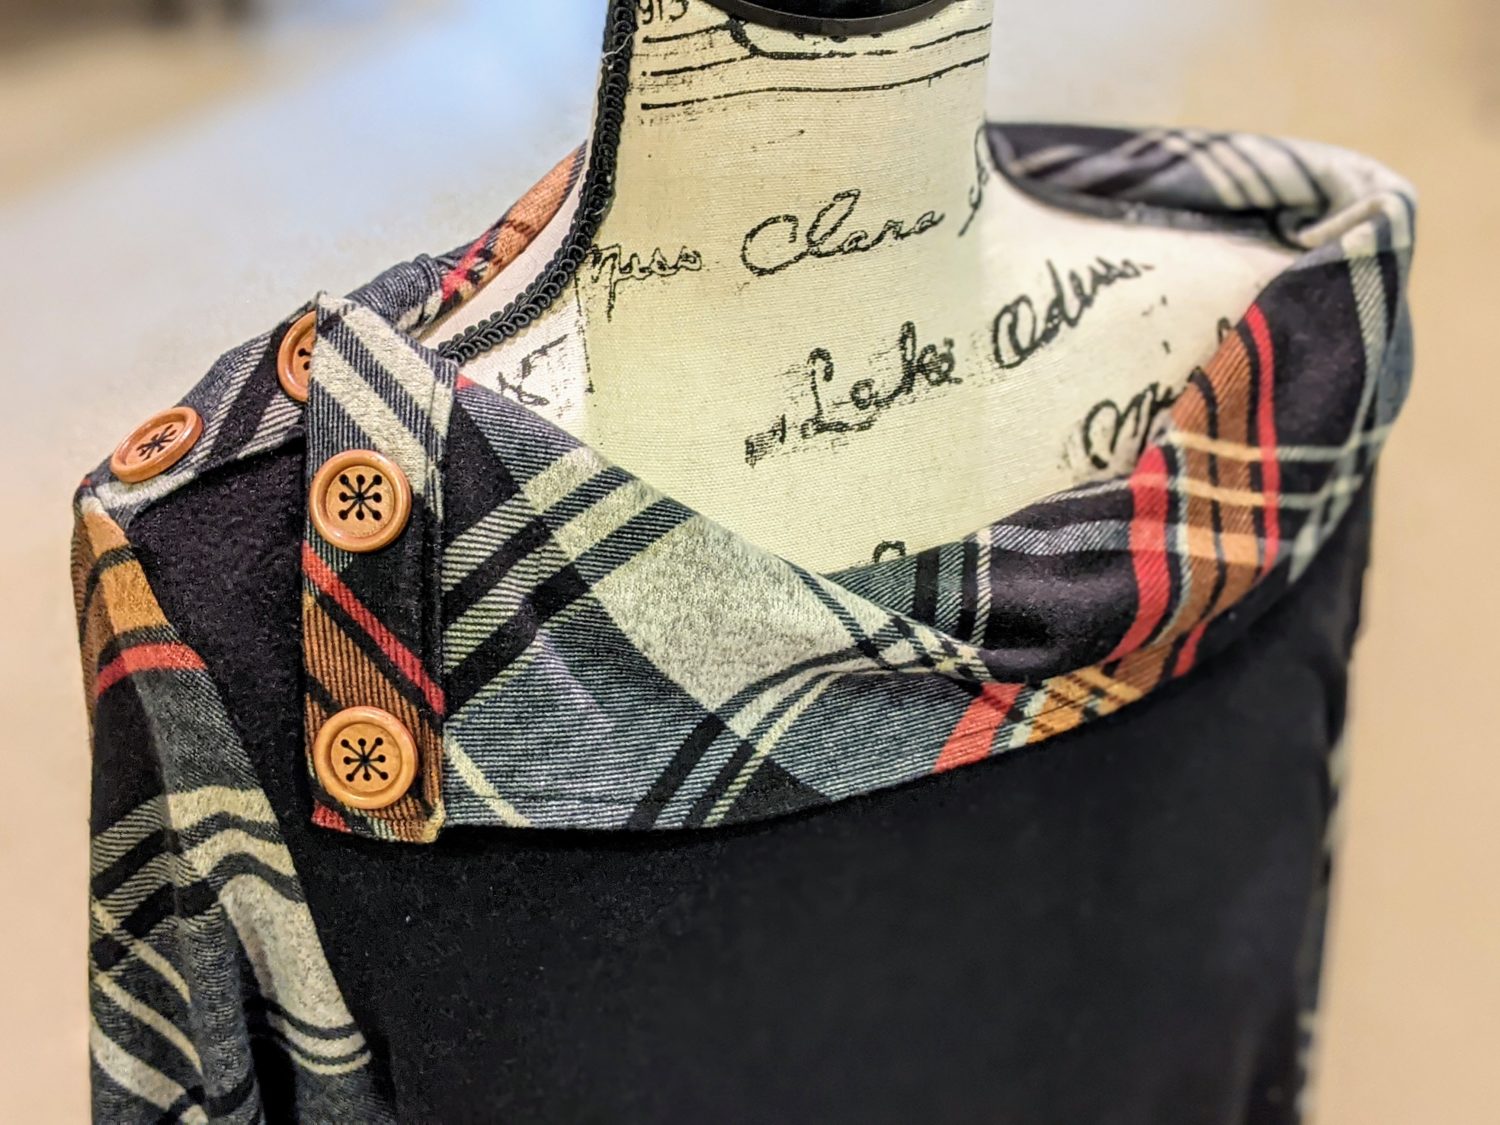
Before we get to constructing, I’m putting some finished closeups here for a better visual to refer back to if needed.
Let’s Get Sewing!
- Starting with your front and back bodices right sides together, pin just the left shoulder together, and sew with a stretch stitch or serger. Do not sew the right shoulder.
- Pin both sides of the bodices together and sew with a stretch stitch or serger.
Creating the Collar
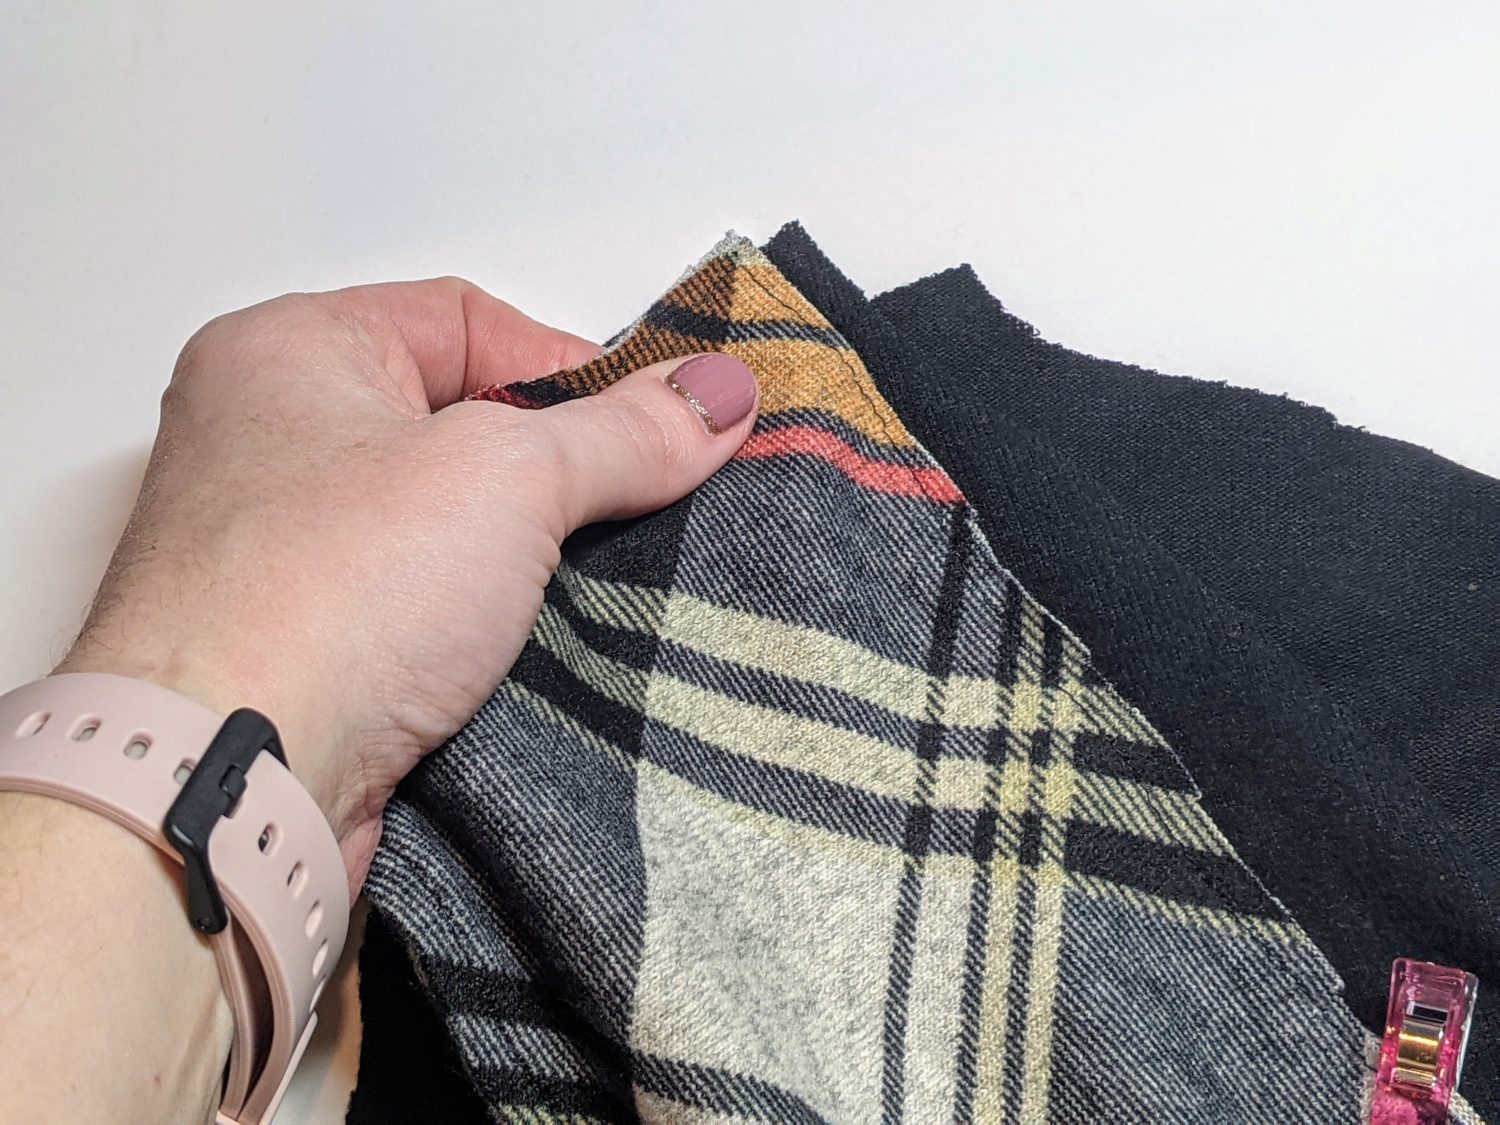
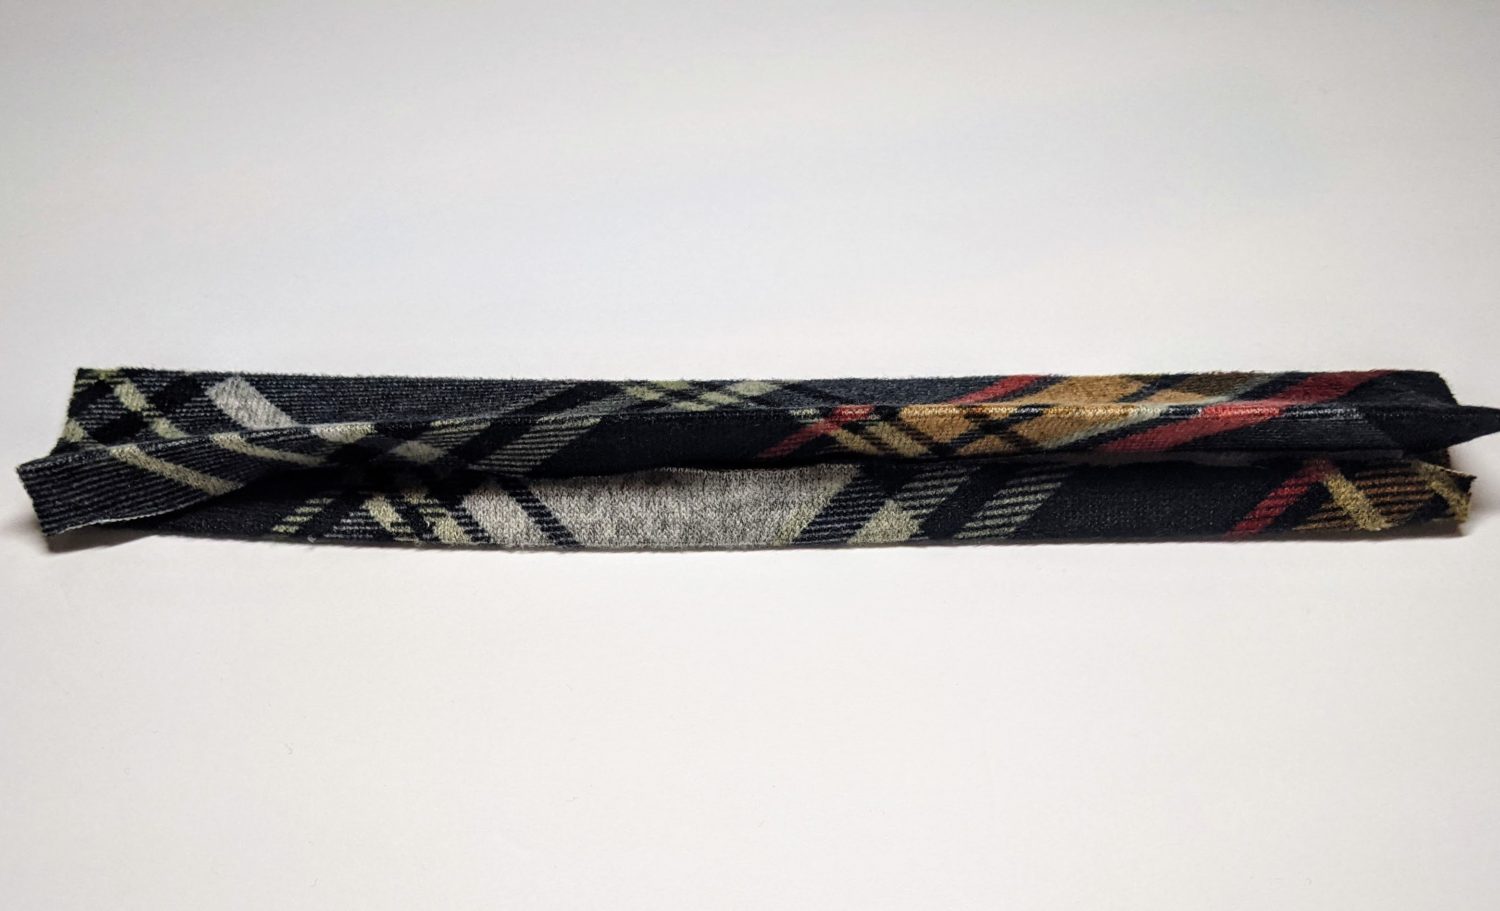
- Lay both collar pieces on top of each other with right sides together.
- Pin along one long edge and sew or serge together.
- Turn the collar right side out and press along the sewn edge.
- Topstitch along the sewn edge with a 1/4″ seam allowance, then baste around the other 3 sides with a long stretch stitch.
- Next, we need to find the quarter points for the bodice neckline. You will use the unsewn shoulder seams as your first point, then find the half point on the other side of the bodice. Finally, match up those two points and fold in half to find the other quarter points.
- Find the middle and quarter points of your collar piece.
Attaching the Collar
- Lay your bodice piece right side up. Take your collar piece and lay it on top of the bodice alining the raw edges.
- Line up each end of the collar with the inner neckline edges and pin in place. (The short ends of the collar will line up with the unsewn shoulder seams, but do not sew that side.)
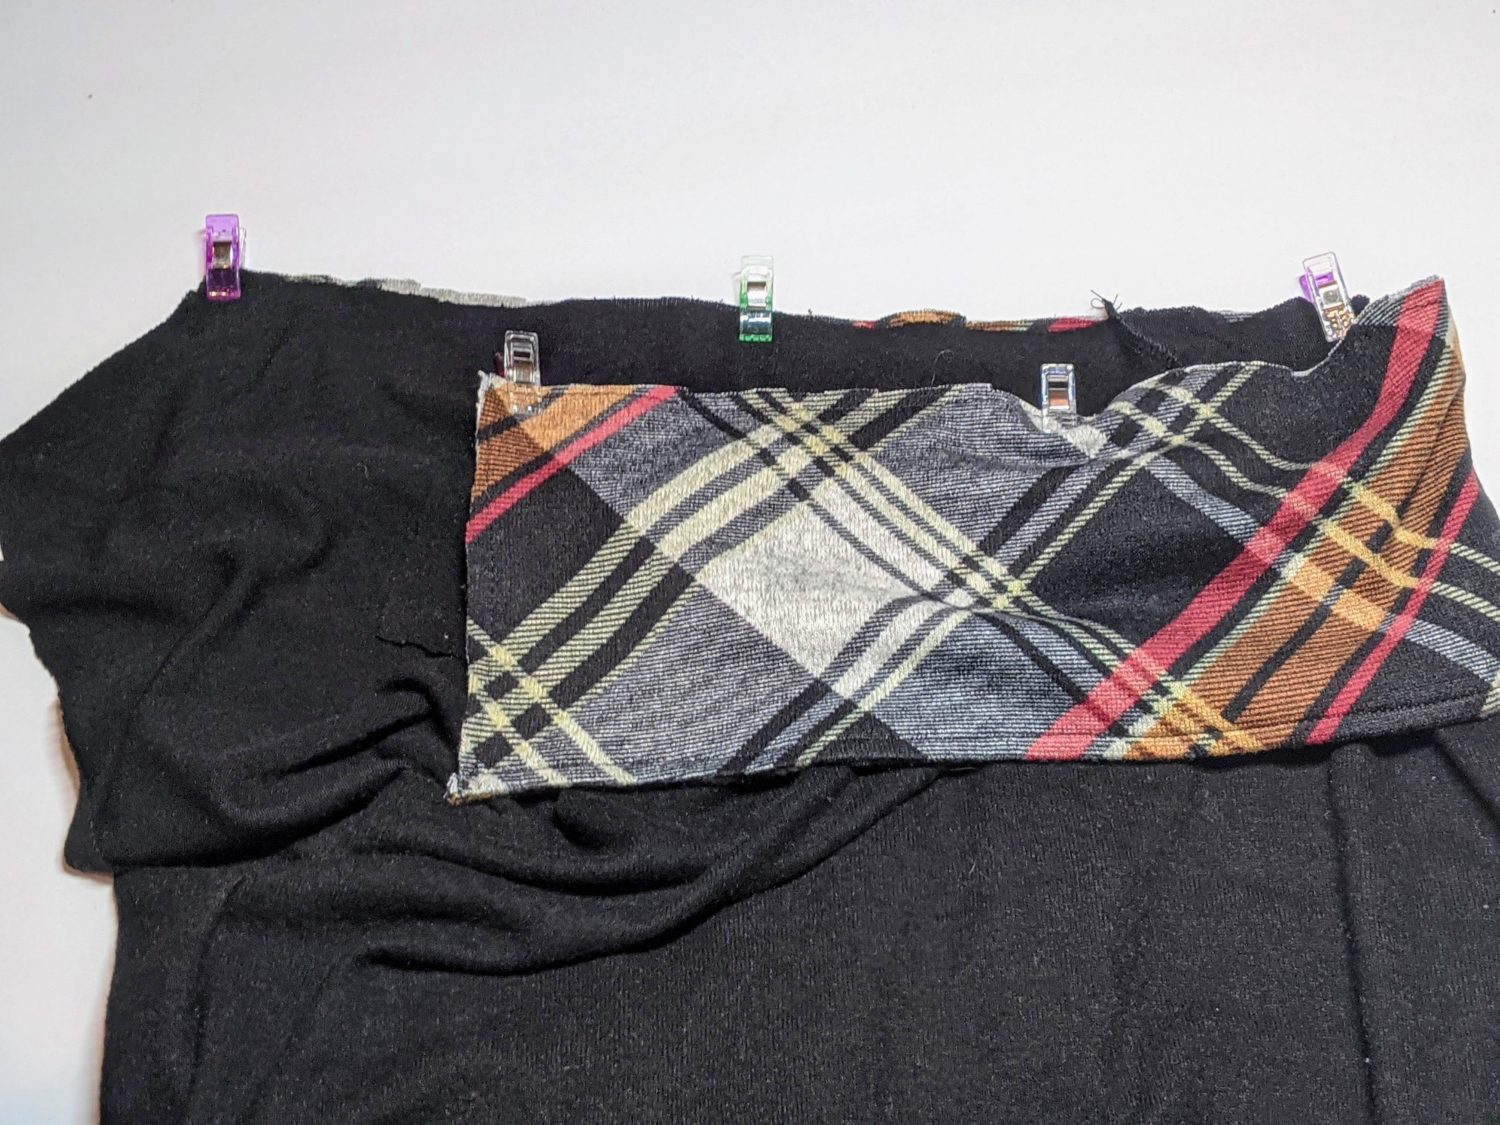
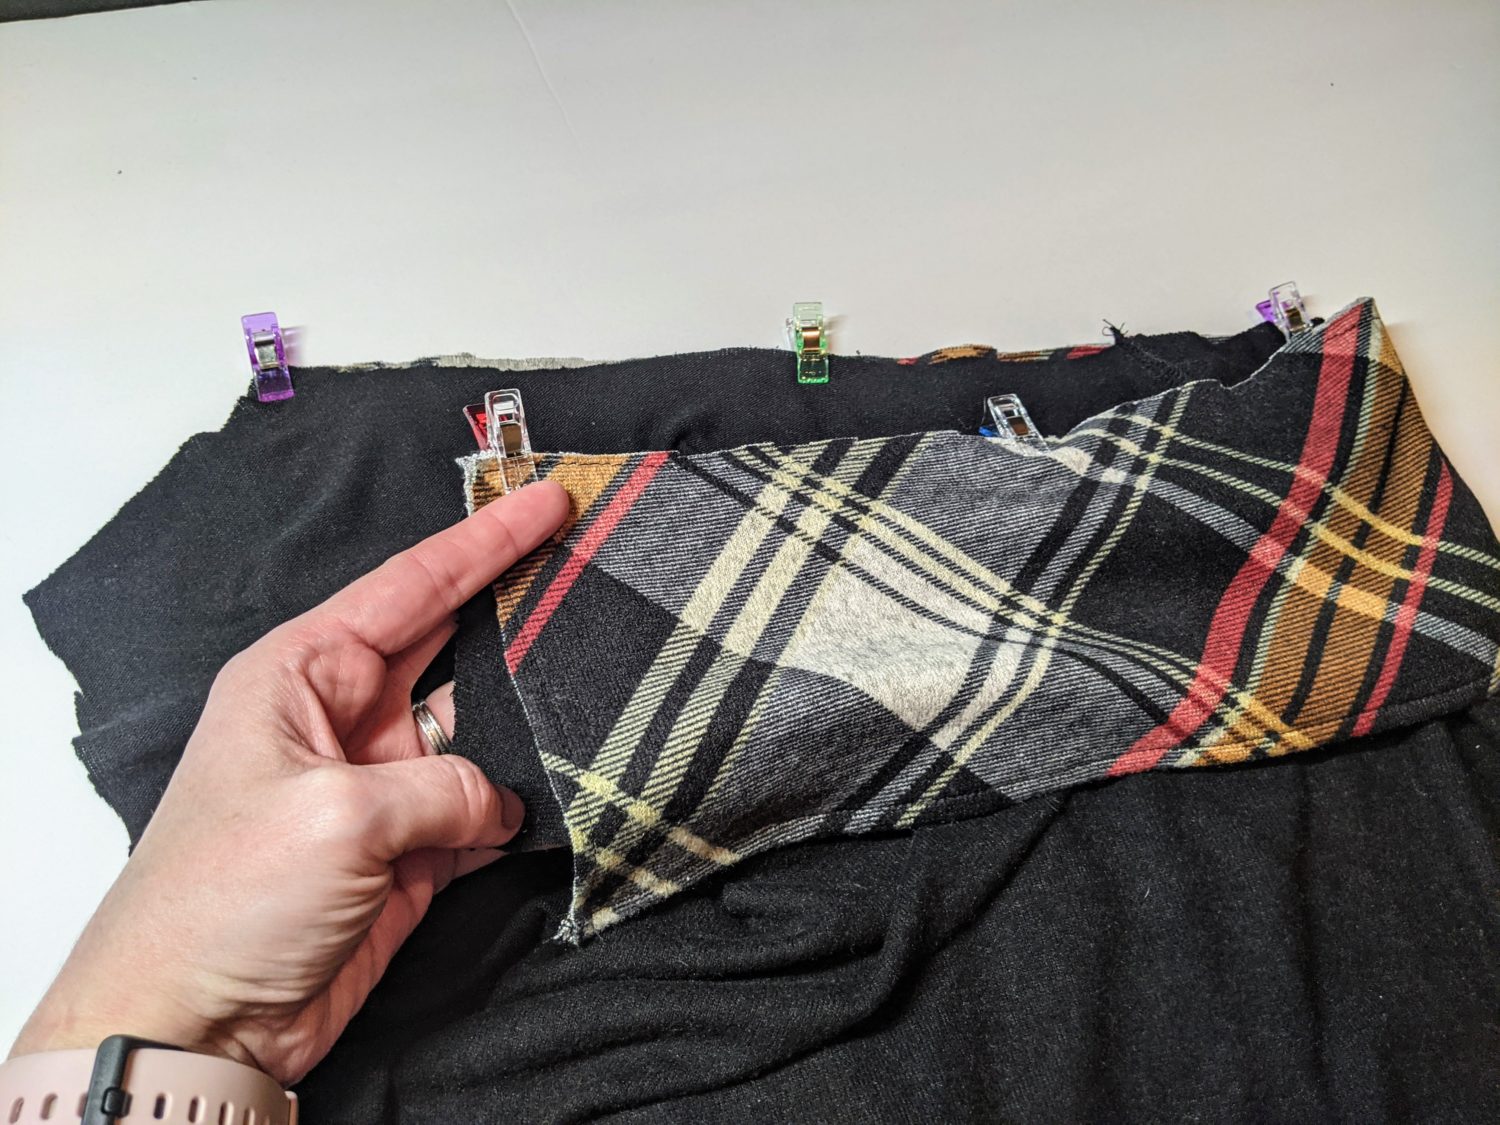
- Sew your collar to your neckline using a stretch stitch or serger.
- Press the seam allowance down towards the bodice and topstitch it in place.
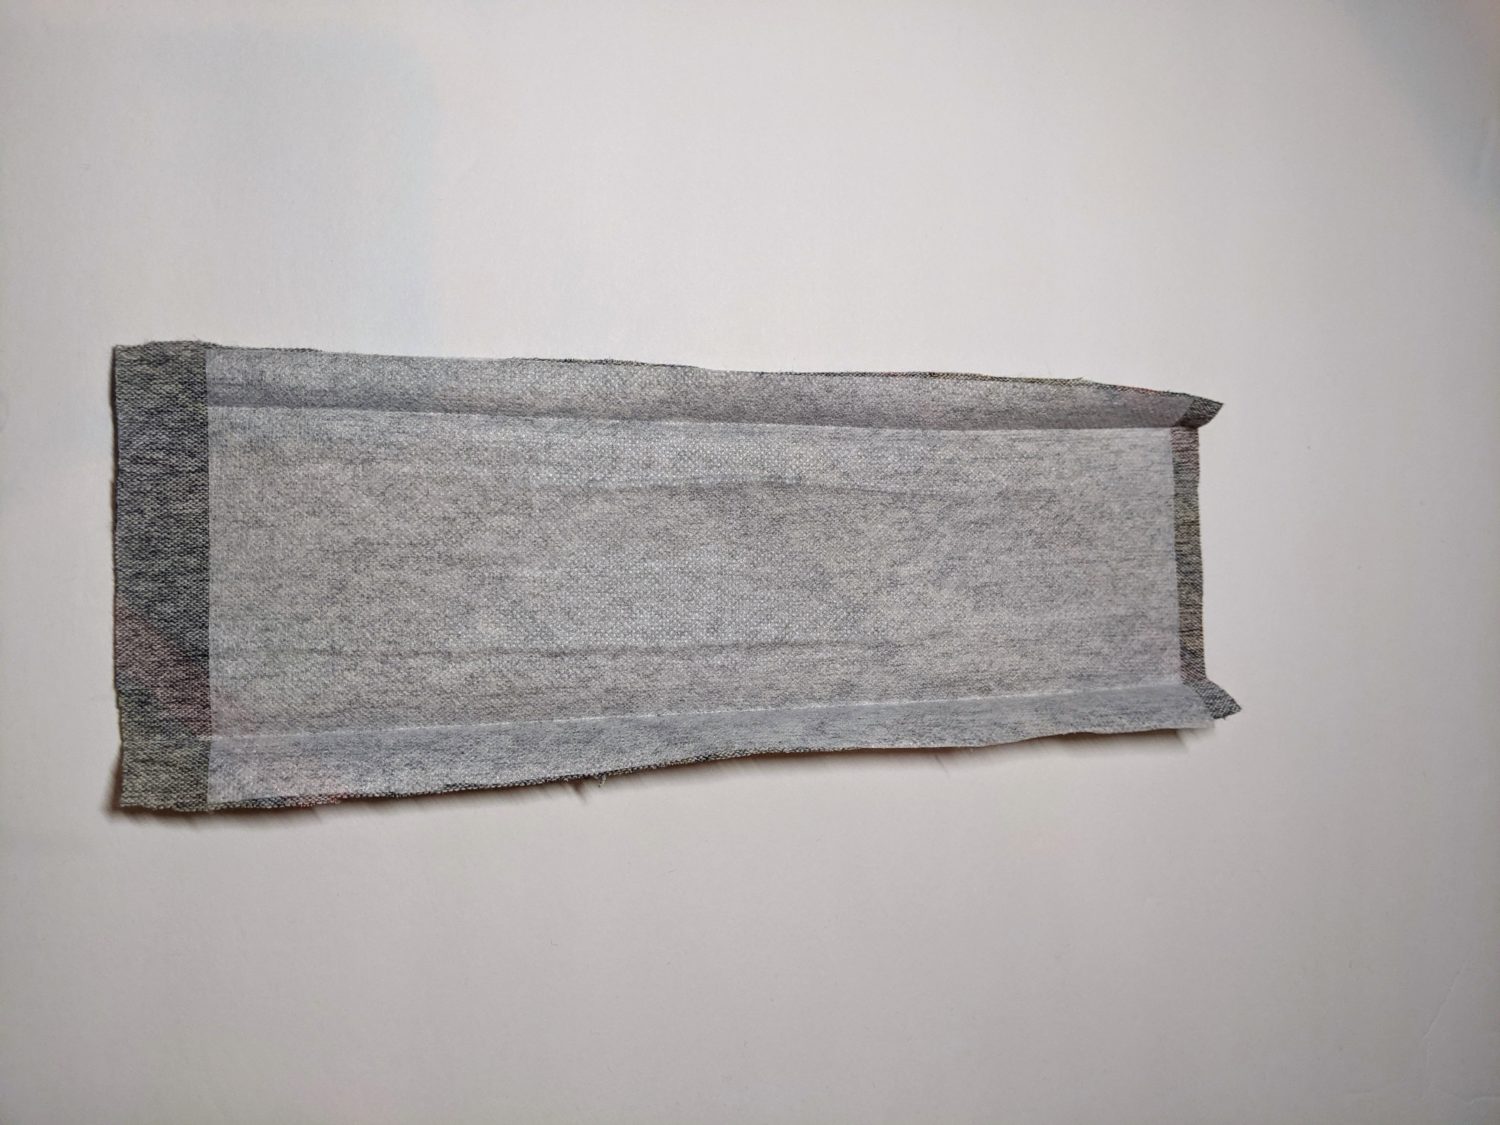
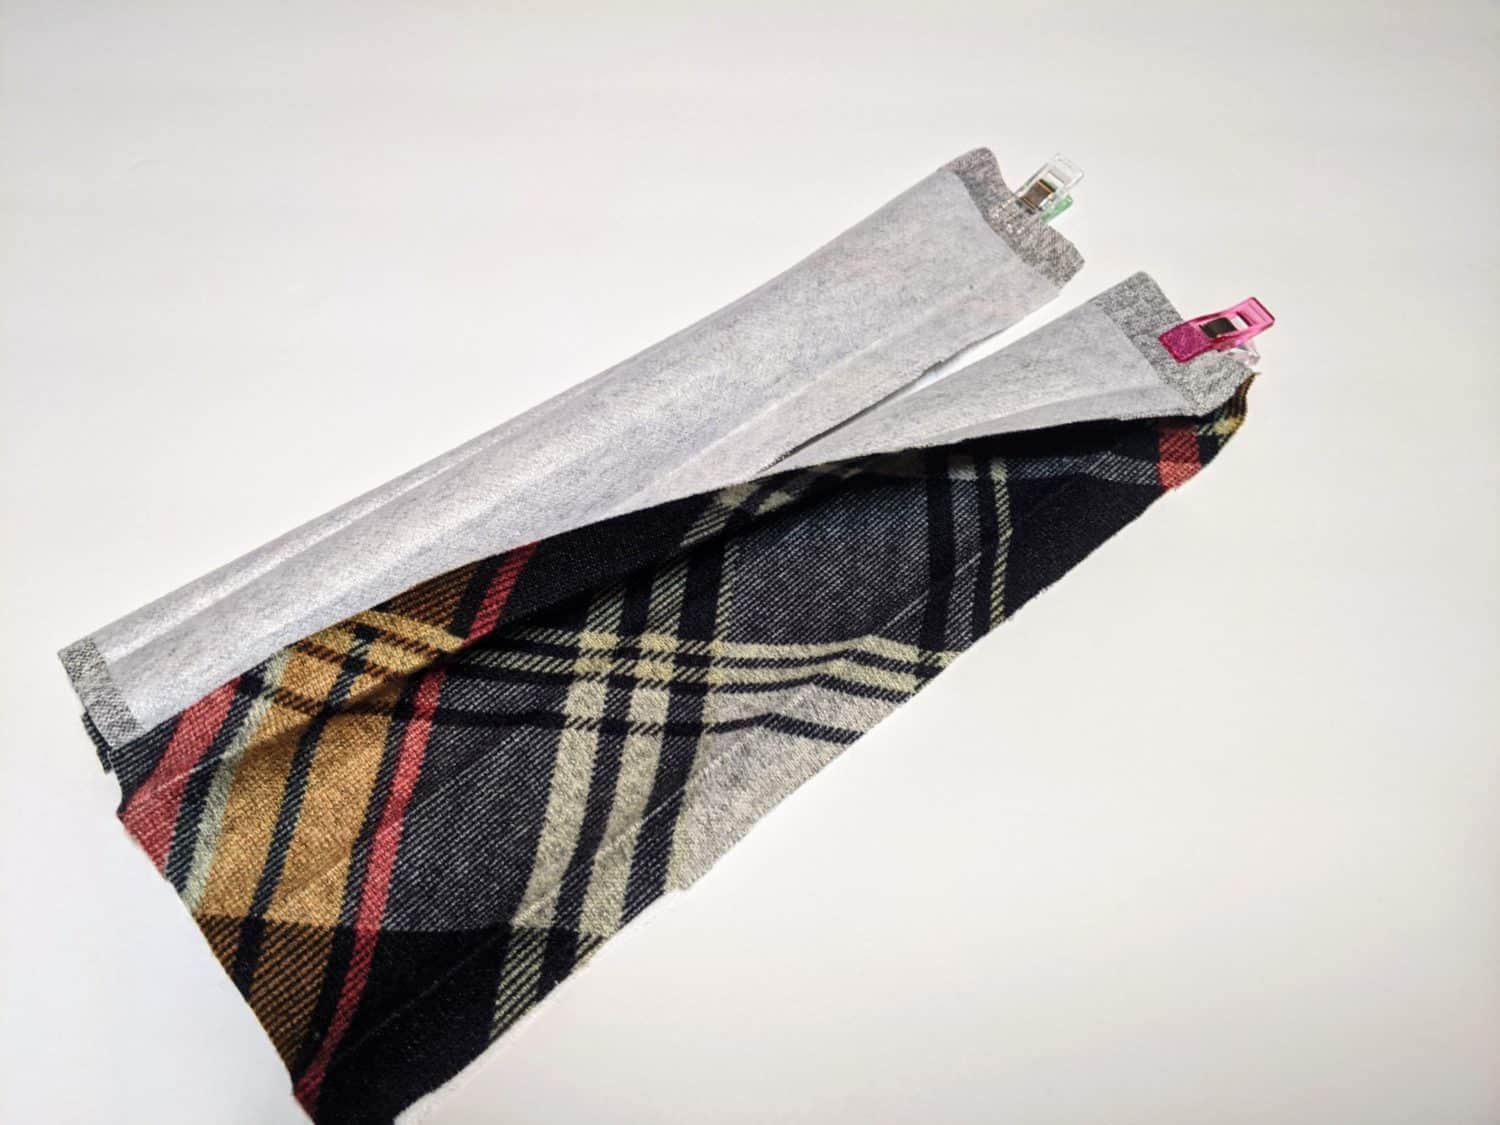
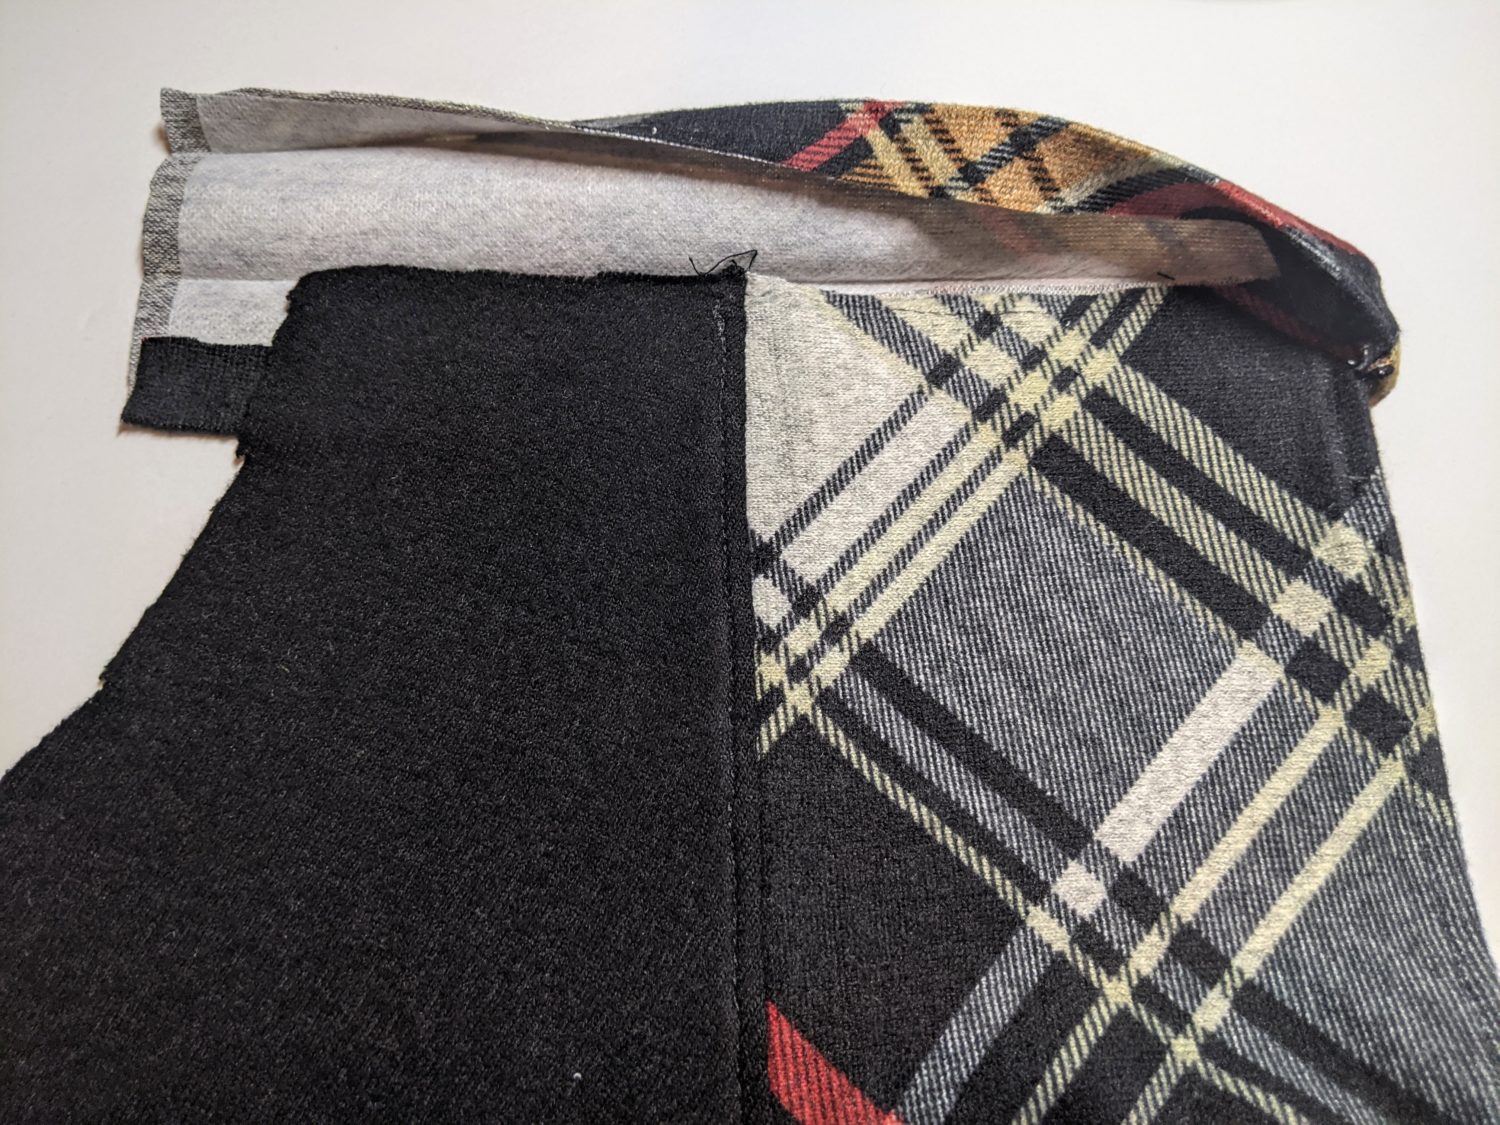
Shoulder and Collar Binding
- Iron your interfacing onto the wrong sides of the binding pieces per the instructions for your particular interfacing.
- Fold one long edge in 1/2″ towards the center and press. Repeat on the other long edge.
- Fold the binding in half lengthwise and press.
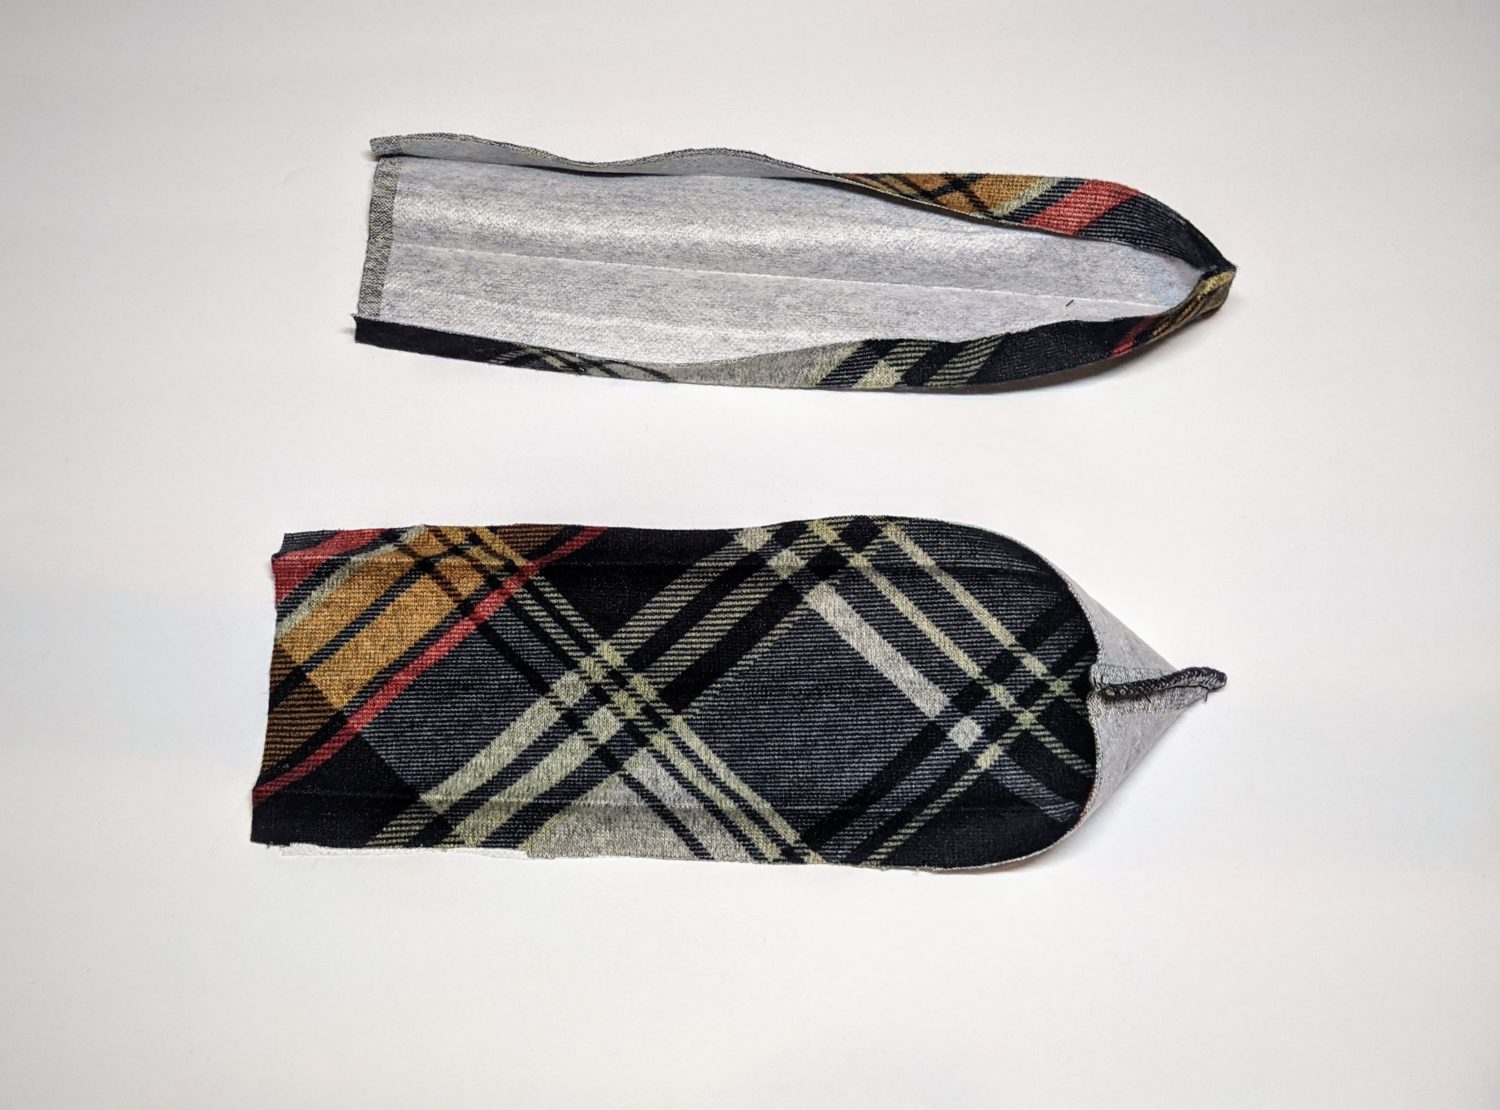
- Open the binding piece and fold in half lengthwise with right sides together.
- Pin the end with the shorter interfacing together and sew with a 1/4″ seam allowance.
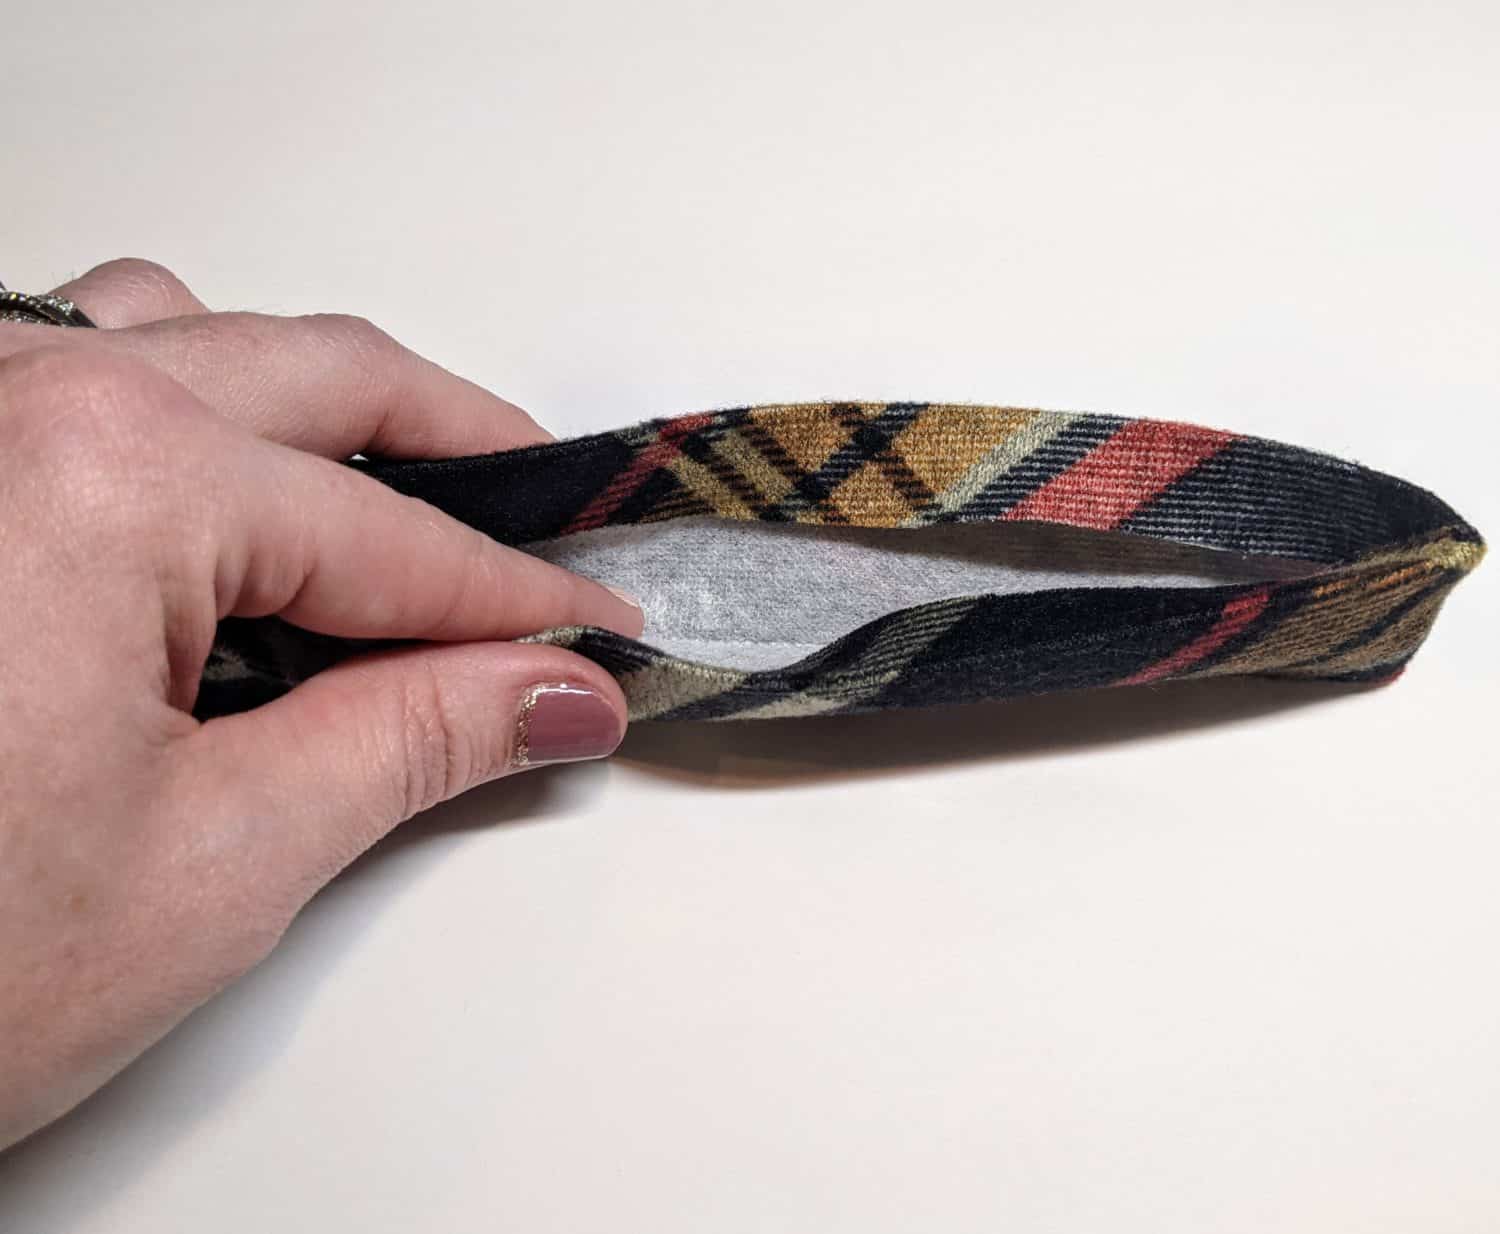
- Turn right side out and tuck all pressed edges back in and give it one last good press.
Time to Put it All Together
- Lay one side of the shoulder and collar right side up.
- Line up the enclosed end of the binding with the outer (topstitched side) edge of the collar.
- Sandwich the raw edge of the collar and shoulder between the binding and pin in place. (Check the front and back of the piece to make sure everything is tucked in and looking nice.)
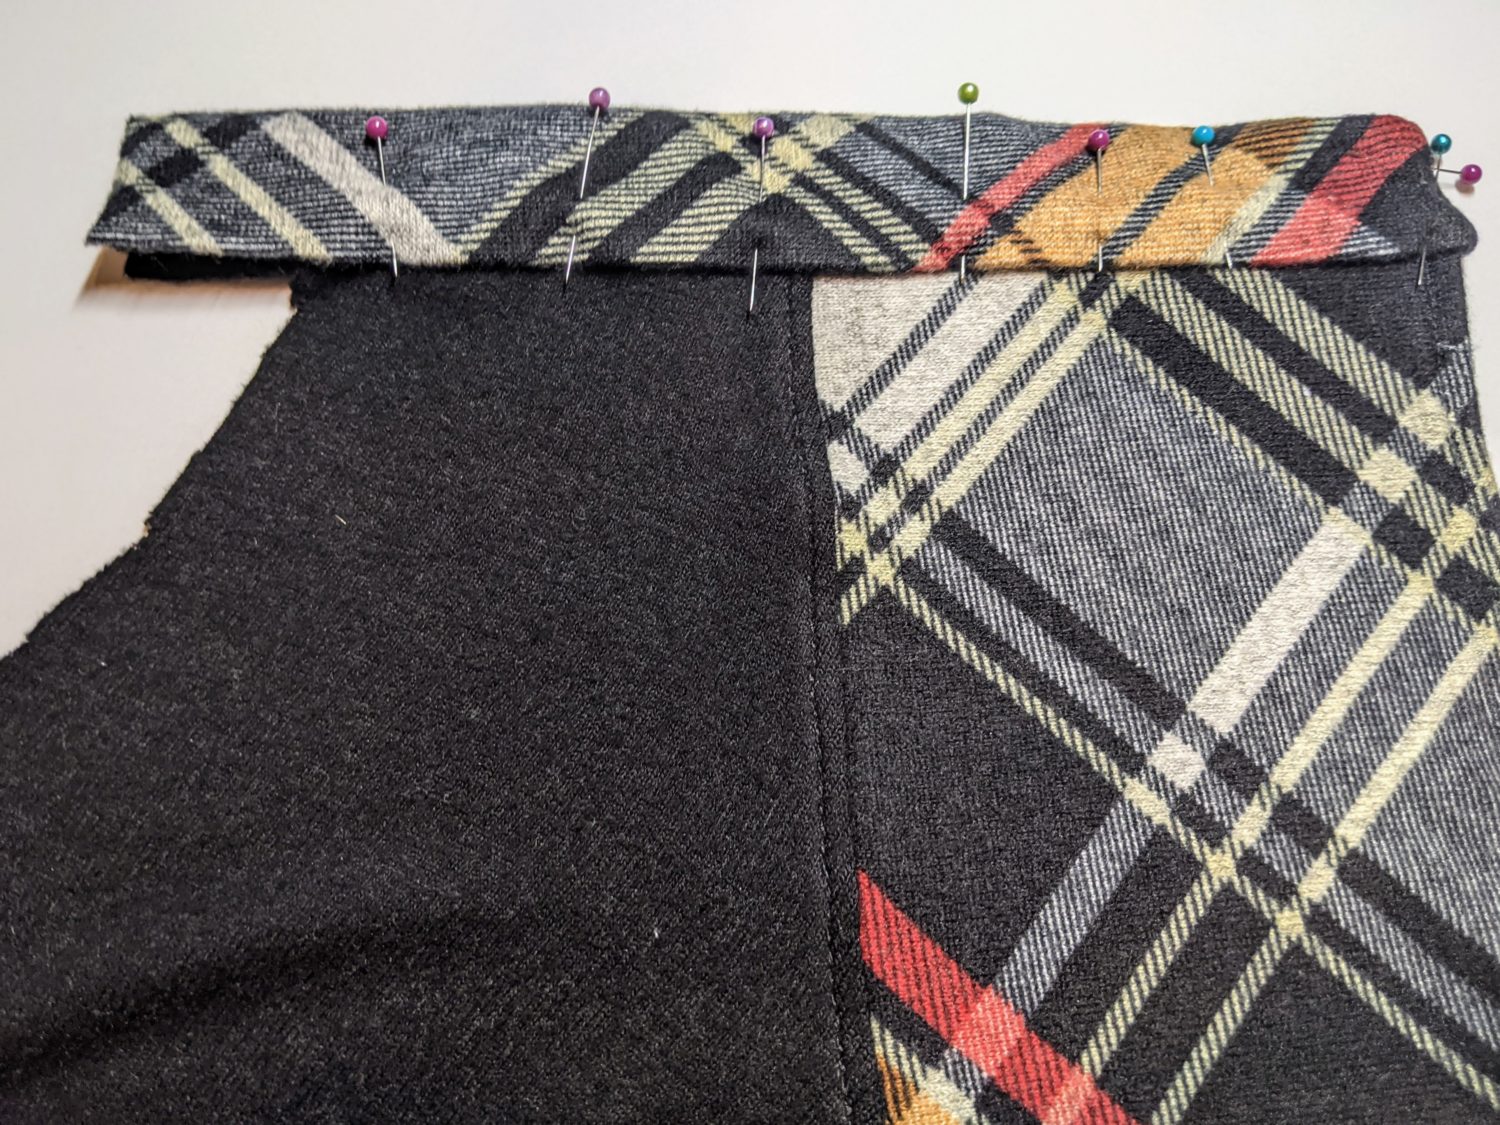
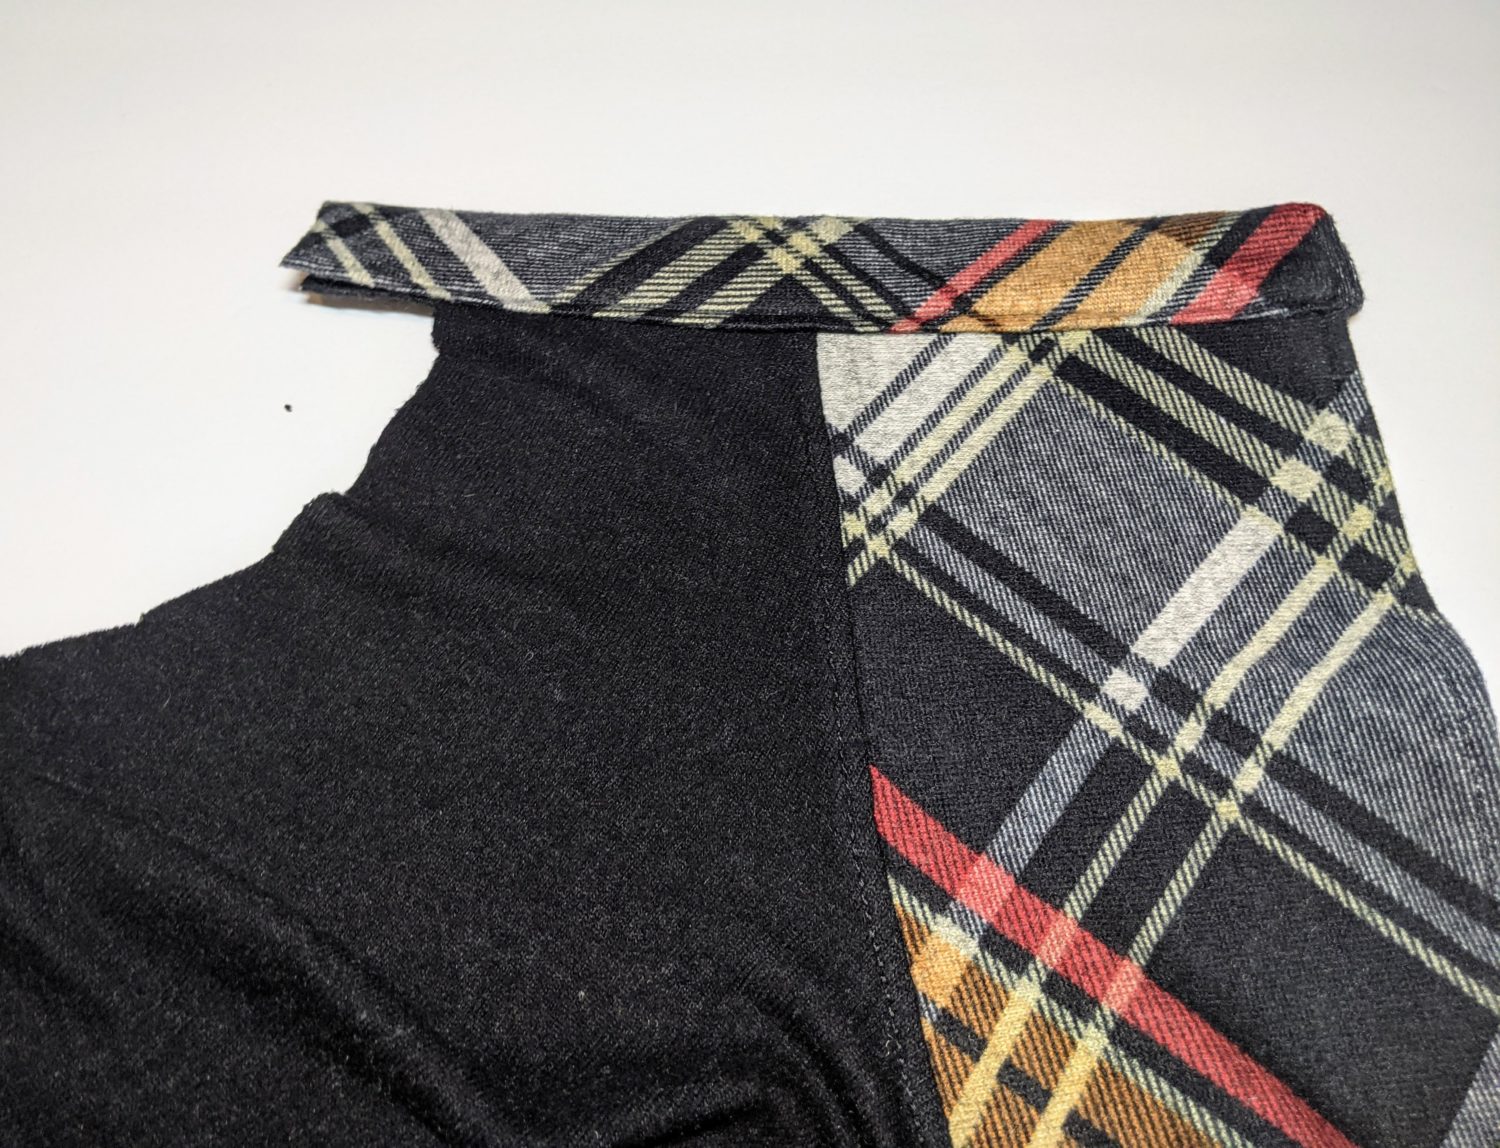
- Sew along inner edge of binding with a 1/4″ seam allowance. Trim off any excess binding.
- Reapeat on the other shoulder.
Let’s Make This Look Like a Real Shirt!
- Lay out your bodice with the collar open and the bodice’s wrong side facing up.
- Fold the back bodice side of the collar in.
- Fold the front bodice side in and line up the binding pieces so that the front binding is stacked on top of the back binding.
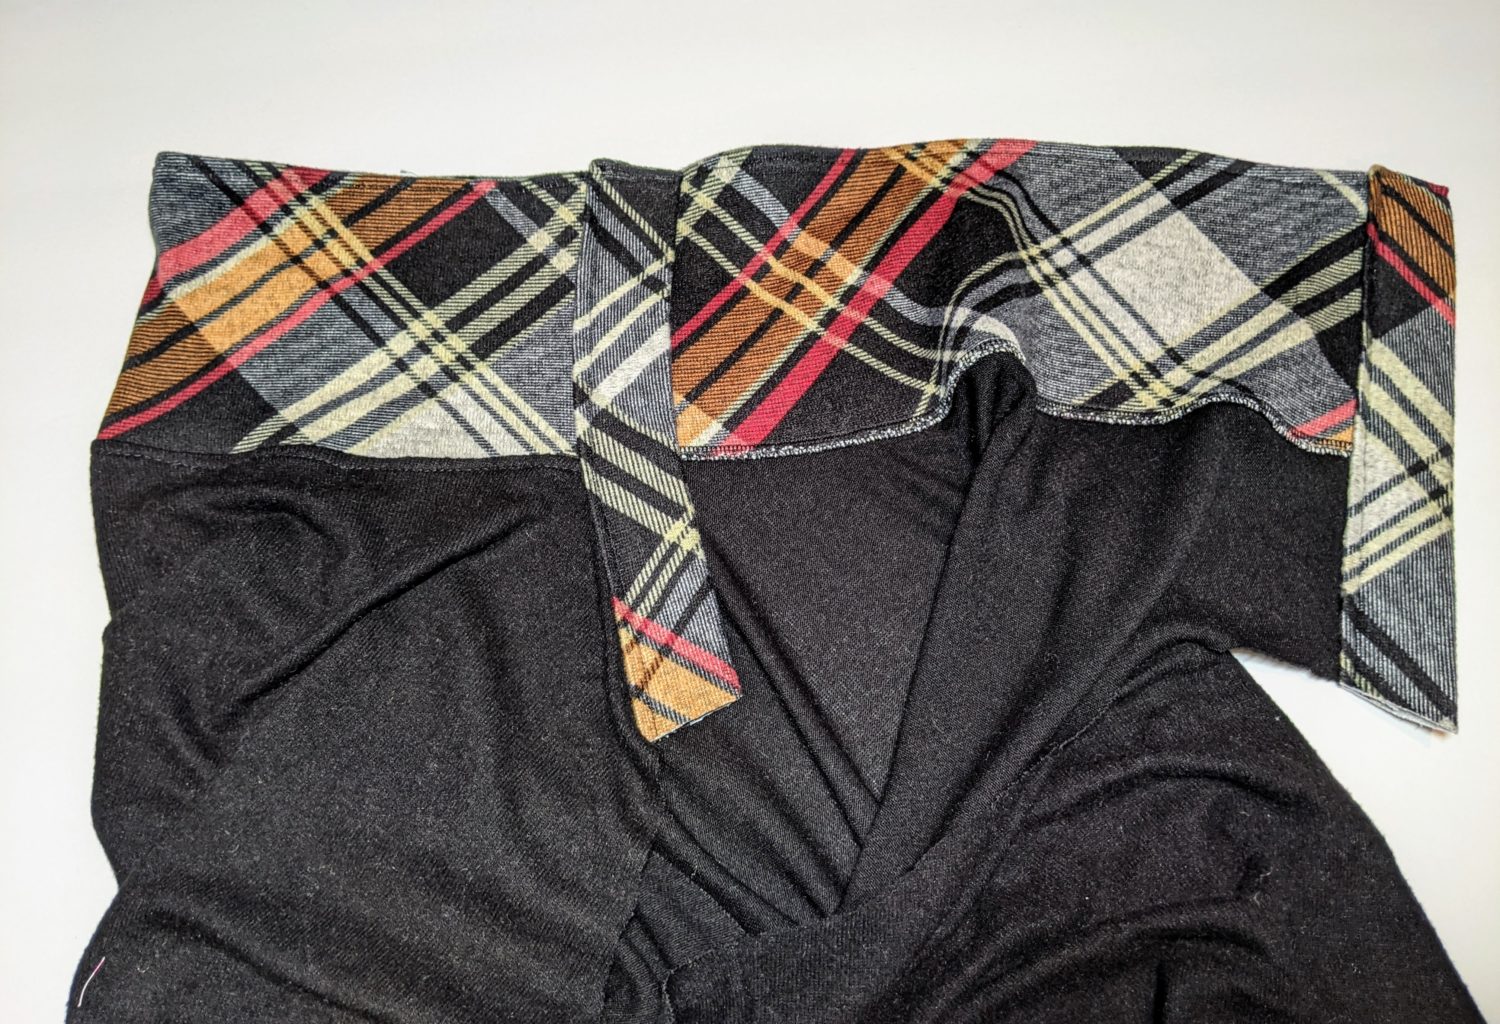
- Hand baste the front and back binding pieces together between the outer edge of the shoulder and the seam between the bodice and collar to hold everything in place while you attach the sleeves.
**I chose to add elbow patches to my sleeves. If you want elbow patches too, you can find a tutorial for that HERE! This step is done before any other construction of the sleeves.**
- Fold your sleeves in half wrong sides together. Pin raw edge and sew together with a stretch stitch or serger.
- Find the quarter points of the upper (shoulder side) of the sleeve and the armscye of the bodice and mark.
- With the bodice inside out and the sleeves right side out, slip the sleeve into the armhole, line up the quarter marks and pin in place.
- Sew both sleeves on using a stretch stitch or serger being sure you go slowly over the binding section as there are several layers there you’re sewing over.
*I also added sleeve cuffs to this pattern as they were not included. To do this, I measured the total length of the sleeve hemline and multiply that by 90% to find the length, and you can choose the width you prefer. (Mine are 6″ wide, then folded in half to attach)*
- Remove the basting stitches from the collar binding.
- Decide where you want your buttons to be, and pin the collar in place at those points.
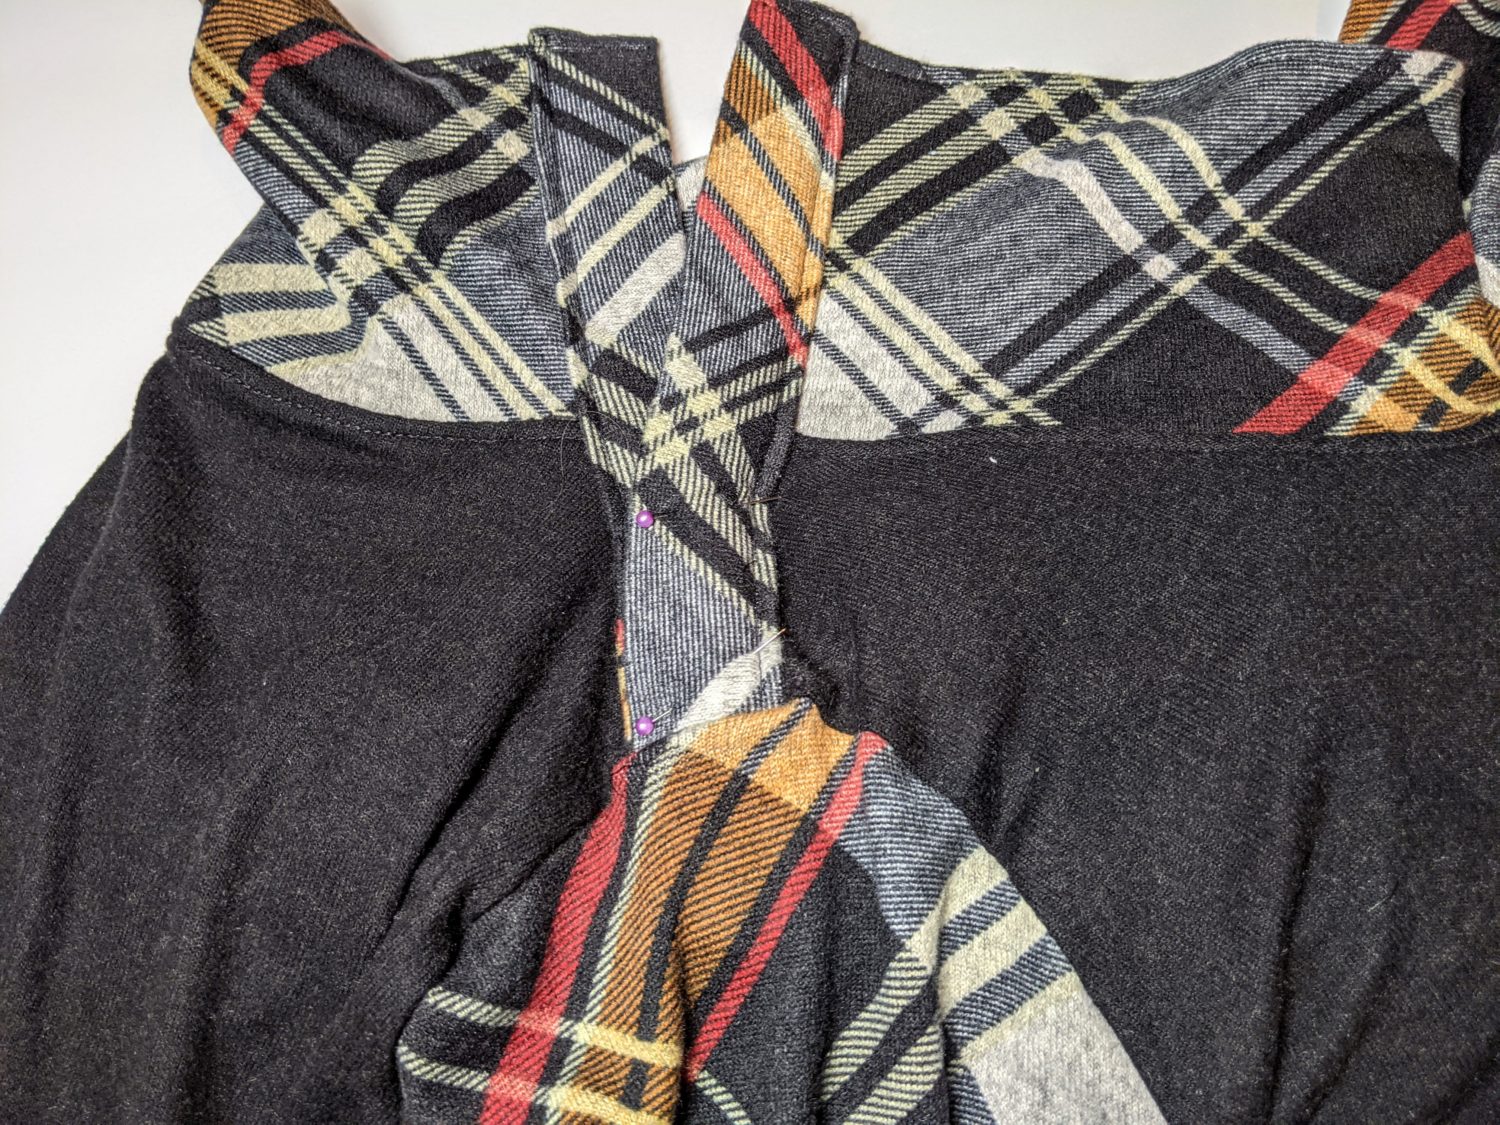
- Hand sew the buttons onto the shoulder binding sewing through all the layers.
- Optionally, you can also add more decorative buttons on the upper part of the collar binding as well.
Look at You! You Did it!

As always, we’re here to help if you need it! Join us HERE and on Facebook, Instagram, Twitter, Youtube, and Pinterest. We’re everywhere you are.
Leave a Reply