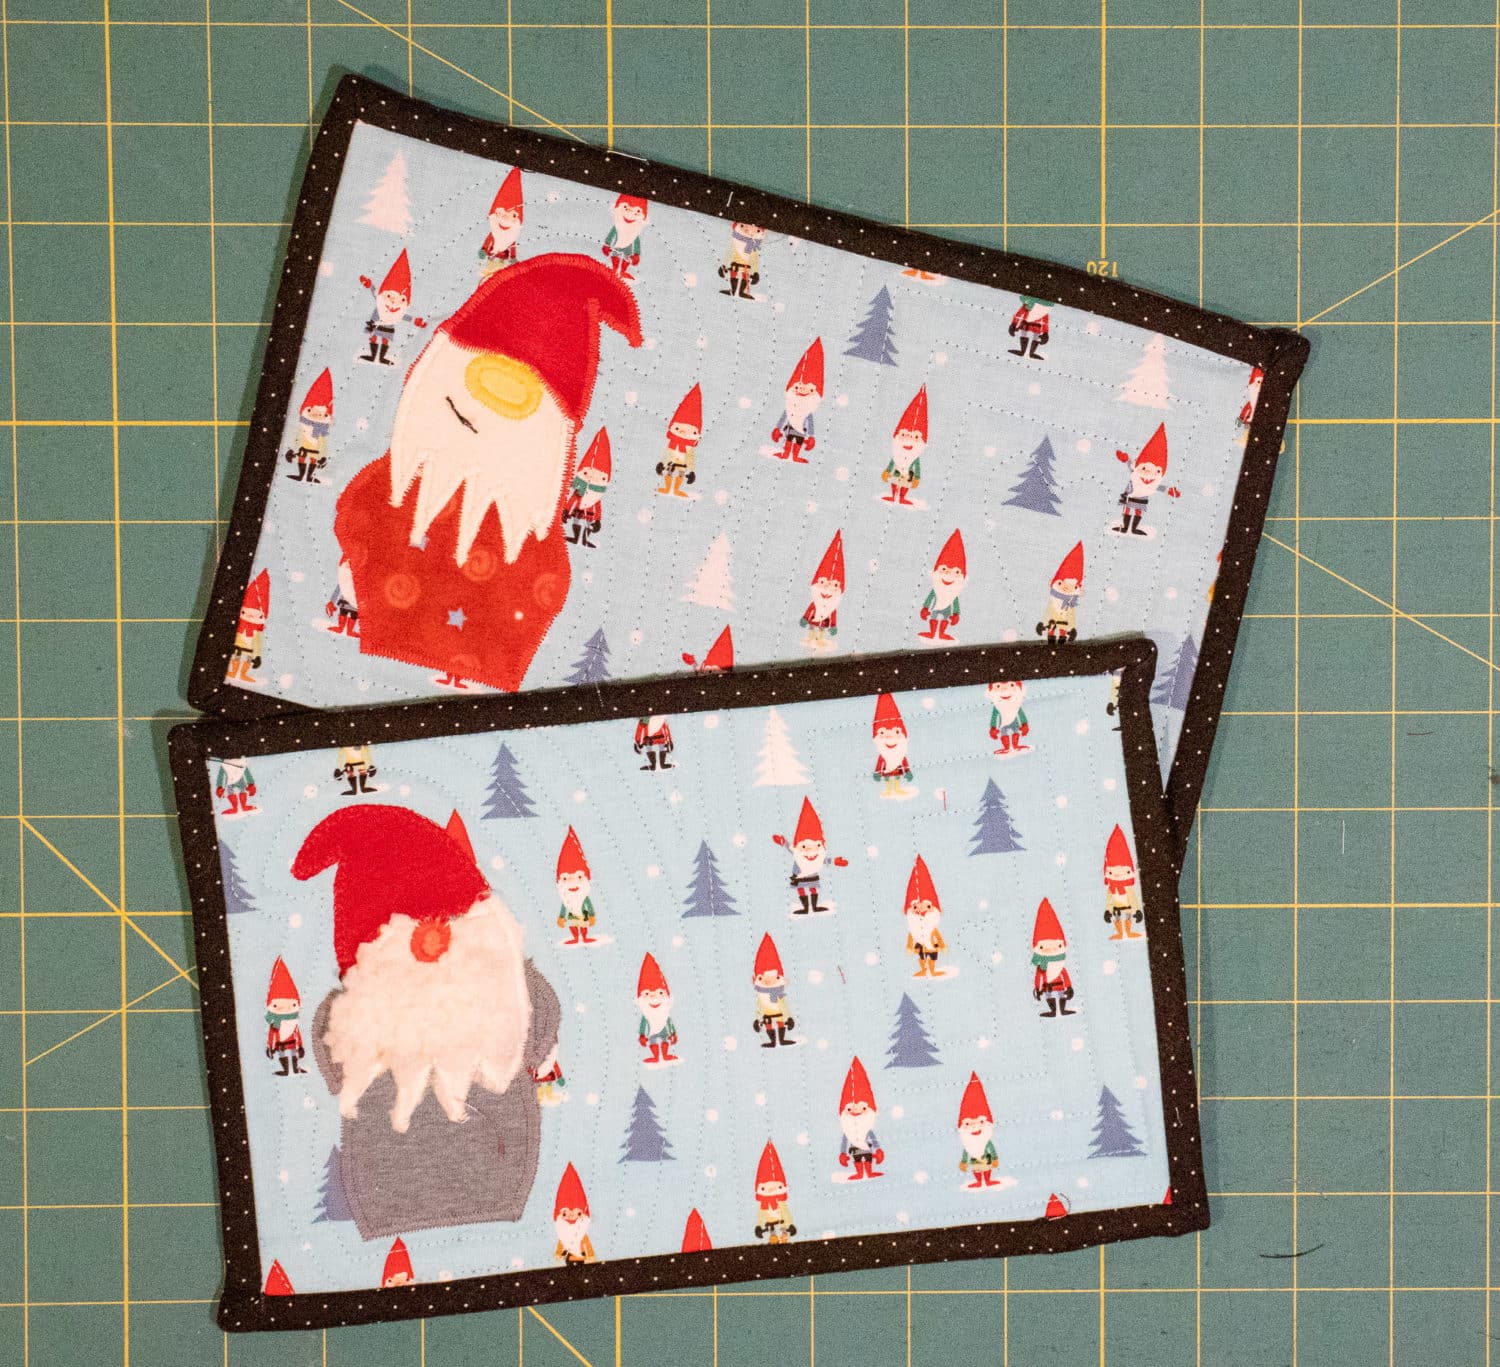
Oooo, I’ve got a new one for you! I did a mug rug with a gnome appliqué ! I LOVE IT SO MUCH.
Want to make one? I’ll walk you through how to do the appliqué.
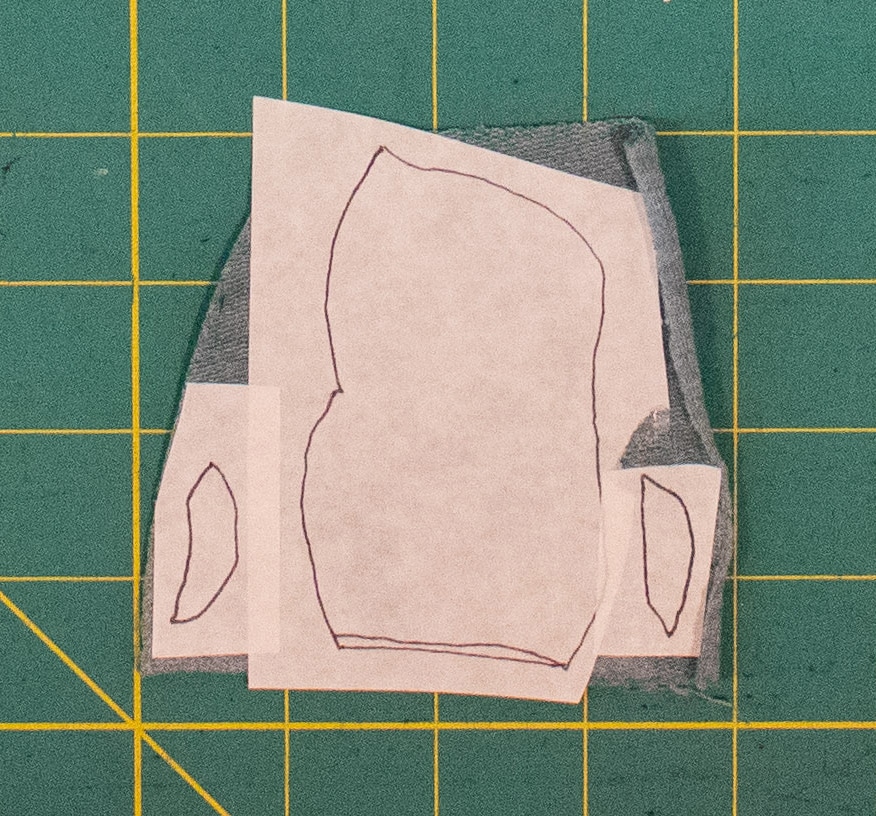
Please notice – I did the gnome appliqué two different ways while I was working on this tutorial. In the first one (blue shirt, fuzzy beard), I had separate arms. In the second one, I made the arms and body one piece by taping the arms to the body. I’ve given you the pattern pieces with separate arms, so if you’d rather skip tiny pieces then tape them to the body the same way I did. (See picture below.) The video showing how to do the satin stitch is on the version without separate arms. Please remember to iron the gnome’s arms on if you decide to do them separately! Sorry if you have any confusion. I thought it would be quicker without arms (and I don’t love tiny pieces…), but in the end, I prefer the one with arms!
Separate Arms 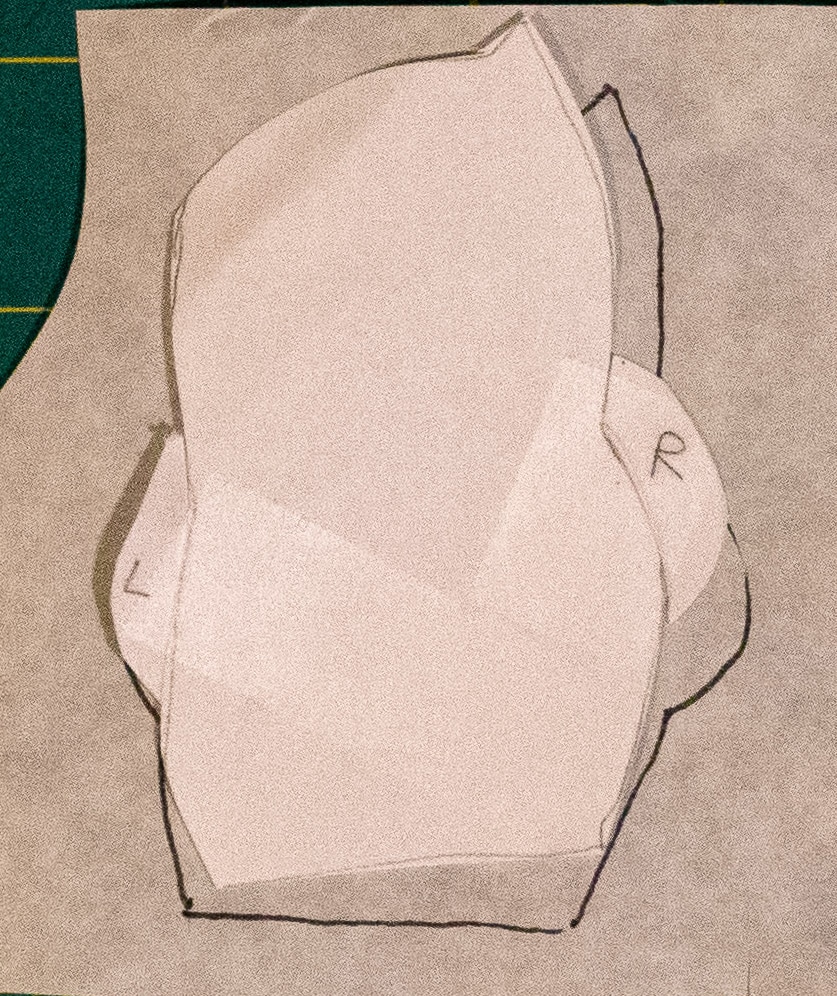
No Arms
Supplies:
- Heat ‘n Bond Lite
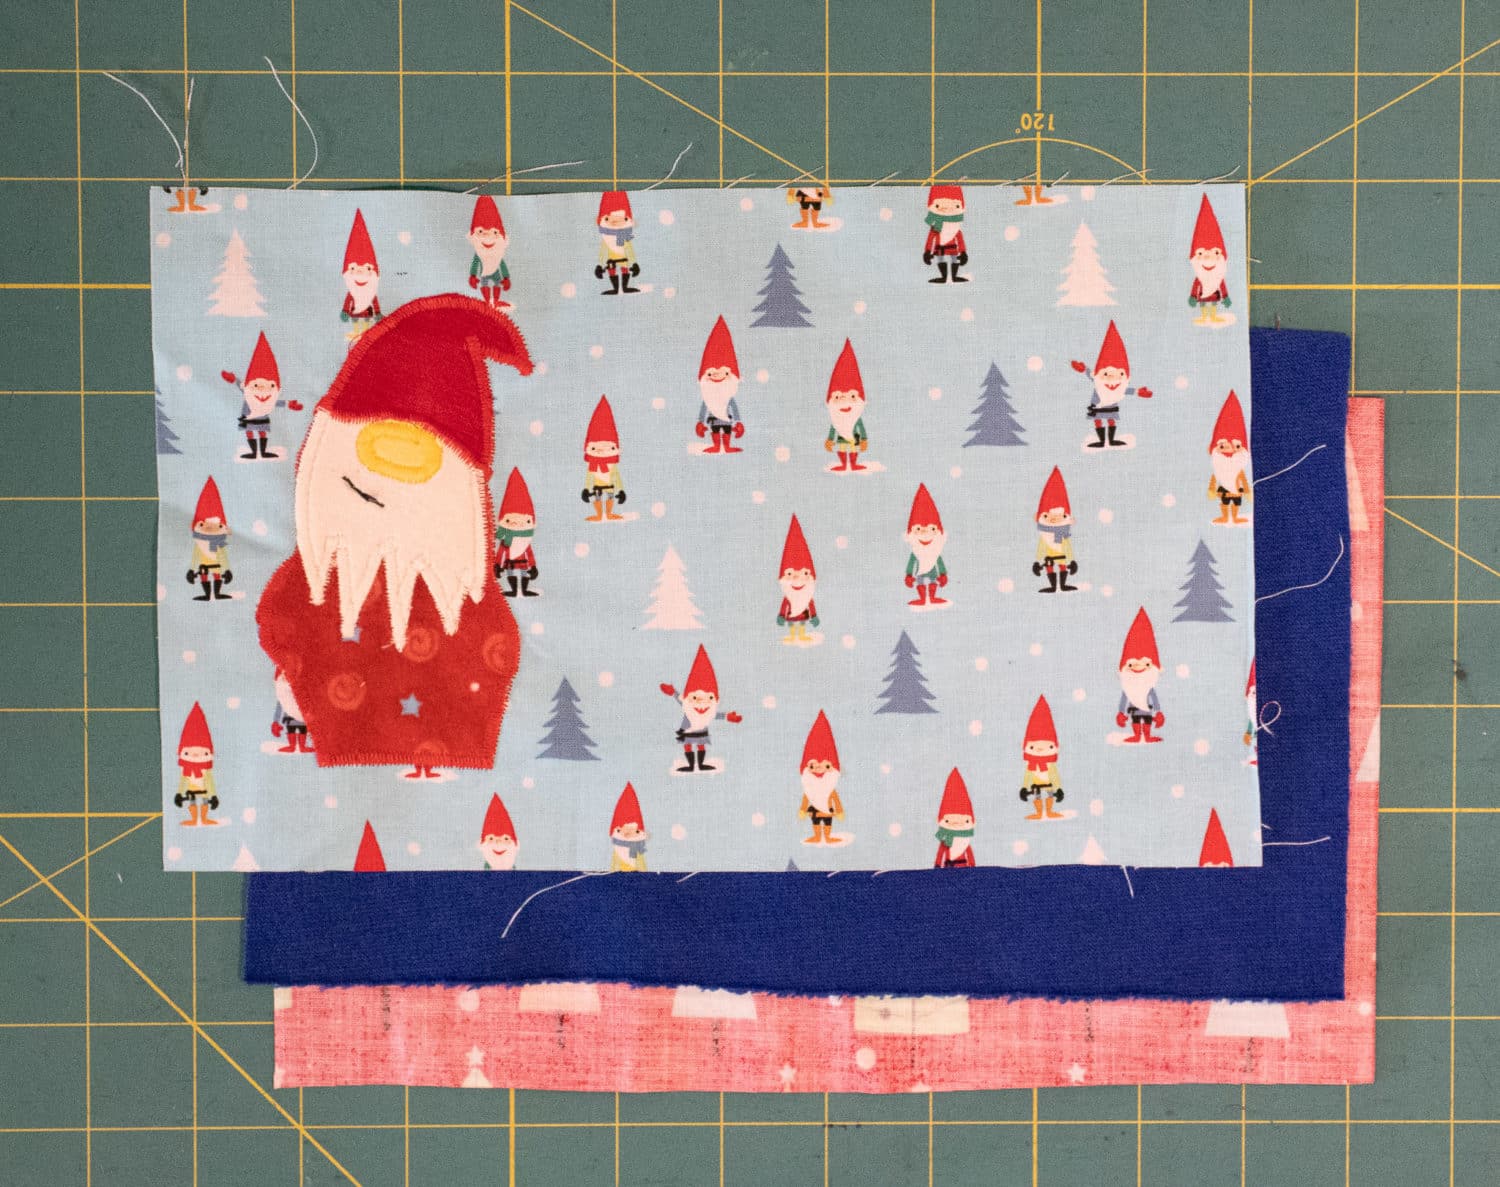
- Fabric scraps in coordinating colors (including 2 main pieces that are 6″L x 8″W for front and back)
- Coordinating binding in a quilting cotton – 2.25″L x WOF (width of fabric)
- quilt batting (or fleece, sweatshirt fabric, flannel remnants/scraps) same size as the main fabric (6″L x 8″W)
- Coordinating thread
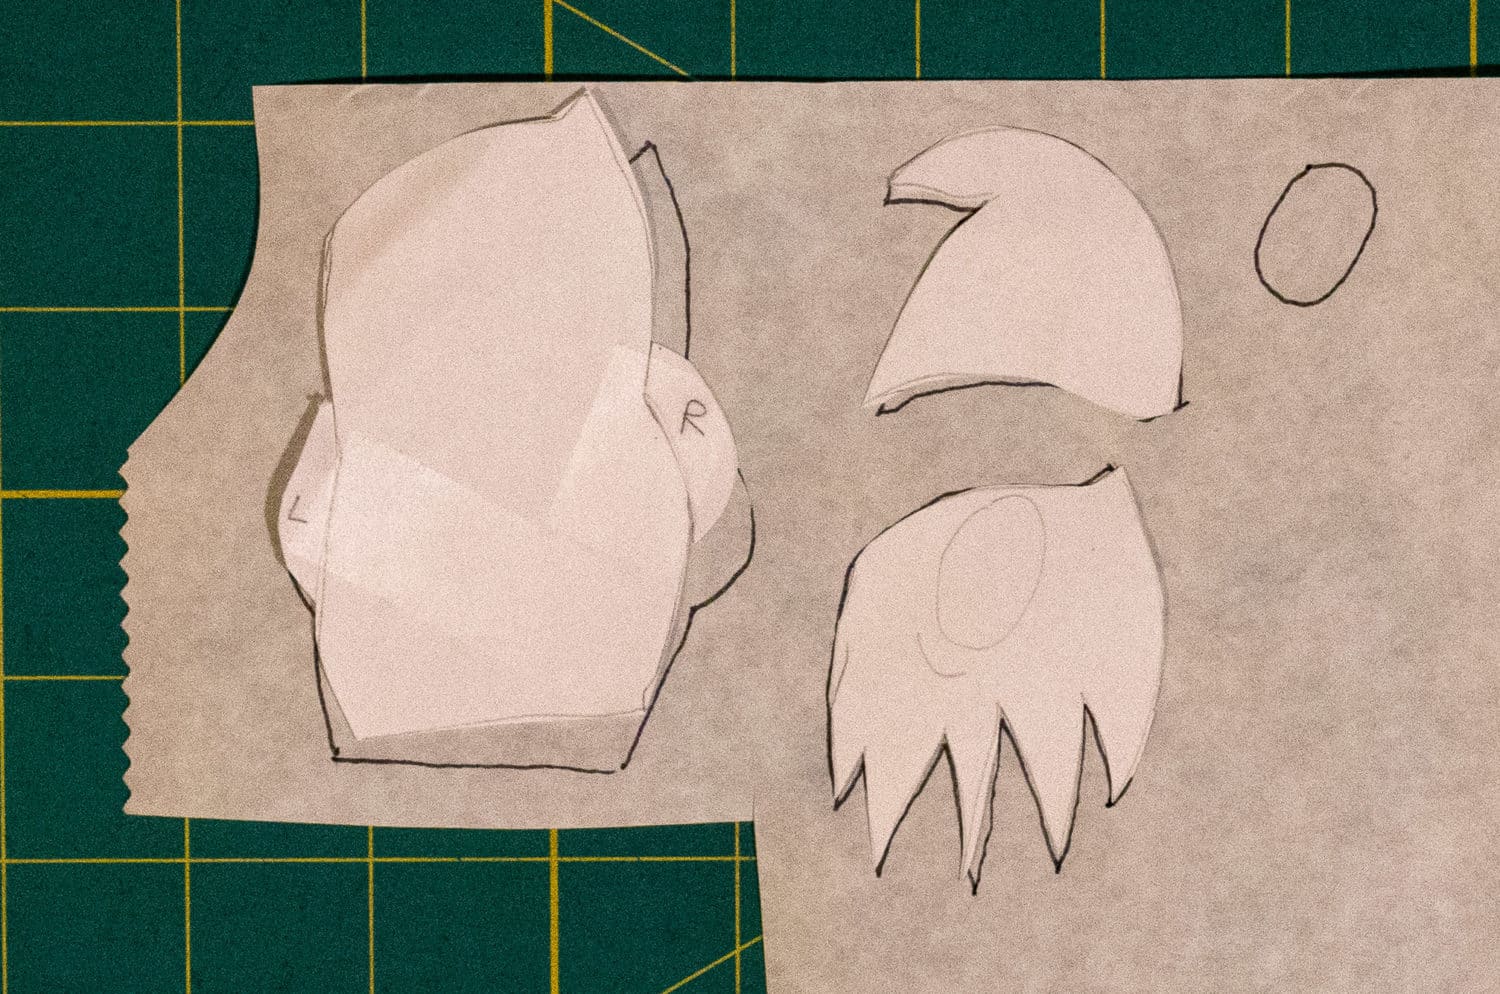
- Pattern Pieces for gnome (right below this) – print actual size
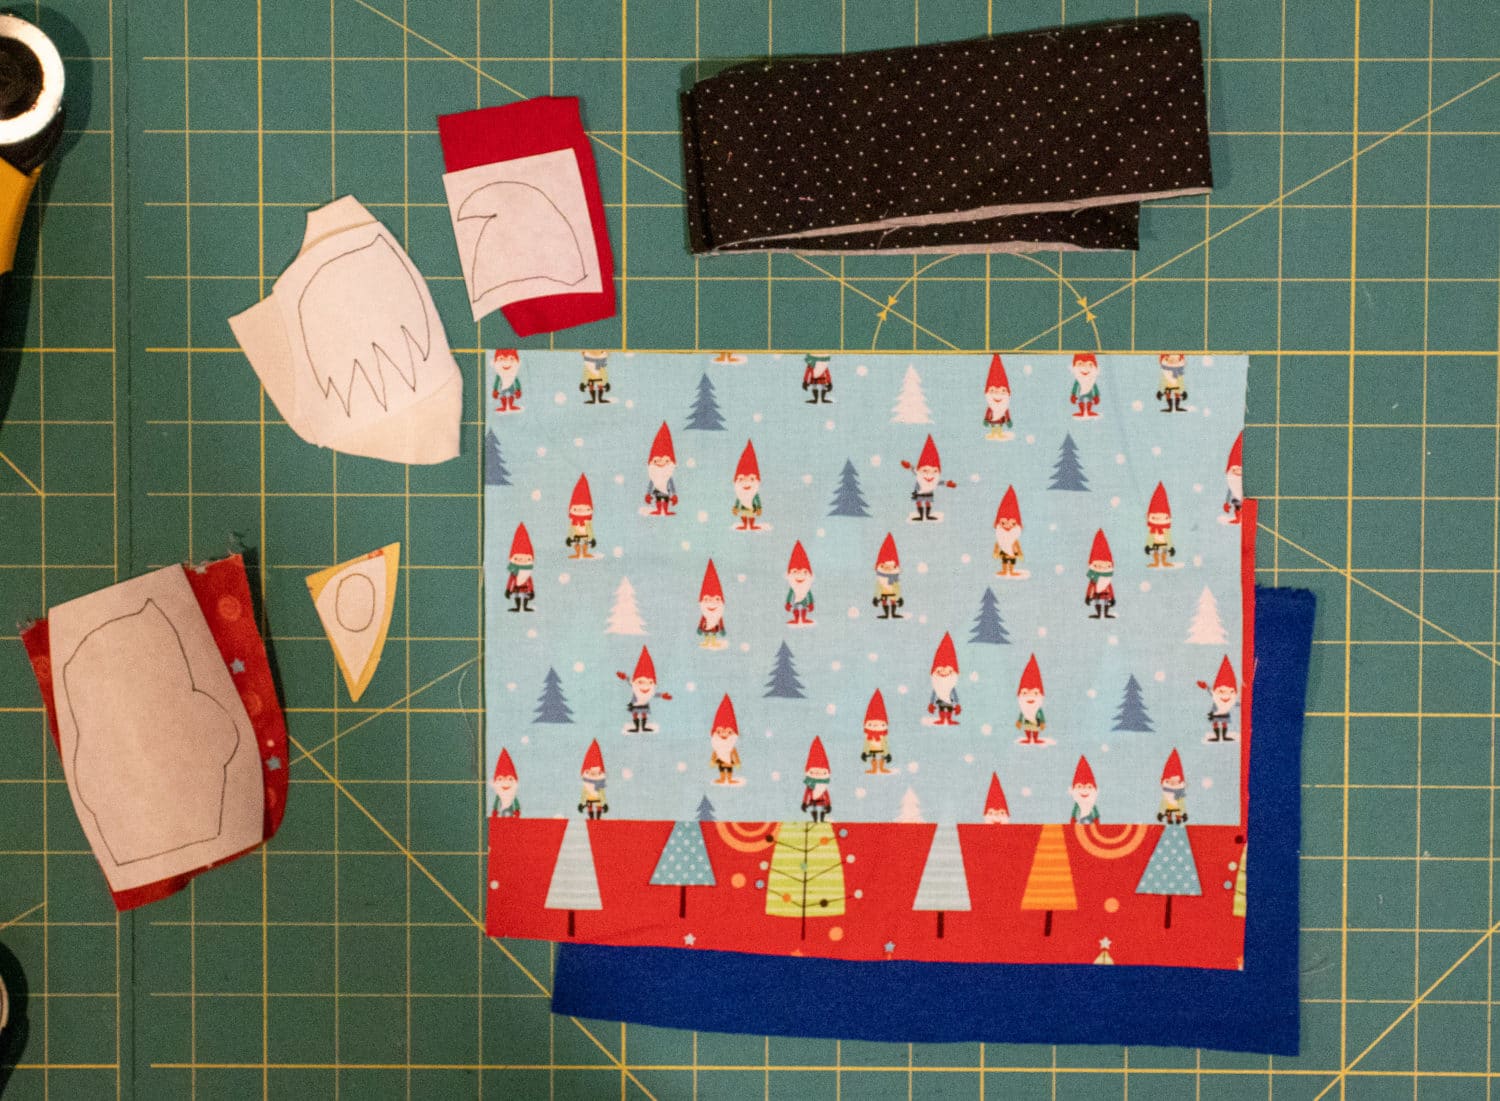
Trace pattern pieces onto the back of the Heat ‘n Bond (HnB).
Adhere HnB to the BACK of your fabric scraps in whichever colors you want for each section. Cut shapes out.
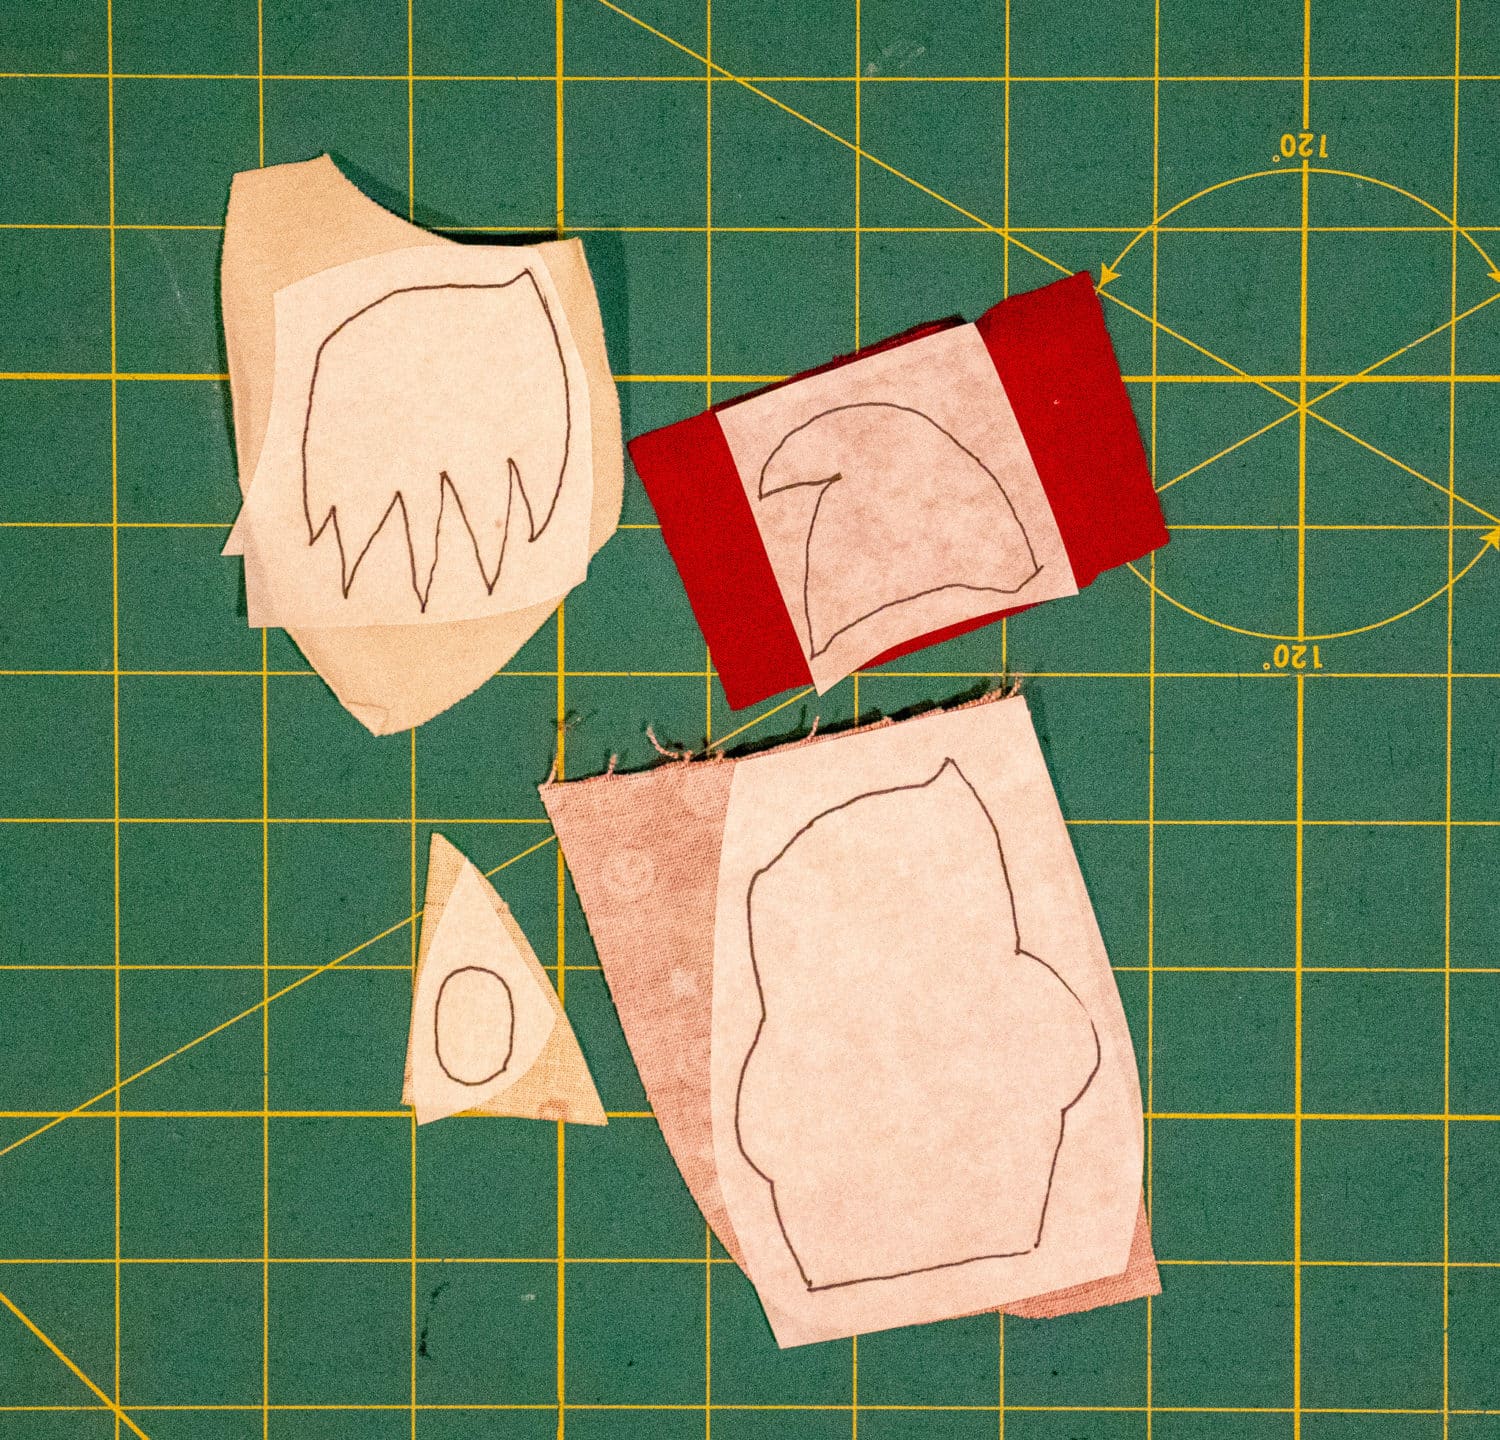
Iron HnB to Fabric 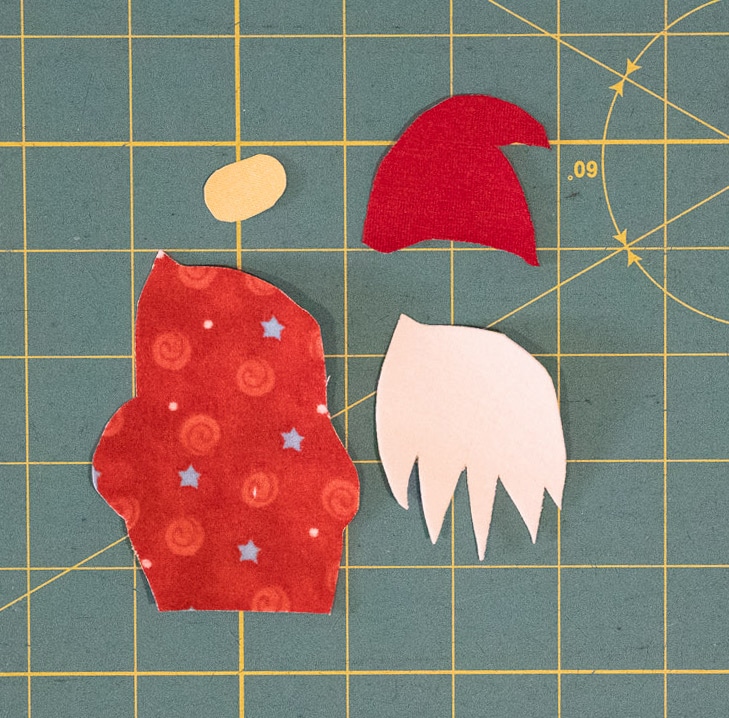
Cut out shapes
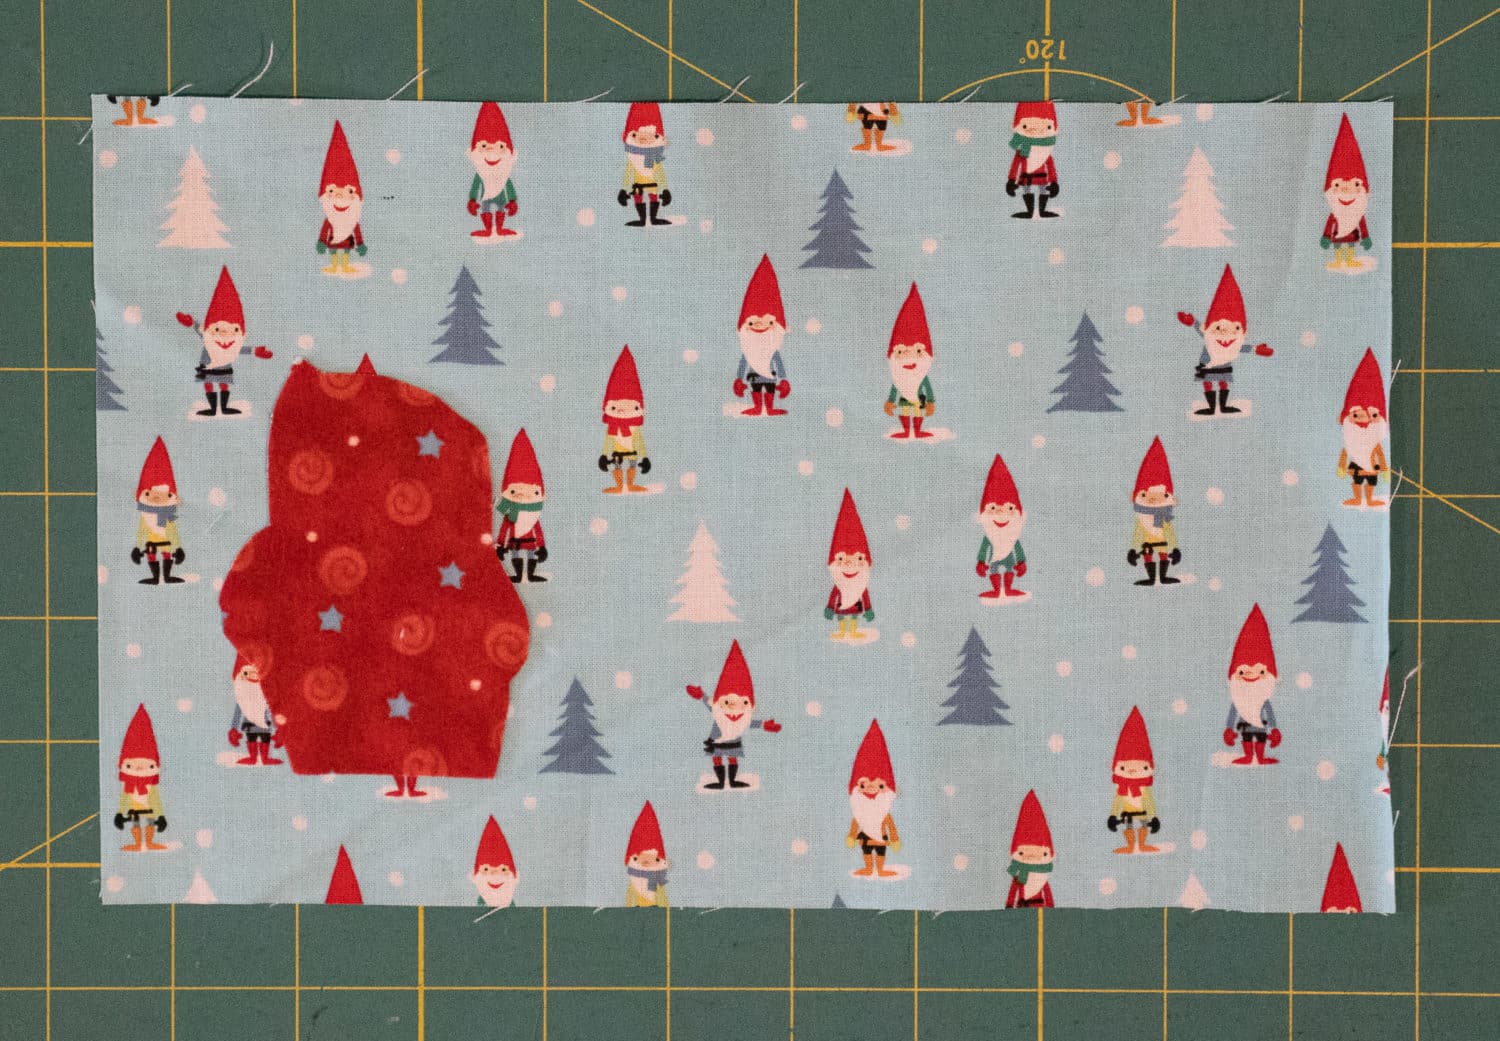
Place main body (red with stars) on background of mug rug and iron in place.
Applique gnome to background fabric using a satin stitch. If you have a basic zigzag on your machine, take the length down to .3-.5mm for a satin stitch. (I show you this at the beginning of the video below.) After sewing the body of the gnome, continue with the hat and beard.
Once all of your pieces are appliquéd on, you’re ready to make your quilt sandwich.
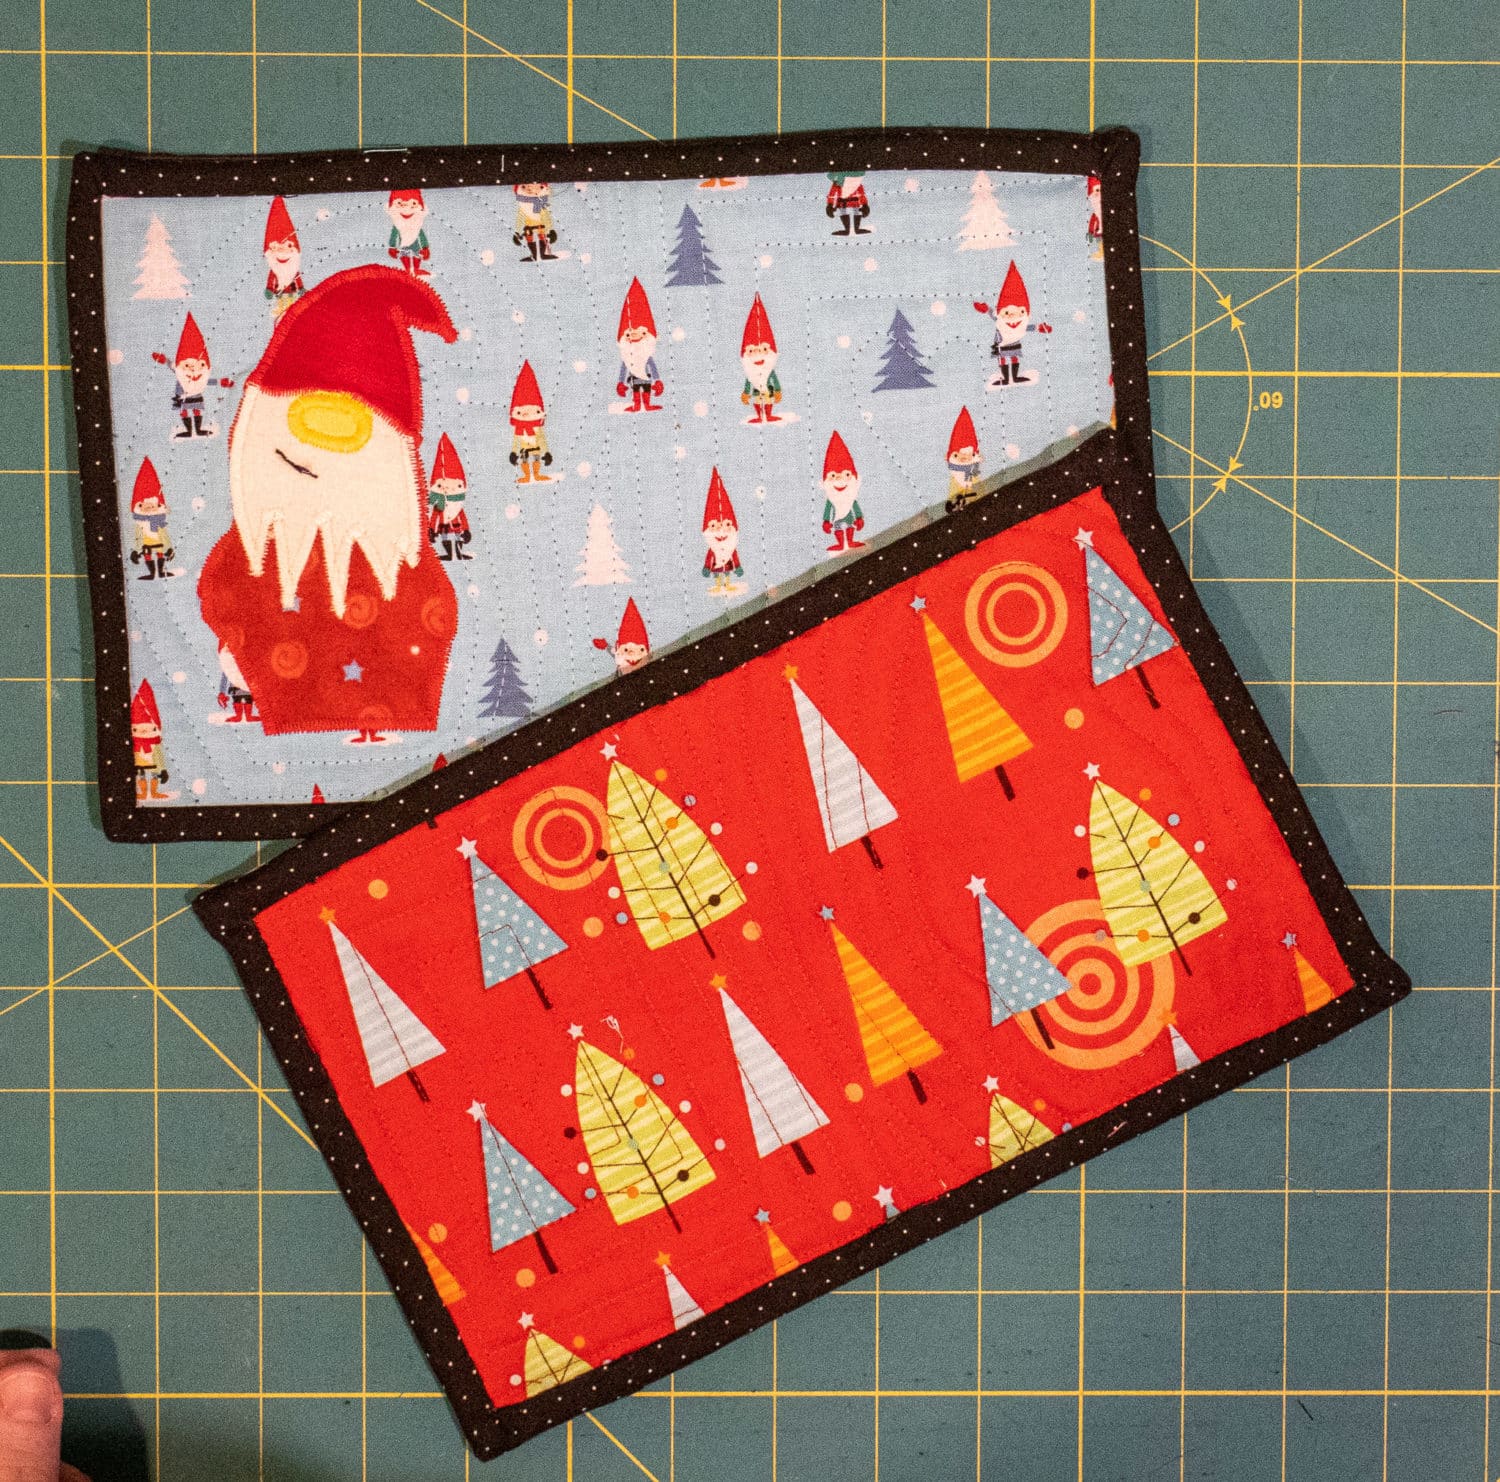
Quilt as you would like. Just your normal foot and a straight stitch is fine.
Apply binding, turn and hand stitch your binding to the back. For in depth instructions on how to do this, see the previous Mug Rug post here.
And that’s it! I’ve gotten a little addicted to these. The gnome brings me a LOT of joy. I hope you enjoy the mug rug with a gnome appliqué too. ❤️
Thank you for the tutorial. I’ve been “into” gnomes since we lived in Scandinavia back in the 70s.
thank you so much! he is just so cute!
so cute thank you for this for free….