
Swimsuit season is upon us and I love making swimsuits! Store bought tankinis are too short on me and this year I am nursing which gives me even more reason to sew up a couple for myself. Let’s face it, nursing suits are rare, they are not appealing and are very expensive. I also happen to enjoy picking out fabrics that I like.
I am not a lay-in-the-sun type of girl, I like to get out and PLAY! I swim, kayak, paddleboard, waterski and play in the sand with the kids. I do not want a wardrobe malfunction after resurfacing from a dive or splashing off the slide. For this tankini, I used our fabulous Agility pattern, the nursing a-line with a strappy back to be more specific. The same could also be done using the Agility overlay version as well as our other tank pattern, the Versatility (Women’s and Kids patterns available separately). Now, you could just follow the pattern exactly and come out with a great tankini, but I also added sewn-in bra cups and slimmed the sides down a bit so it will not float up in the water.
My fabrics include the beautiful nylon lycra palm trees and poly/cotton/nylon swimsuit lining. The Fabric Fairy carries a large selection of swimsuit prints, solids and also lining material. If you need more support for the bra portion, check out our blog post on supportive fabrics, many of which can be used in swimwear. Other notions I used are polyester thread (I like Gutermann) and stretch (not ballpoint) needles.
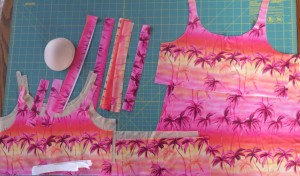 When I cut out my pieces, I used the nursing layer pattern piece and cut two linings in addition to the one in my outer swim fabric (as seen on the left side of the picture). For the bra back, I cut one of my two pieces in the lining also (bottom center of picture). All other pieces are cut as detailed in the tutorial. You could get away with using only one layer of lining. Really, it comes down to personal preference. If you find the fabric of the cups to be scratchy and therefore do not want them against your skin, cut two layers of lining. If you don’t mind the cups being against your skin, one layer will work just fine.
If you do think you need the support of something more like power mesh, you can cut one lining piece from it and the other from standard swimsuit lining fabric. Since some people find the power mesh to be bit on the scratchy side, I recommend using the power mesh layer between the regular swim lining and the outer fabric.
I purchased my cups from Wawak. They have a few styles and sizes to select from including round, demi, and teardrop. I used the round cups which are quite structured and really more cup than I prefer, but live and learn, right? Sew Sassy Fabrics also carries basic and push up cups for swimwear.
If you are wanting to make a regular (non-nursing) tankini, use the bra front pattern piece to cut your two lining pieces, then use your bra back pattern piece and cut using the swim lining (and/or power mesh). Follow the cutting diagram in the tutorial for the remaining pieces. When it came time to sew, I assembled the bra and left the elastic band off. I also pinned my straps on in the back and left that for final adjustment later, after the bra elastic was in place.
With the bra mostly assembled, I headed to the mirror with cups and pins in hand. I tried it on, placed the cups BETWEEN the two lining pieces and readjusted several times, finding just the right position for the cups and then pinned them into place. 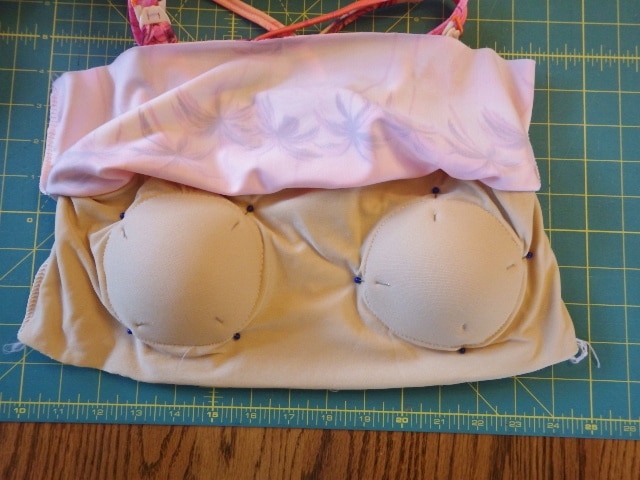 If you are using only one lining, be sure your cups are next to your skin. This will prevent an outline of the cups from being seen through your outer fabric layer.
When I had them just right I headed back to the sewing machine and used a zigzag stitch, sewing through the two layers of lining and the cups. Be sure you only sew through your your lining and cups, even if you are making the overlay version. You don’t want your stitches to show on the outside. This is the inside of the lining pieces with the cups sewn BETWEEN the two layers of lining.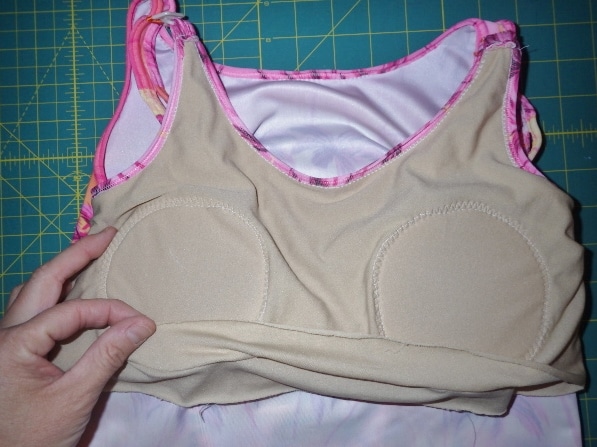
Now you can complete the bra and move onto the lower portion of the bodice. I wanted to slim down the shirt portion of my tankini to keep it from floating up. I tried it on, determined where I needed to bring in the seams, made my adjustments and then finished by hemming the bottom.
Yay, a beautiful and one-of-a-kind tankini that I can both nurse and play in!
If you are not a fan of sewn in cups, we also have a tutorial for removable swim cups!
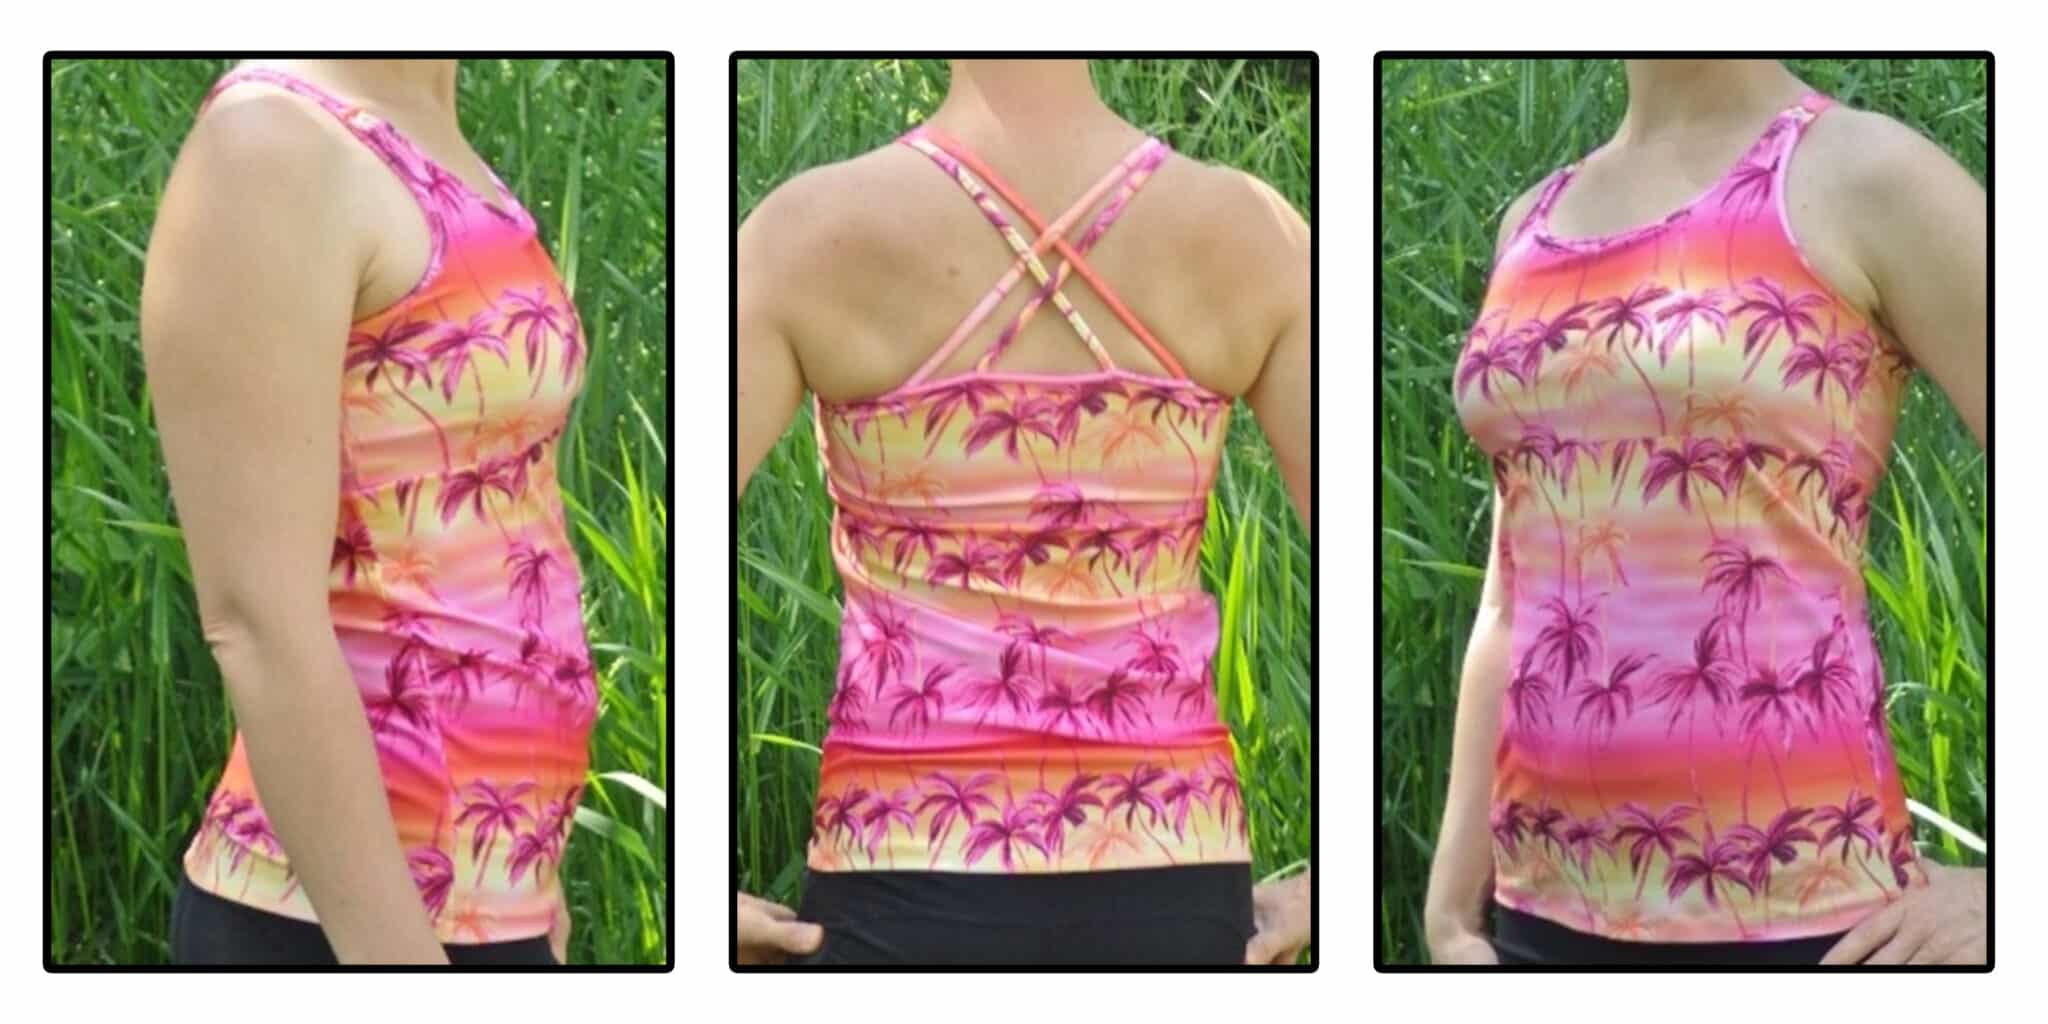
 Are you concerned about nursing modestly in a swimsuit? I think this picture leaves no doubt that it is possible. We have more swim modifications coming including how to modify our tank patterns to allow the use of removable pads. Have you seen our upcoming skort pattern? It will be released in the next few weeks!

We would love to see your finished tankini, join us in 5 Out Of 4 Patterns Group and show it off! Be sure to follow the Dive Into Swimwear blog tour with Cole’s Corner and Creations to learn tips and tricks and other great information about sewing for swimming plus a chance to win prizes!
Don’t forget to check out the other two posts in this series: Removable Bra Cups and The Adventure Skort-The Swim Edition.
Happy sewing and enjoy some swimming!

Your tankini looks great! Thanks for the helpful tips. I hope to sew a few suits soon.
Love this! Just in time for me to make me one!
I love this blog post! Thank you so much for joining our blog hop!
Your swimsuit looks fabulous and I did not know that wawak carried bra cups!!! How did I not know that?
Thank you Nicole! It was great fun being a part of our first blog hop.
Thanks for the reat tips on sewing a suit for yourself…after I conqure the kids suits I might have to atempt this!
Can’t wait to try this! Thanks for doing the Coles corner sew along!
thanks for being a part of dive into swimwear!!
I love this!! I always have problems with my swimsuit “malfunctioning” and now that I’m a mom, I want something cute but also practical! lol Thanks so much for being a part of Dive Into Swimsuits!
LOVE it! So cute! The strappy back looks awesome!
WOW, that is beautiful on you!!! I’m so inspired!
This is such a cool hack and so resourceful, even though my breastfeeding days are over 🙂
This looks so amazing and well worth the effort!!!
Great idea for nursing moms! Wish patterns like this had been around when I nursed my babies. Back in the 70’s!!
I really need to try to make a swimsuit…..
Great tutorial on the bra cups. Tankini is awesome.
Very inspiring! I would love a custom fit swimsuit!
Too late for me, but a nursing swim suit is a great idea. Thanks
Thank you. The same idea can be applied to regular non-nursing swimsuits as well and the patterns we make include both nursing and non-nursing patterns. 🙂
Great suit and great tutorial! I’ll be nursing a newborn this summer, and this will be perfect.
Thanks so much for this! It’s winter in Australia at the moment but I’m already planning my nursing friendly swimsuit ready for summer! Besides, winter doesn’t last long here anyway 😉
Great info. I’m not sure I will attempt a women’s suit as my first. I am a bit nervous. Thank you for the links for the items required.
Love it, very stylish! Love the strappy back and how it’s not skin tight on the stomach
I truly enjoyed reading about sewing in bra cups, which I need. I’m way past nursing and I have 4 now adult kids and would have loved the nursing bra swimsuit! I have gained much weight and the suits that are out for older plus size women are ugly. I decided to try adjusting a basic pattern for myself and wasn’t really sure about the bra part,. Thanks! It helped a lot.
Looking forward to seeing your other blogs.