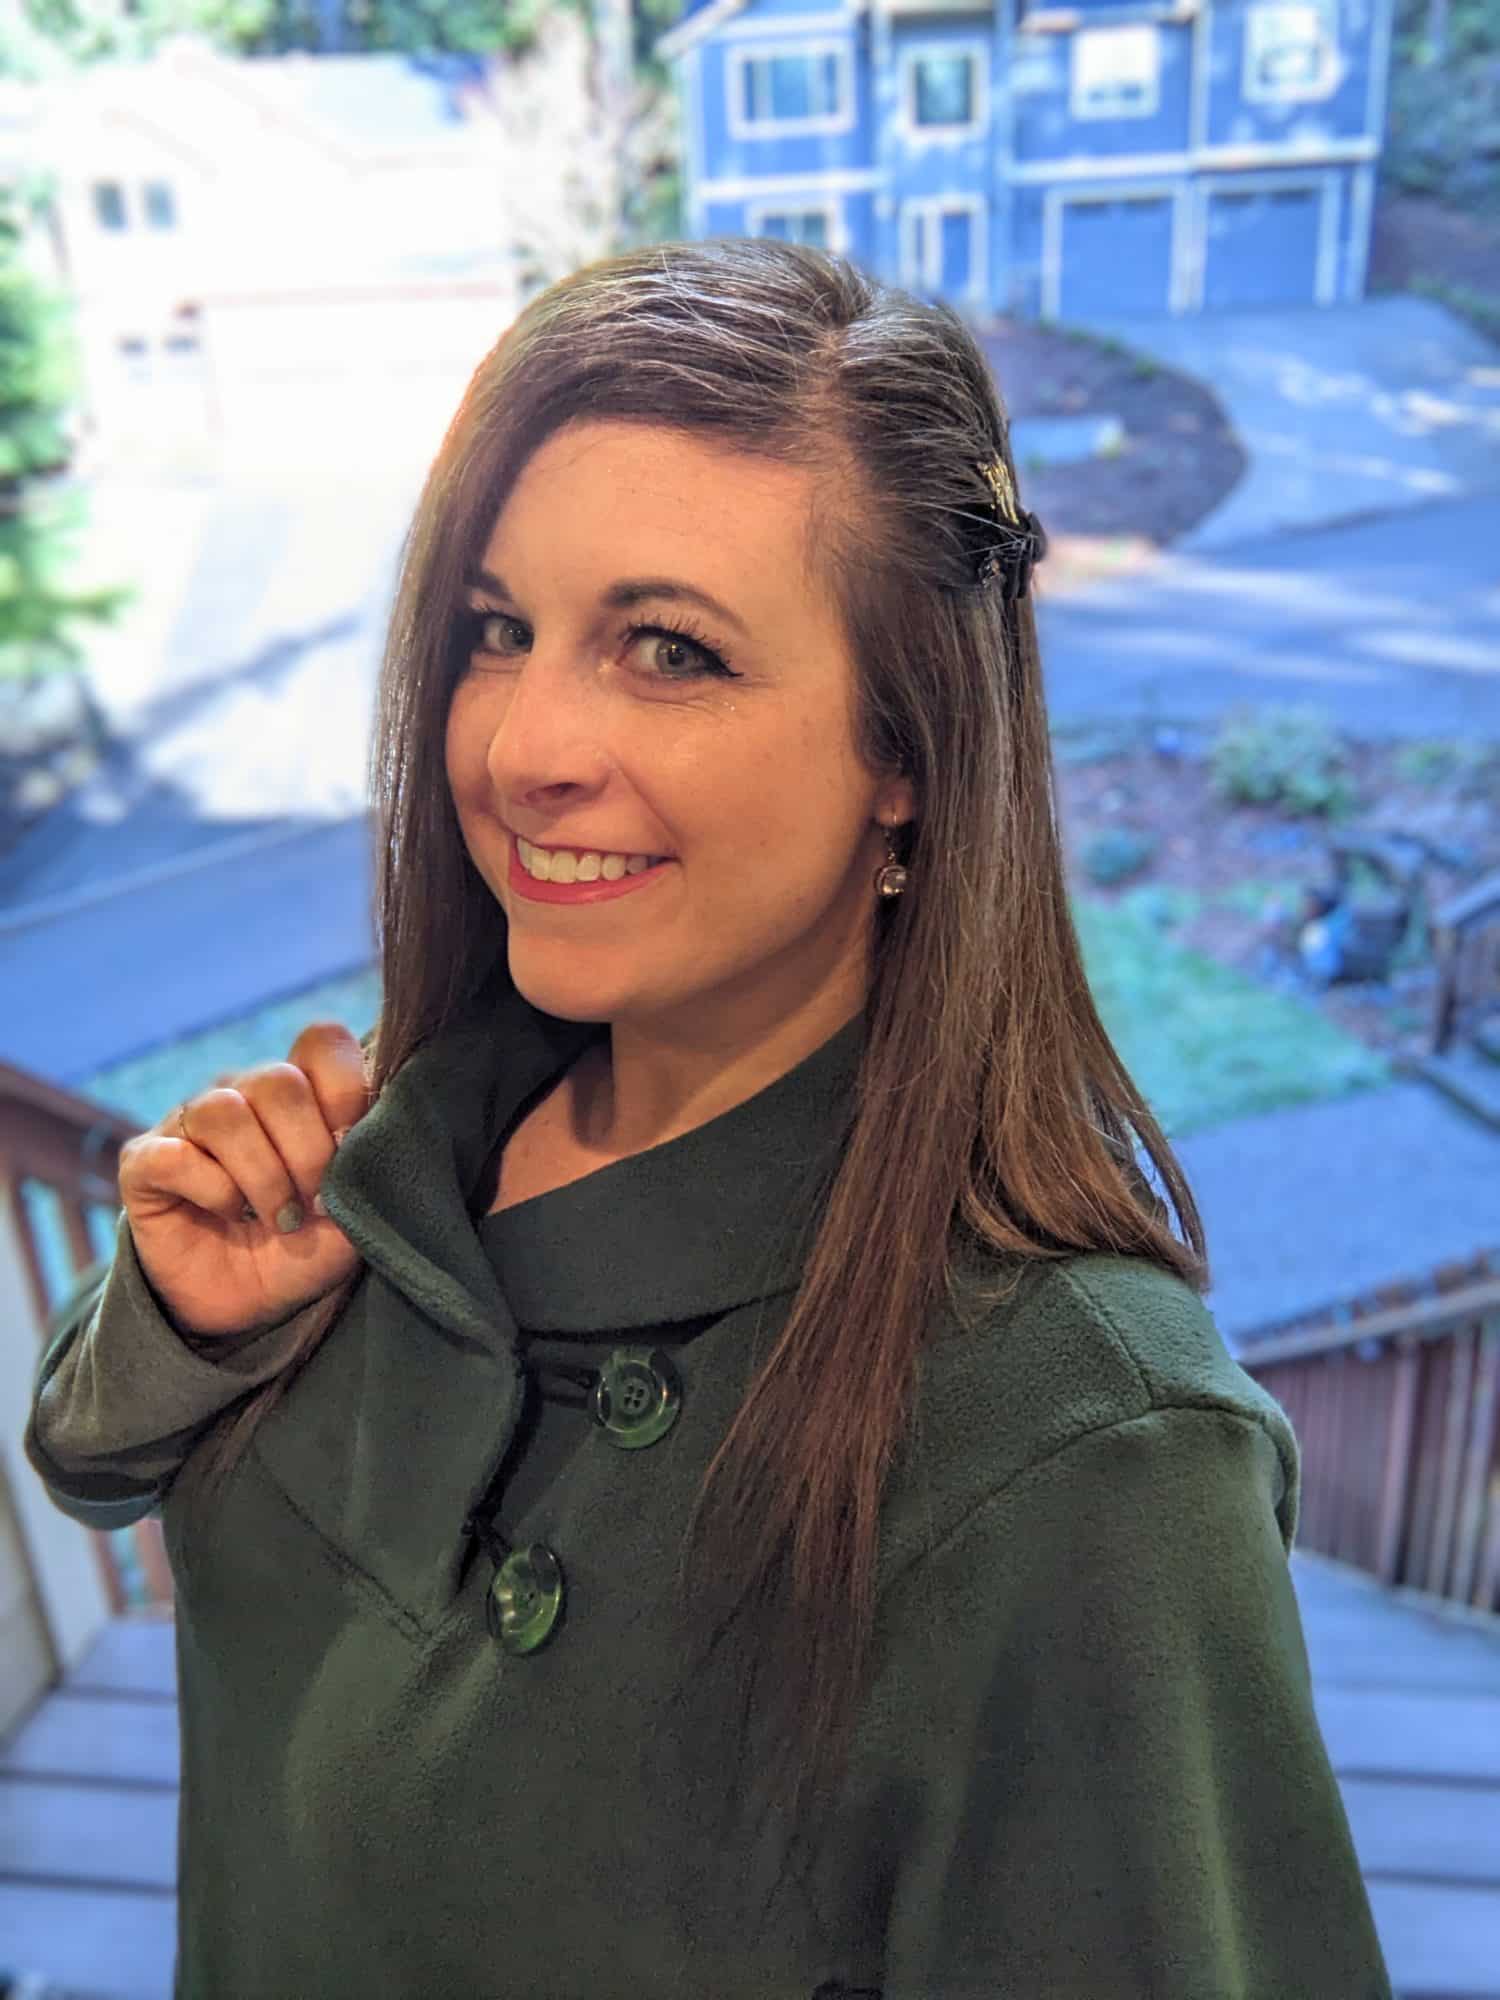
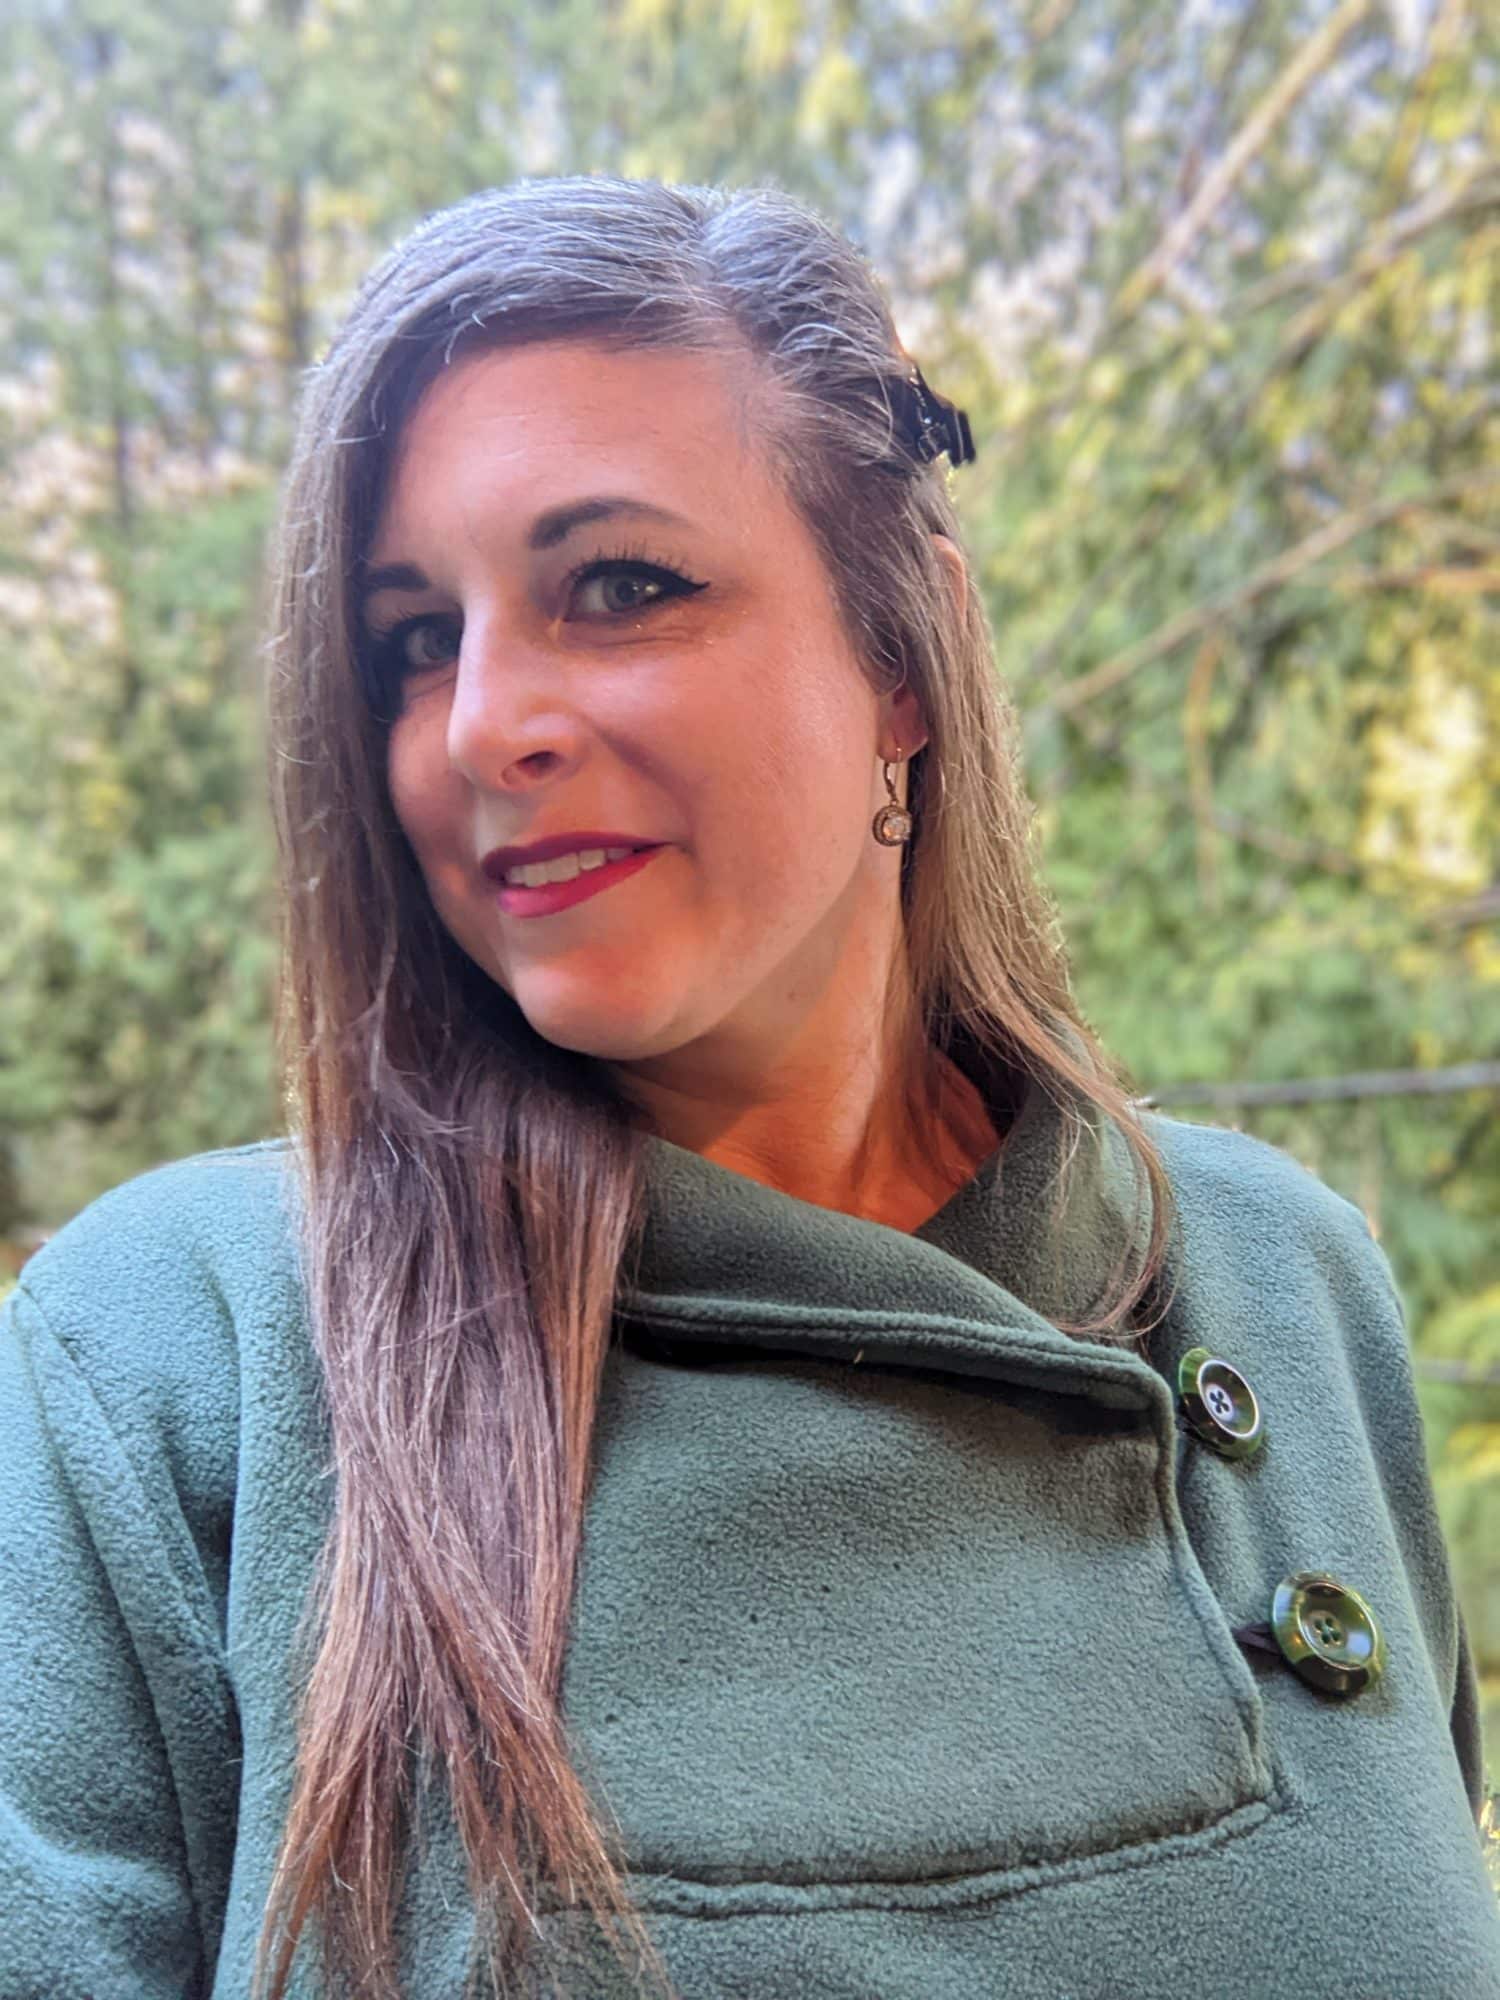
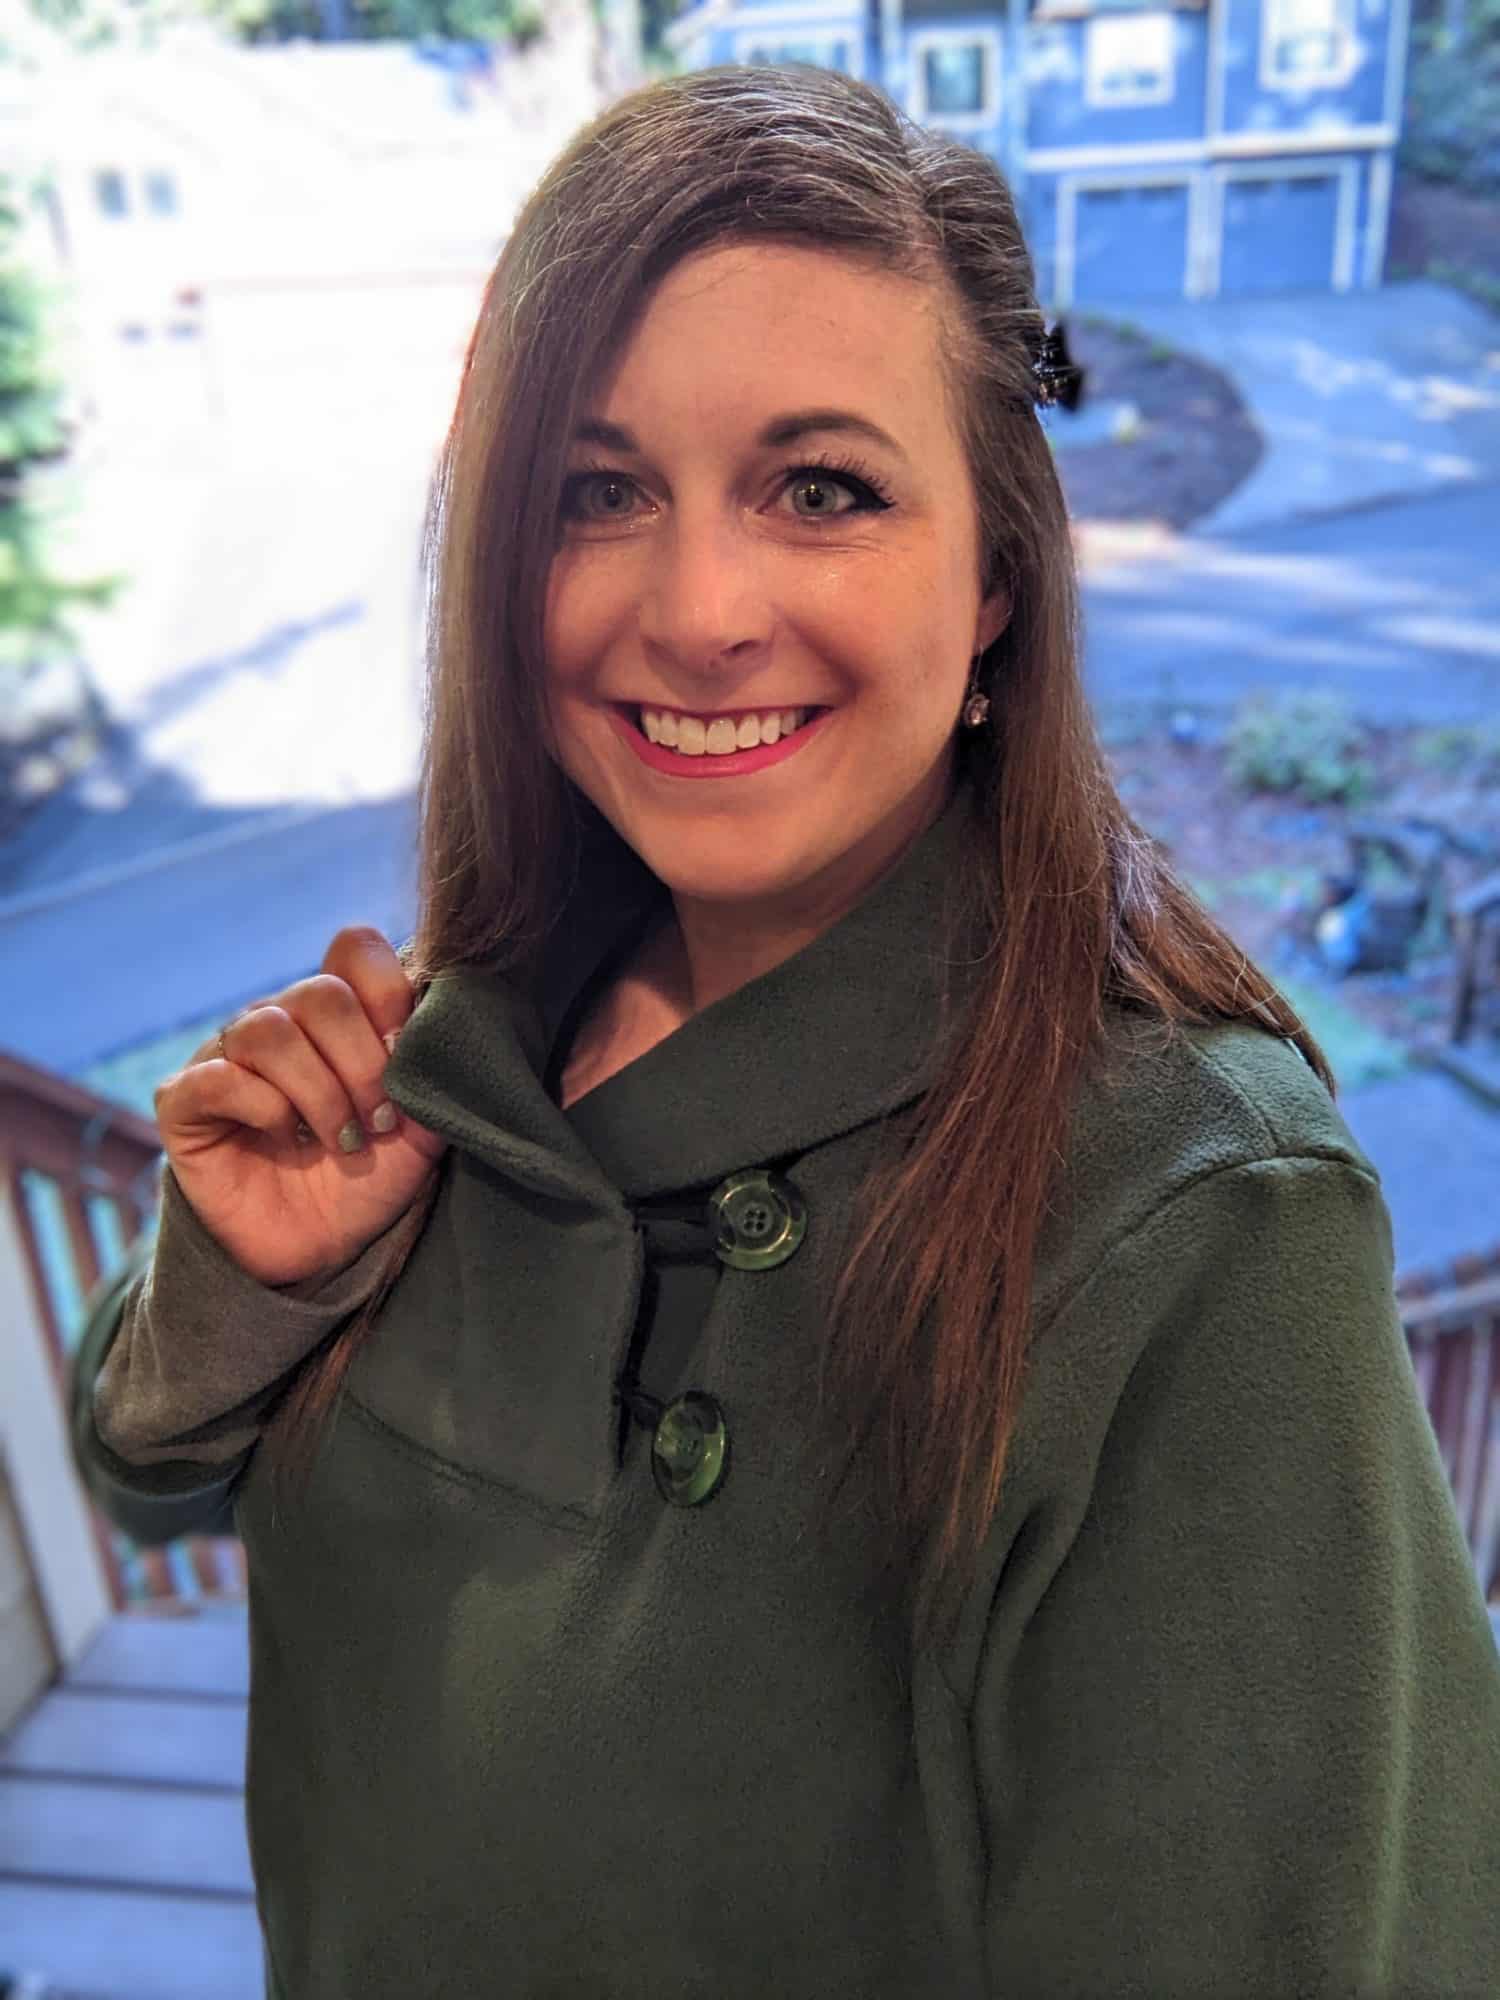
For this Leslie Top, I didn’t have any zippers on hand, but I did have buttons! I made a couple of small changes and now I have a cute and cozy Leslie with a button and loop collar. The same steps apply to the Lester Top too. If you don’t already have your pattern, you can grab the Leslie Top HERE or the Lester Top HERE.
Additional Materials:
- Two buttons or toggles
- Material for loops such as elastic, ribbon, drawstring, or leather string
Cutting the Fabric
- Print out and assemble all of your pattern pieces as outlined in the tutorial using the shawl collar option. (The tall and short collar options will both work.)
- Cut out all of the same fabric pieces for your chosen options the same as you normally would per the instructions in the tutorial
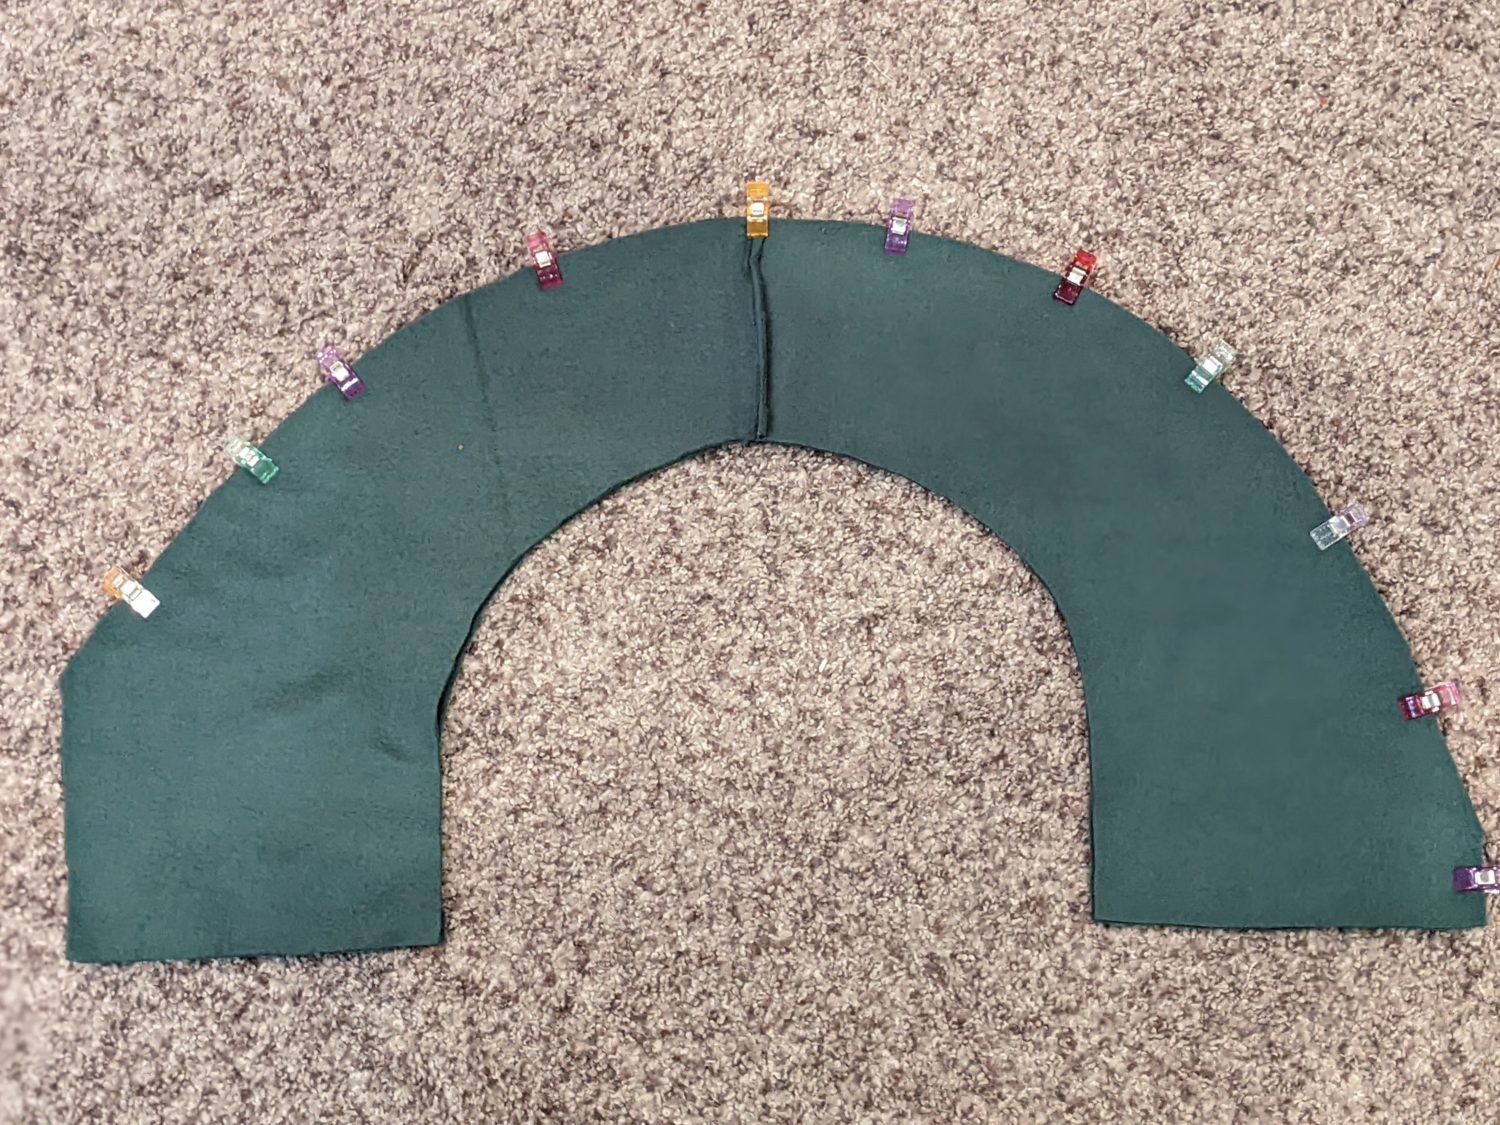
Sew the Collar
- Sew the short ends of both the main and lining pieces to create the longer collar pieces per the tutorial
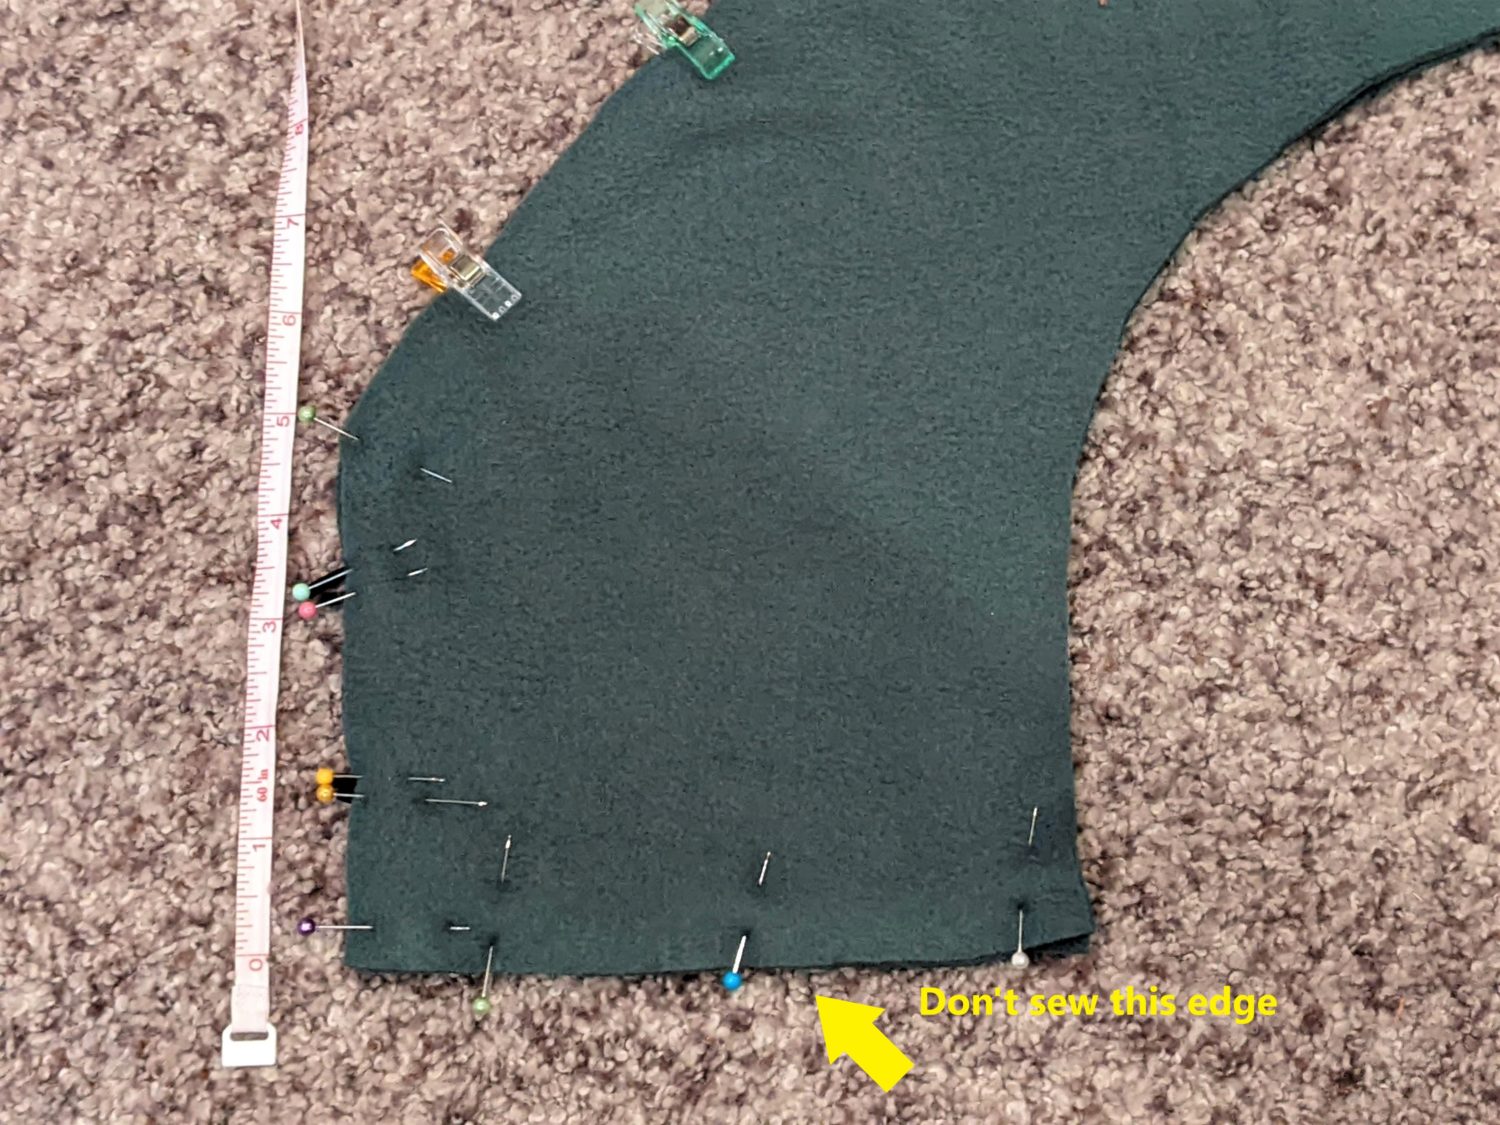
- Once you have your full main and lining pieces, lay them right sides together lining up all of their edges.
- Pin along the top curved edge and down the side that would normally have the zipper.
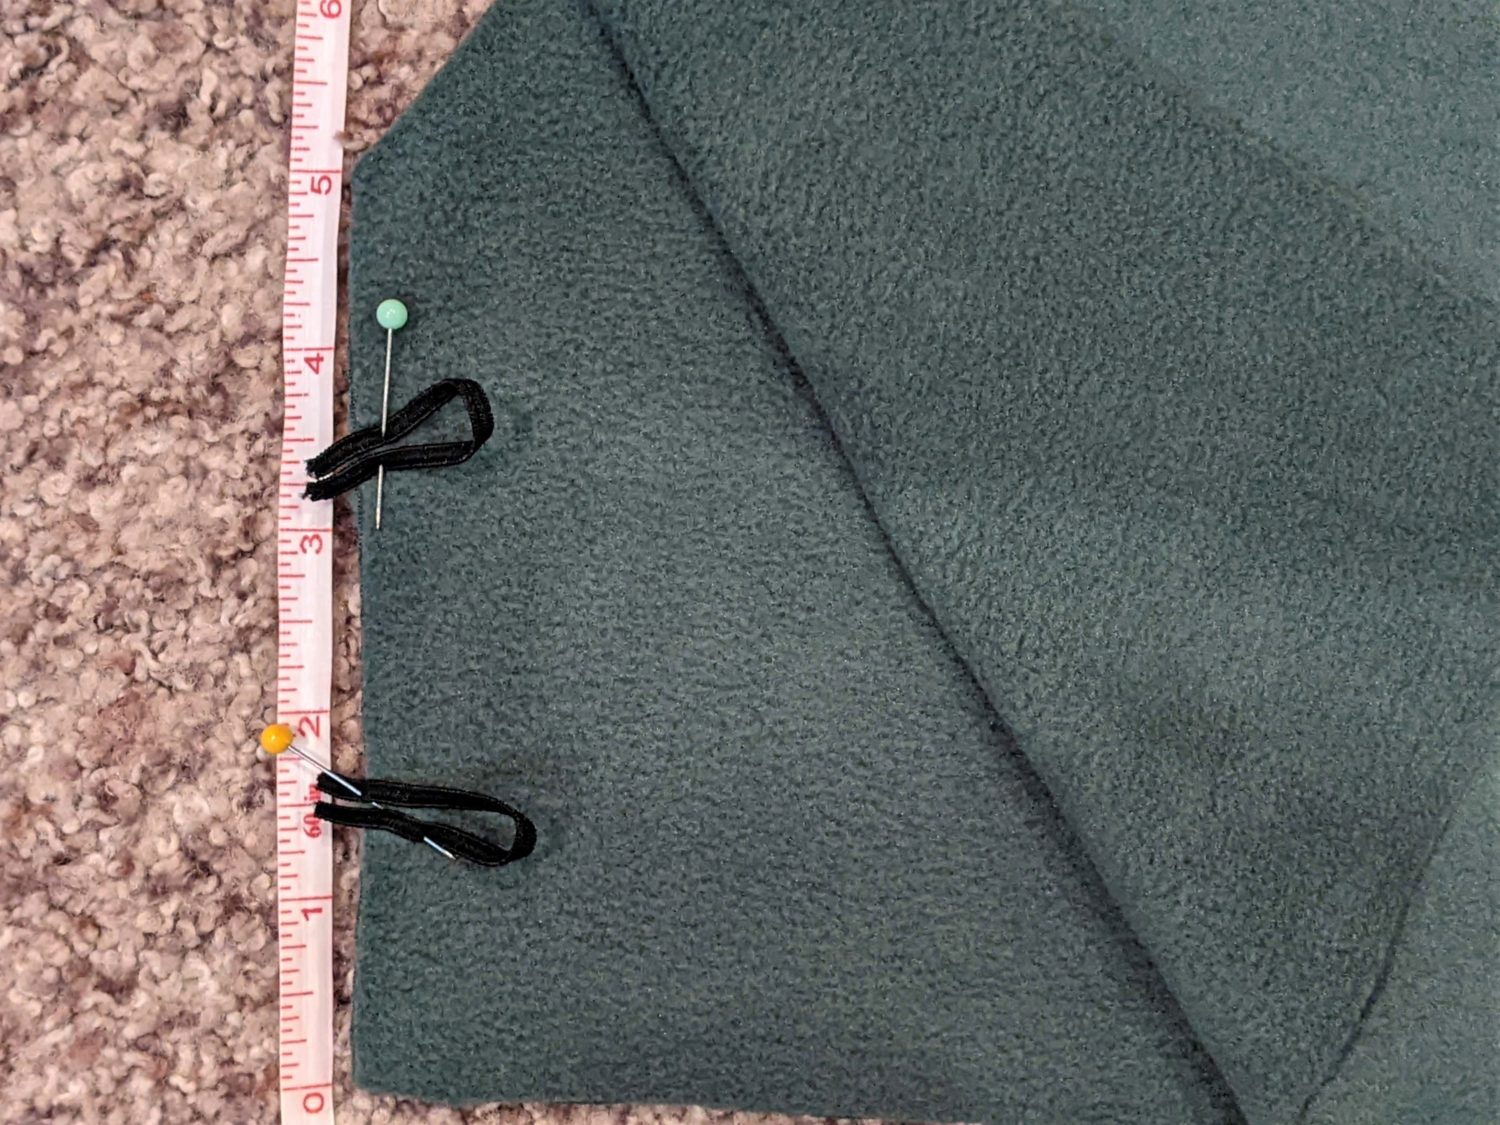
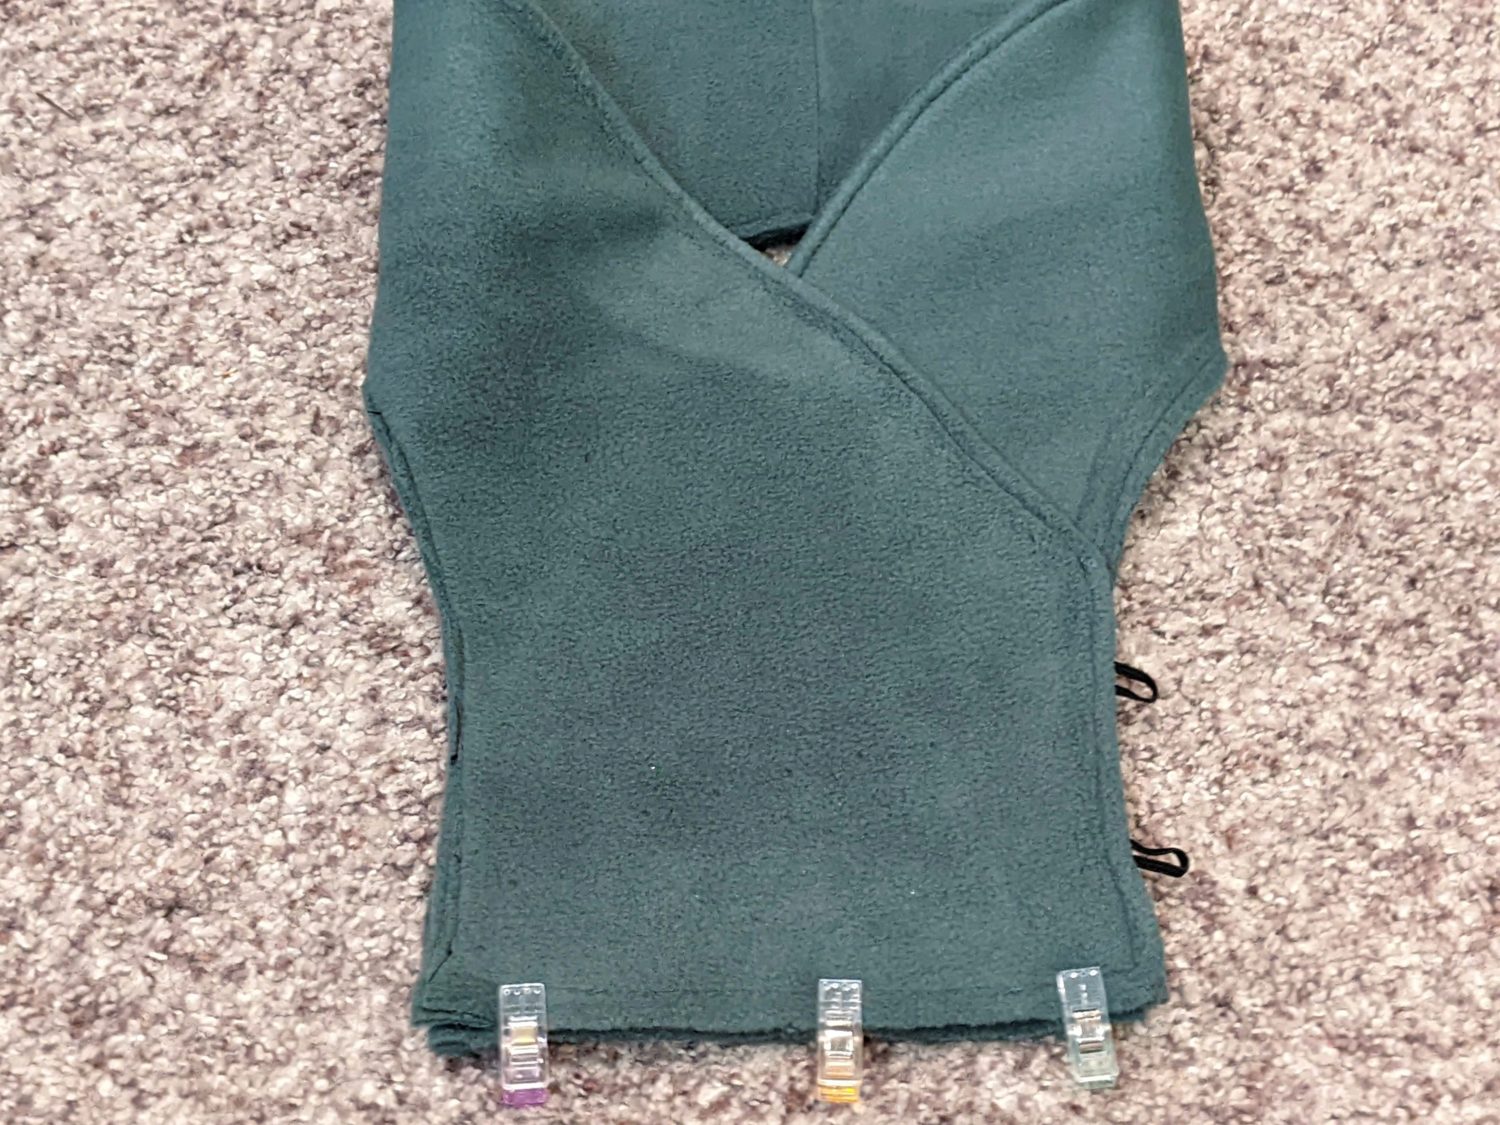
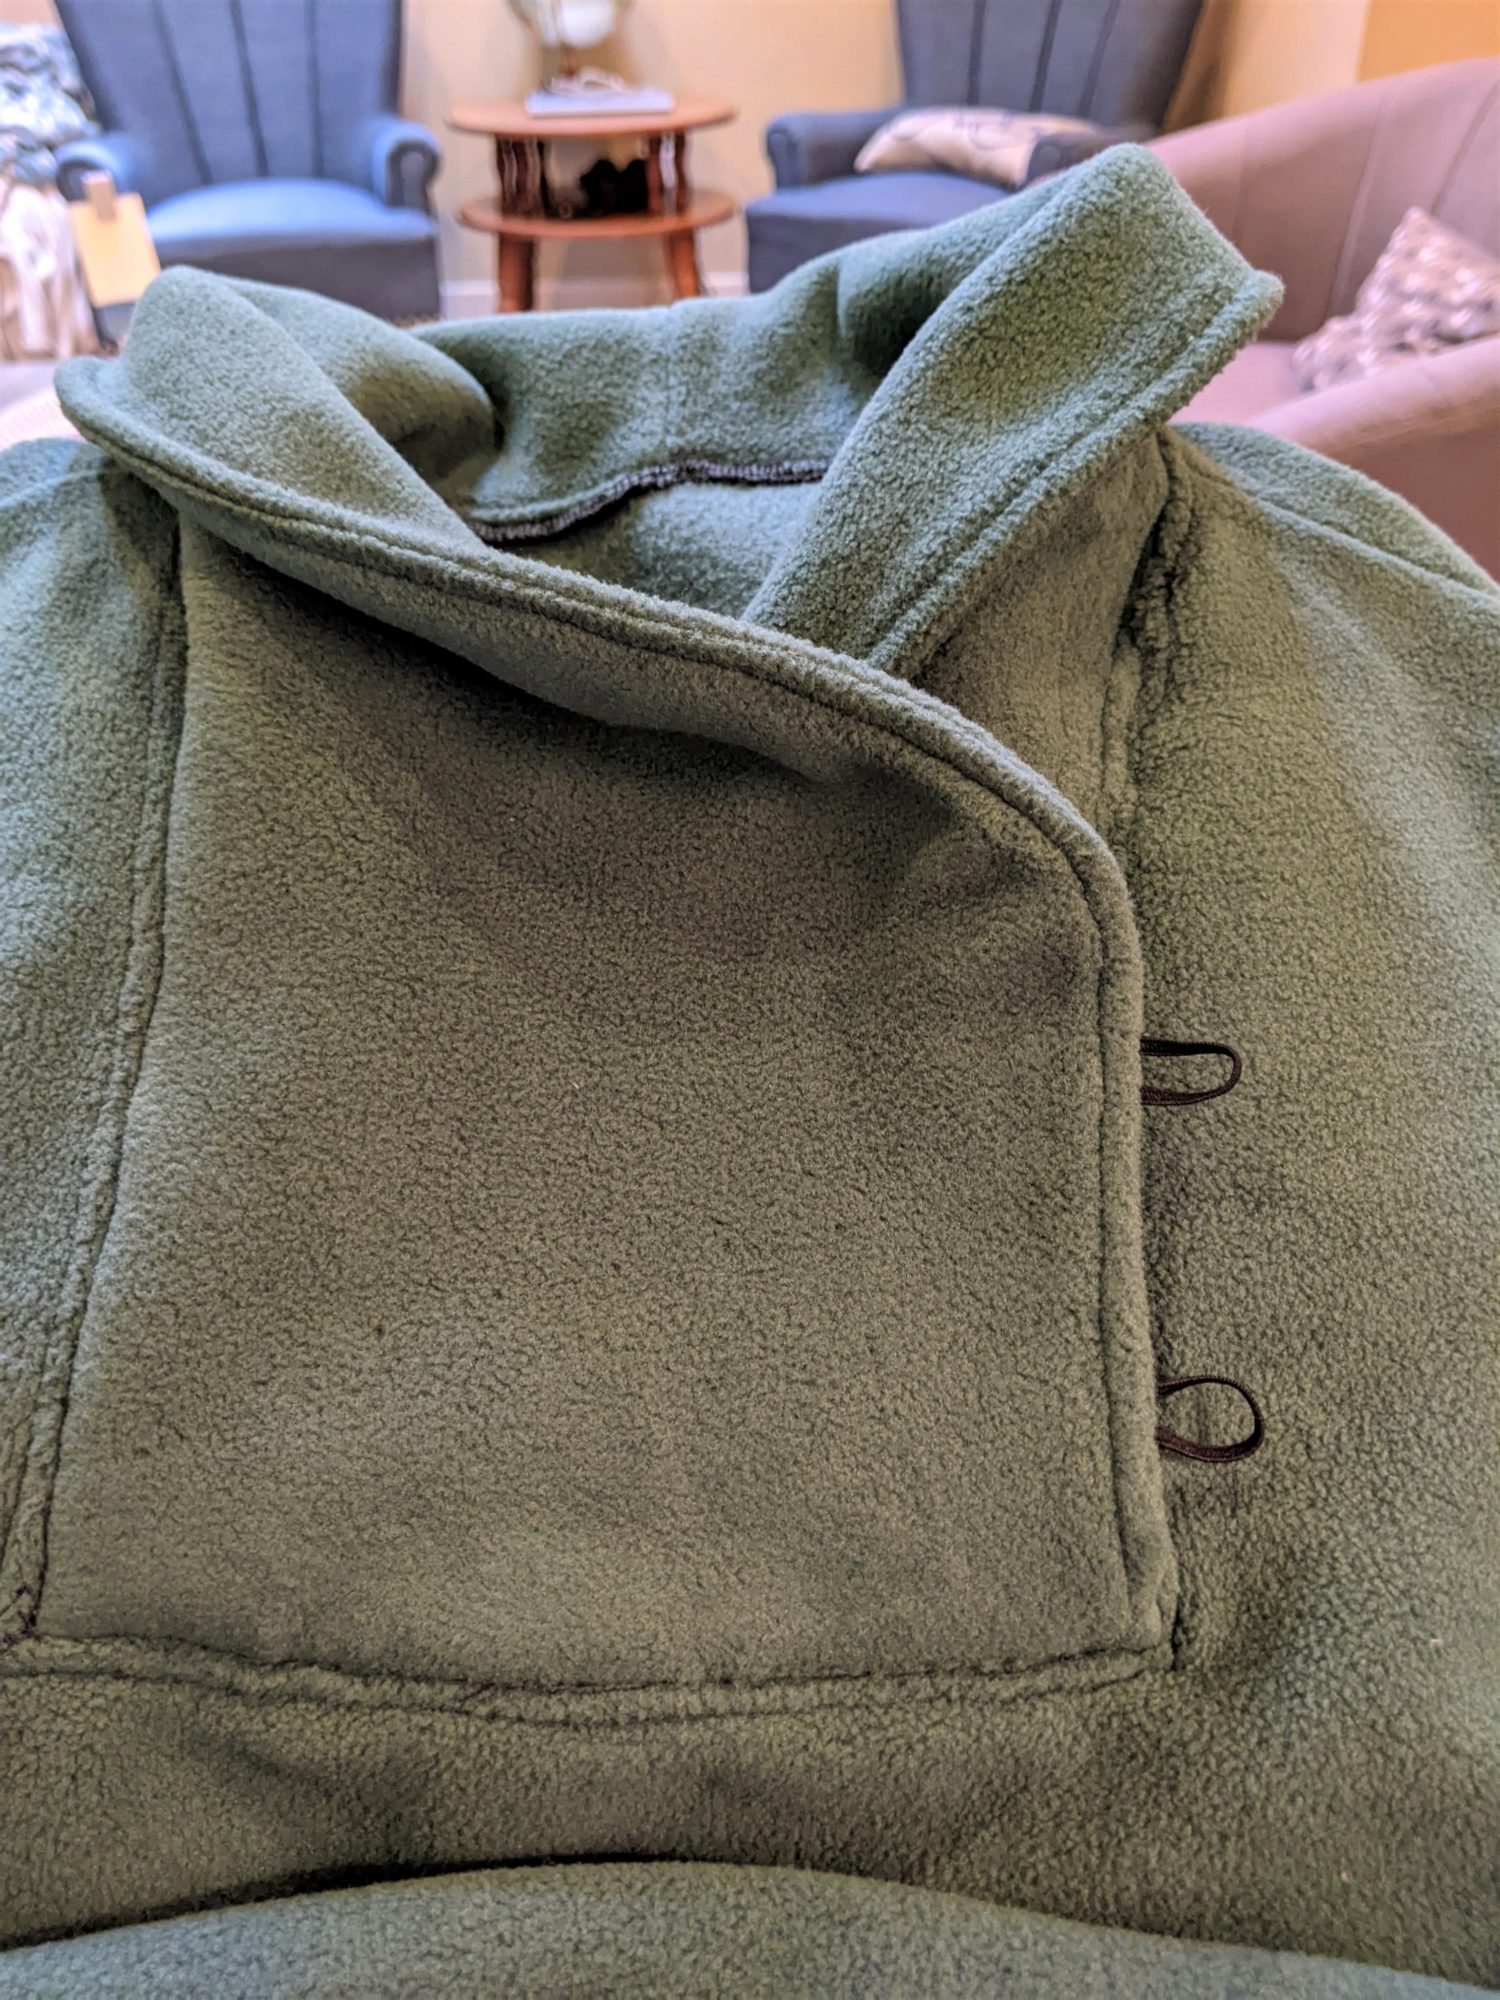
- Cut two pieces of your loop material approximately 4″ long.
- Open the edge where the zipper would have been sewn and measure in 1.5″ from both the top and bottom edges.
- Make two loops from your cut material and place them 1.5″ in from the top and bottom with their loop sides facing in, and raw edges hanging over the fabric edge 1/4″
- Pin the loops in place.
Measure and place your loops
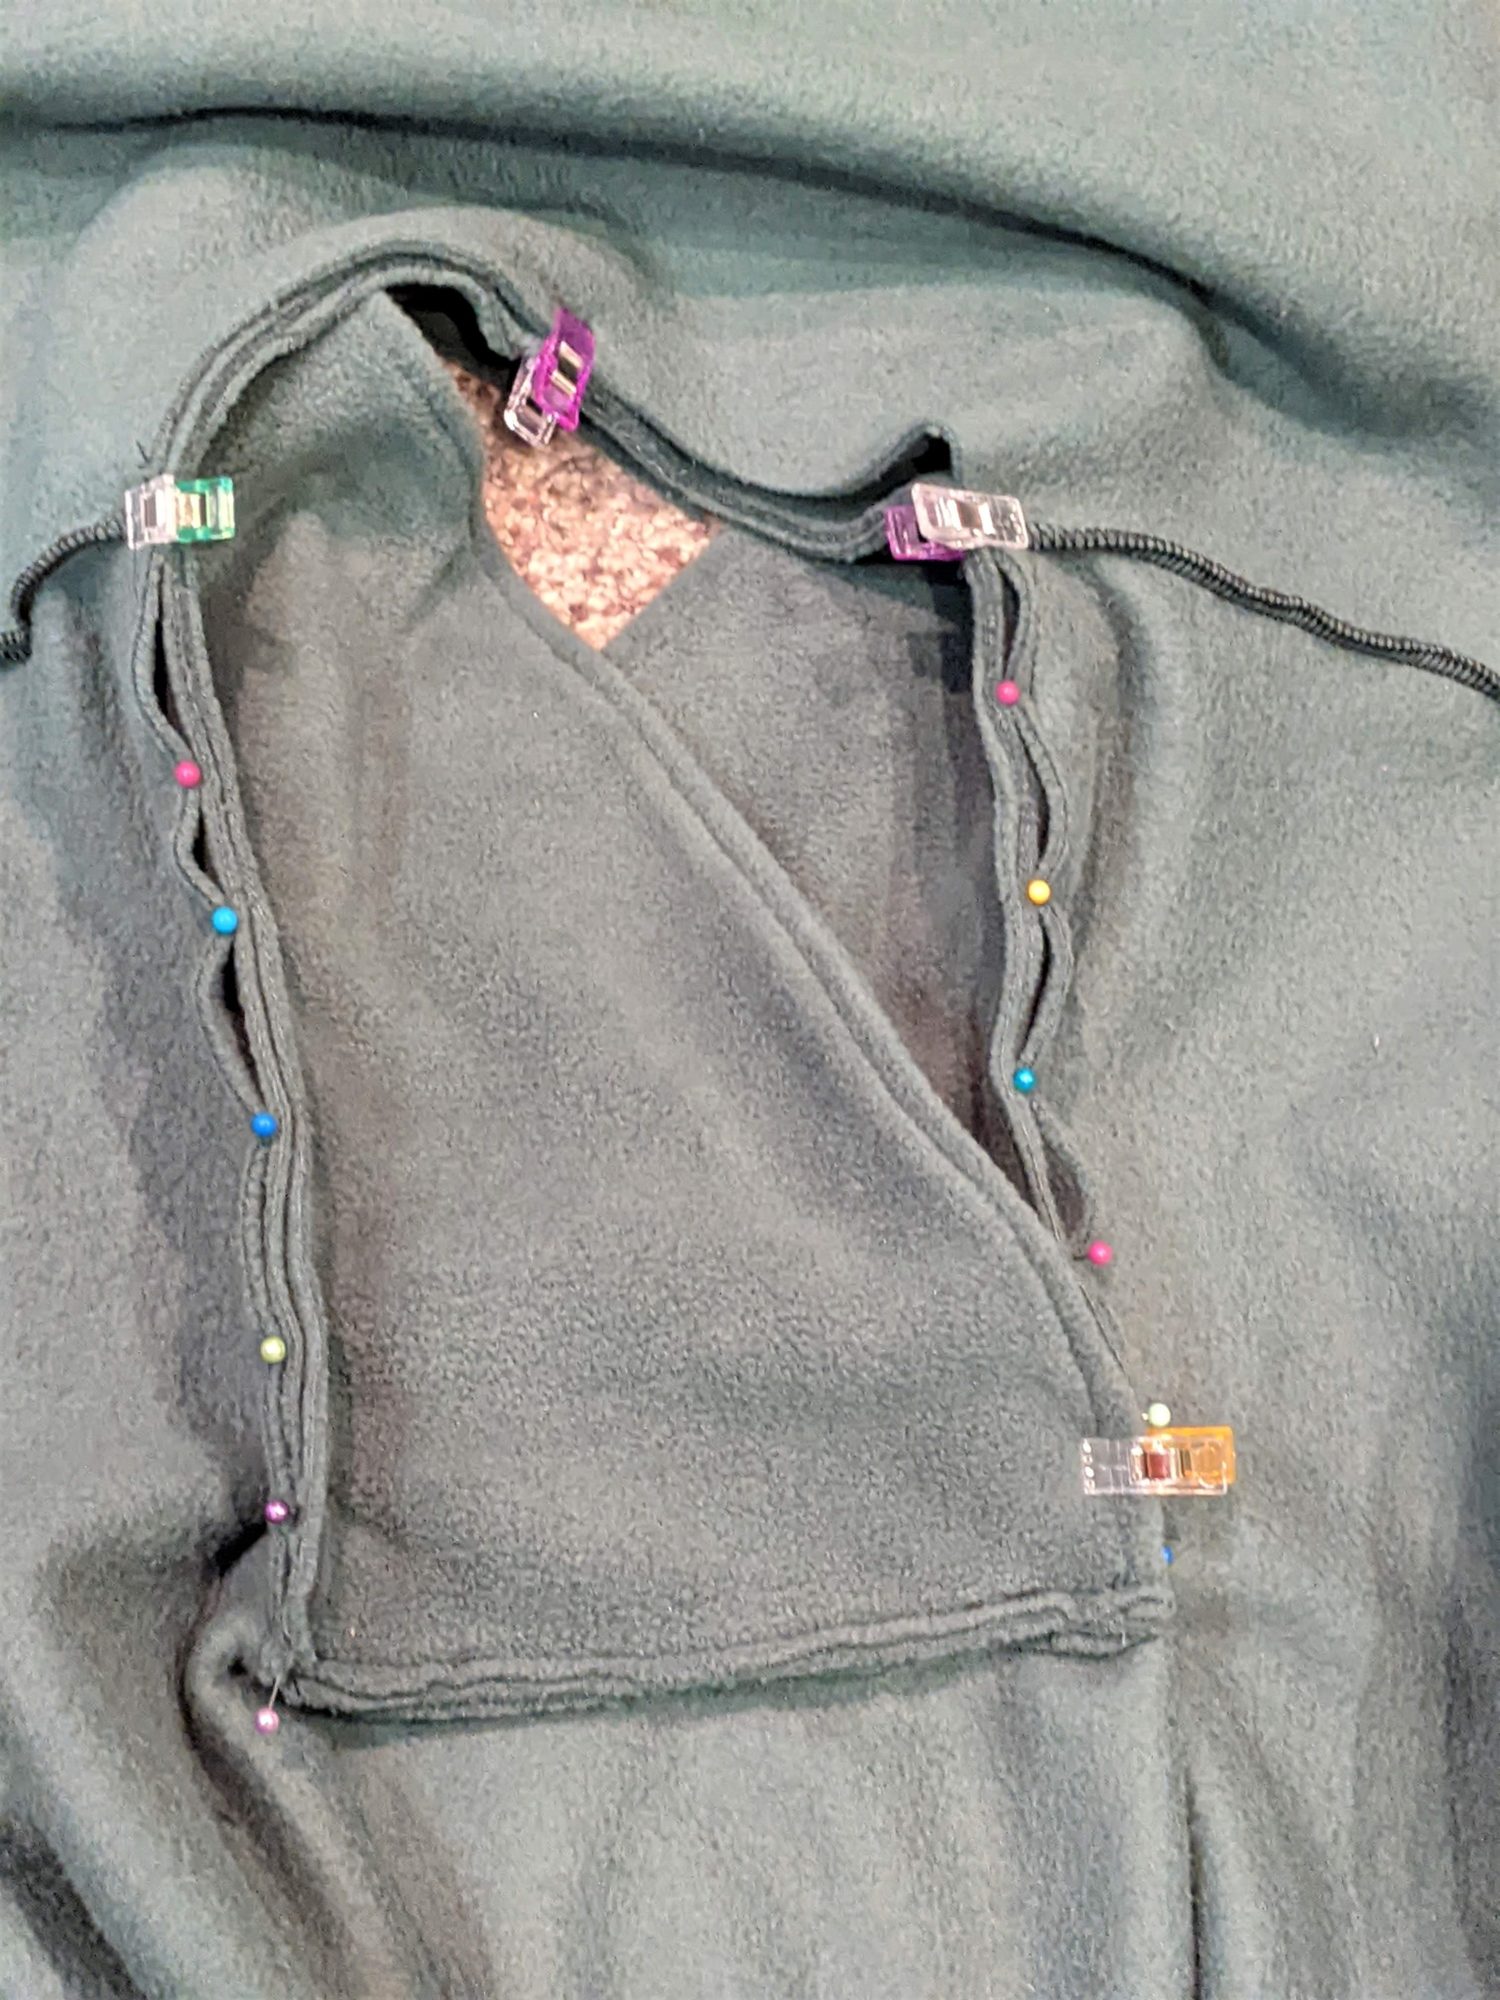
- Flip the other collar piece down to sandwich the loop pieces between the main and lining.
- Pin along the loop edge making sure you keep your loop pieces secure.
- (For some reason, I pinned and sewed the bottom edge also and then went back and removed it. Don’t sew along the short bottom edges.)
- Sew along the loop side using a 1/4″ seam allowance (as that is what is used in the original tutorial for the zipper) then along the top arch with a 3/8″ seam allowance.
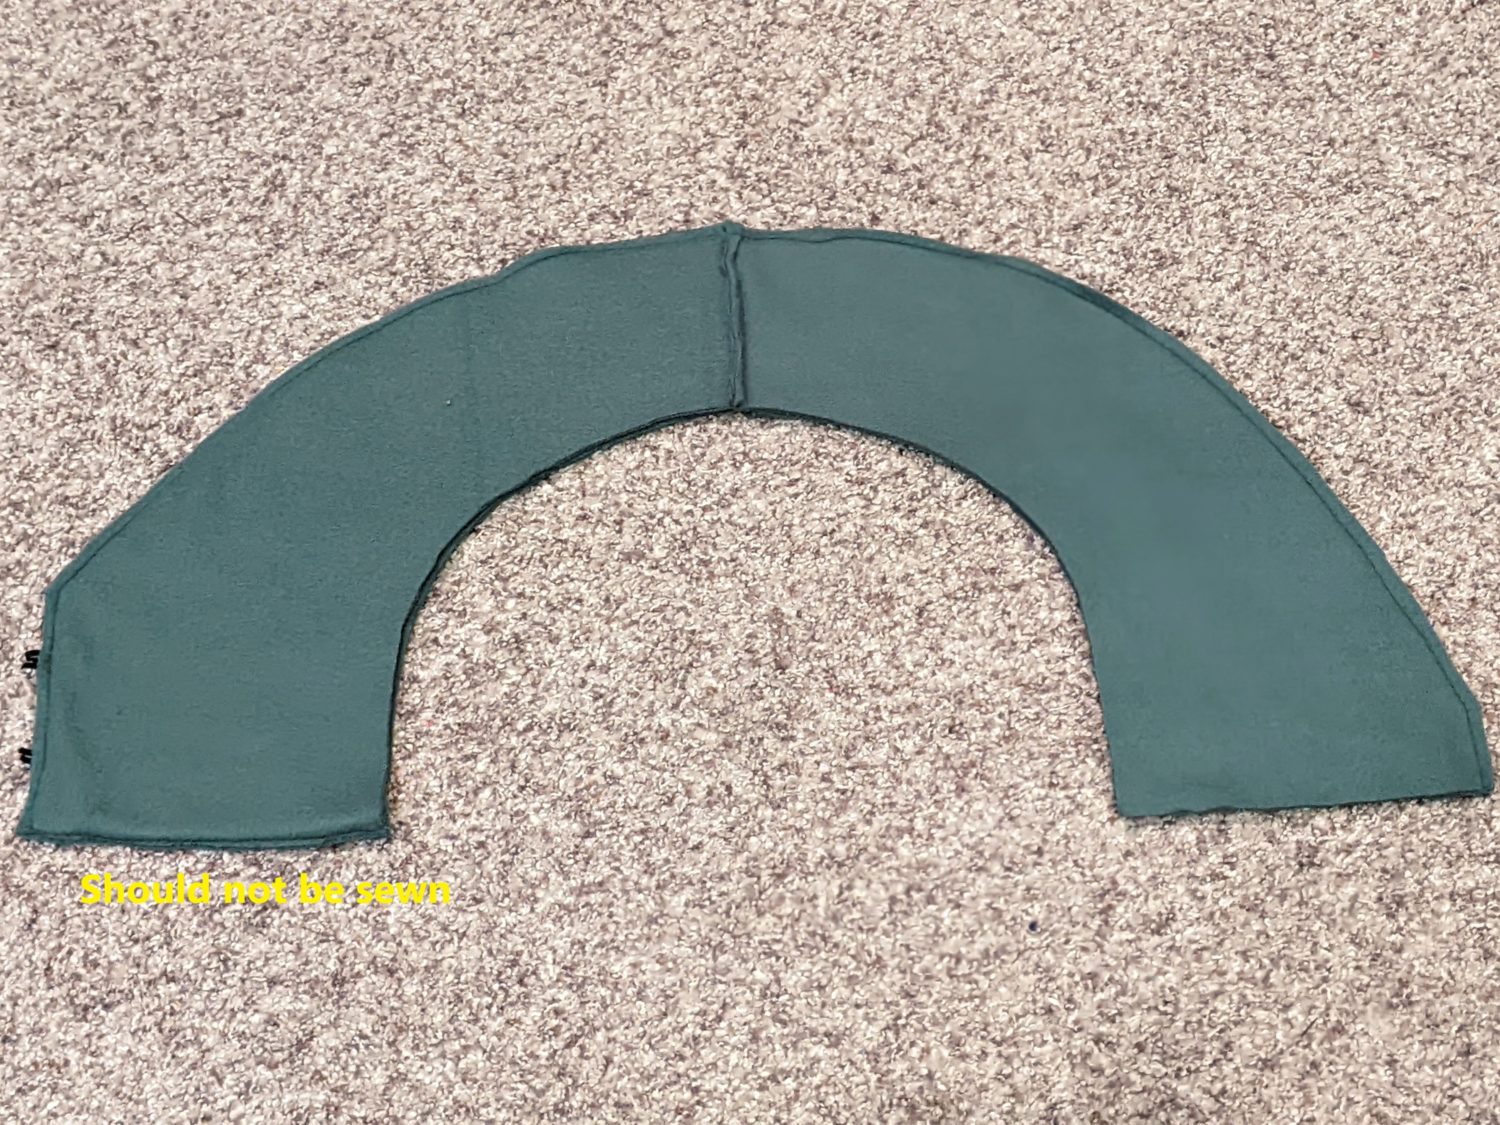
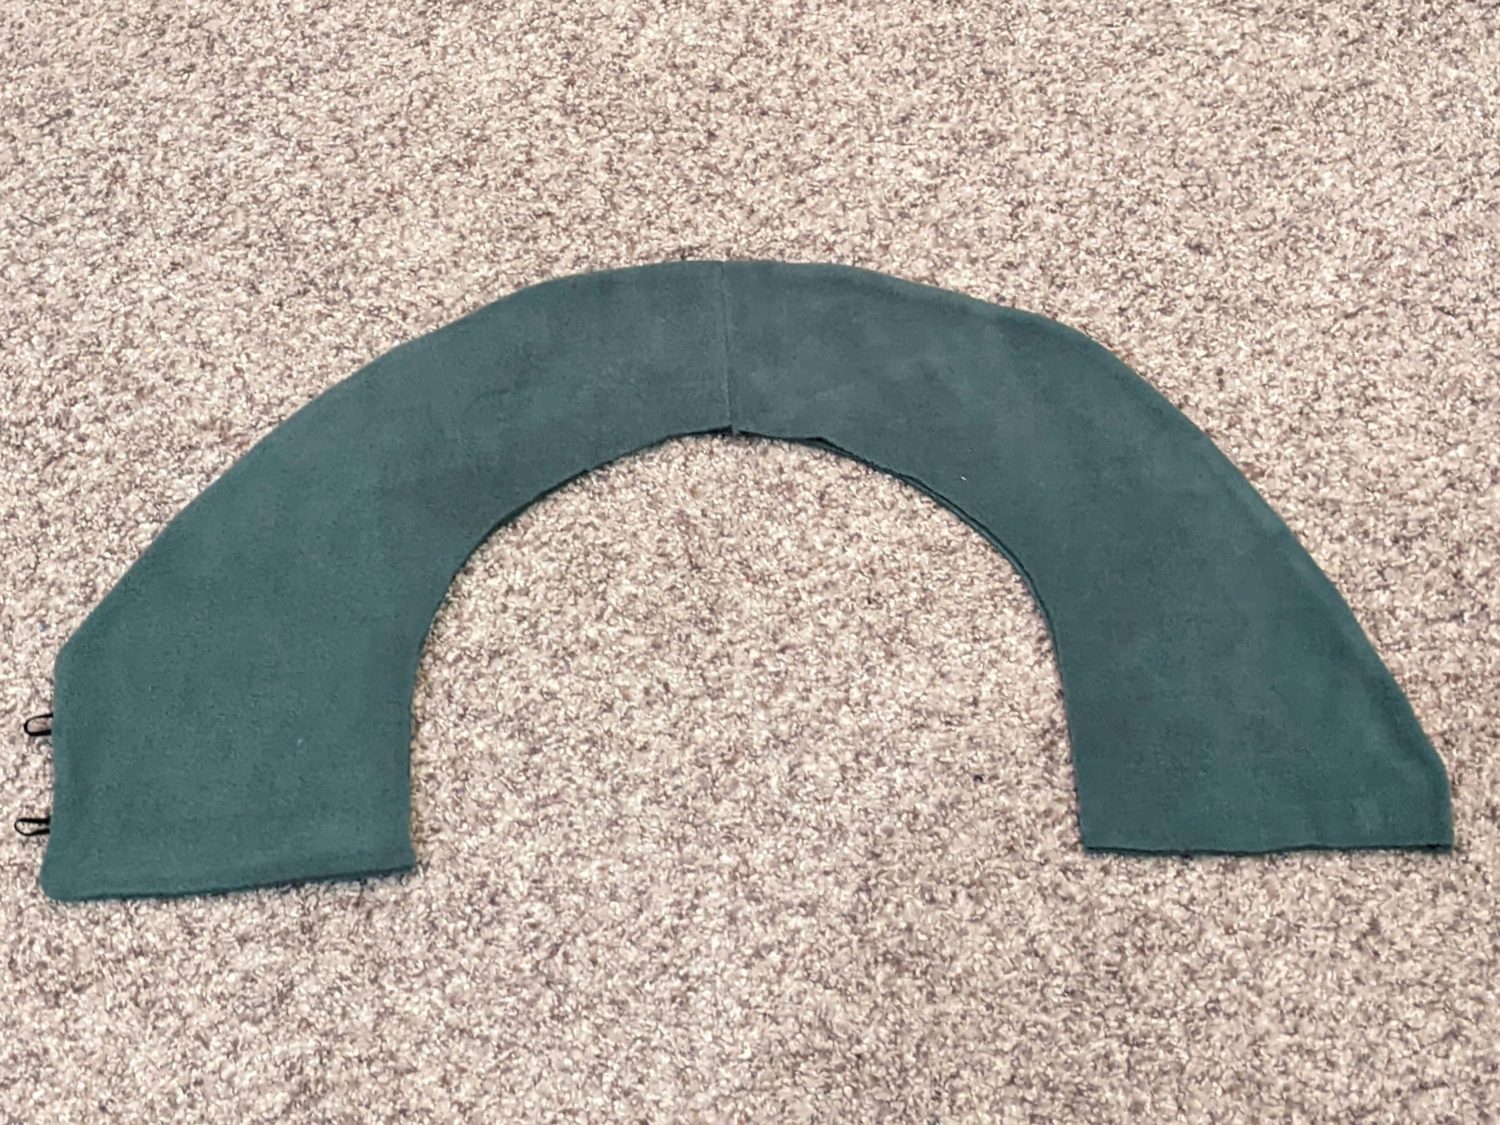
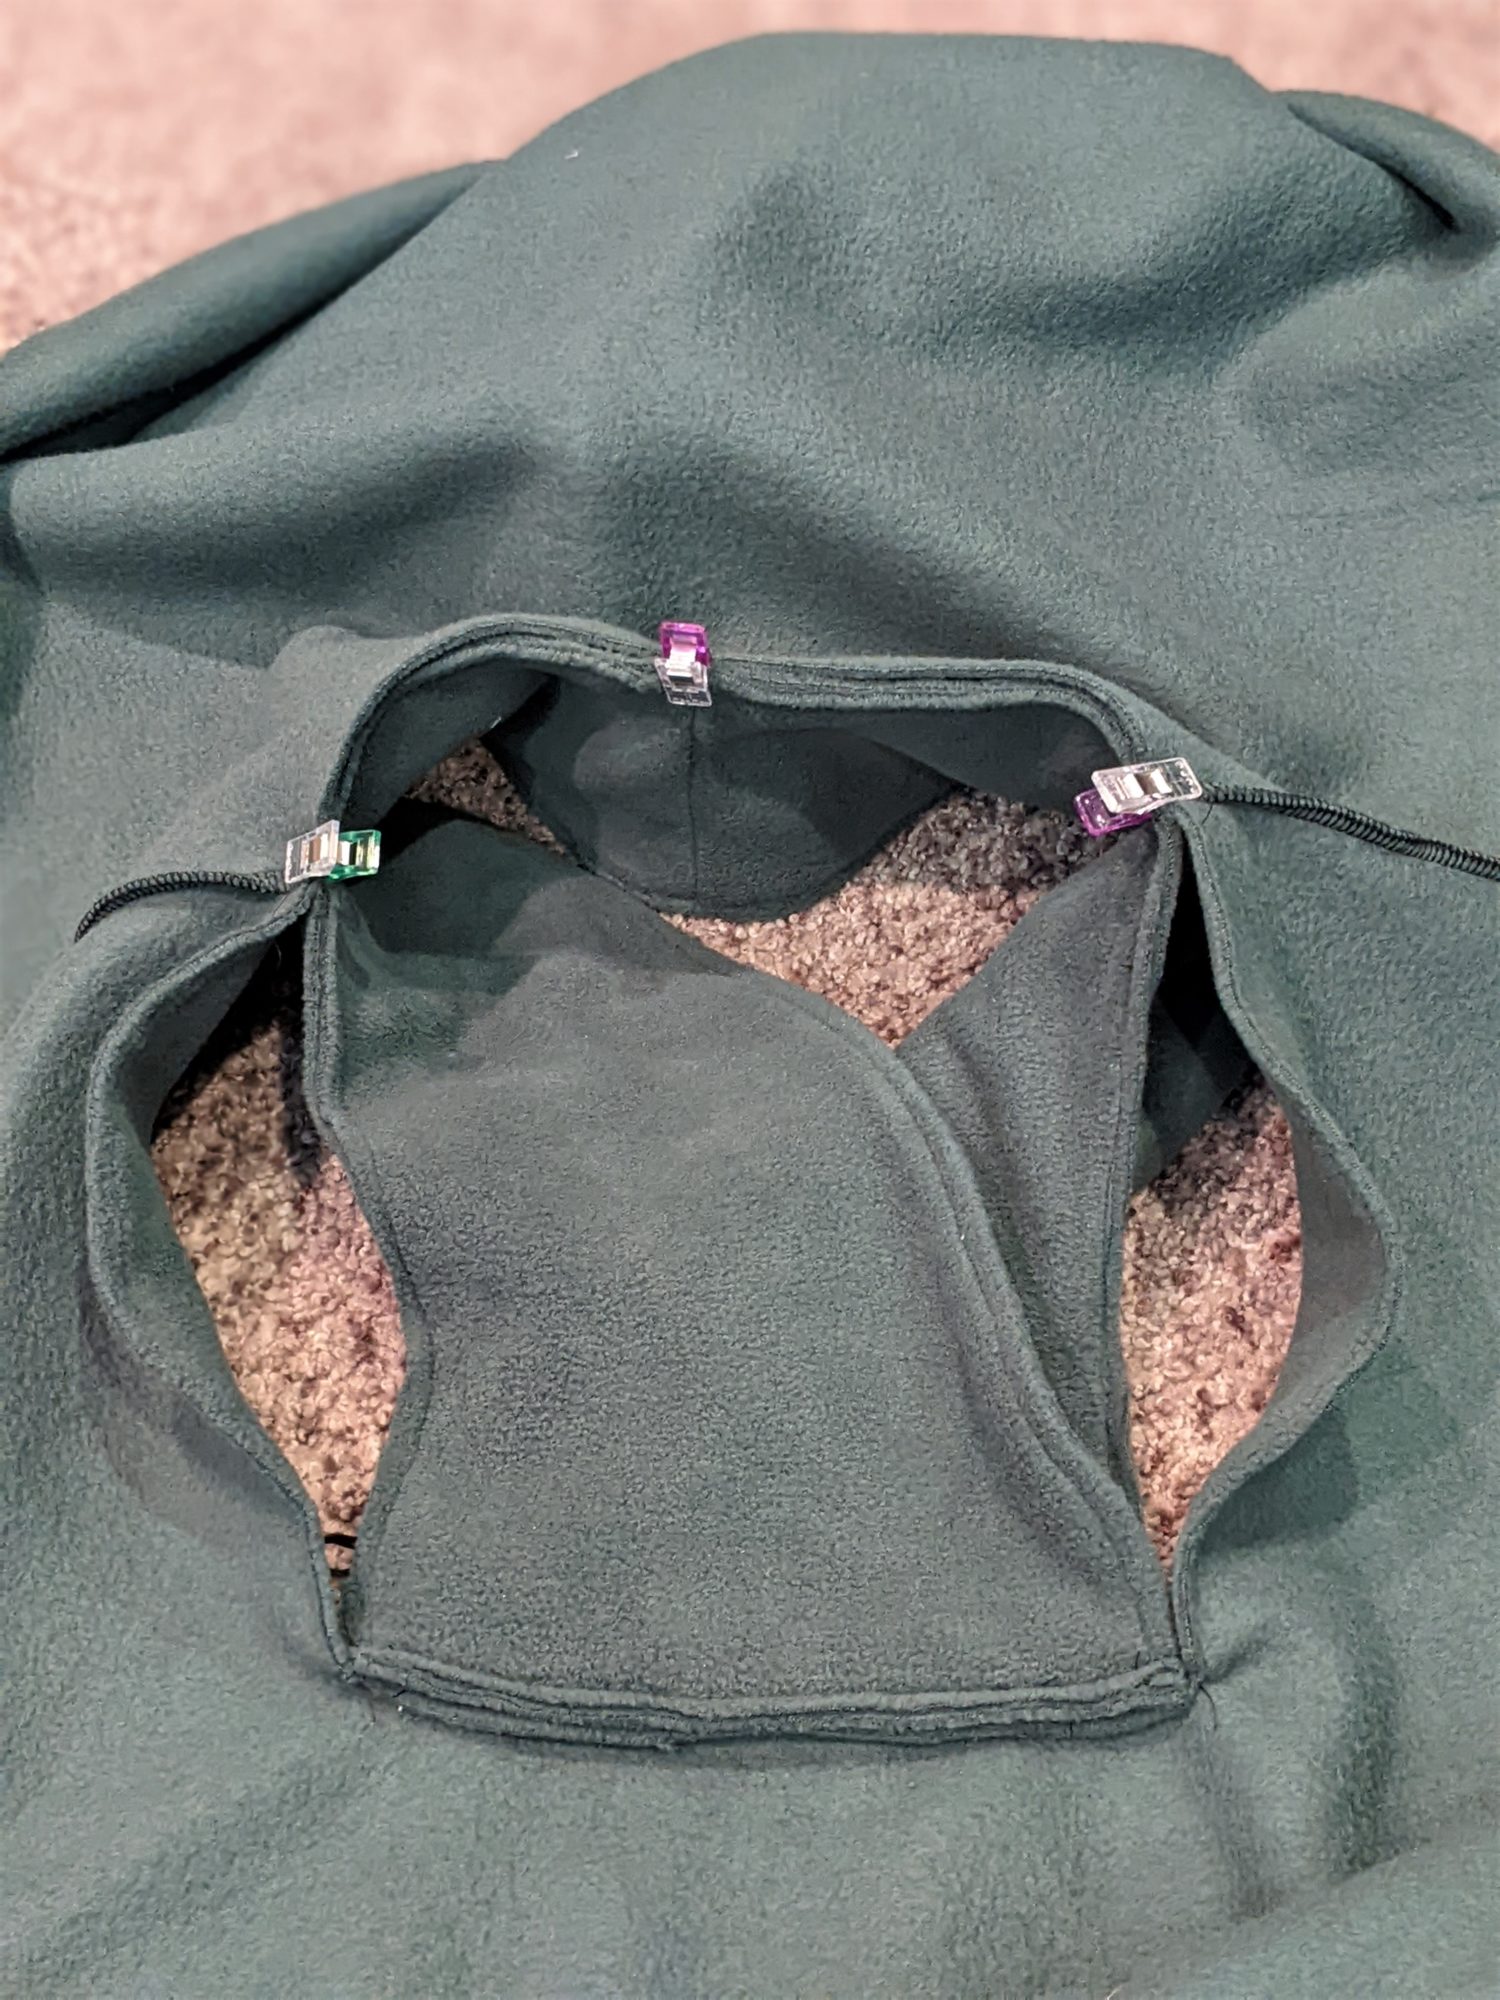
- Turn the collar piece right side out and press the edge if your fabric allows it.
- Optional: topstitch your seam allowance.
- Baste the main and lining pieces together using a long straight stitch.
Turn right side out 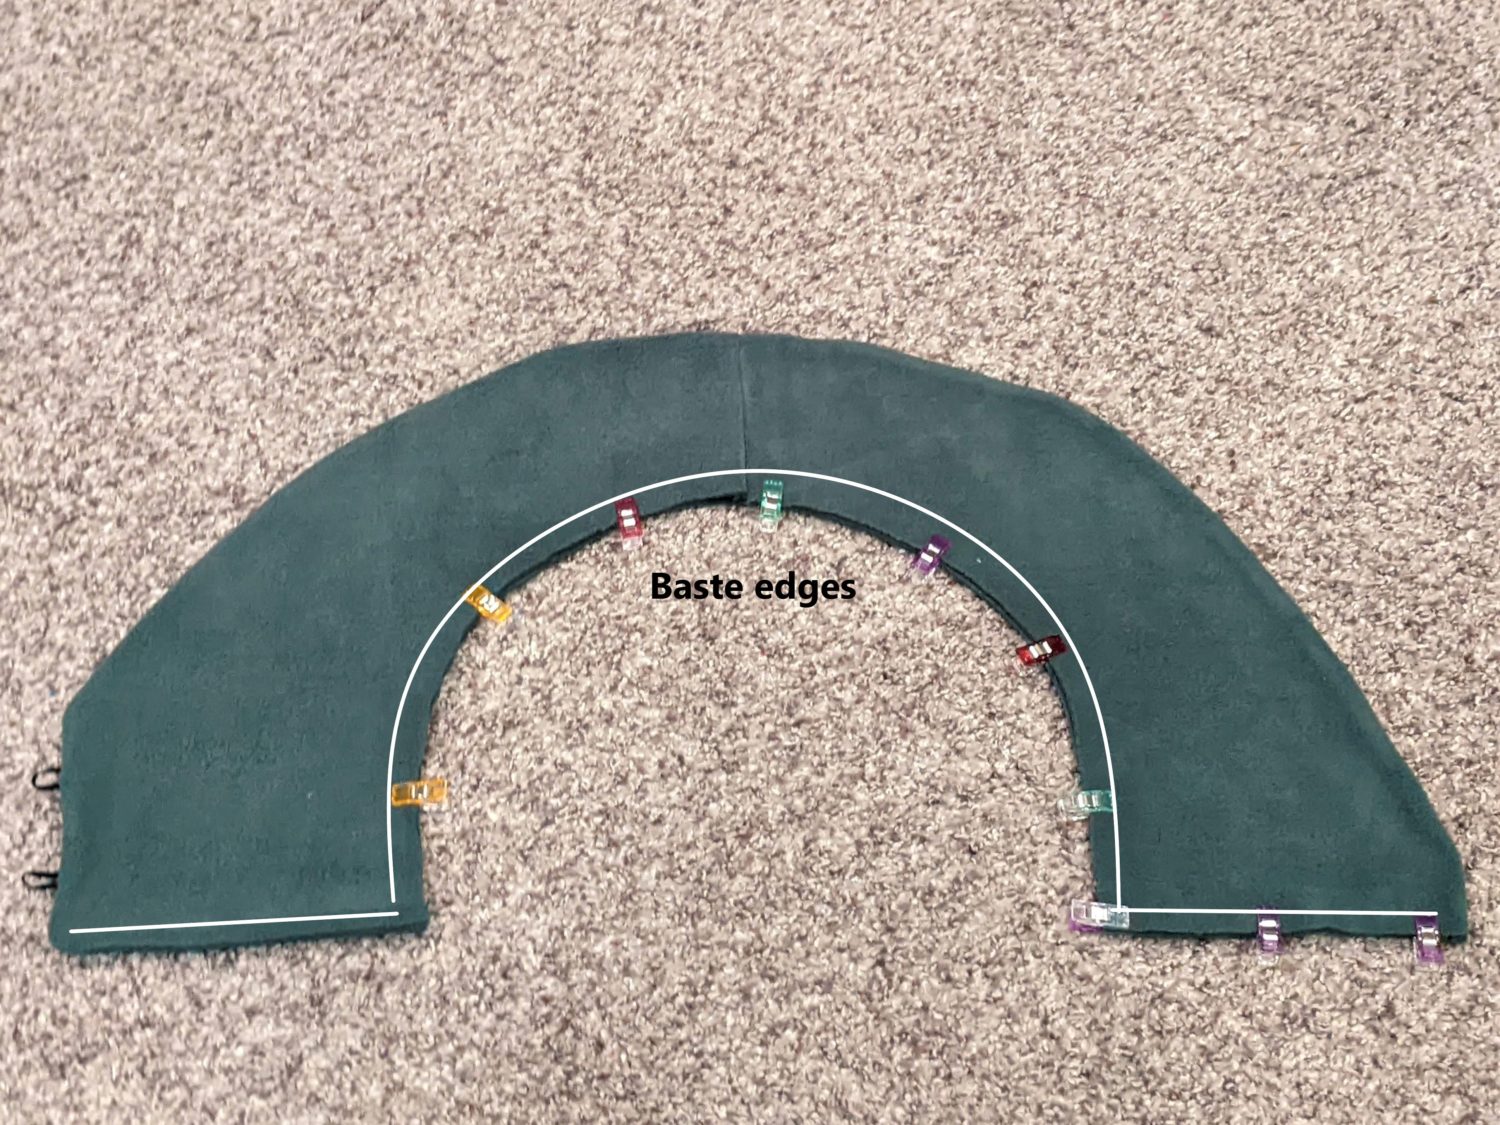
Baste bottom edge 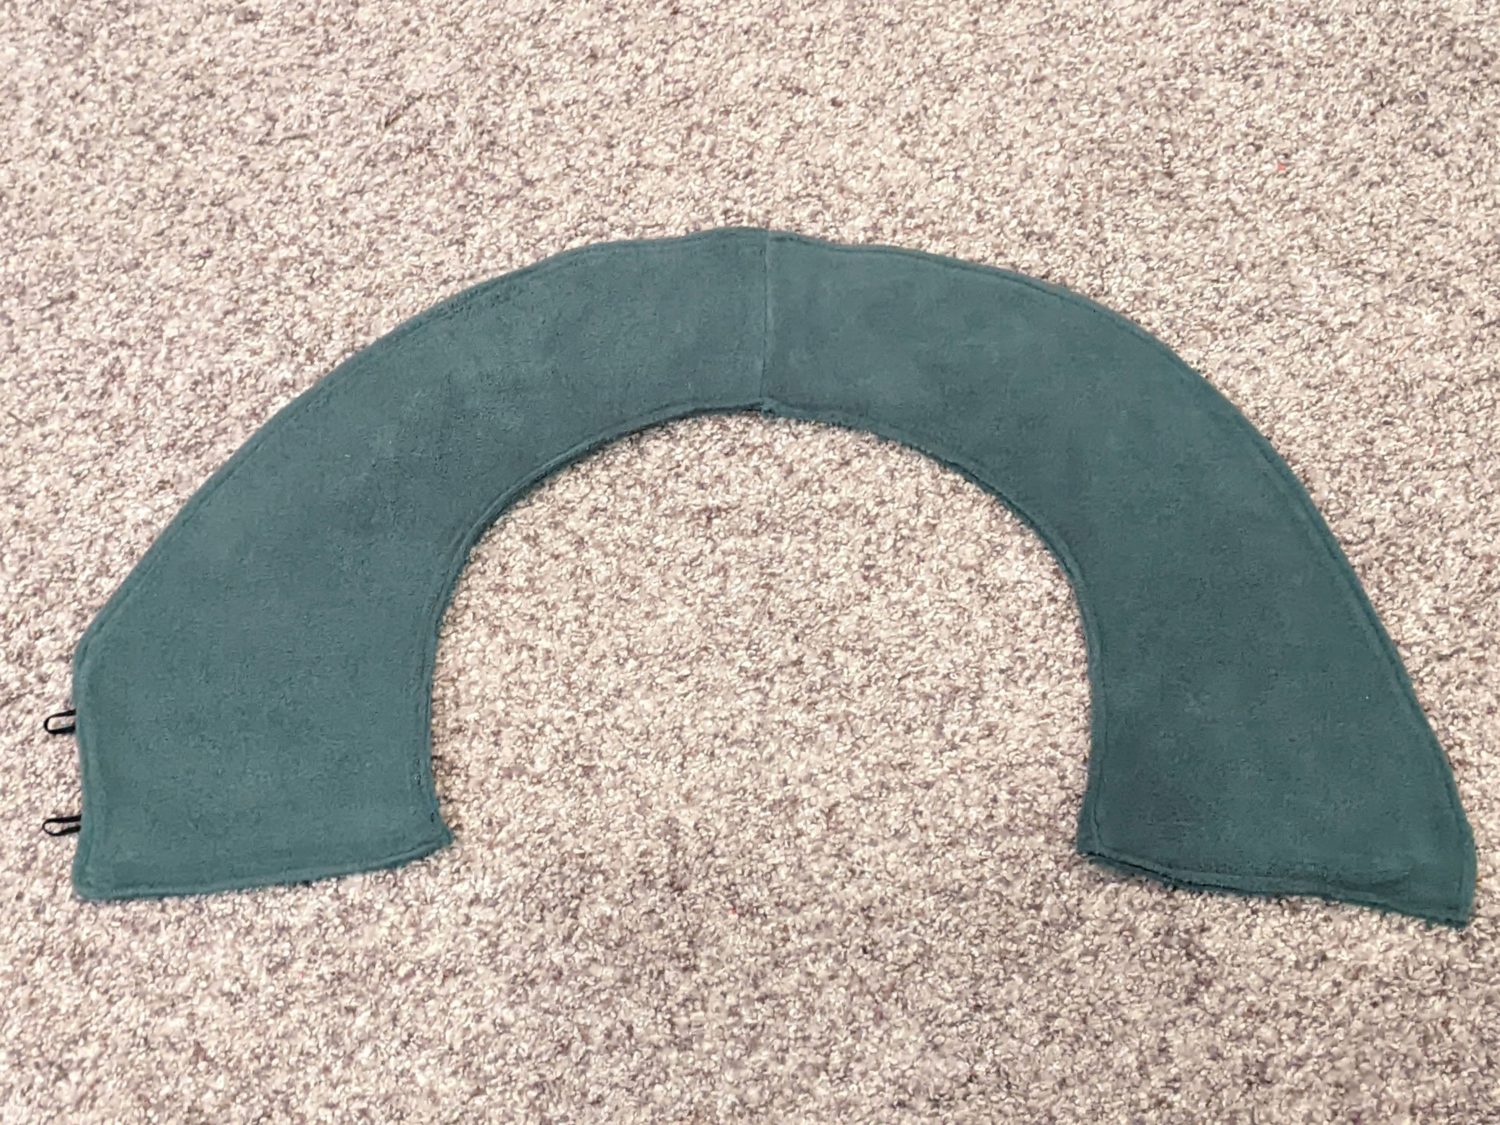
Attach the Collar
- Fold the collar pieces on top of each other (so the side with the loops is on top) and baste the bottom edge the same as stated in the tutorial.
- Sew the shoulder seams of the front and back bodice and stay stitch the neckline per the tutorial as well.
- Flip your collar piece with the loop part facing the right side of the bodice and line up the front neckline edges of the collar and bodice. (Just ignore the puppy paw in the picture, he really wanted to help.)
- Pin the collar, then baste it in place.

Baste collar front to bodice front
- Turn your bodice inside out, then line up and pin the center back collar and bodice necklines as well as the marked points from the pattern pieces at the shoulder seams with the bodice and collar right sides together.
- Pin the outer collar piece to the vertical edge of the neckline.
- Continuing on the same side, pin the lower (straight section) edge of the inner collar piece to the bodice.
Match up collar and bodice points 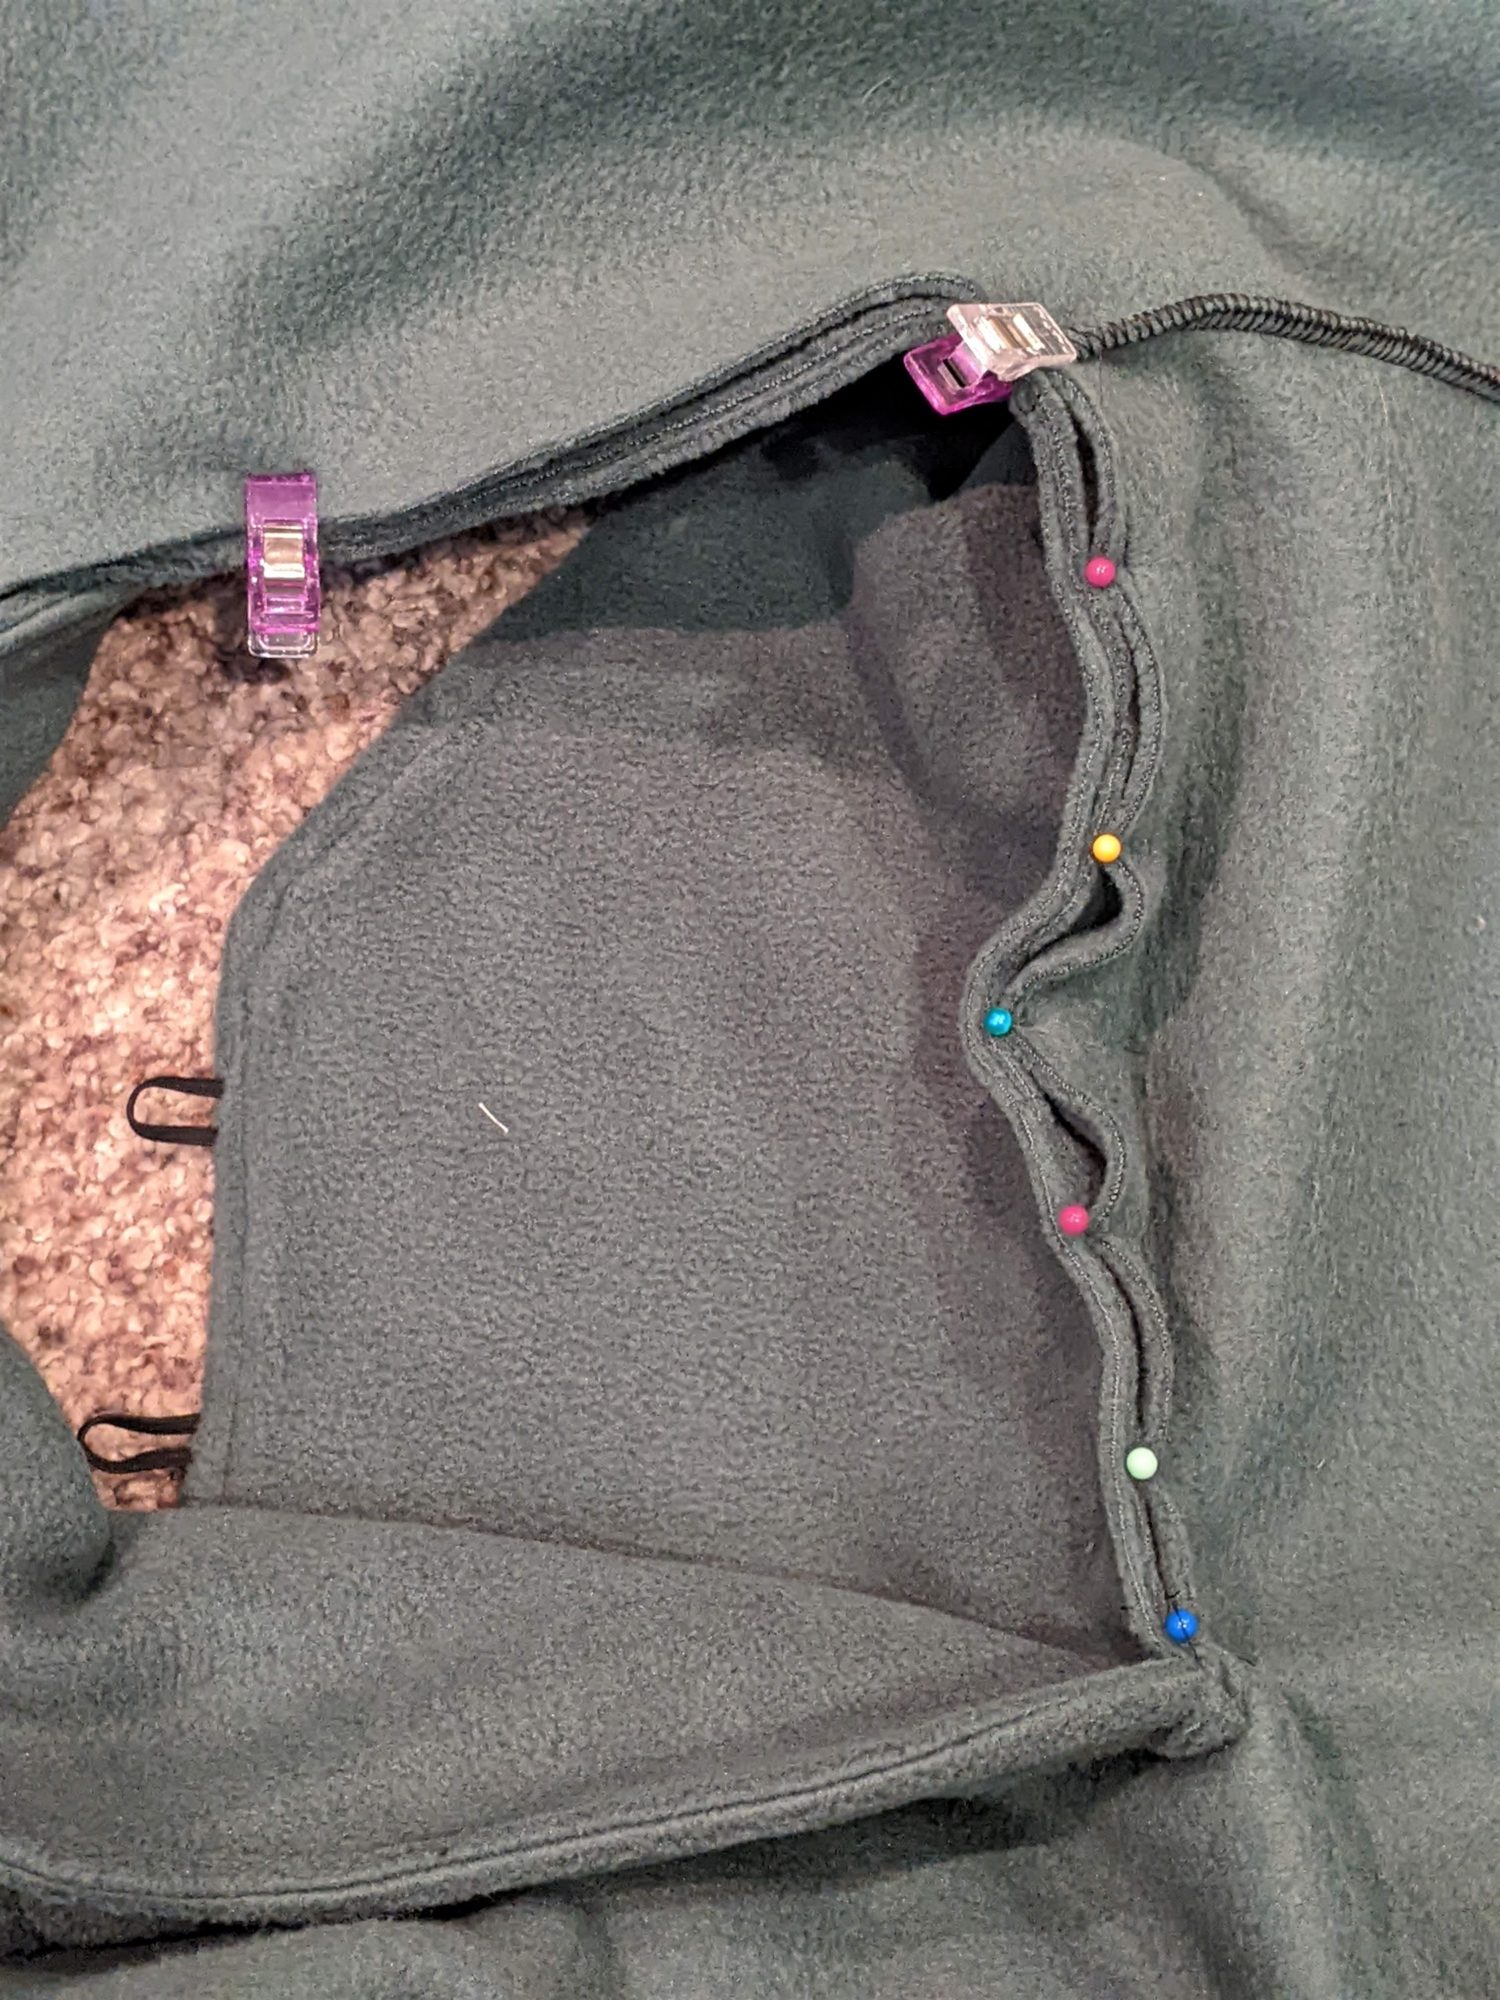
Pin top piece to bodice neckline 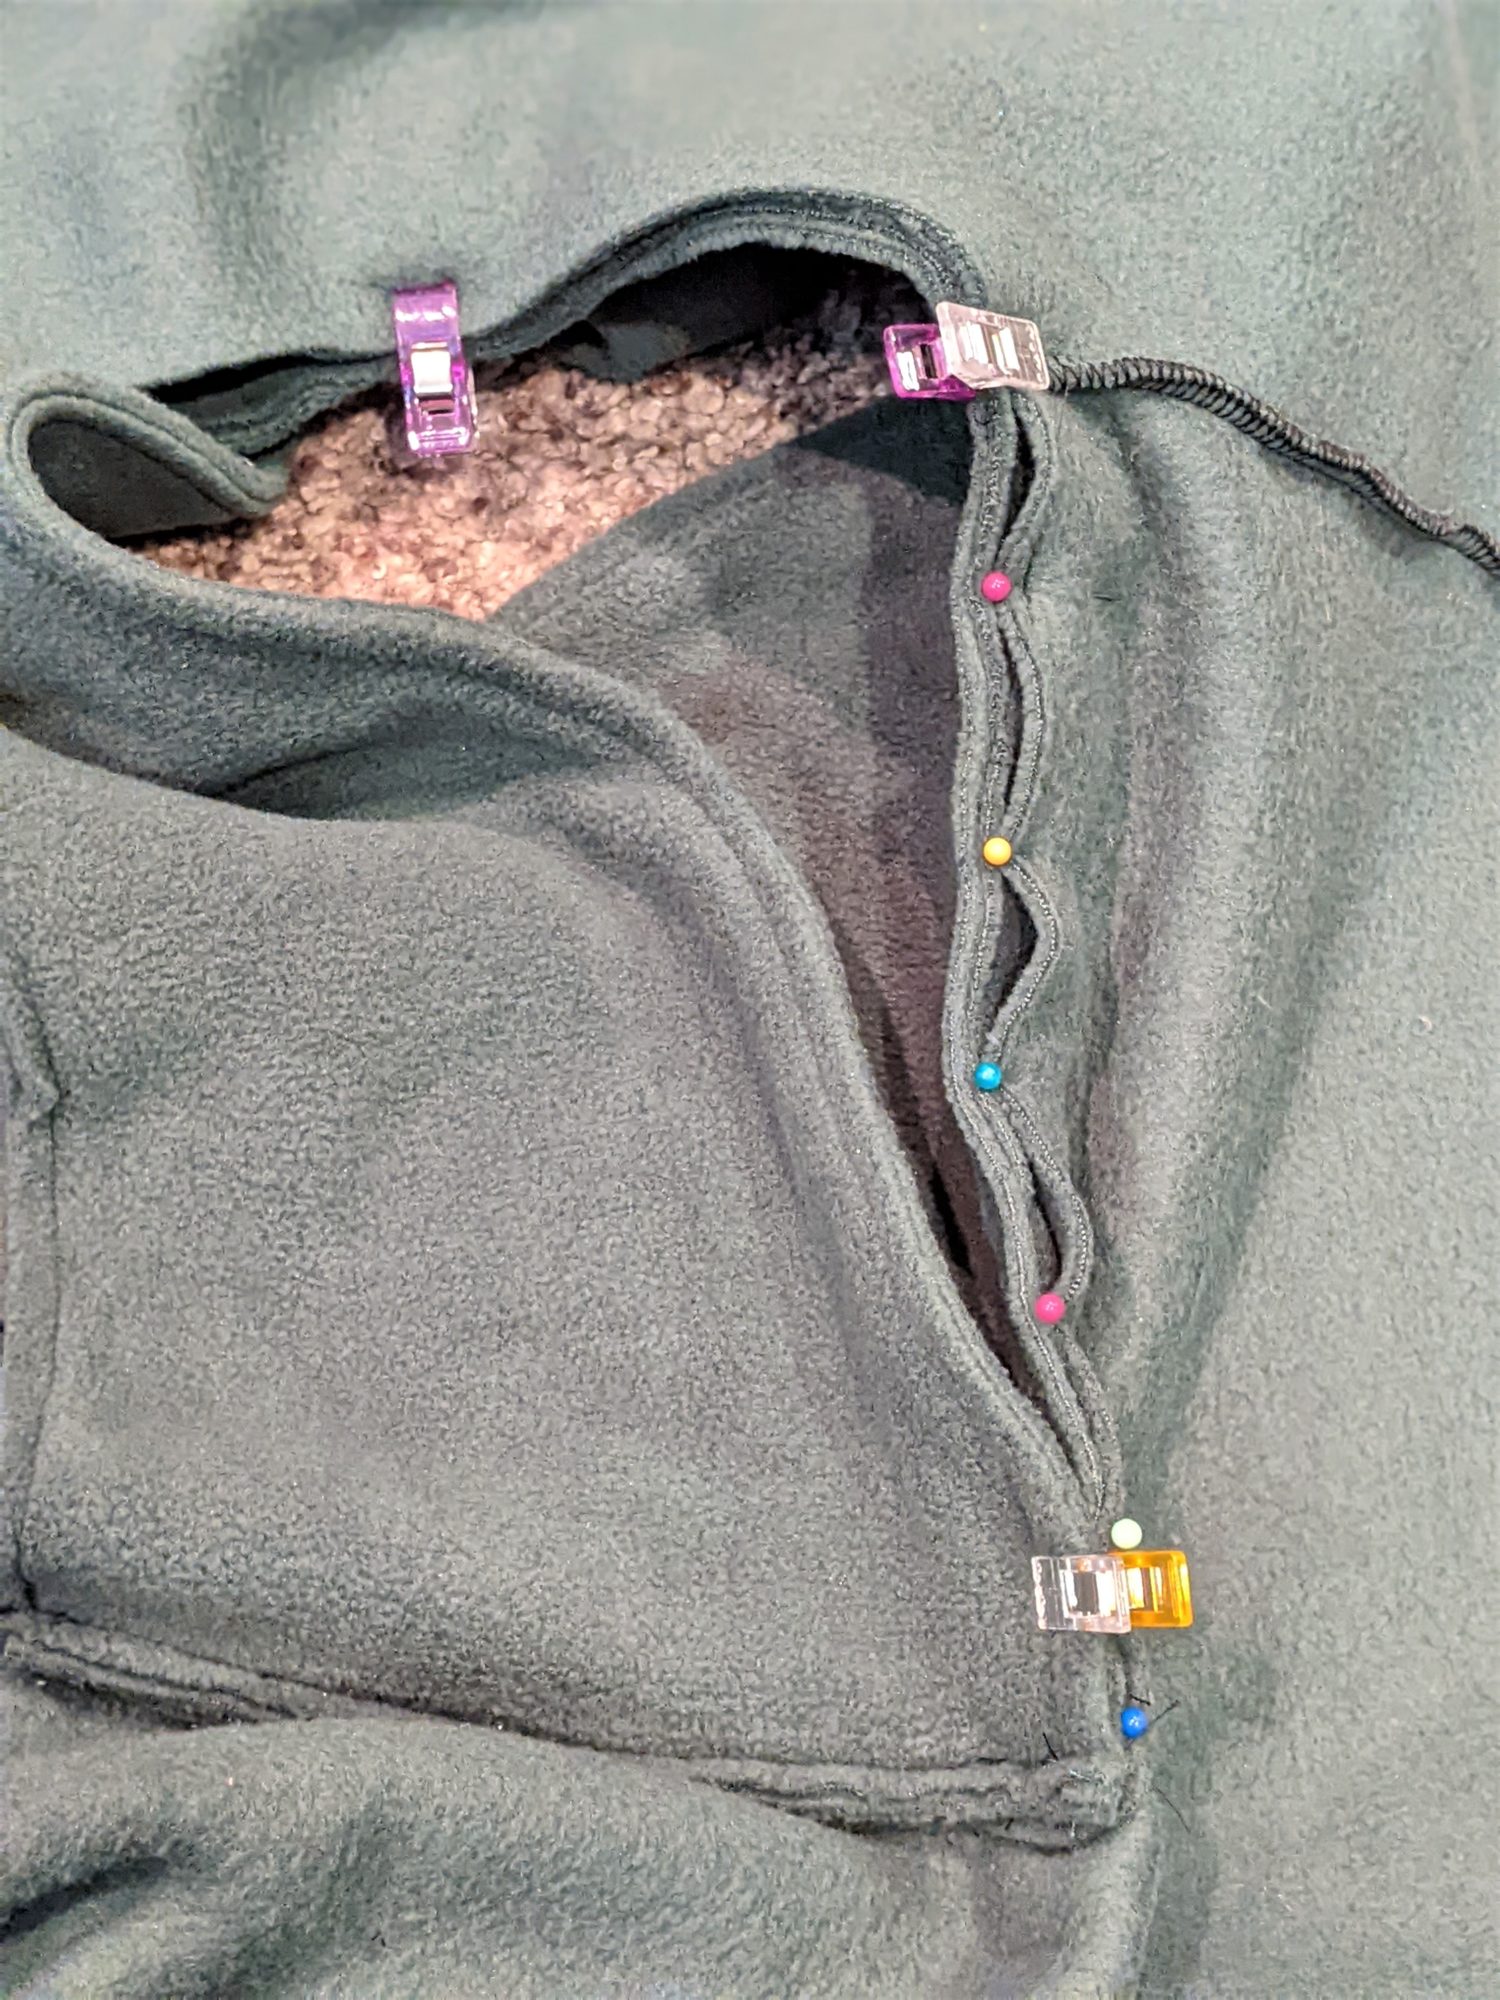
Pin lower inner piece to neckline
- On the opposite neckline edge, pin the inner collar piece to the bodice.
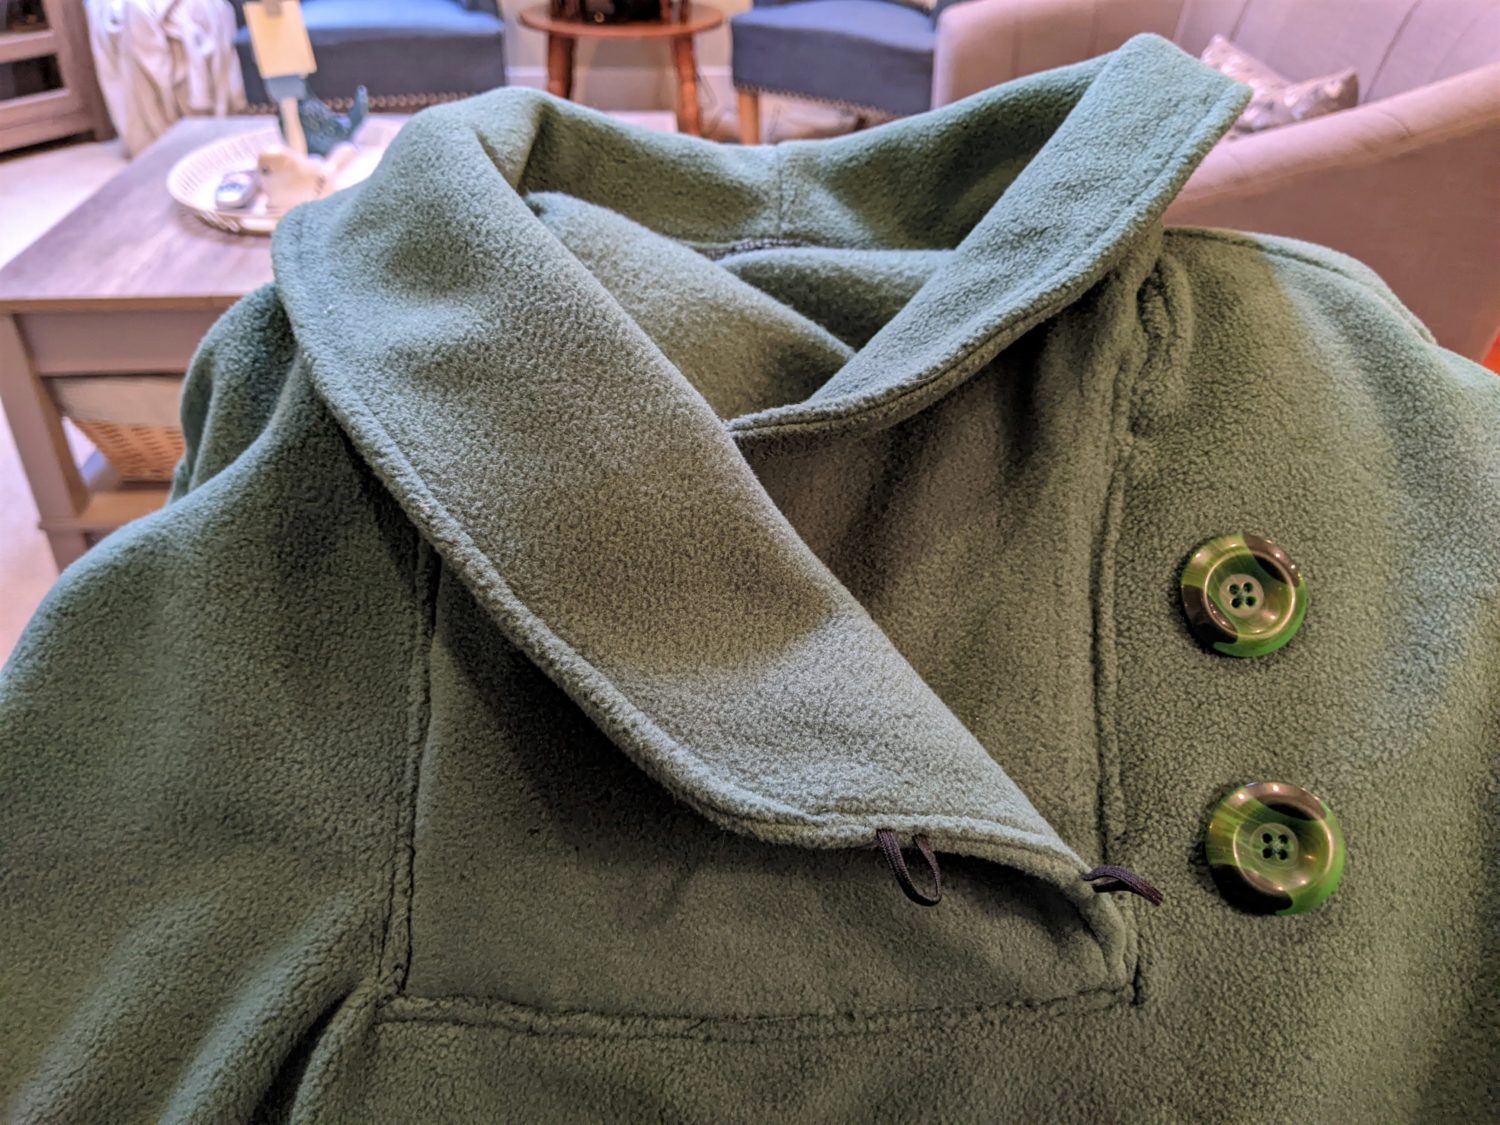
- At the very bottom corner, pin the point of the front (loop side) in as well. (See pictures below)
- Baste the collar in place, then turn right side out and check your work. If any parts are not laying flat, remove the basting stitches and try again.
- Once you are happy with the neckline, follow the tutorial to finish sewing the neckline and the remainder of the top.
Pin opposite collar edge to neckline 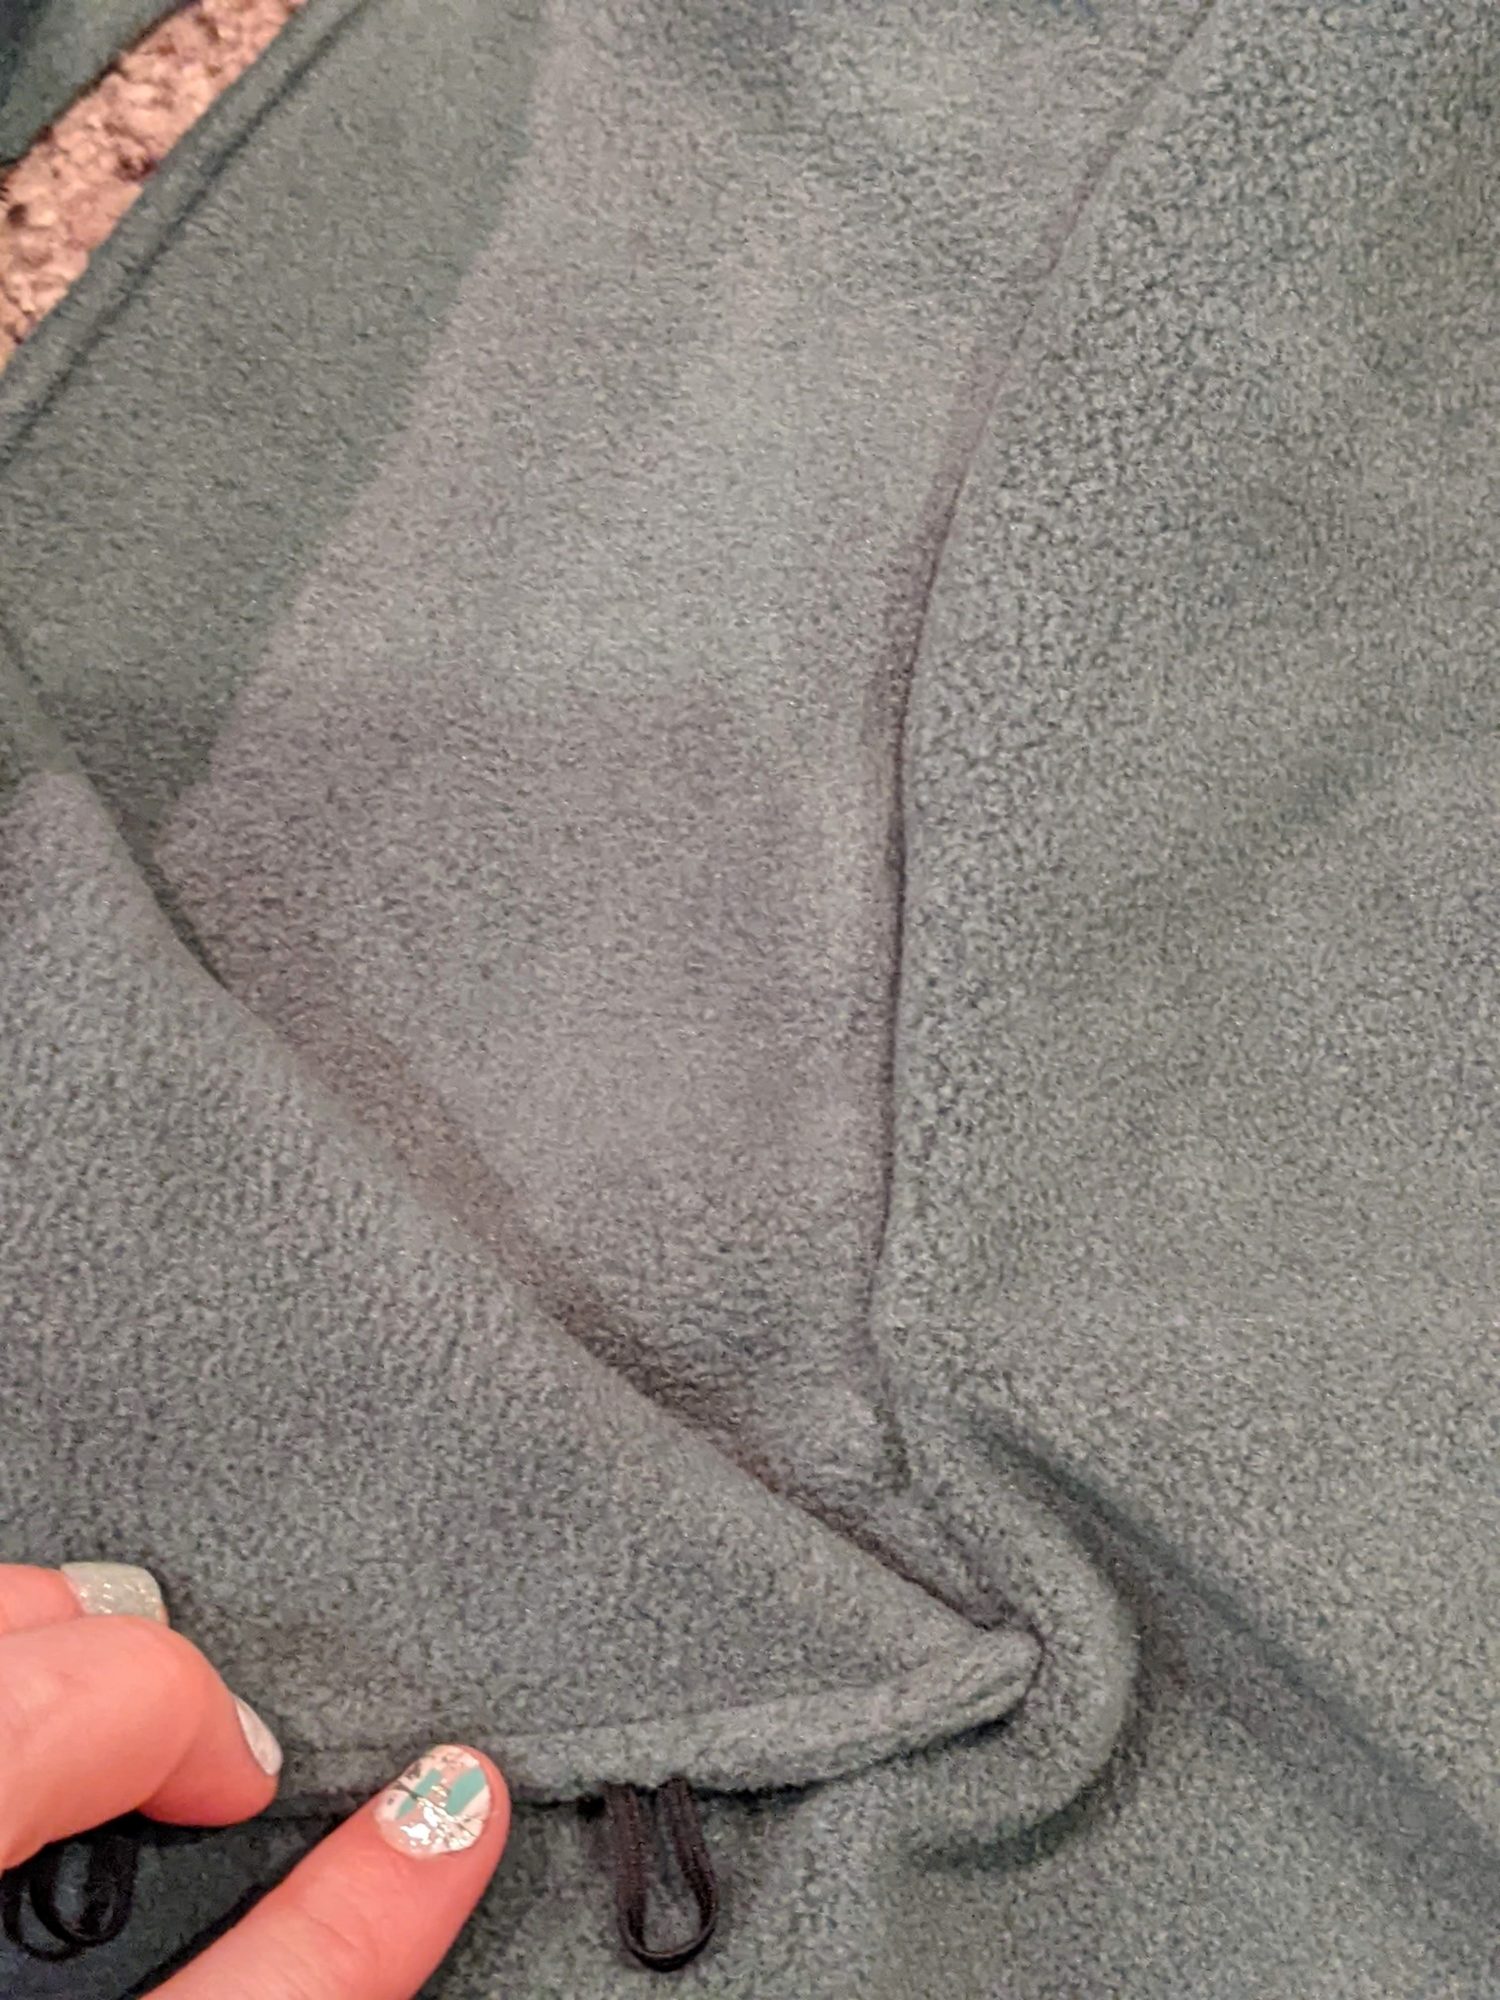
Catch the bottom corner of the loop side in the pinned seam edge 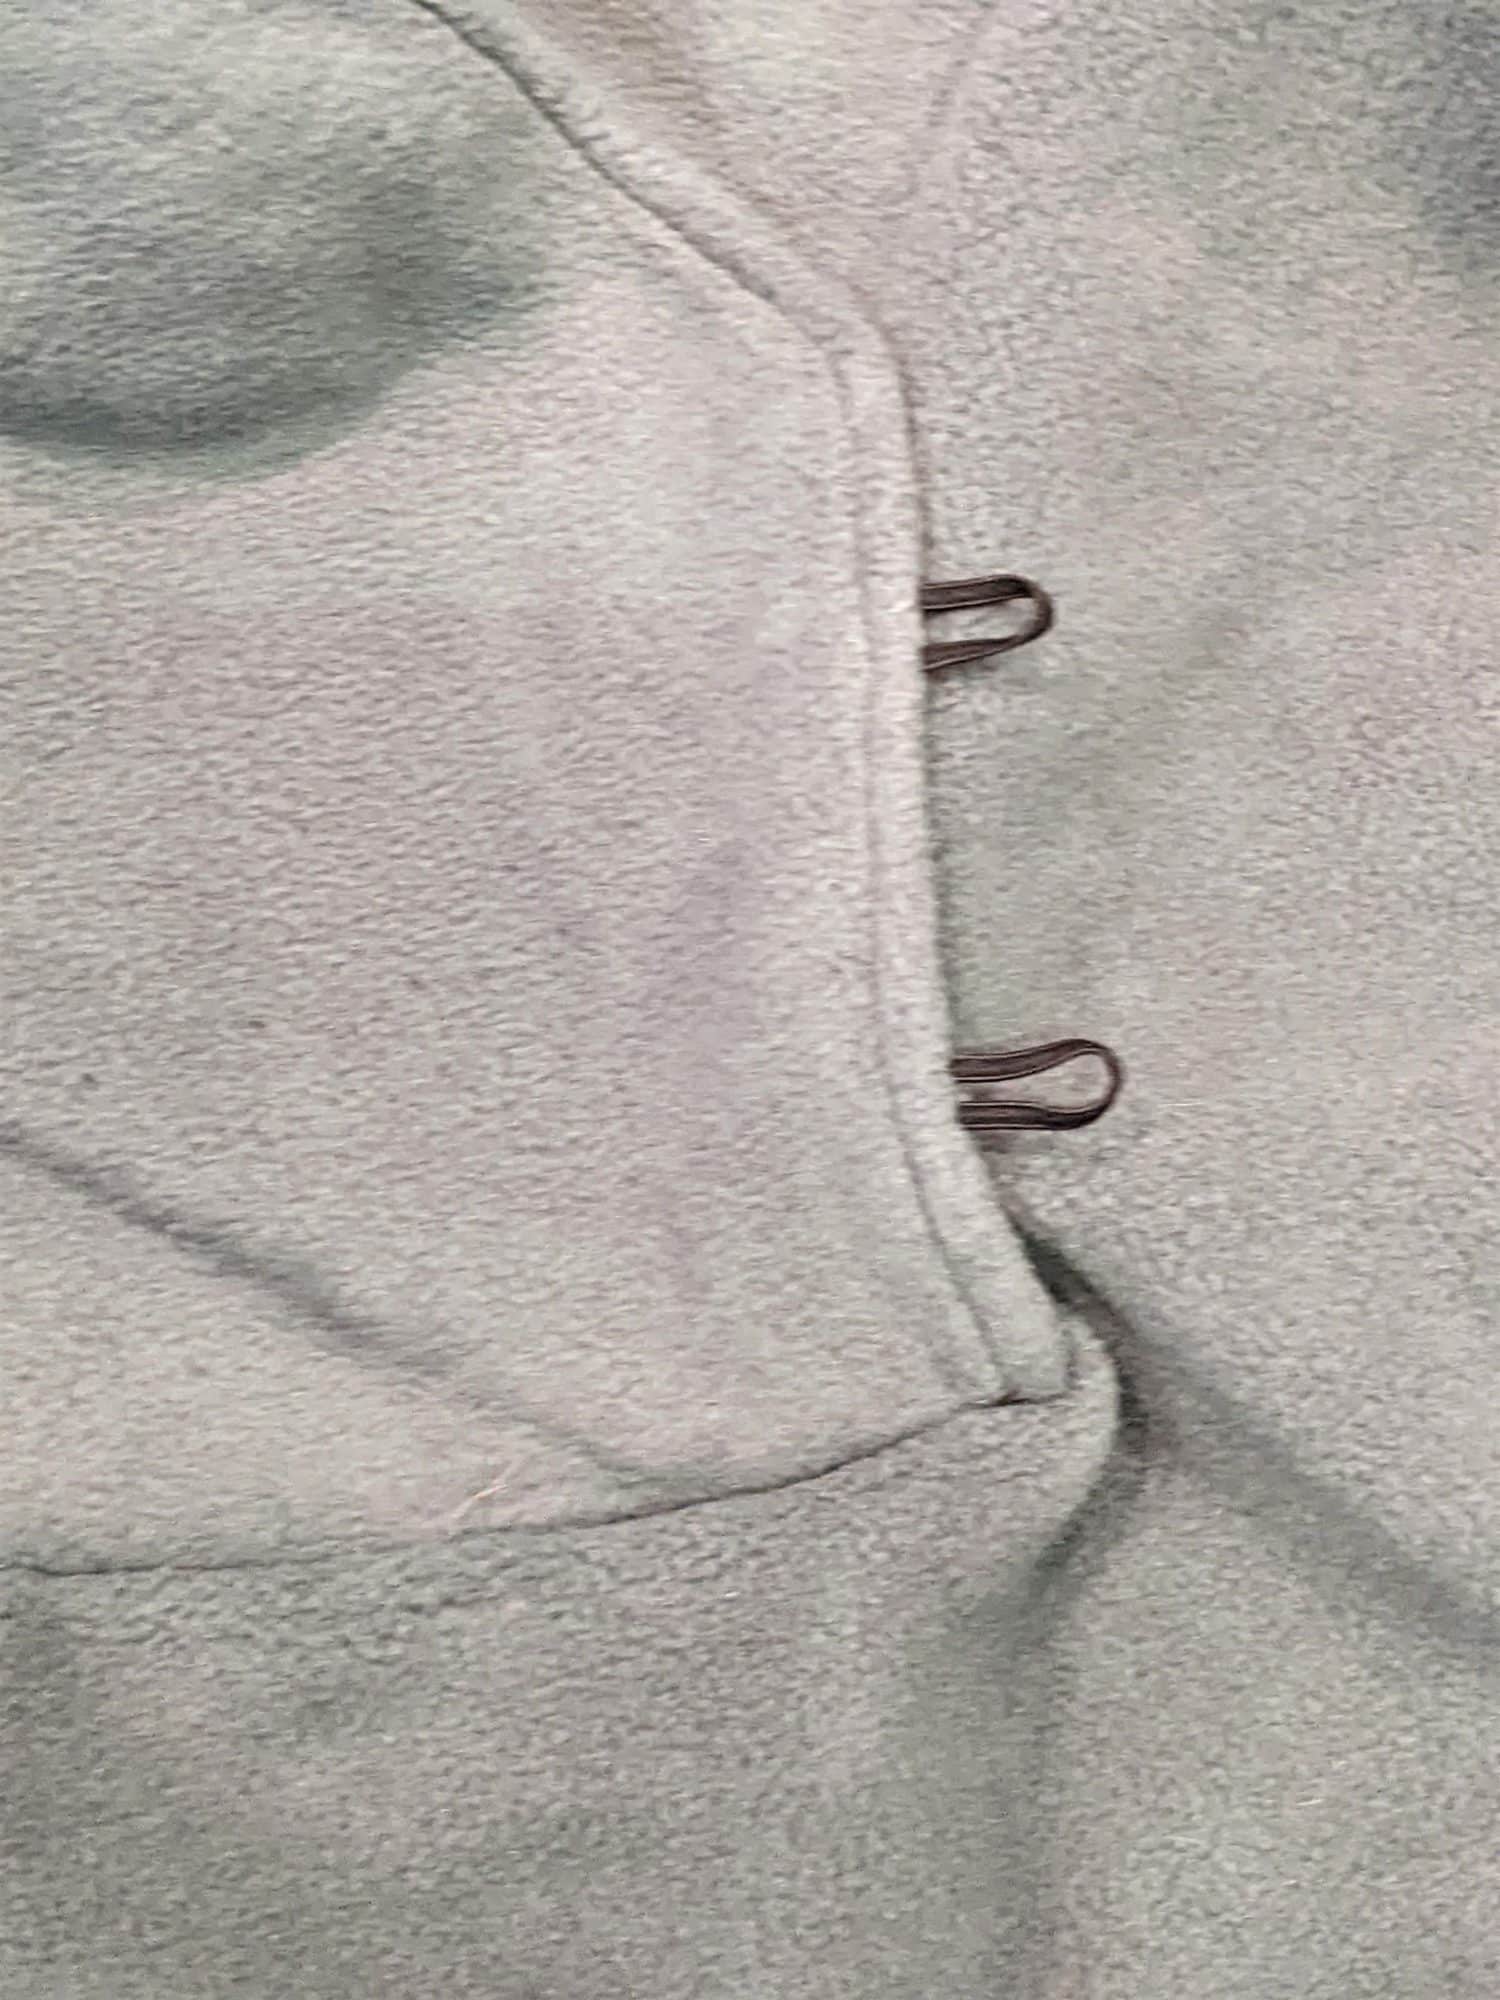
Baste neckline and check your seams
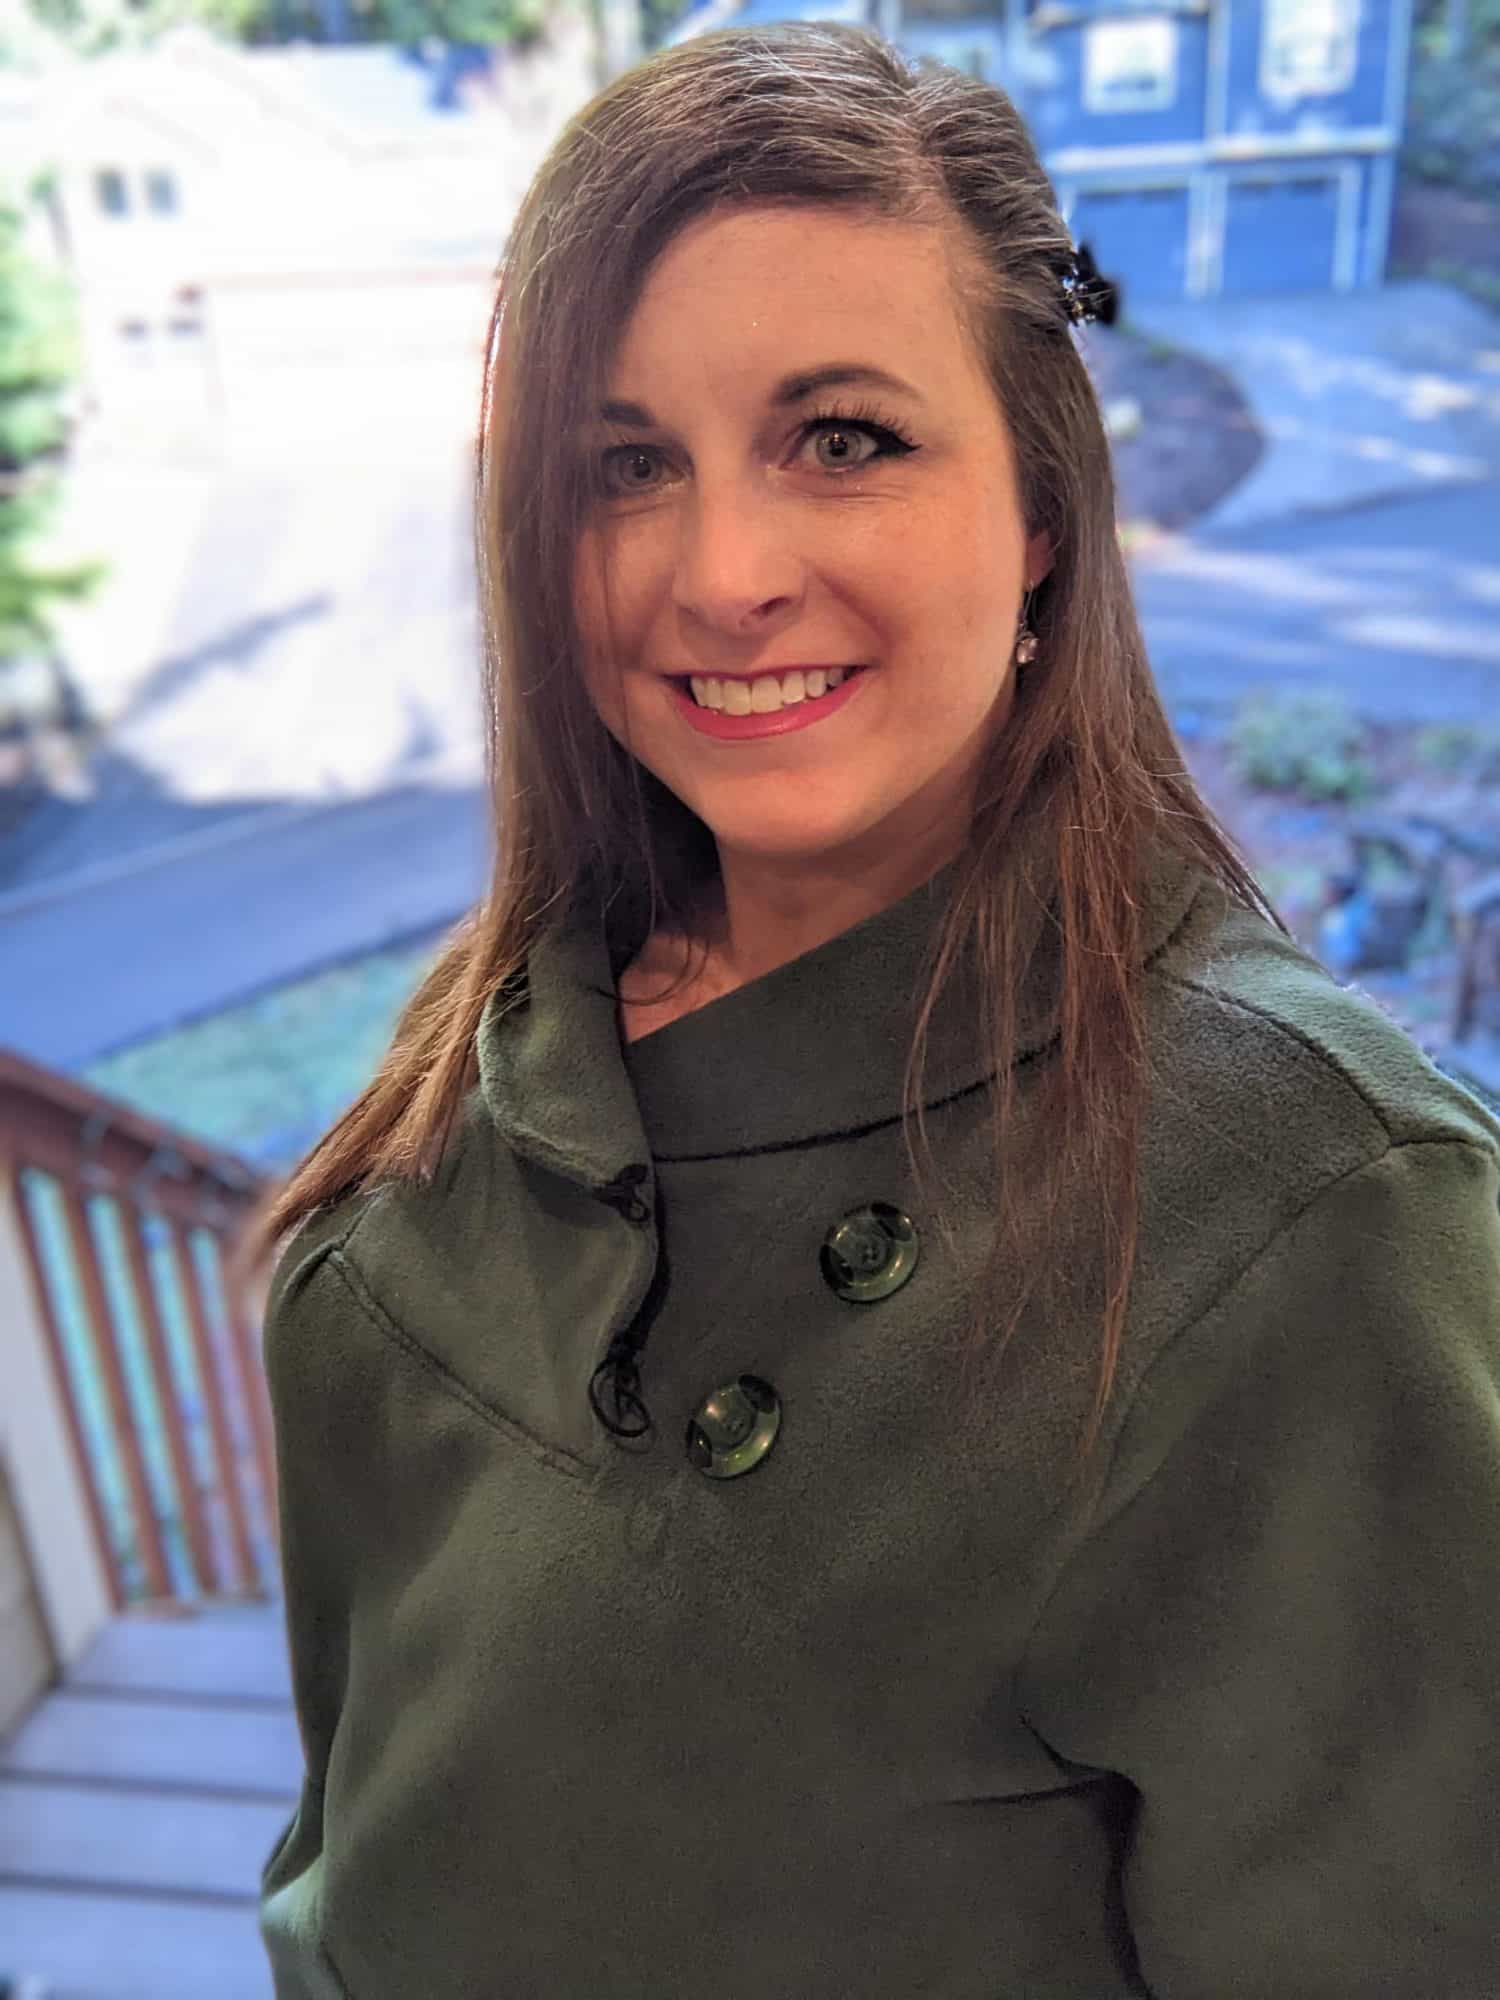
Sew on Your Buttons
- Once your top is finished, lay your collar flat and mark with an air soluble pen or chalk at the center of your loops on the opposite side of the bodice.
- Grab your buttons and sew them on.
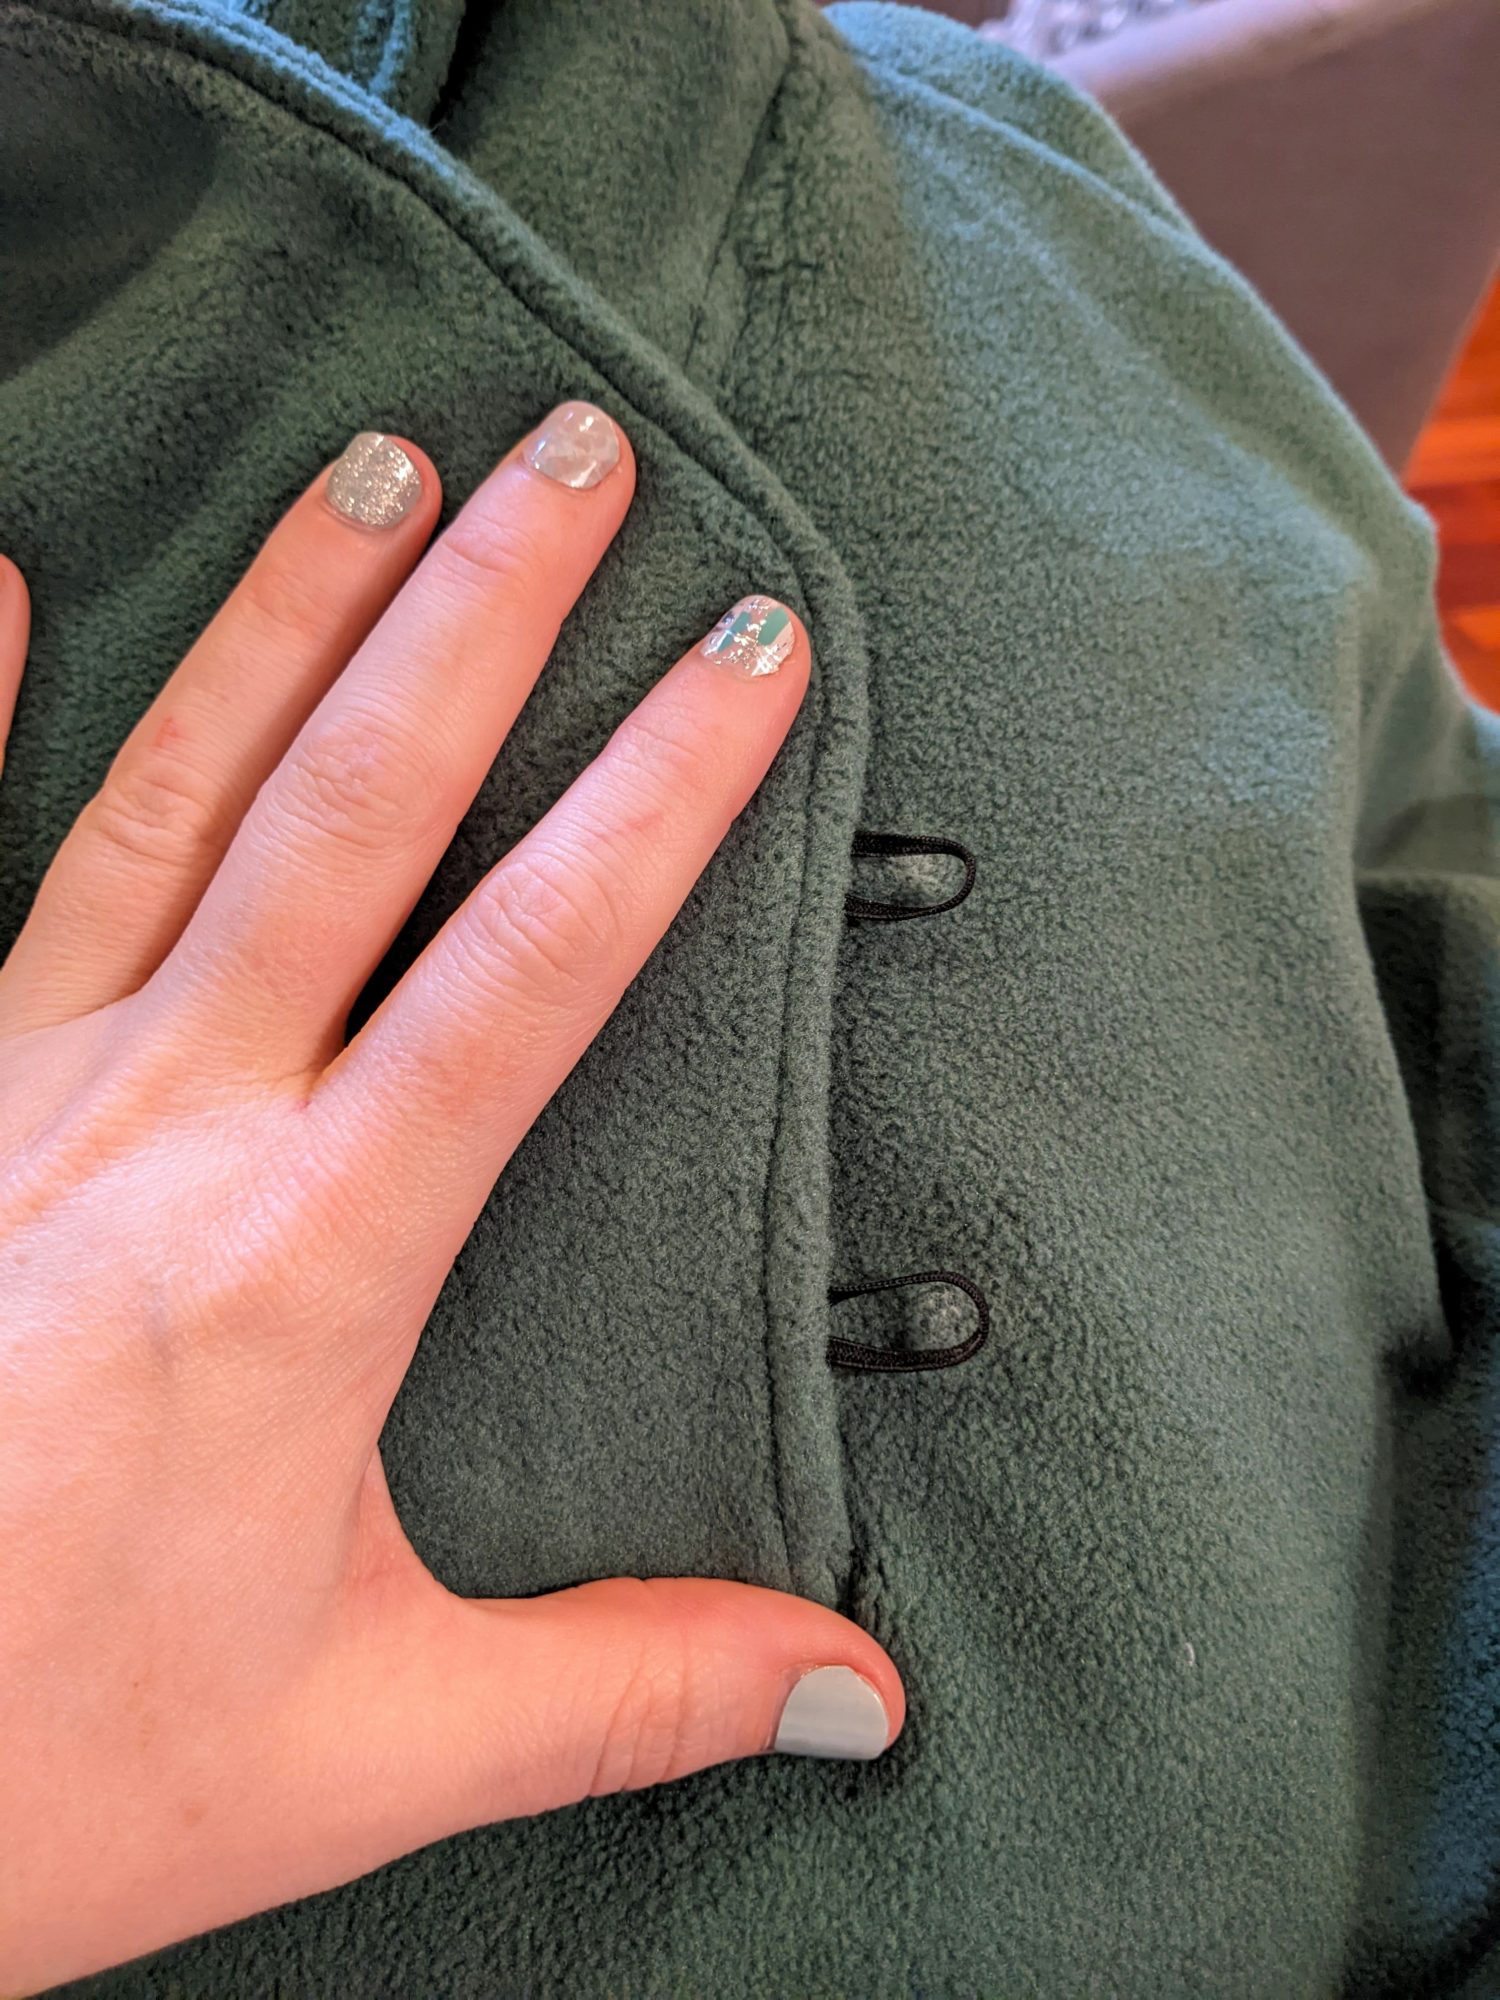
Mark button placement
Sew on buttons 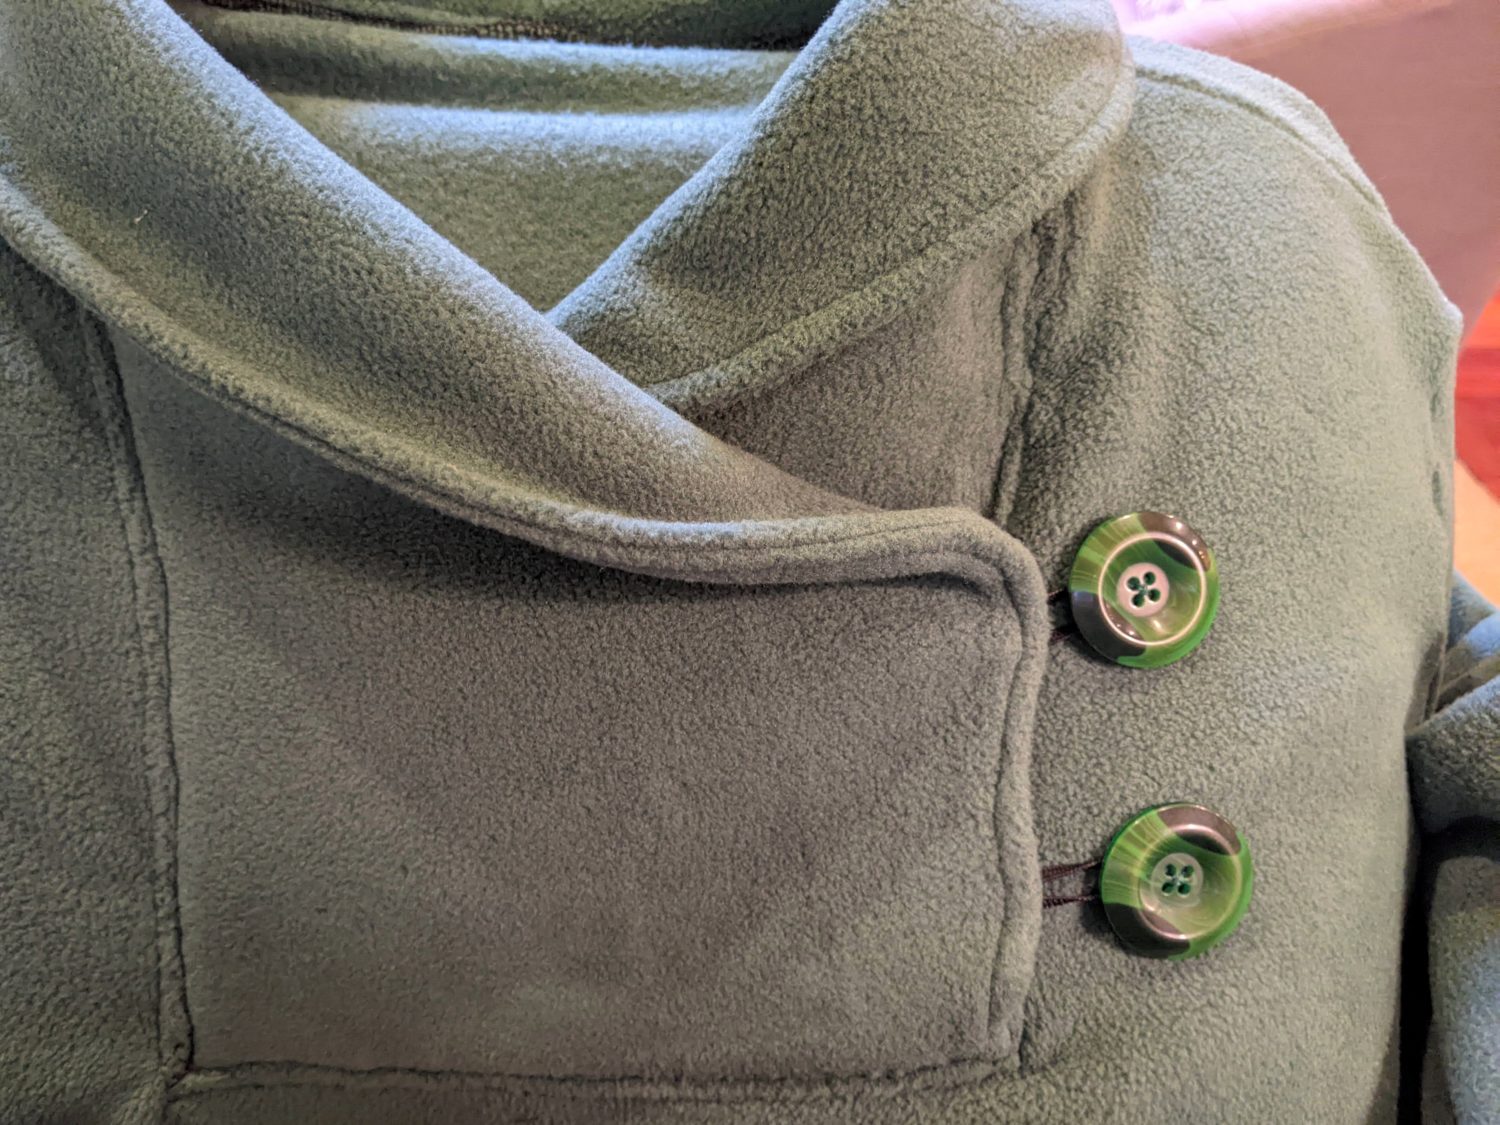
Button yourself up and you are ready to go!
Want more FUN DIY Freebies? Check out the FREEBIE TUTORIALS and the FREEBIE PATTERNS!
As always, we’re here to help if you need it! Join us HERE and on Facebook, Instagram, Twitter, Youtube, and Pinterest. We’re everywhere you are.
This is gorgeous!! I will have to remember this when I finally get around to making this one!!