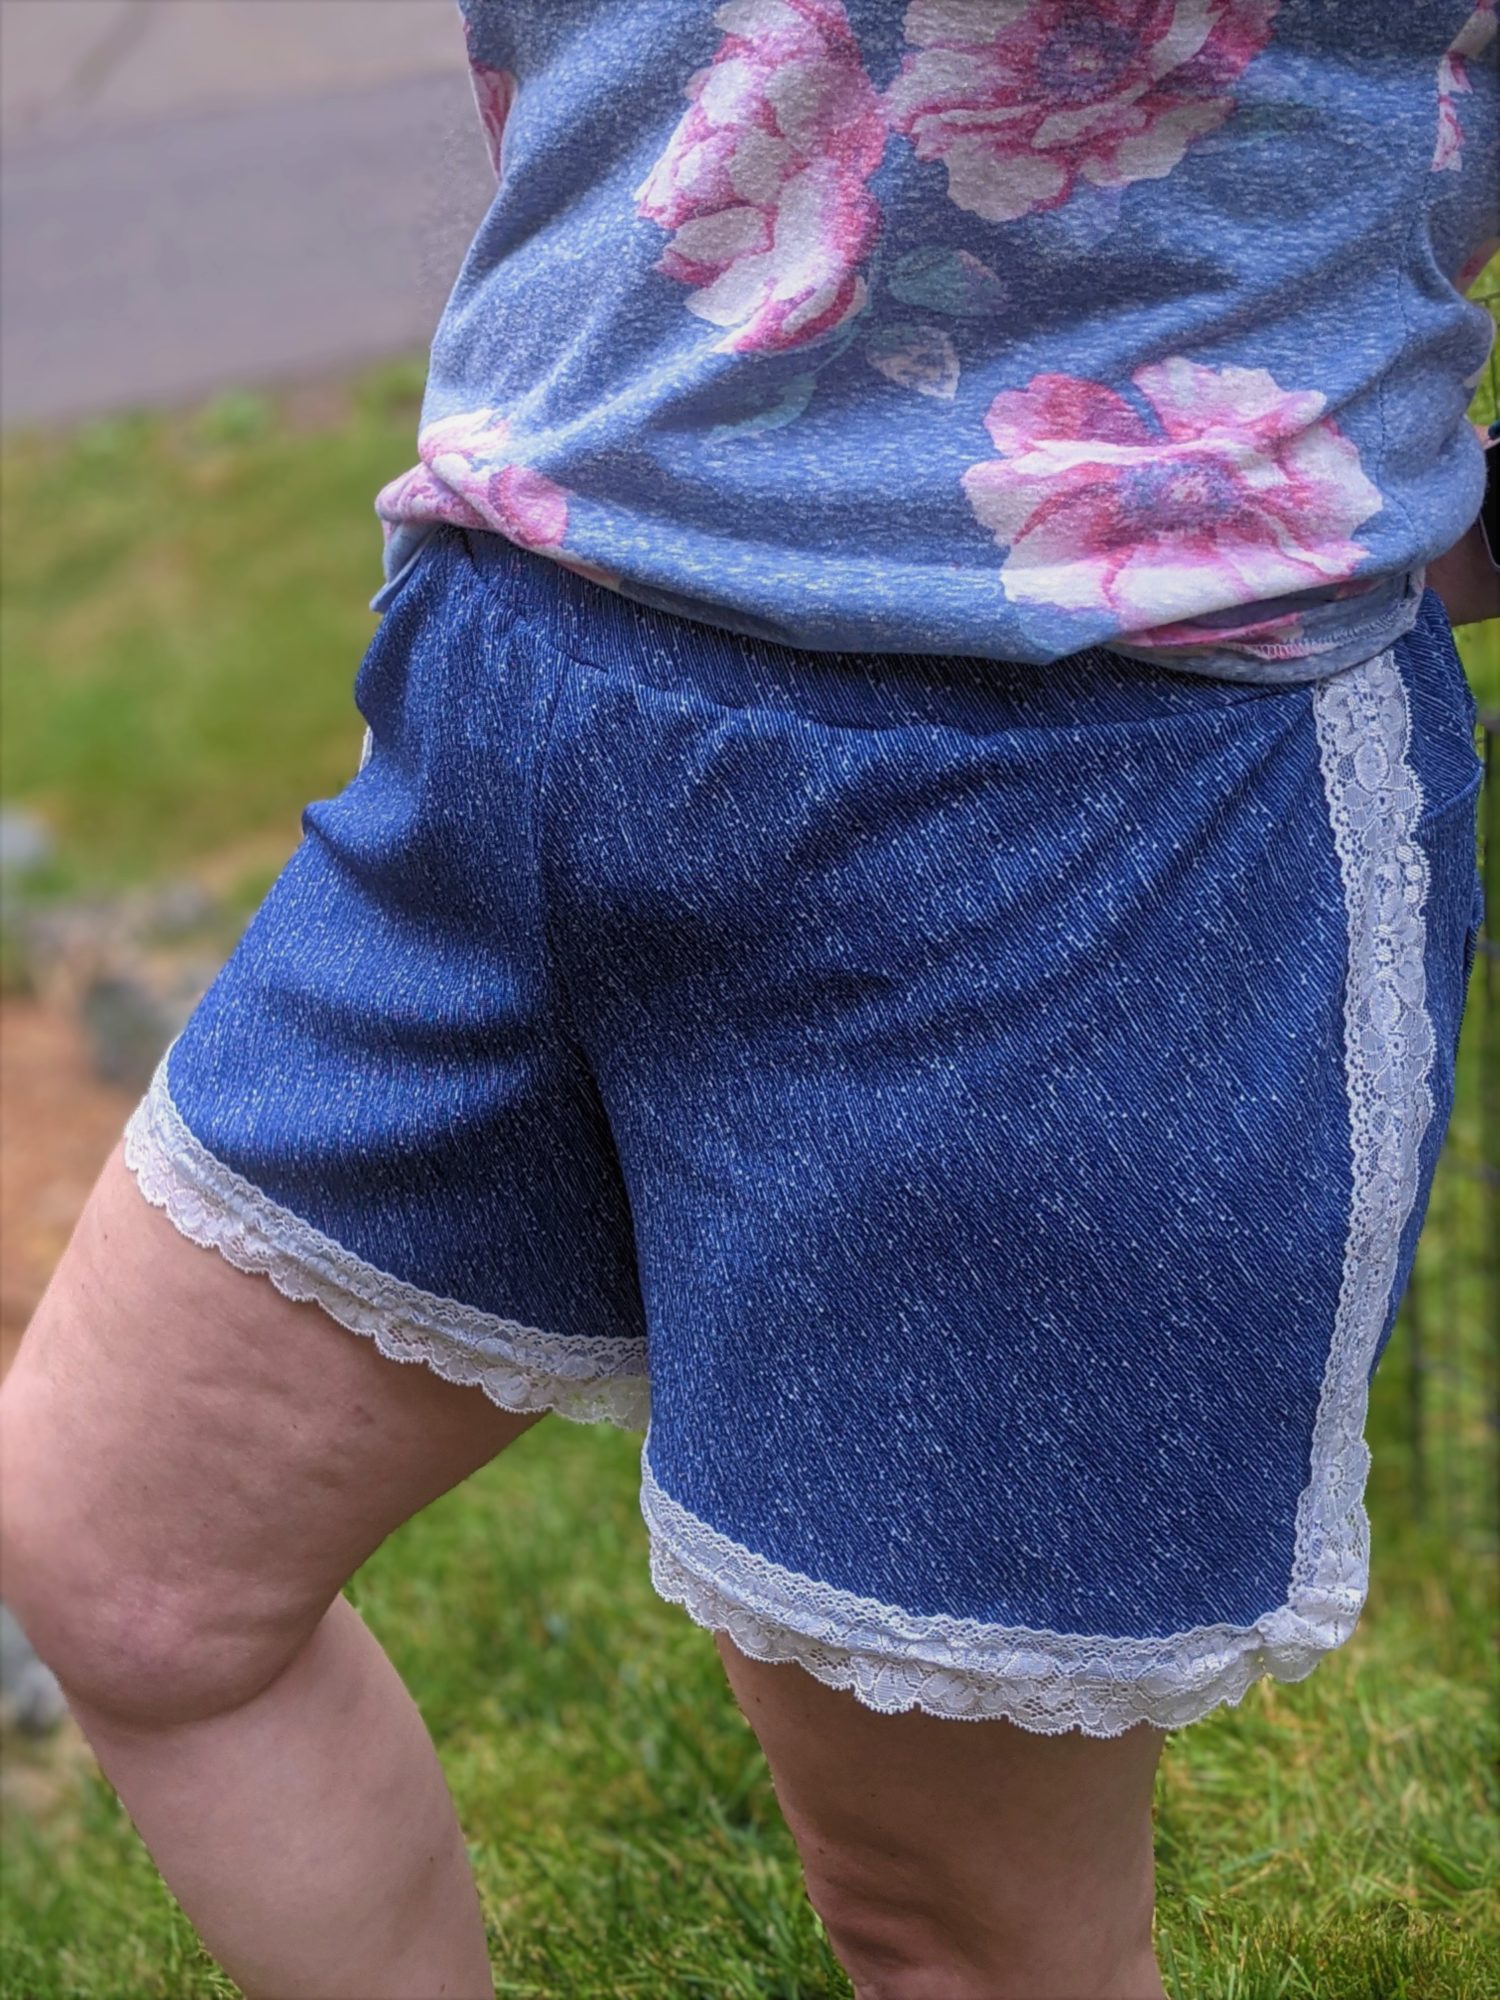
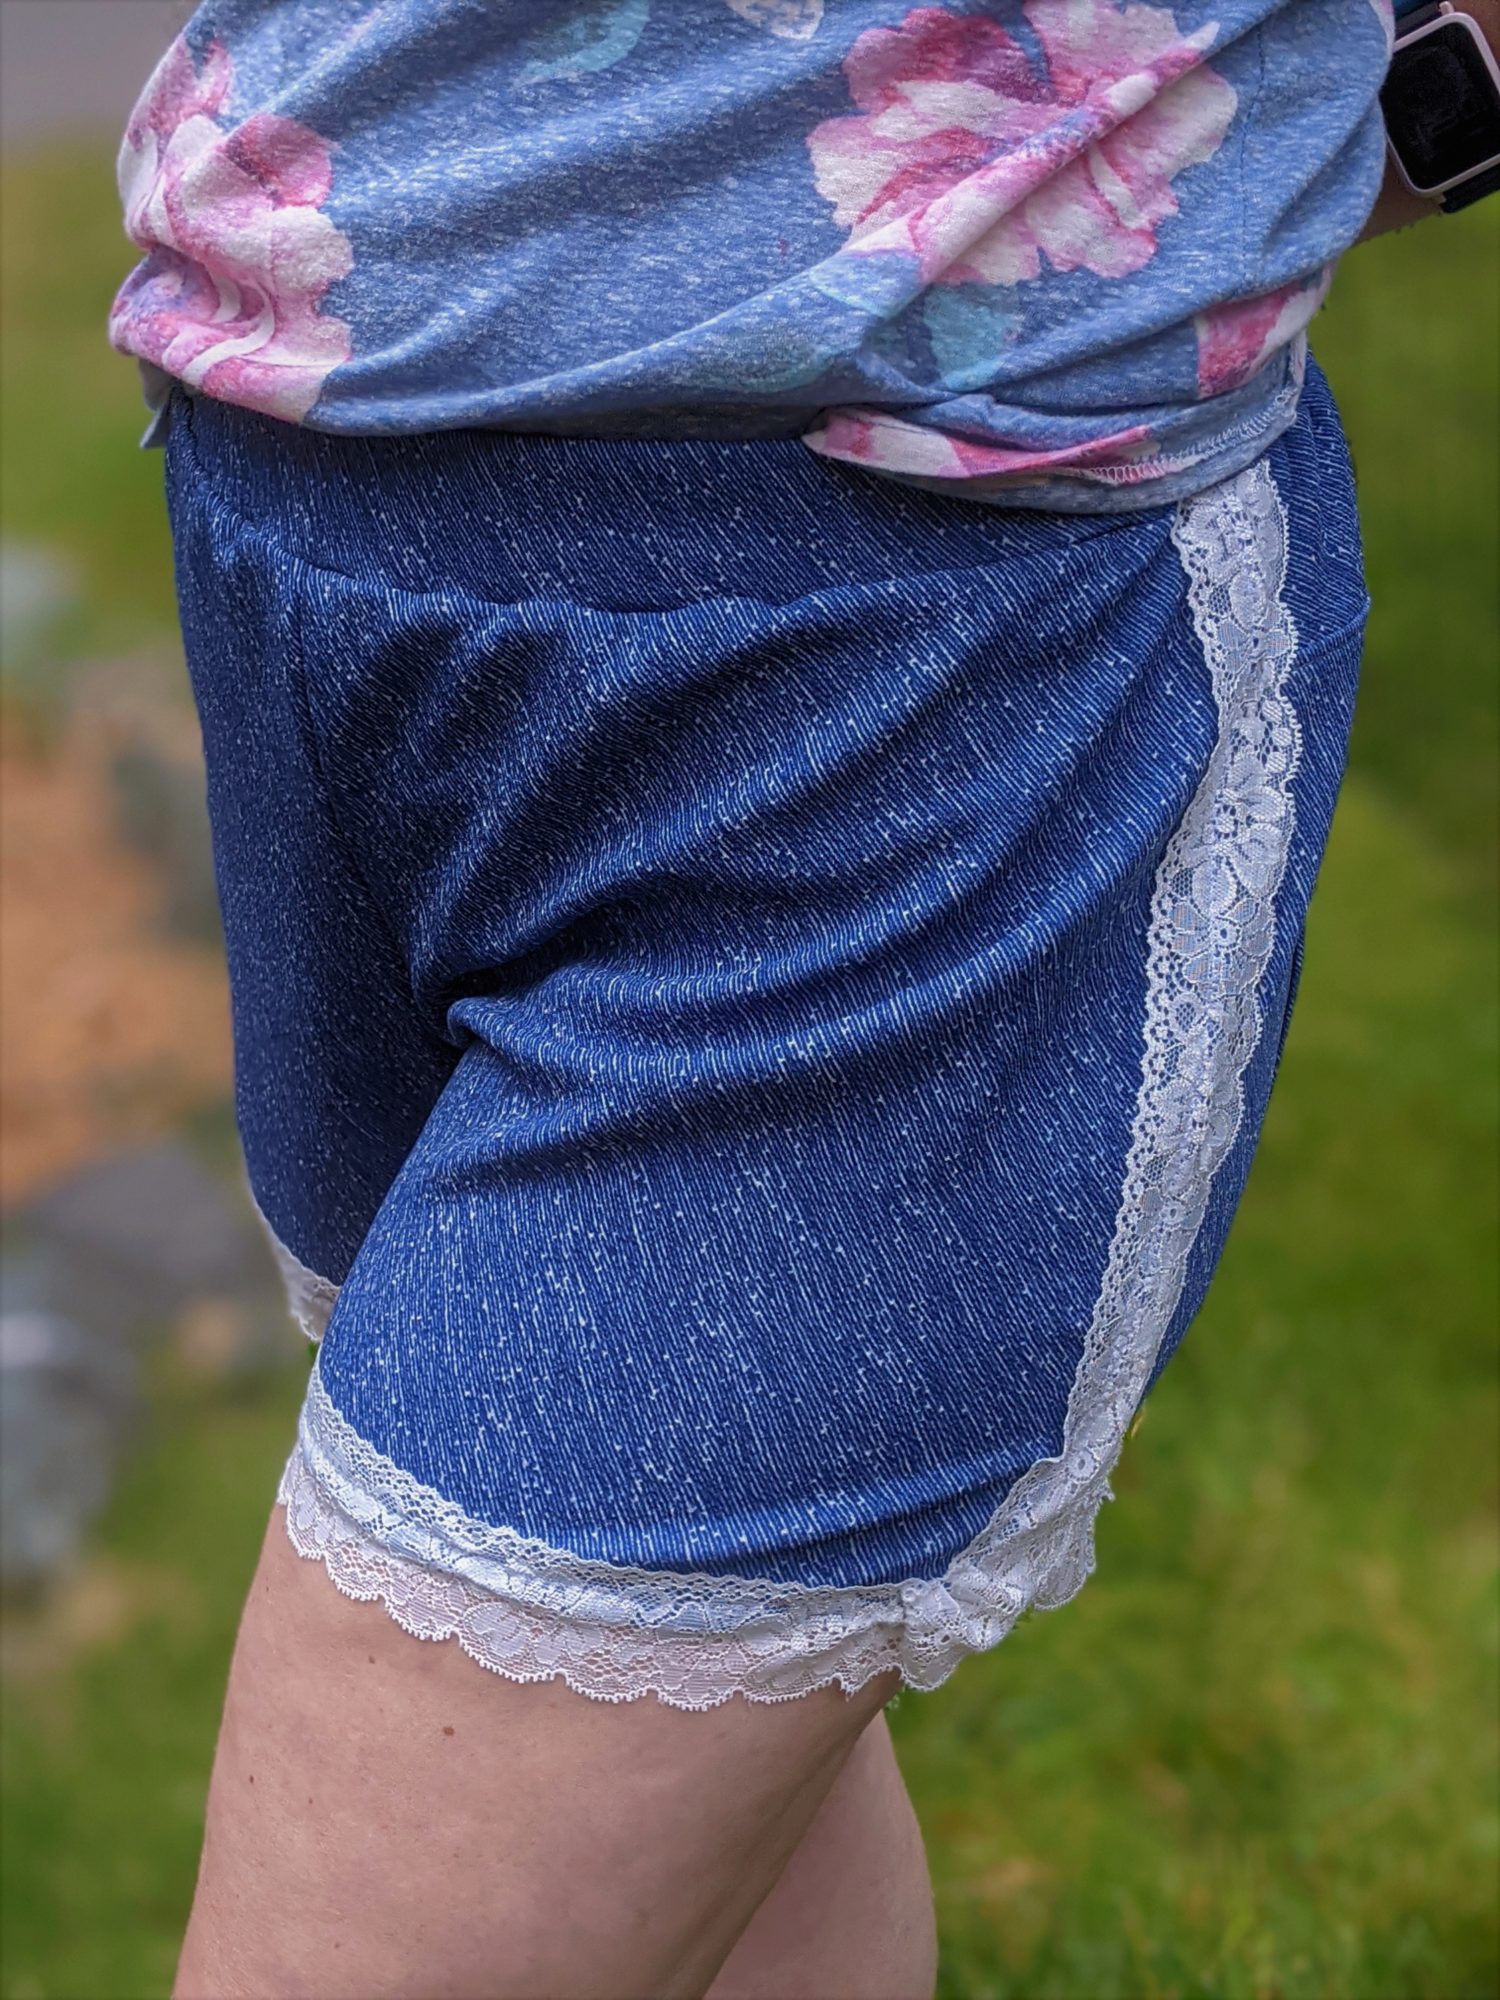
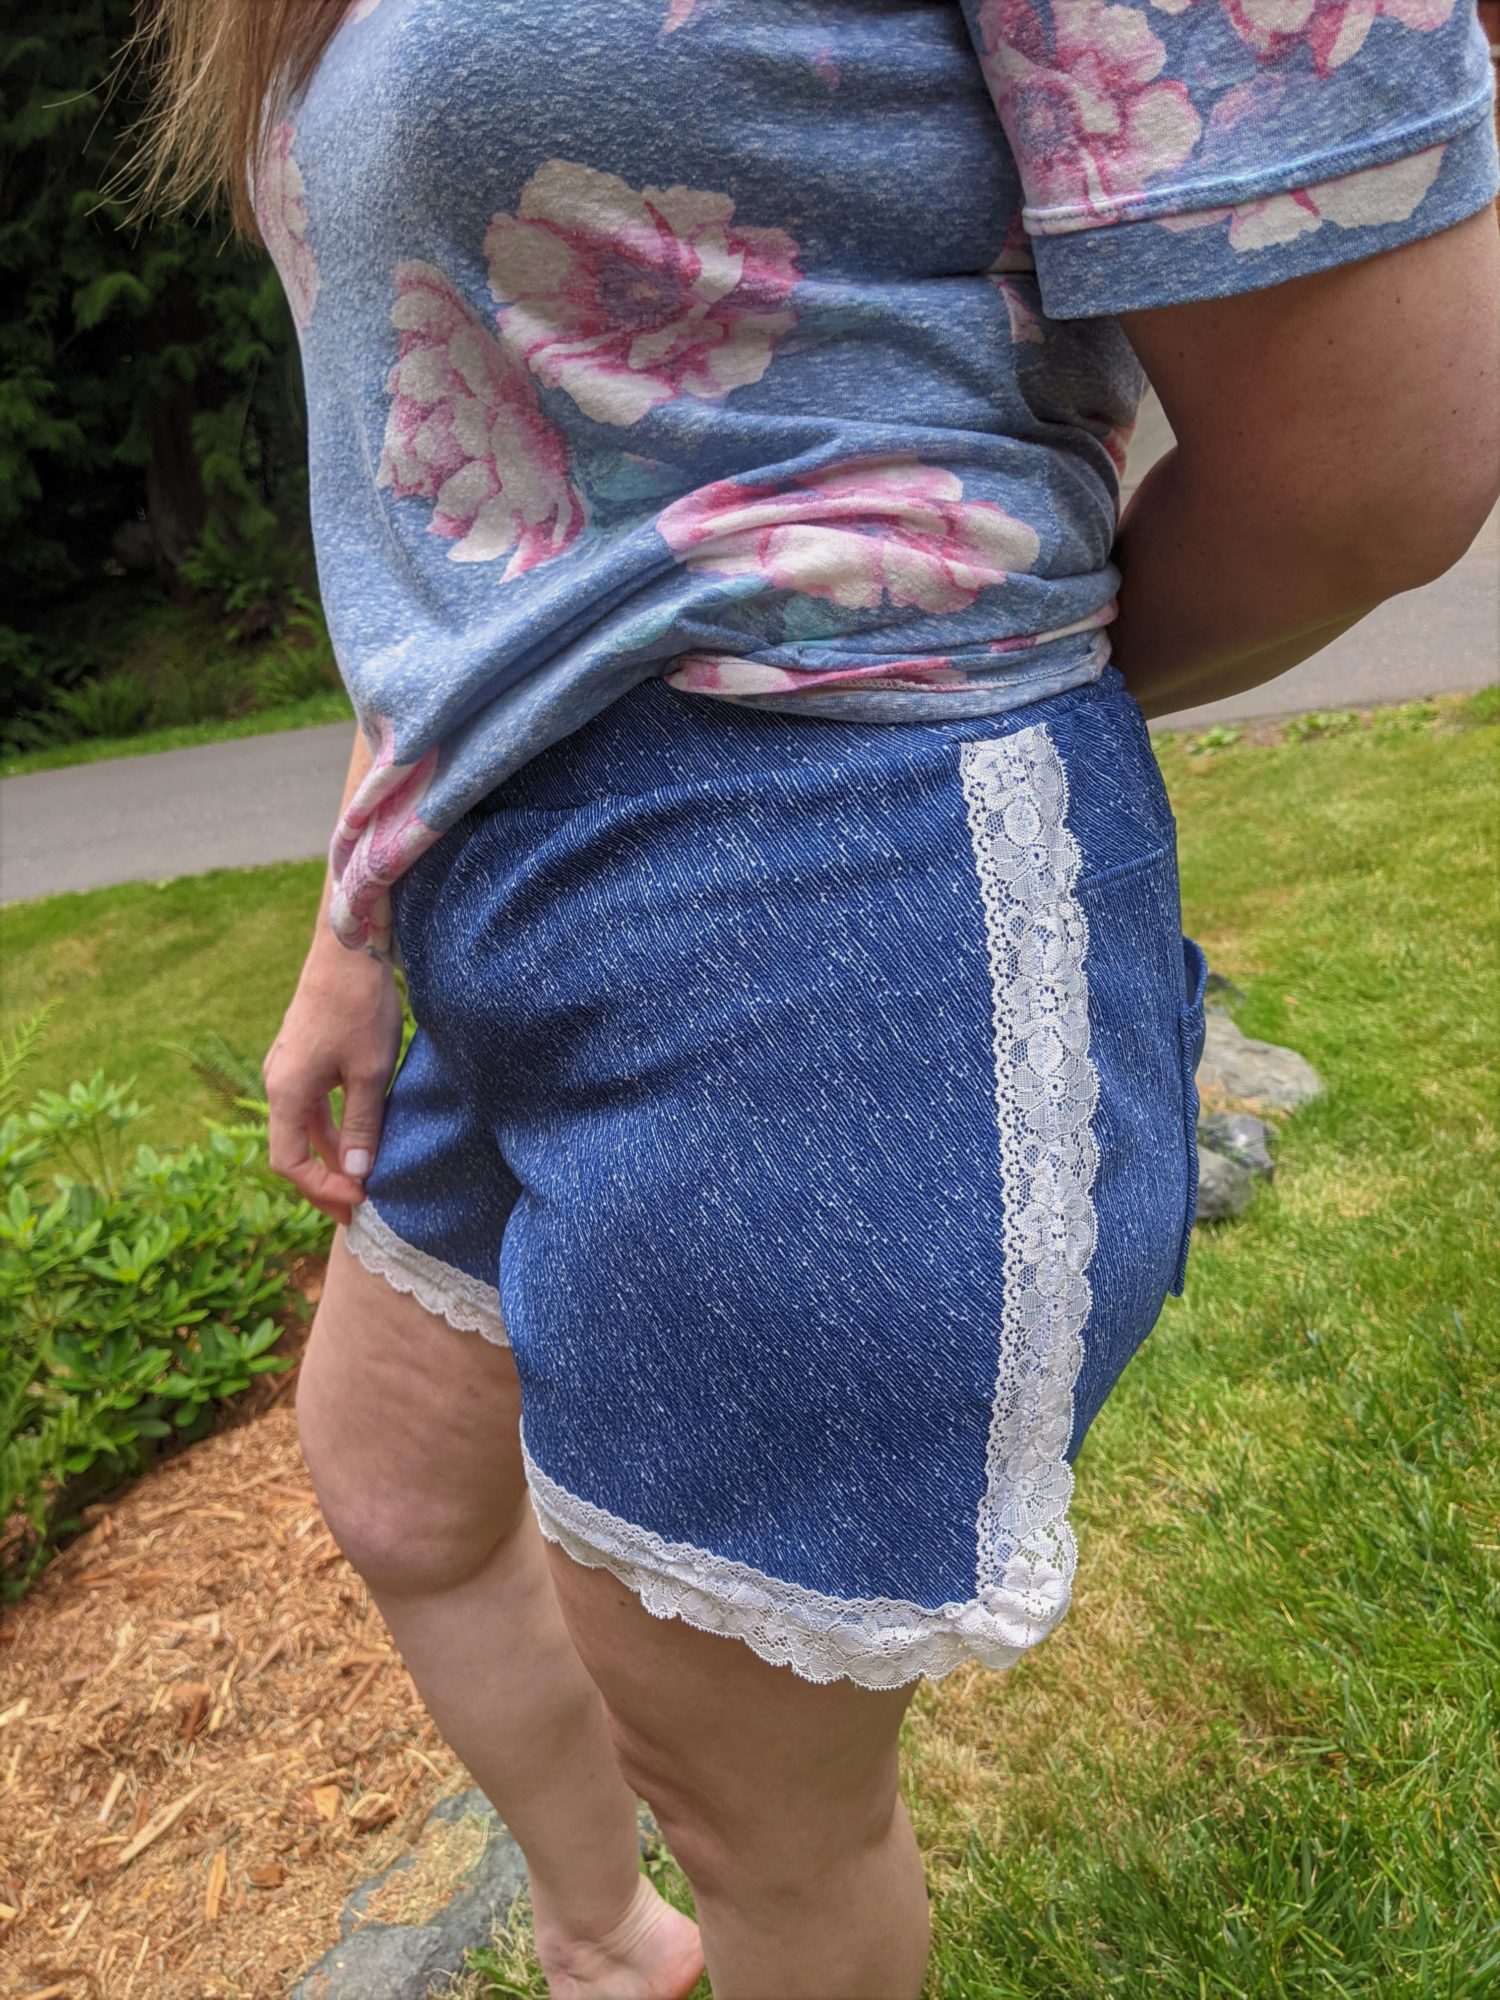
I love the binding detail on the Malia Shorts. It gives a great pop of color, and accents the lines of the pattern. With a few adjustments, I replaced the binding with lace trim and it’s so cute and summery!
Let’s get right to it!
For these shorts, I used 1.5″ stretch lace. You can decide if you want to use stretch or non-stretch lace and any width that you think looks good. I also added regular back pockets to my shorts, so just ignore that part of the pictures.
- Print and assemble your pattern as instructed in the tutorial
- Cut out all pieces per the tutorial except for the binding
- Find the cut chart for the binding in the tutorial on page 17
- Find the length for your size and add 2″ to that measurement
- Cut 2 strips of lace to your determined length
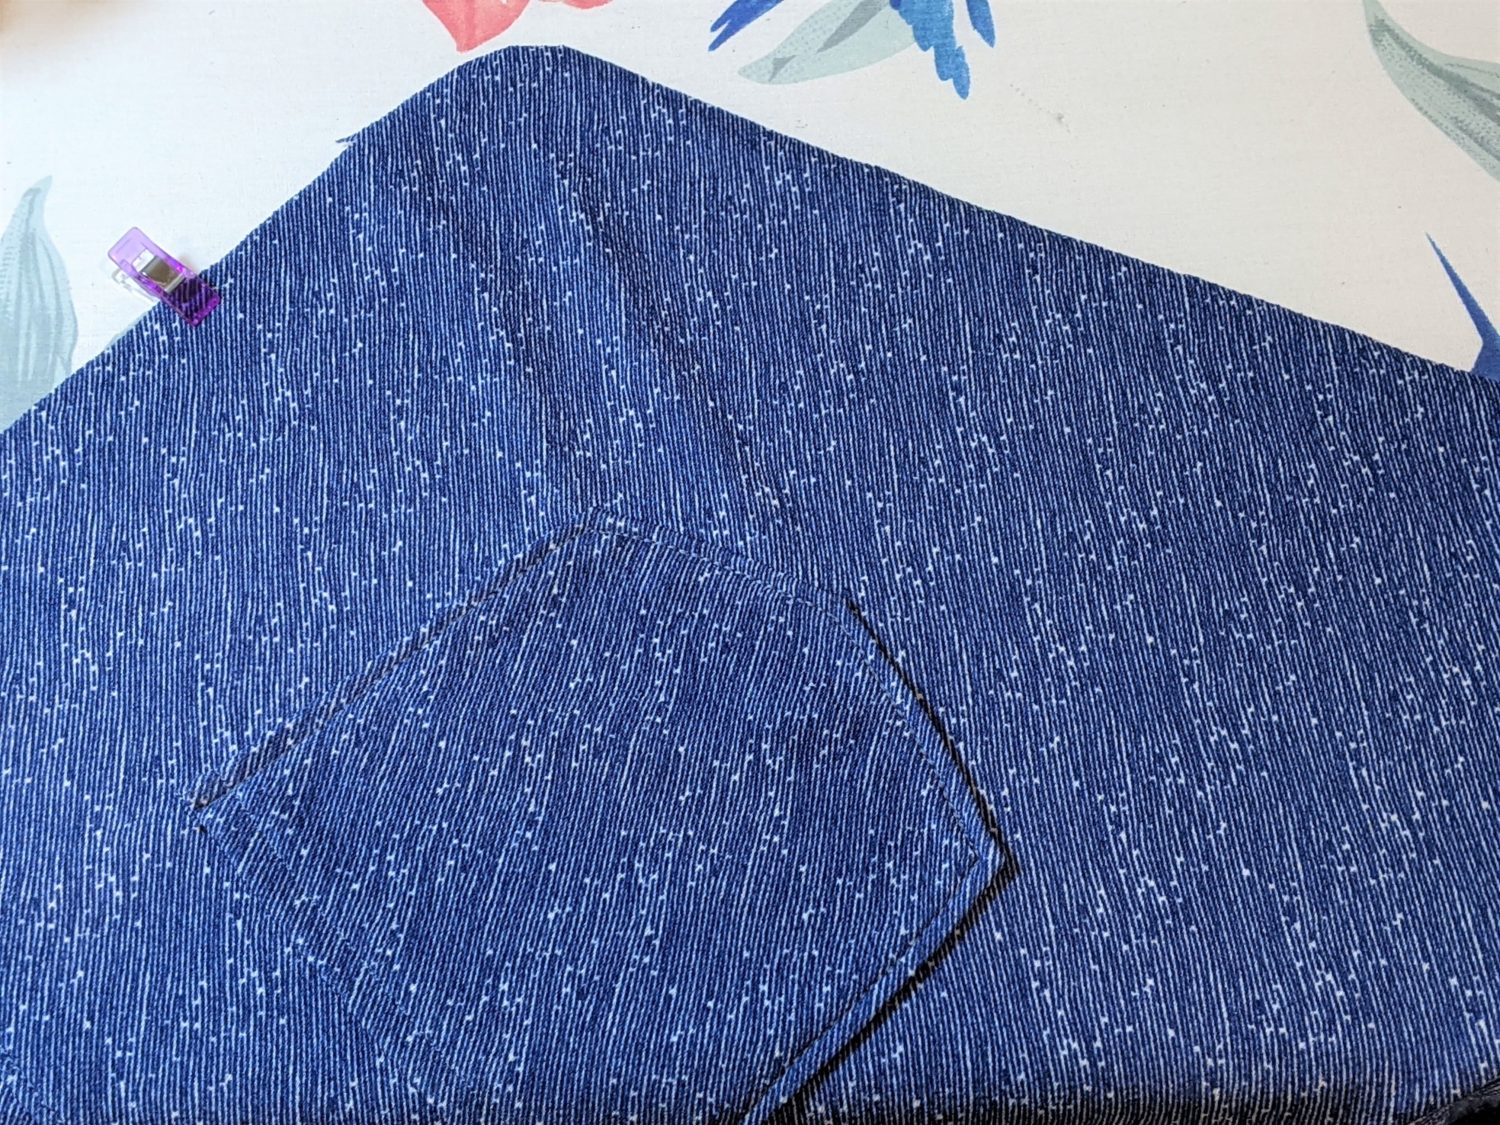
- Follow the instructions in the tutorial to sew the front, back, yoke, and crotch seam.
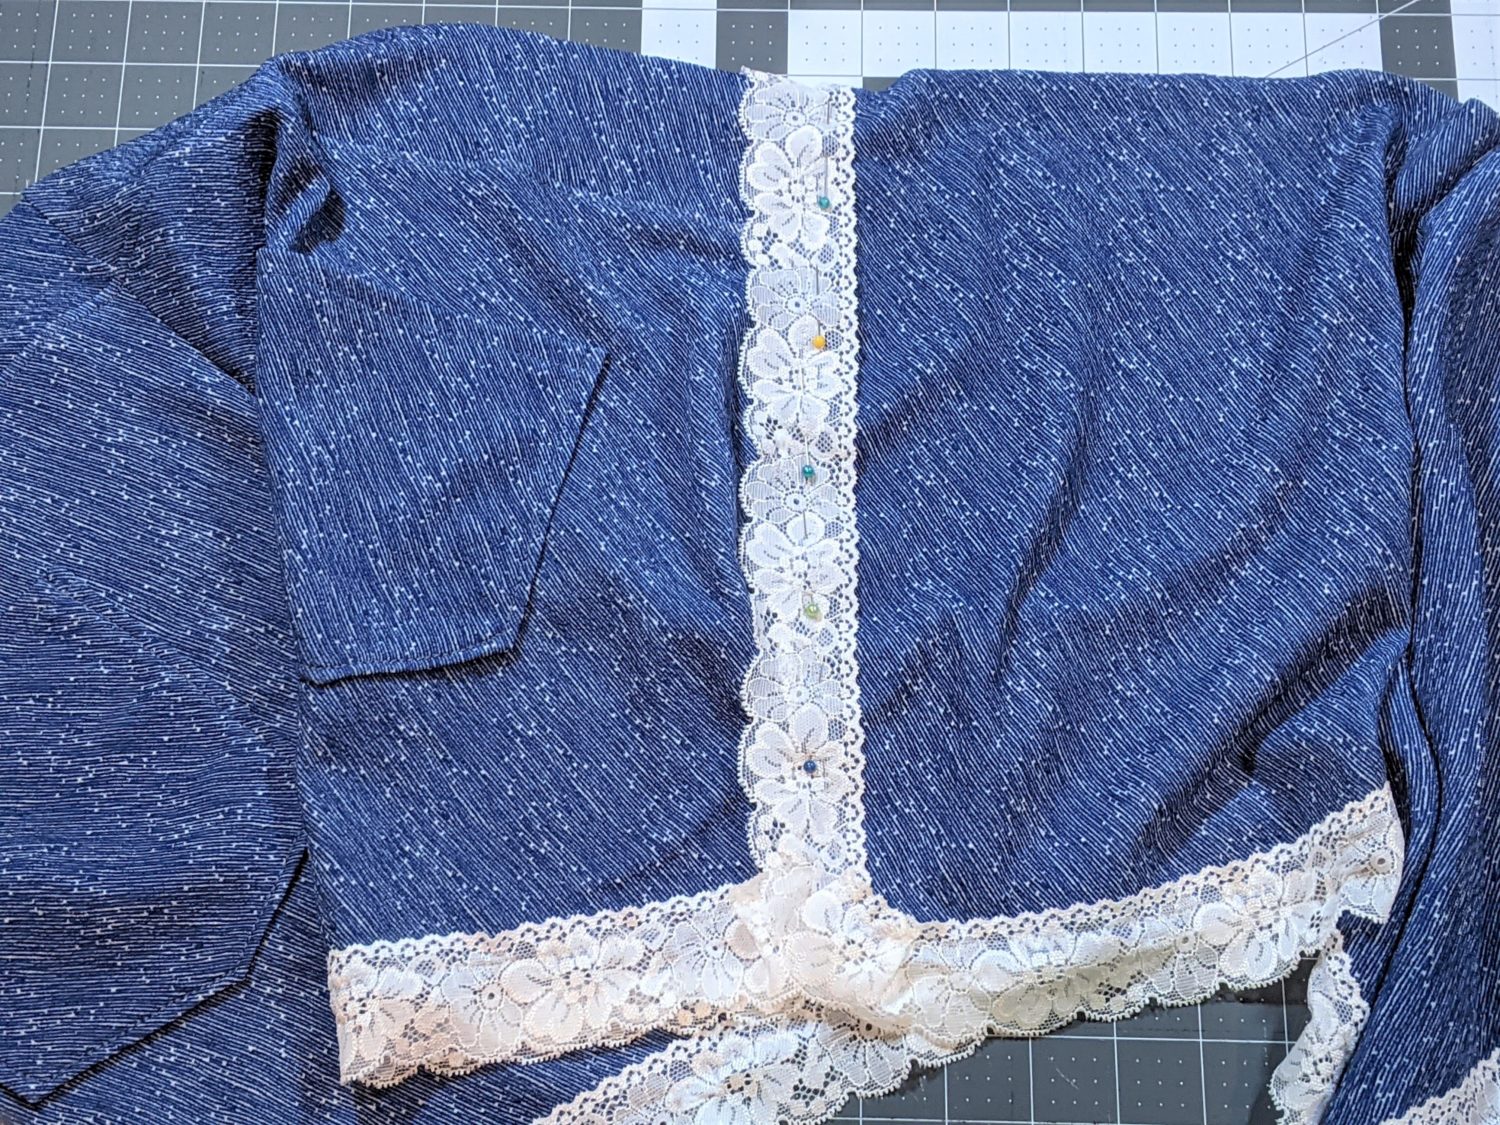
- Place a pin or clip on the back legs 1/2″ above the diamond marked on the pattern piece.
- Fold the fabric edge in 3/8″ towards the back all the way from your back leg marking to the top of the waist opening on the front. (This follows the placement instructions for the binding in the tutorial.)
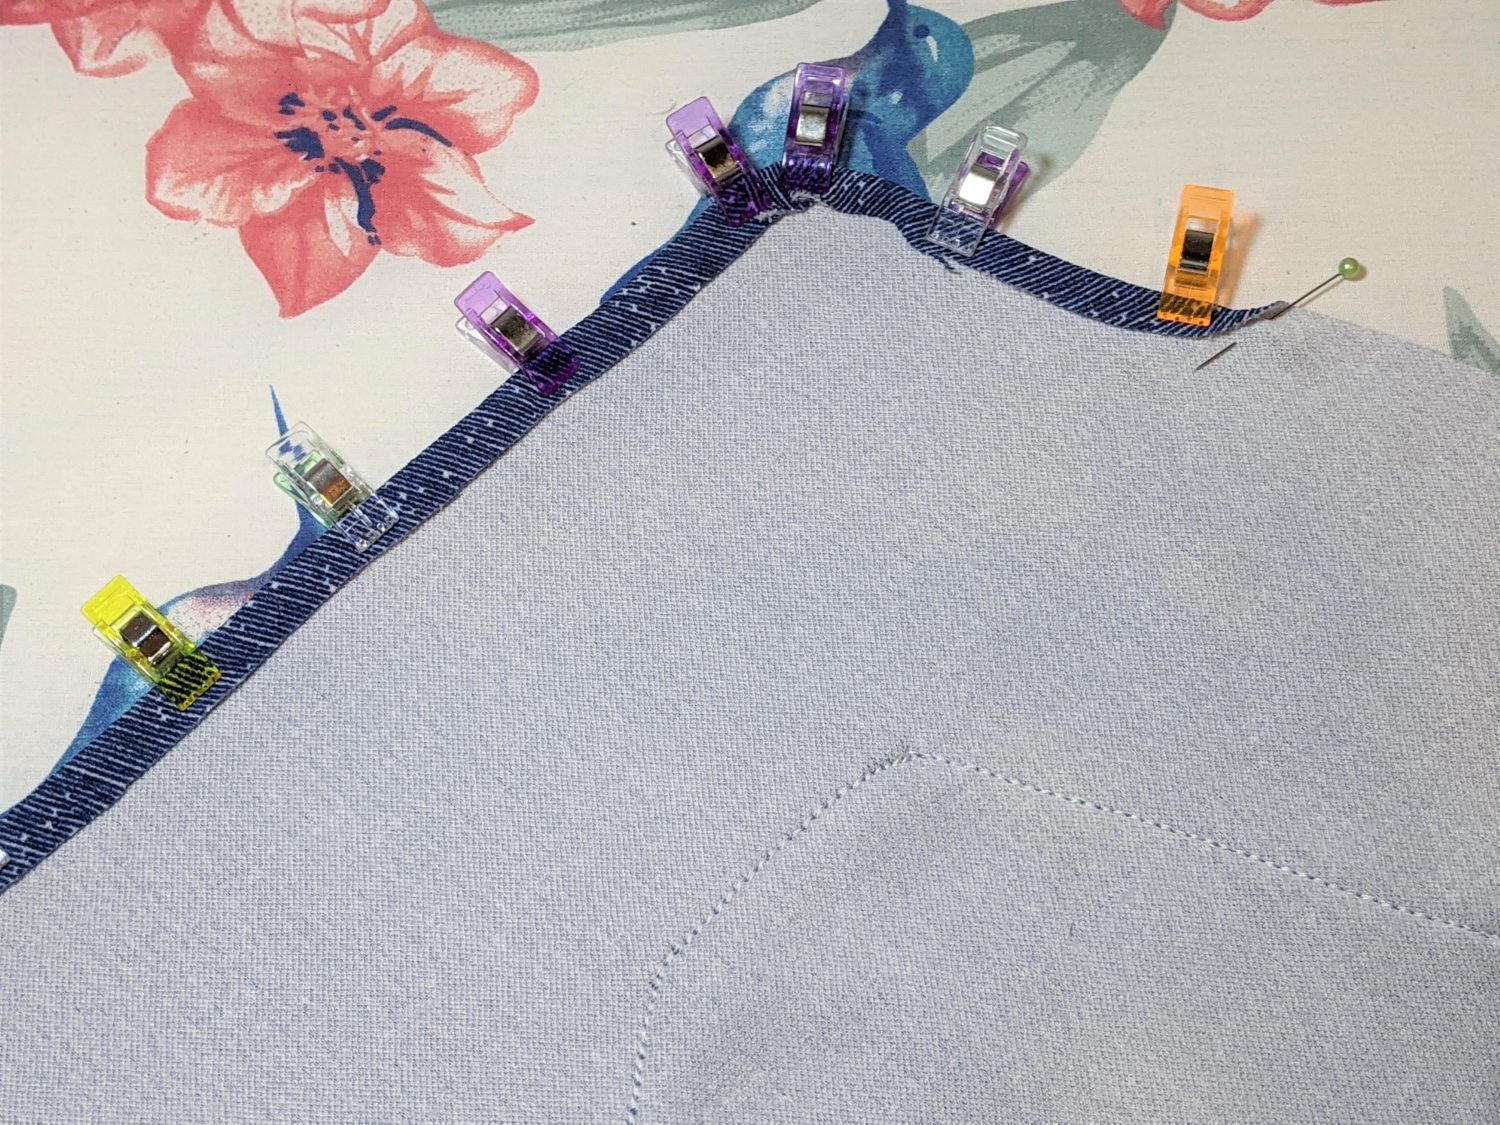
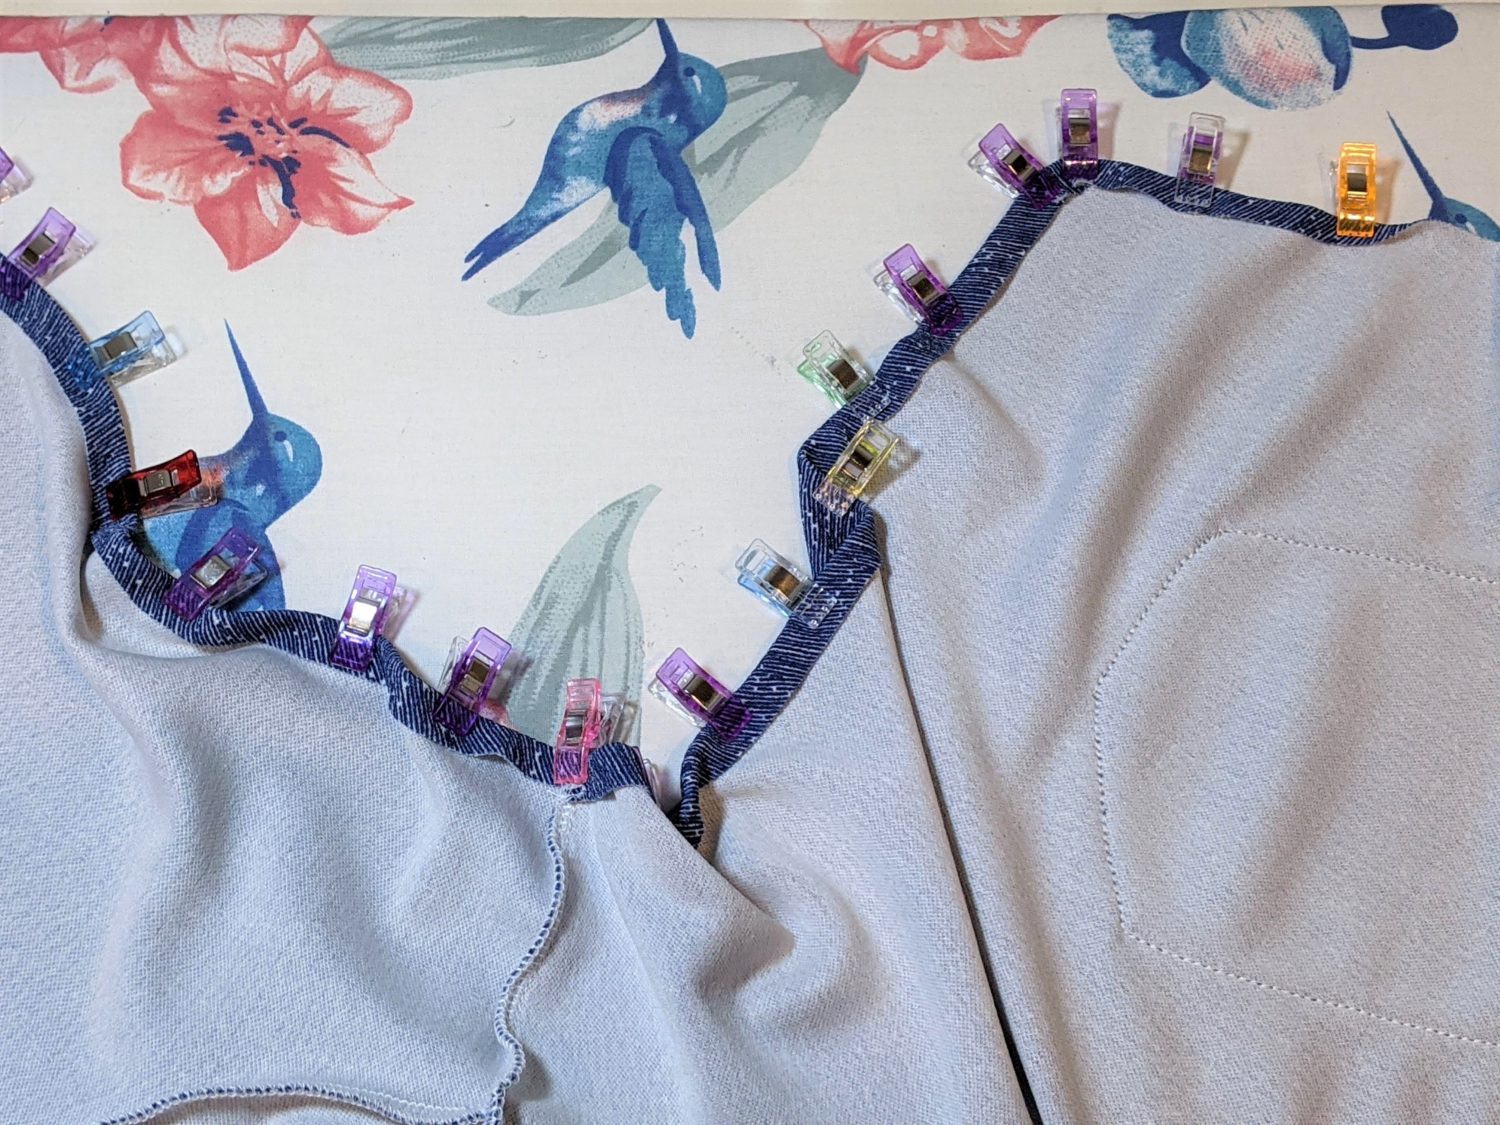
- Topstitch along the pinned edge with a 1/4″ seam allowance, sewing off the edge when you get to the last pin marking on the back leg.
- Repeat on the other leg.
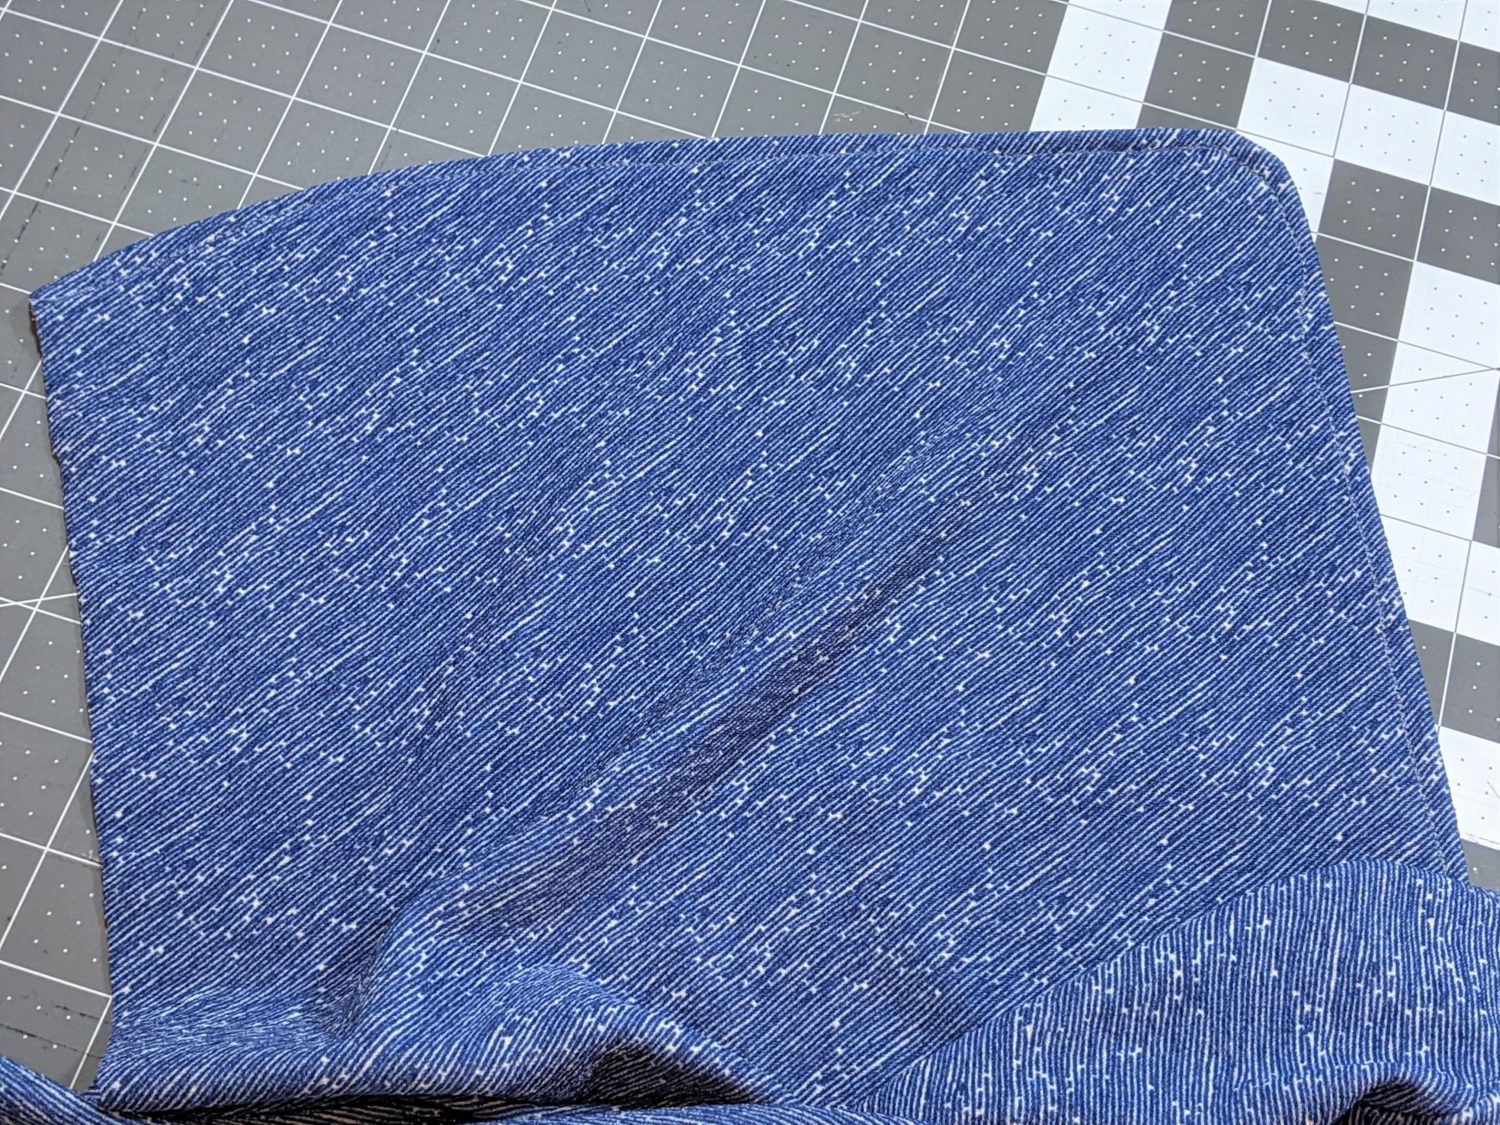
- Press all along both edges.
Adding the Lace
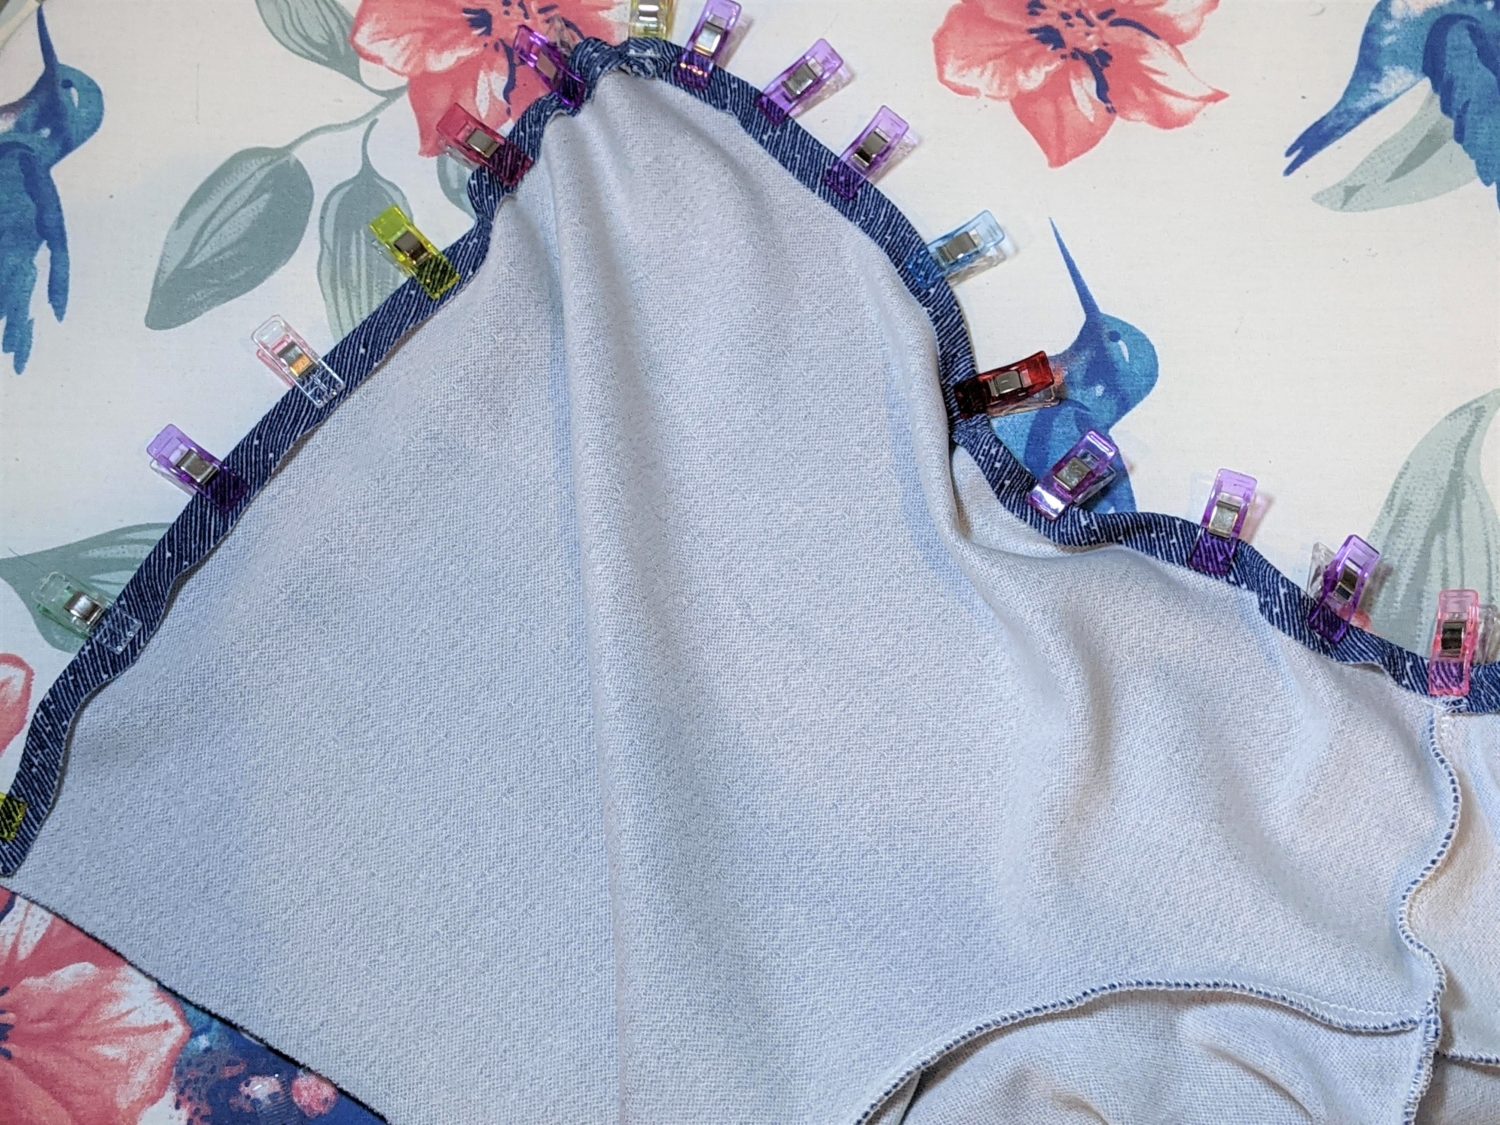
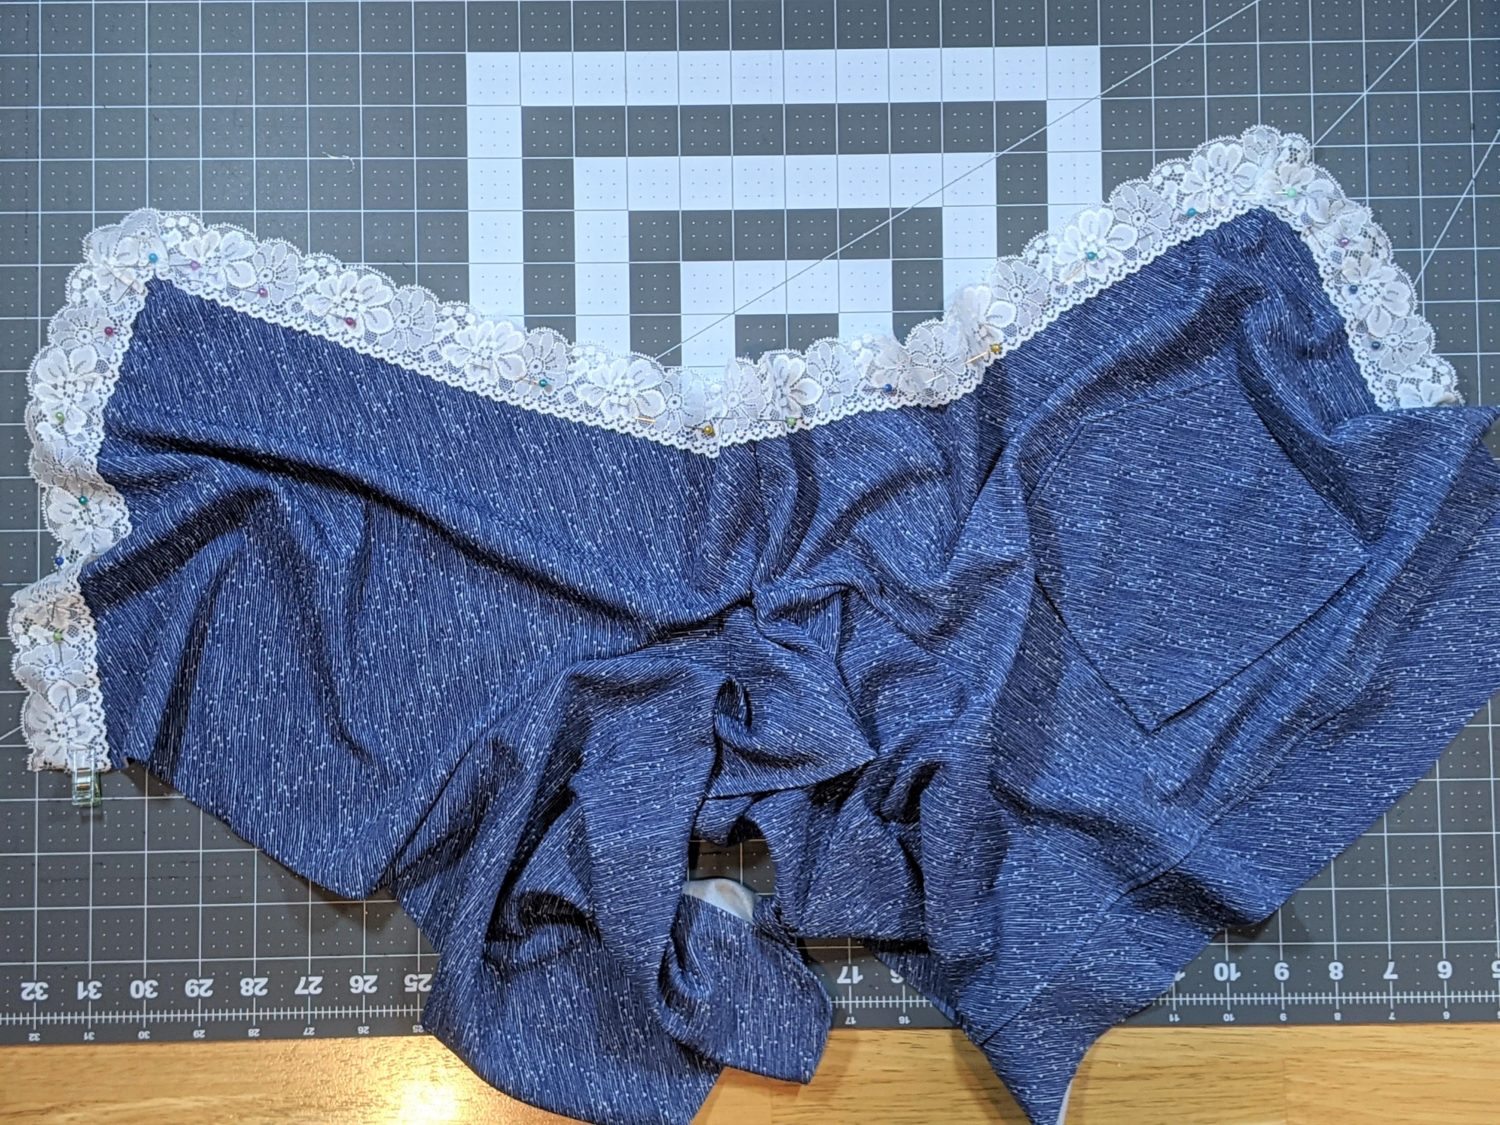
- Take one of your lace strips and lay it wrong side down against the right side of your hemmed leg edge at the back leg marking.
- Pin the lace along the edge up to the first corner.
- As you get to the corner, carefully fold and pin the lace around the curve until it lays down how you like it.
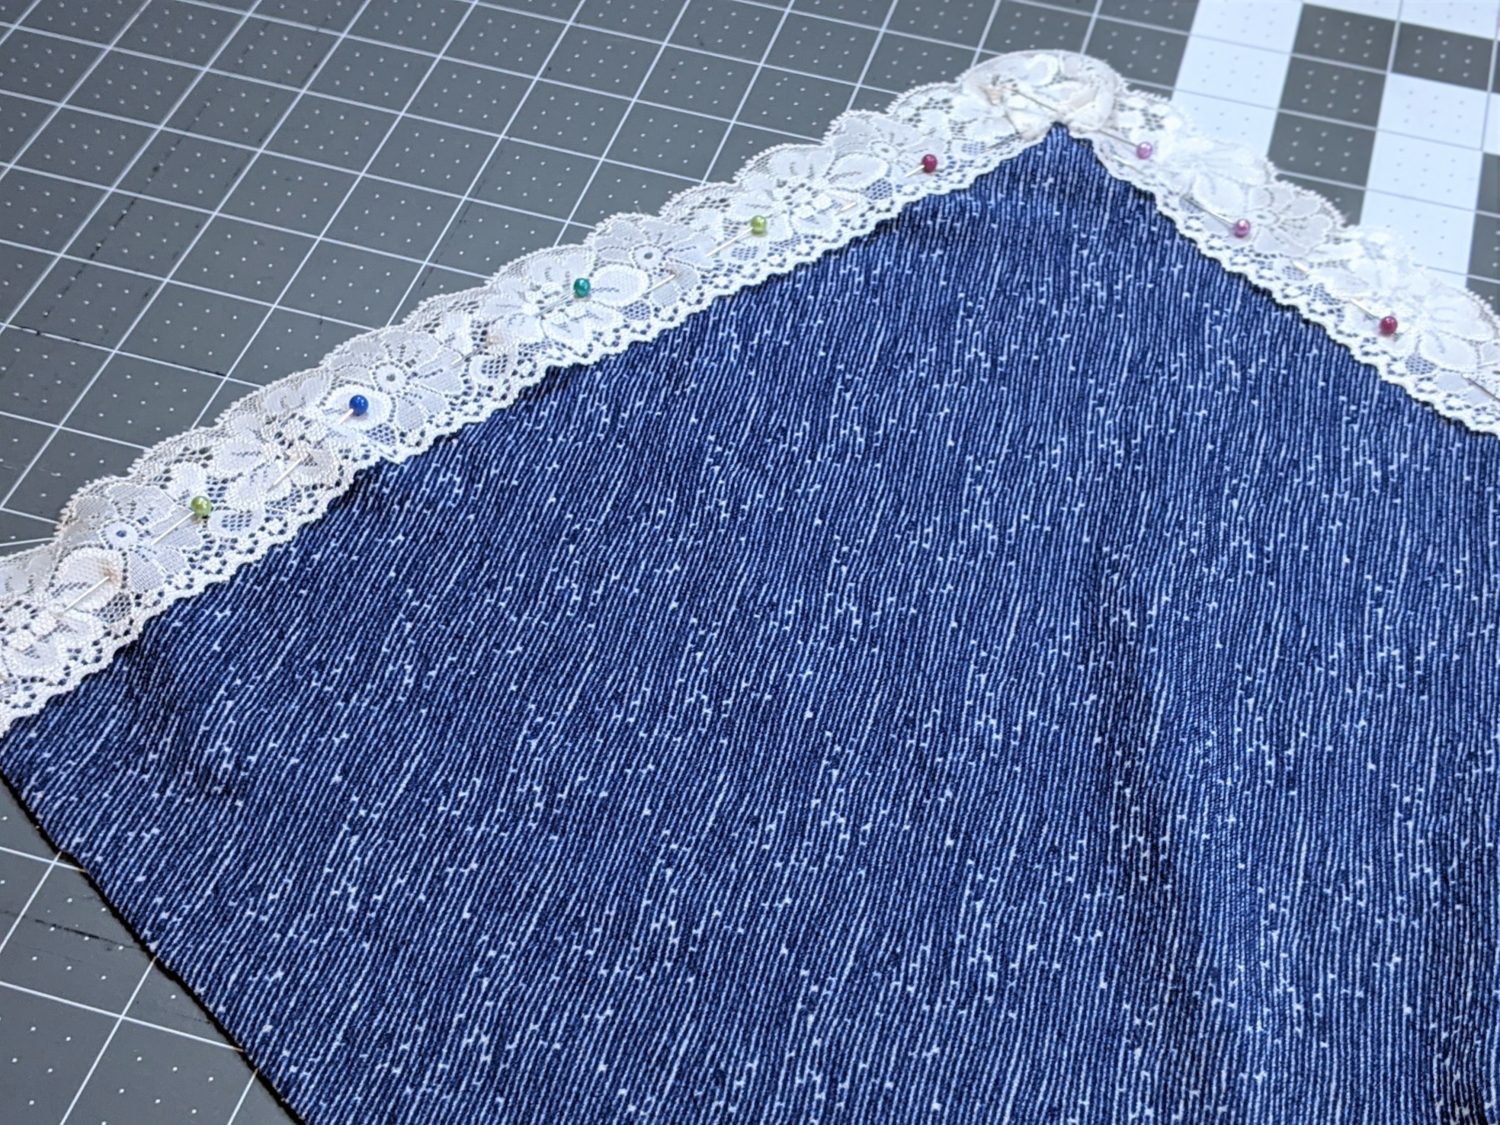
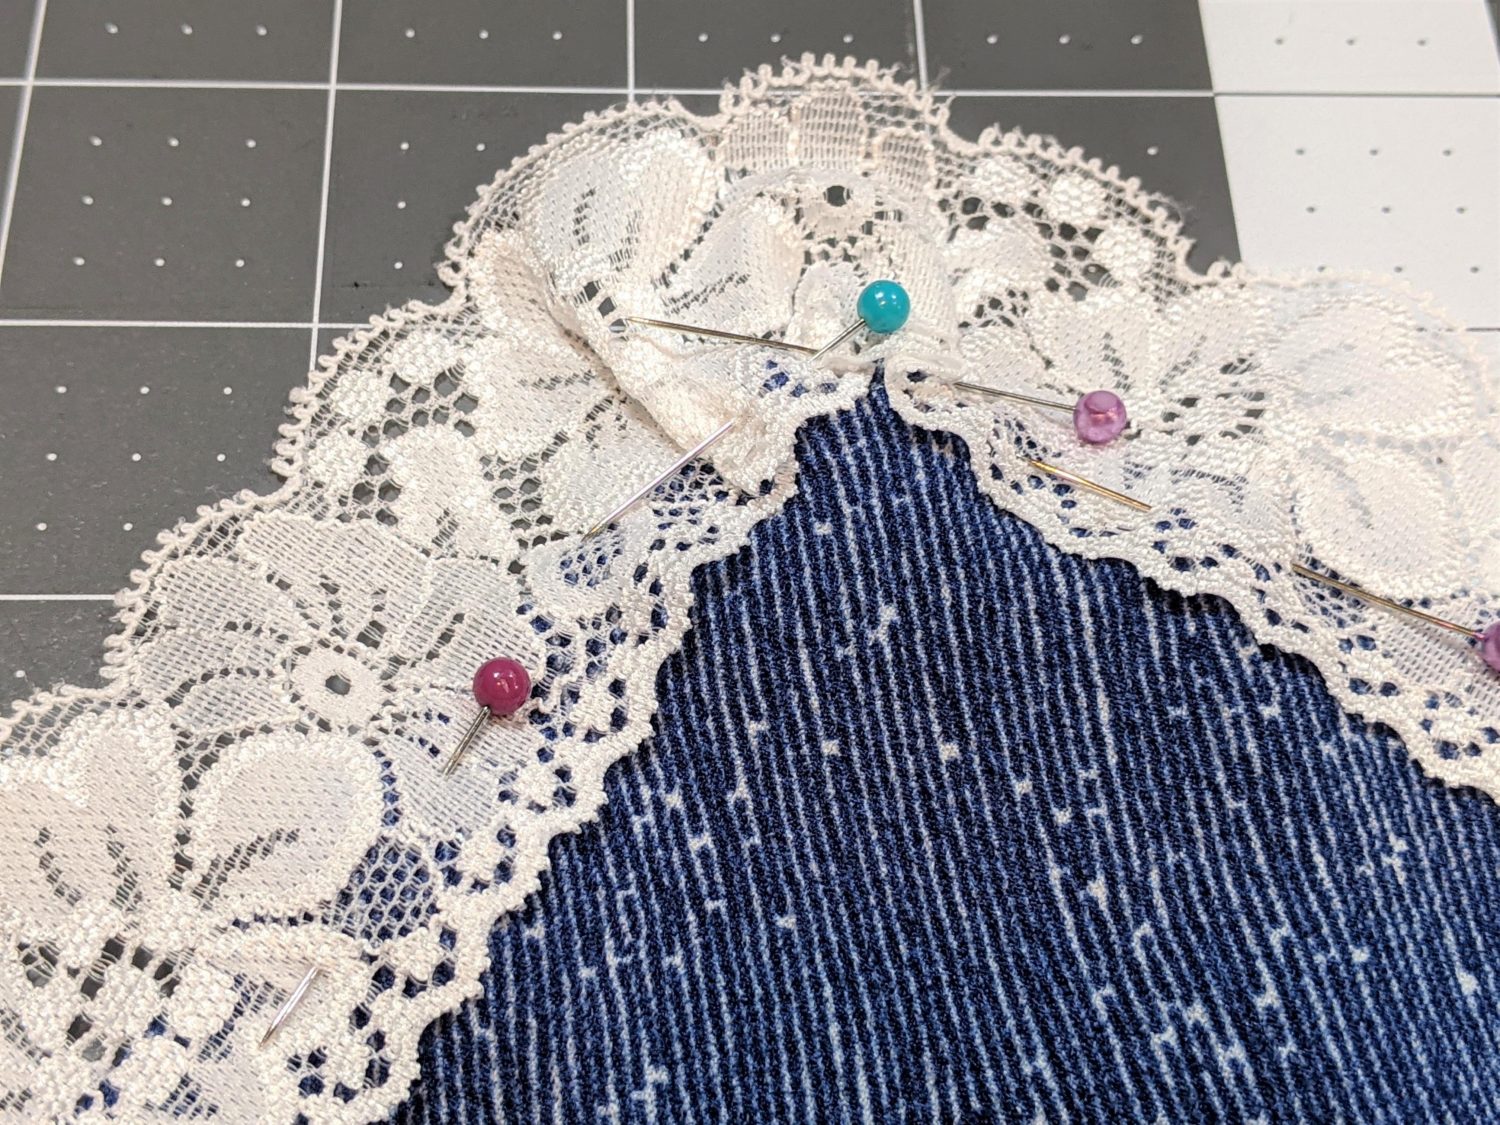
- Continue pinning along the edge adjust the lace at the second corner, then continue pinning until you reach the top of the front waist opening.
- If there is any excess lace, trim it off to be even with the top of the waist.
- Repeat on the other side.
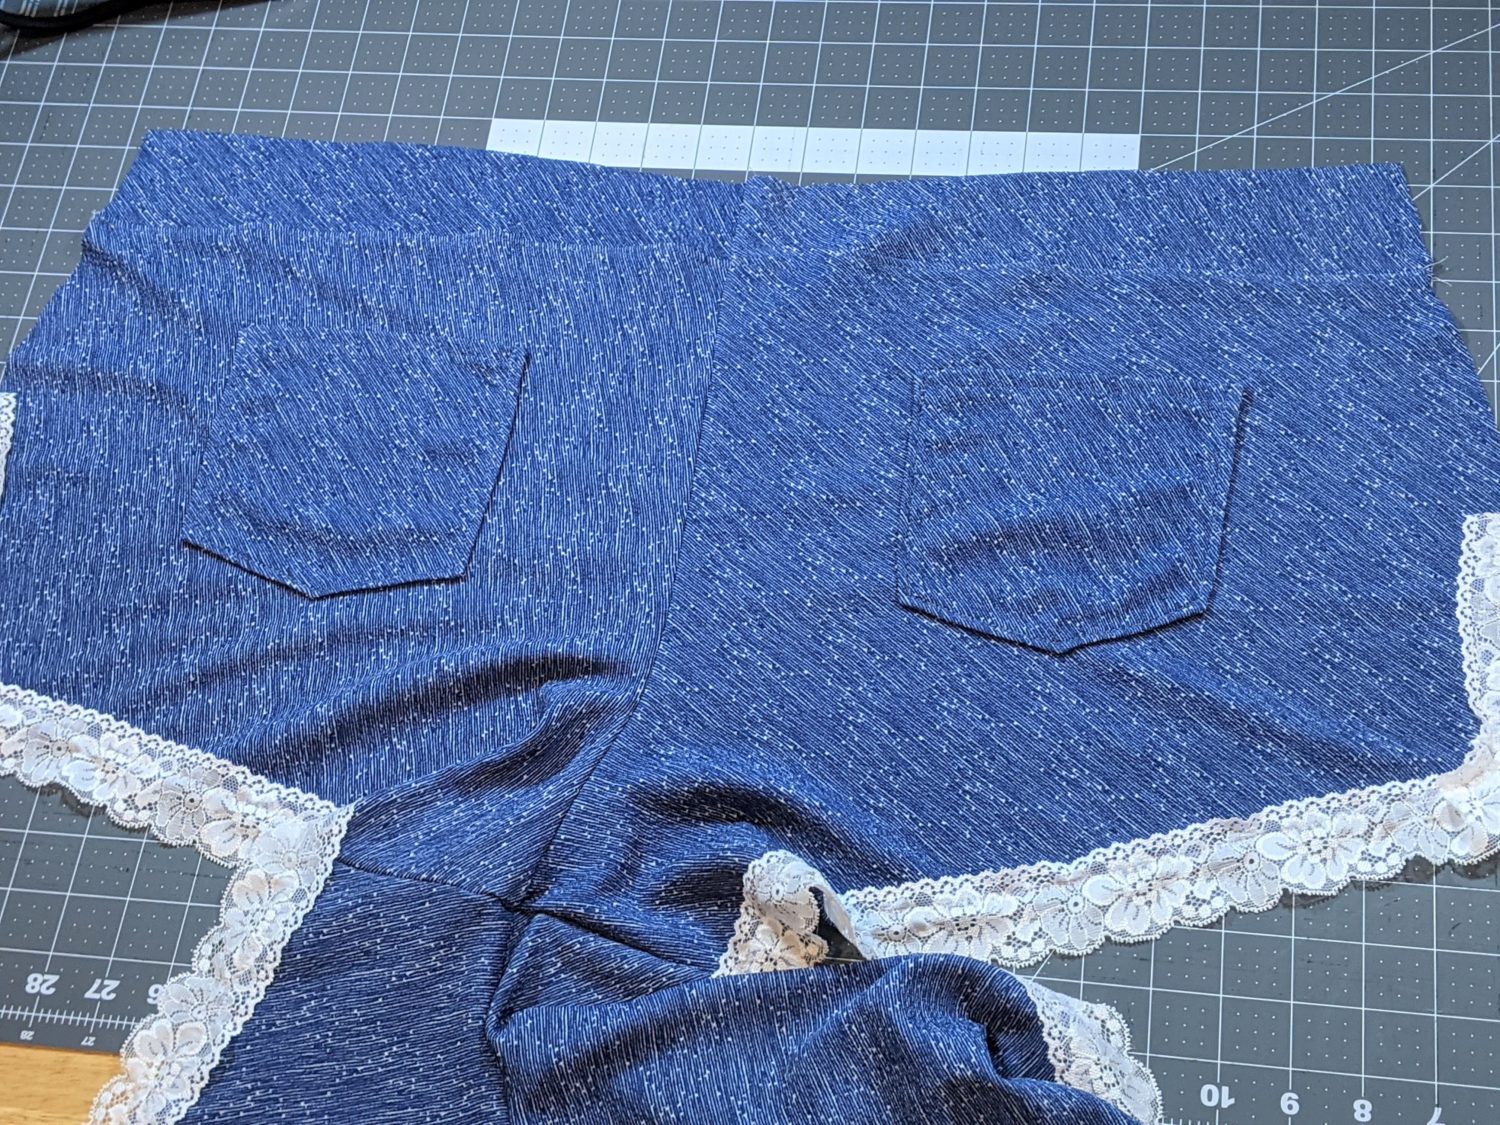
- Topstitch the lace to the shorts using thread that matches the lace, try to follow close to the hem stitching on the shorts.
- Lay the front wrong side on top of the back right side along the side seams and follow the tutorial to sew the side seams together.
- Attach your waistband as instructed.
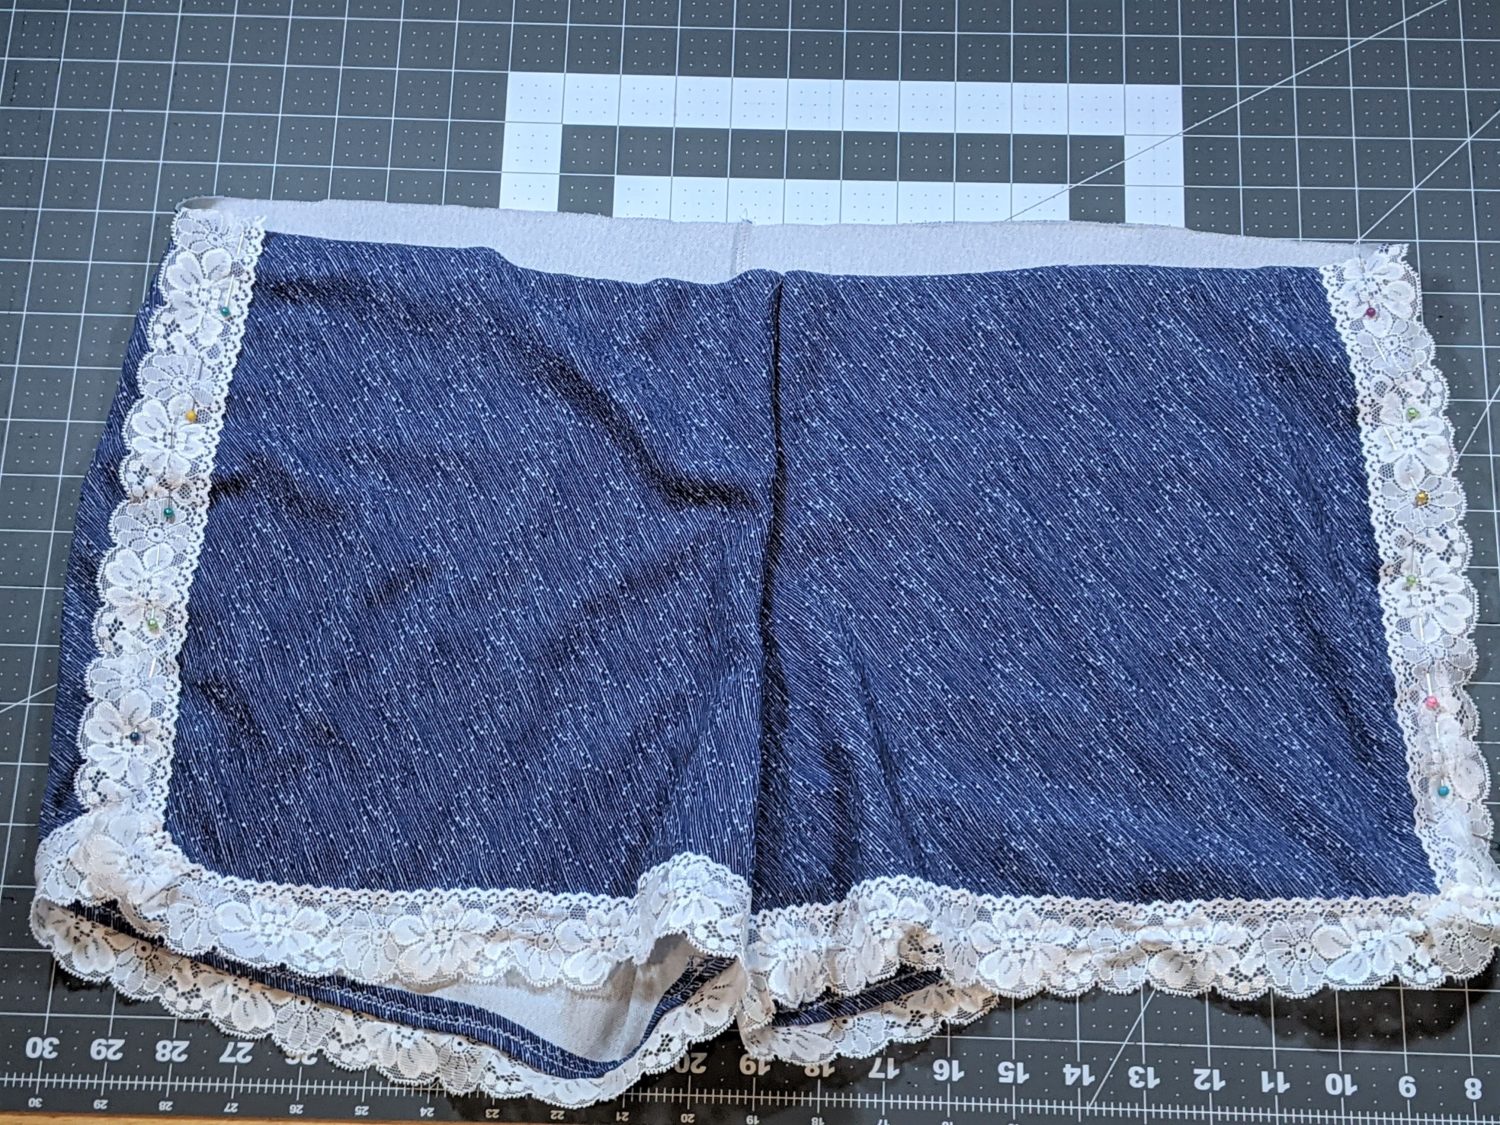
Ta-da! So cute and lacey!
Want more FUN DIY Freebies? Check out the FREEBIE TUTORIALS and the FREEBIE PATTERNS!
As always, we’re here to help if you need it! Join us HERE and on Facebook, Instagram, Twitter, Youtube, and Pinterest. We’re everywhere you are.
OH MY GOODNESS!!!! I Love this so much! such a fun, cute, flirty little detail. Thanks so much for sharing this little hack.