
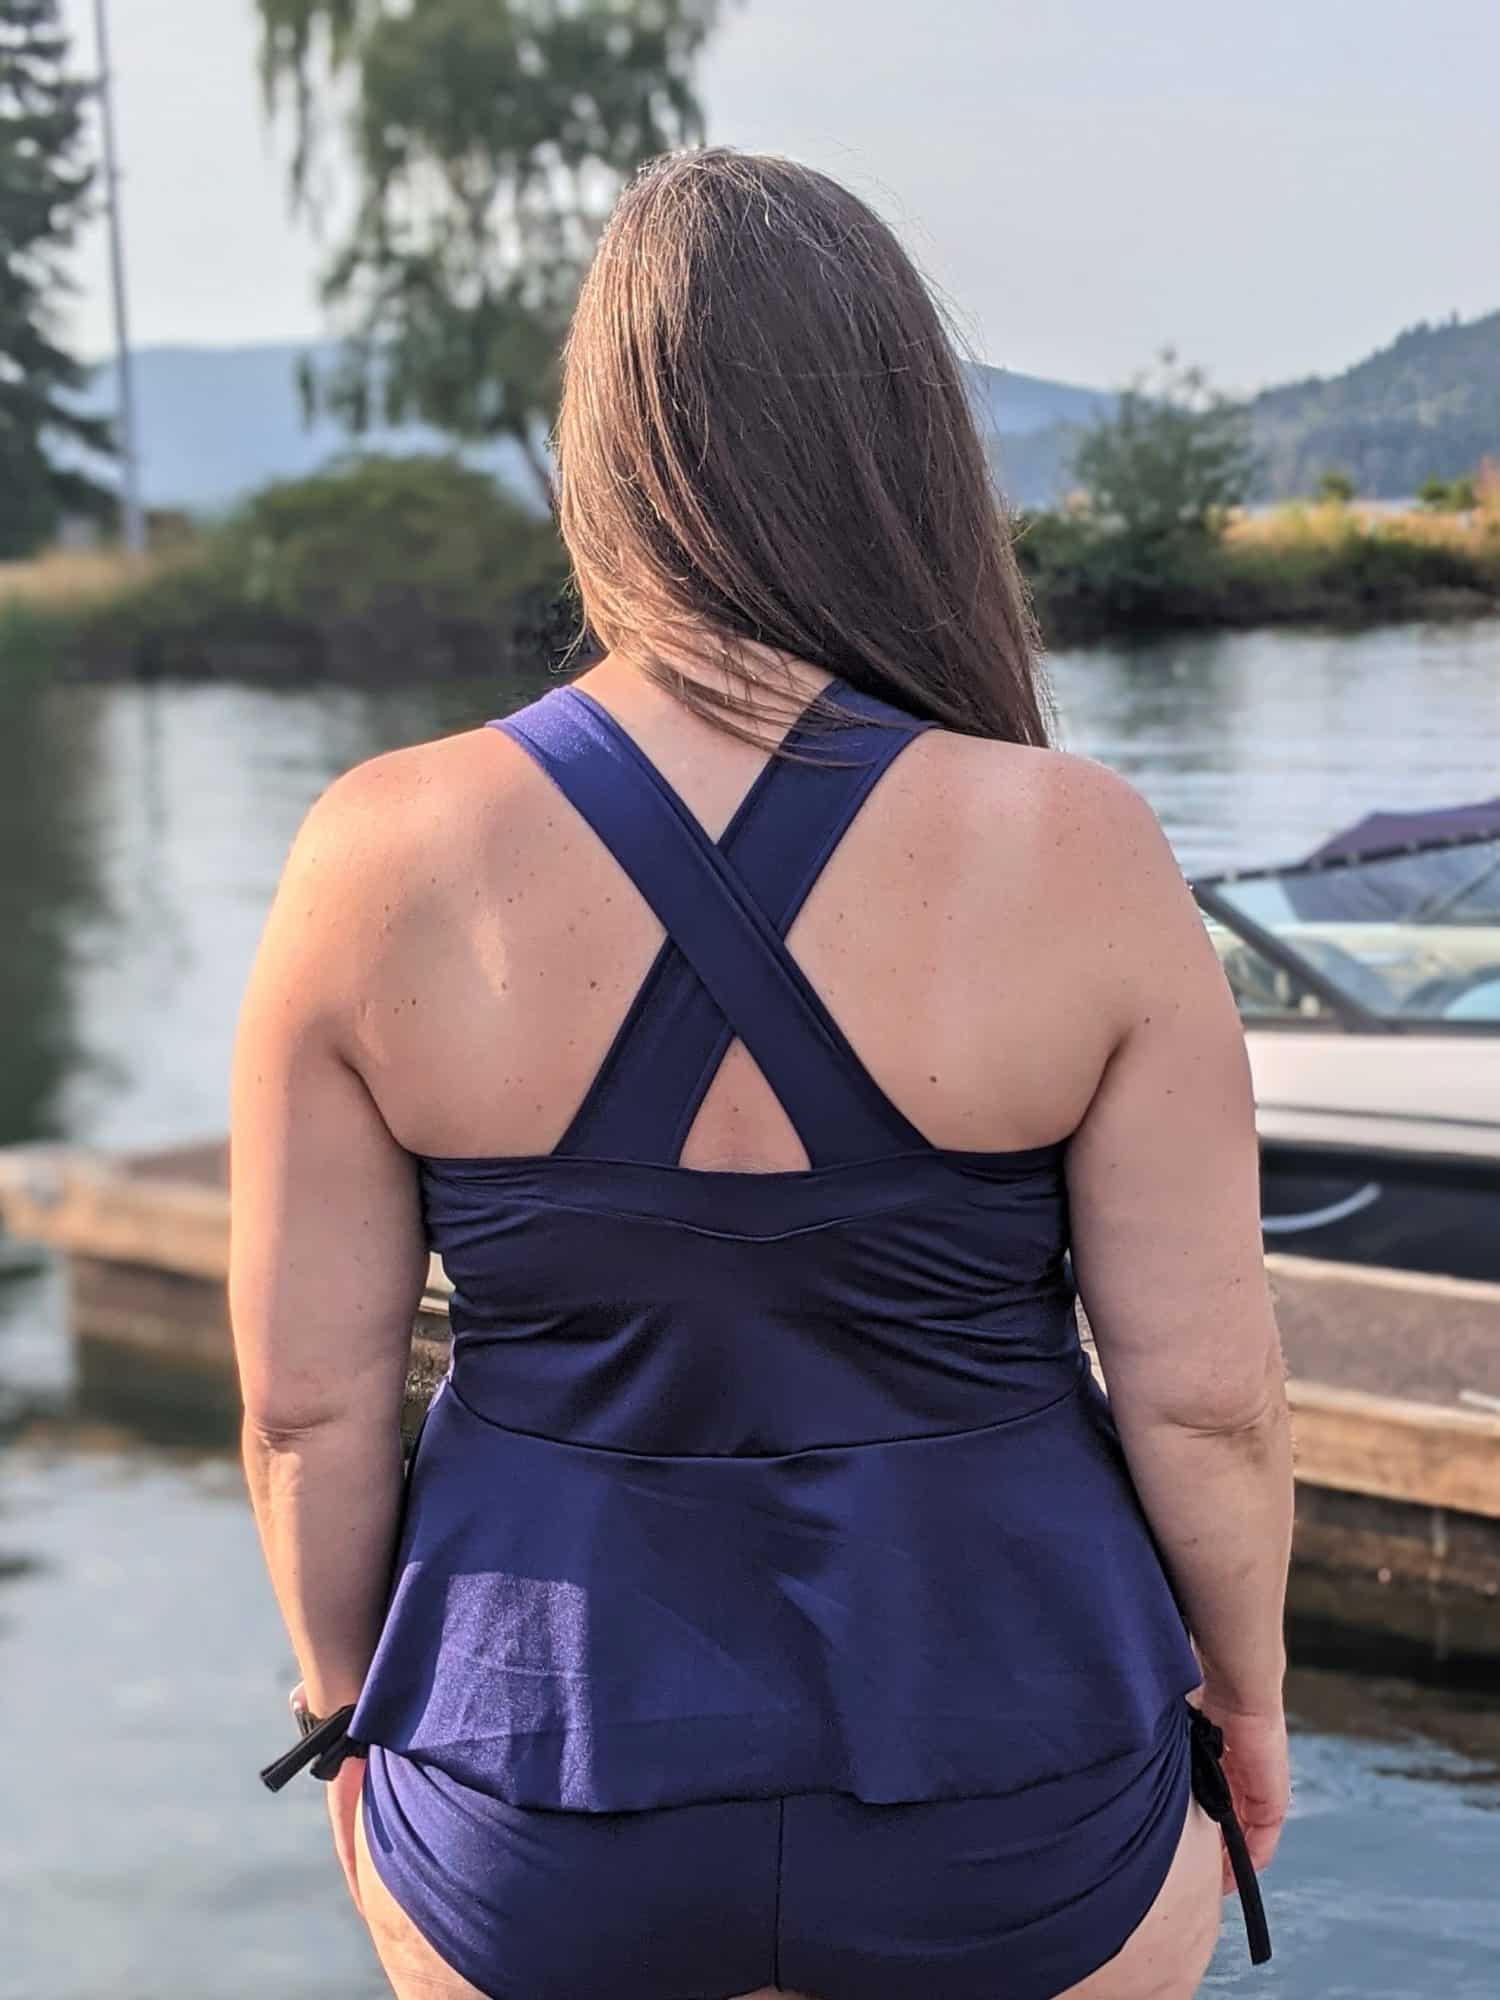

Just in case you needed another reason to love the Jackie Jumpsuit pattern, I’m going to show you how to modify it to turn it into a swim top with optional removable cups. If you don’t already have the Jackie Jumpsuit, you can grab it HERE.
Pieces to print:
- Bodice: front and back
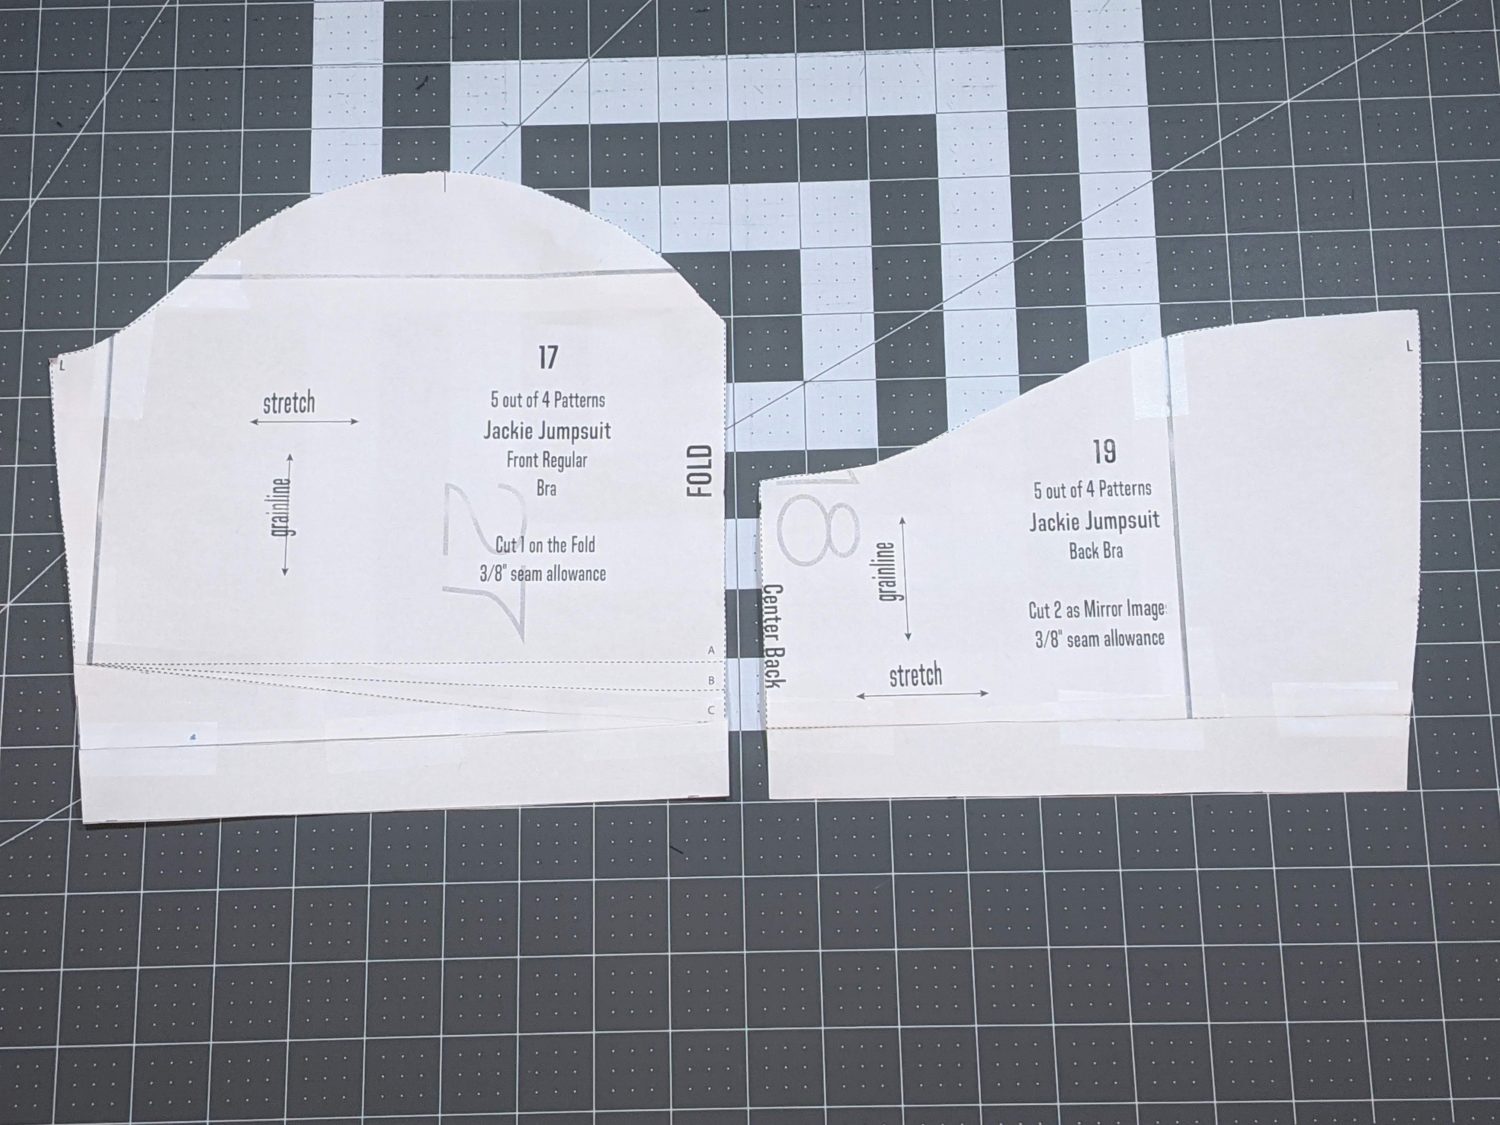
- Bra: front and back
- Neckbands: front and back
- Suspenders
- Peplum length skirt
Bodice Adjustments:
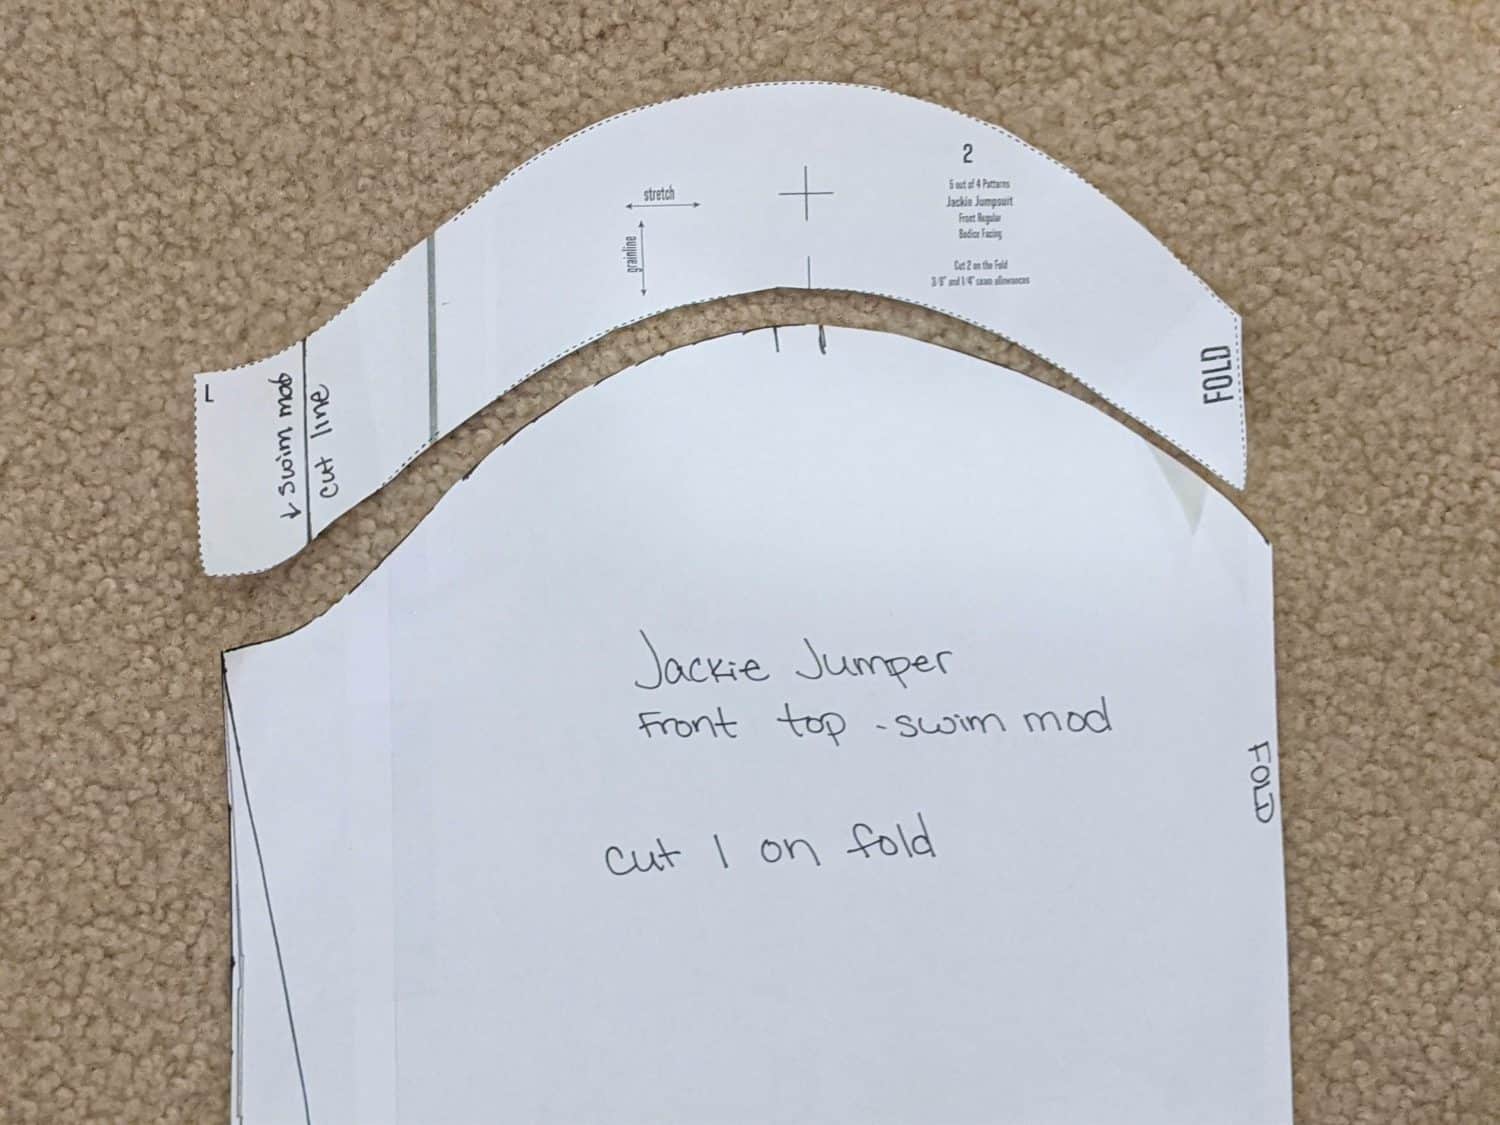
Front:
- Lay the front main bodice pattern piece on top of tracing paper and trace all the way around it.
- Line up the front bra piece at the fold and the inner top edge of the traced bodice, then draw around the top and side of the bra piece.
- Start at the top outer edge of the traced bra and draw an angled line down to the bottom corner of the traced main bodice.
- The fit at the bottom of the bodice will remain the same so you will not need to make any adjustments to the peplum piece.
- Add labels to your new piece and cut it out.
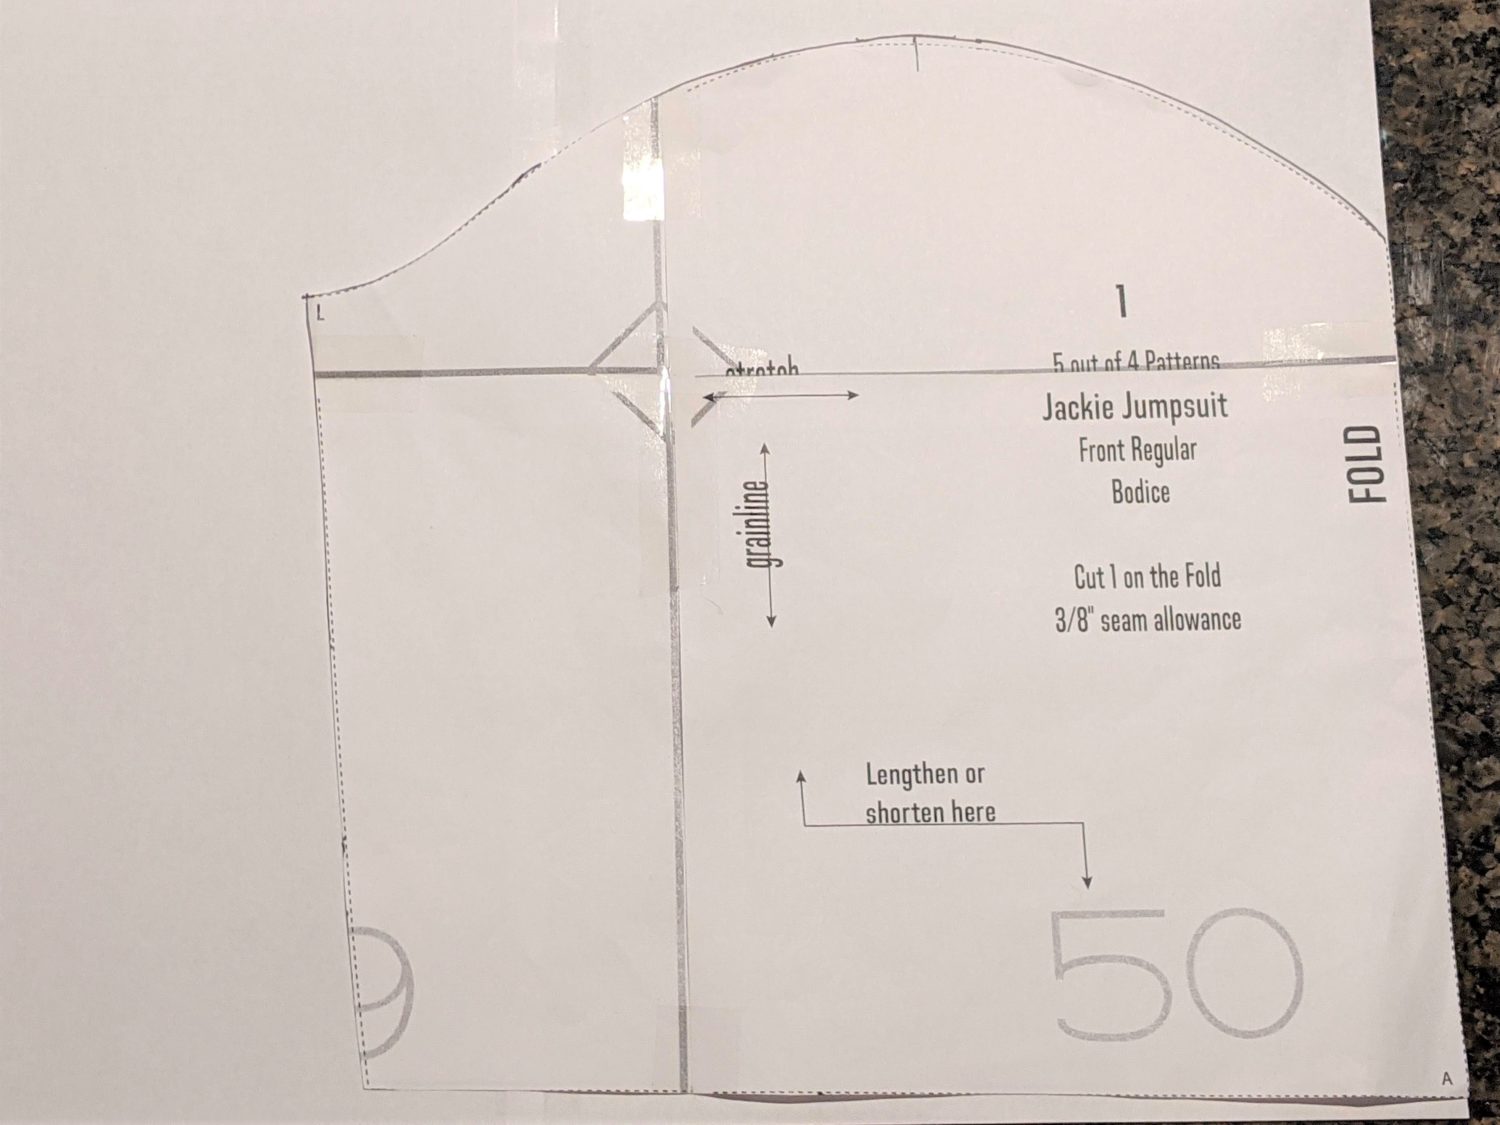
Trace your bodice 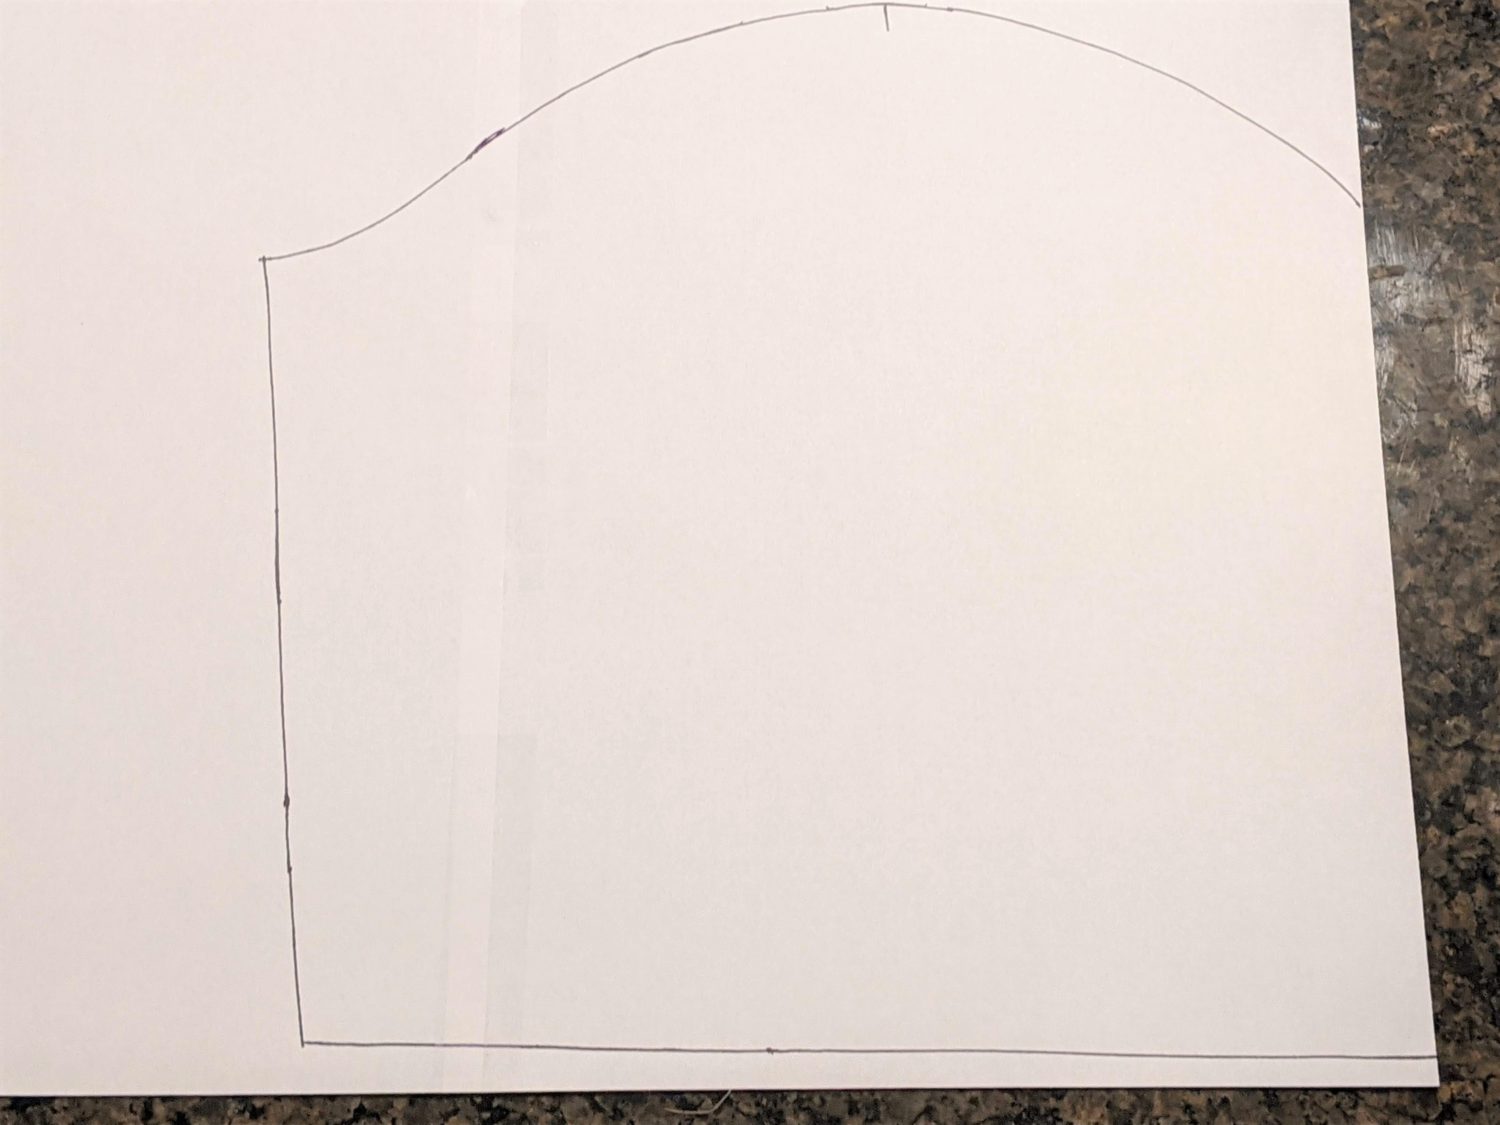
Line up bra piece 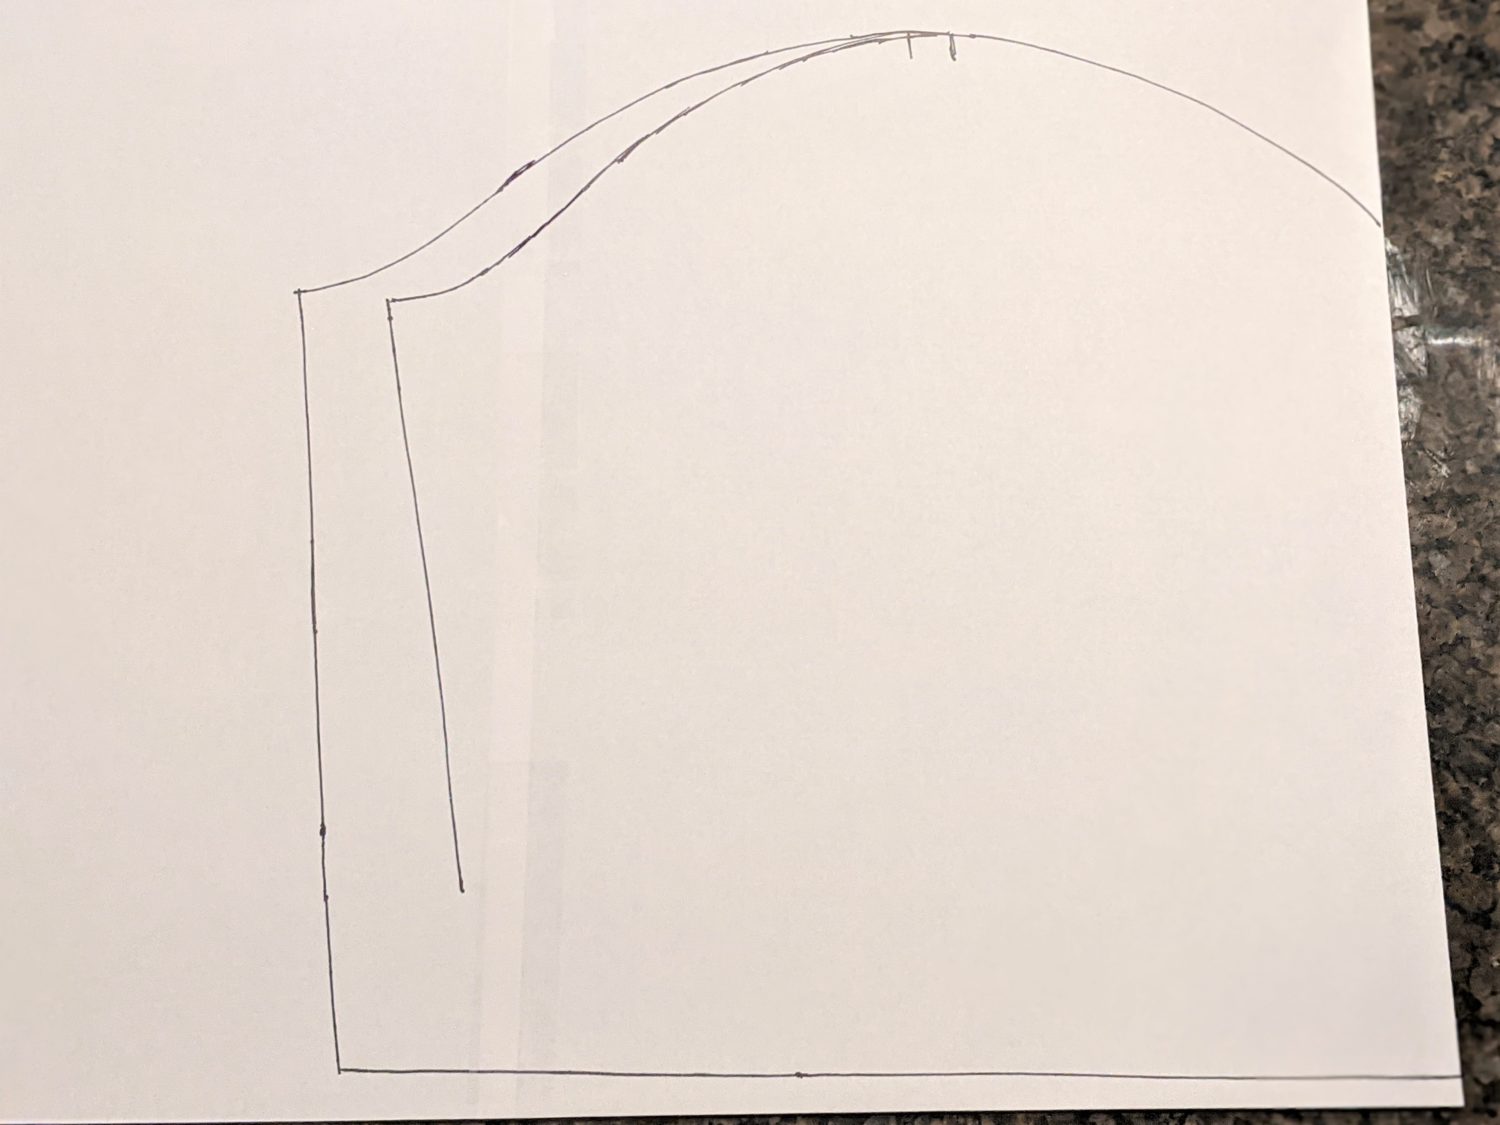
Trace the bra piece 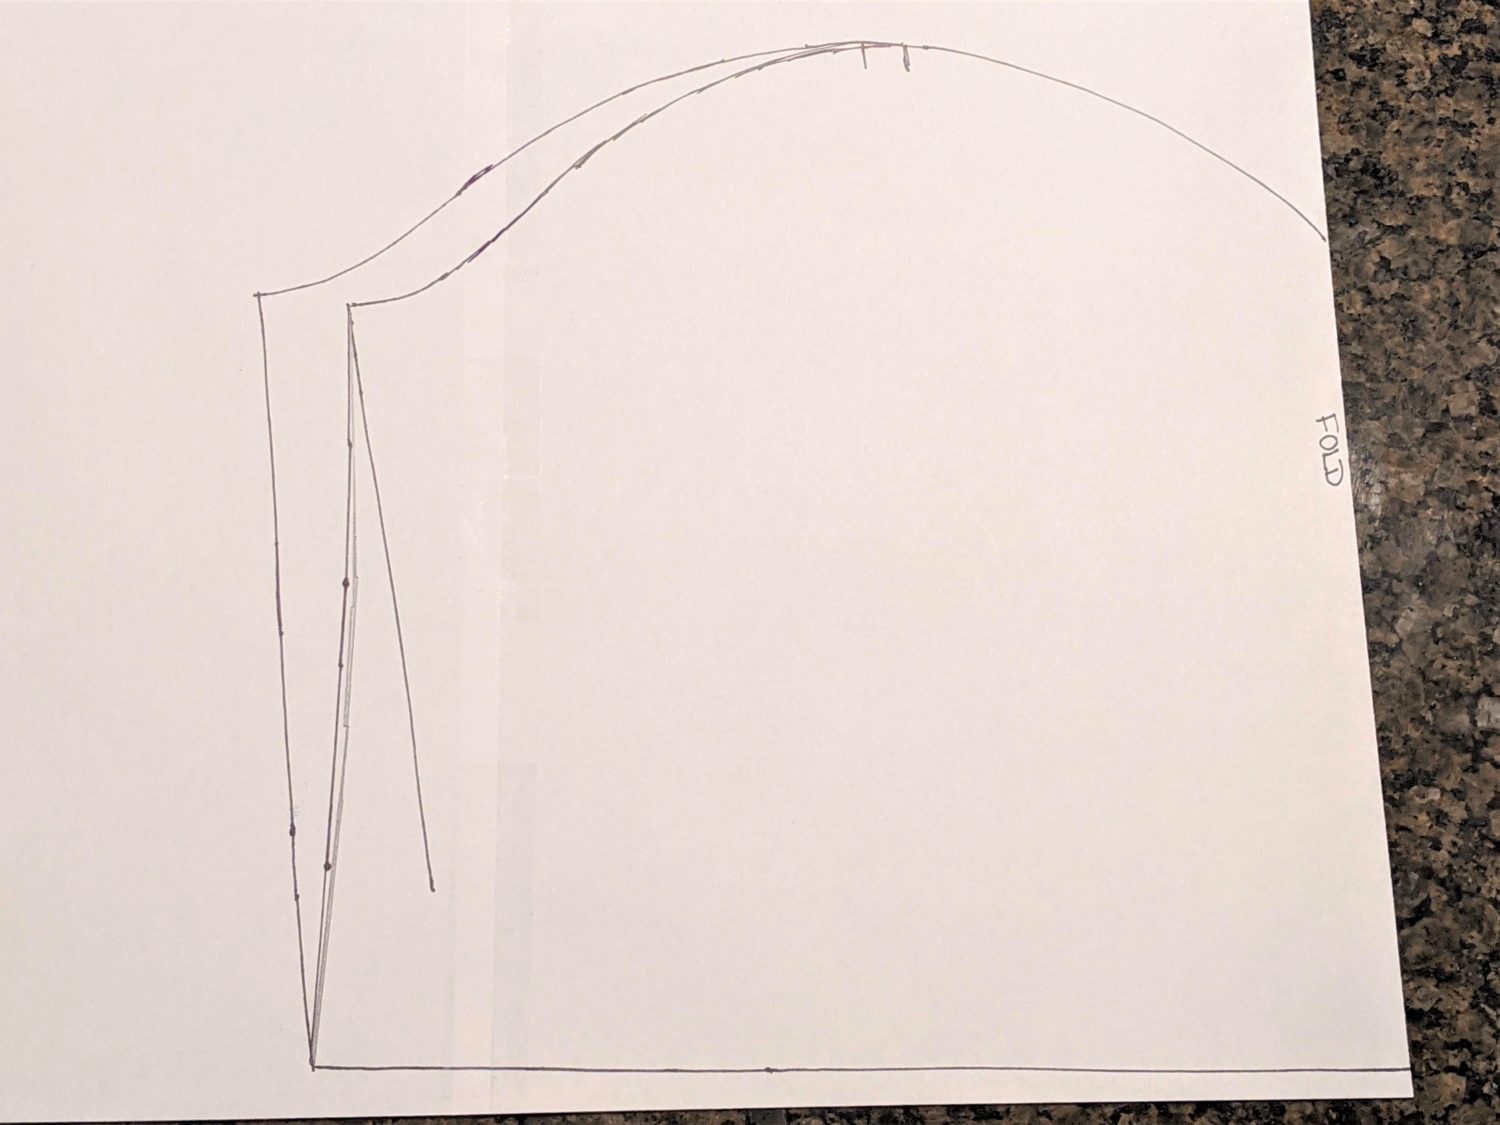
Connect the inner top corner to the outer bottom corner
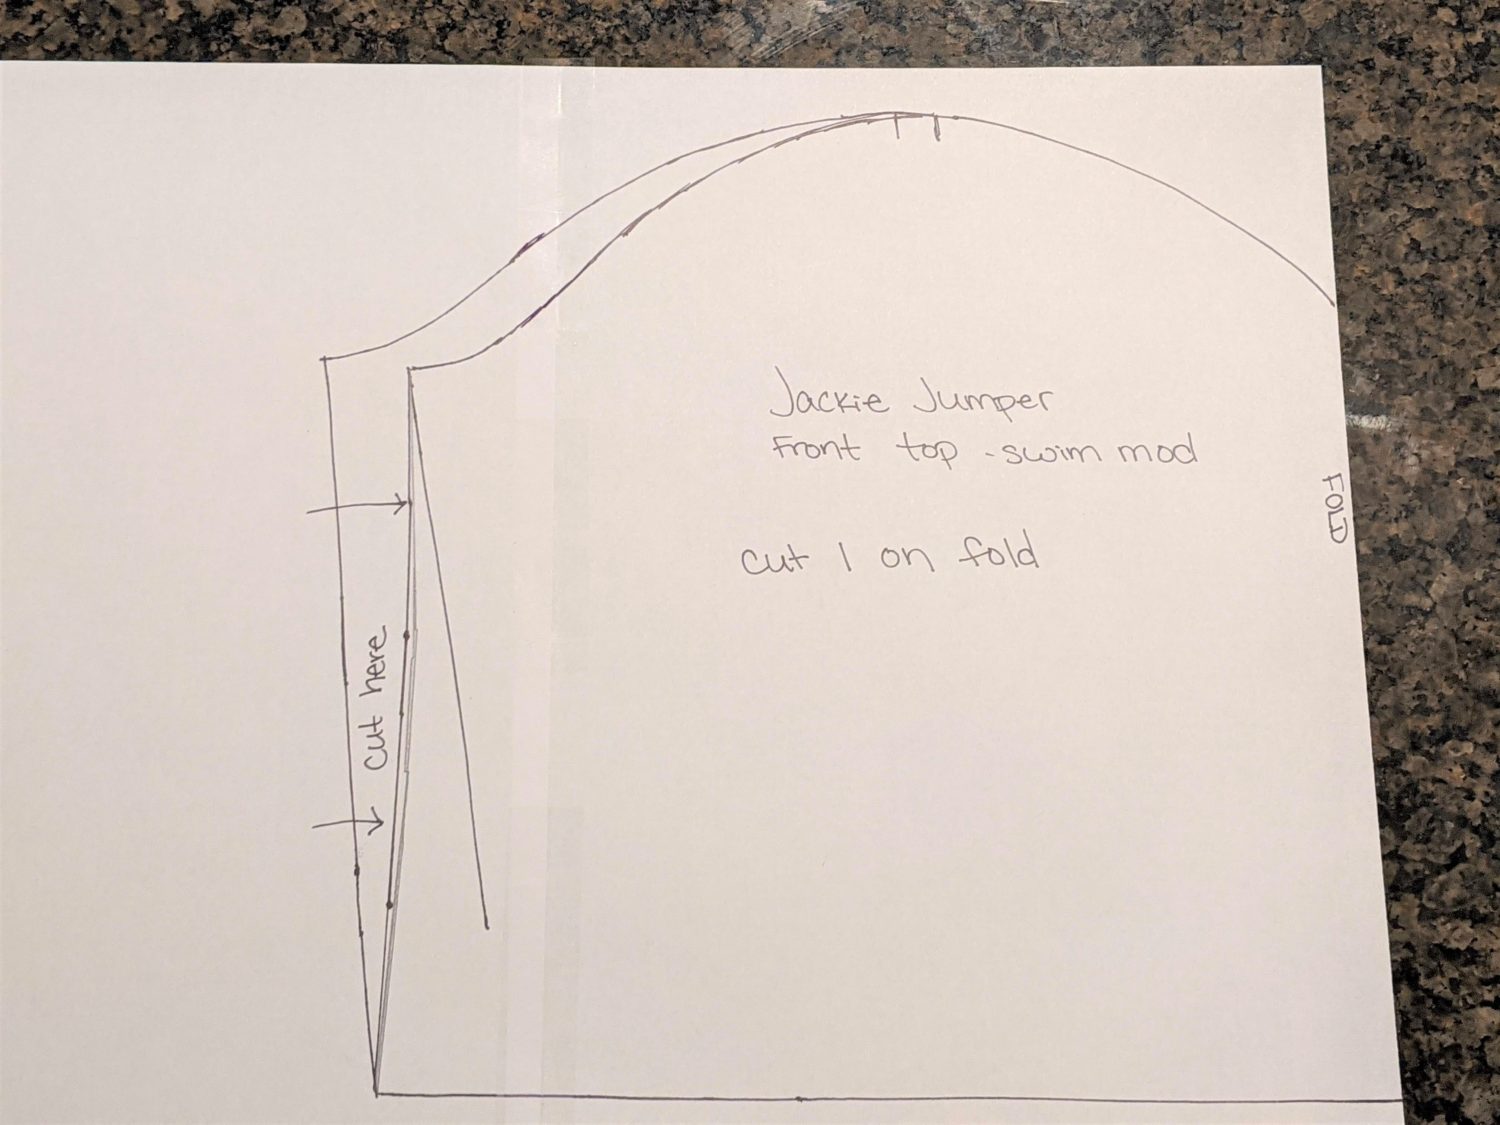
Add labels 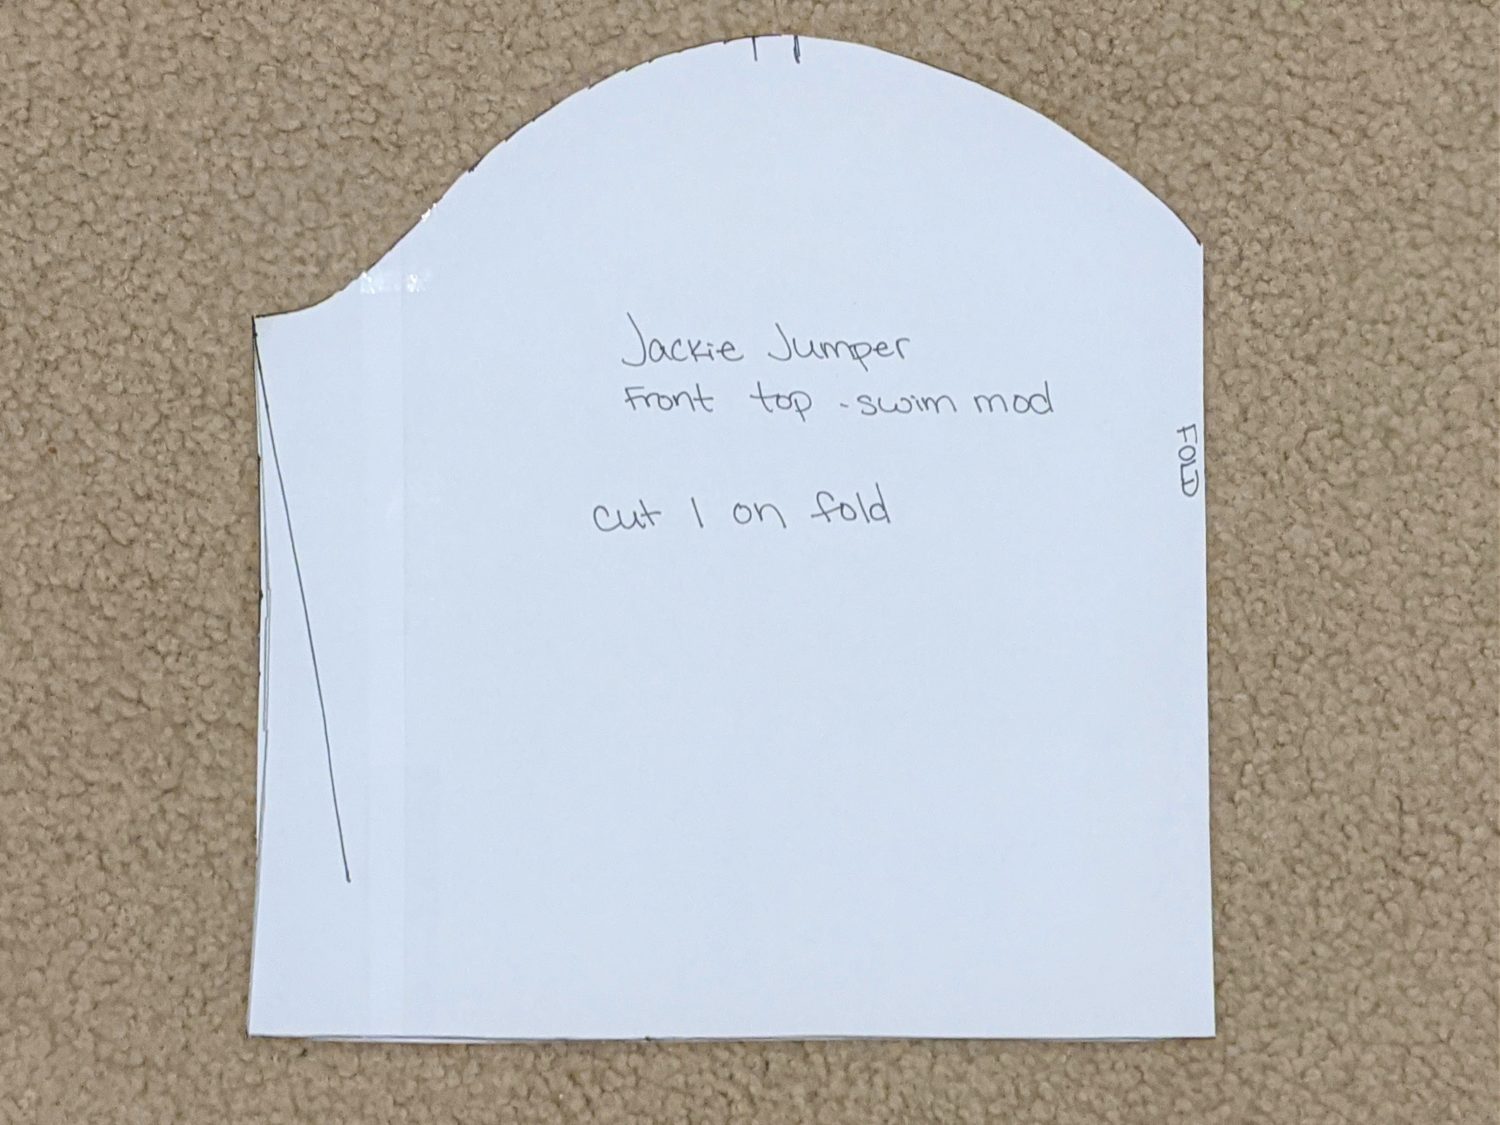
Cut out
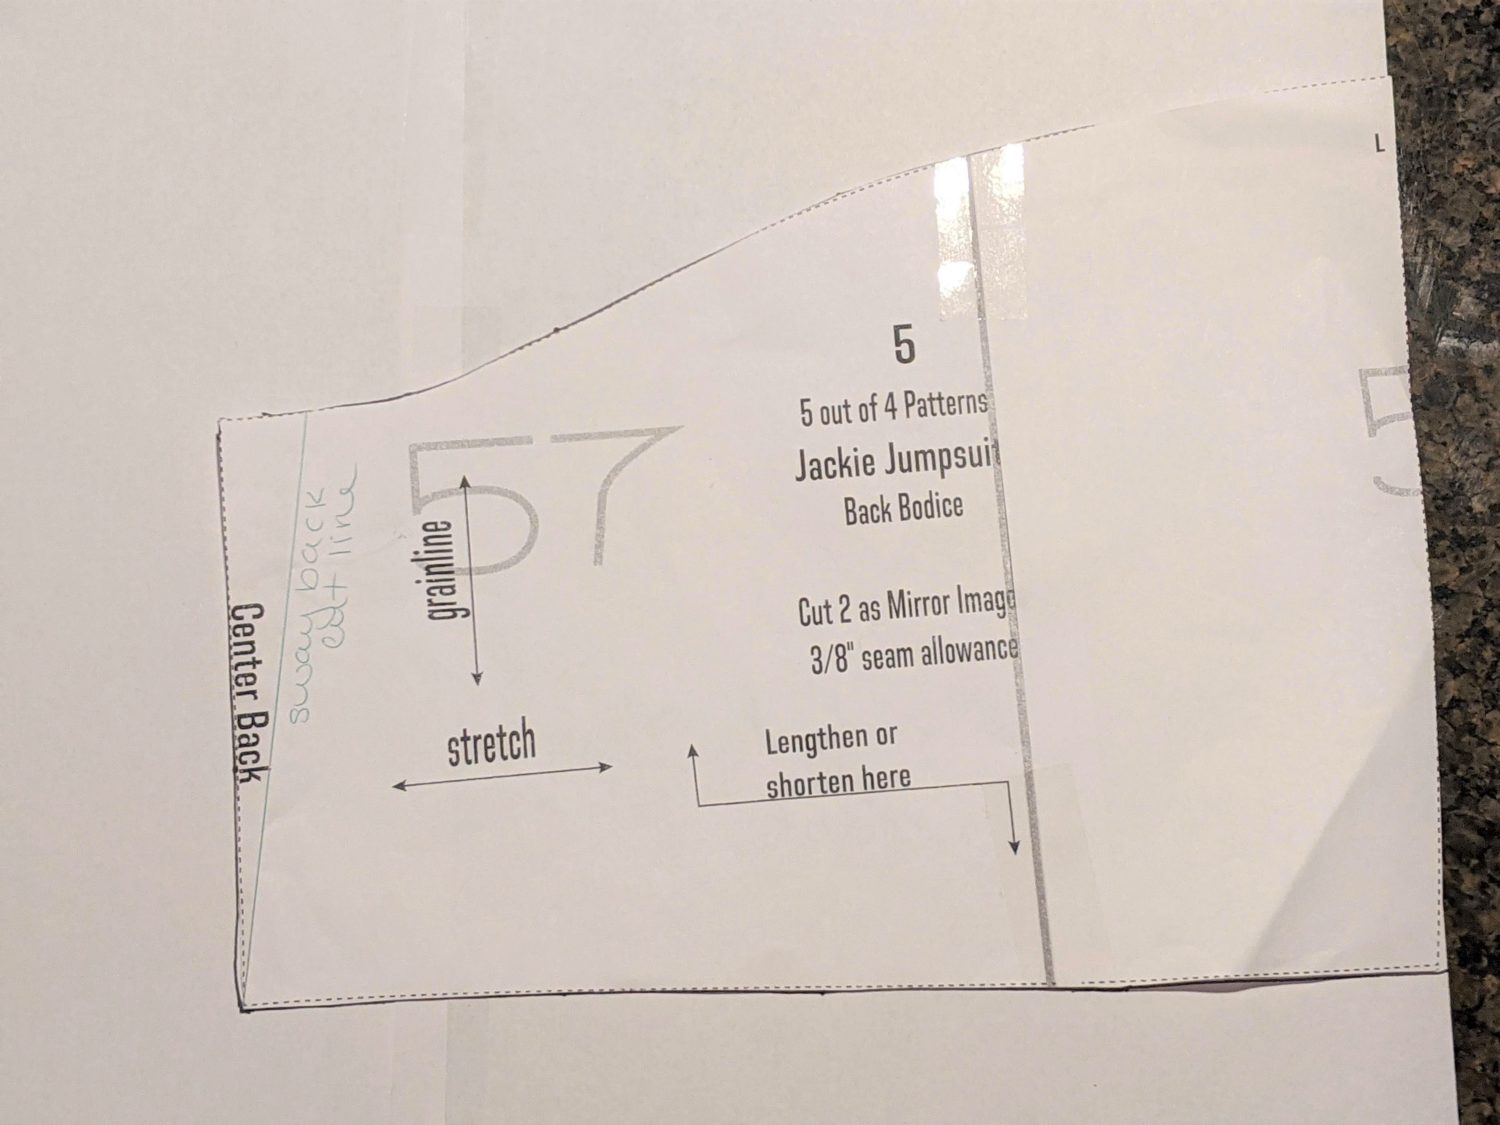
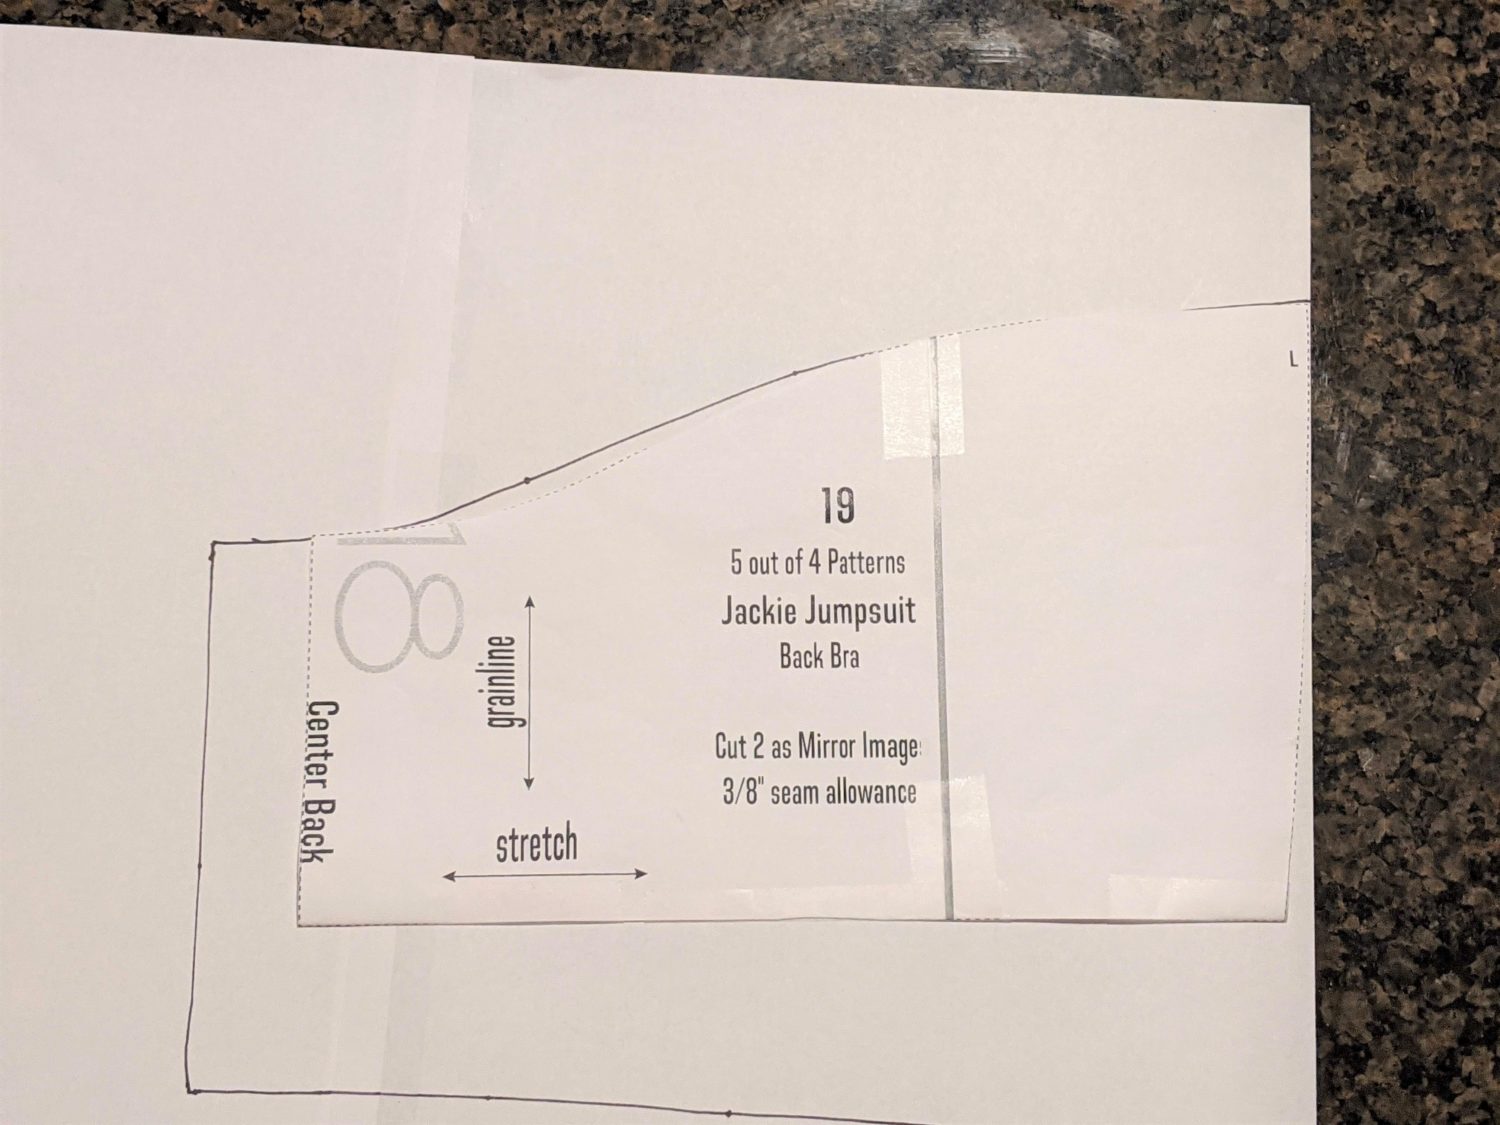
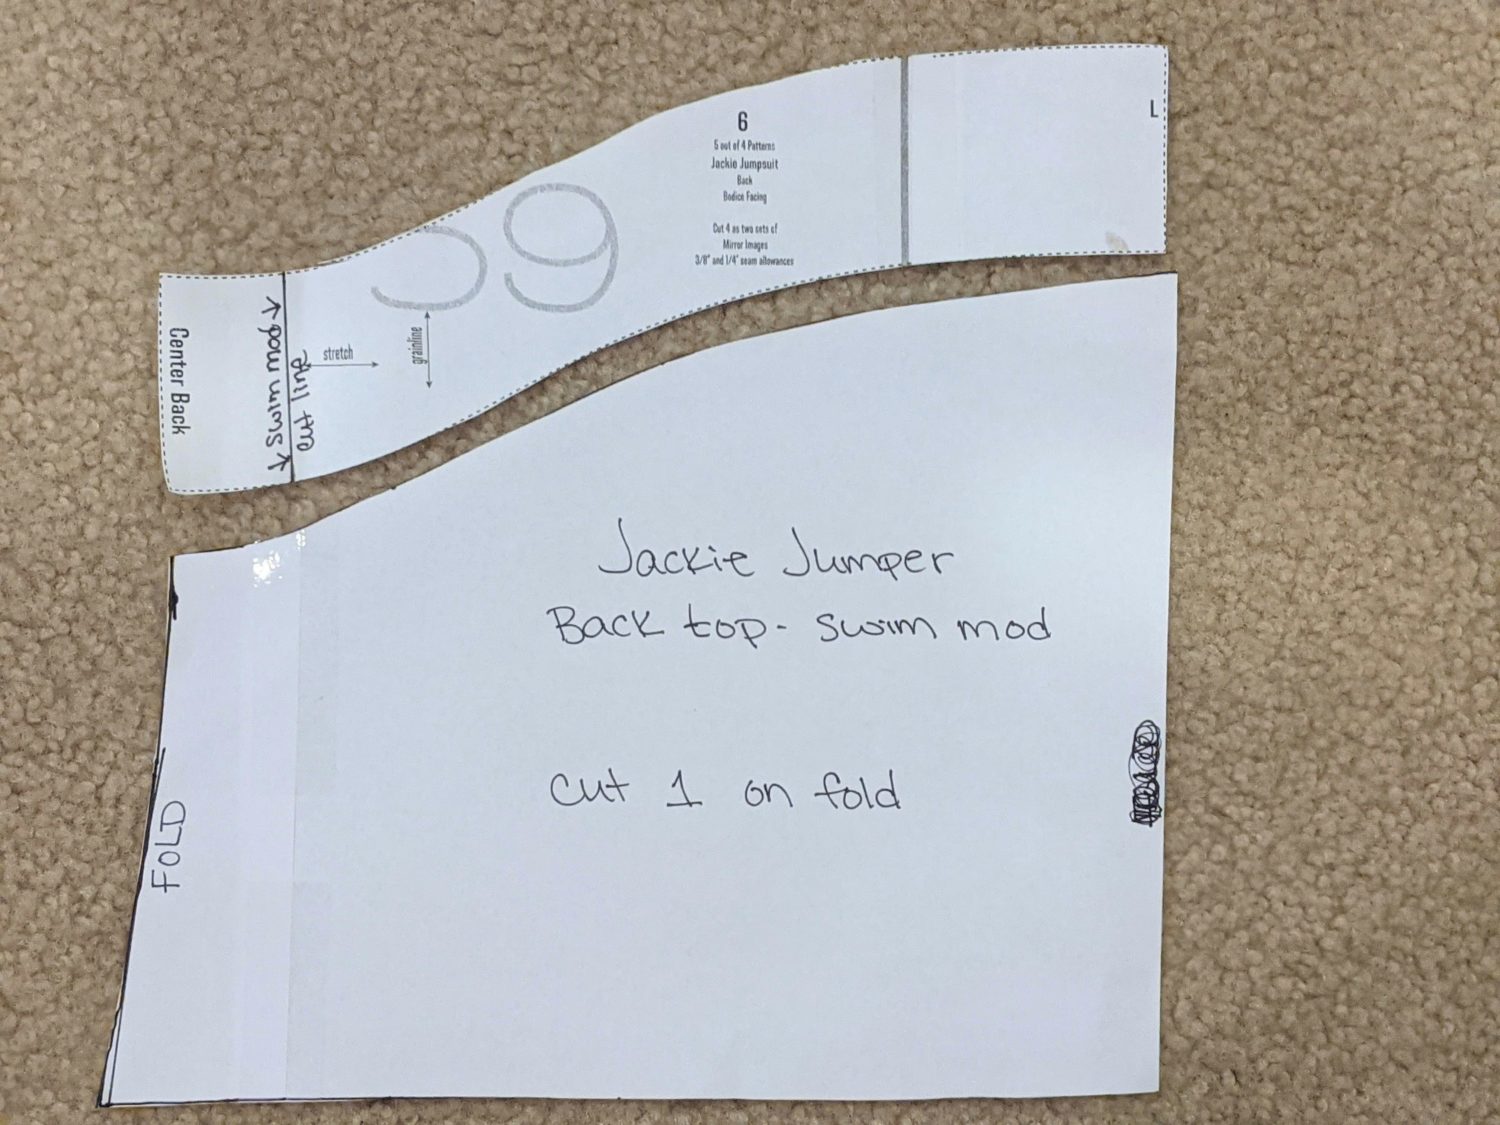
Back:
- Lay the main back bodice piece on tracing paper and trace all the way around it.
- Line up the back bra piece along the wider edge and the inner top edge, trace around the top and center back sides.
- Start at the top outer edge of the traced bra and draw an angled line down to the bottom corner of the traced main bodice.
- This is a little tricky as the shorter side will now be the fold, yet is slightly angled. The main goal is to keep very top the same width as the bra for it to be tight enough around the top edge and not be loose since swimsuits are meant to be fitted in places to hold them up. The bottom of the bodice should be the same width as the original bodice to keep from needing to adjust the peplum.
- Add labels to the back piece and cut it out. (The fold edge will be the narrower edge of the bodice.)
Trace the back bodice 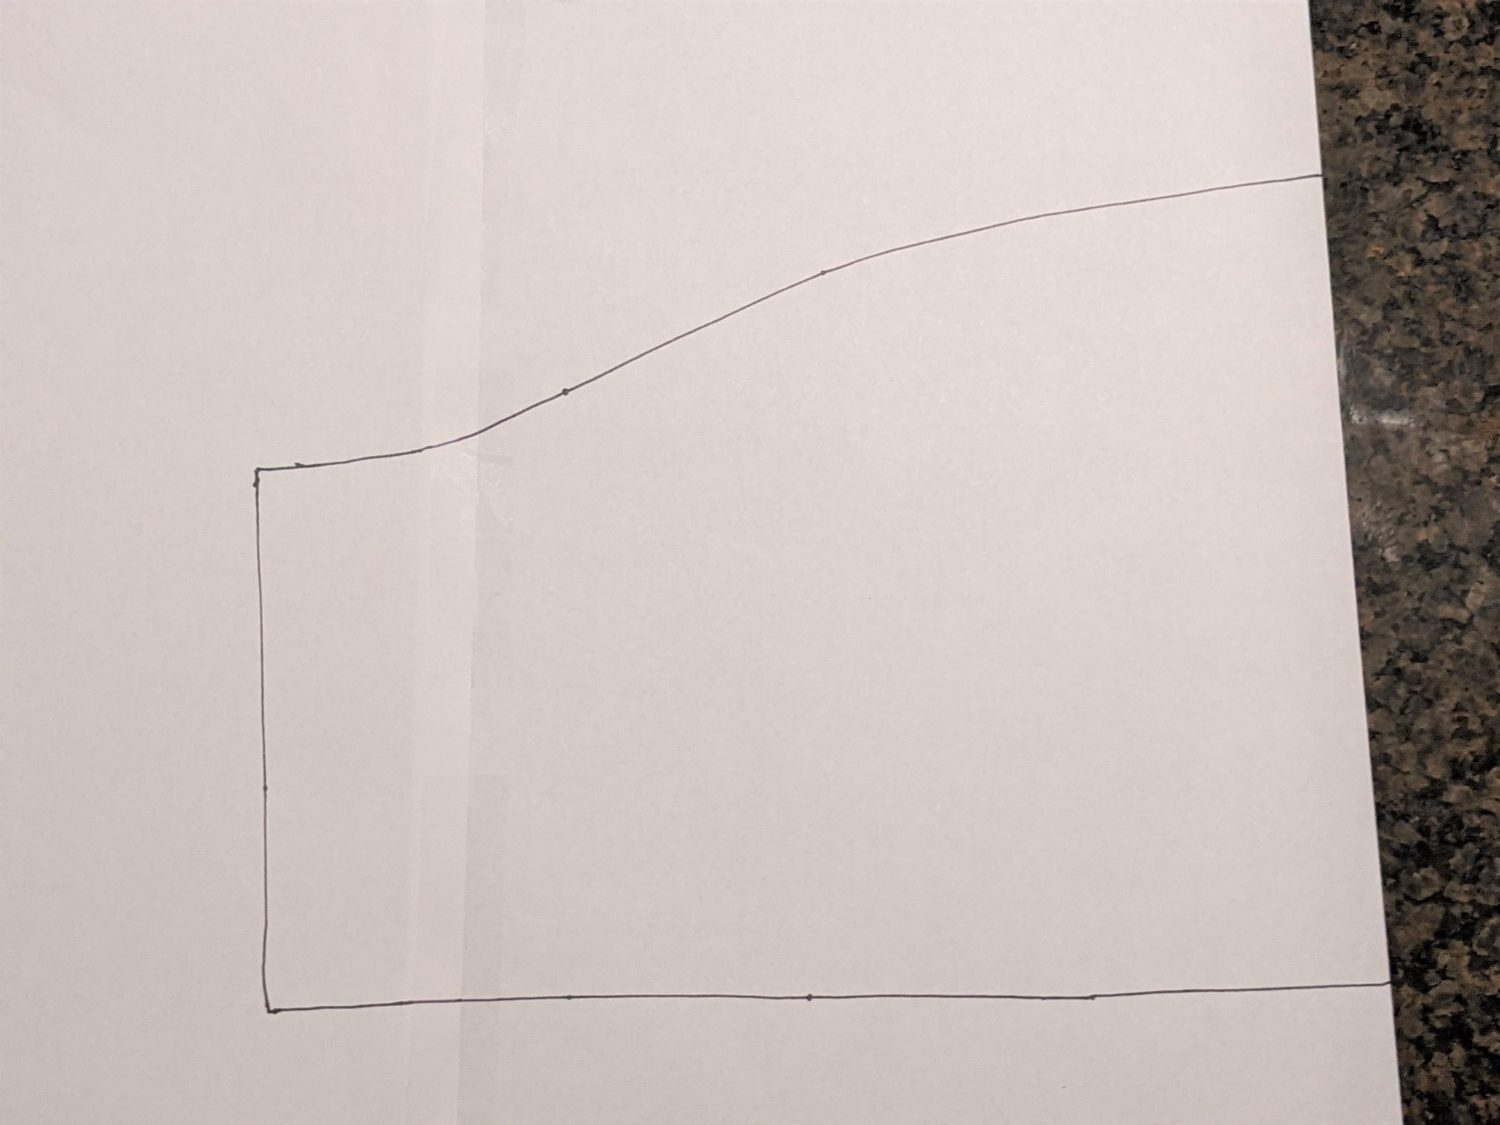
Line up the back bra piece 
Trace the back bra piece
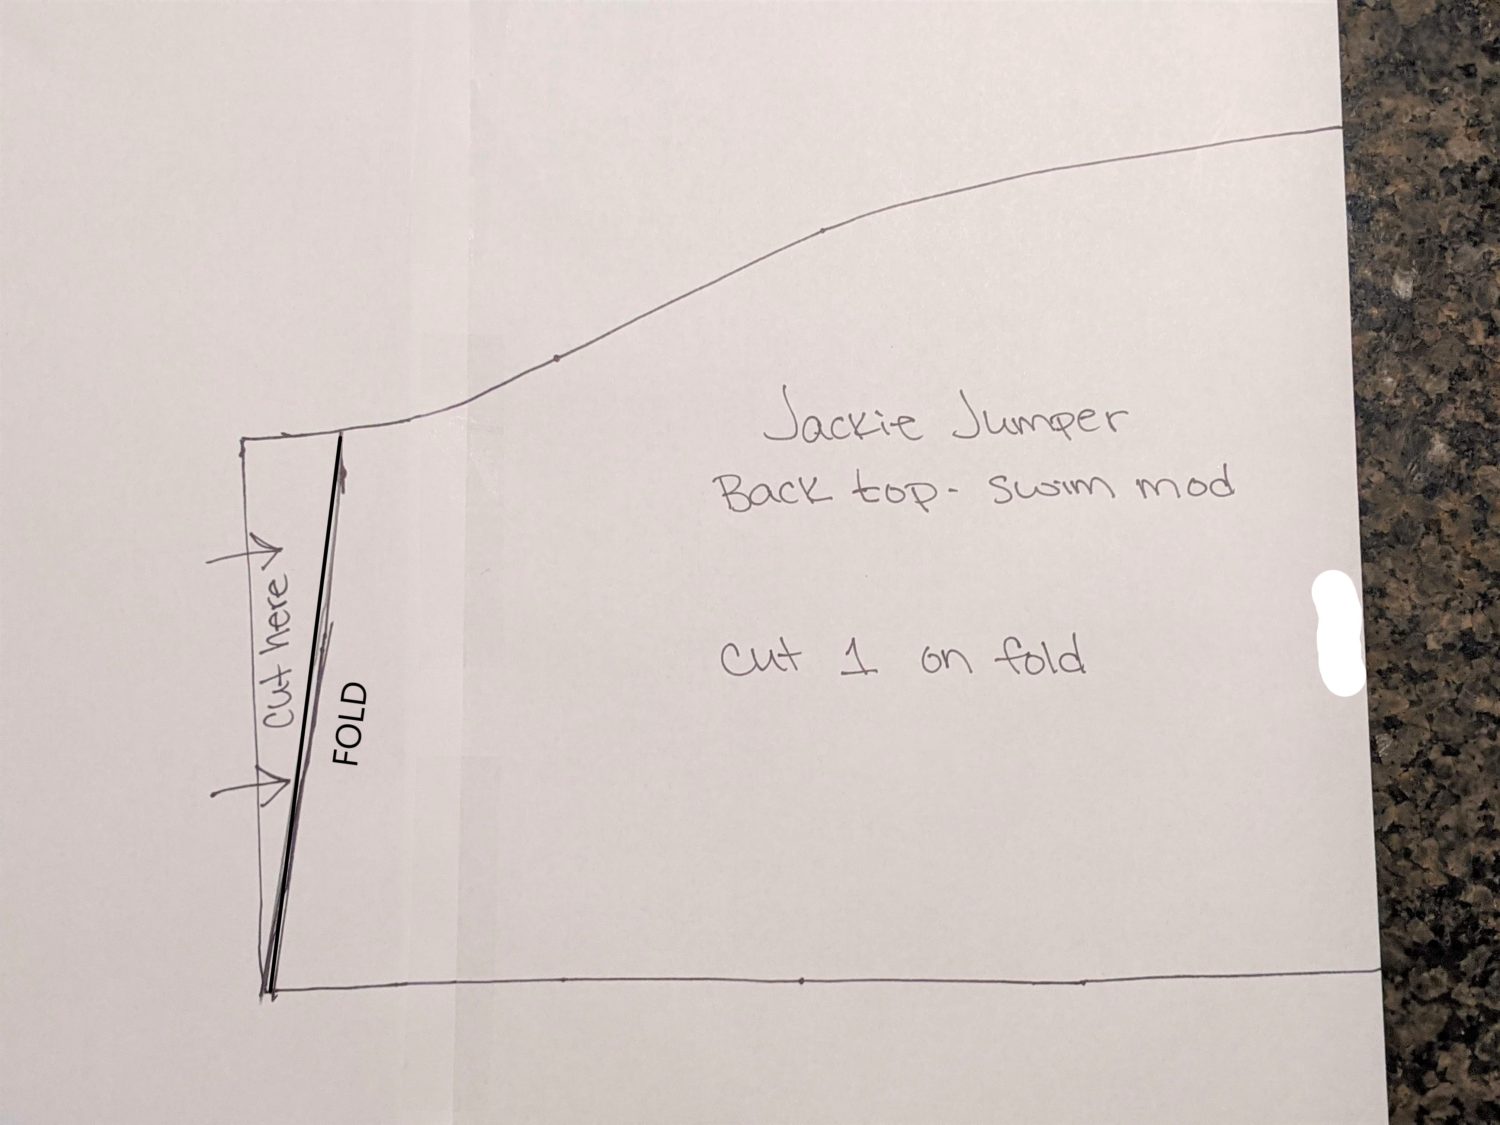
Connect the top inner edge to the bottom outer edge
Add labels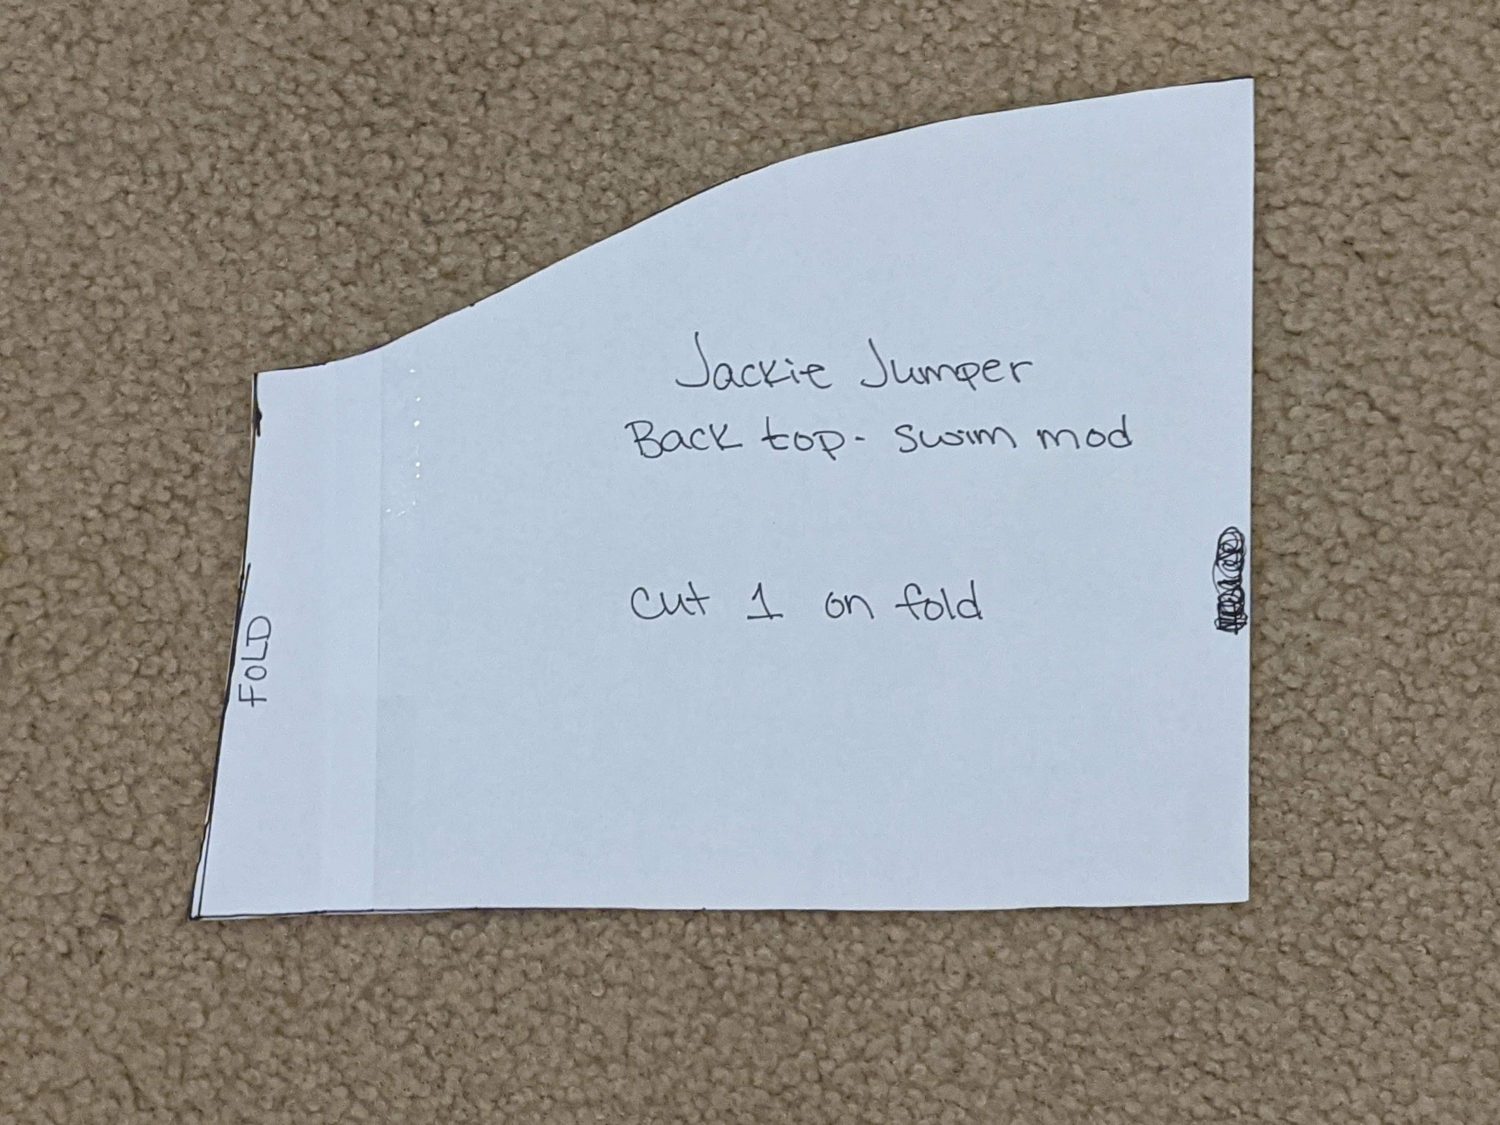
Cut out
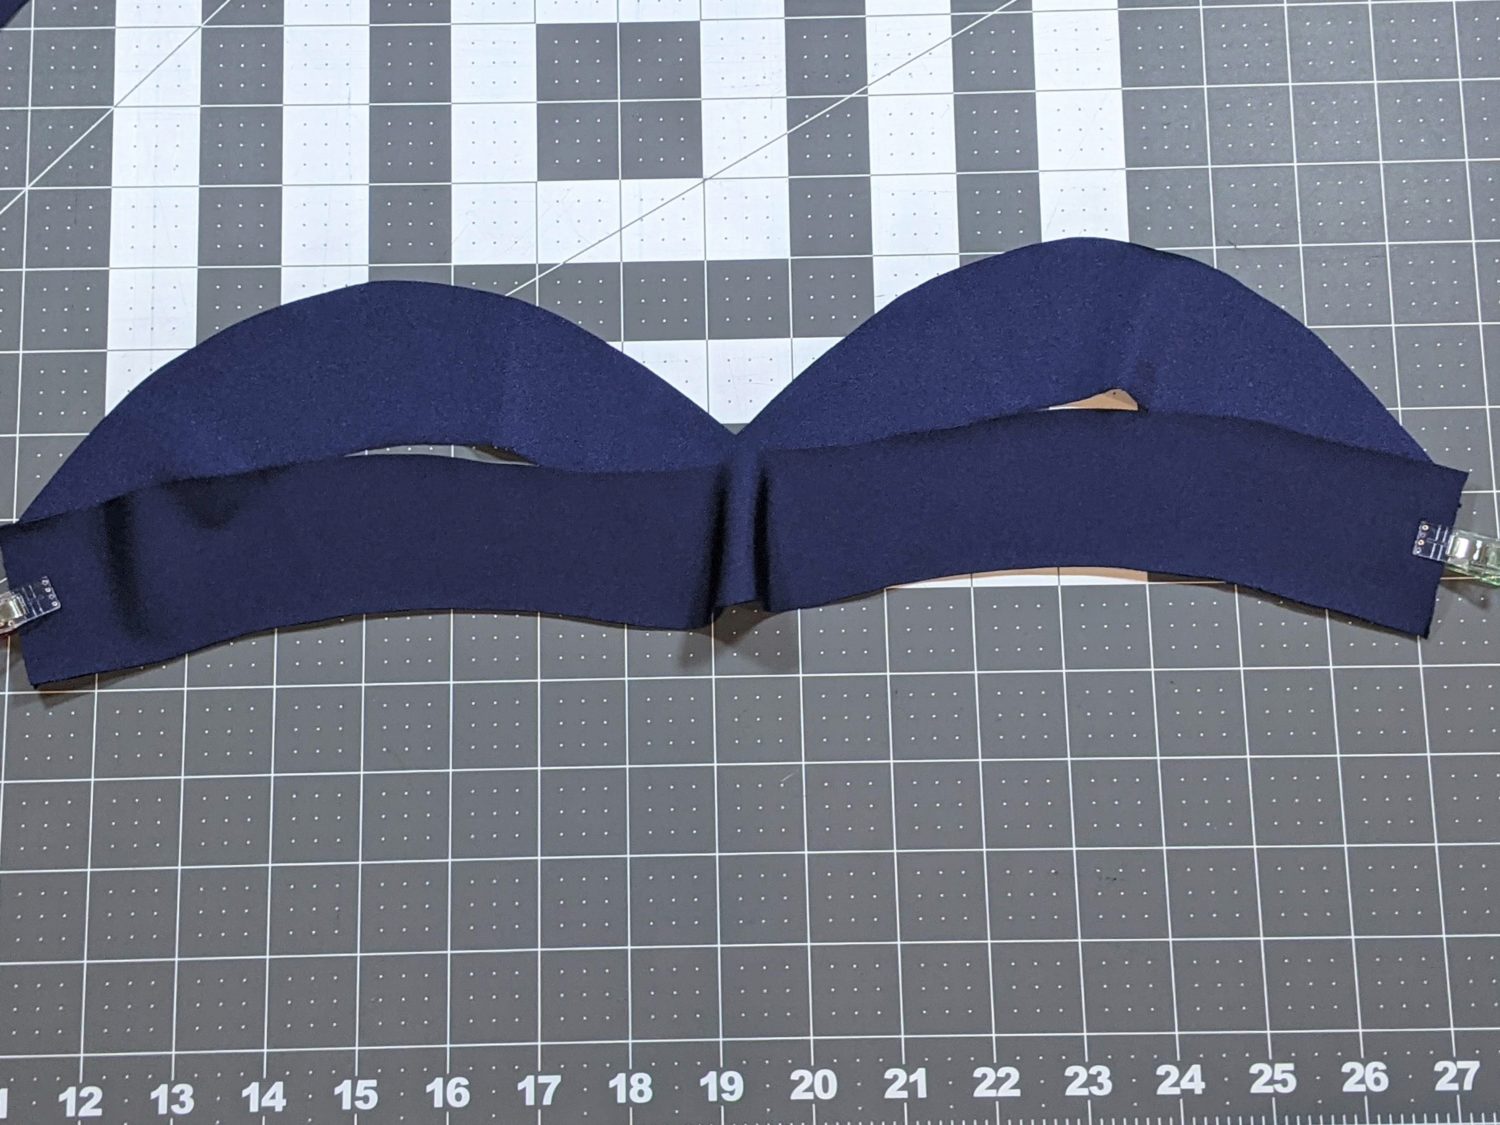
Bodice Bands:
- The band will be 90% of the measurement along the top of the bodice.
- Measure the top edge of the bodice front from fold edge to outer edge.
- Multiply your measurement by 90% to find your band length.
- Measure along the inner curved edge of your front band piece and draw a line at your previously determined length on the outer side of the band.
- Repeat the same measuring process for the back band piece. Remember that the back will now be cut on the fold, so be sure to mark that on your pattern piece as well.
Original front bodice band length 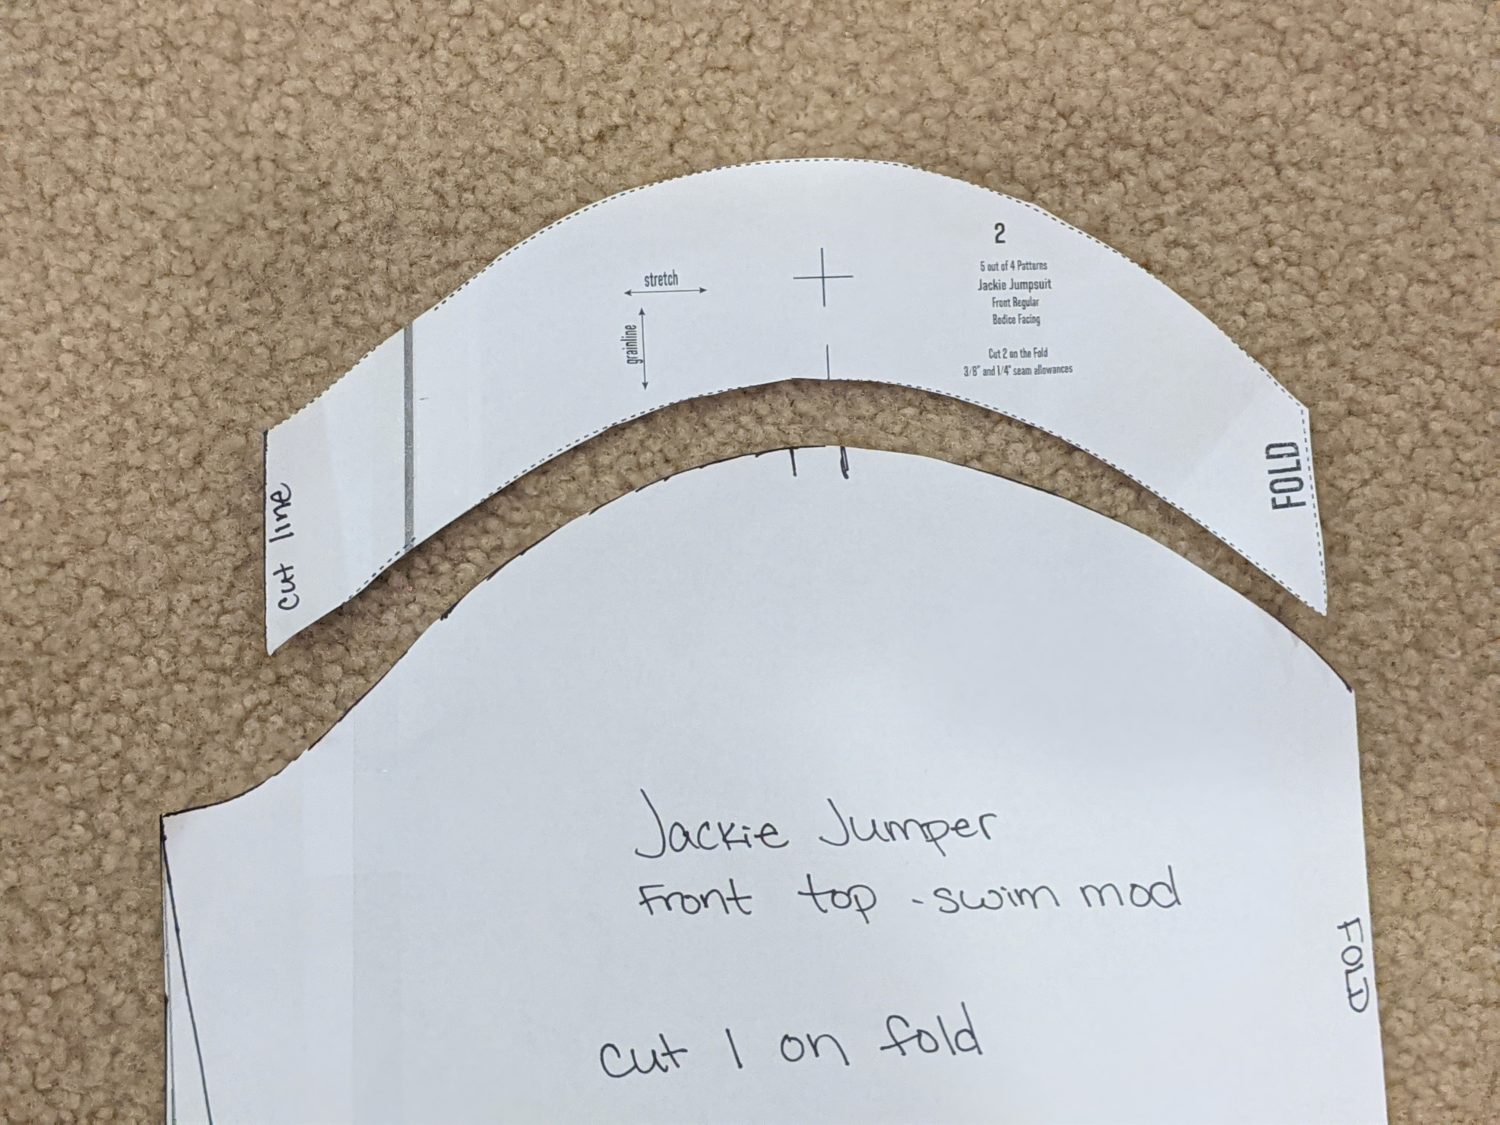
90% front bodice band length
Original back bodice band length 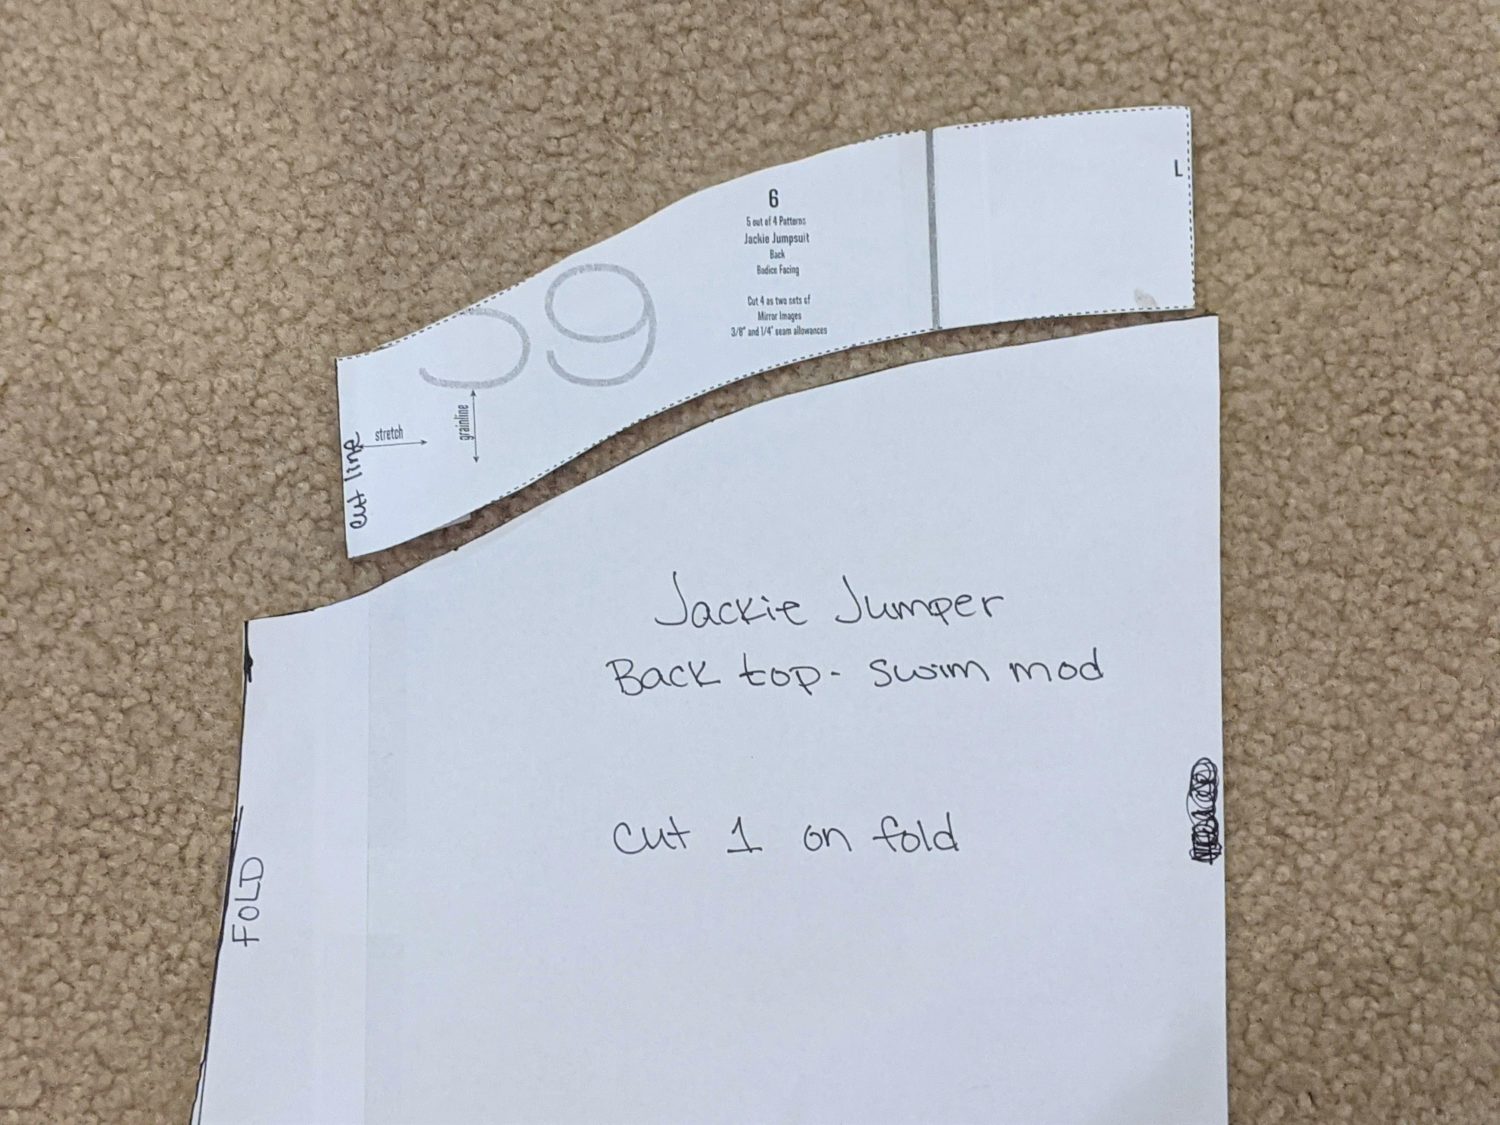
90% back bodice band length
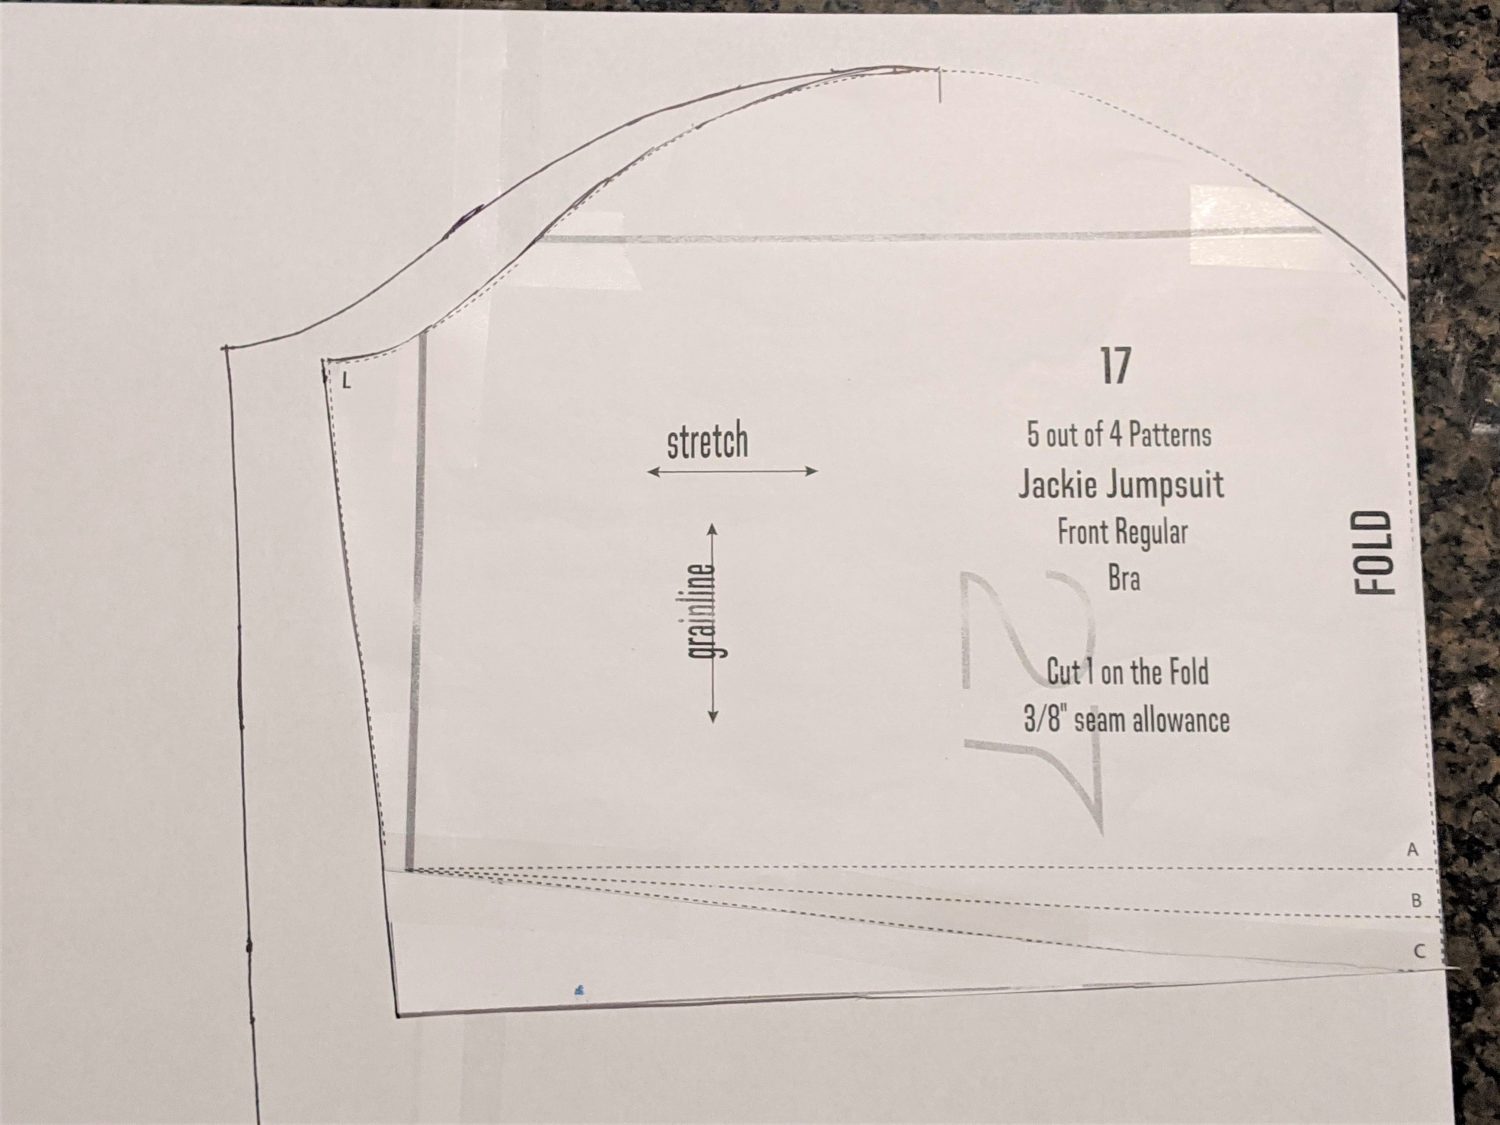
Bra:
Add 1″ along the bottom edge of both bra pieces. In the original tutorial, the bottom edge of the bra is kept flat. For the swim bra, you will be folding the edge up so you will need the extra fabric for it to be the correct length when finished.
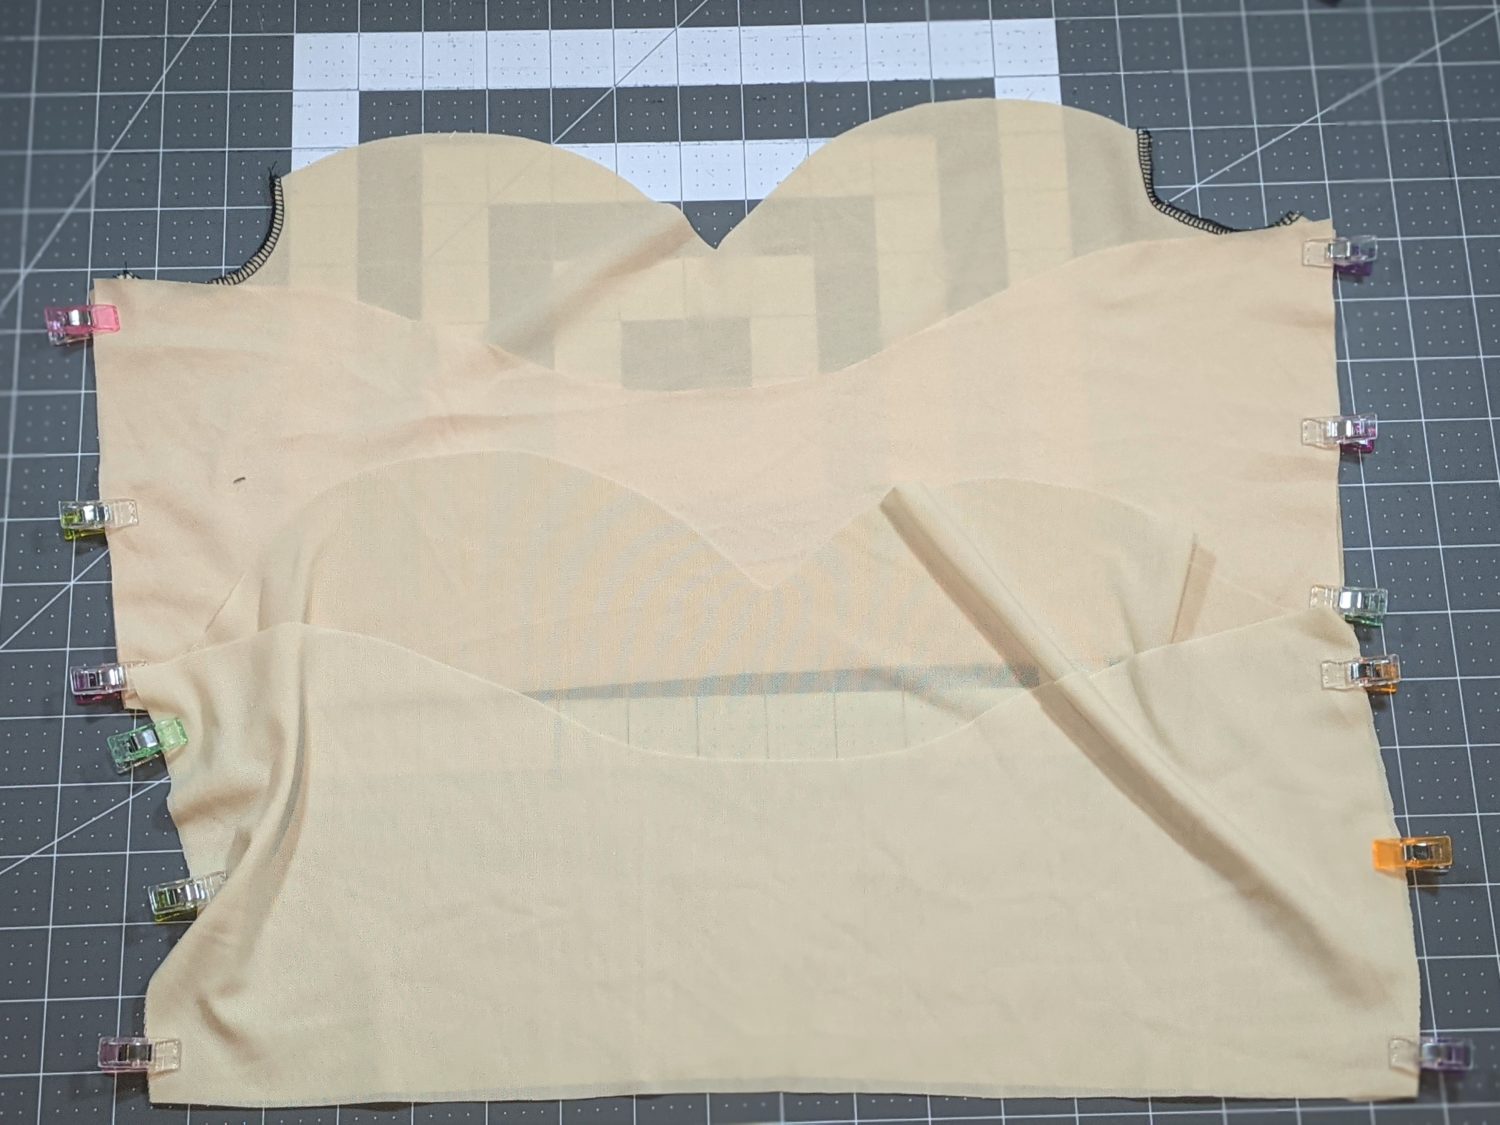
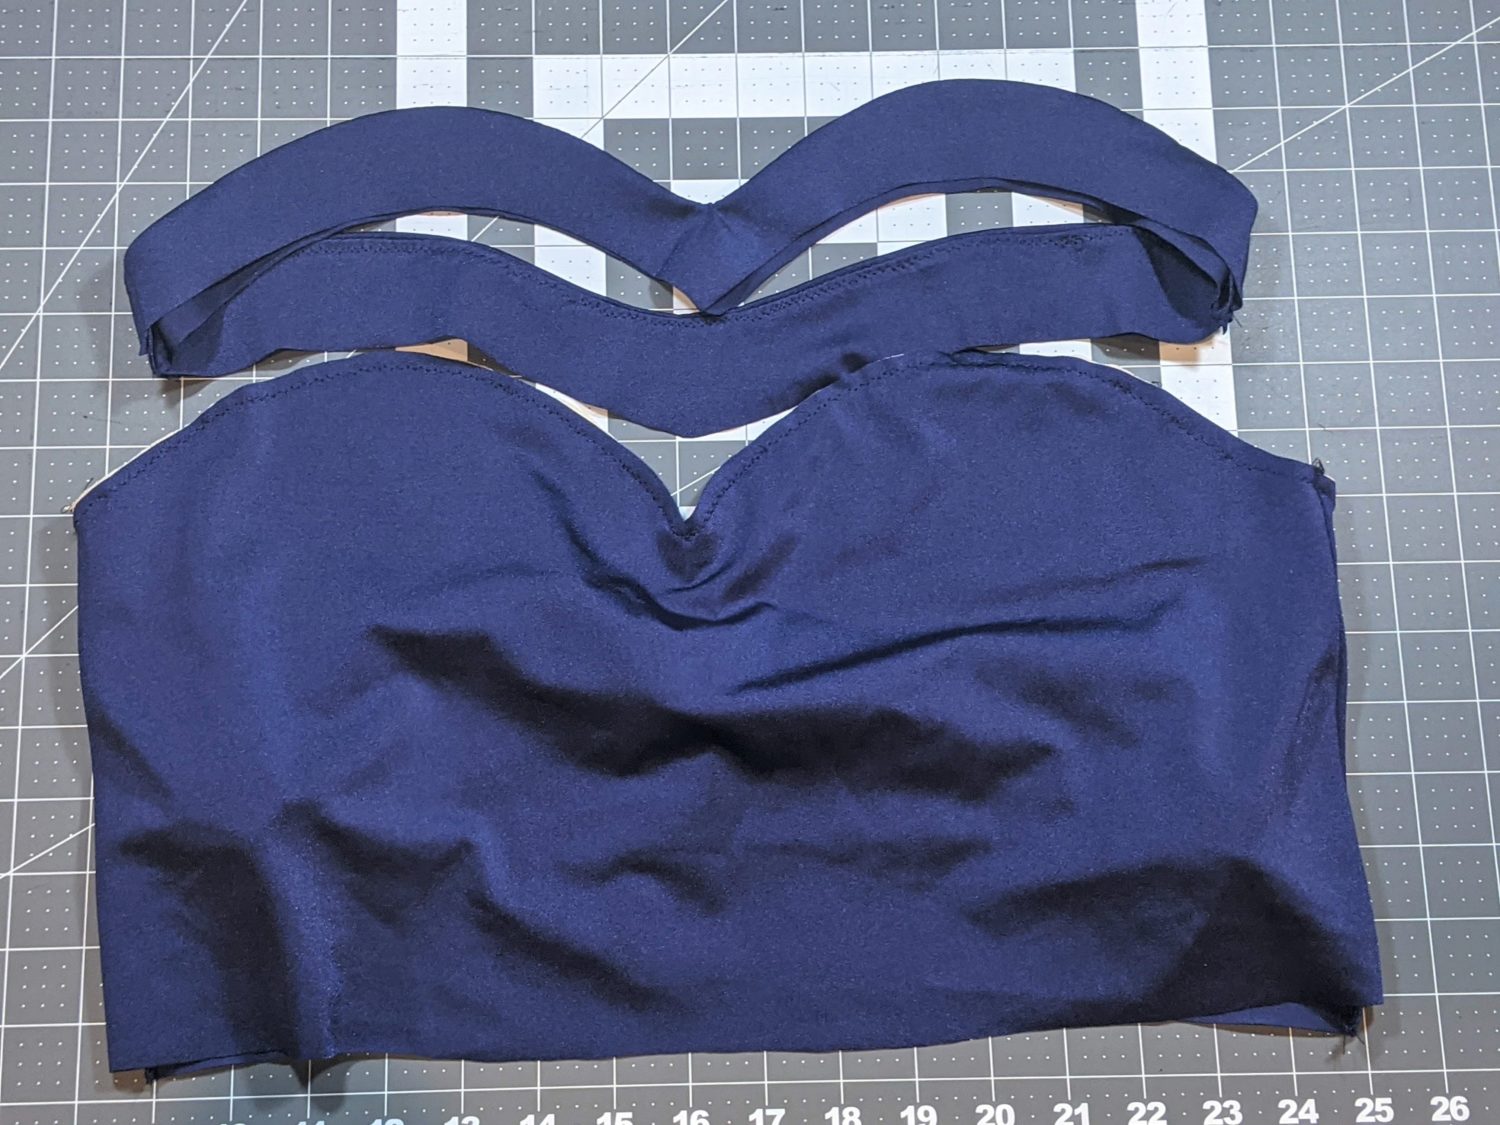
Cut out your Pieces
- Main front bodice: cut 1 on the fold – swim fabric
- Main back bodice: cut 1 on the fold – swim fabric
- Front bodice band: cut 2 mirrored on the fold – swim fabric
- Back bodice band: cut 2 mirrored on the fold – swim fabric
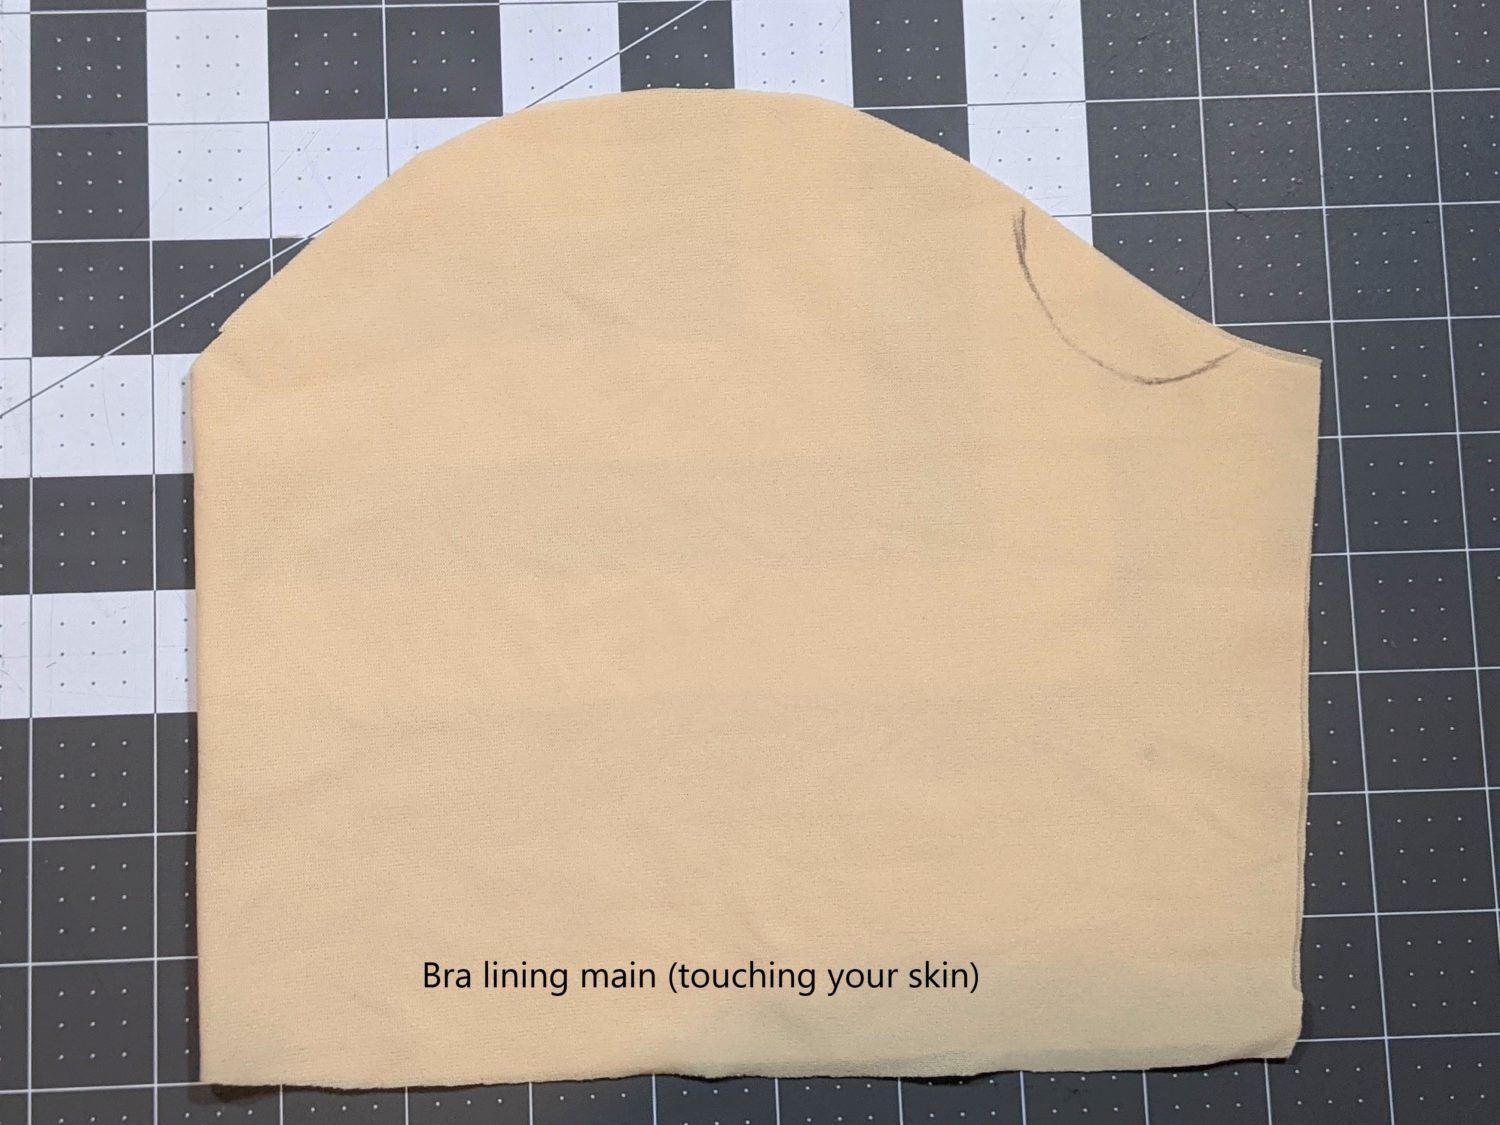
- Bra front: cut 1 on the fold – swim lining (optional 2nd lining layer or powermesh)
- Bra back: cut 1 on the fold – swim lining (optional 2nd lining layer or powermesh)
- 2 sets of mirrored images of suspenders
- Peplum skirt
- Optional: swim cups
Phew, now it’s time to sew!
Optional Removable Swim Cups:
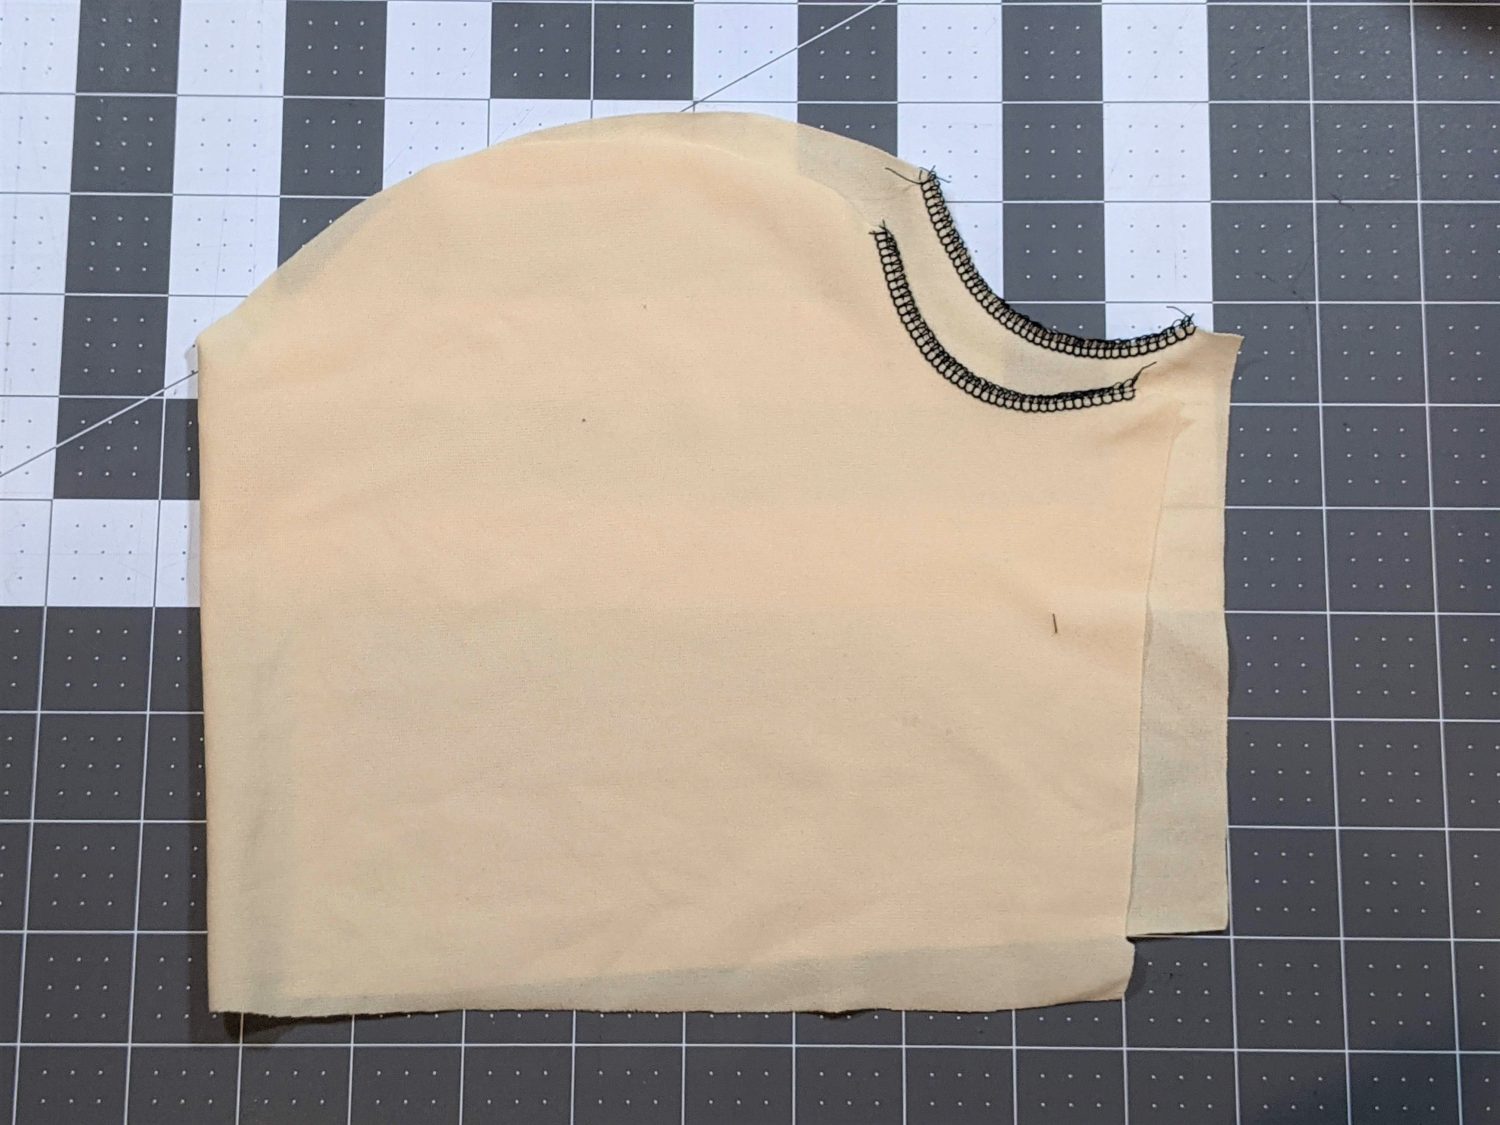
- Fold your innermost lining in half (the piece that will be against your skin) and draw a half moon along the side near your armpit.
- Cut out your marked section.
- Optional: serge along the raw edge.

Create the Bra
- Lay your lining pieces right sides togher and pin along both outer edges. If you are adding a second lining layer or powermesh, repeat with the aditional pieces.
- For two lining layers:
- Slip the swim lining layer inside the powermesh layer.
- Pin along top and bottom edges.
- Baste together – treat as 1 piece from this point on.
- If adding removable cups:
- Draw a line down the center from top to bottom and stitch with a long narrow zigzag to keep the swim cups from sliding all around in there.
This is a great time to check the fit!
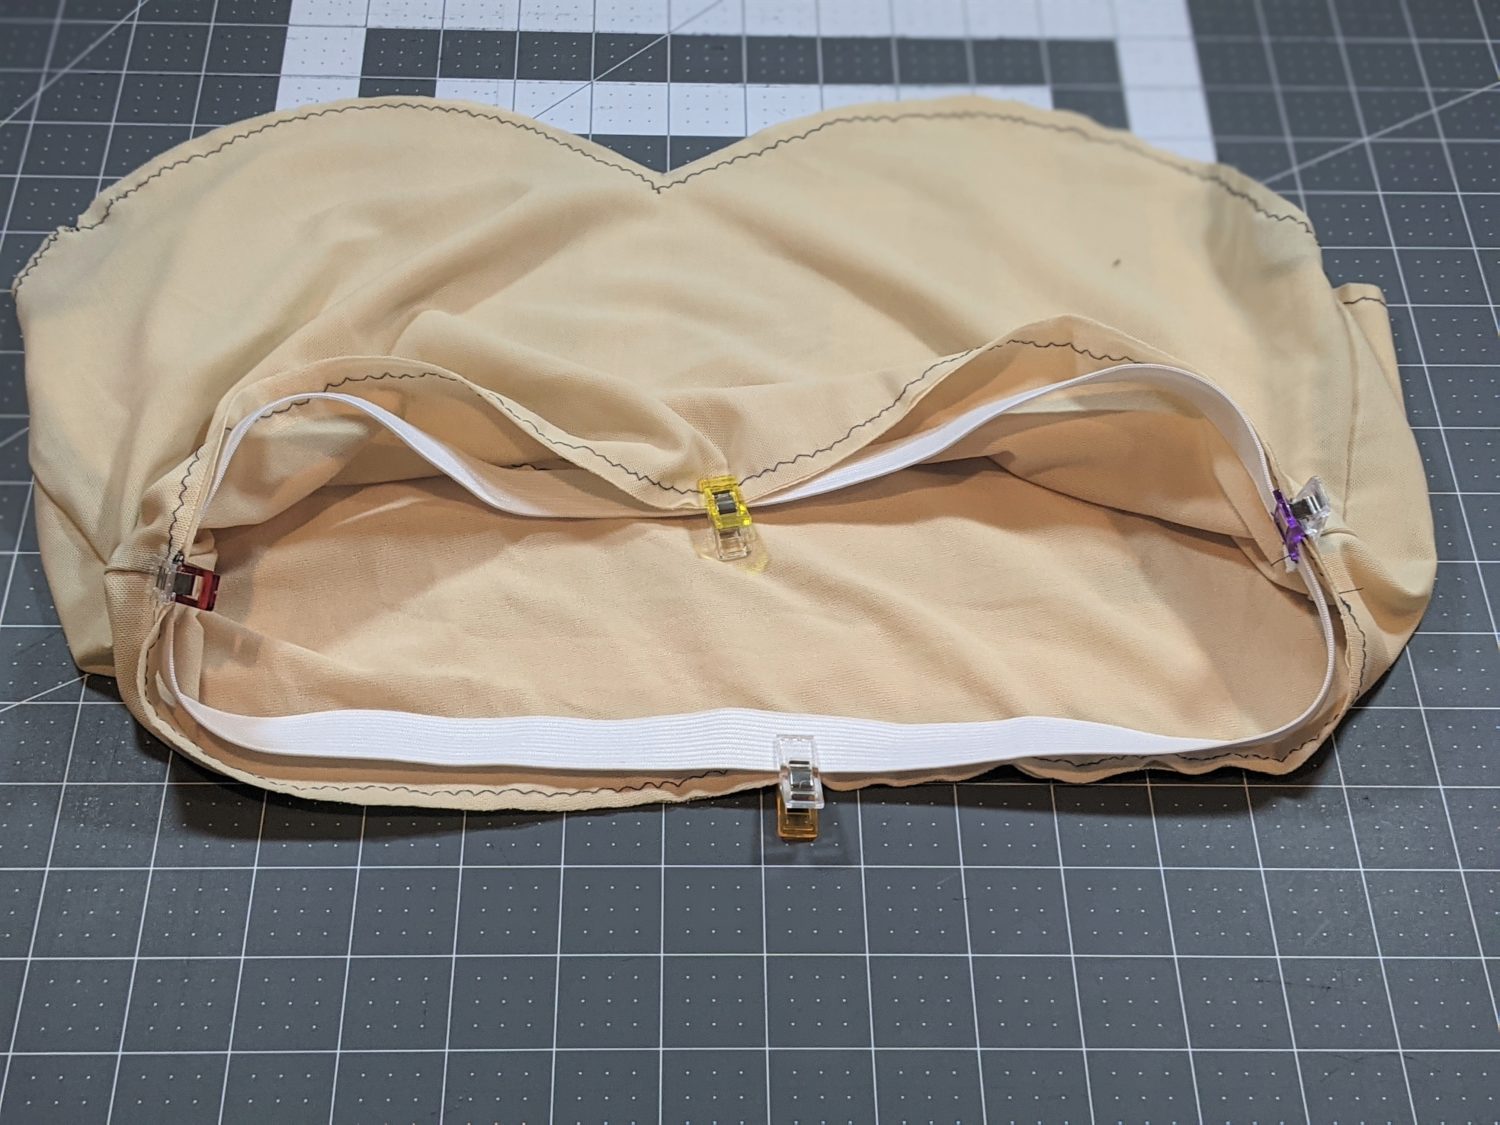
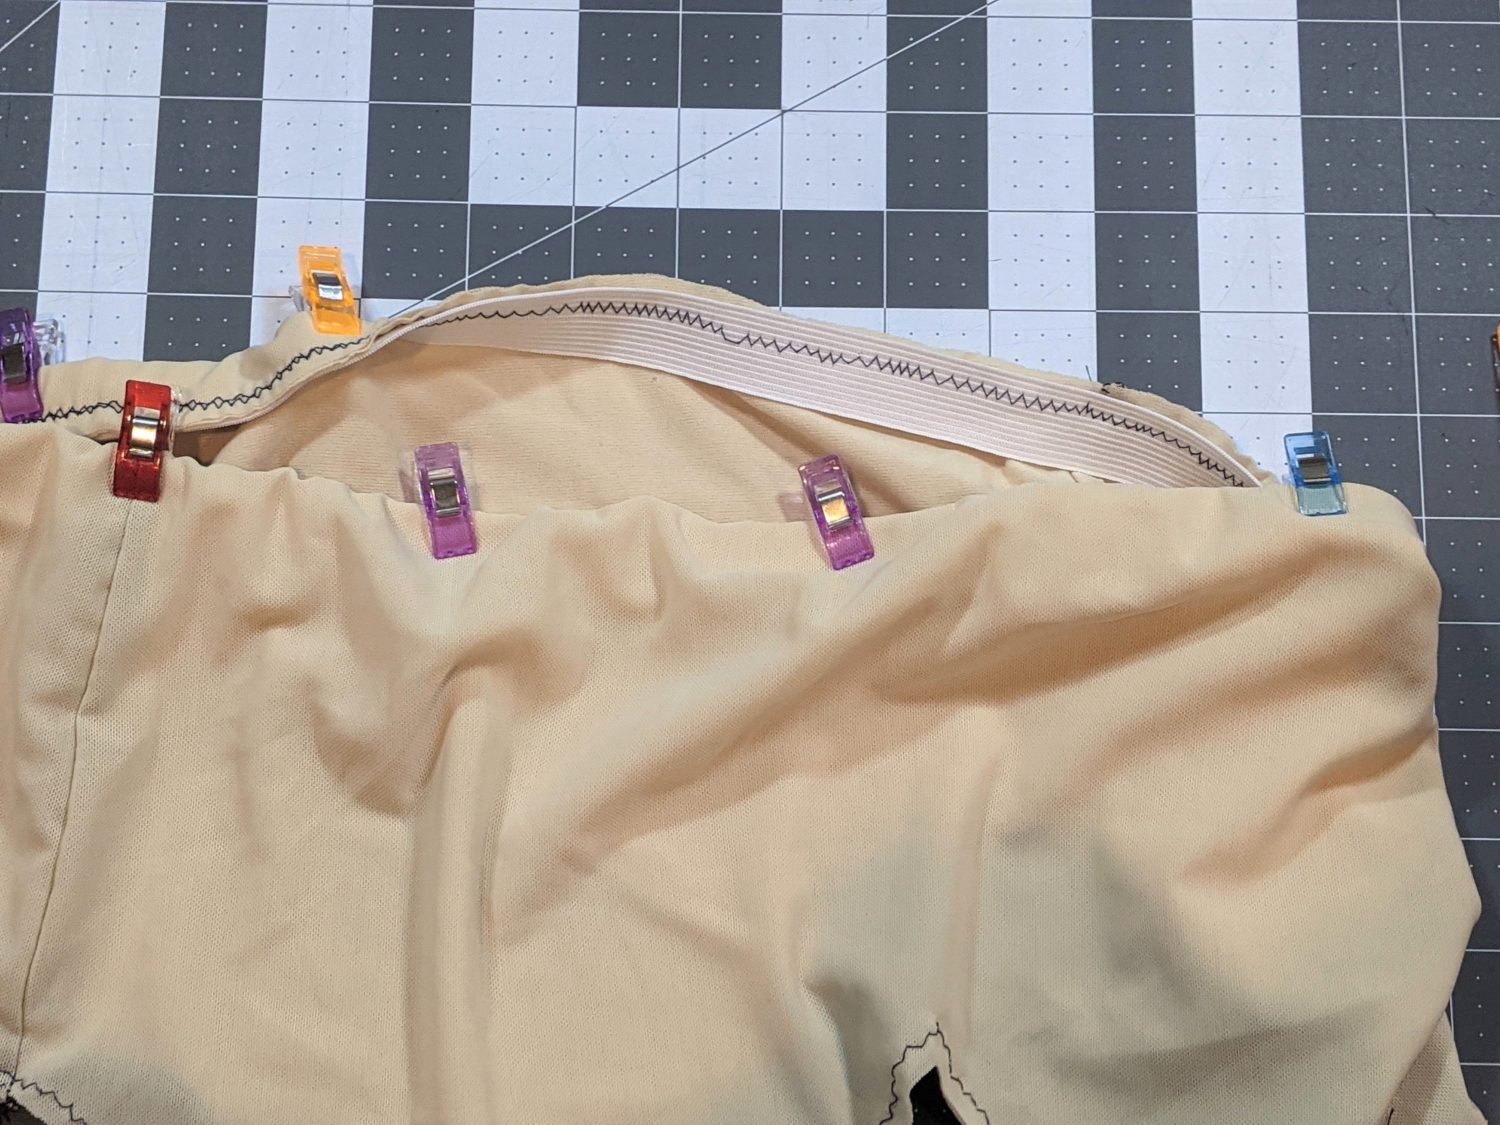
Elastic Band
- Measure your 3/4″ elastic under your bust then subtract approximately 2″ – make it fits snuggly, but isn’t too tight.
- Overlap the elastic ends 1/2″ to form a loop then sew together.
- Quarter and pin the bottom edge of the bra and the elastic.
- Slip the elastic into the inner side of the swim lining (the side with the cup cutouts and/or the side that will be against your skin) and line up the quarter points.
- Sew with a stretch stitch stretching only the elastic as you go.
- Fold the elastic in, encasing it in the lining.
- Topstitch along the edge with a 1/2″ seam allowance.

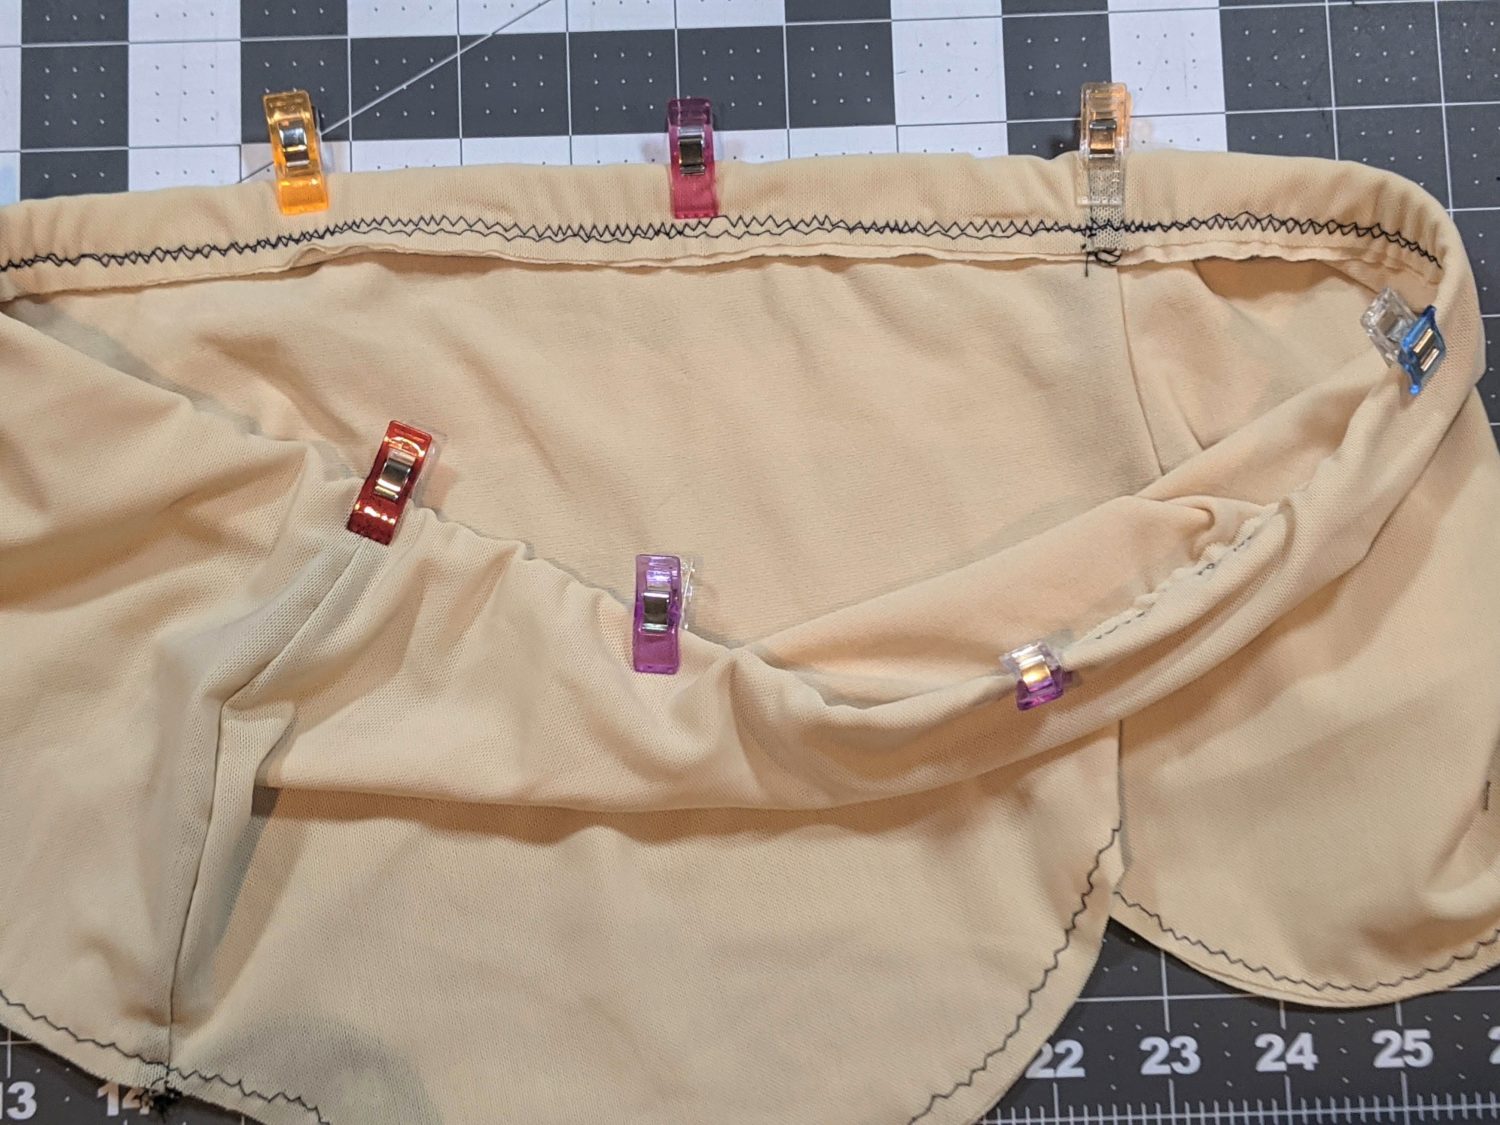

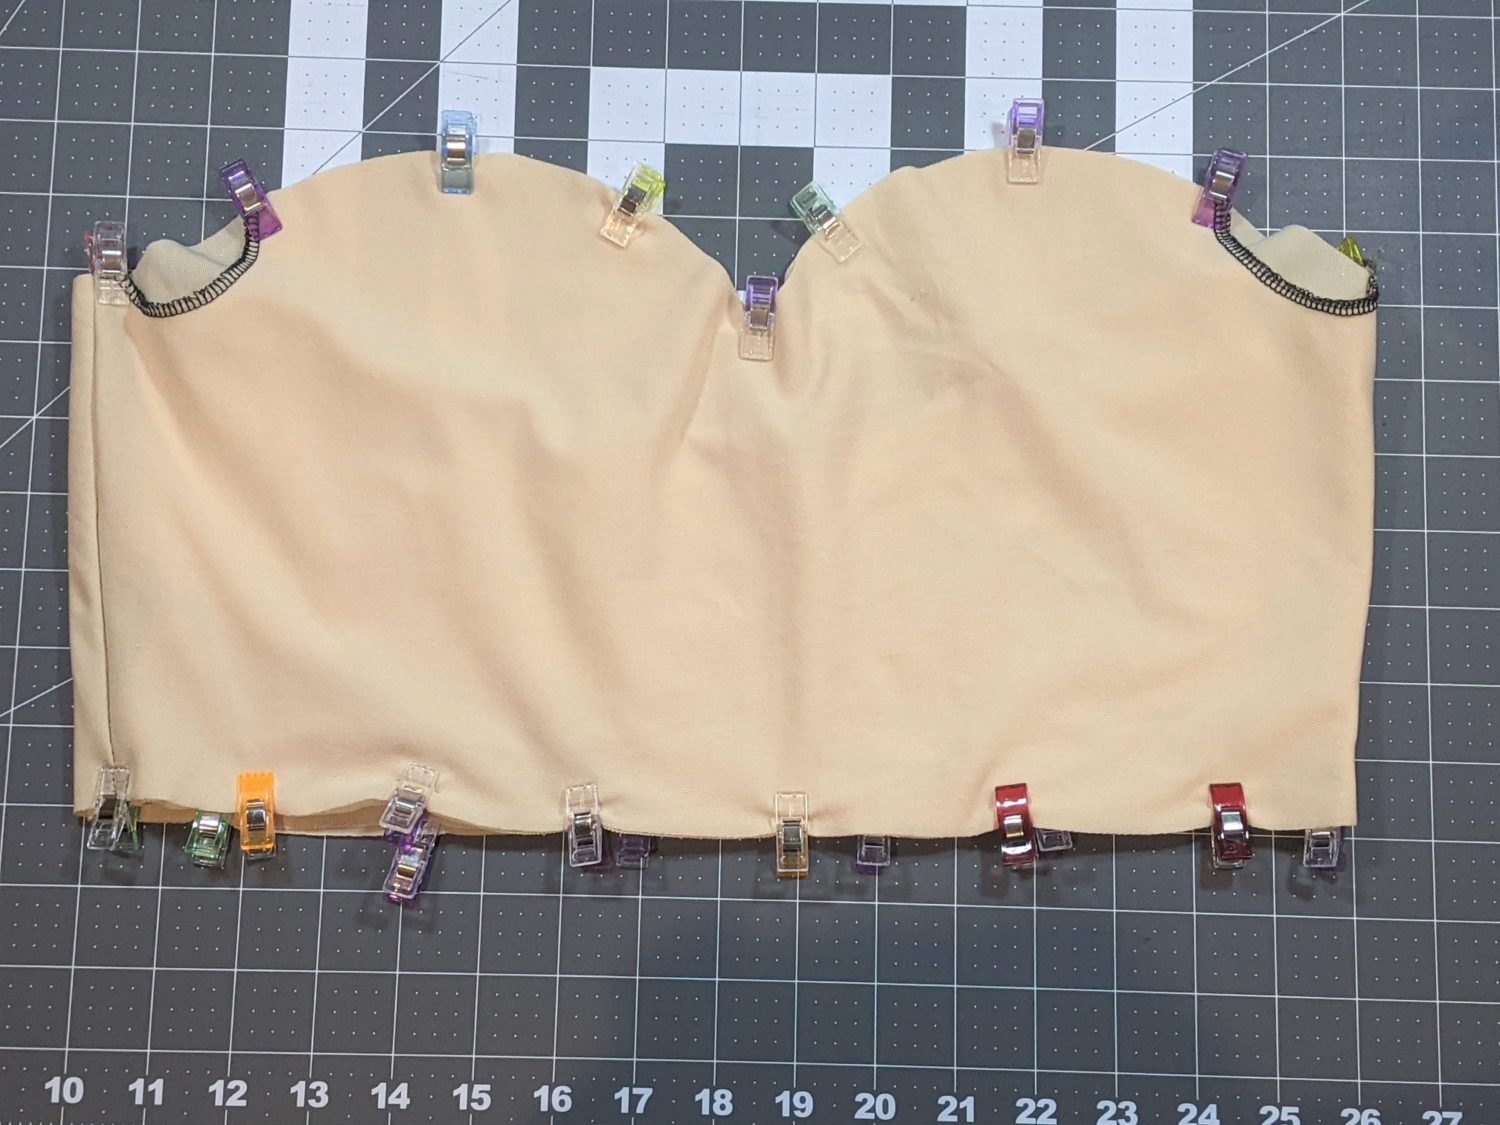
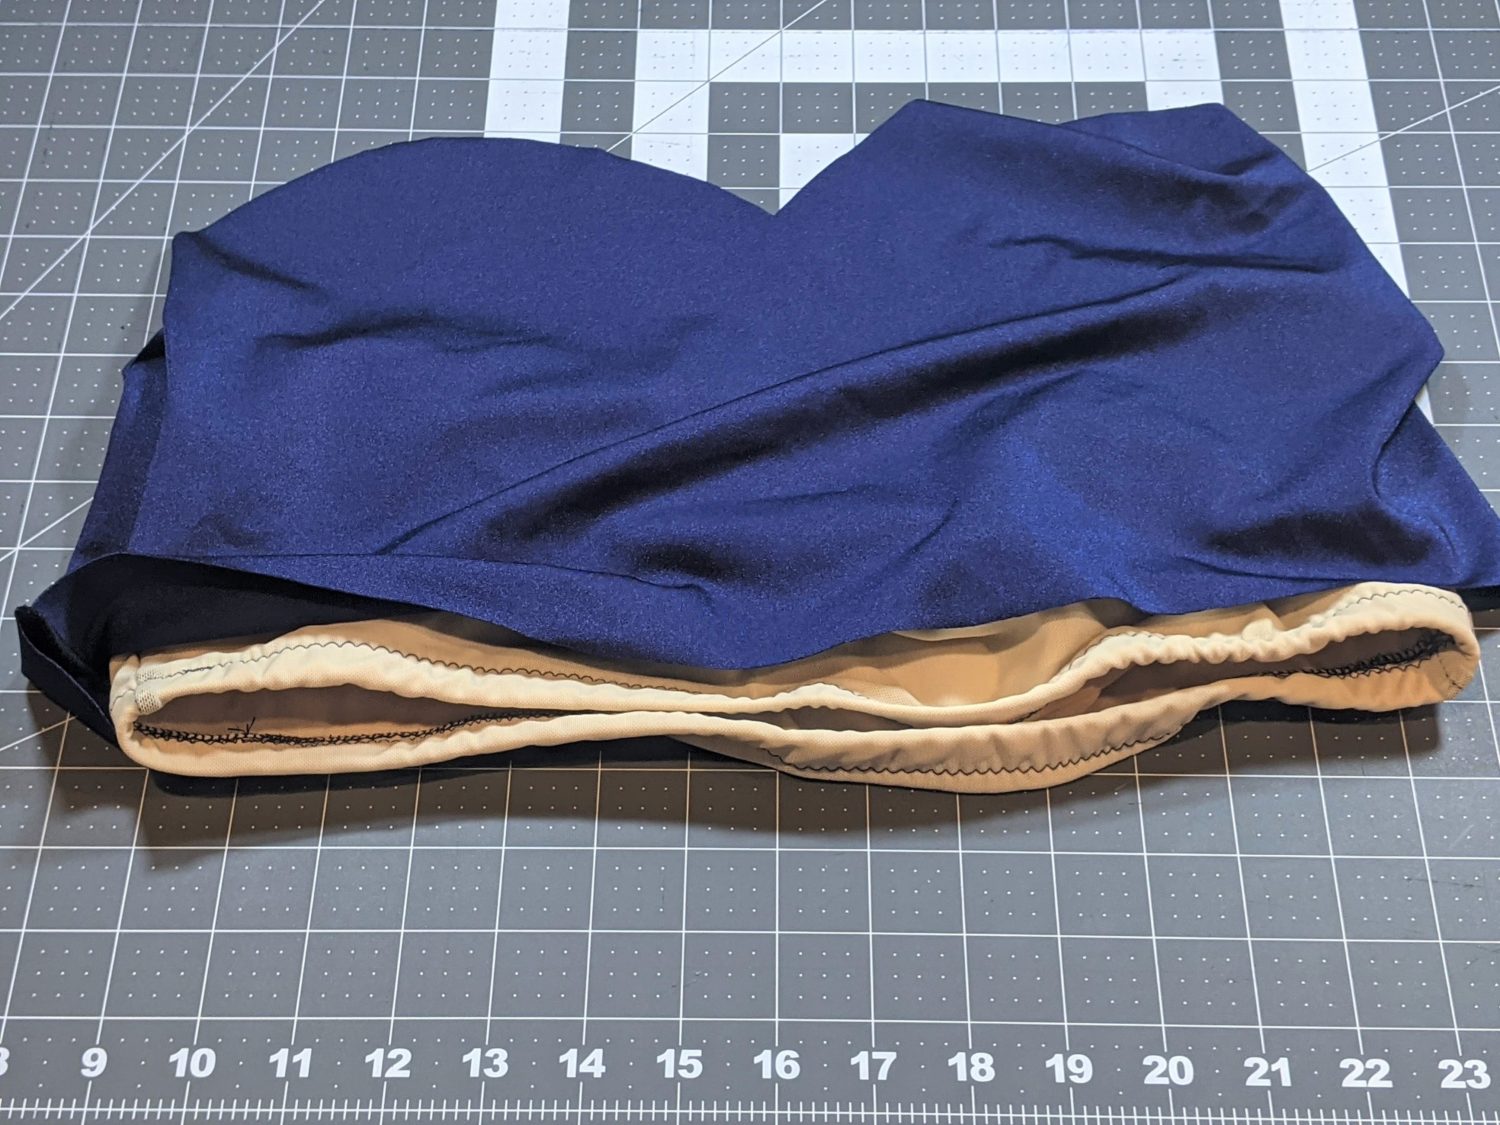
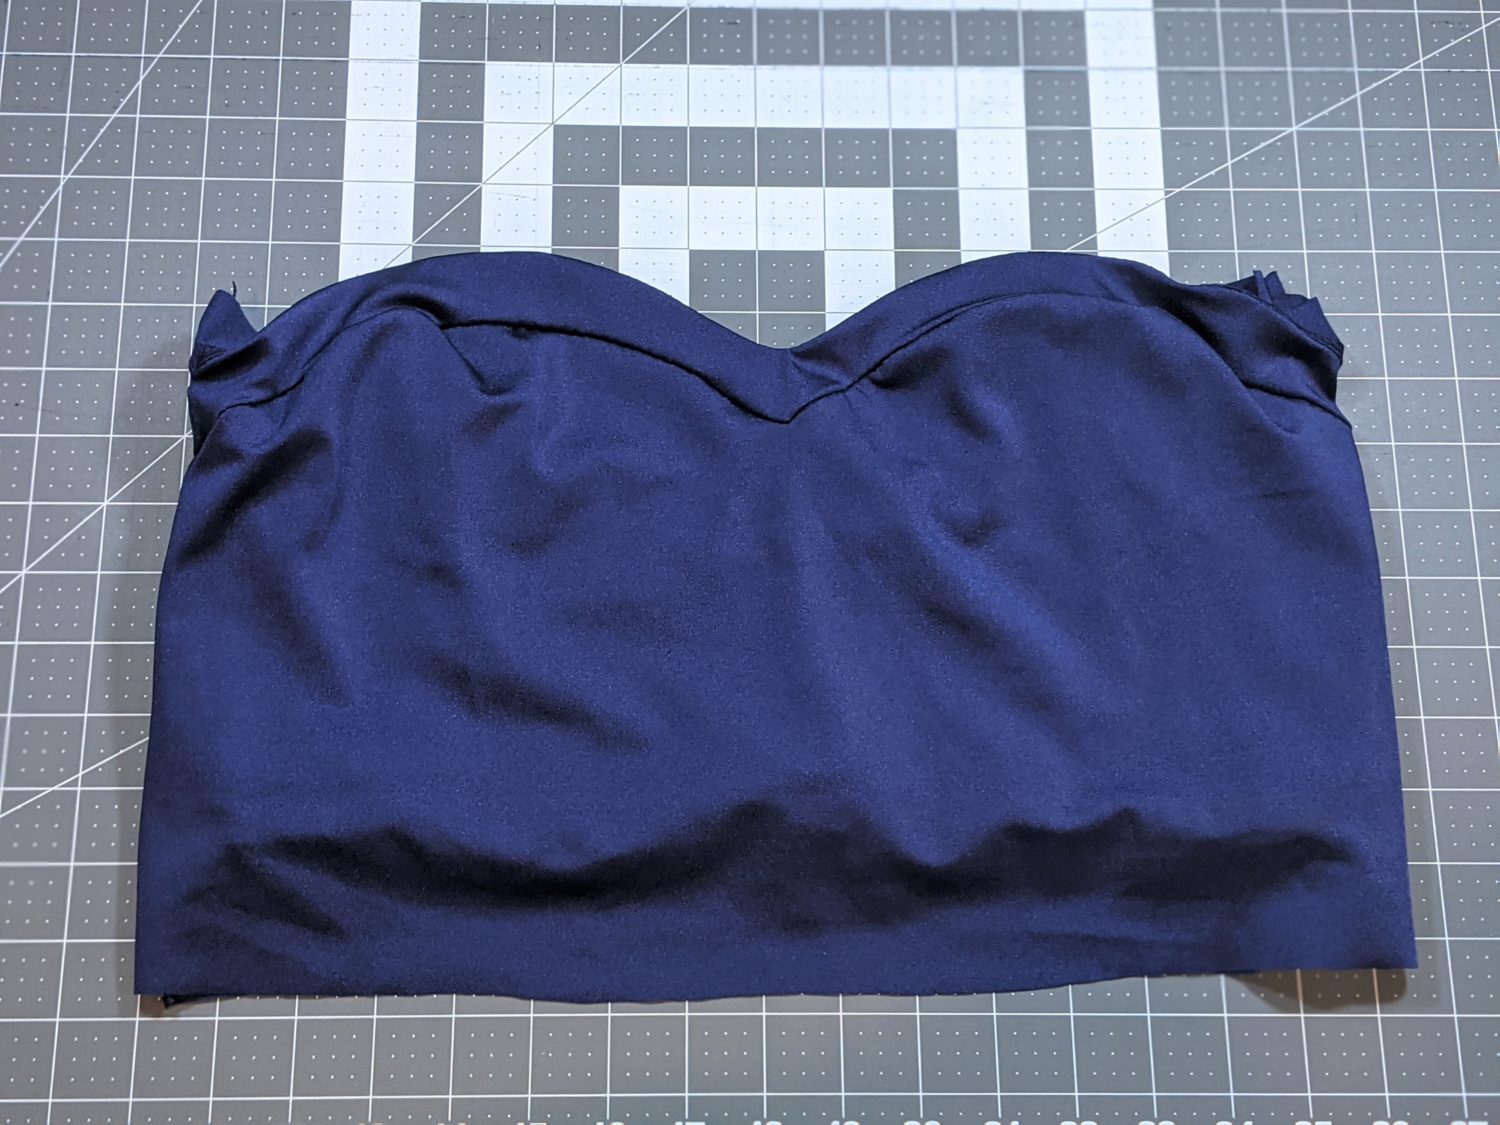
Connecting the Bra and Bodice
The rest will follow closely to the original tutorial, the main difference being that there is no zipper so the back is one full piece.
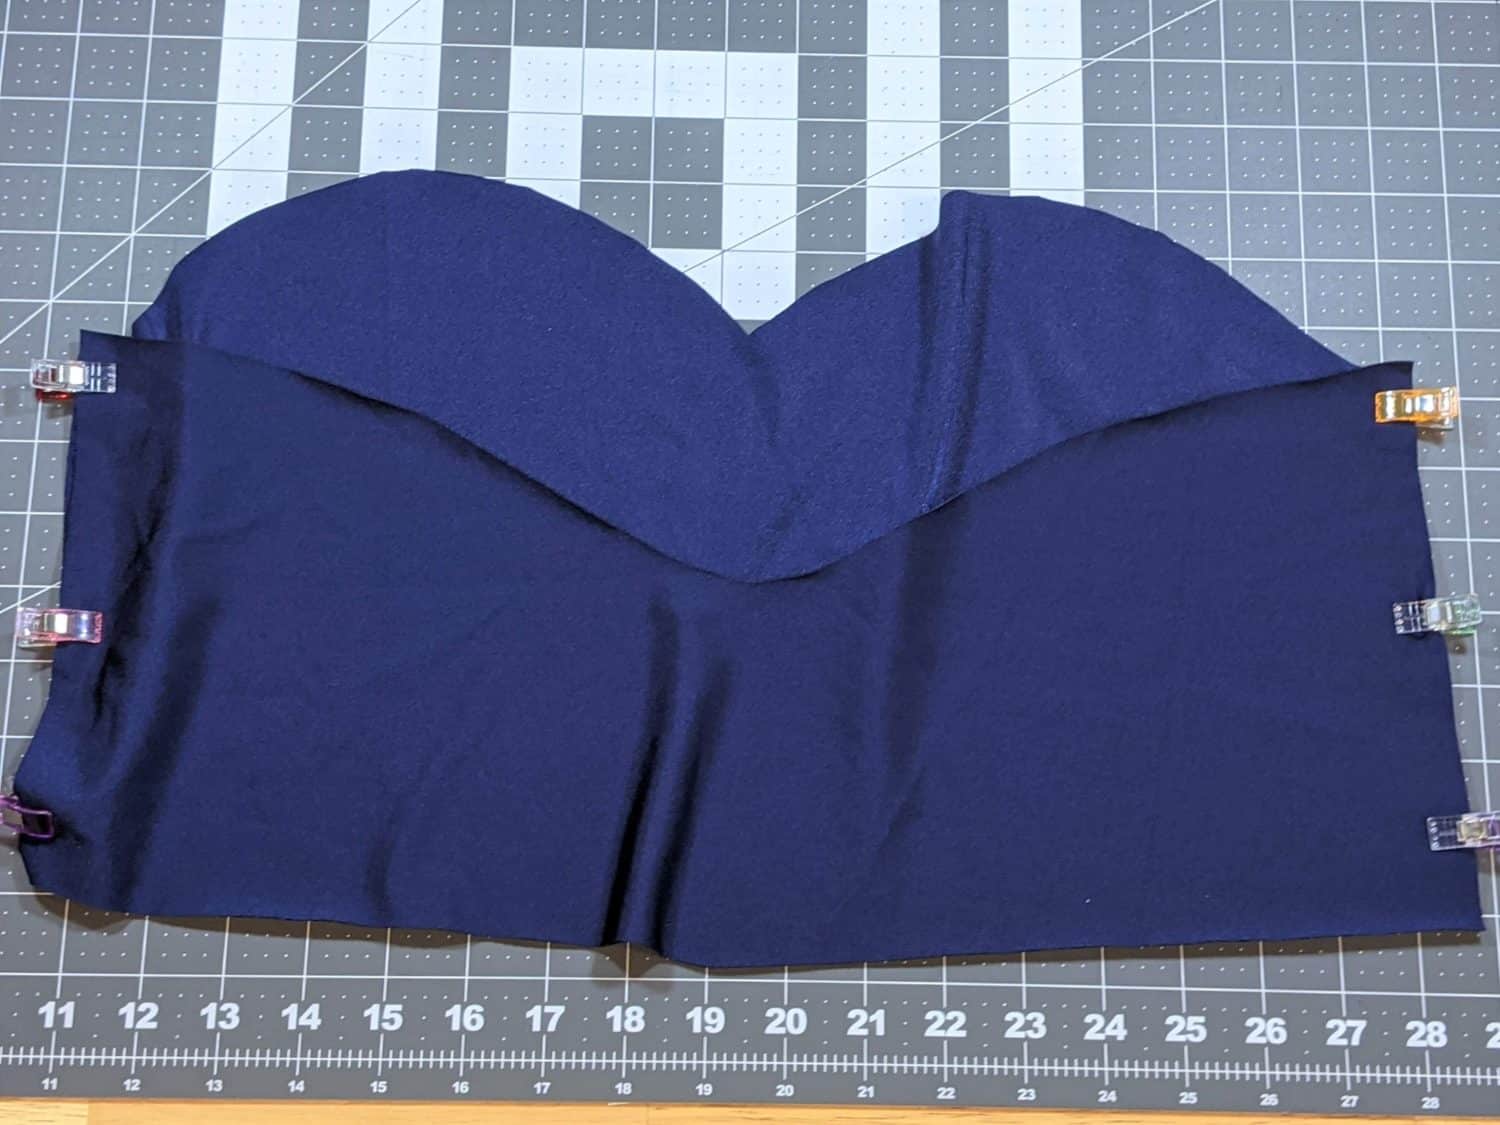
- Sew your main swim bodice pieces right sides together along the side seams.
- Slide bra inside the main bodice with the removable cup cutouts facing away from the swim fabric.
- Pin along top the edges and baste together.
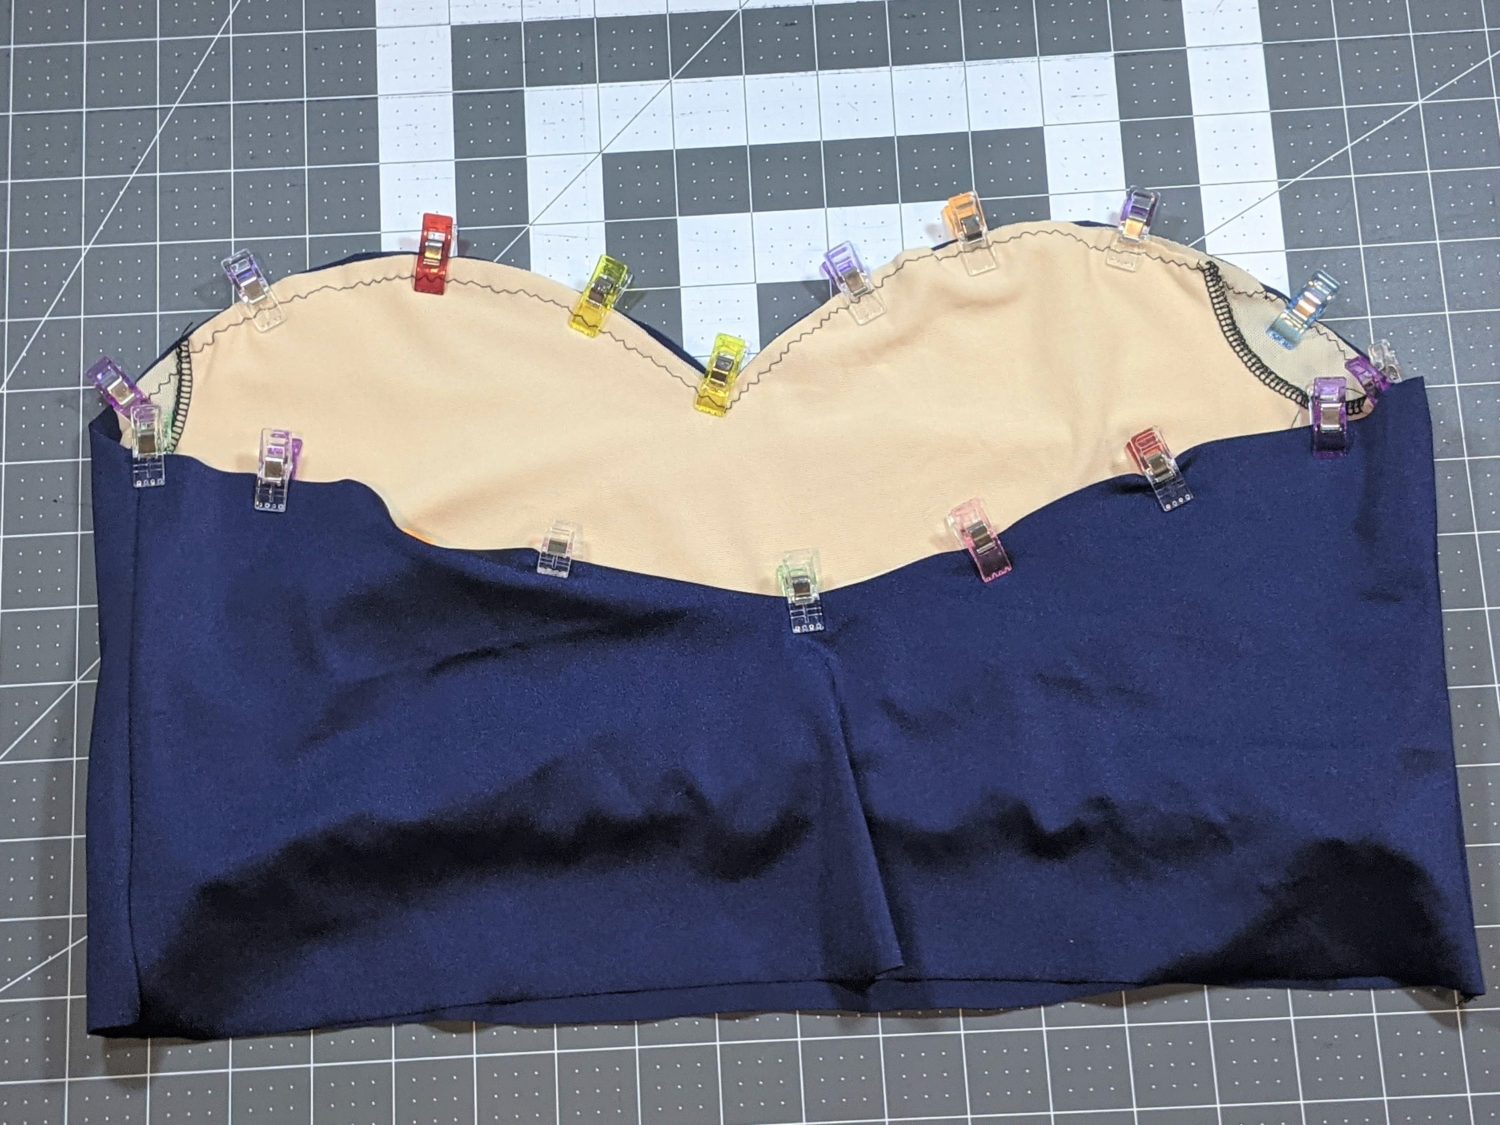
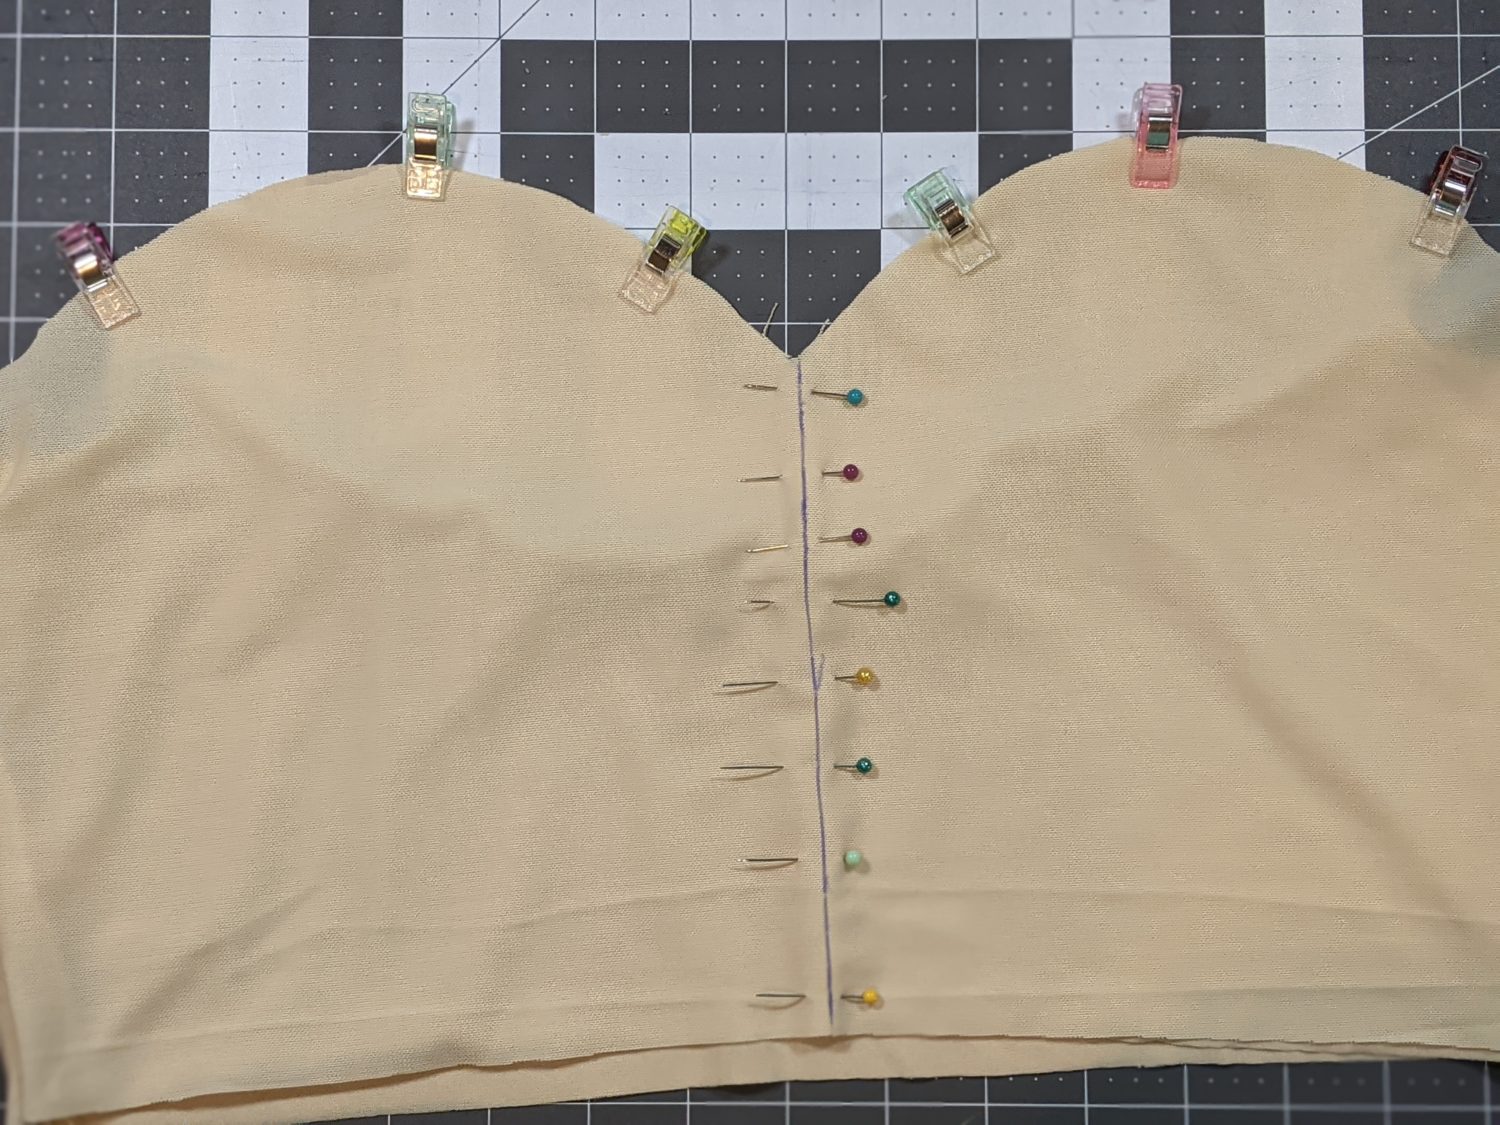
- Follow the tutorial to attach the facing, you will just have one long band for the back instead of two.
- Sew the front “V” first, then match center backs, and side seams.
- Use a small scrap of your swim fabric to determine if it’s safe to use an iron on it. It’s just fine if you use the lowest heat setting. If all is good, follow the tutorial to adhere the interfacing along the sweetheart curves.
- Press the seam allowance down towards the bodice.
- Skip down to page 37 just past the zipper instalation to step 16 to finish the neckline facing.
- Since swim fabric can be pretty slippery, wash-away wondertape can be very useful here along with the pins.
Peplum
- Cut your peplum- There are two cut lines on the pattern piece; one for the front and one for the back. You will just cut 2 front pieces of the fold since we aren’t worrying about a zipper.
- In the original tutorial you hem along the bottom edge. For the swim fabric, you don’t need to hem it, it’s up to you. I skiped the hemming, so I choose to shorten it about 1/2″ and leave the edge raw.
- Follow the insturctions in the tutorial to construct and attach the peplum to your swim top.
Suspenders:
- Cut and sew your suspenders following the tutorial.
- You will still add the interfacing where the button will be whether you choose to make a button hole or not.
- You can choose to follow the steps for making a button hole and attaching the button. The other options (which is what I did) is to sew the front of the suspenders to the bodice stitching an “X” where you will sew your button on.
- Once I was sure they were where I wanted them, I sewed along the edge of the suspenders going over the previous topstitching just where the suspenders overlap the bodice.
- Hand sew your buttons over the “X”
- Follow the tutorial to attach the back of the suspenders.
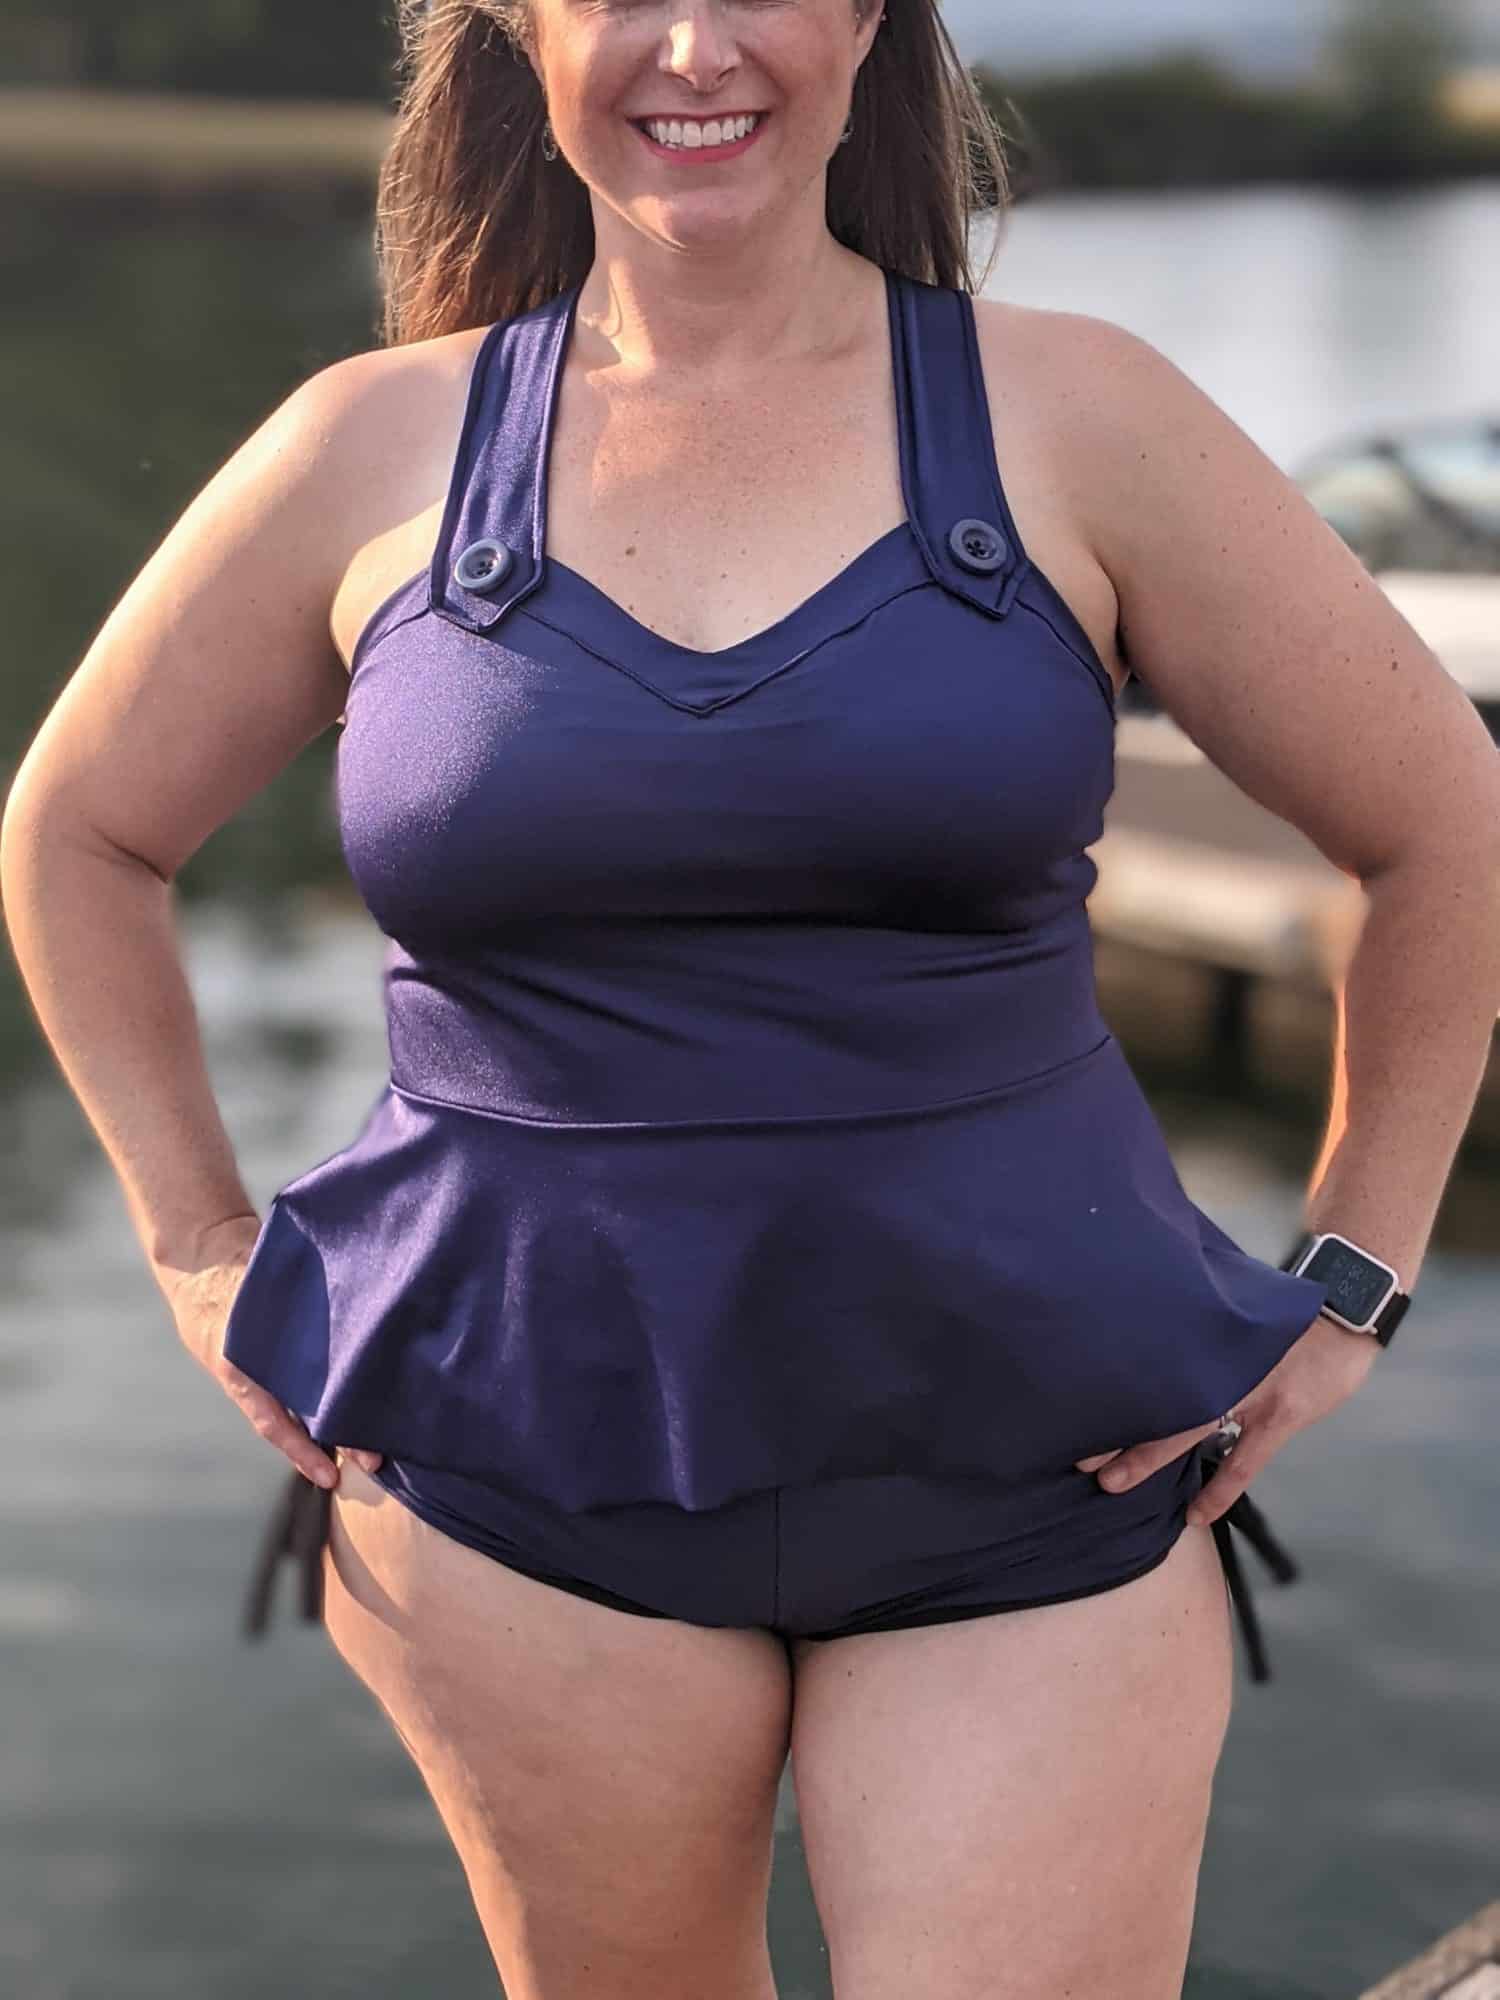
Pair with your favorite 5 out of 4 swim bottoms (mine are the Riptide Shorties) and you are ready to hit the beach and look fabulous doing it!

Want more FUN DIY Freebies? Check out the FREEBIE TUTORIALS and the FREEBIE PATTERNS!
As always, we’re here to help if you need it! Join us HERE and on Facebook, Instagram, Twitter, Youtube, and Pinterest. We’re everywhere you are.
Leave a Reply