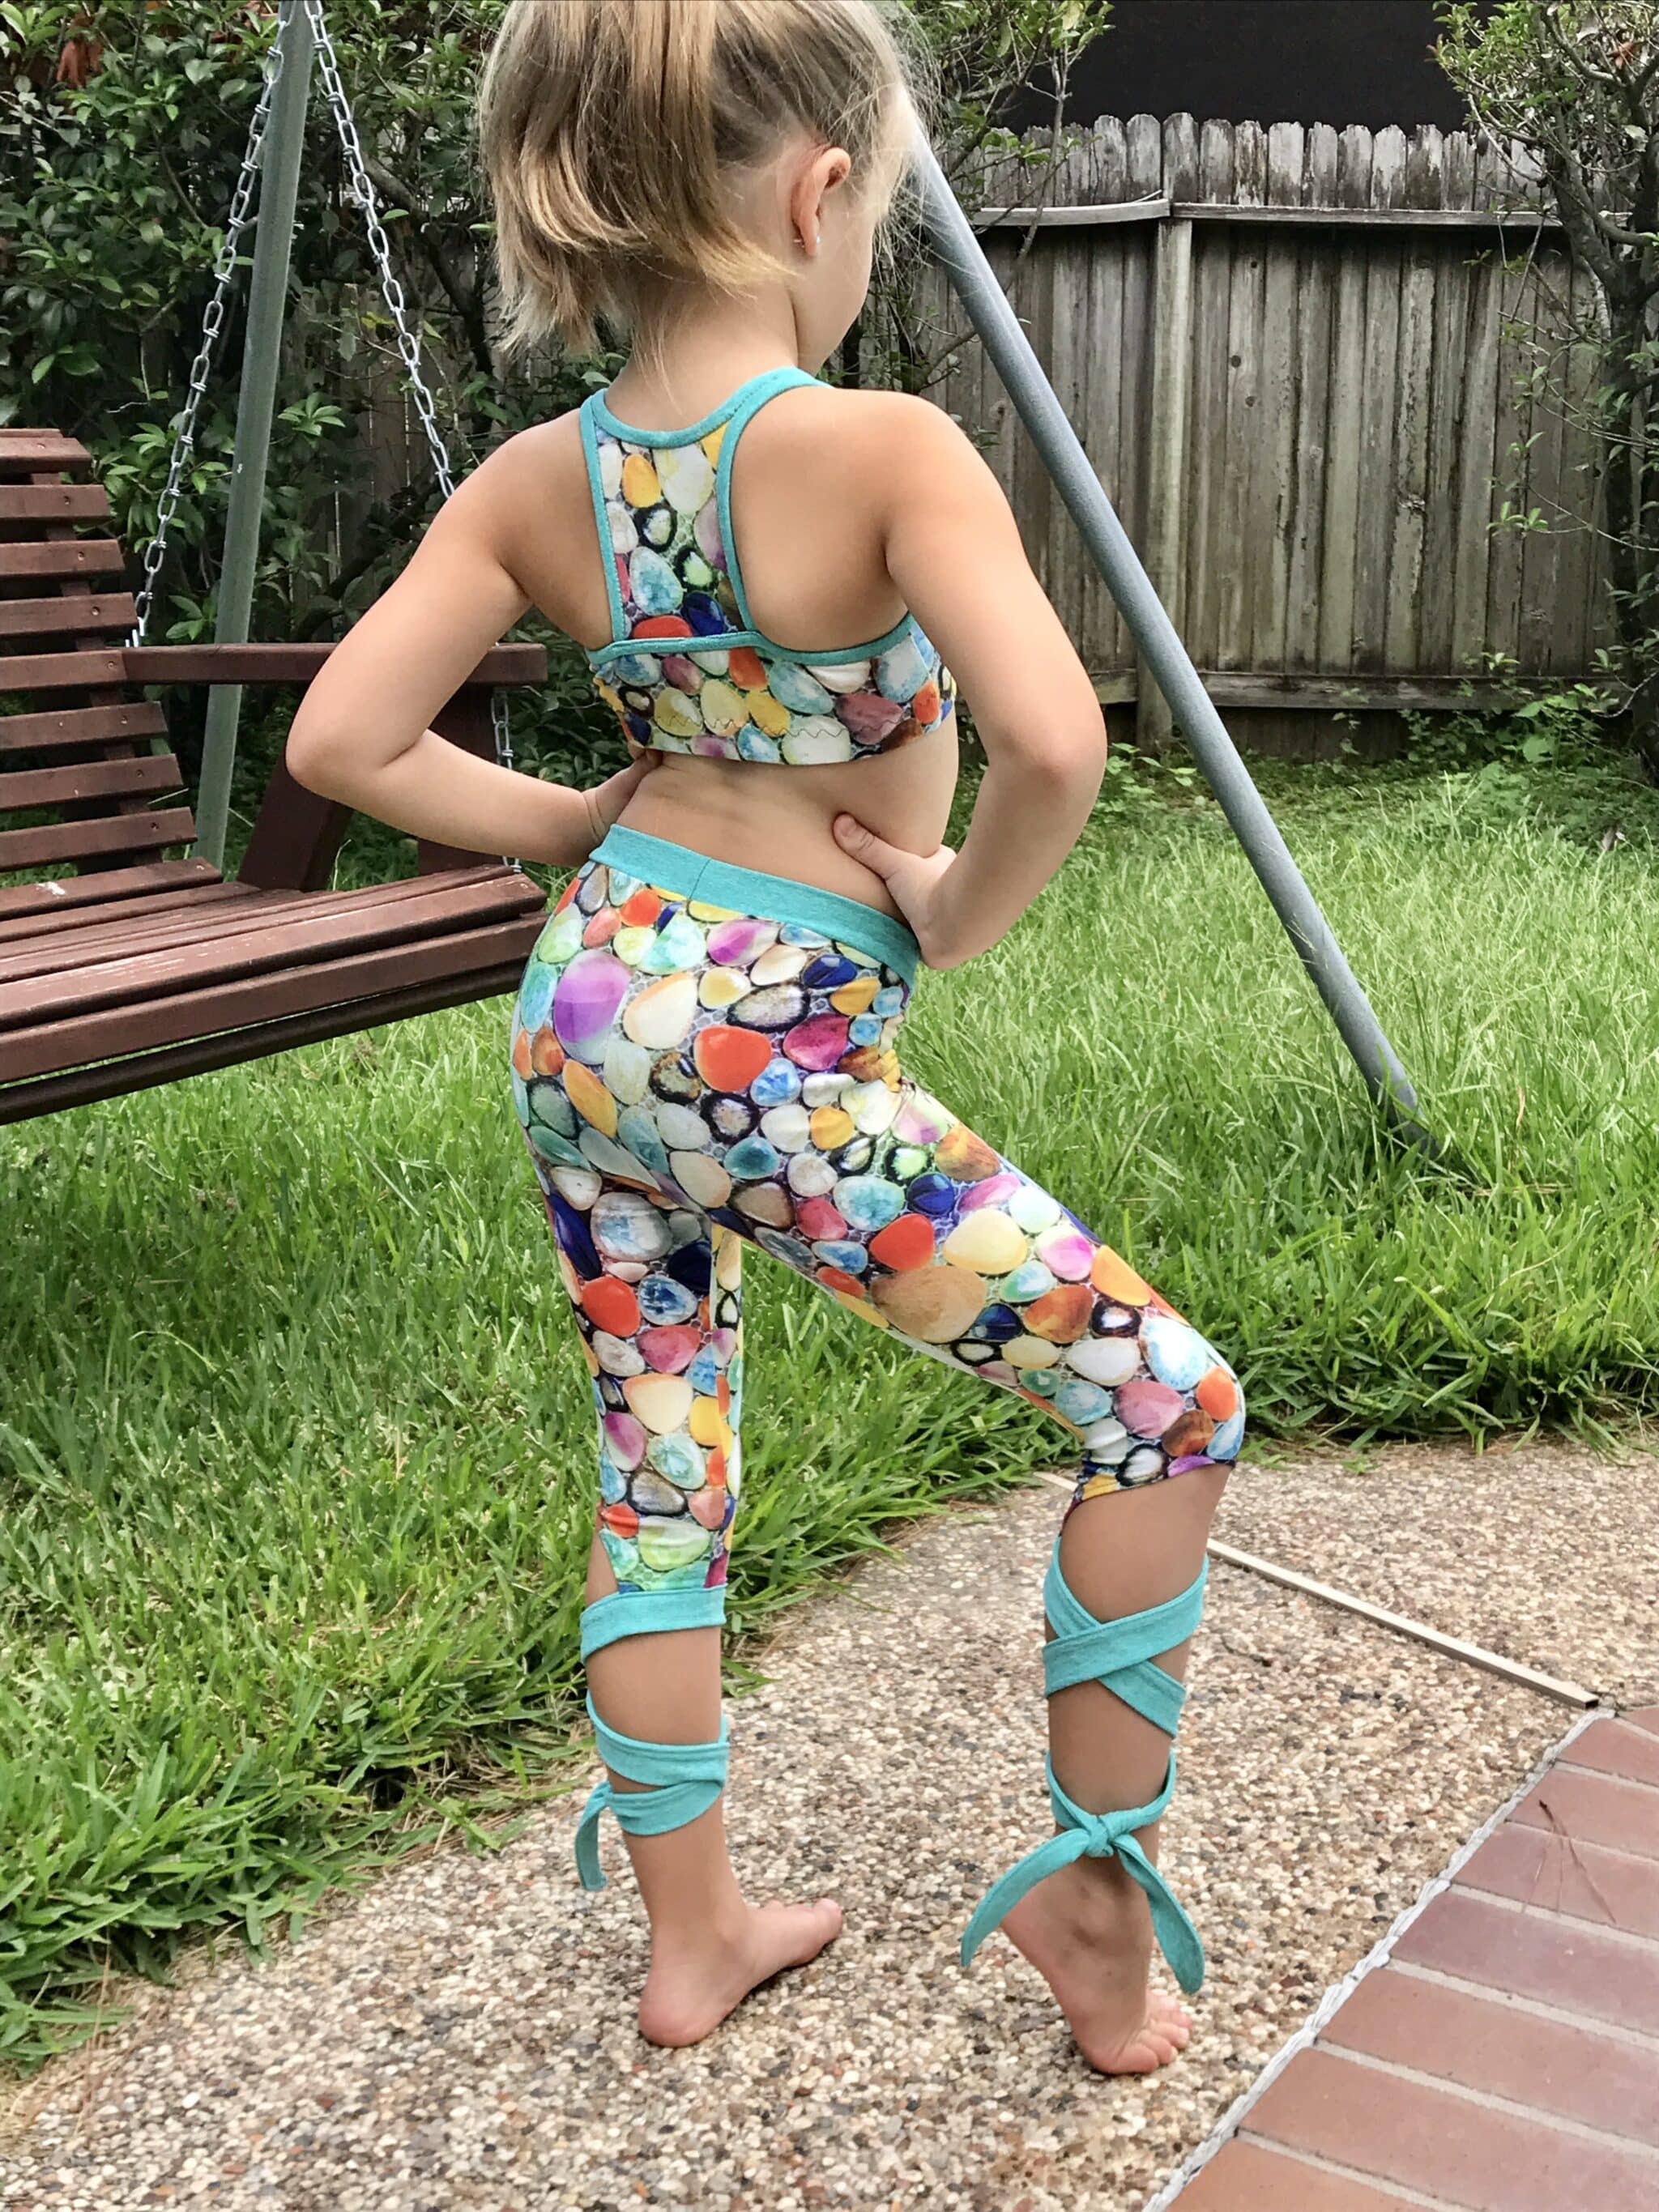
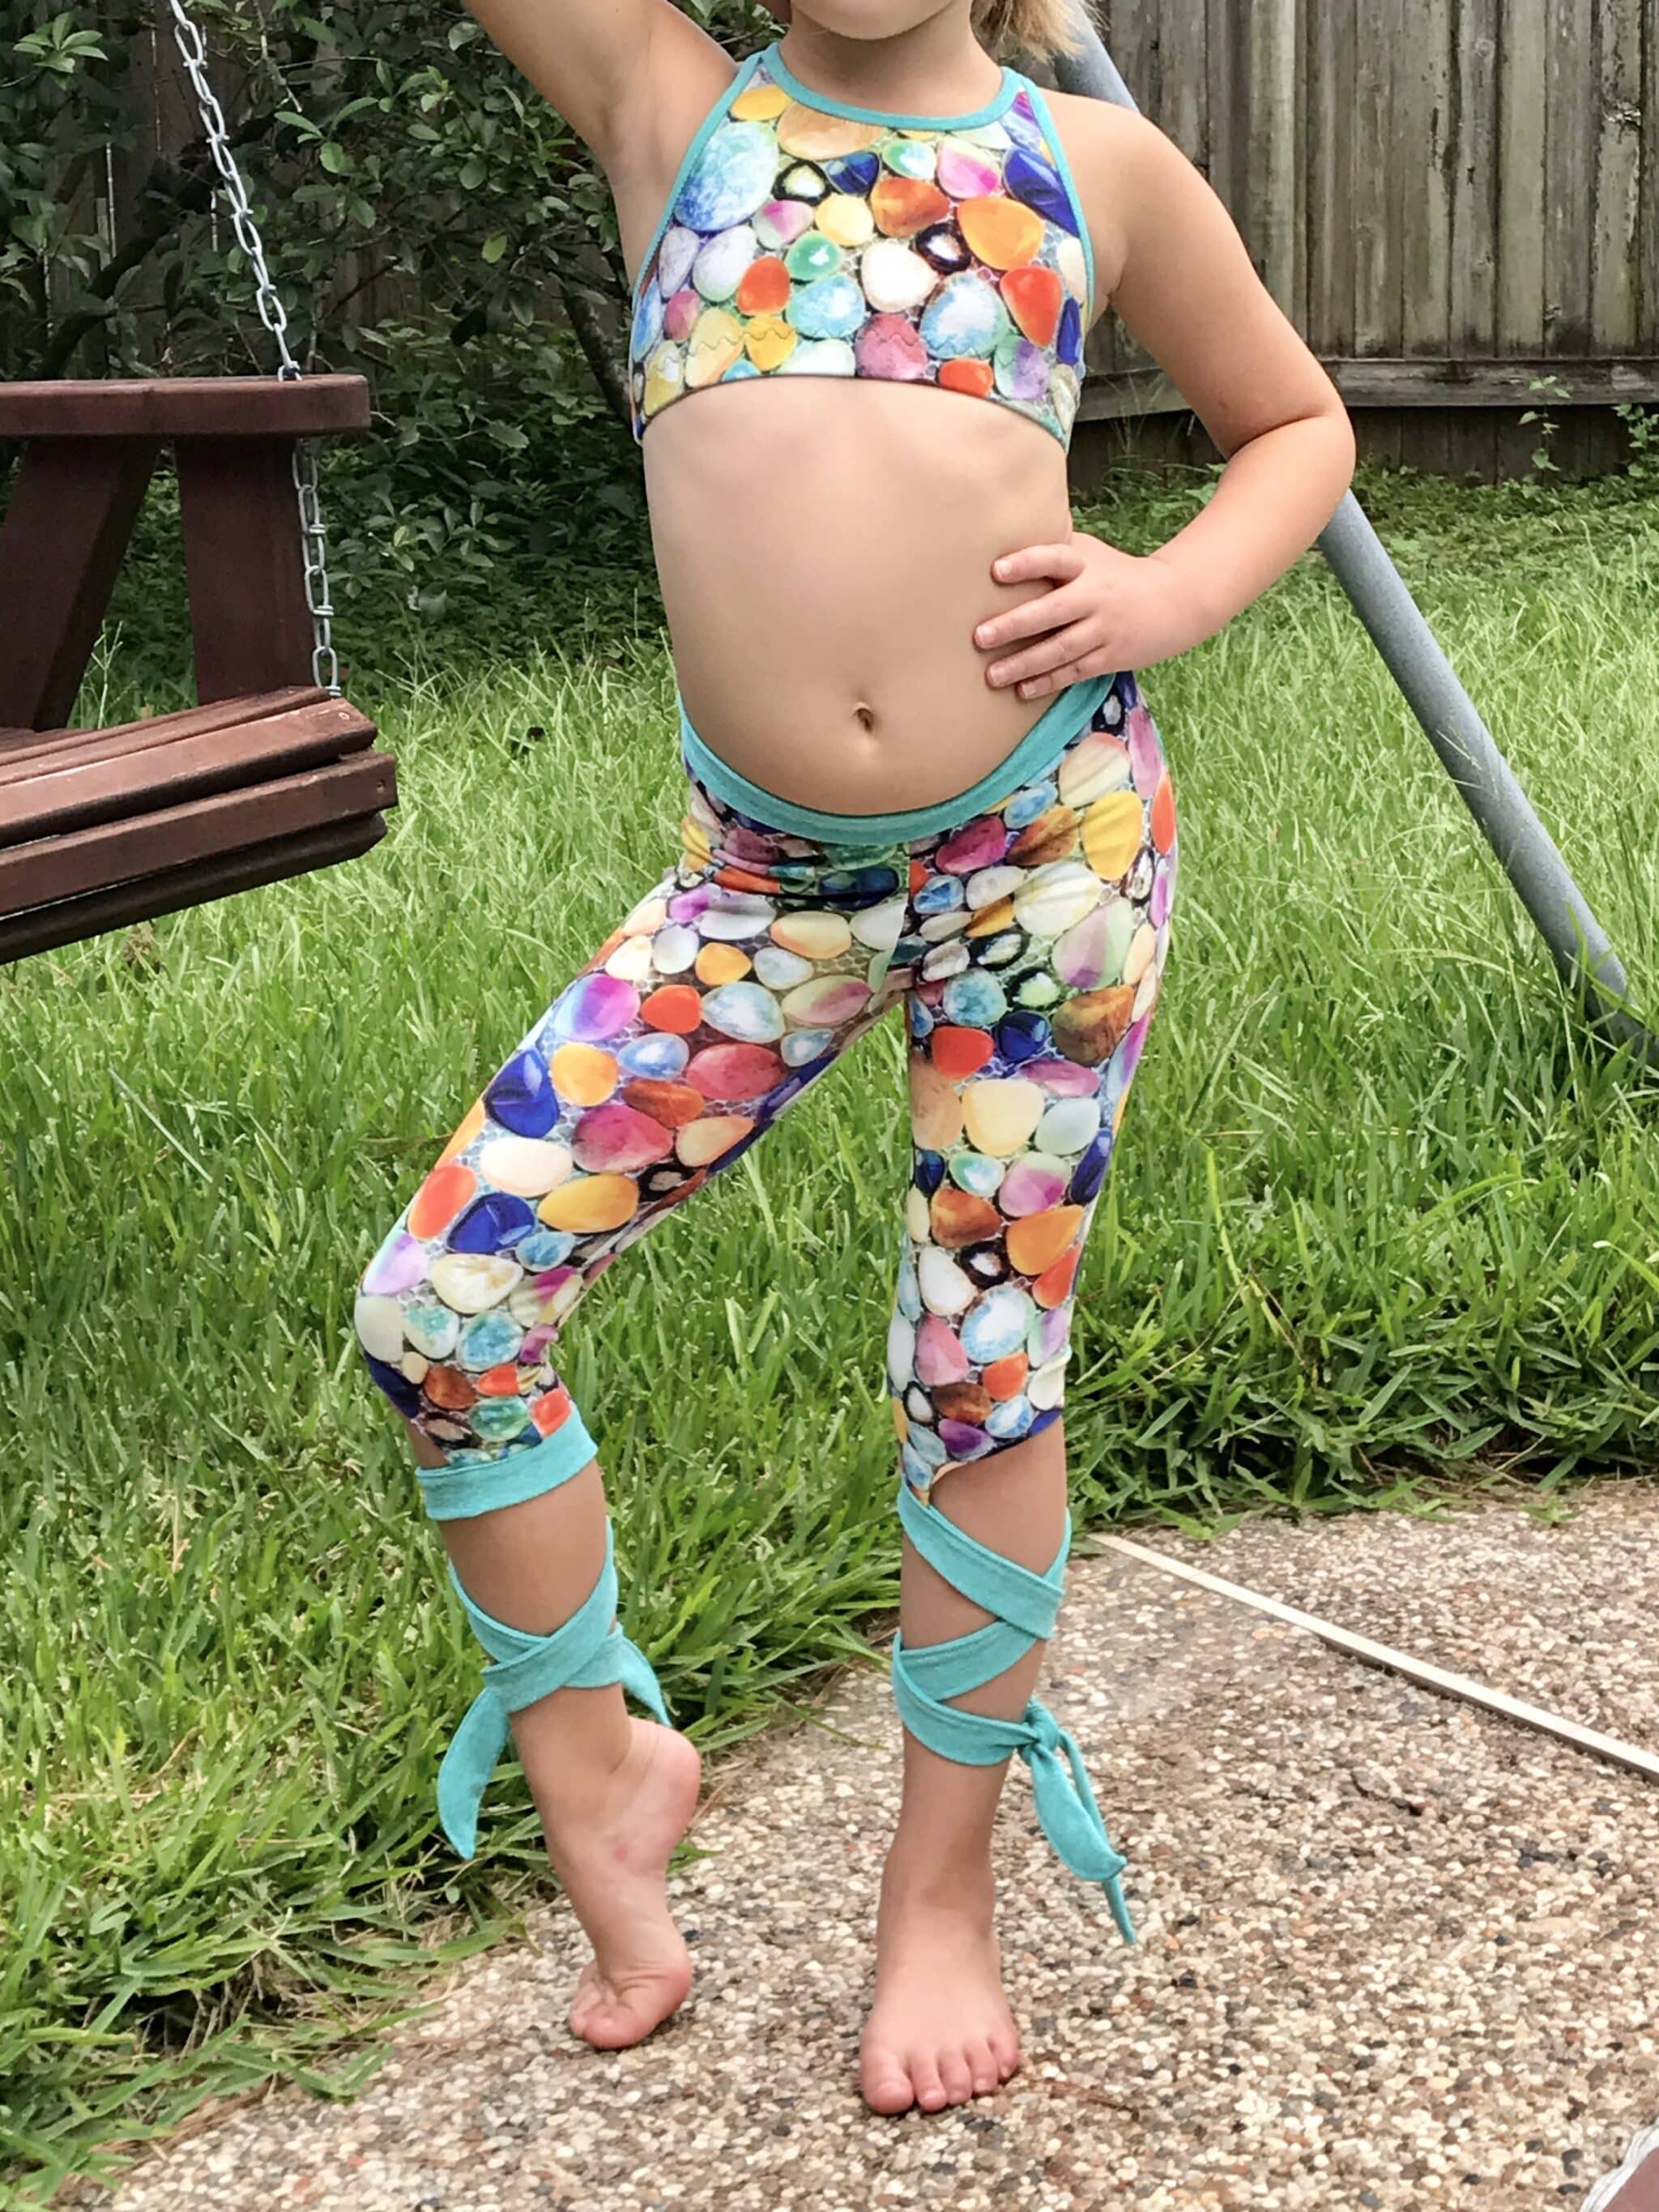
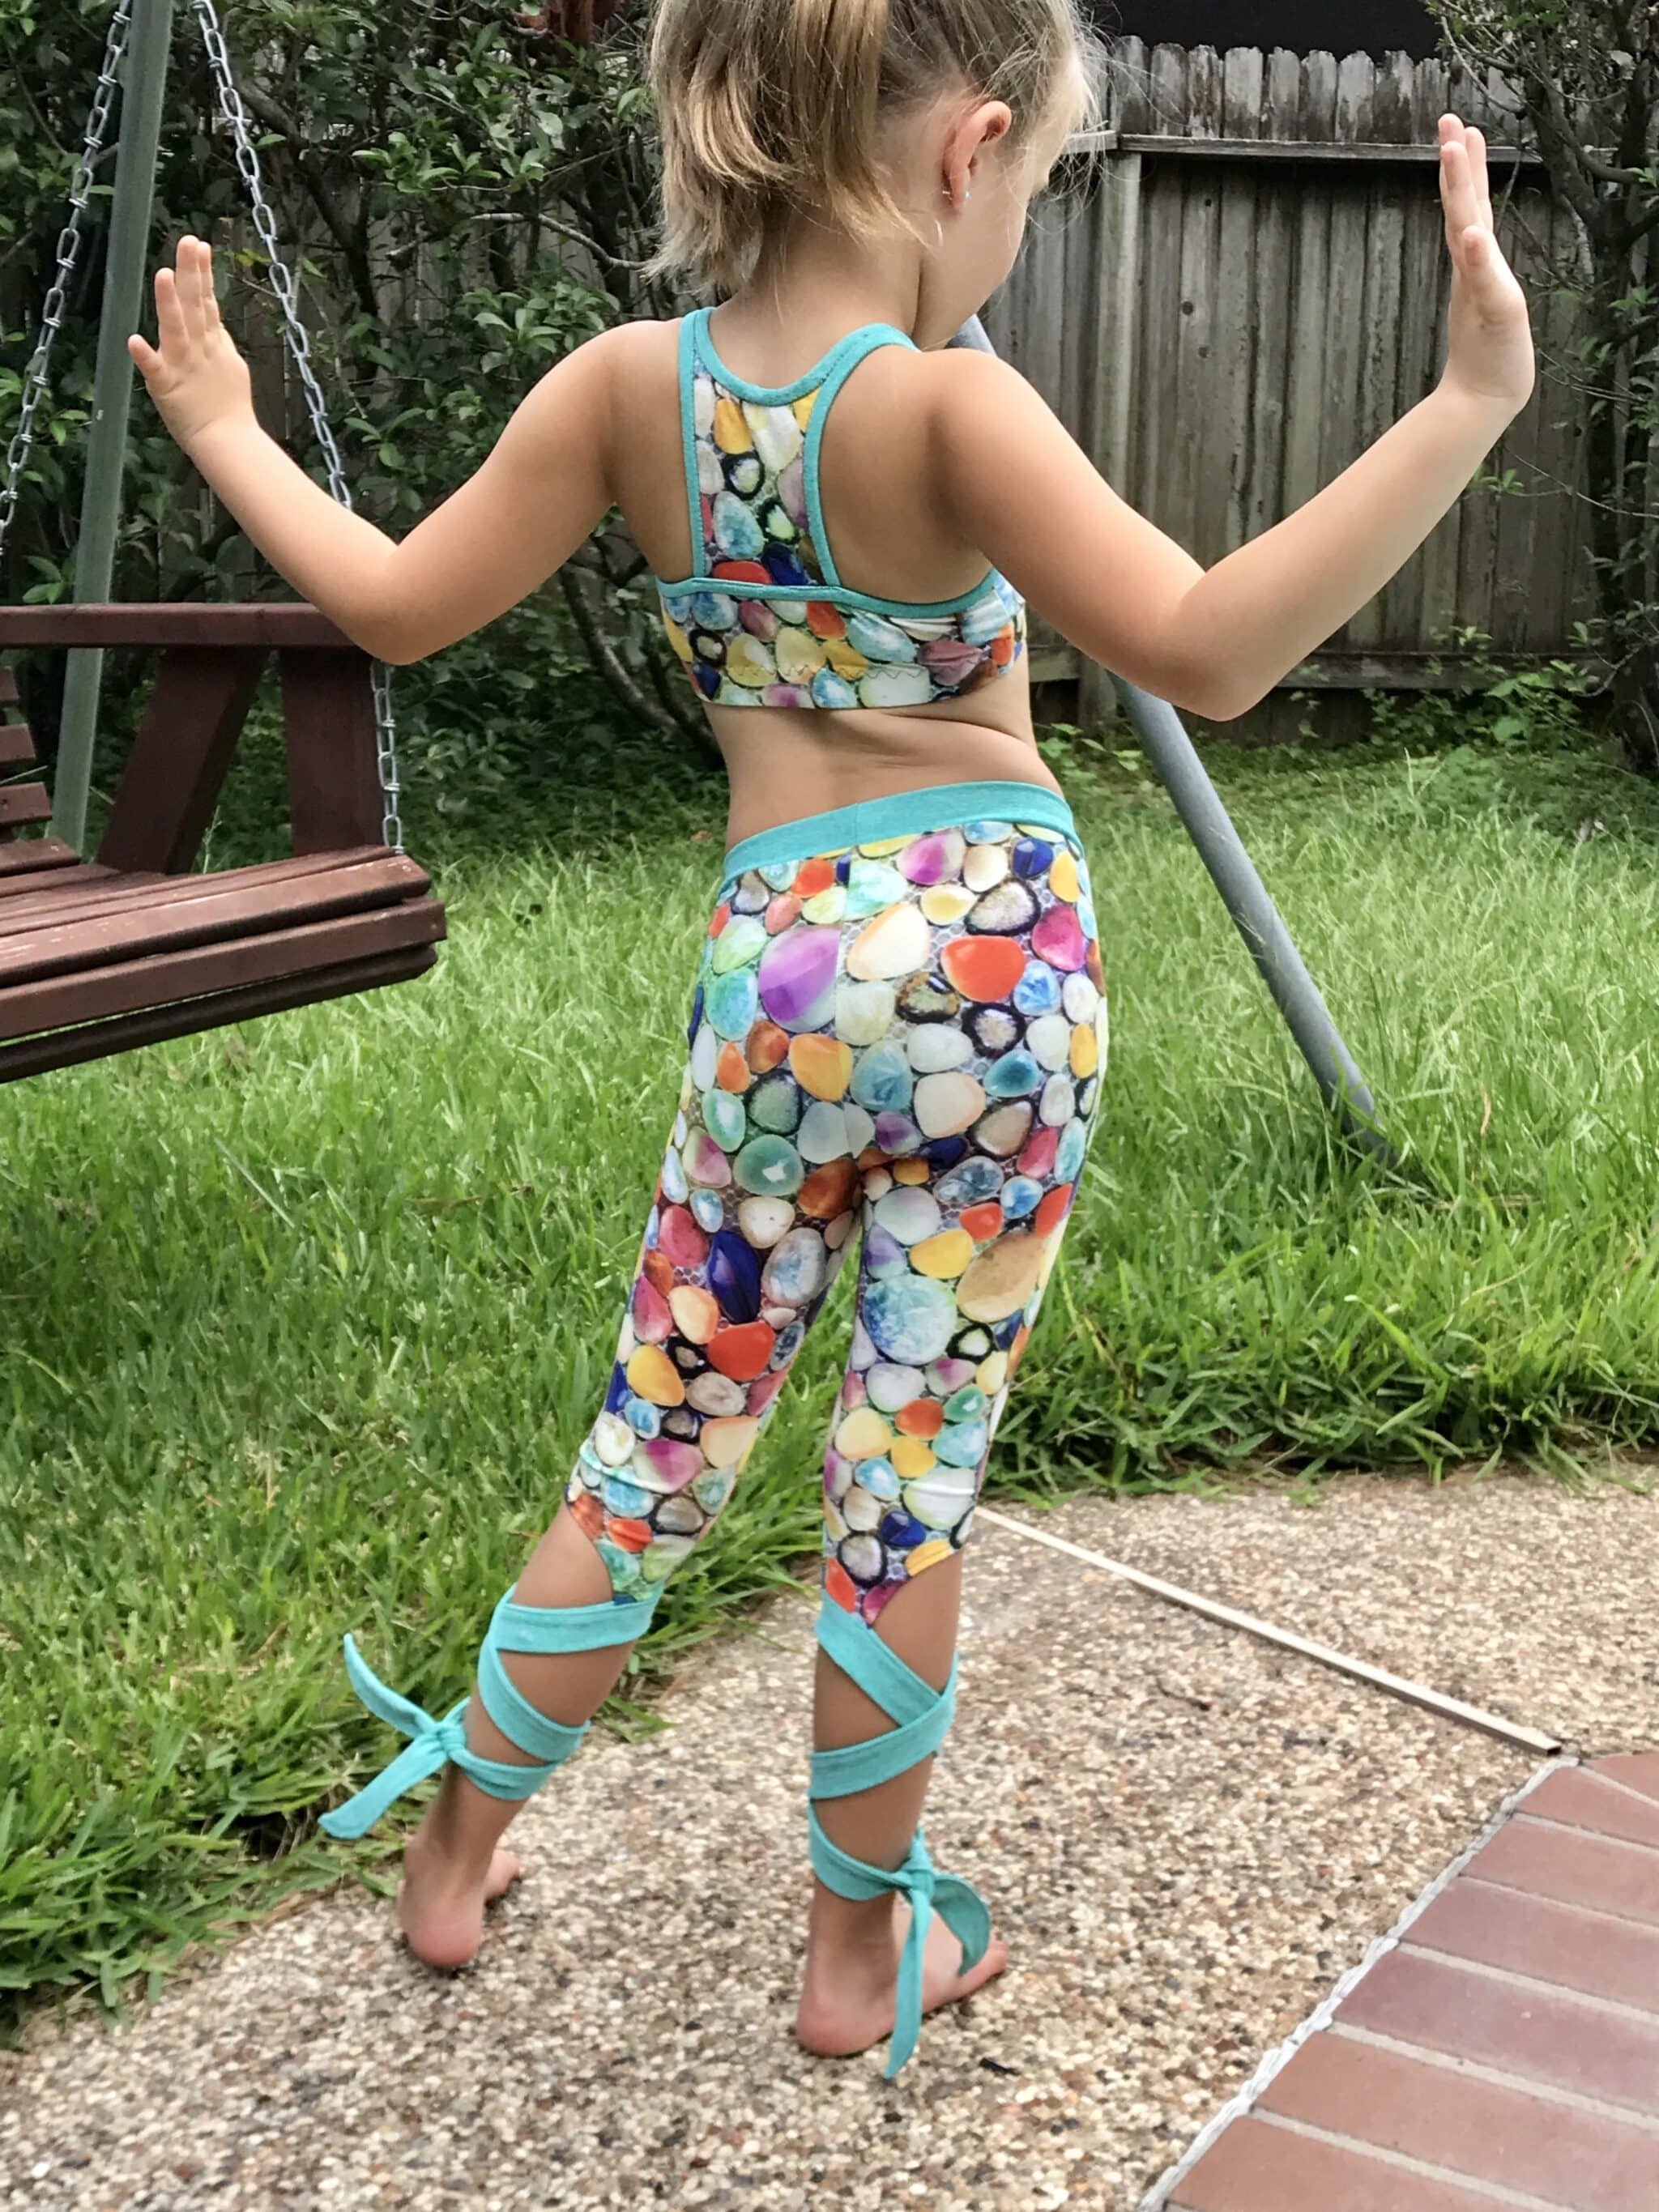
My daughter has been begging for tie bottom leggings ever since she saw a classmate at her dance studio wearing a pair. I looked at them and realized it was a pretty easy modification. Don’t you just love being able to look at something and think, “Hey, I can make that!”?! The leggings part of the Girls’ Shenanigans Skort pattern is my go-to for my daughter. I’ve used them to make booty shorts, capri leggings, full leggings, and, of course, as shorts or leggings under the Shenanigans skirt. You can get the Girls’ Shenanigans Skort 20% off through 7/31 with the code ICANDOTHAT. 🙂
Here is the pair I made for my daughter. She likes to wear them with her Girls’ Agility Sports Bra and it works perfectly for her hip hop and contemporary dance classes! She’s already requested many more pairs!
If you would like to add tie bottoms to your leggings, follow on!

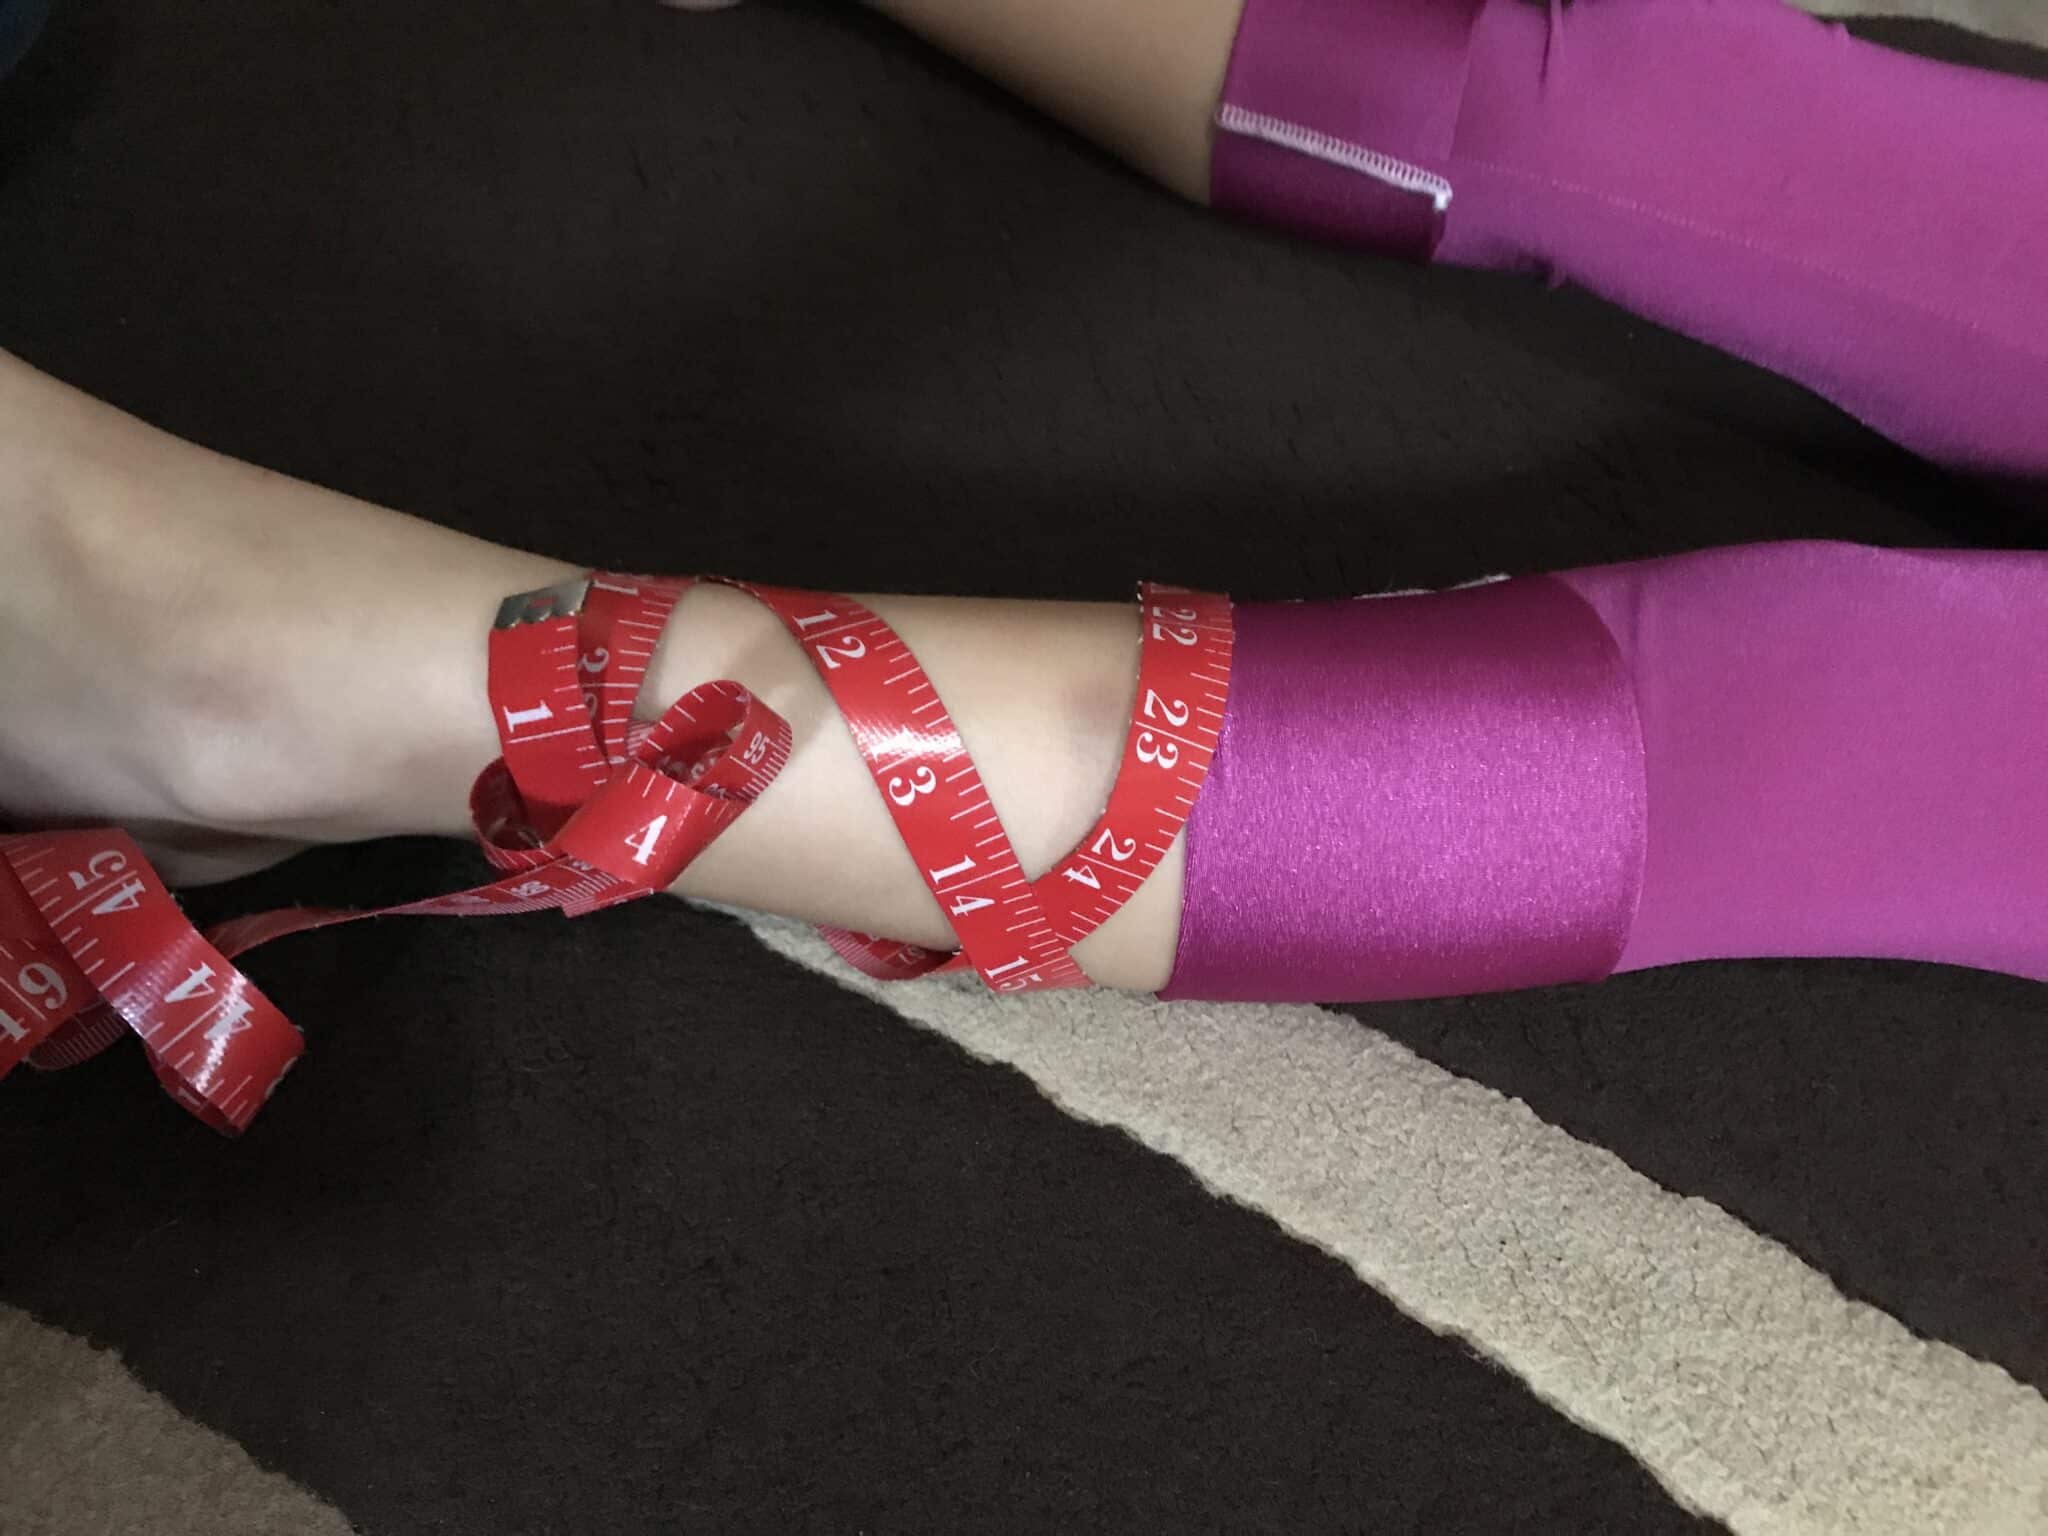
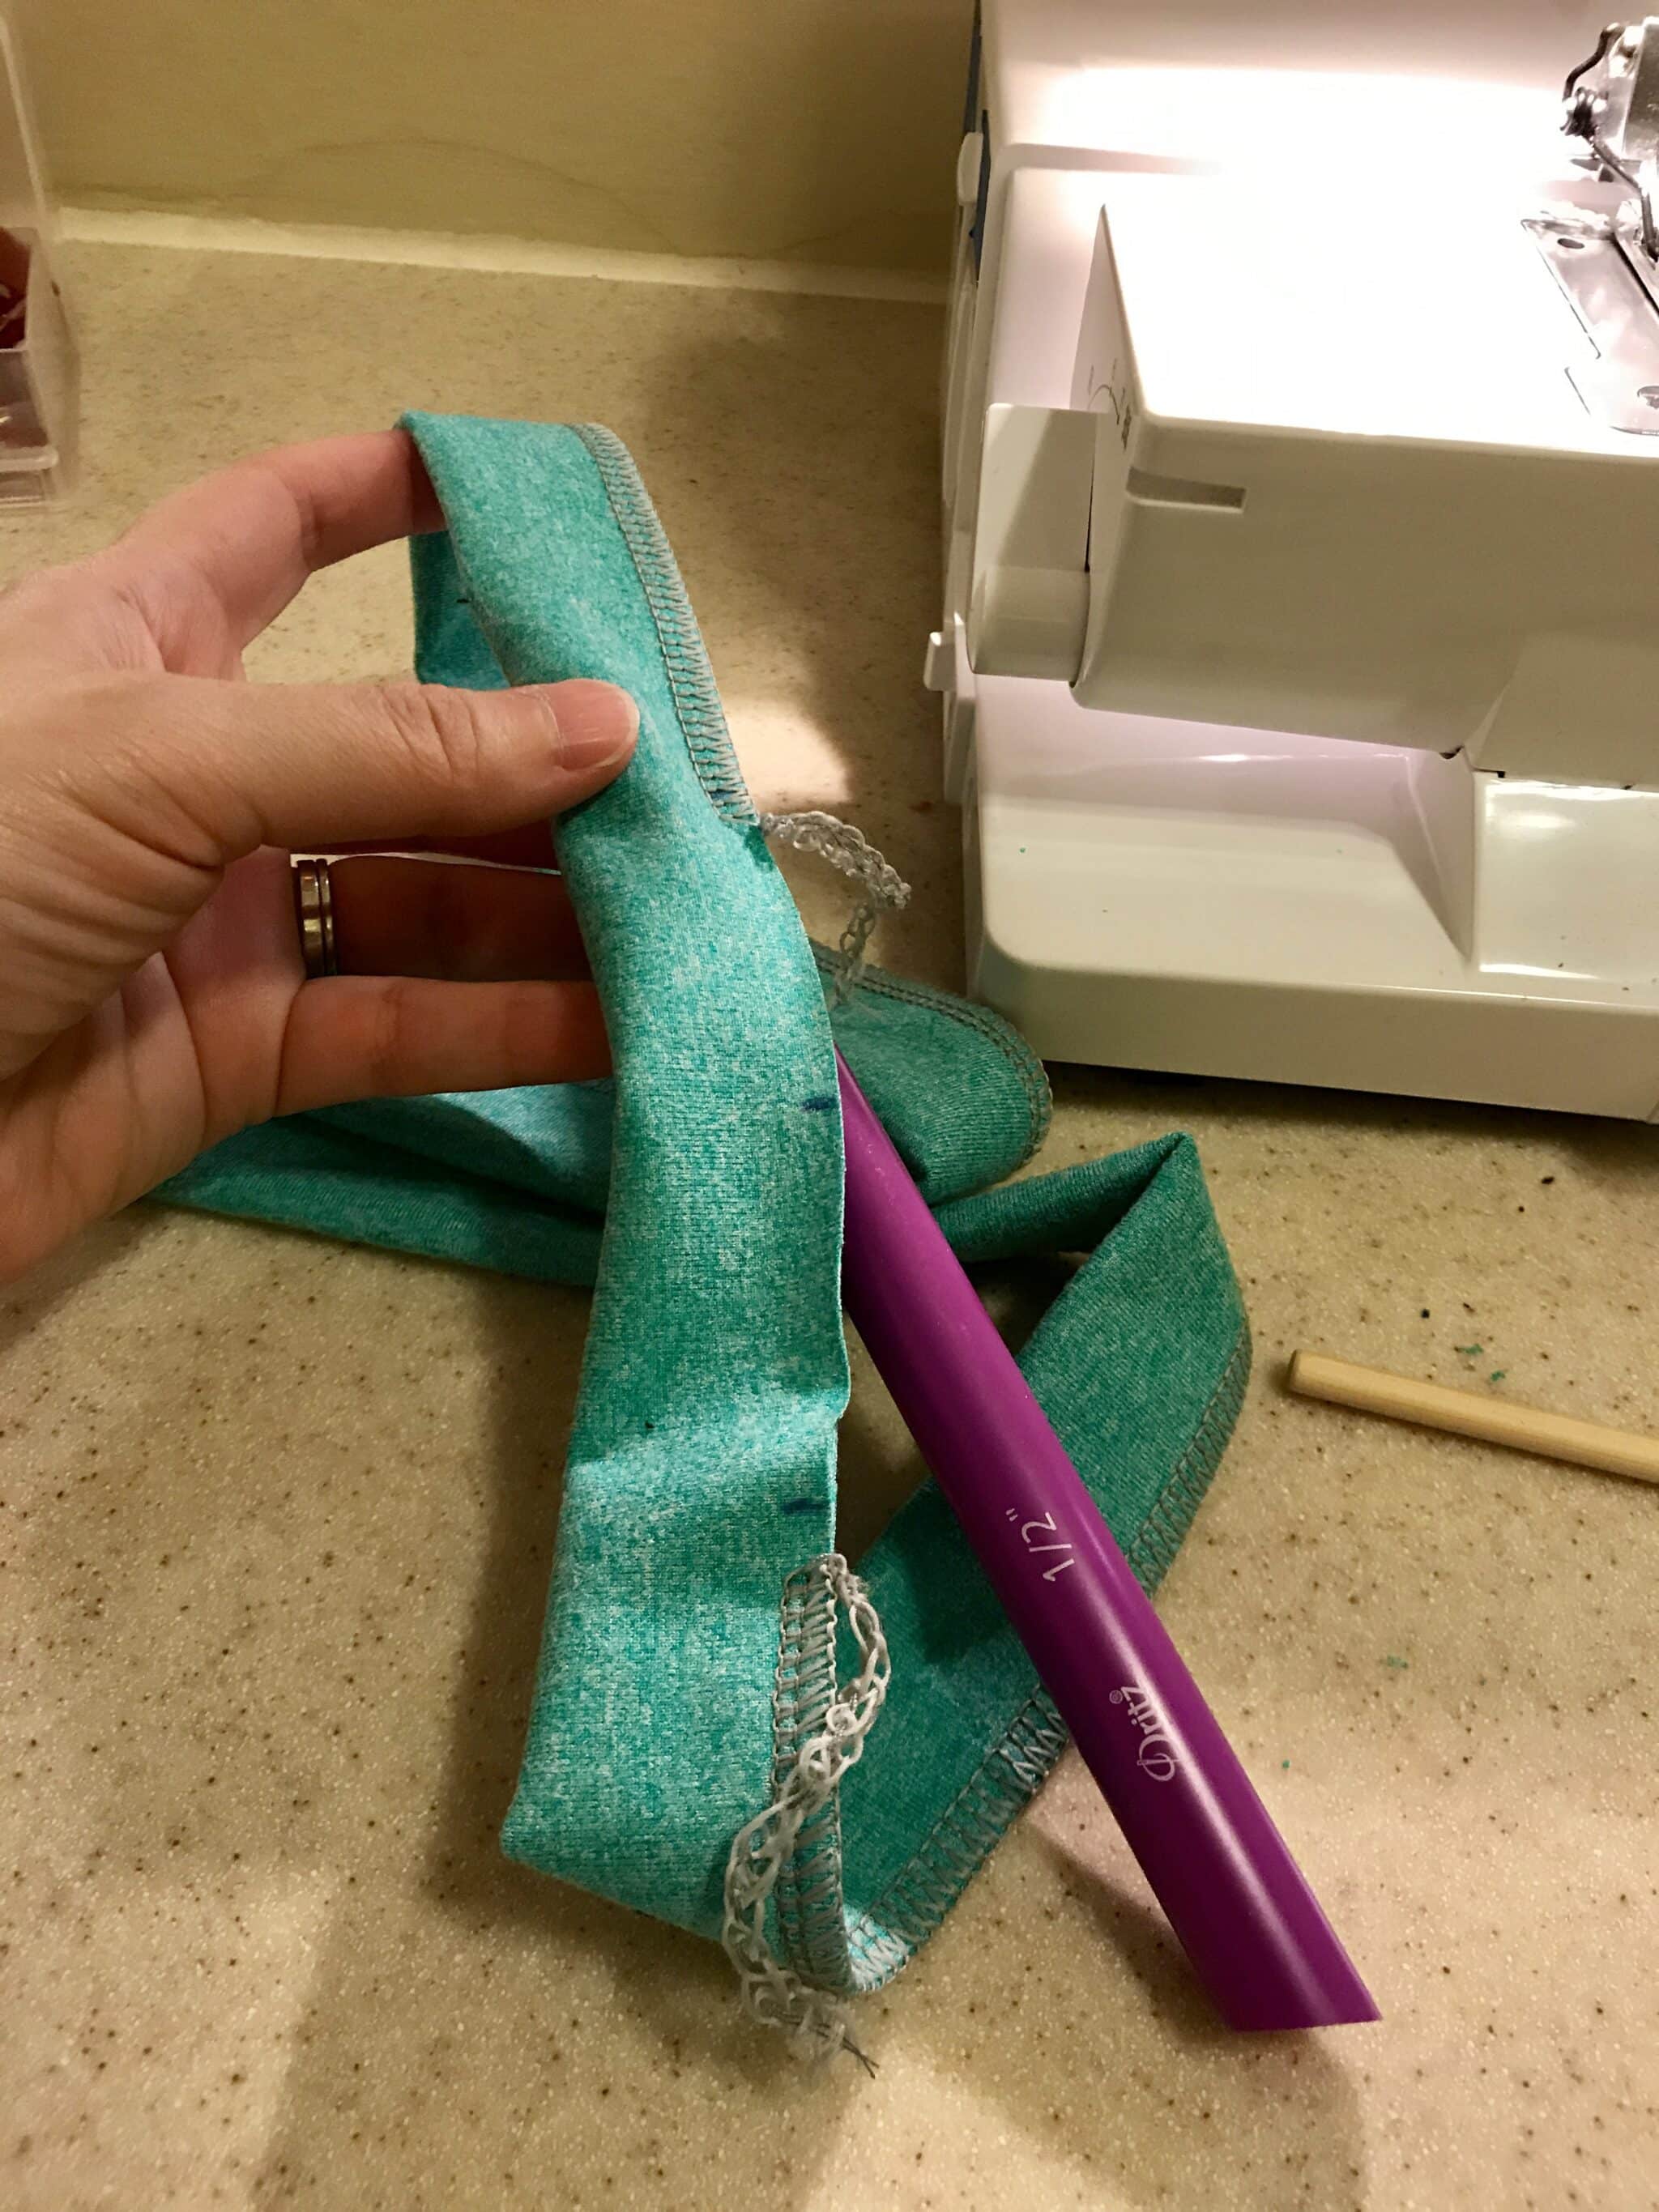
- The first step is to determine how long to make the ties. I used a highly scientific process, which involved wrapping a tape measure around my daughter’s calf/ankle. For reference, my daughter is 7 years old and a size 5 in 5oo4 patterns. I determined that the ties need to be approximately 20” long on each side or 40” total length. I also decided that I would like them to have a final width of 1”. They will be folded in half and I need to add seam allowances; so I made them 2.5” wide.
Final measurement for size 5 ties: 2.5” x 40” (be sure you cut 2)

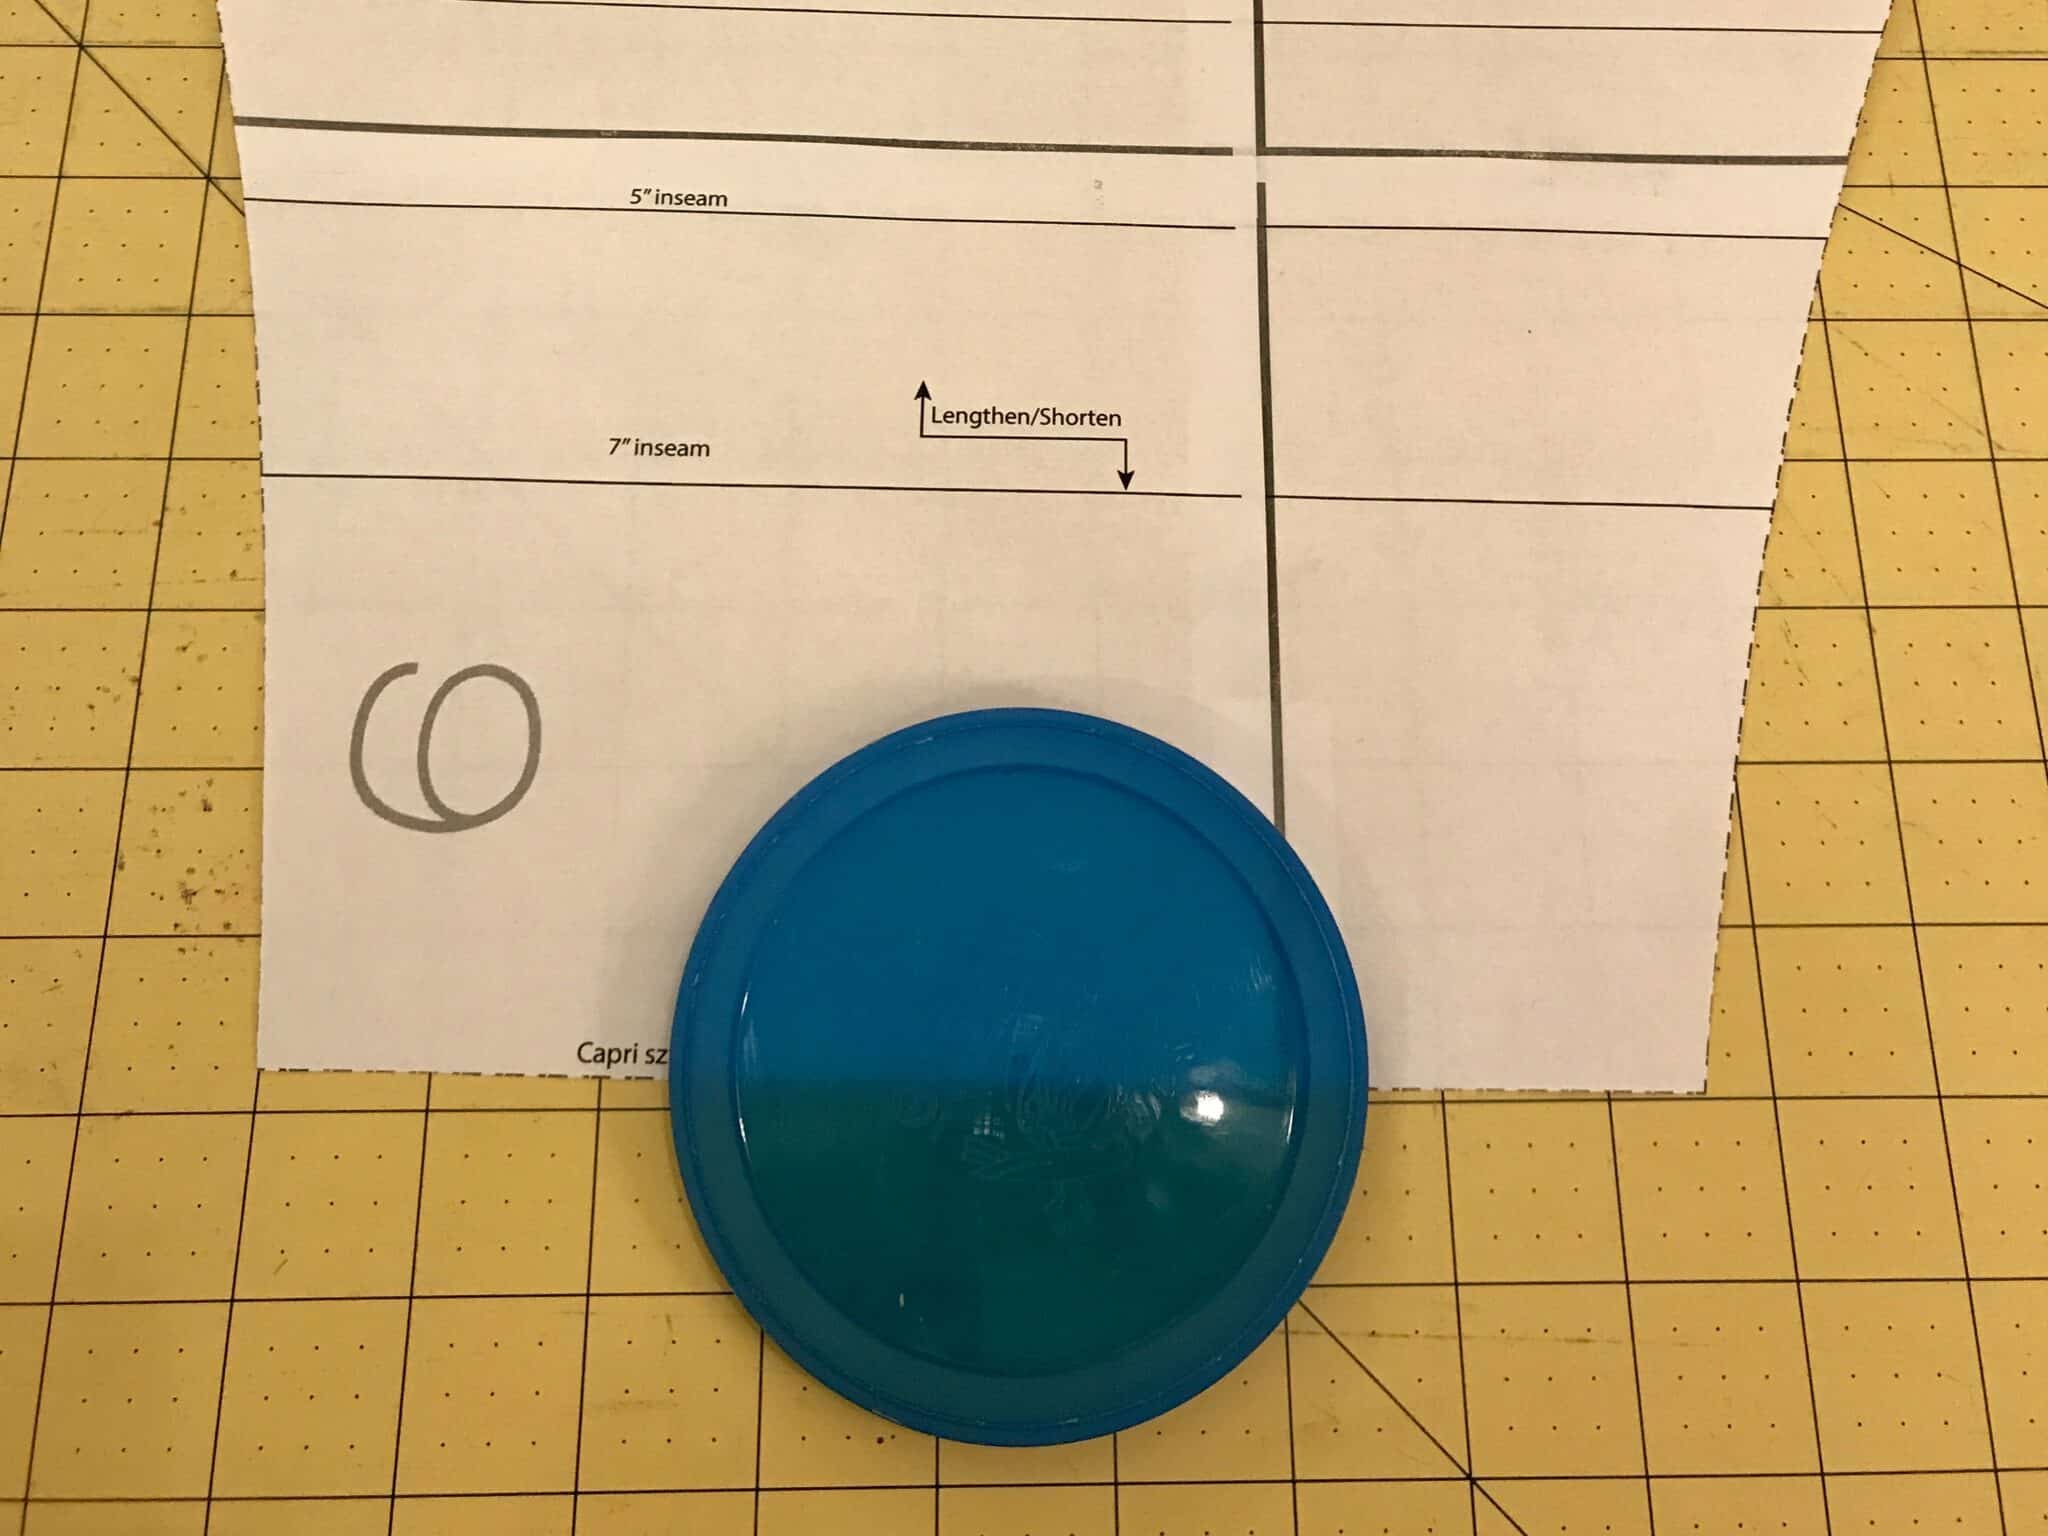
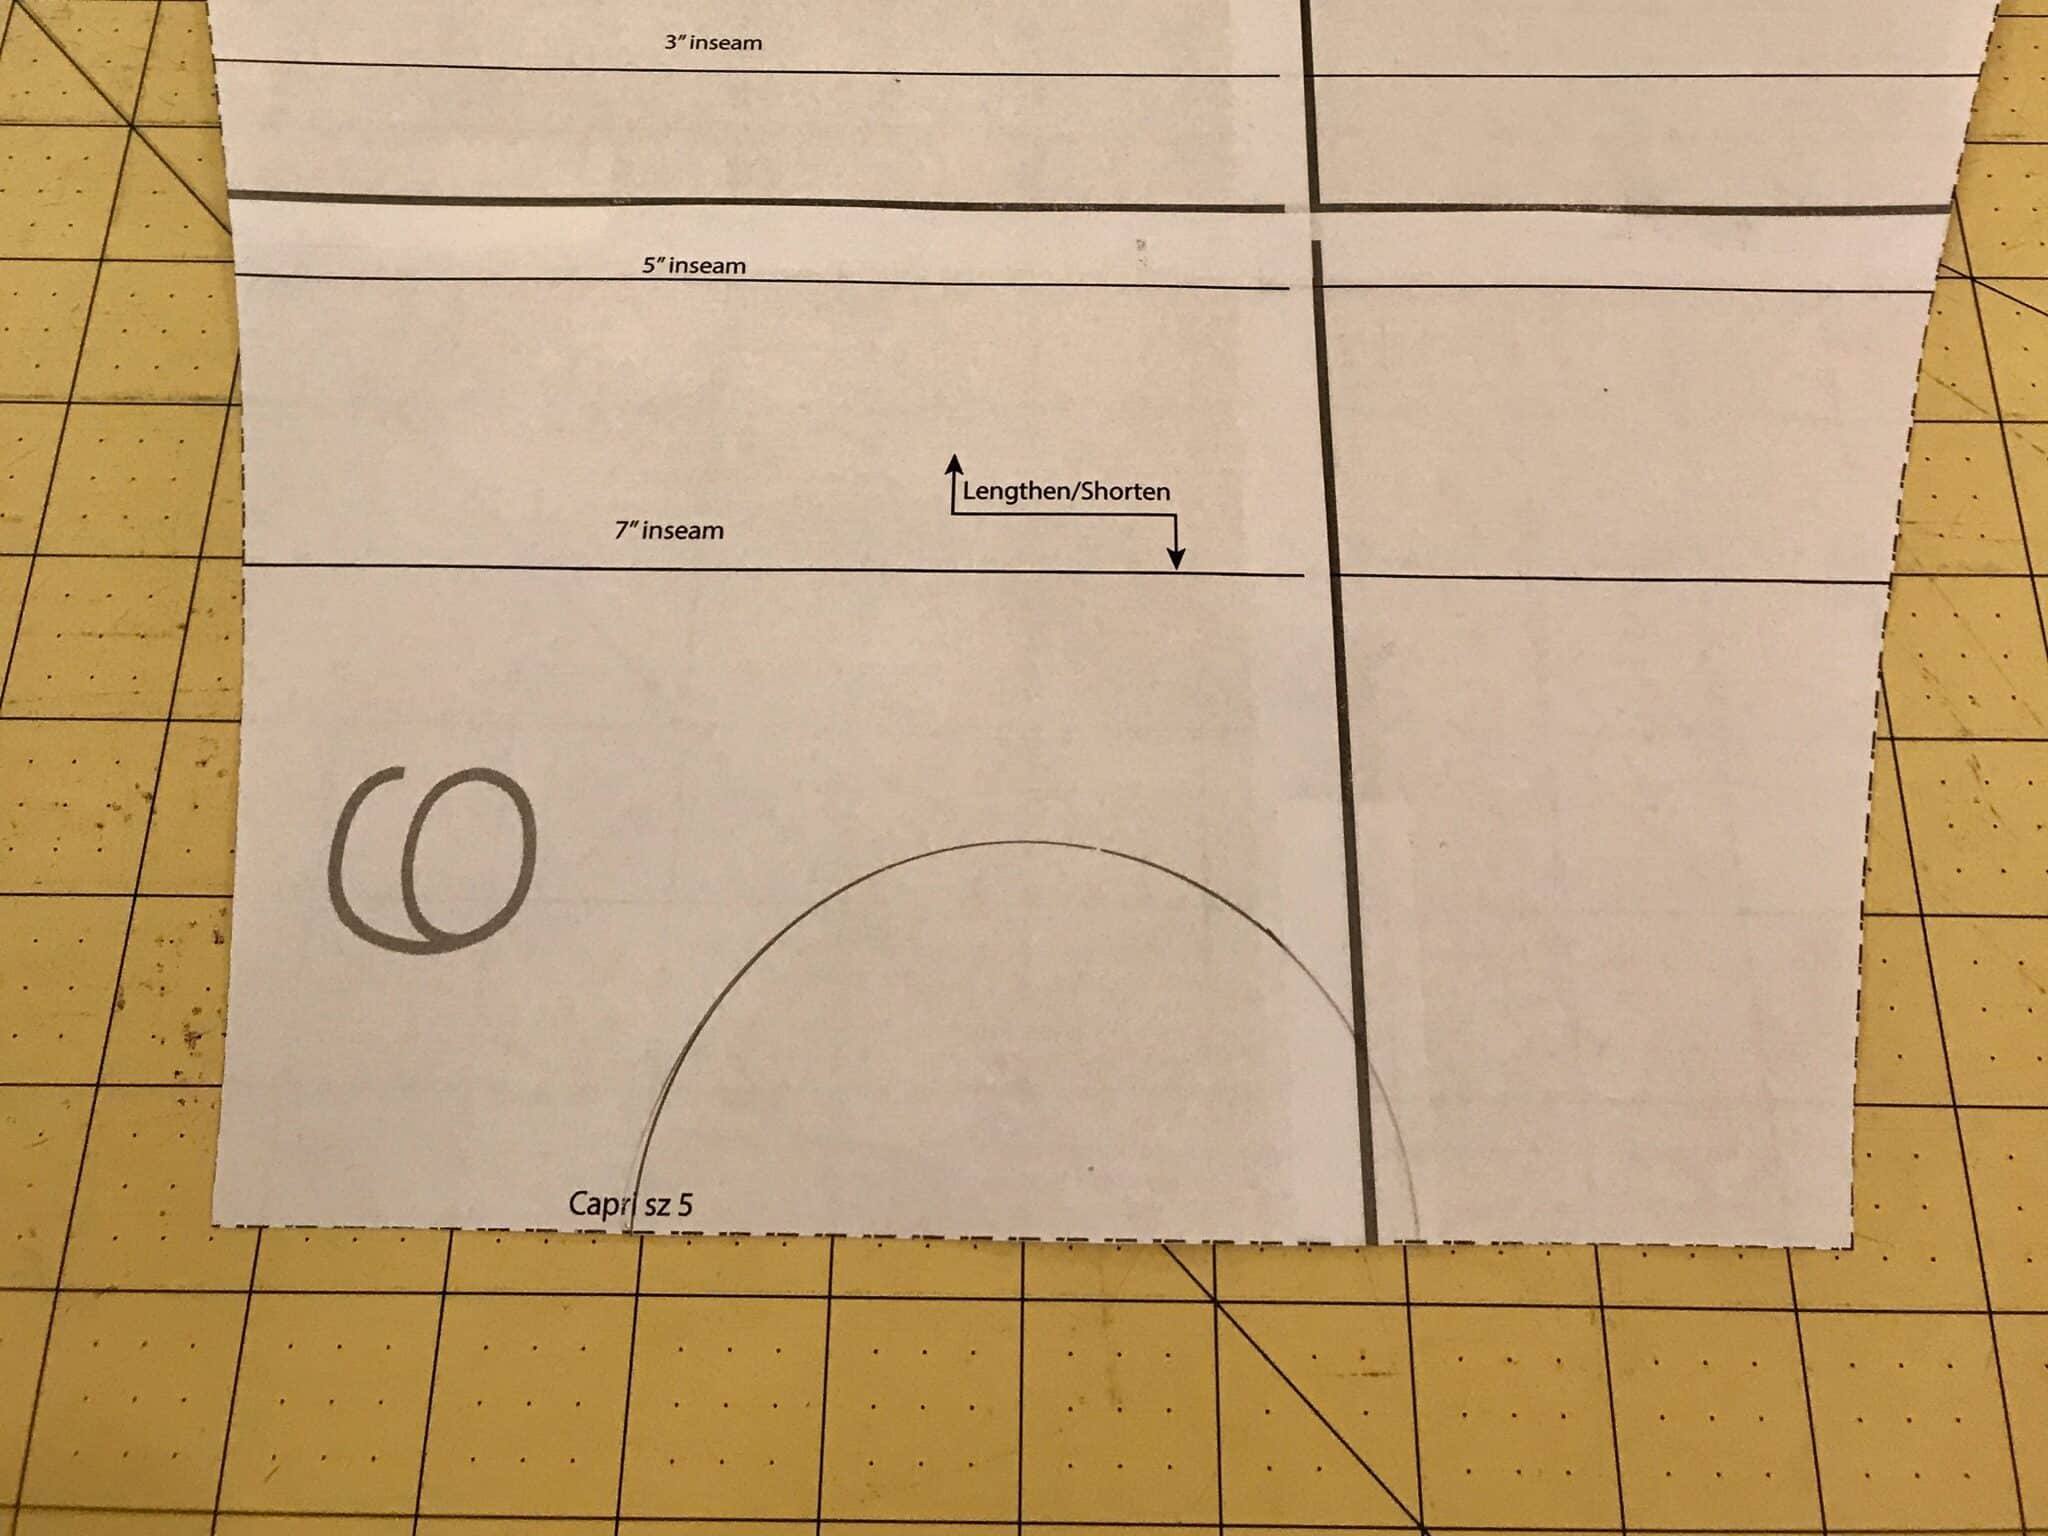
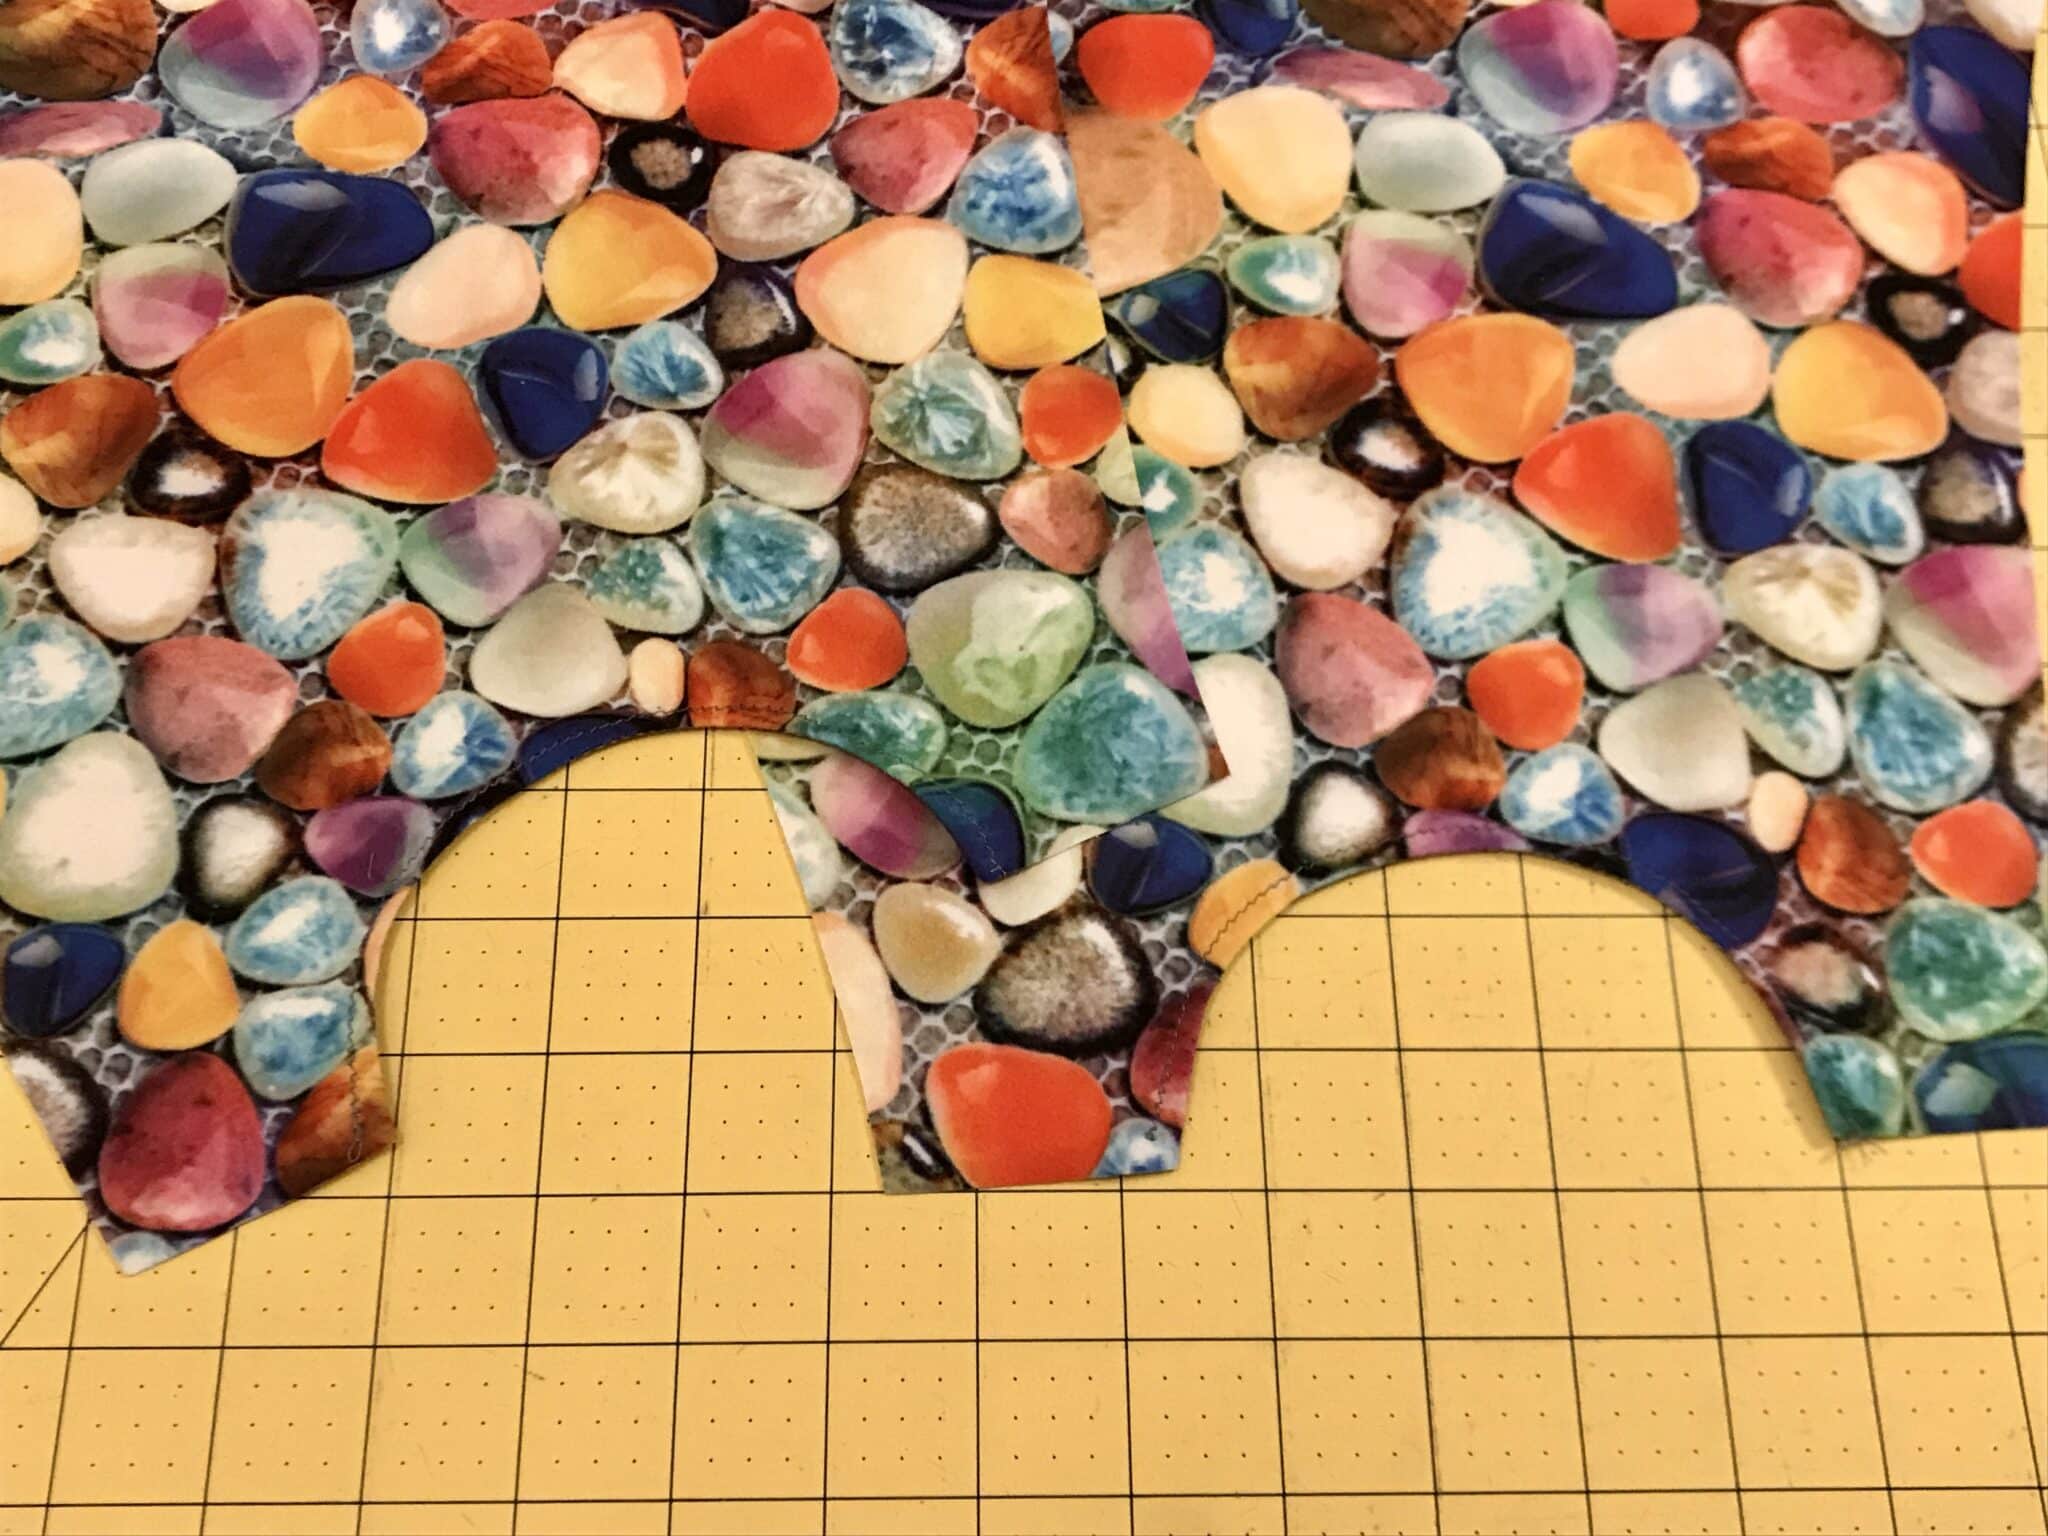
- The next step is to modify the pattern slightly to create a semi-circle cut out at the bottom of the leggings. I used the capri cut line so that ties will wrap around the calf and tie at the ankles. I just eye-balled what would look good and determined that a 4” diameter circle would work well for this size. I just so happen to have a lid that size sitting around…amazing! As you can see by the picture, I placed it directly in the middle of my pattern and cut out the half-circle.
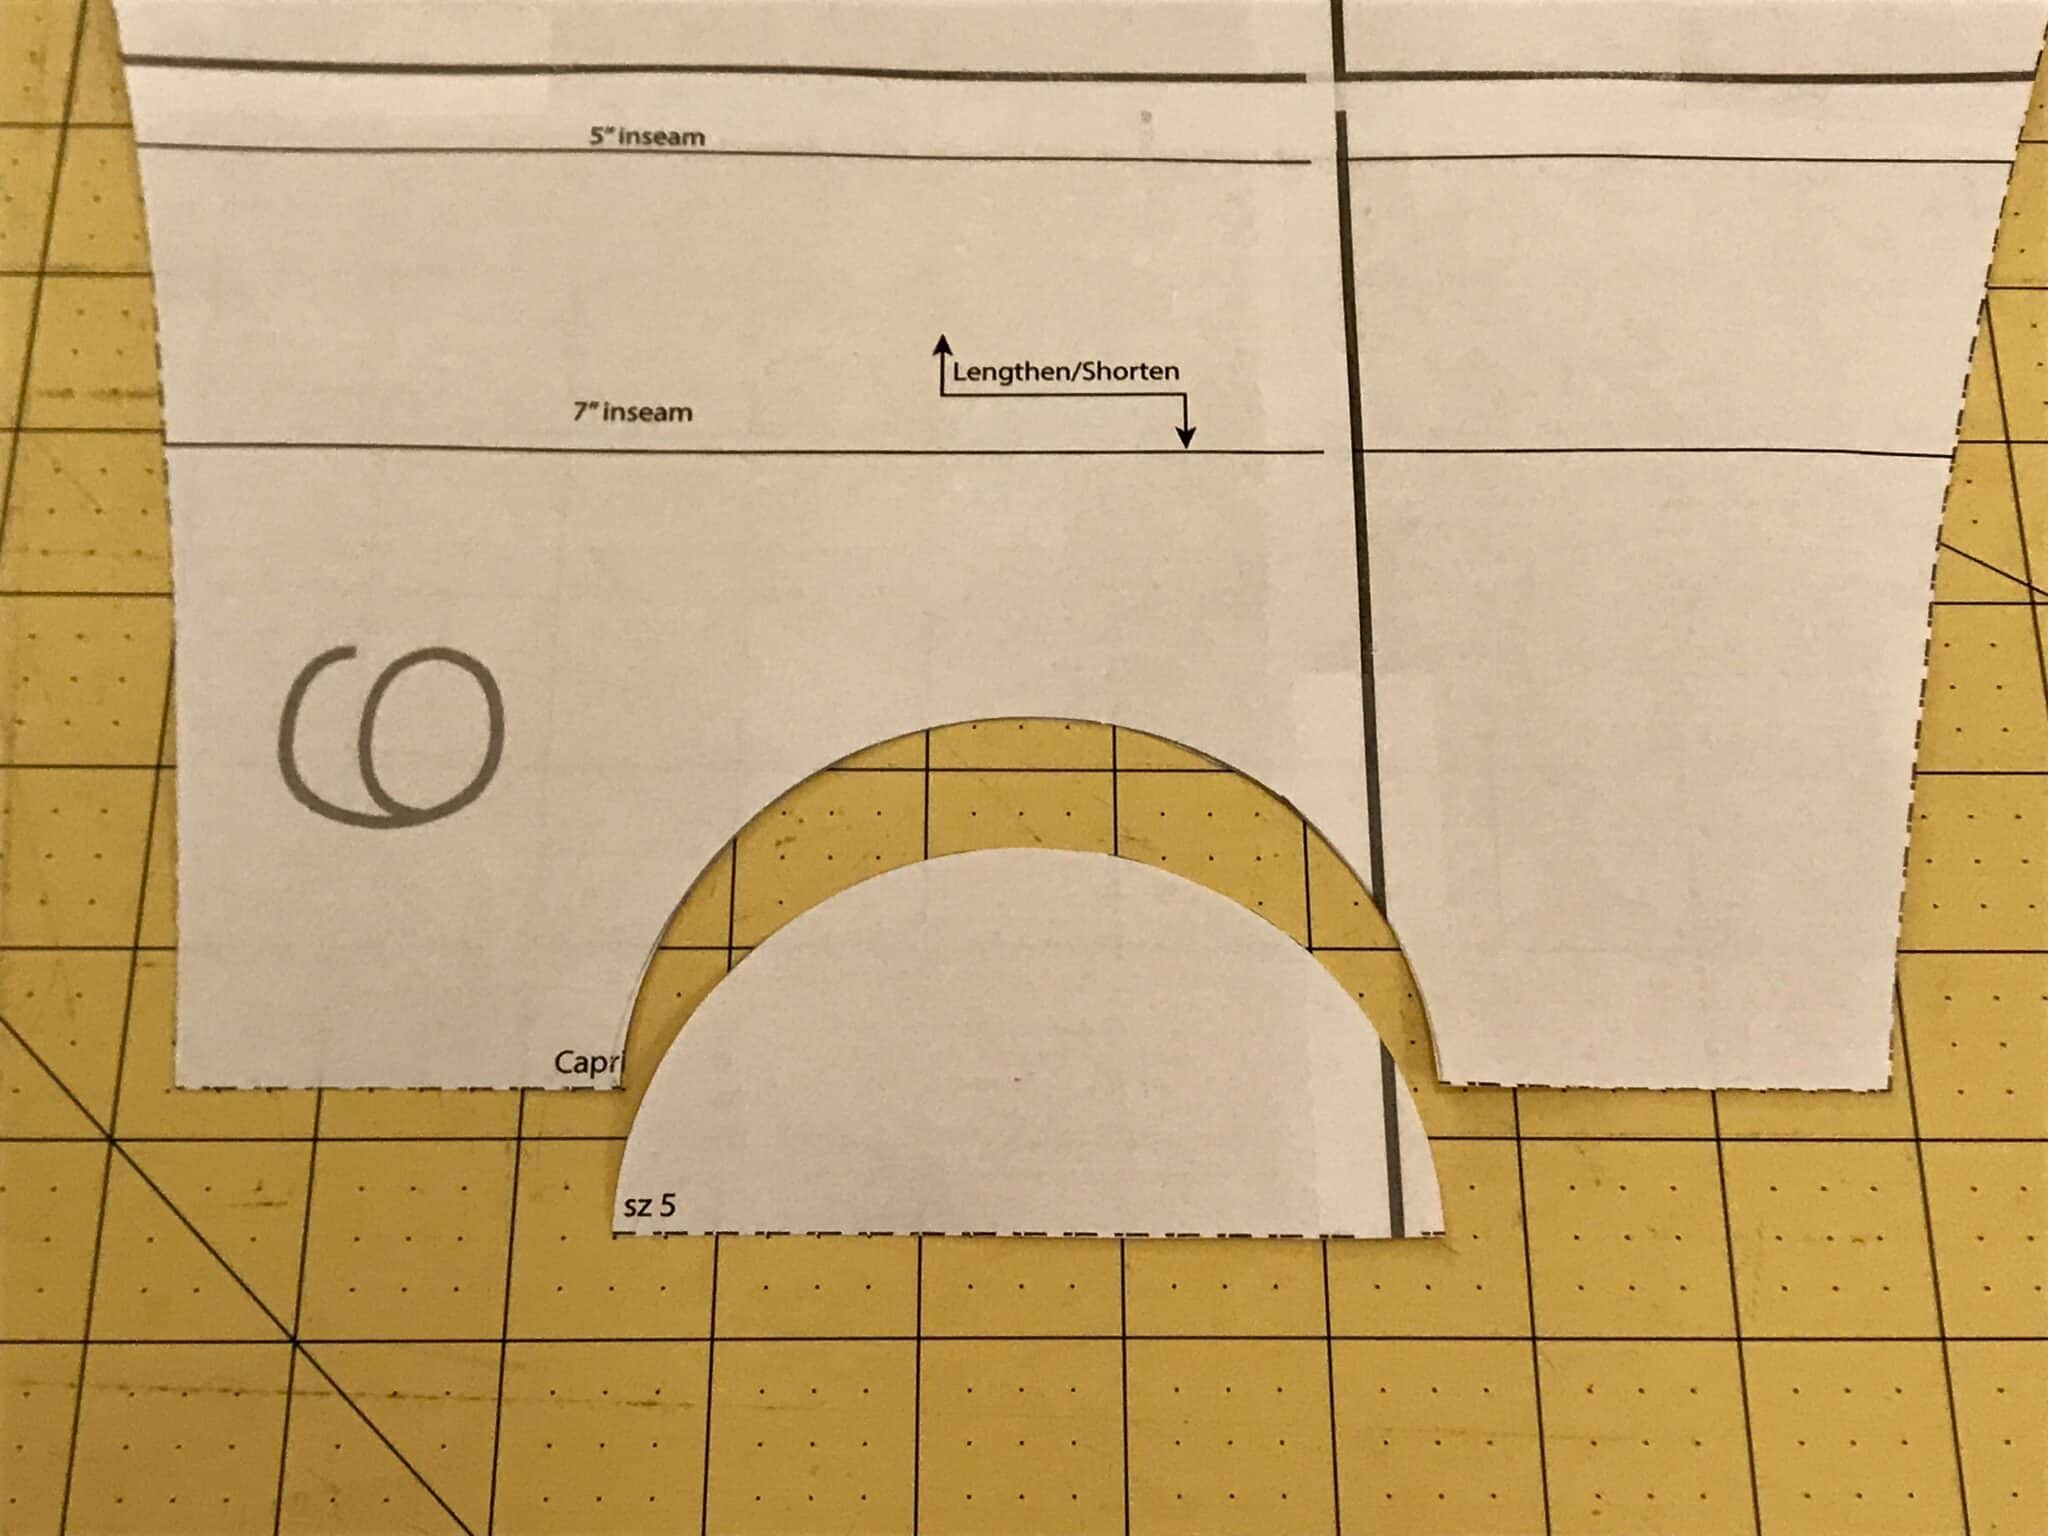
- Cut all pieces out according to the pattern. You should have two legs (mirror images) with the half-circle cut out at the bottom, a waistband, a gusset, and two ties cut to the dimensions from Step 1.
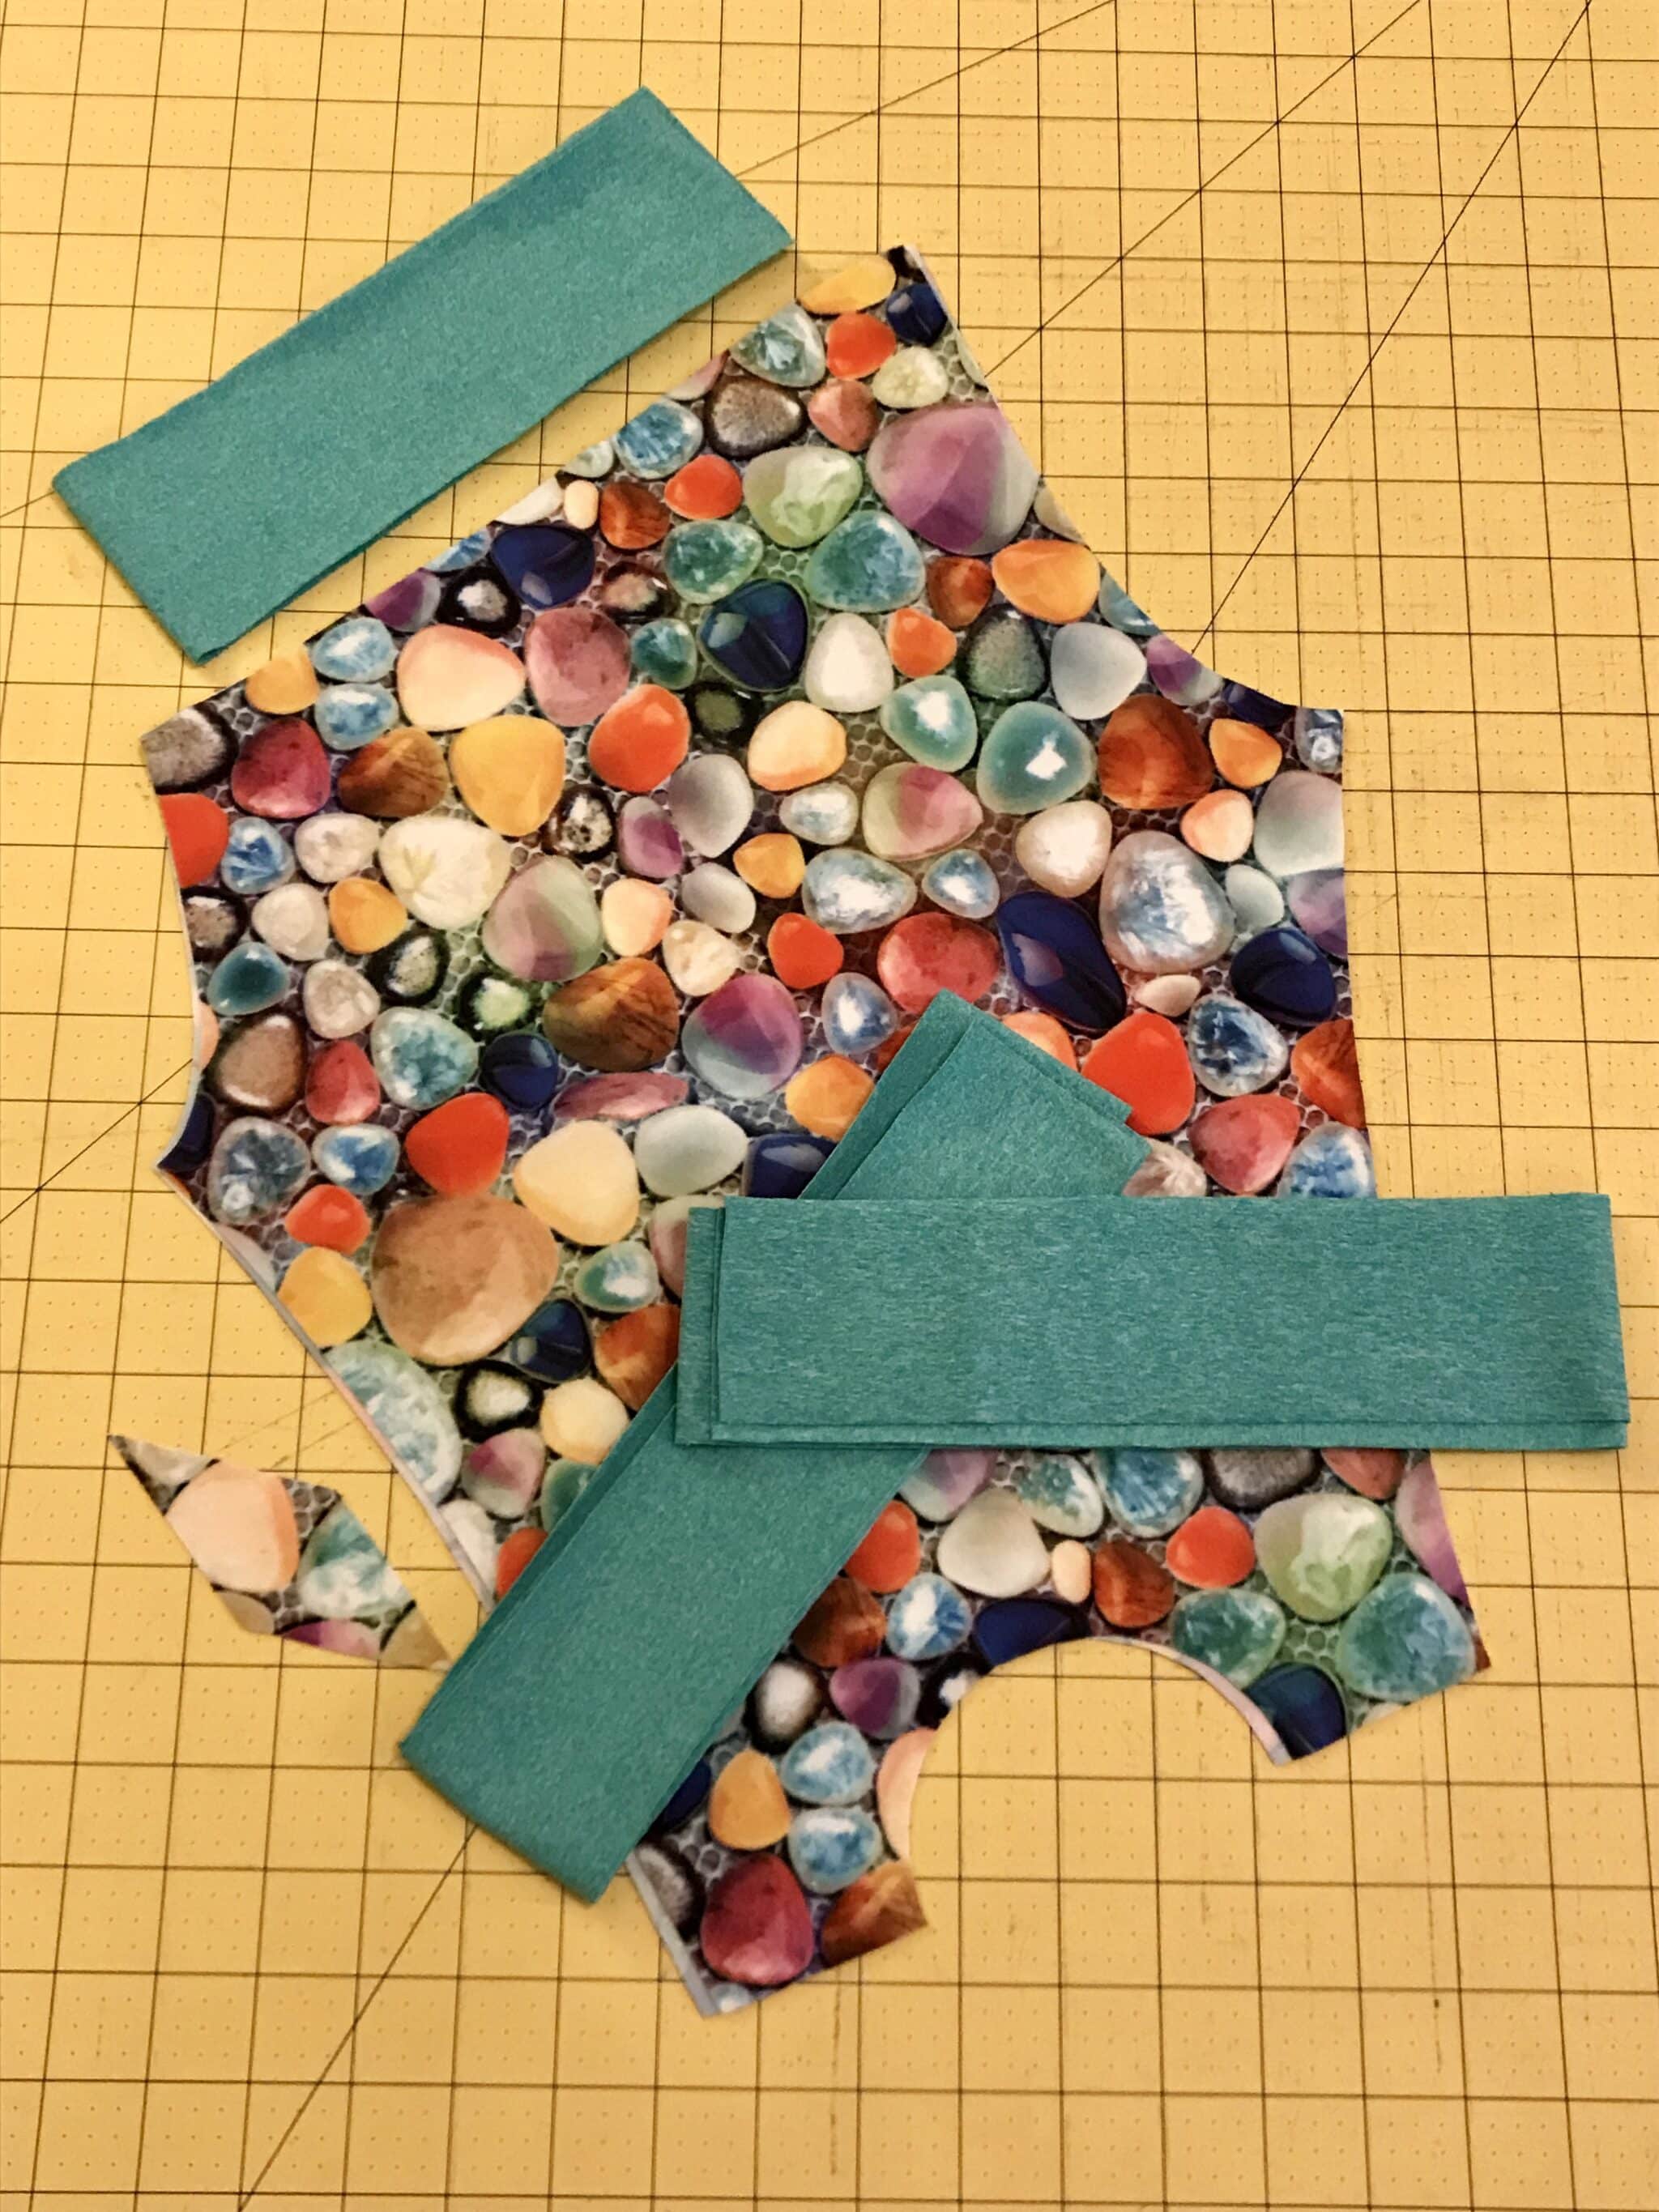
- I decided to hem my half-circle cutouts but you can skip this step if you would like since knits don’t normally fray.
- Next, sew up your leggings per the directions, adding the gusset and waistband (and elastic if used). Don’t forget about the Gusset Tutorial on YouTube if you need help sewing the gusset onto your leggings!
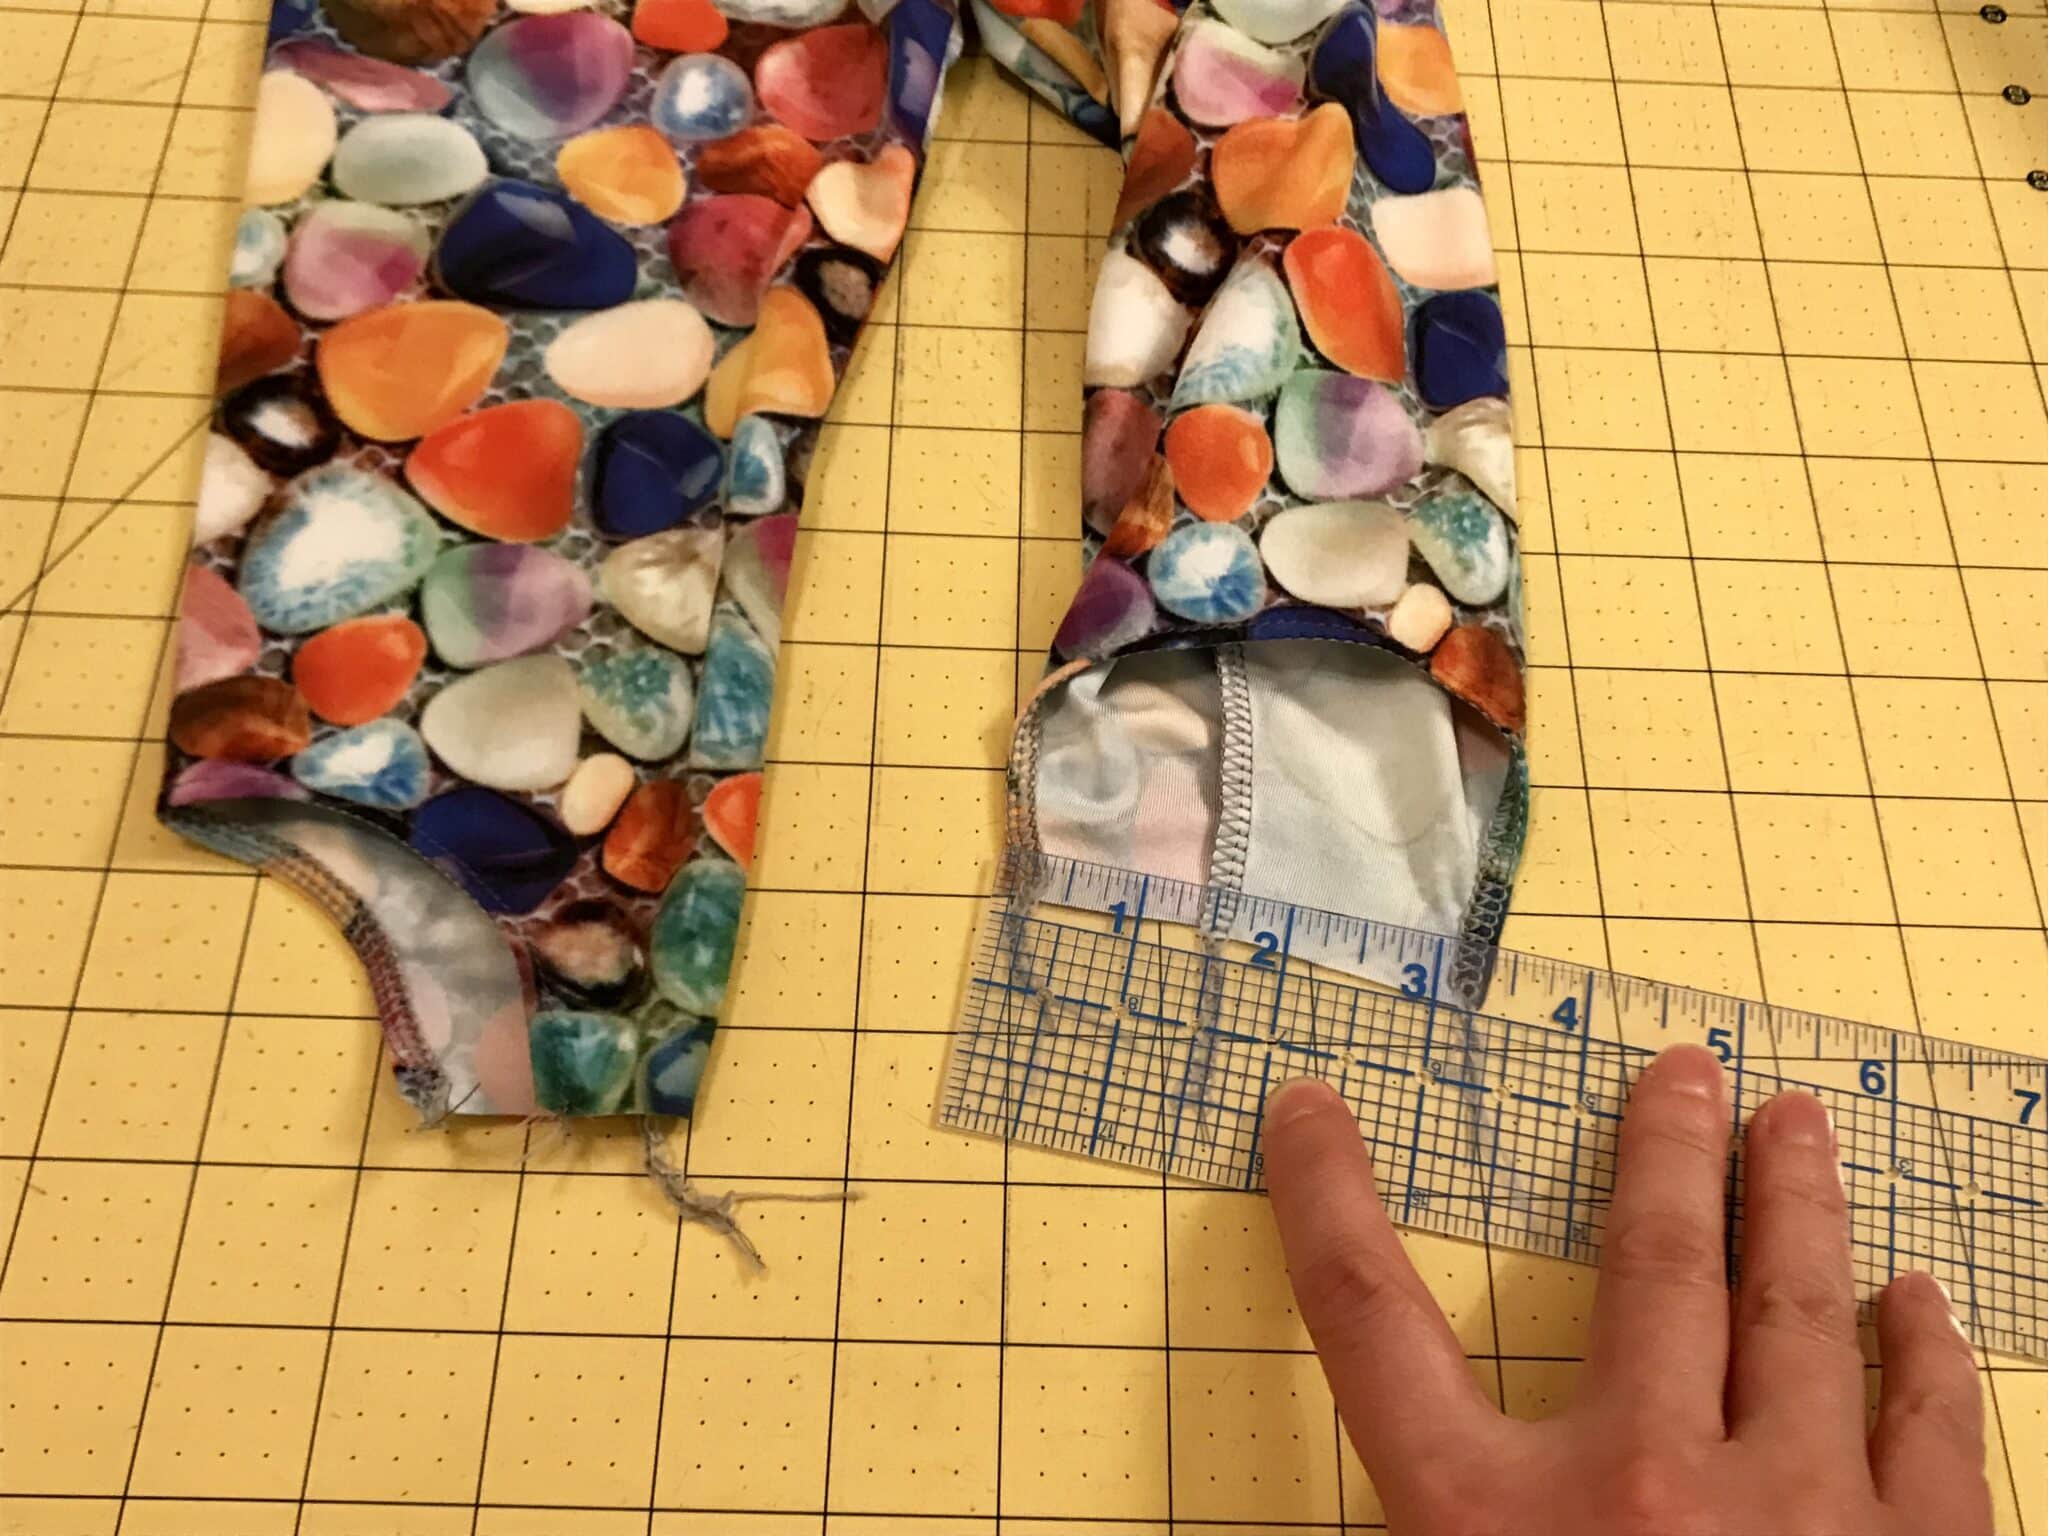
- Once sewn, I measured how wide the bottom of my leggings were: 3.5” for this size. This tells me how much of an opening I will leave in the ties when I sew them up. In this case, I will leave 4” open to make sure I have room when I go to attach them.
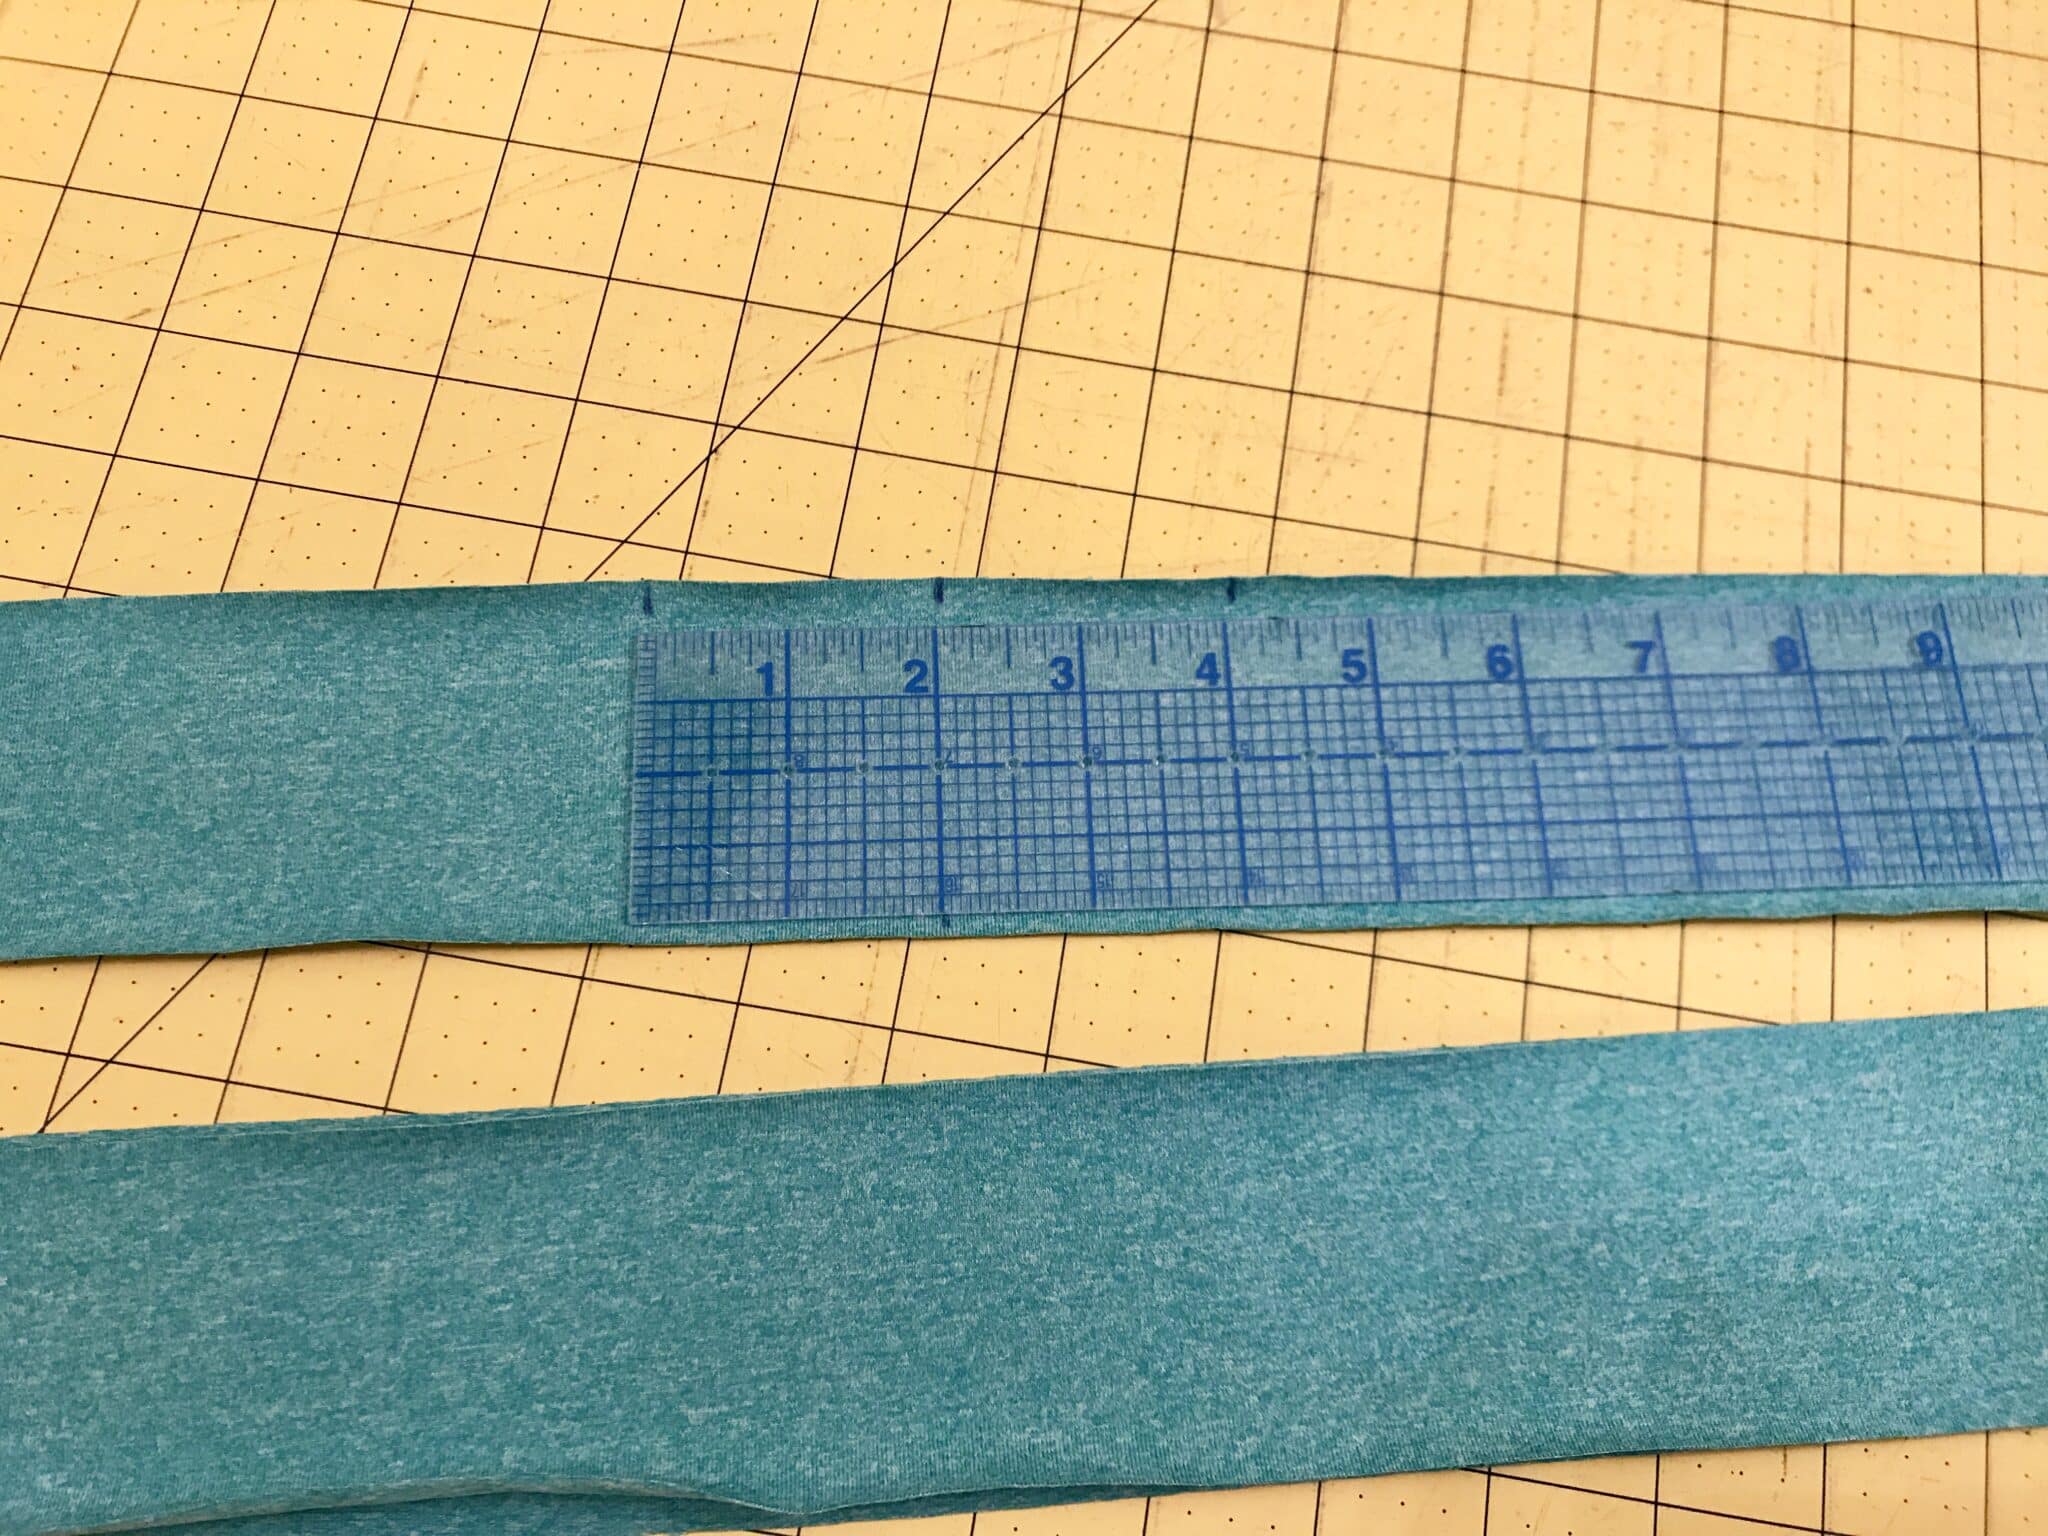
- Next, I marked the middle point of both ties. Make this marking on the wrong side of the fabric.
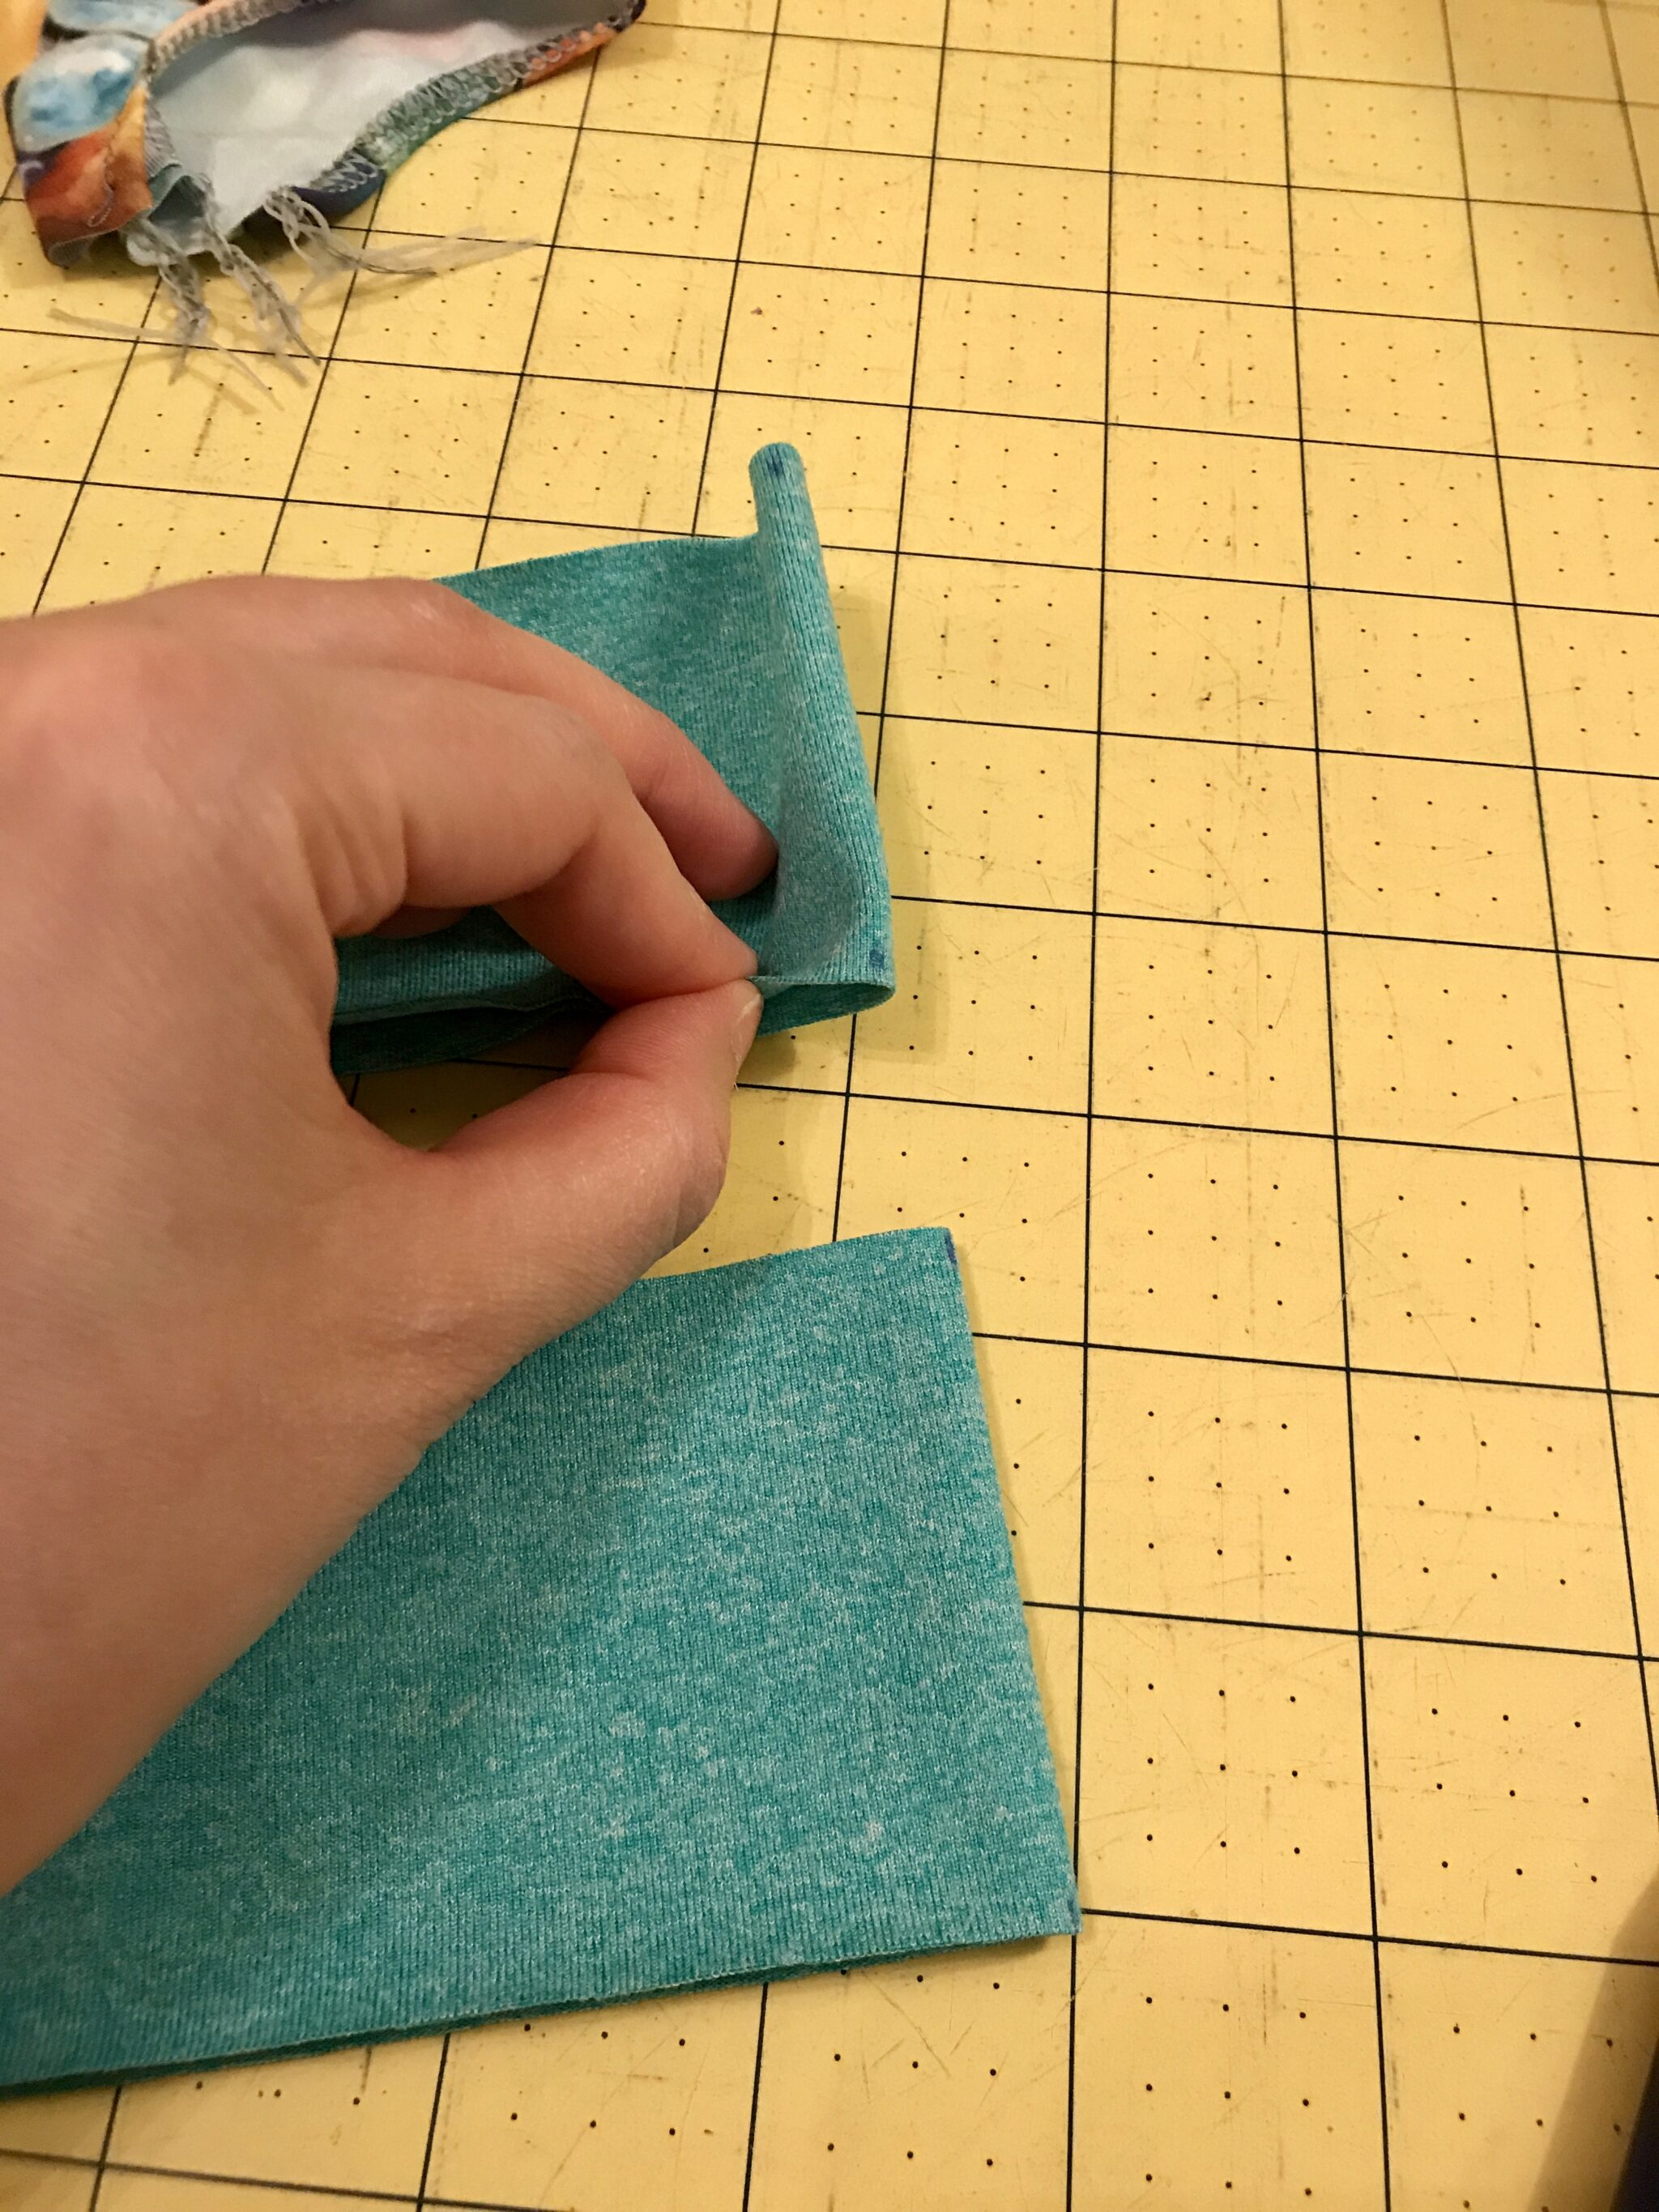
- Now, since I want to leave a 4” opening, I measured to each side of the center by 2” and marked that location.
- Fold each tie in half the long way (like a hot dog) with RIGHT SIDES TOGETHER and pin or clip.
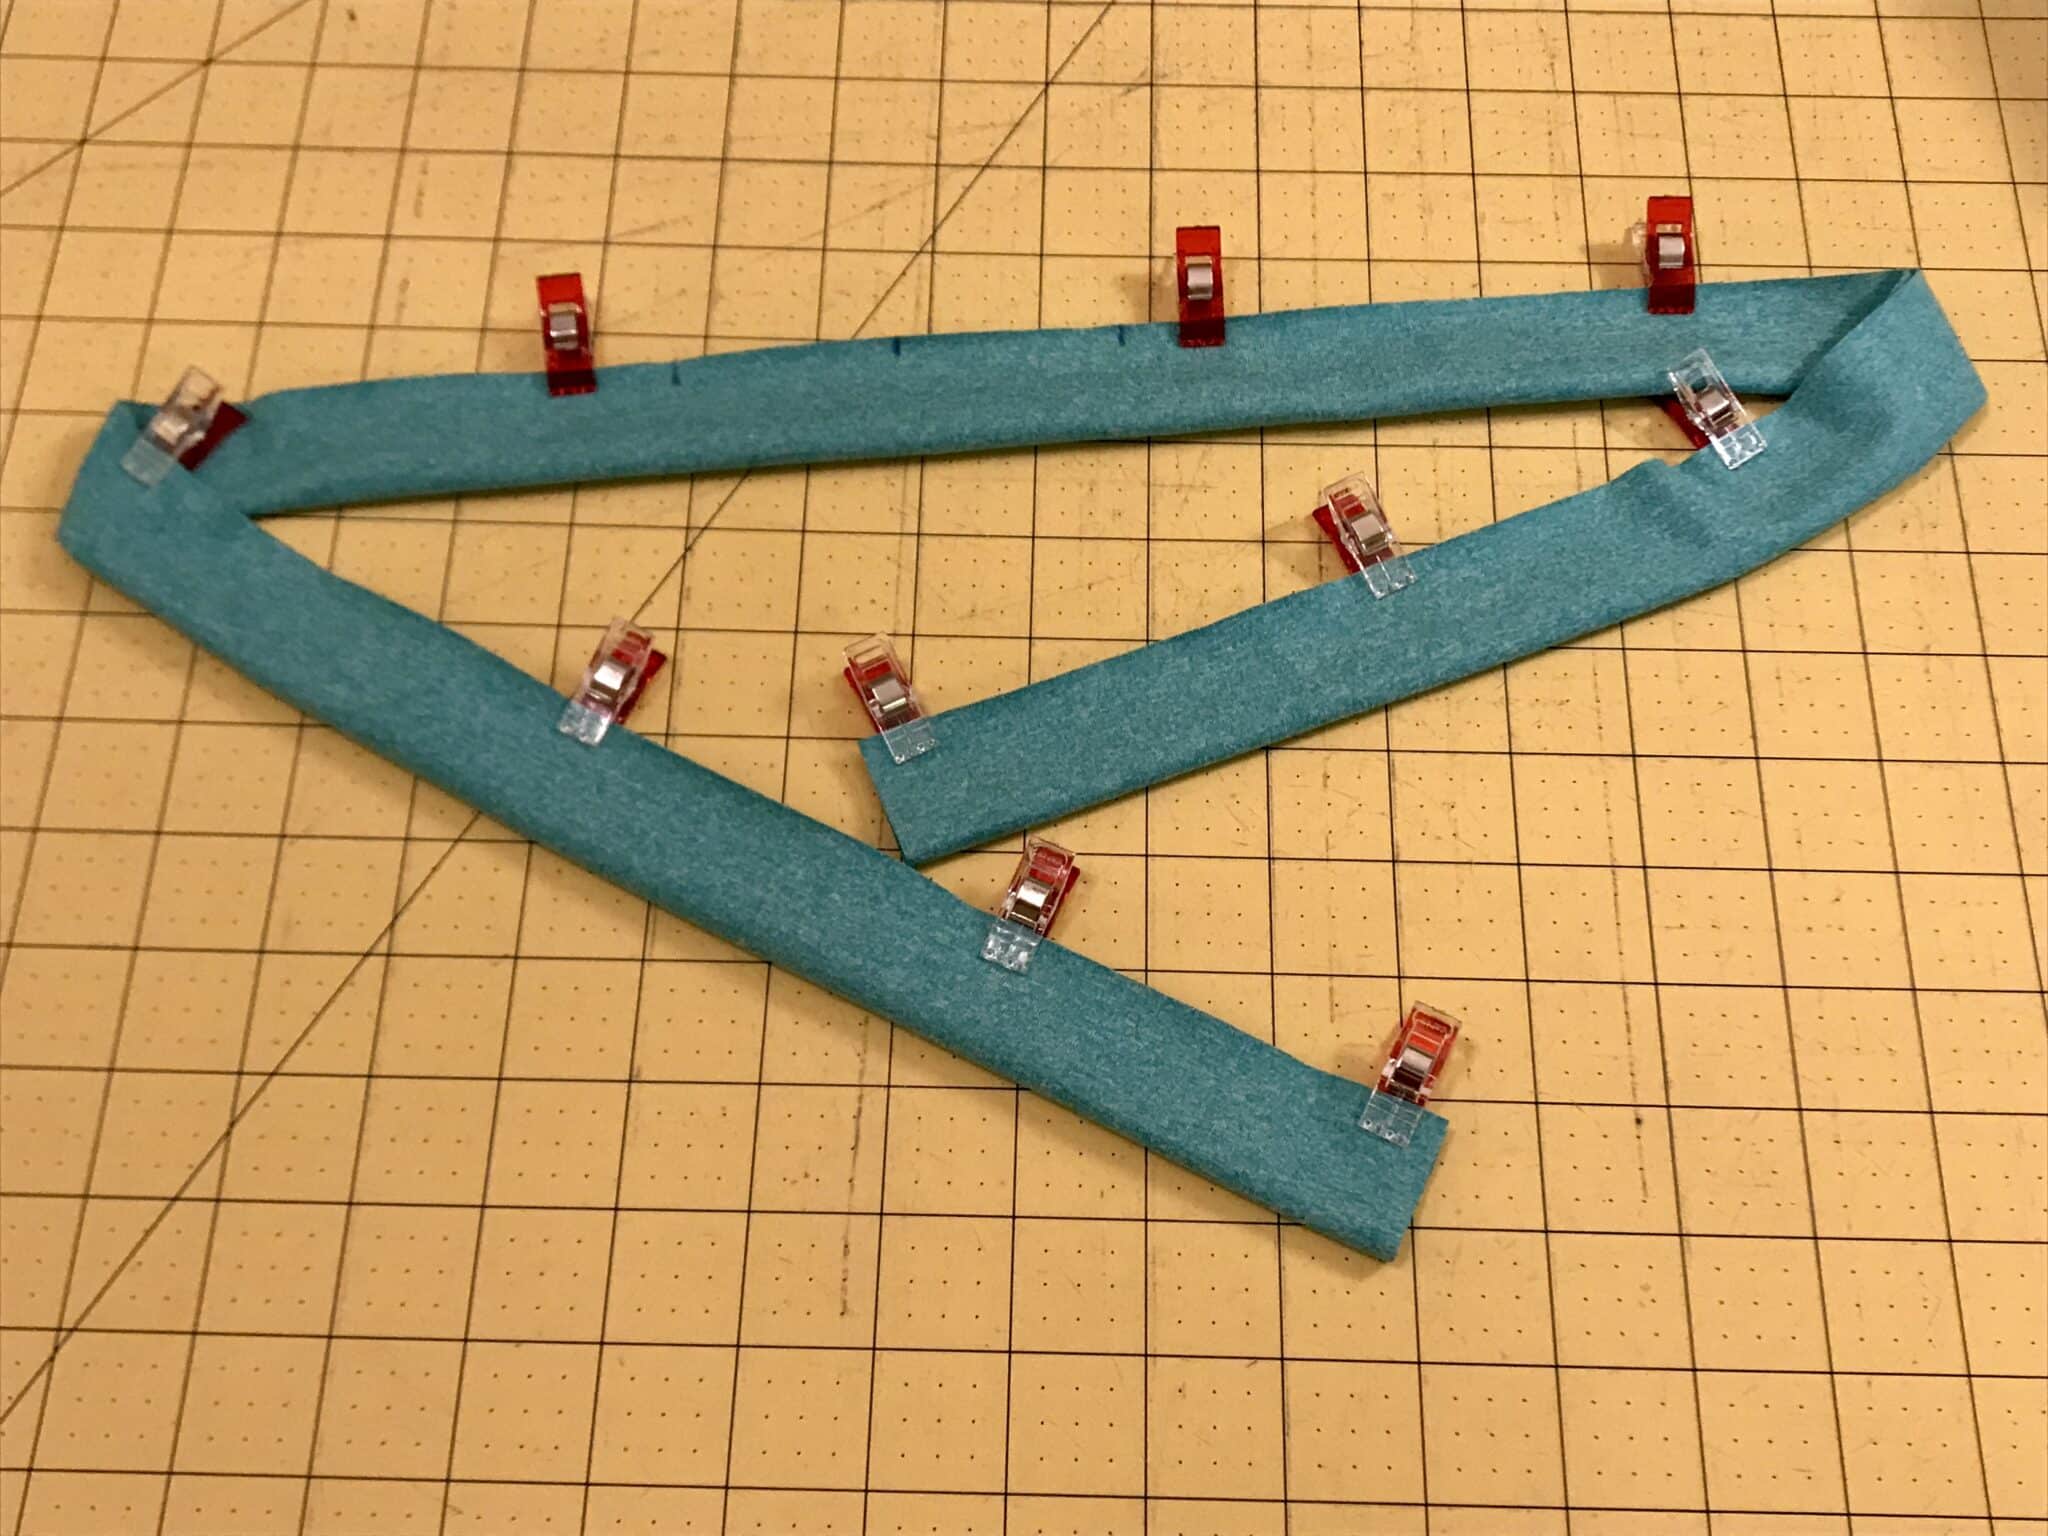
- I decided that I would like to have each end of the tie taper in to a point. To do that I just drew a curved line at each end.

- Now to sew up the ties! I started at each of my “2” away from center” marks and sewed to the end following my taper line at the end. This will leave an opening in the middle for us to insert the bottom of our leggings.
- Once sewn, turn each tie right side out, using something with a point to poke out the end points. I have this fantastic Dritz turner contraption (aff link) that works beautifully.
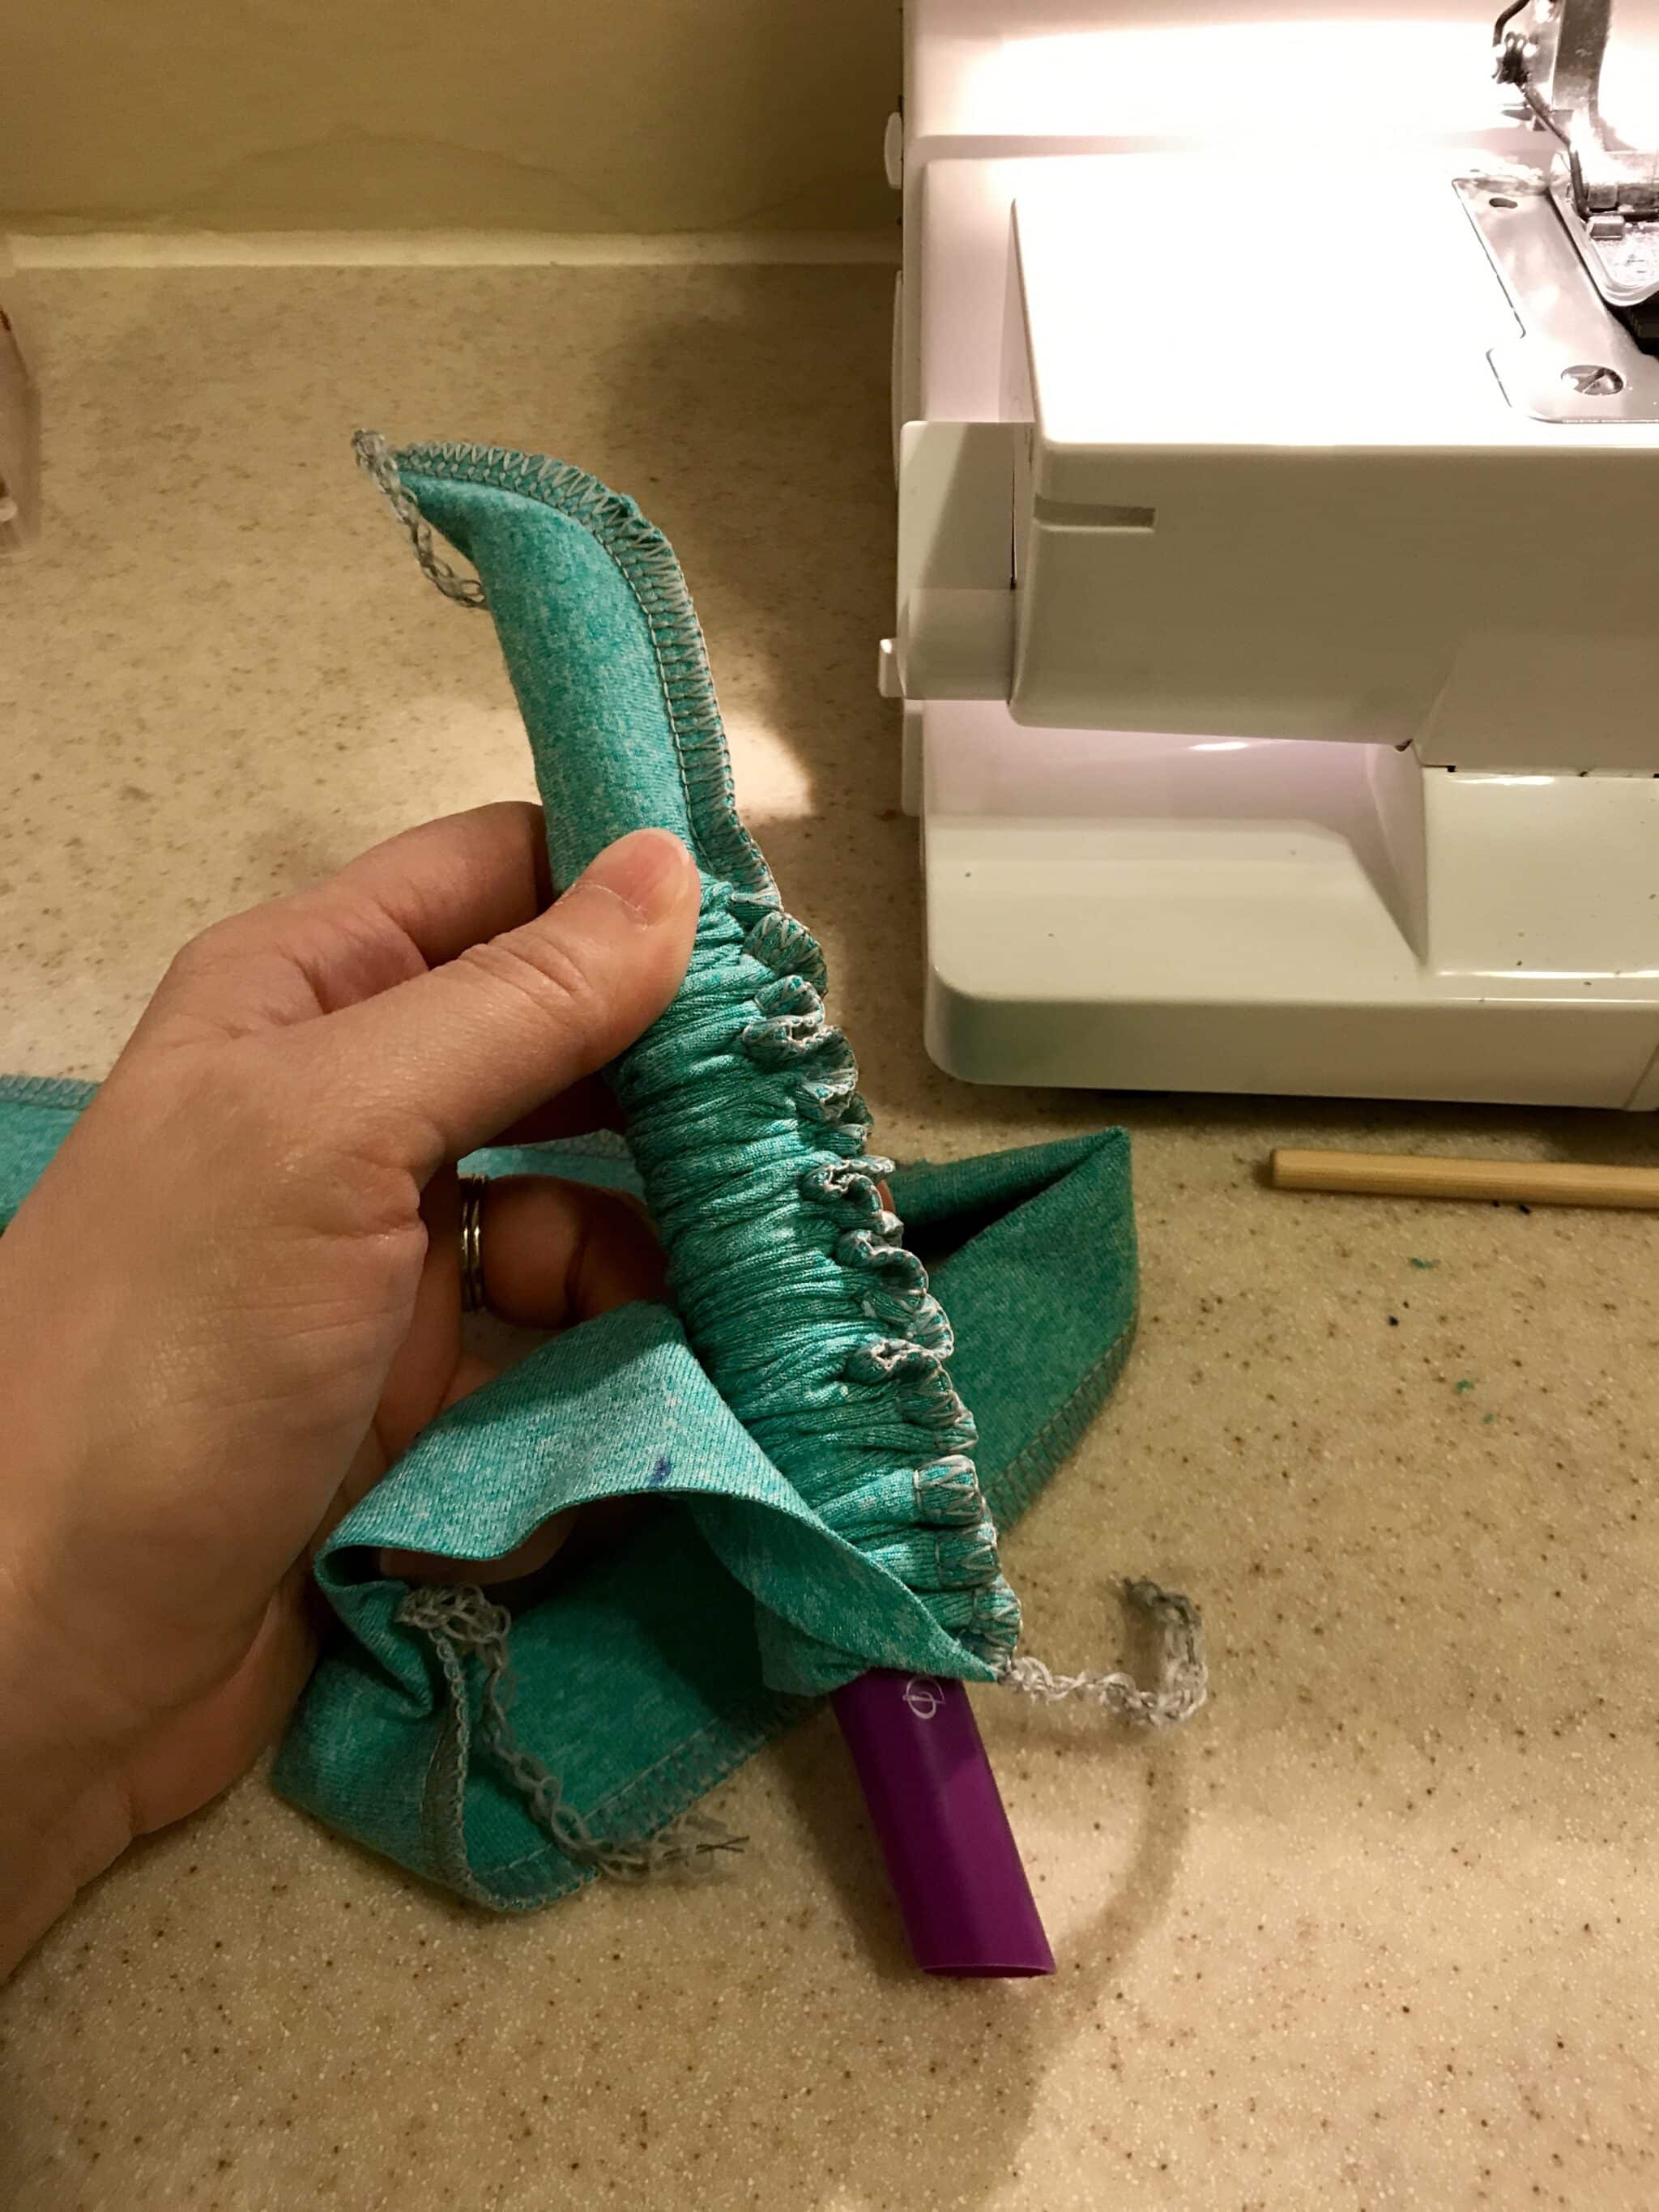

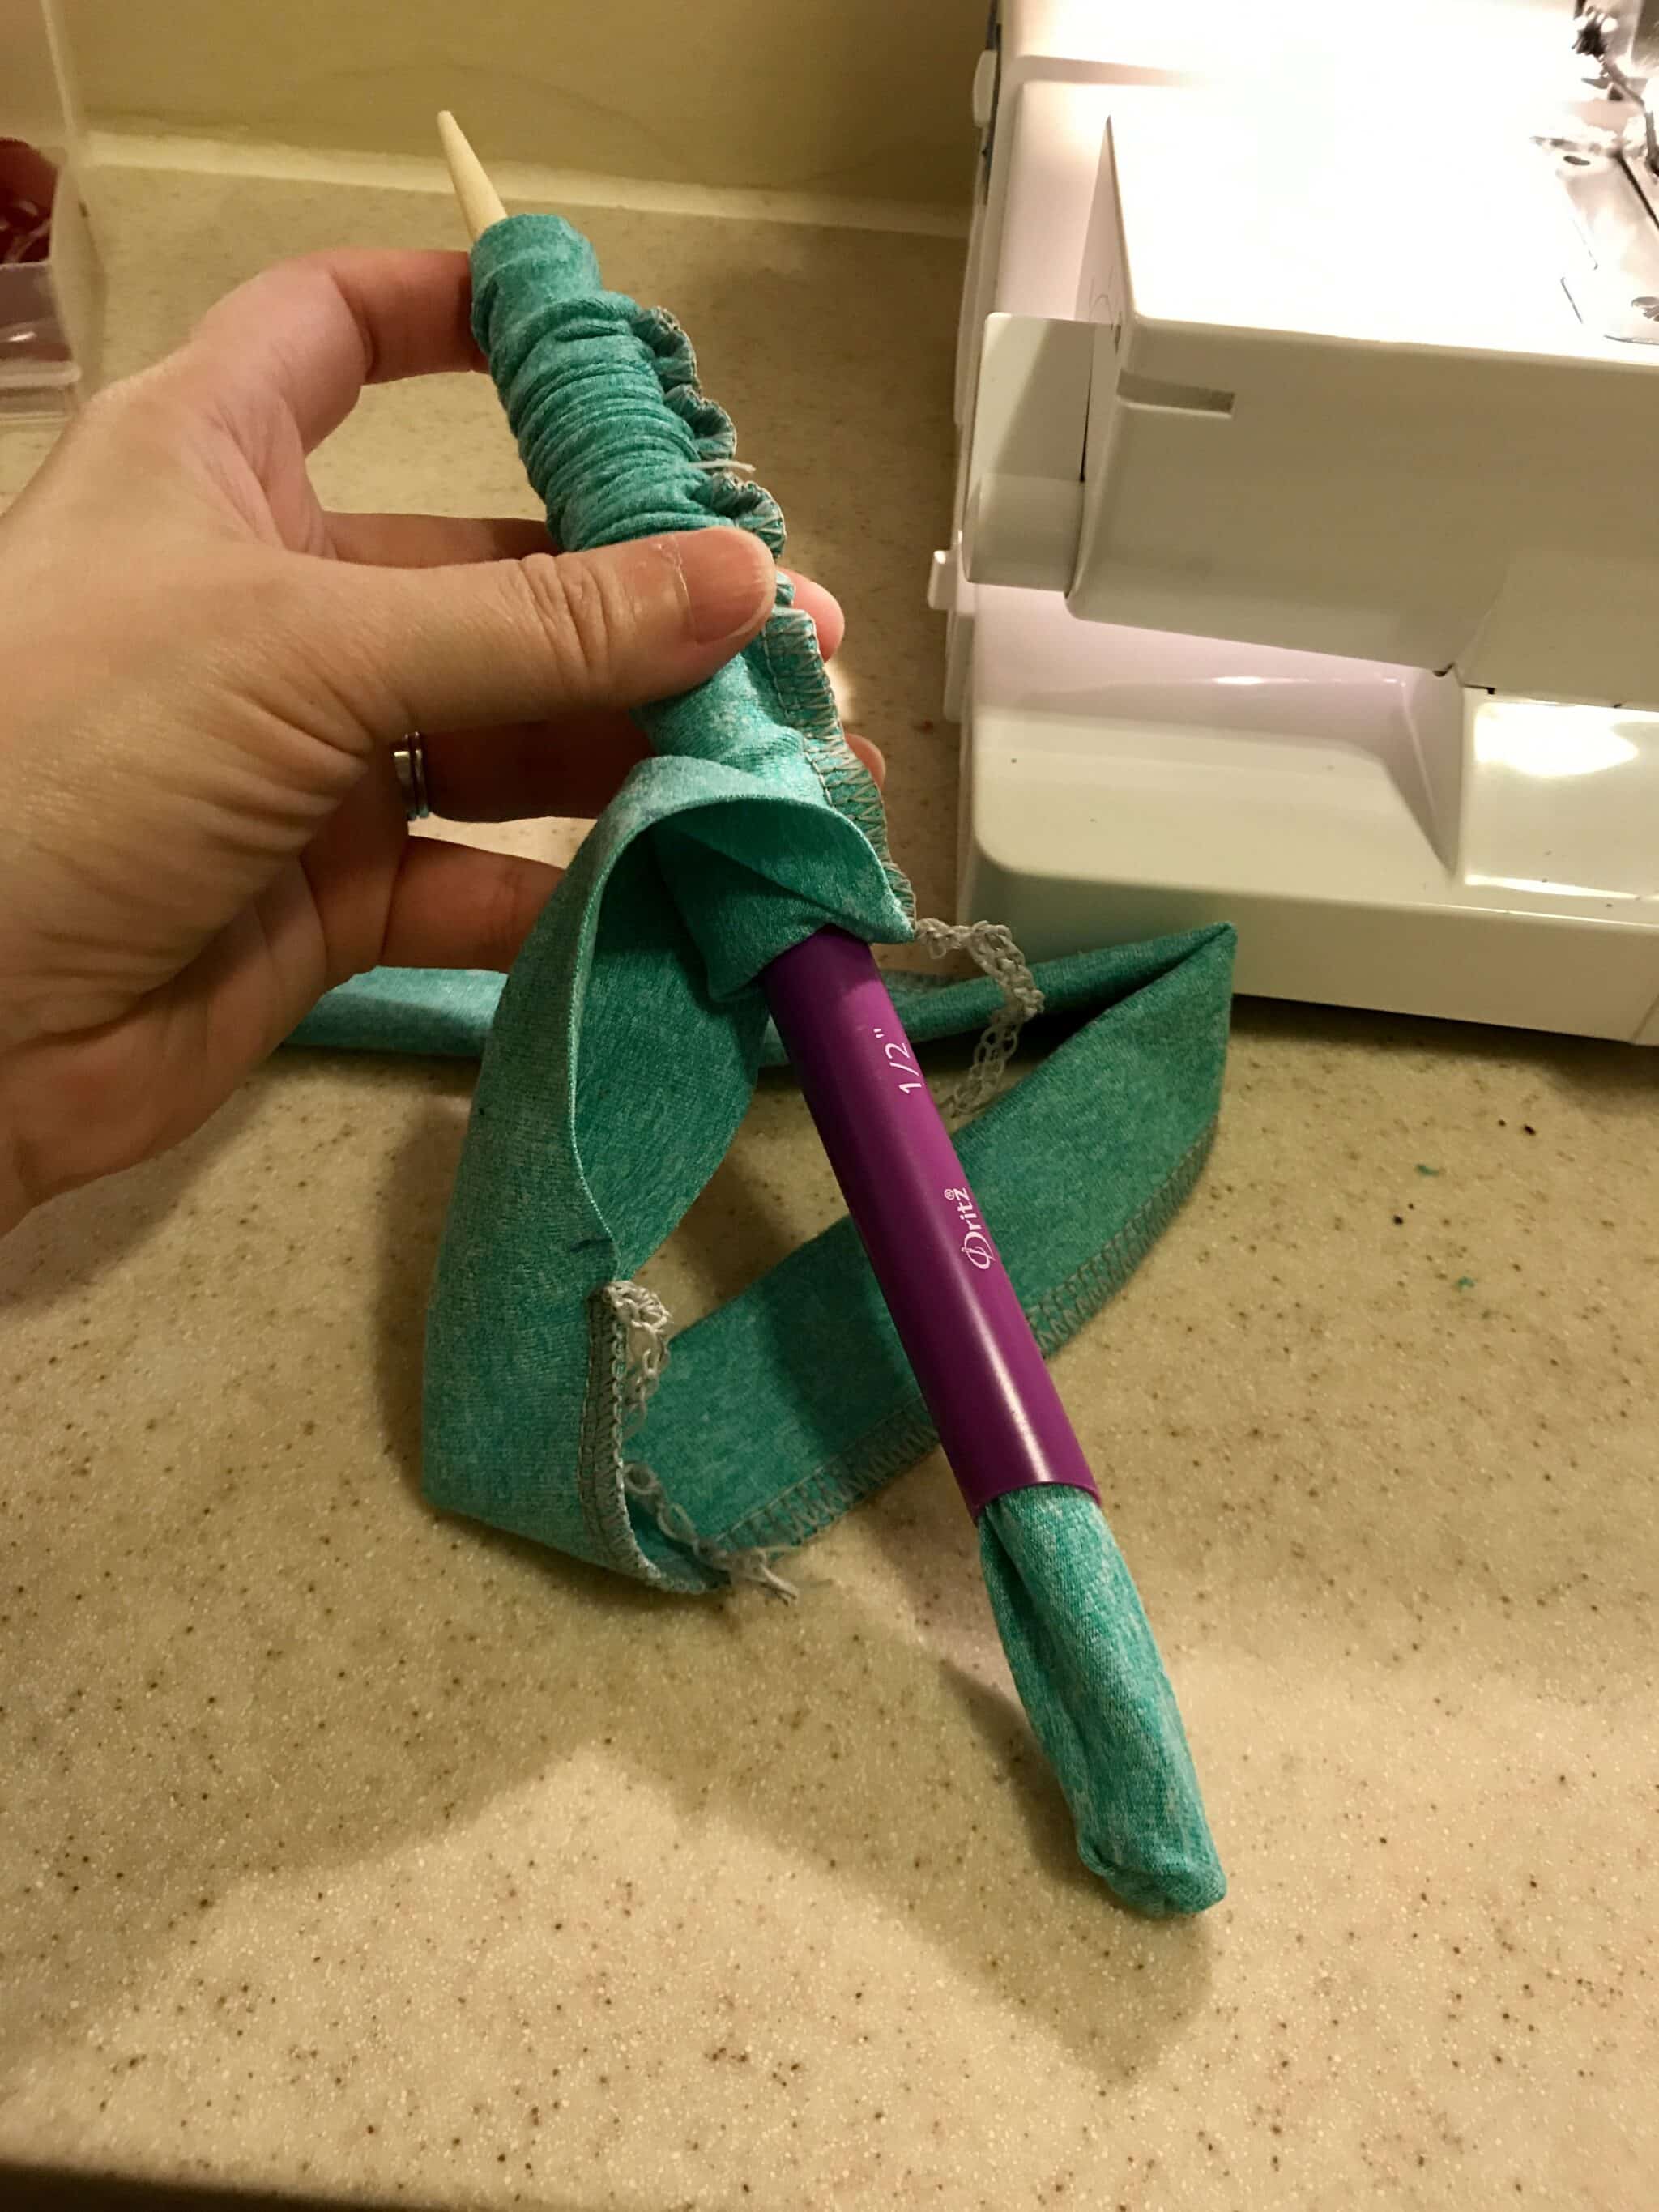
- We are now left with the opening in the middle of the ties where we will insert the bottom of the leggings.


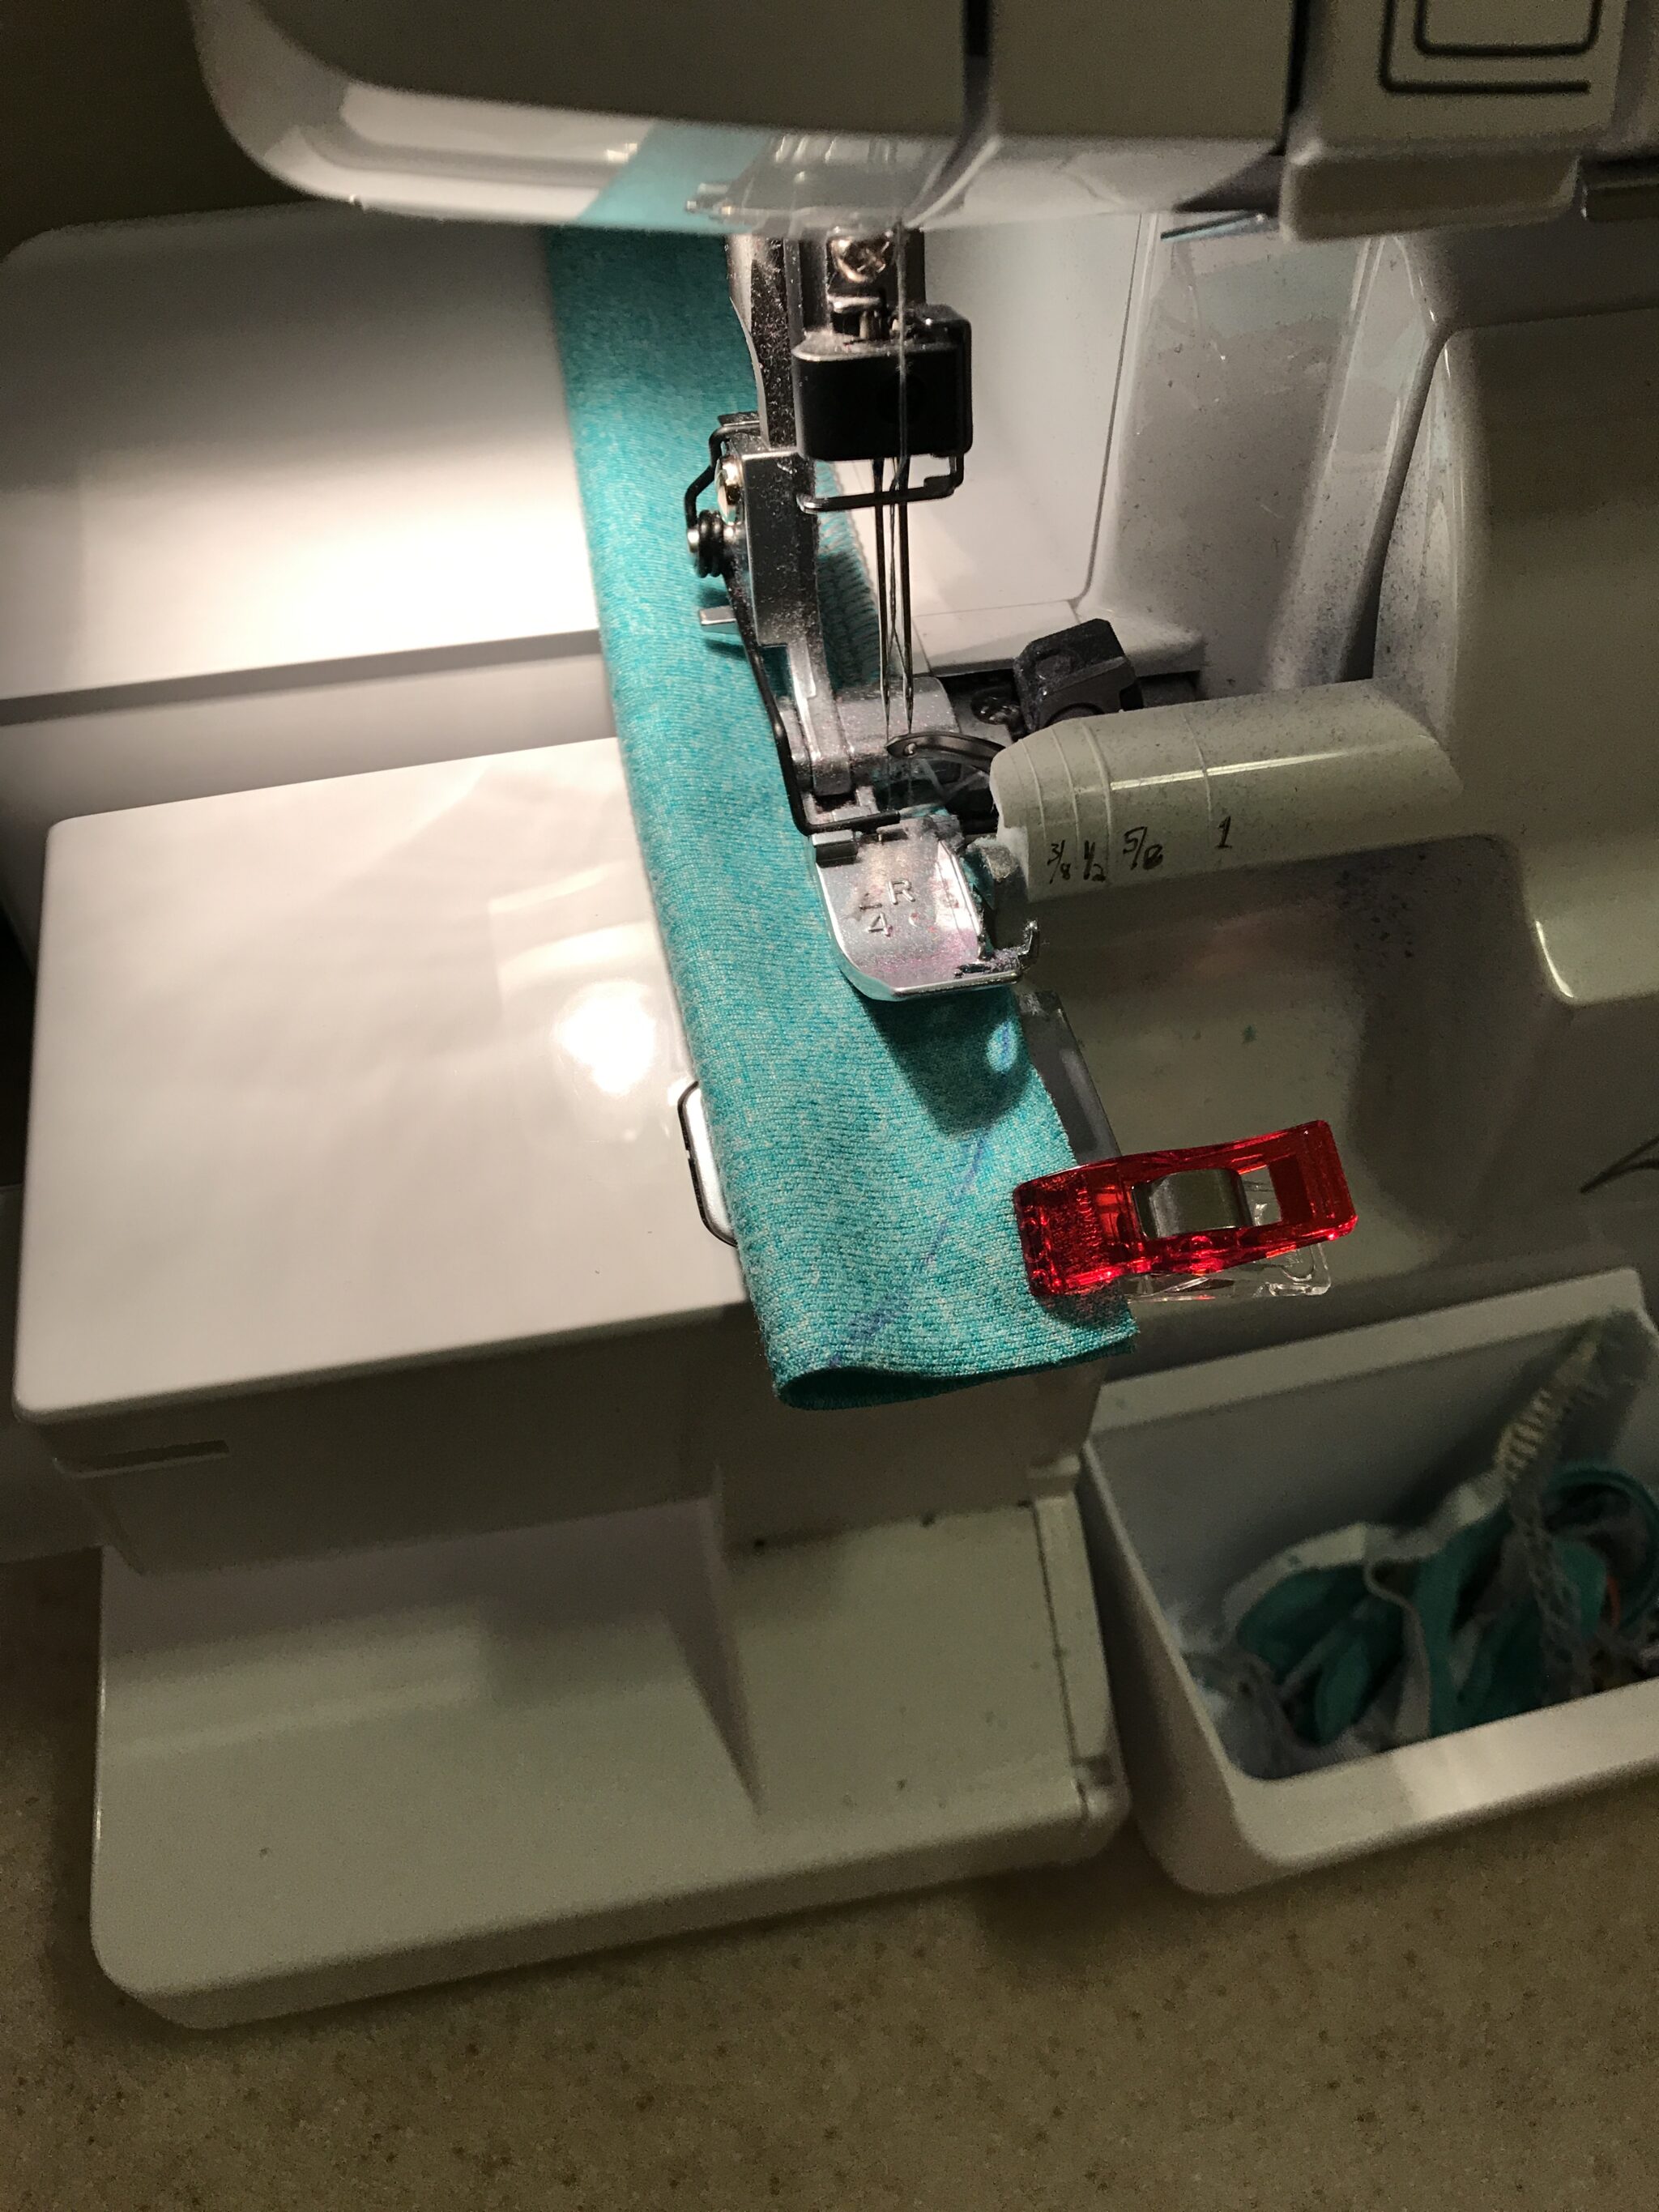
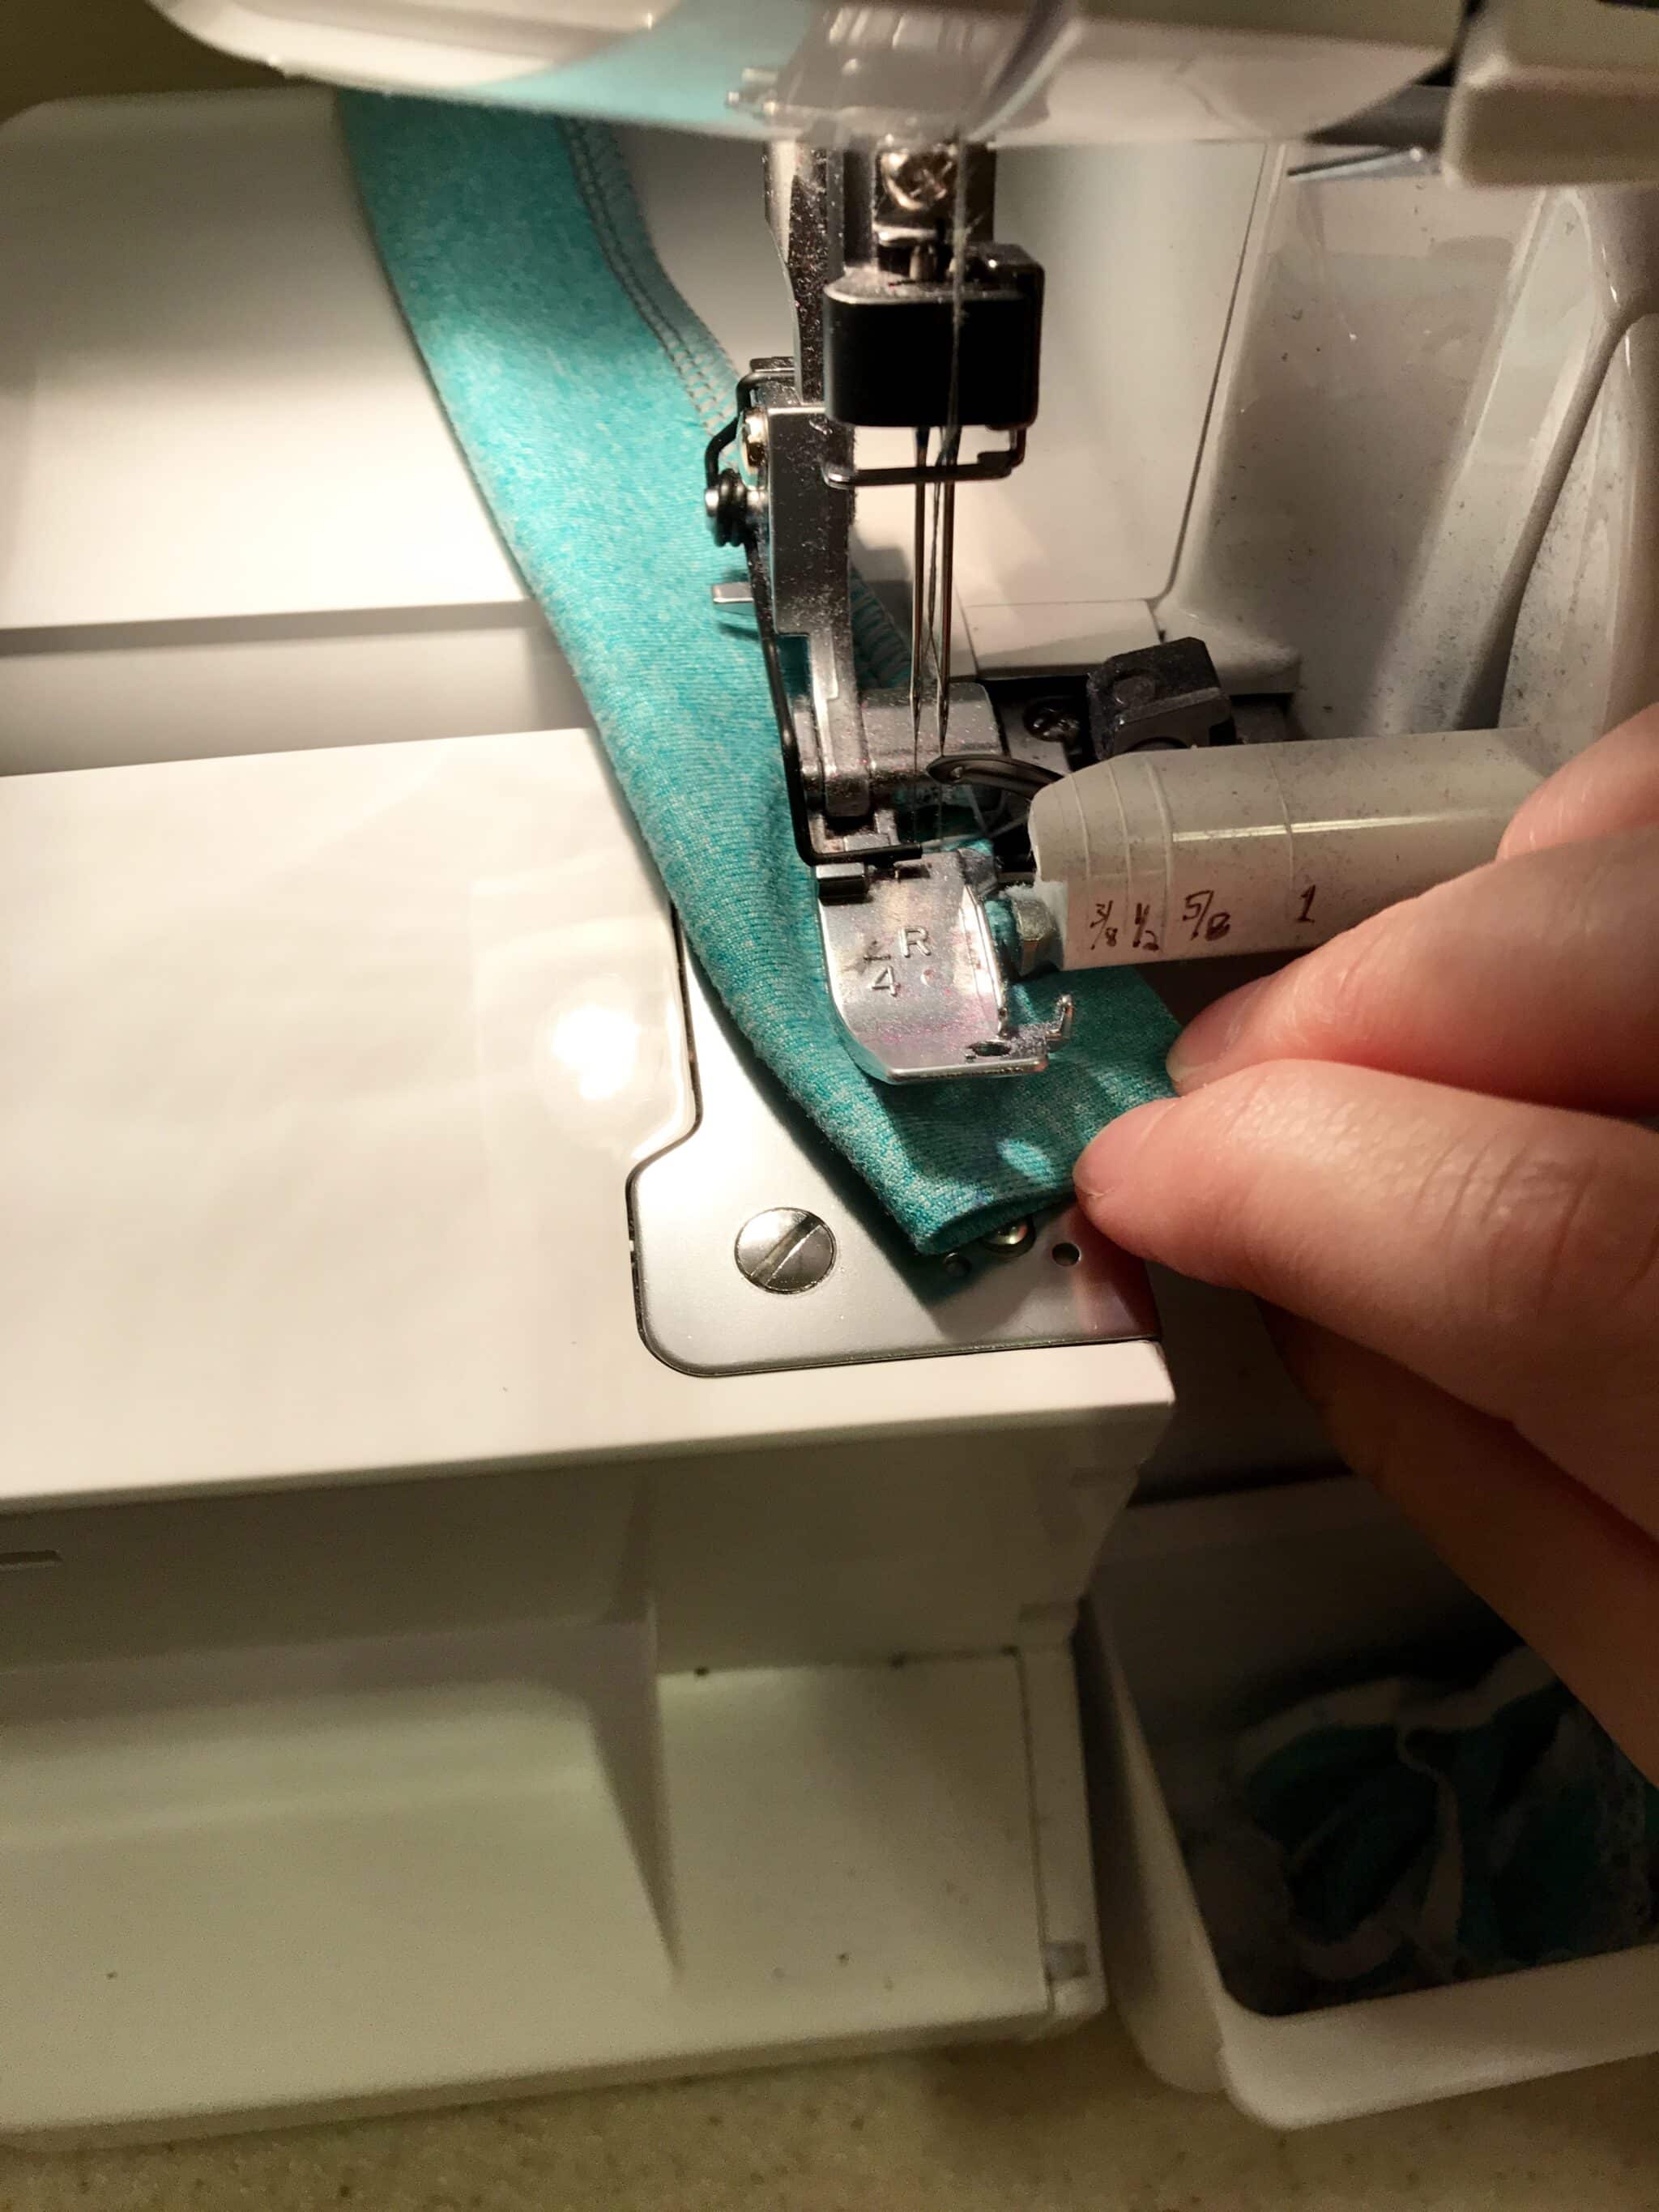
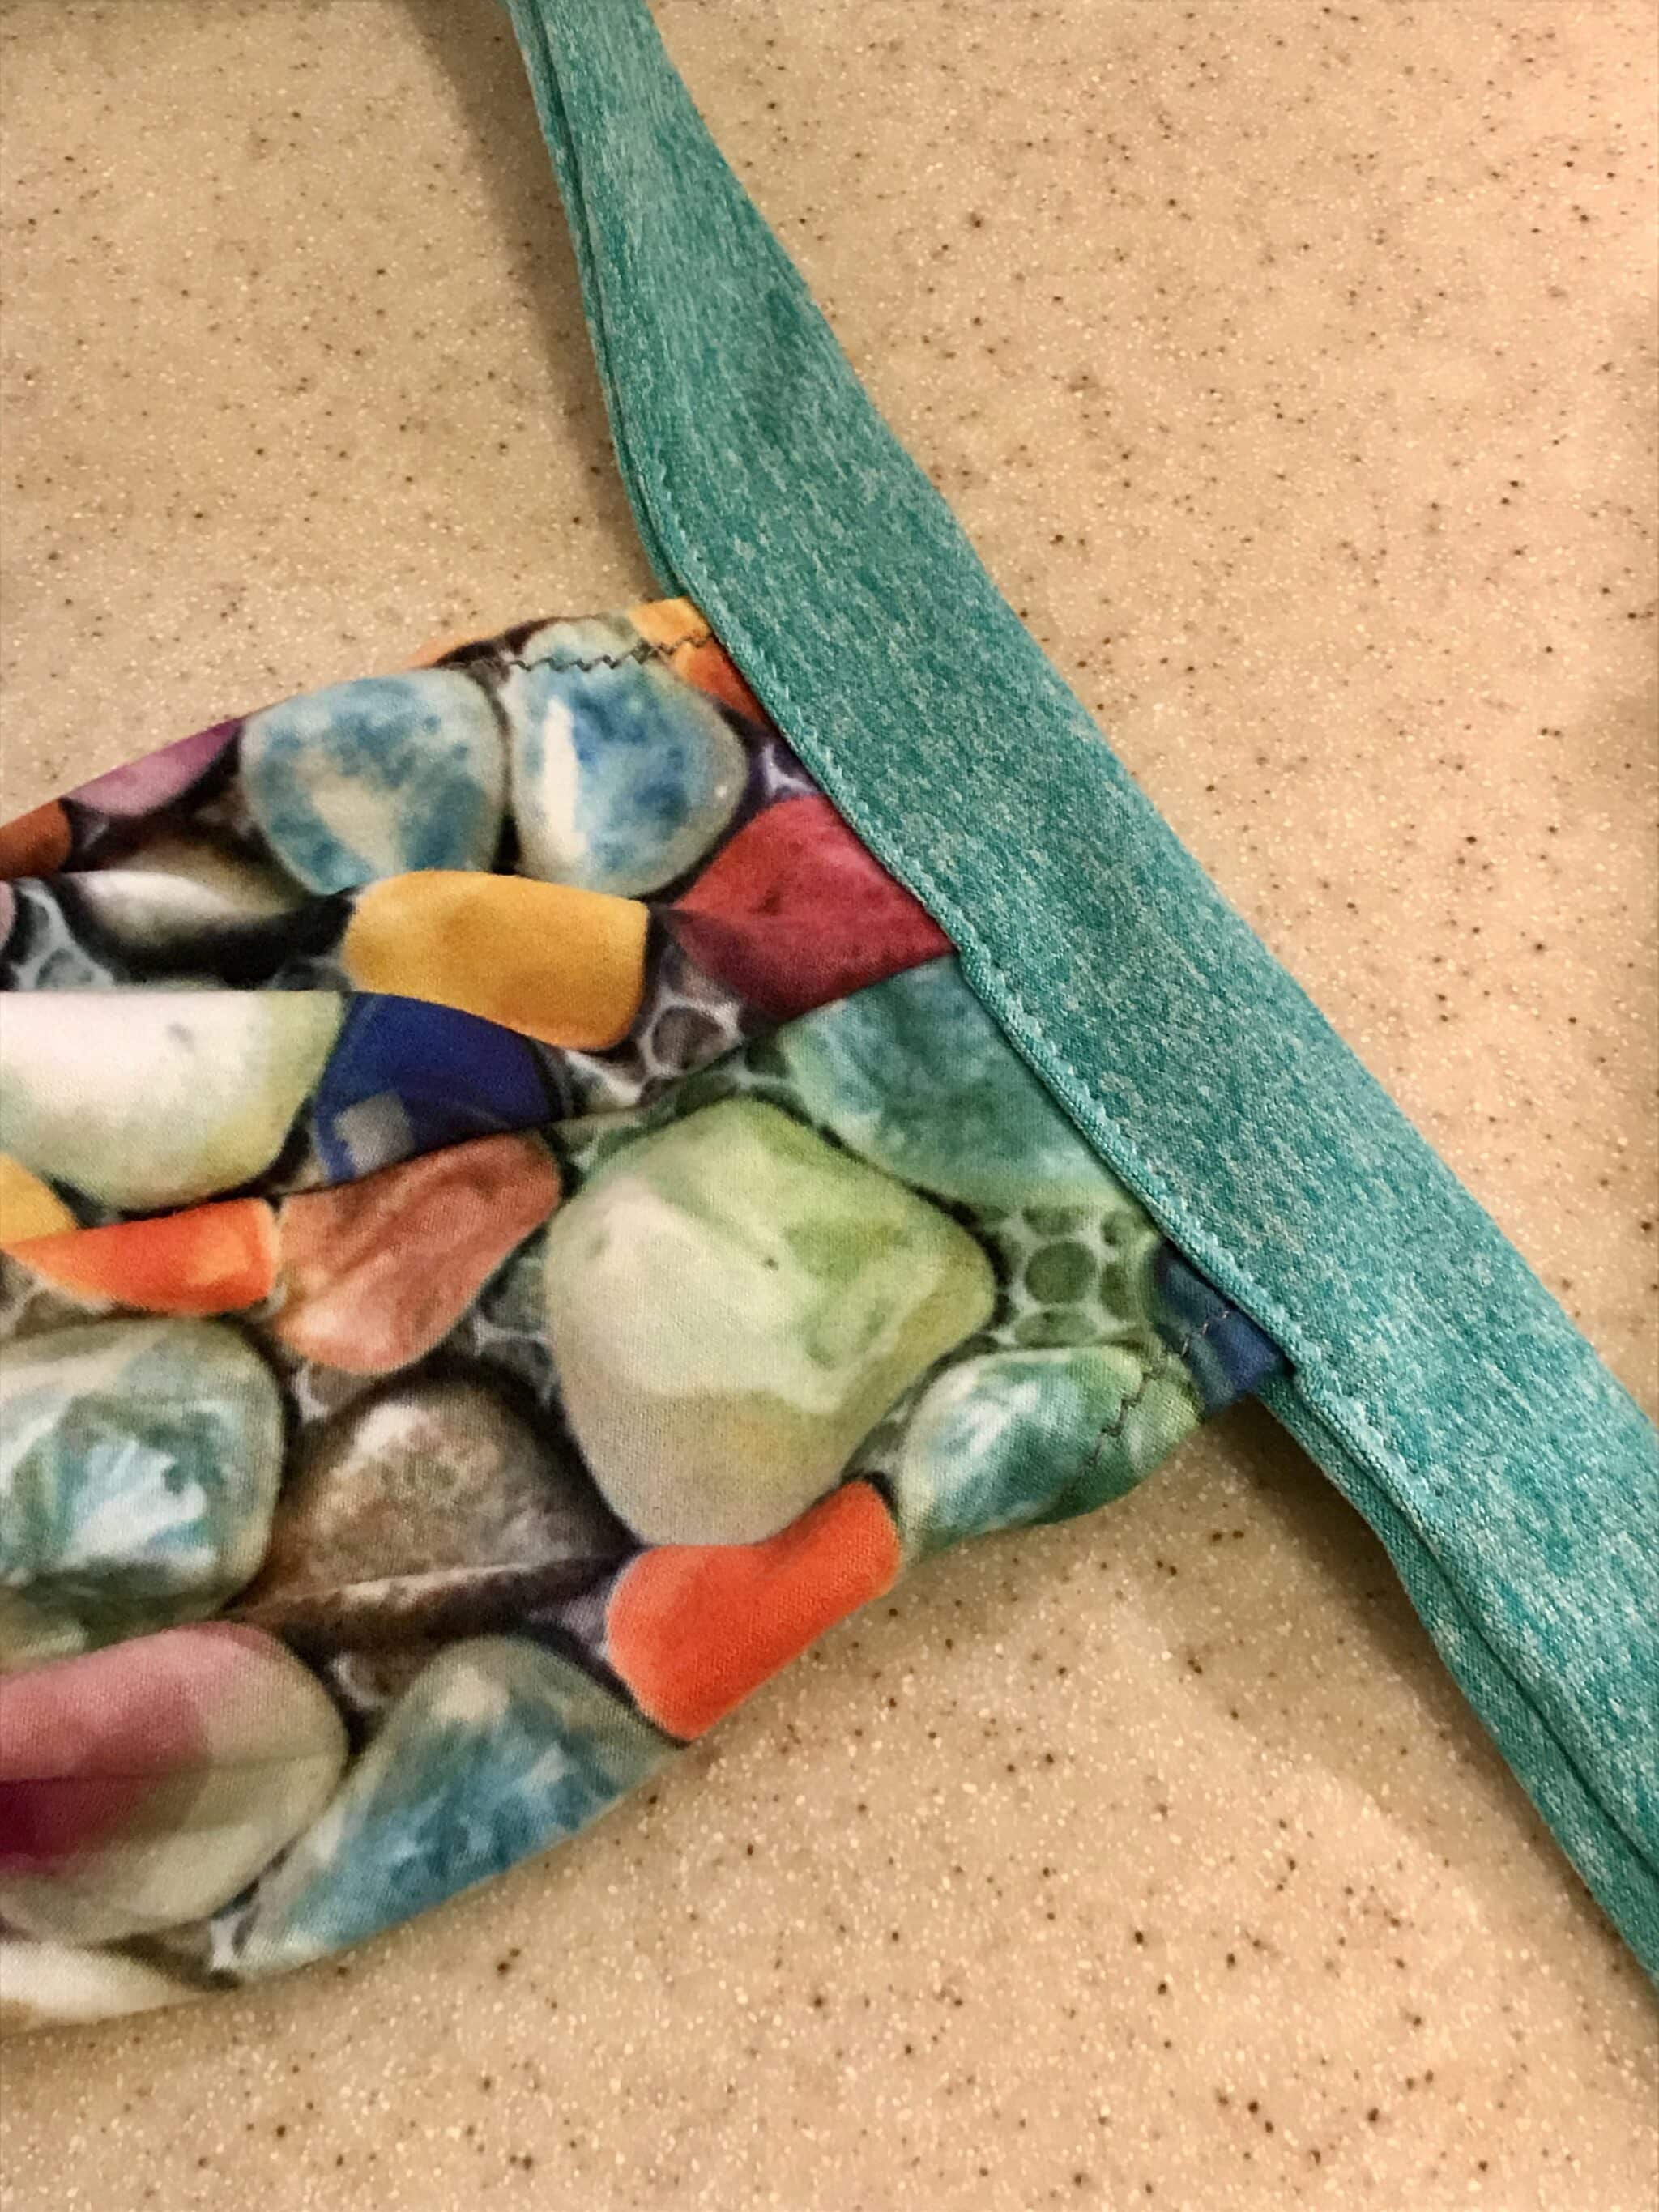
- Now, we want to insert the bottom of the leggings into the opening while folding back the seam allowance of the tie fabric (this way the raw edges are enclosed inside). Pin and/or clip the opening closed.
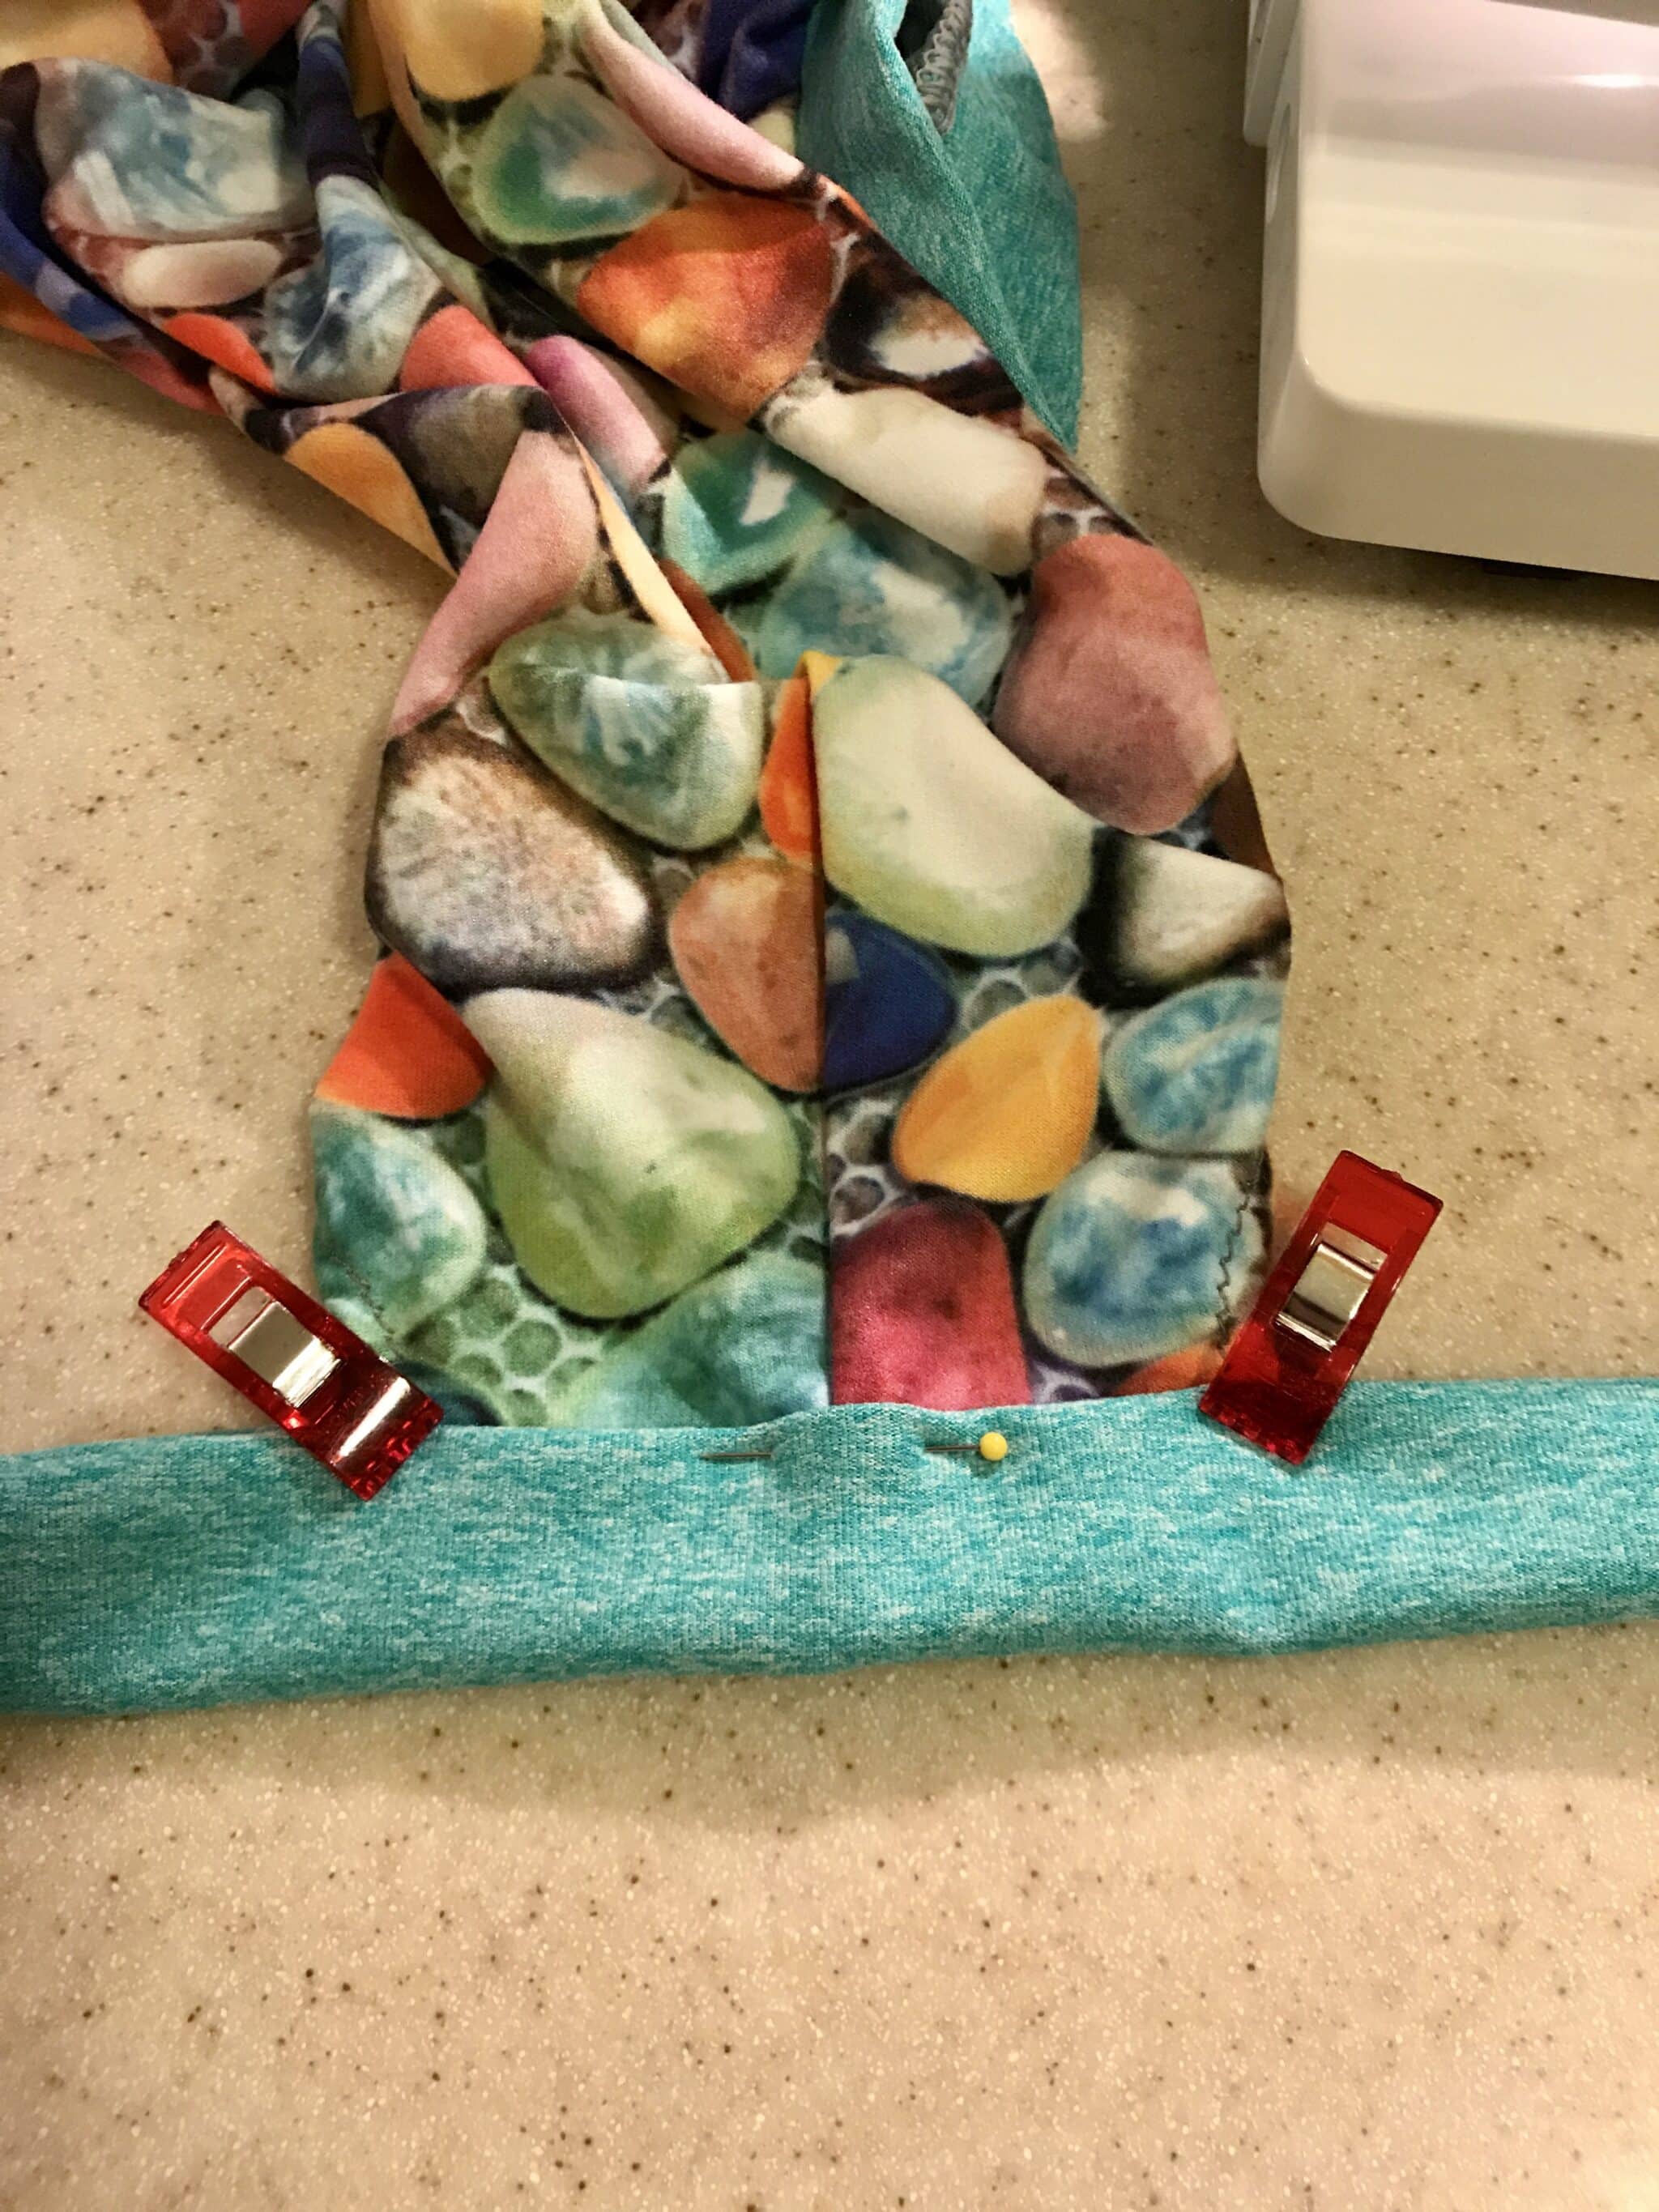
- Using a stretch stitch, sew this opening up by sewing on the tie fabric using a 1/8” seam allowance.

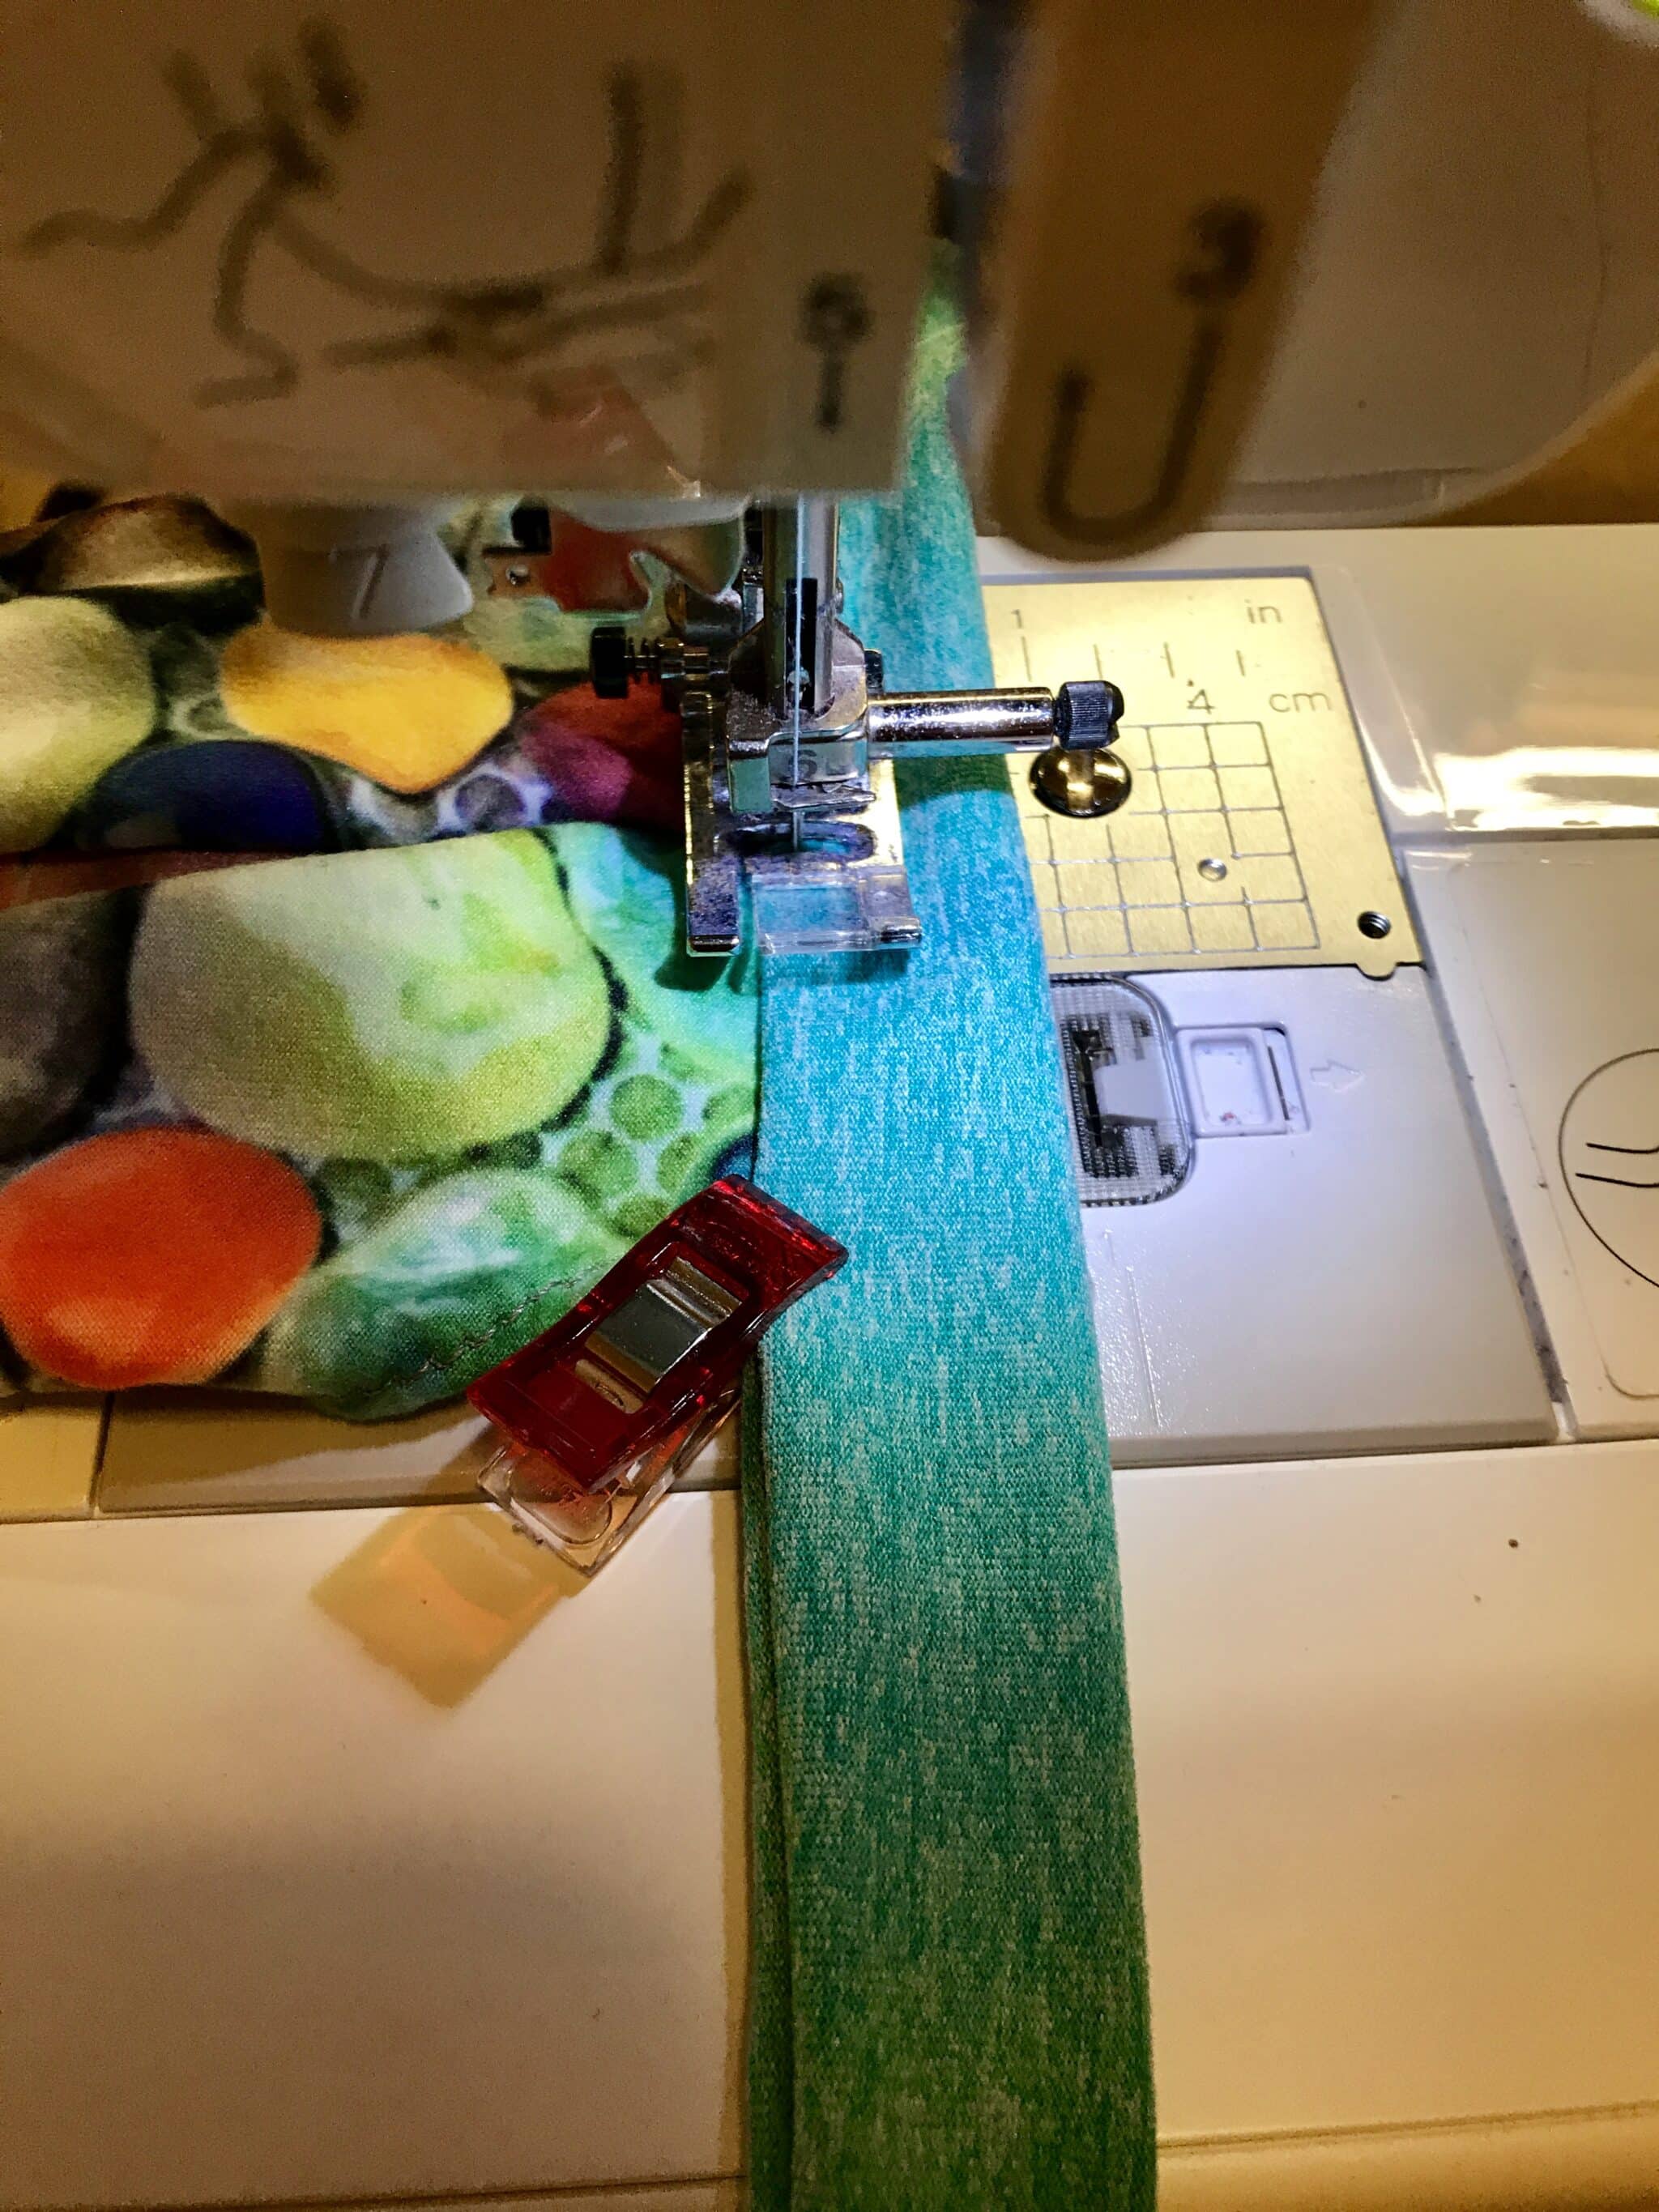
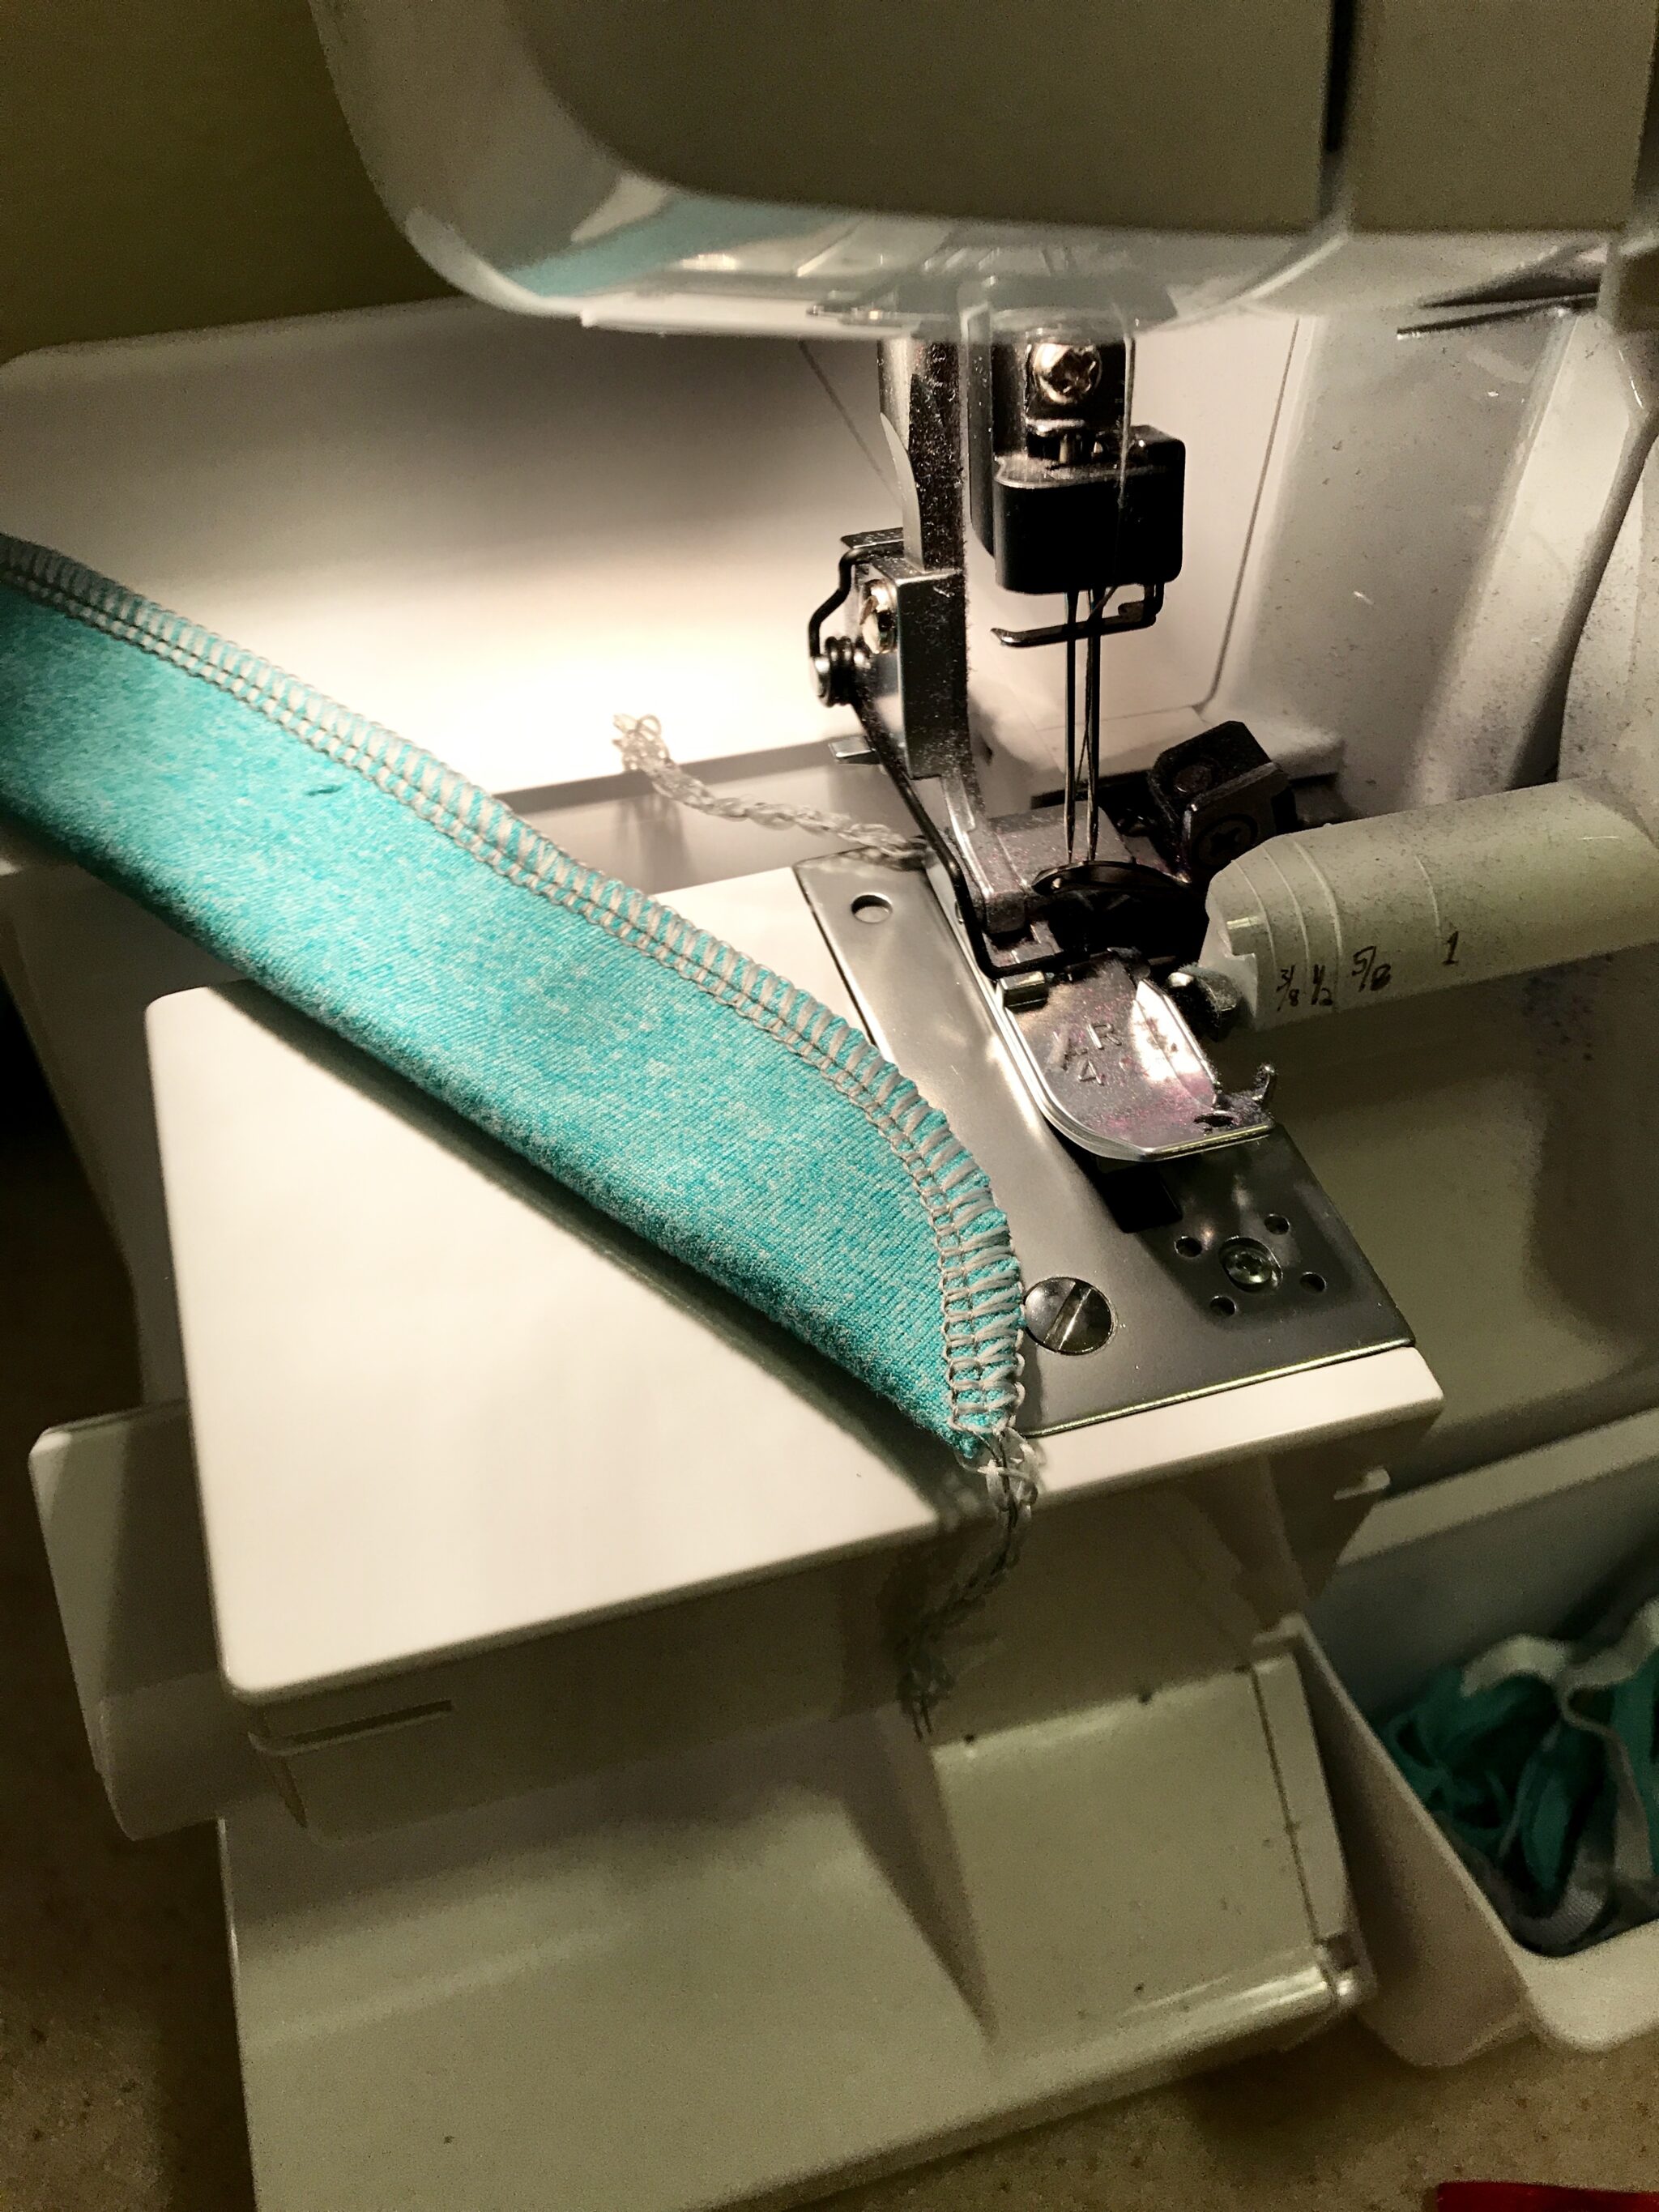
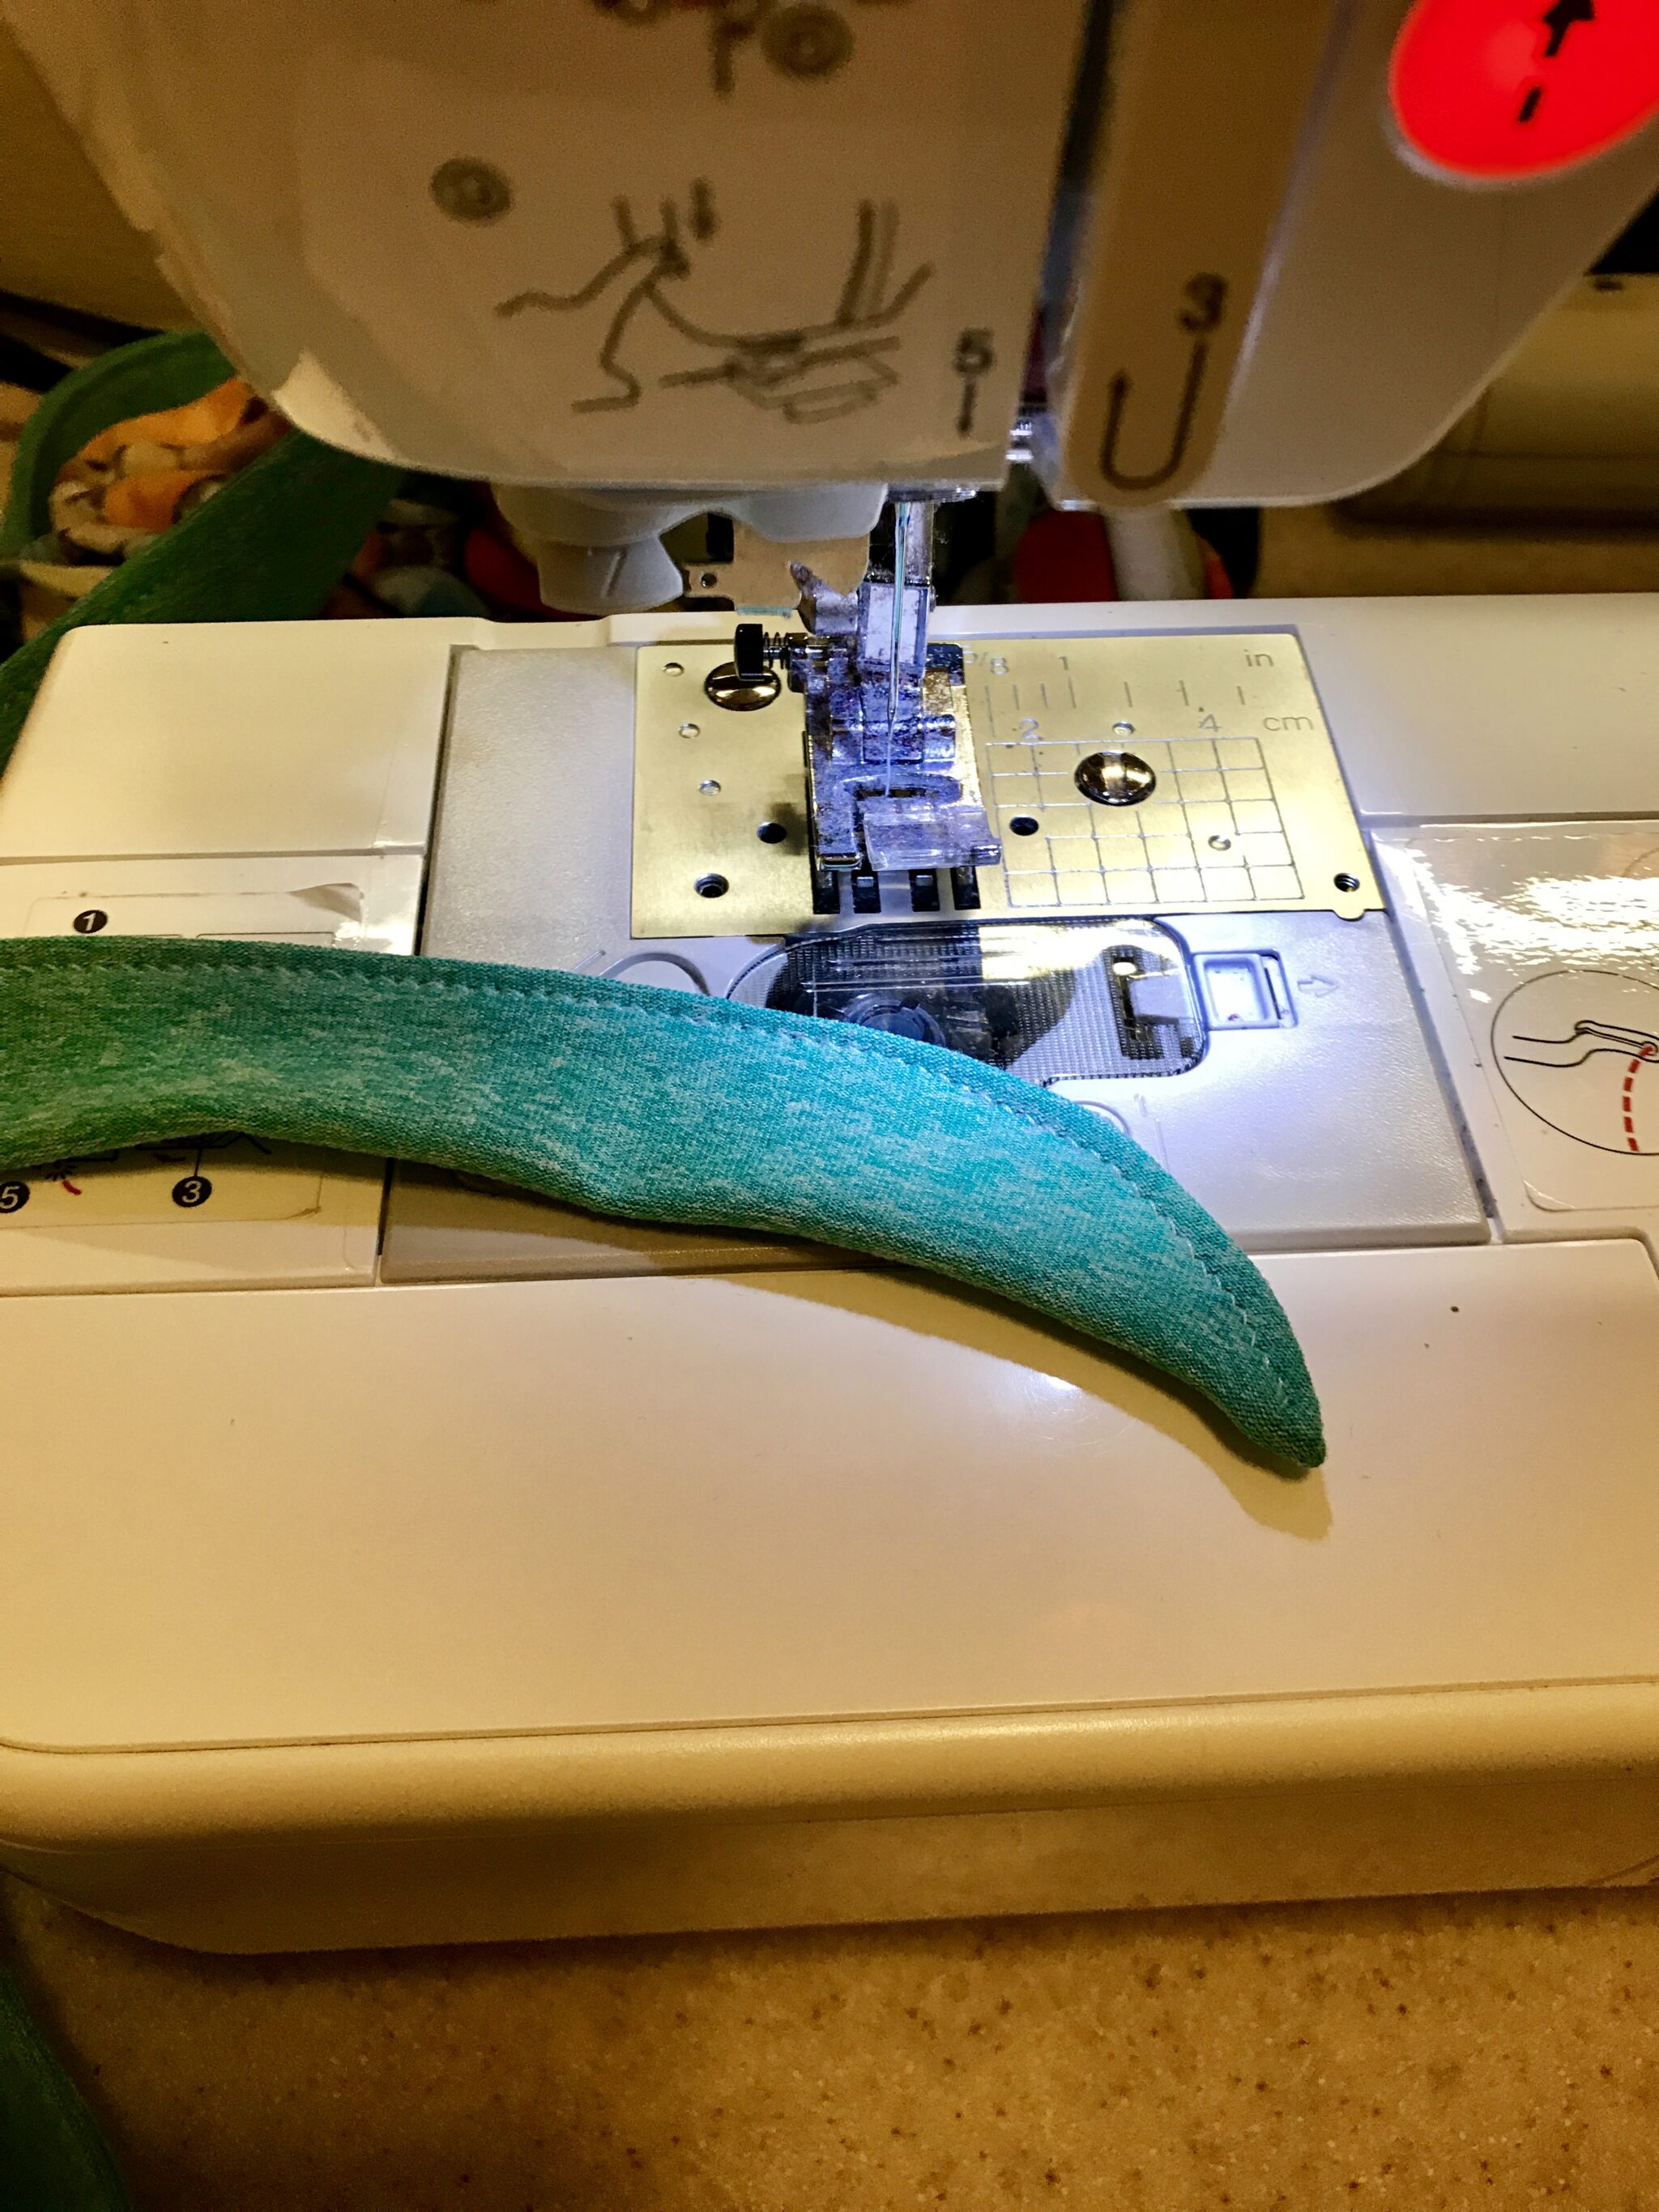
- I choose to go ahead and top stitch the entire length of both sides of the ties. I feel it gives a slightly more finished look.
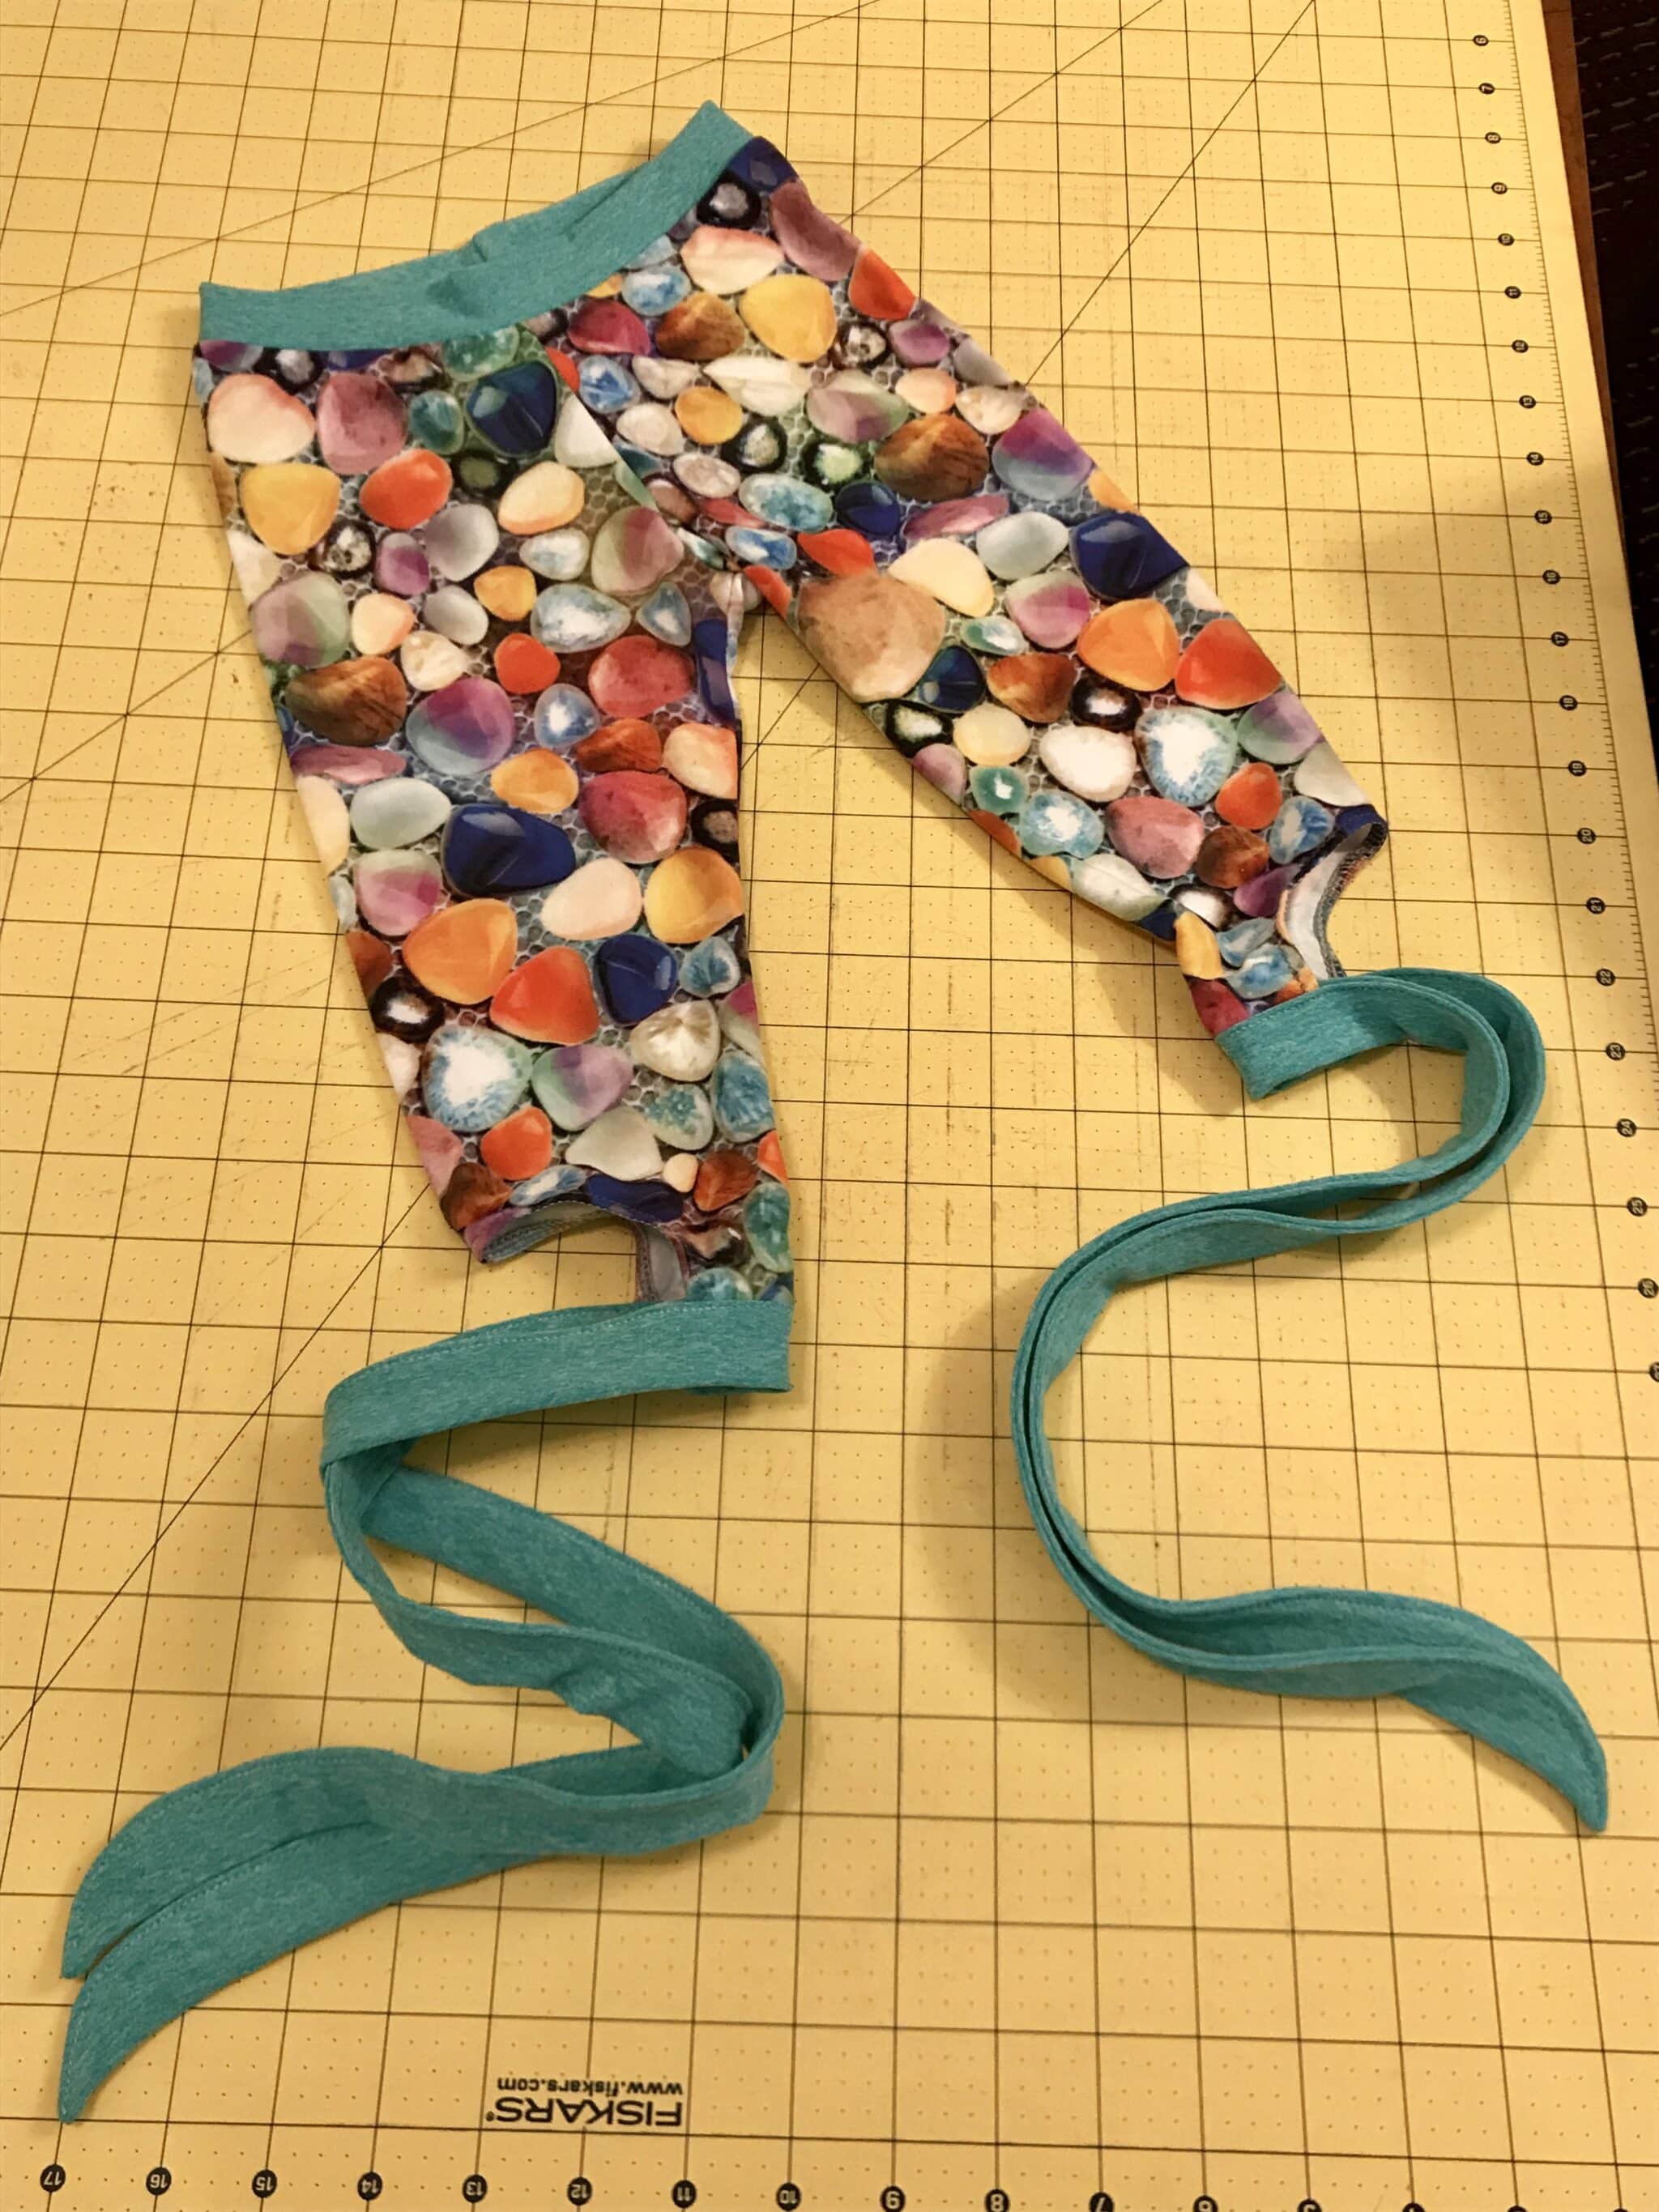
- Your tie bottom leggings are now complete! I can’t wait to see what you create!
So cute!
What a fun and creative modification! Love it .. it’s on my to-do list!