
I was inspired by one of my favorite shirts to create this hack. It is gathered on one side and has accent buttons and is adorable. The only thing that is not my favorite is that it’s a dolman sleeve that’s on the tight side which I don’t think is a flattering style for my arms, or all that comfortable. Call me crazy, but I like to be able to move my arms without having the circulation cut off. I went to work on hacking the Easy Tee to get the same style, but so much more comfortable.
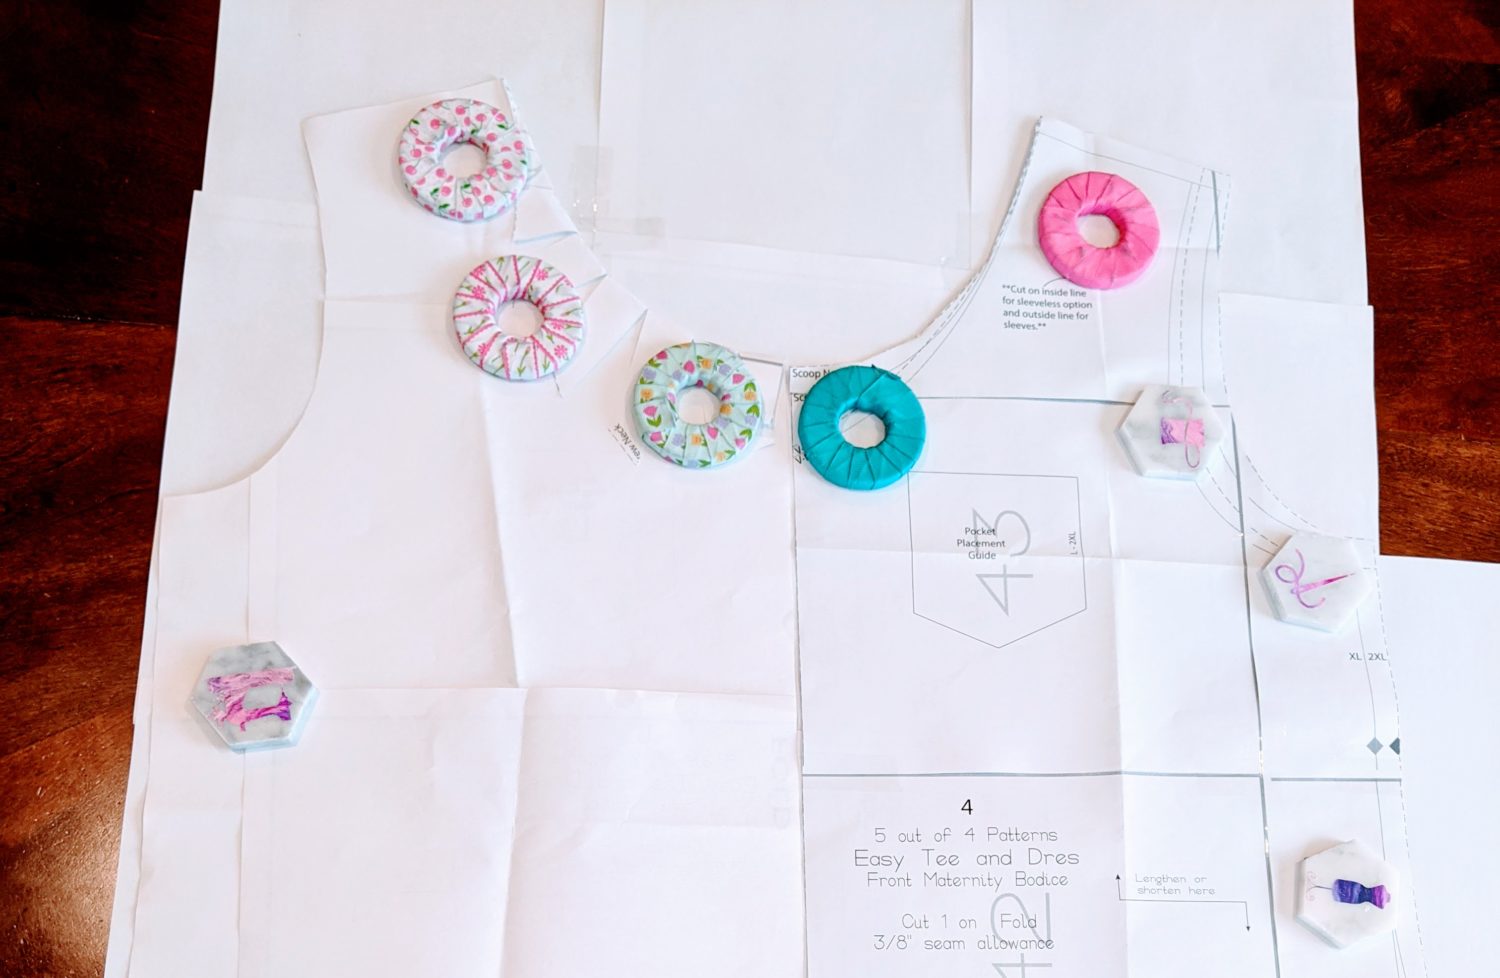
Before you start, you will need to print and assemble the full easy tee pattern with the options you would like. If you don’t have the Easy Tee pattern, you can get it here. In addition, you will need to print the maternity front bodice in the same size. We will be adjusting the front bodice, so set everything else to the side for now and just have both the regular and maternity front bodice pieces out.
Getting it all ready
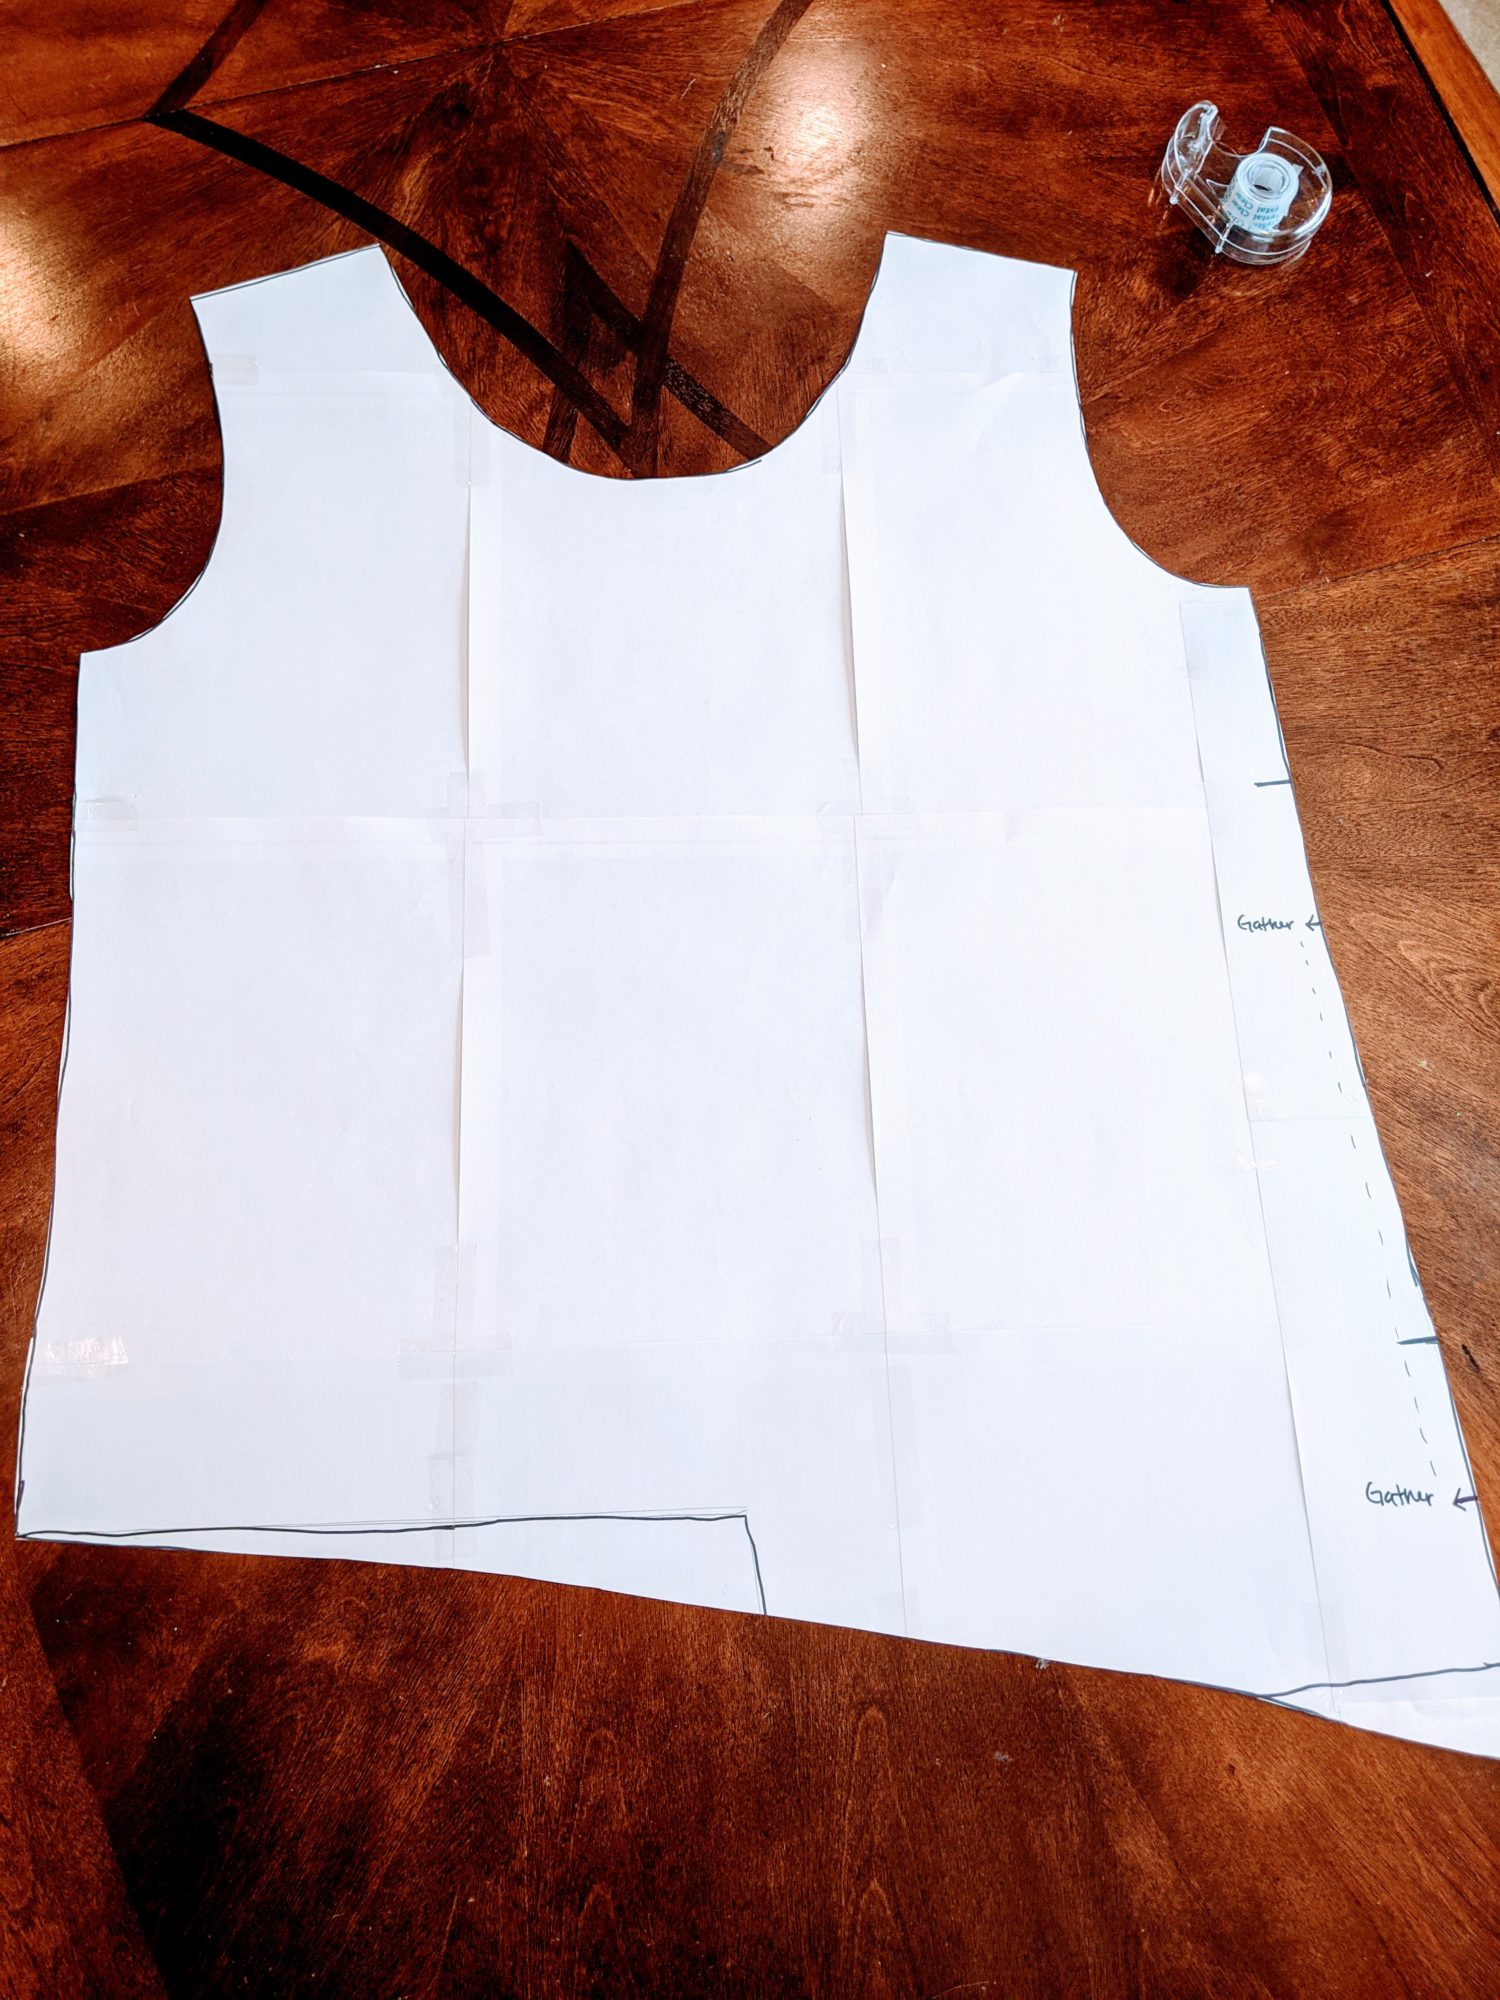
We are going to make a whole new front bodice pattern piece. You will need paper big enough for your entire front bodice to fit onto. I am making the shirt length banded option. You can choose any length option you like, but be sure you use the same one for both front pieces and the back piece.
- Lay the pattern out on top of the paper, lining up the necklines and center fold lines.
- Trace the entire pattern onto the paper.
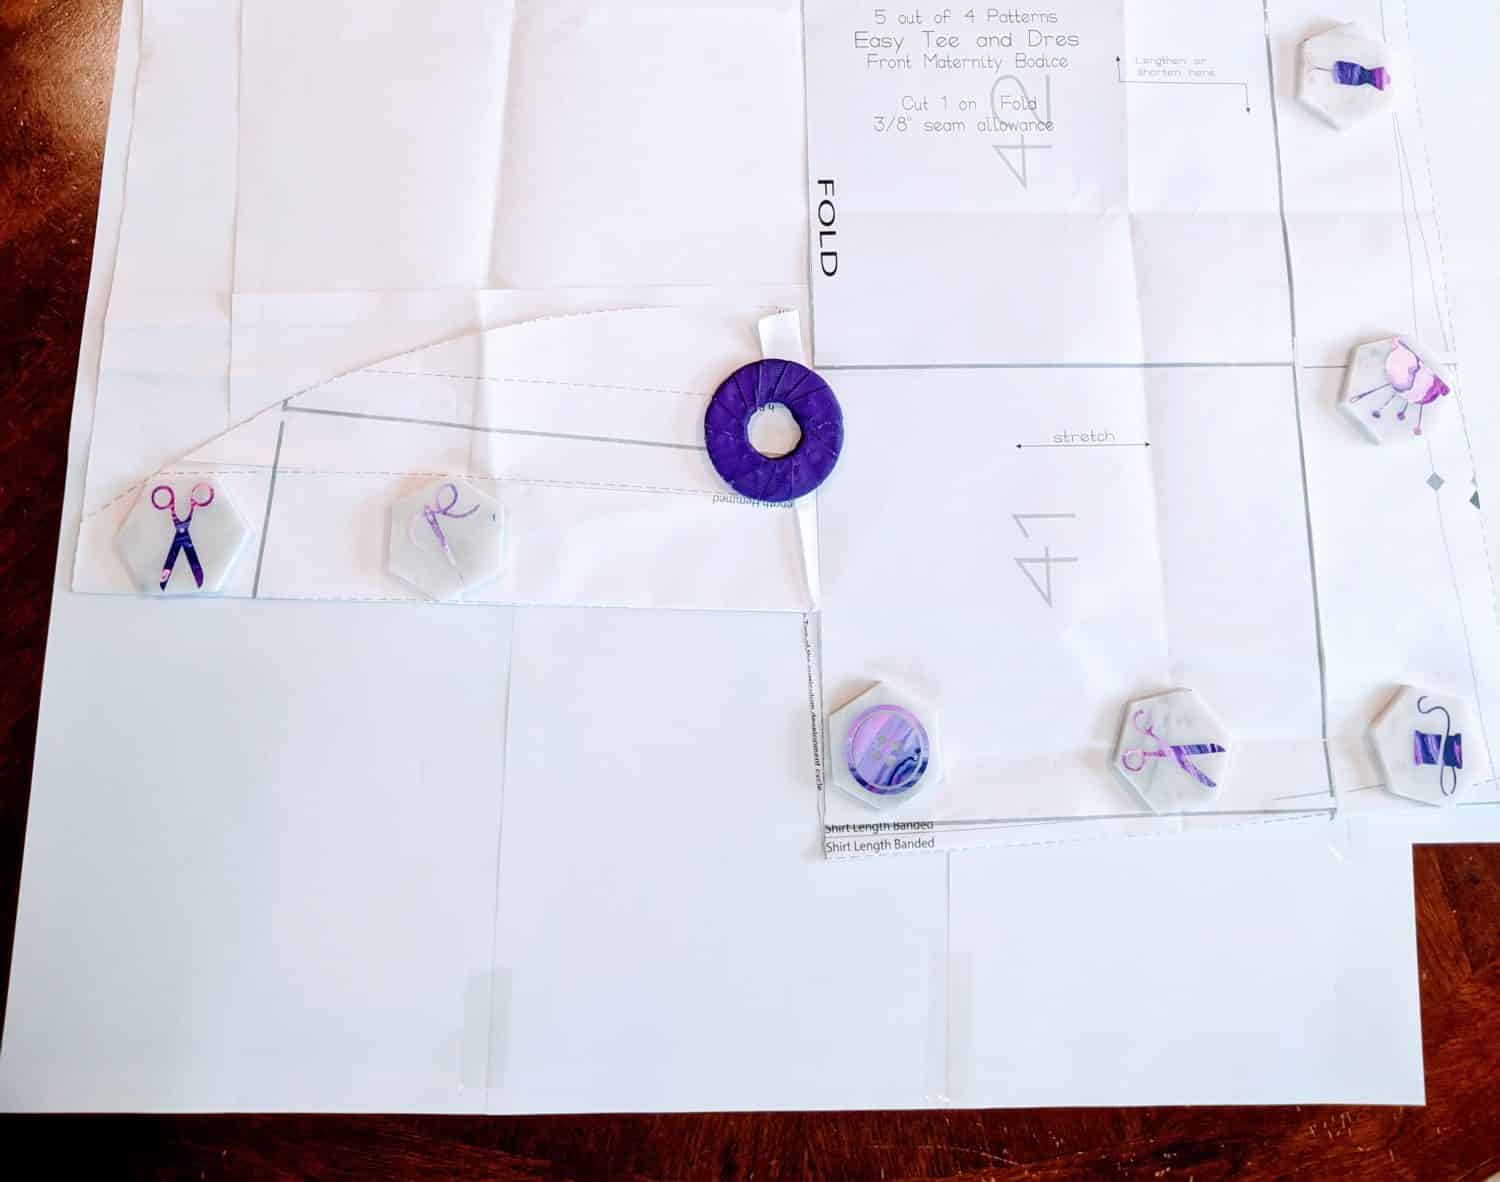
3. Don’t forget to transfer the gathering marks from the maternity side onto your new front bodice piece. We will adjust these later, but it helps to have a starting point. To make the gathers more pronounced, I’m adding 2 inches of length to my maternity side by measuring down 2 inches and making a short line.
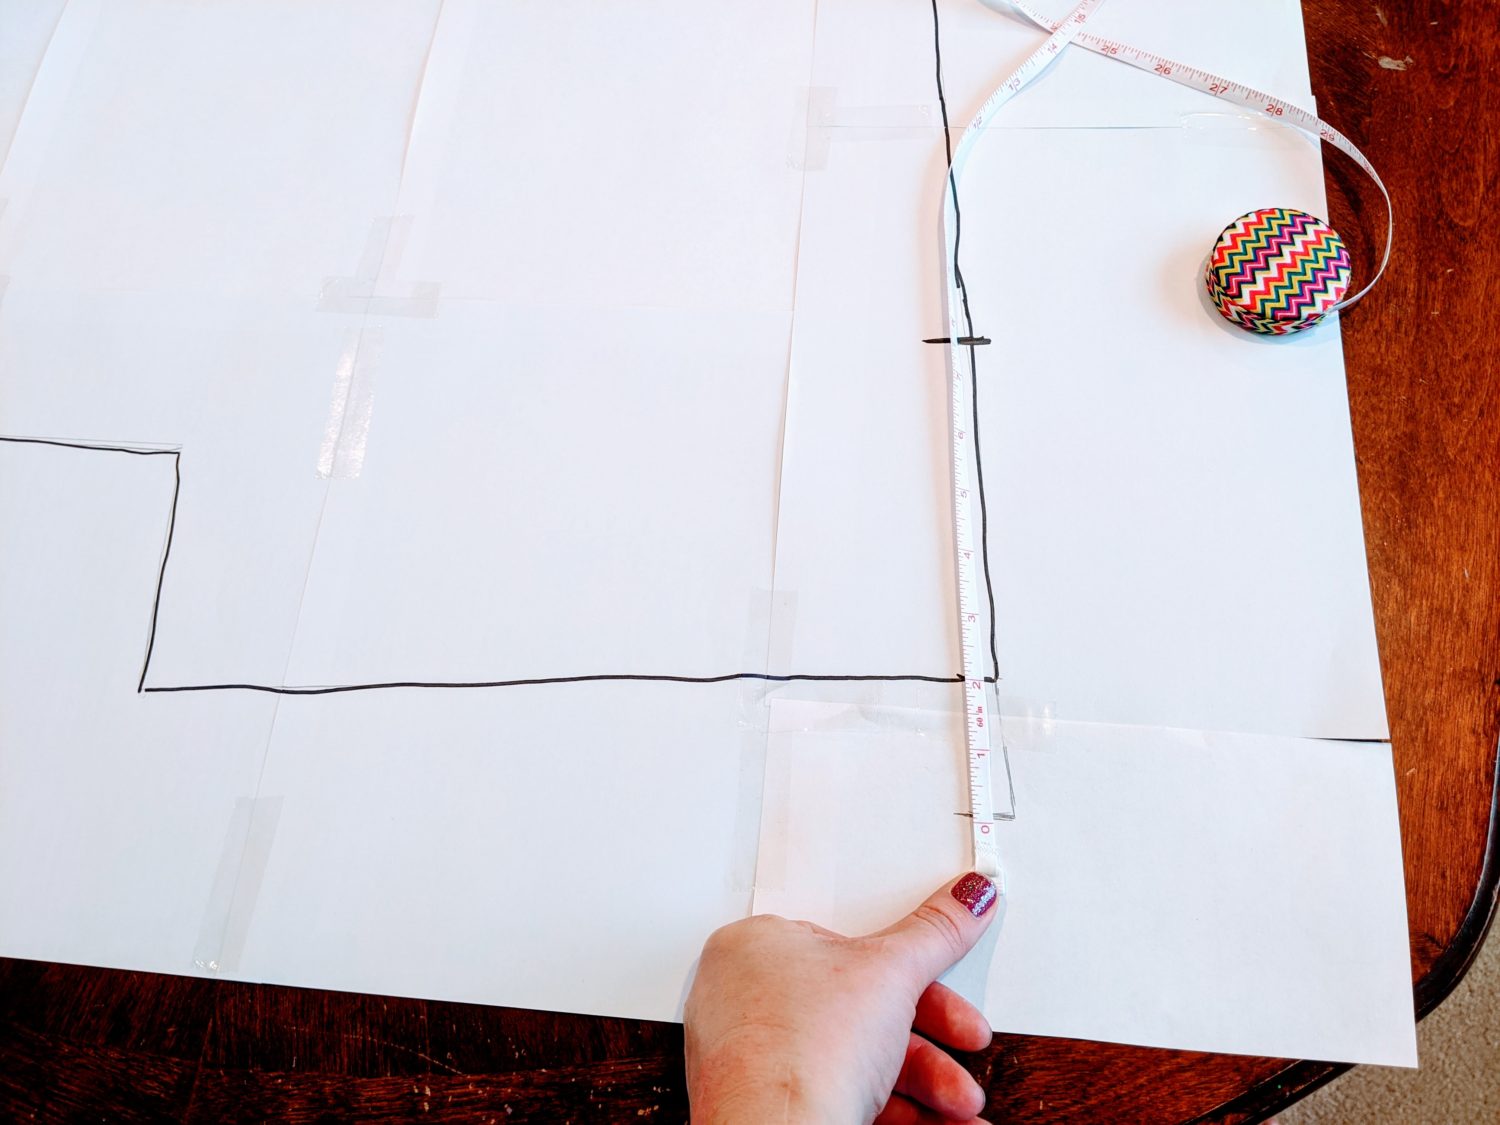
4. Draw a long, smooth line from the lowered point of the maternity side all the way up to meet the side of the regular bodice. Since I added length to the maternity side, I’m going to move down the gathering marks as well. I moved both of them down by 3 inches. You don’t have to adjust at all or you can adjust a different amount depending on your preference of where you want the gathered section to start and end. You will now use this piece as your front bodice piece.
Let’s sew it up!
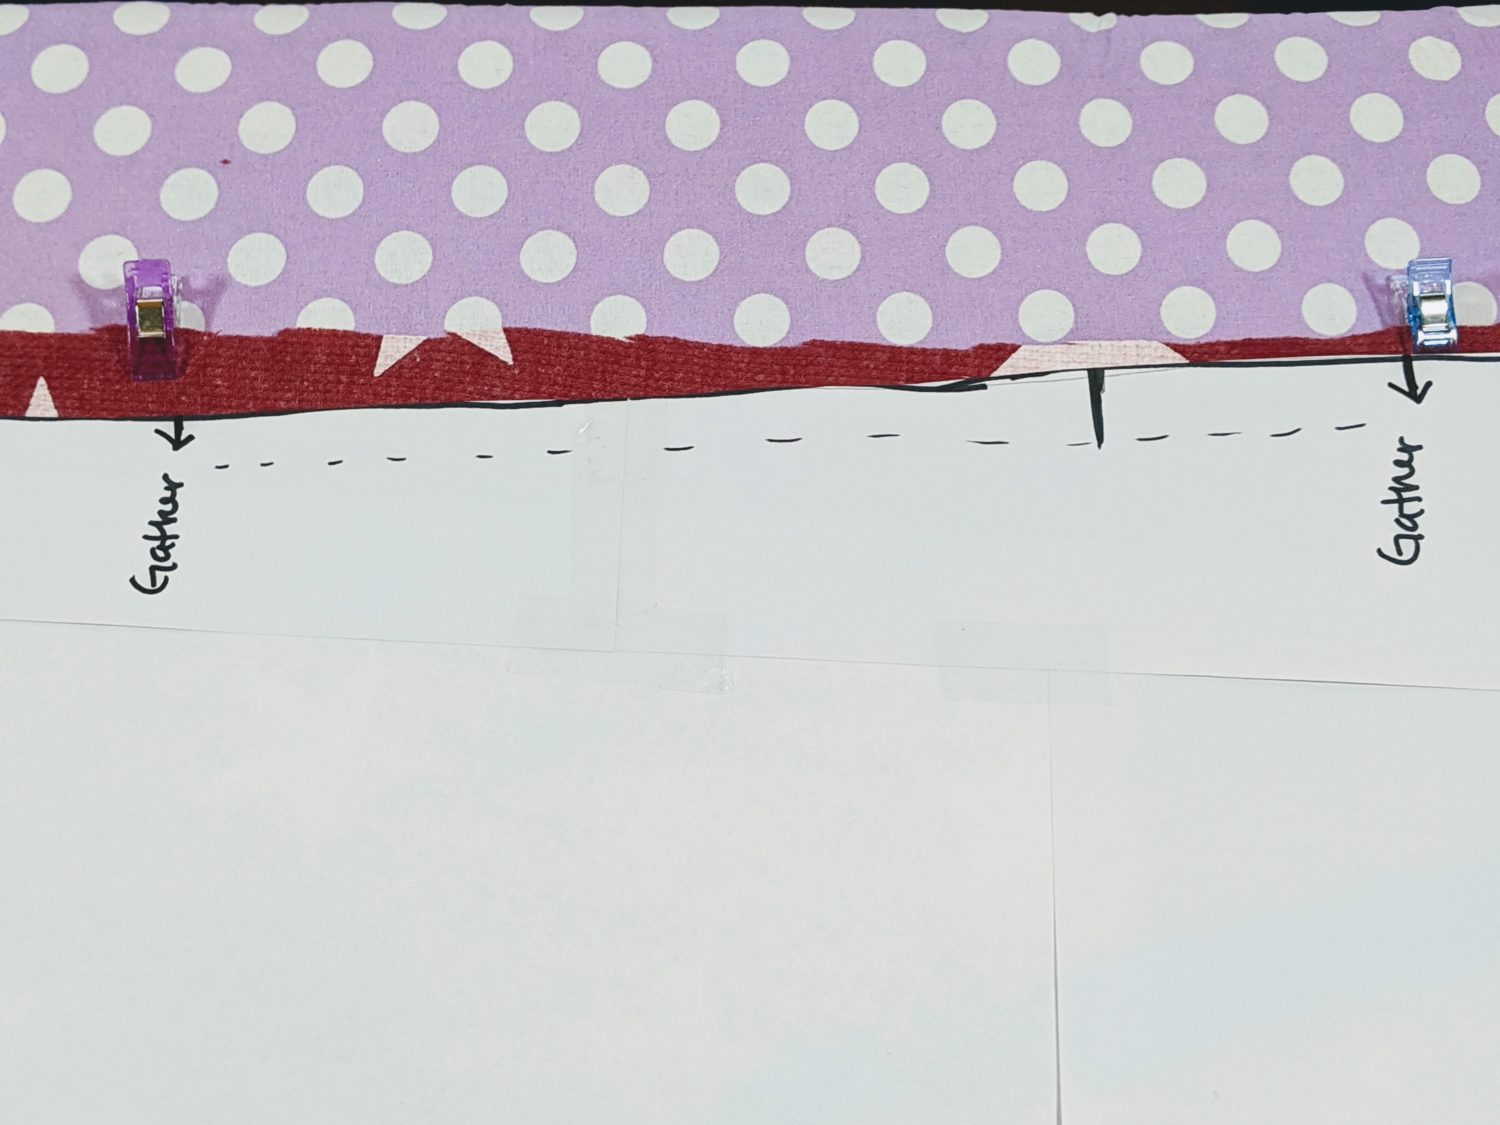
5. Take your front bodice piece. Find the longer (maternity side). Use the pattern piece to mark the points on the outside edge to indicate where you will gather.
6. Using your longest stitch length and loosest tension, run a gathering stitch between those points.
Grab your back bodice piece and line the shoulders up with the front.
7. Sew shoulder seams.
8. Next, line up both the sides of the front and back bodice pieces. On the gathered side you will need to make sure the gathers you made are pulled make it the same length as the back bodice. I use my sewing machine to sew the side with the gathers to make sure it looks just how I want it, then go back over it with my serger.
9. From here, you will continue the construction per the pattern instructions. For one of my shirts I chose to put accent buttons on the gathered side. I put the shirt on, held up a button to decide where I wanted it and hand sewed it on while I was wearing it and did the same with the other two buttons.
You’re Done!
Now go show off your lovely new Easy Tee!


As always, we’re here to help if you need it! Join us HERE and on Facebook, Instagram, Twitter, Youtube, and Pinterest. Be sure to check all our fun extras on the blog. We’re everywhere you are.
Absolutely adorable!!!