
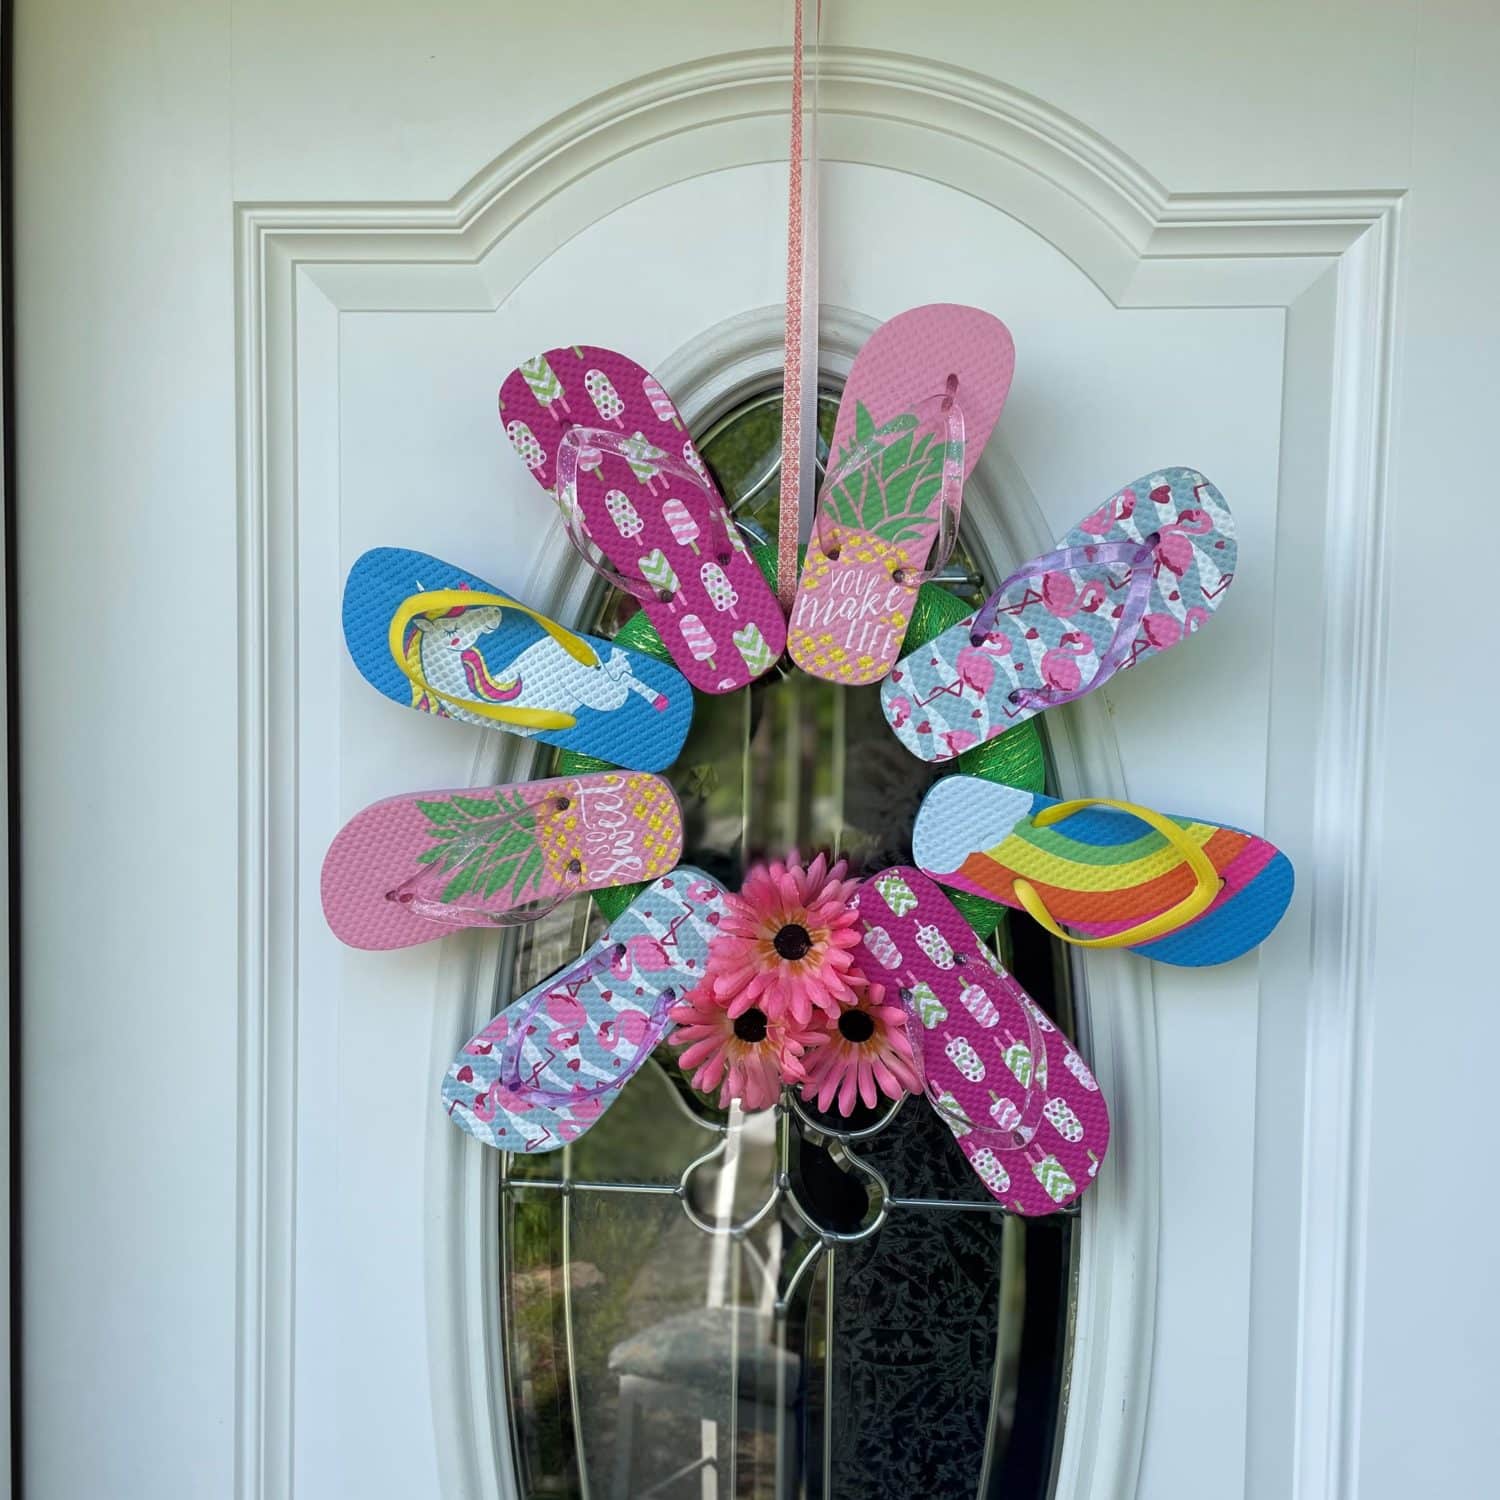
I just love summer time and flip flops! This wreath is super fun and makes me smile! The flip flop wreath is an easy and quick project, but I really love the results! I got all of my materials to make it at the dollar store, so its super affordable, too! You could even make a bigger or smaller flip flop wreath, depending on what size flip flops you get! Do you want to make one?? Of course you do! It’s adorable! Let’s get started!!
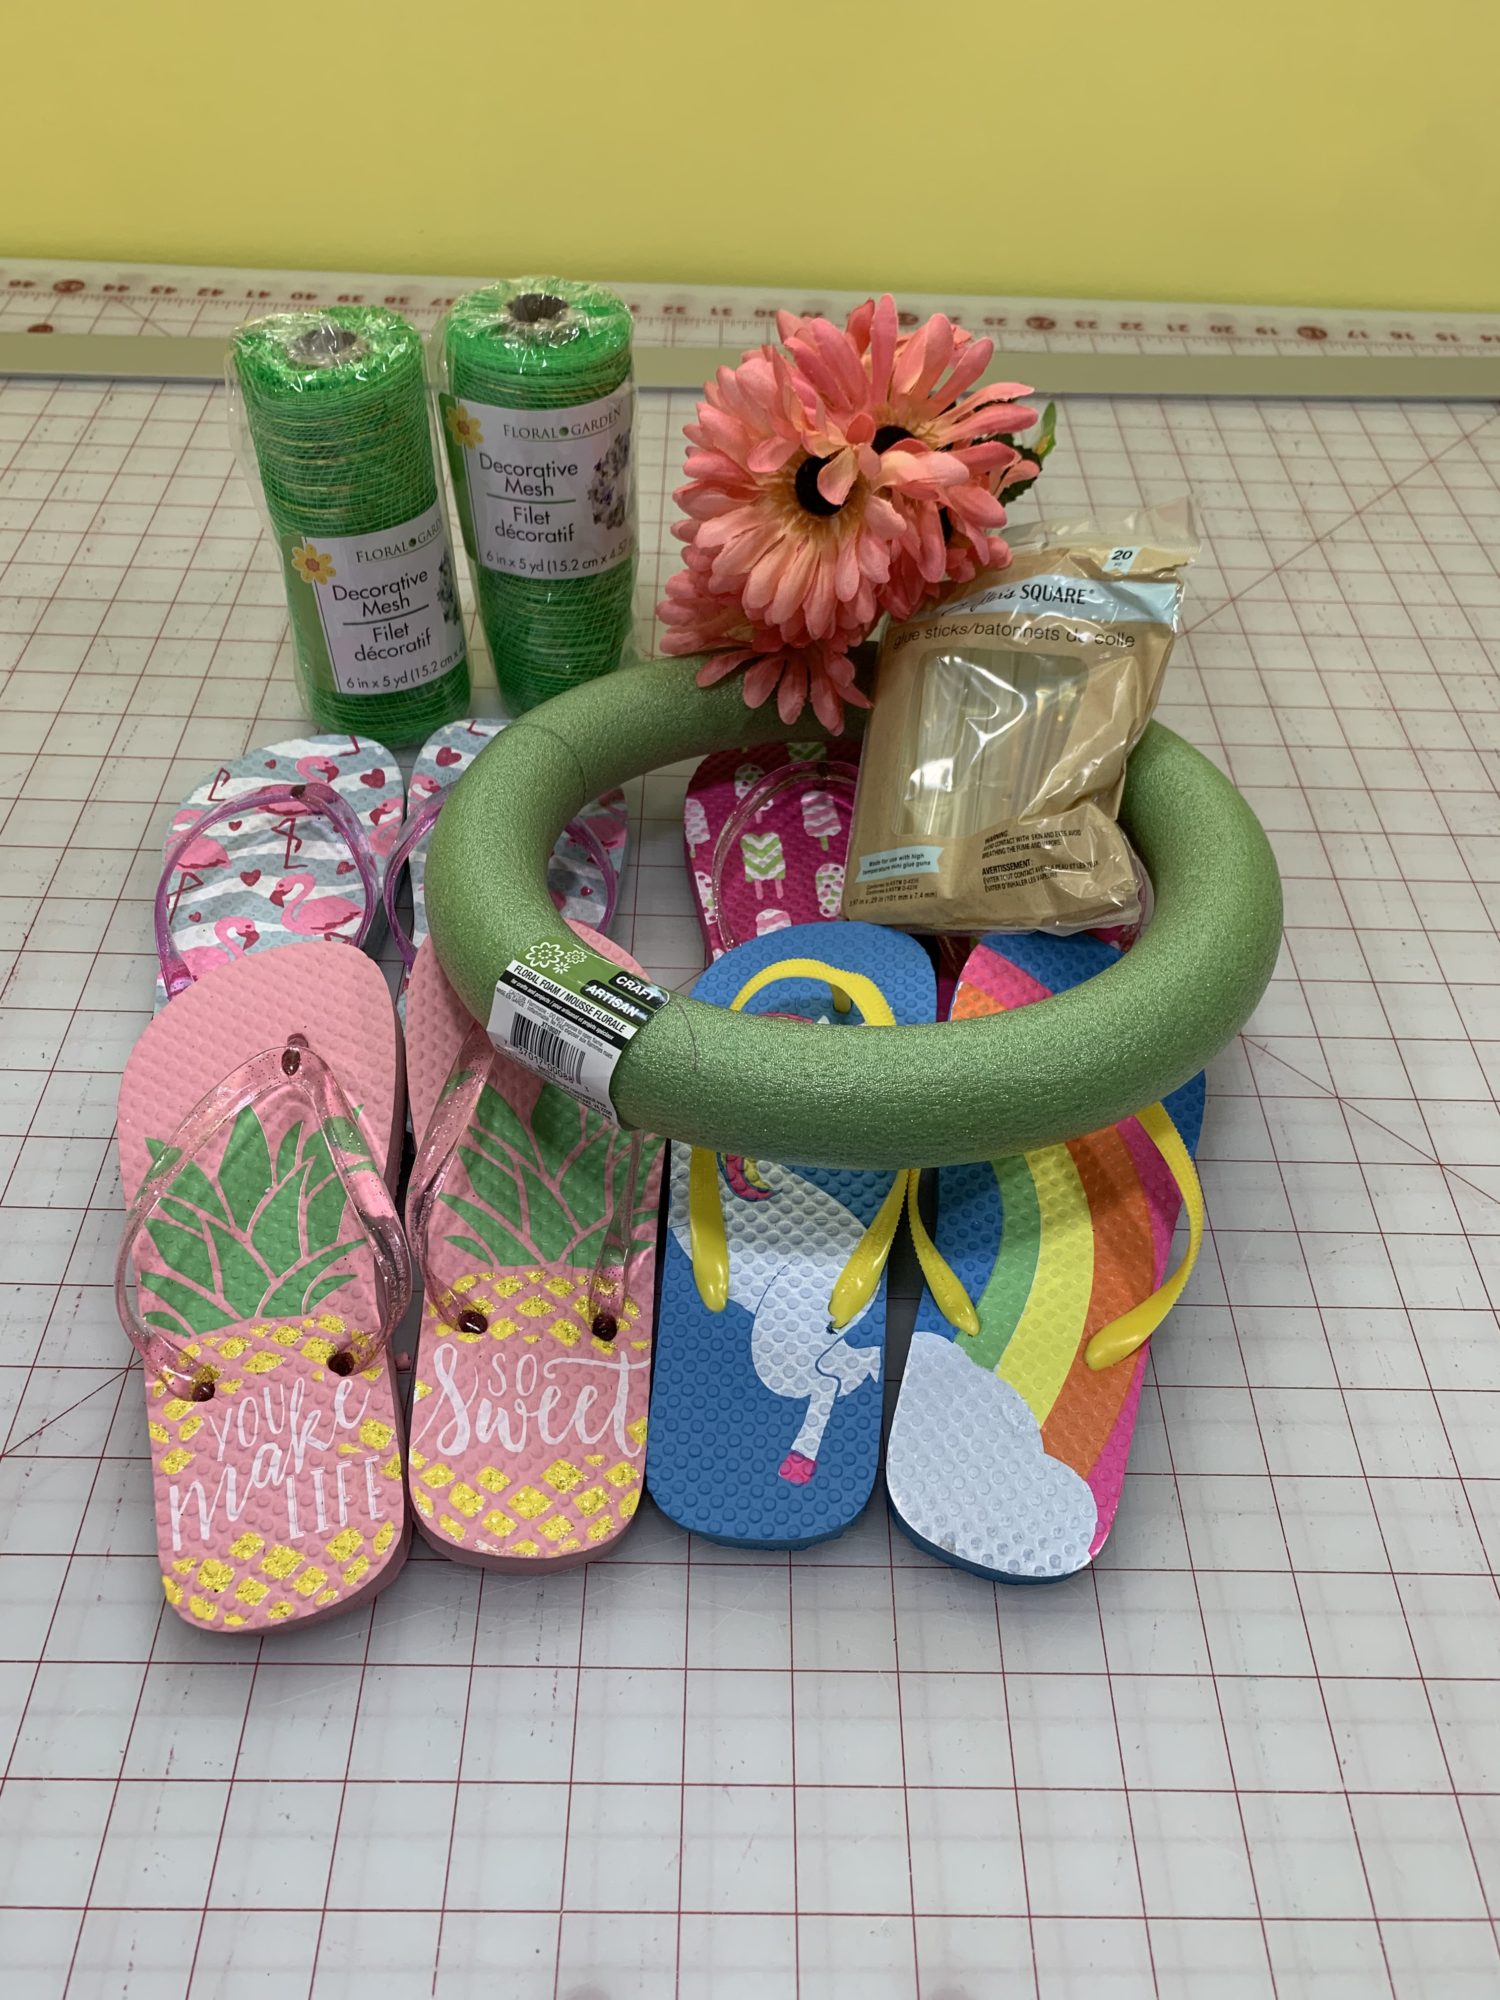
Materials
- A wreath form
- Mine is a 9 inch wreath form
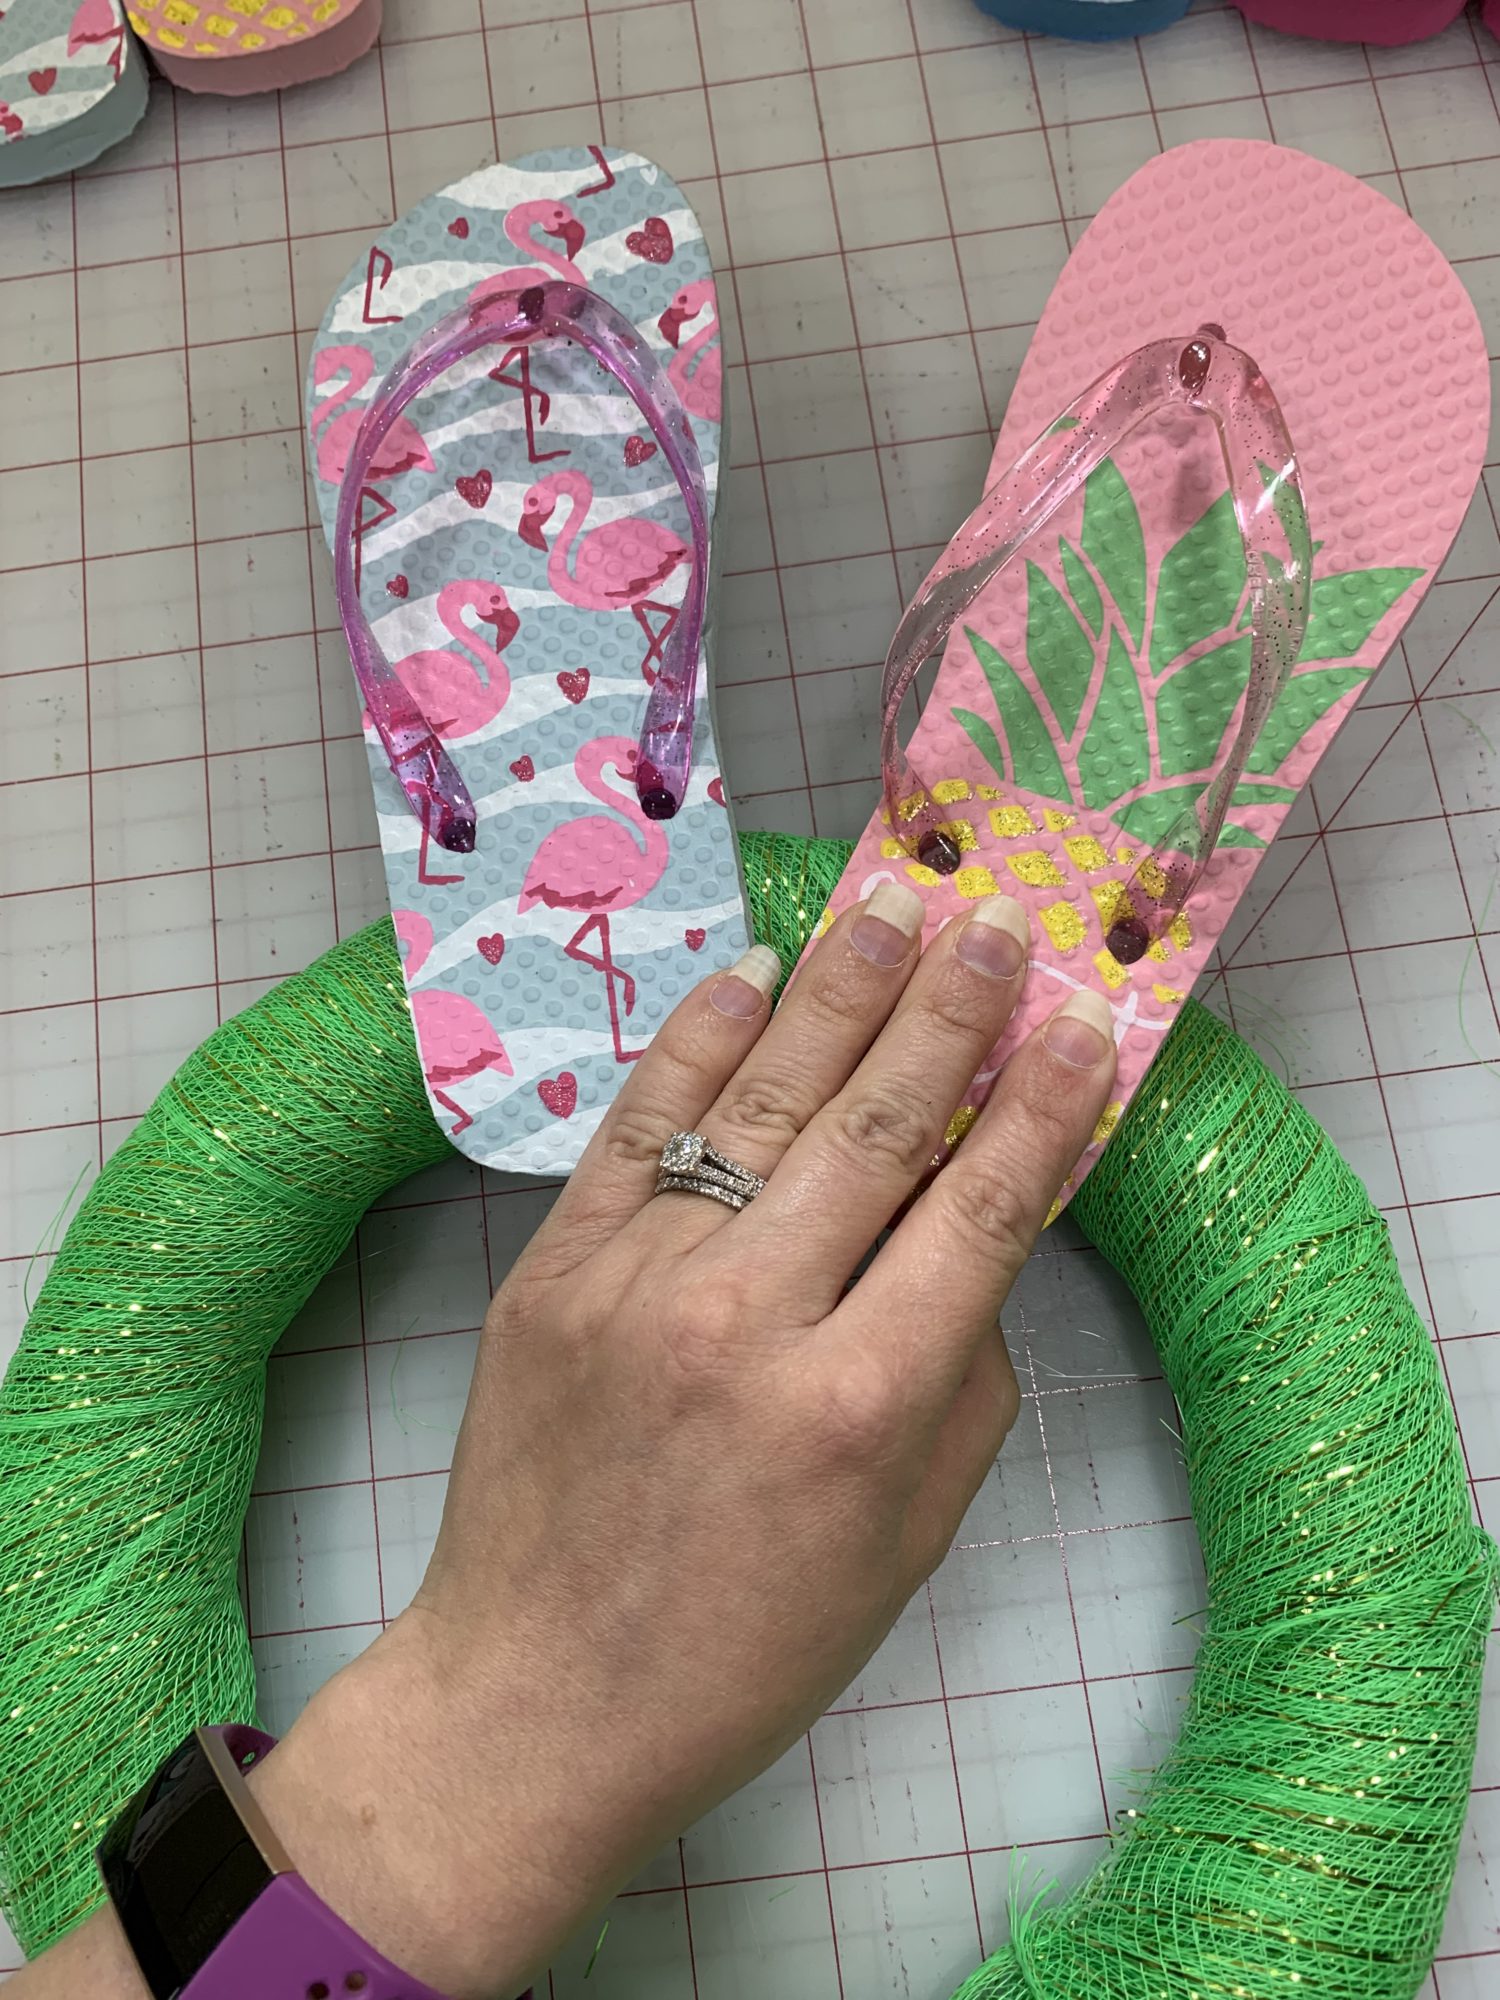
- Flip Flops
- Since my wreath form is a bit small, I used child sized flip flops. They are size small and I used 4 pairs.
- Floral mesh, ribbon, or other material to cover your wreath form
- Flowers or other fun decorations to embellish your wreath
- Ribbon to hang the flip flop wreath
- Hot glue gun and extra glue sticks
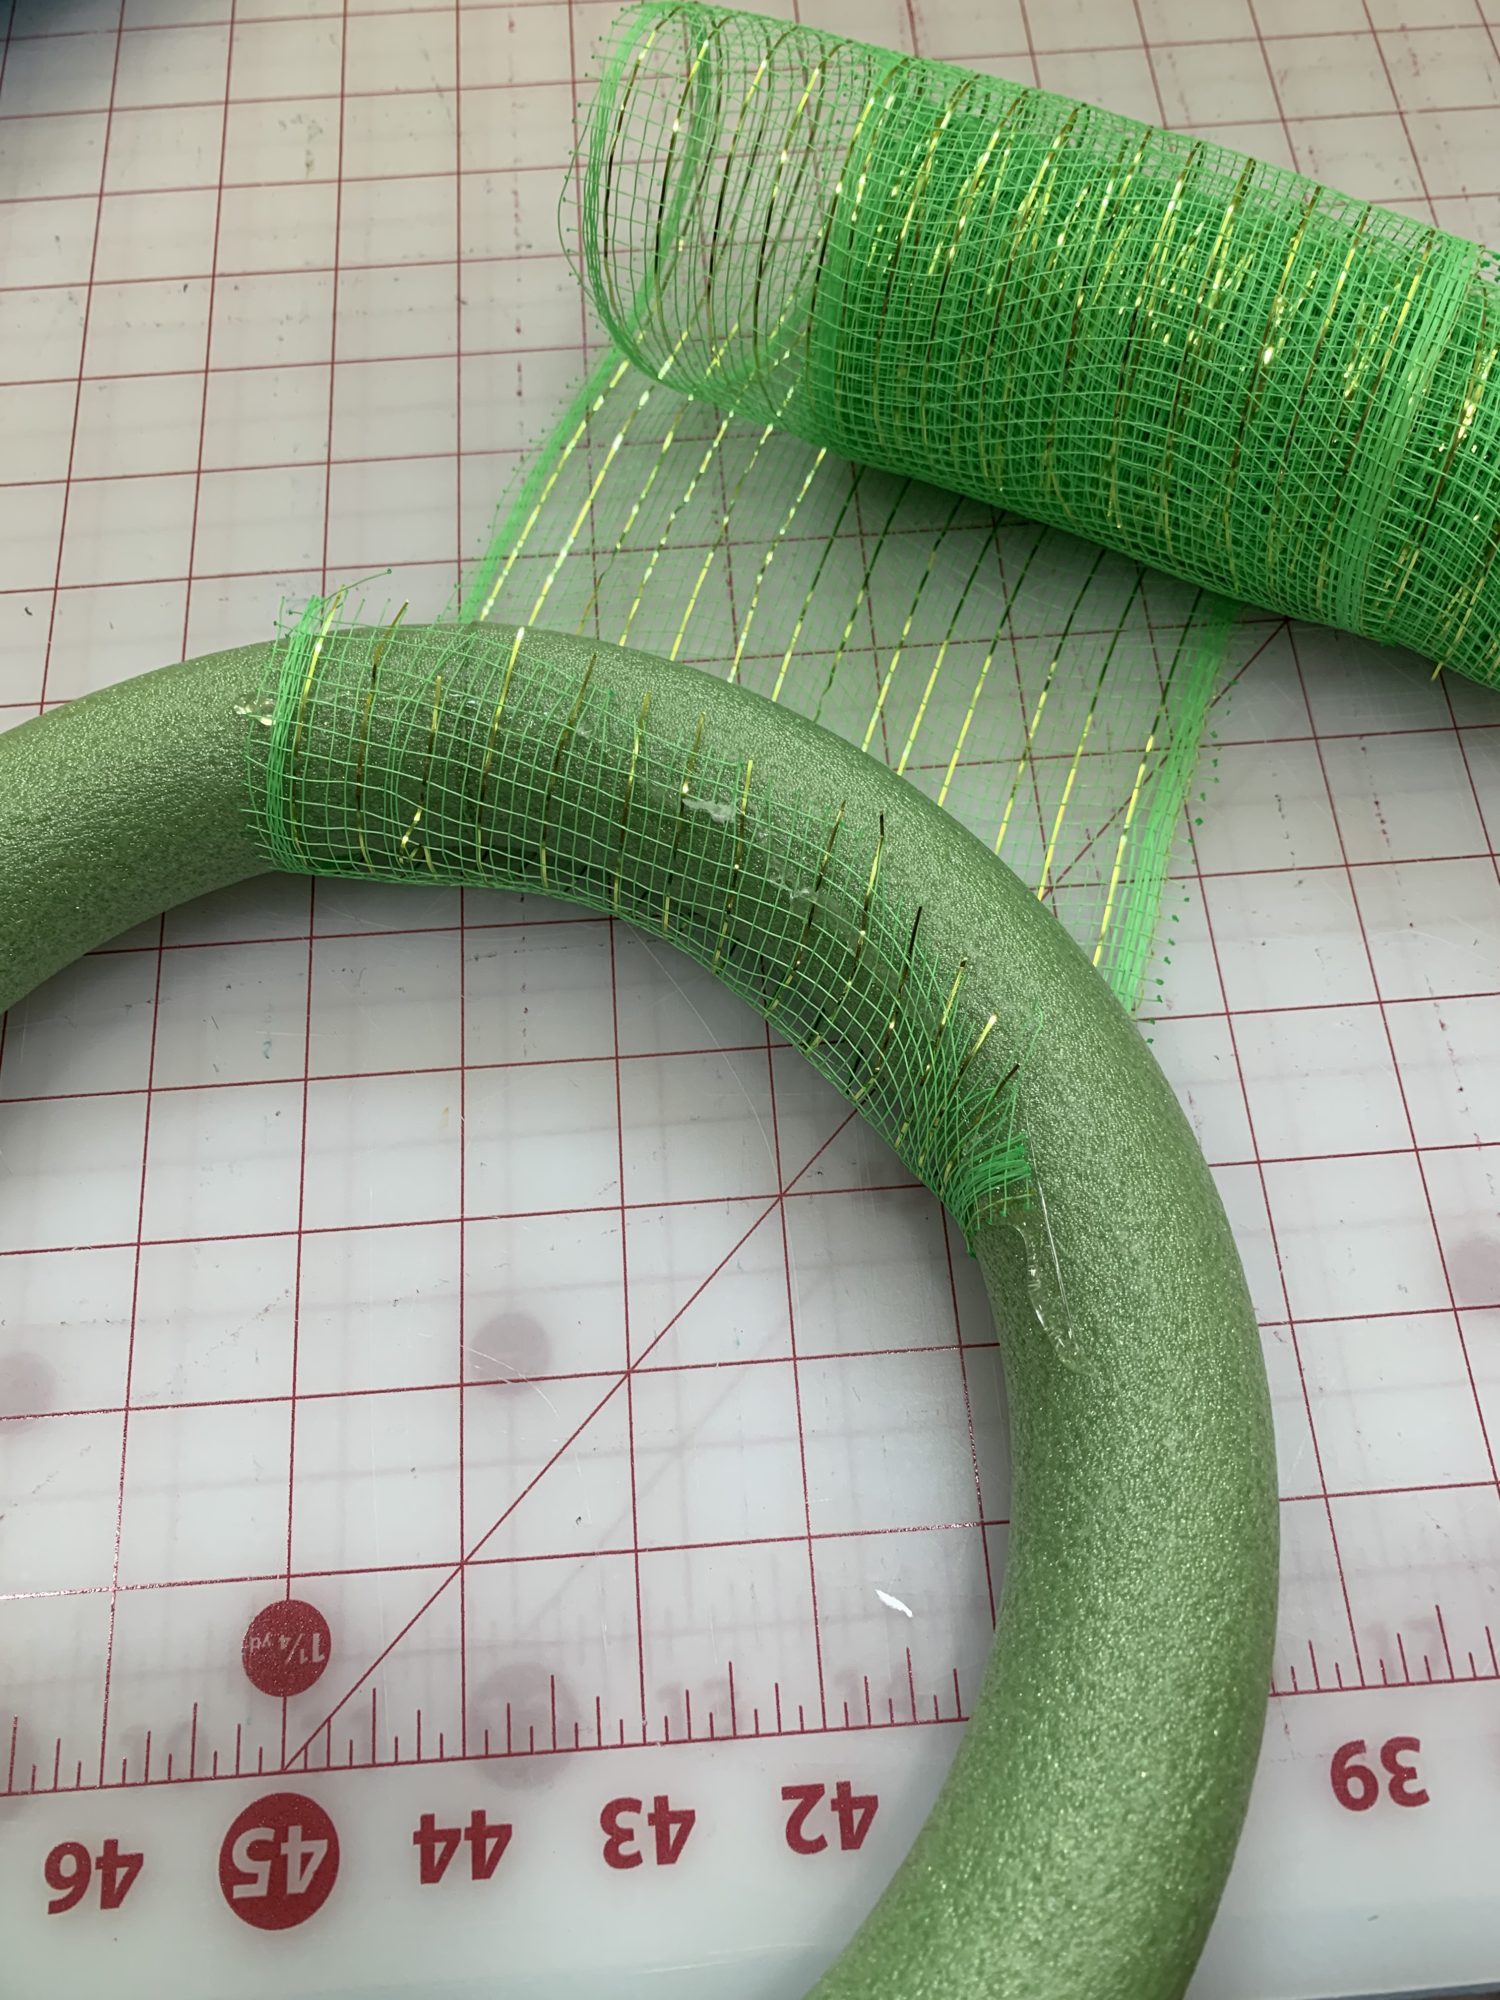
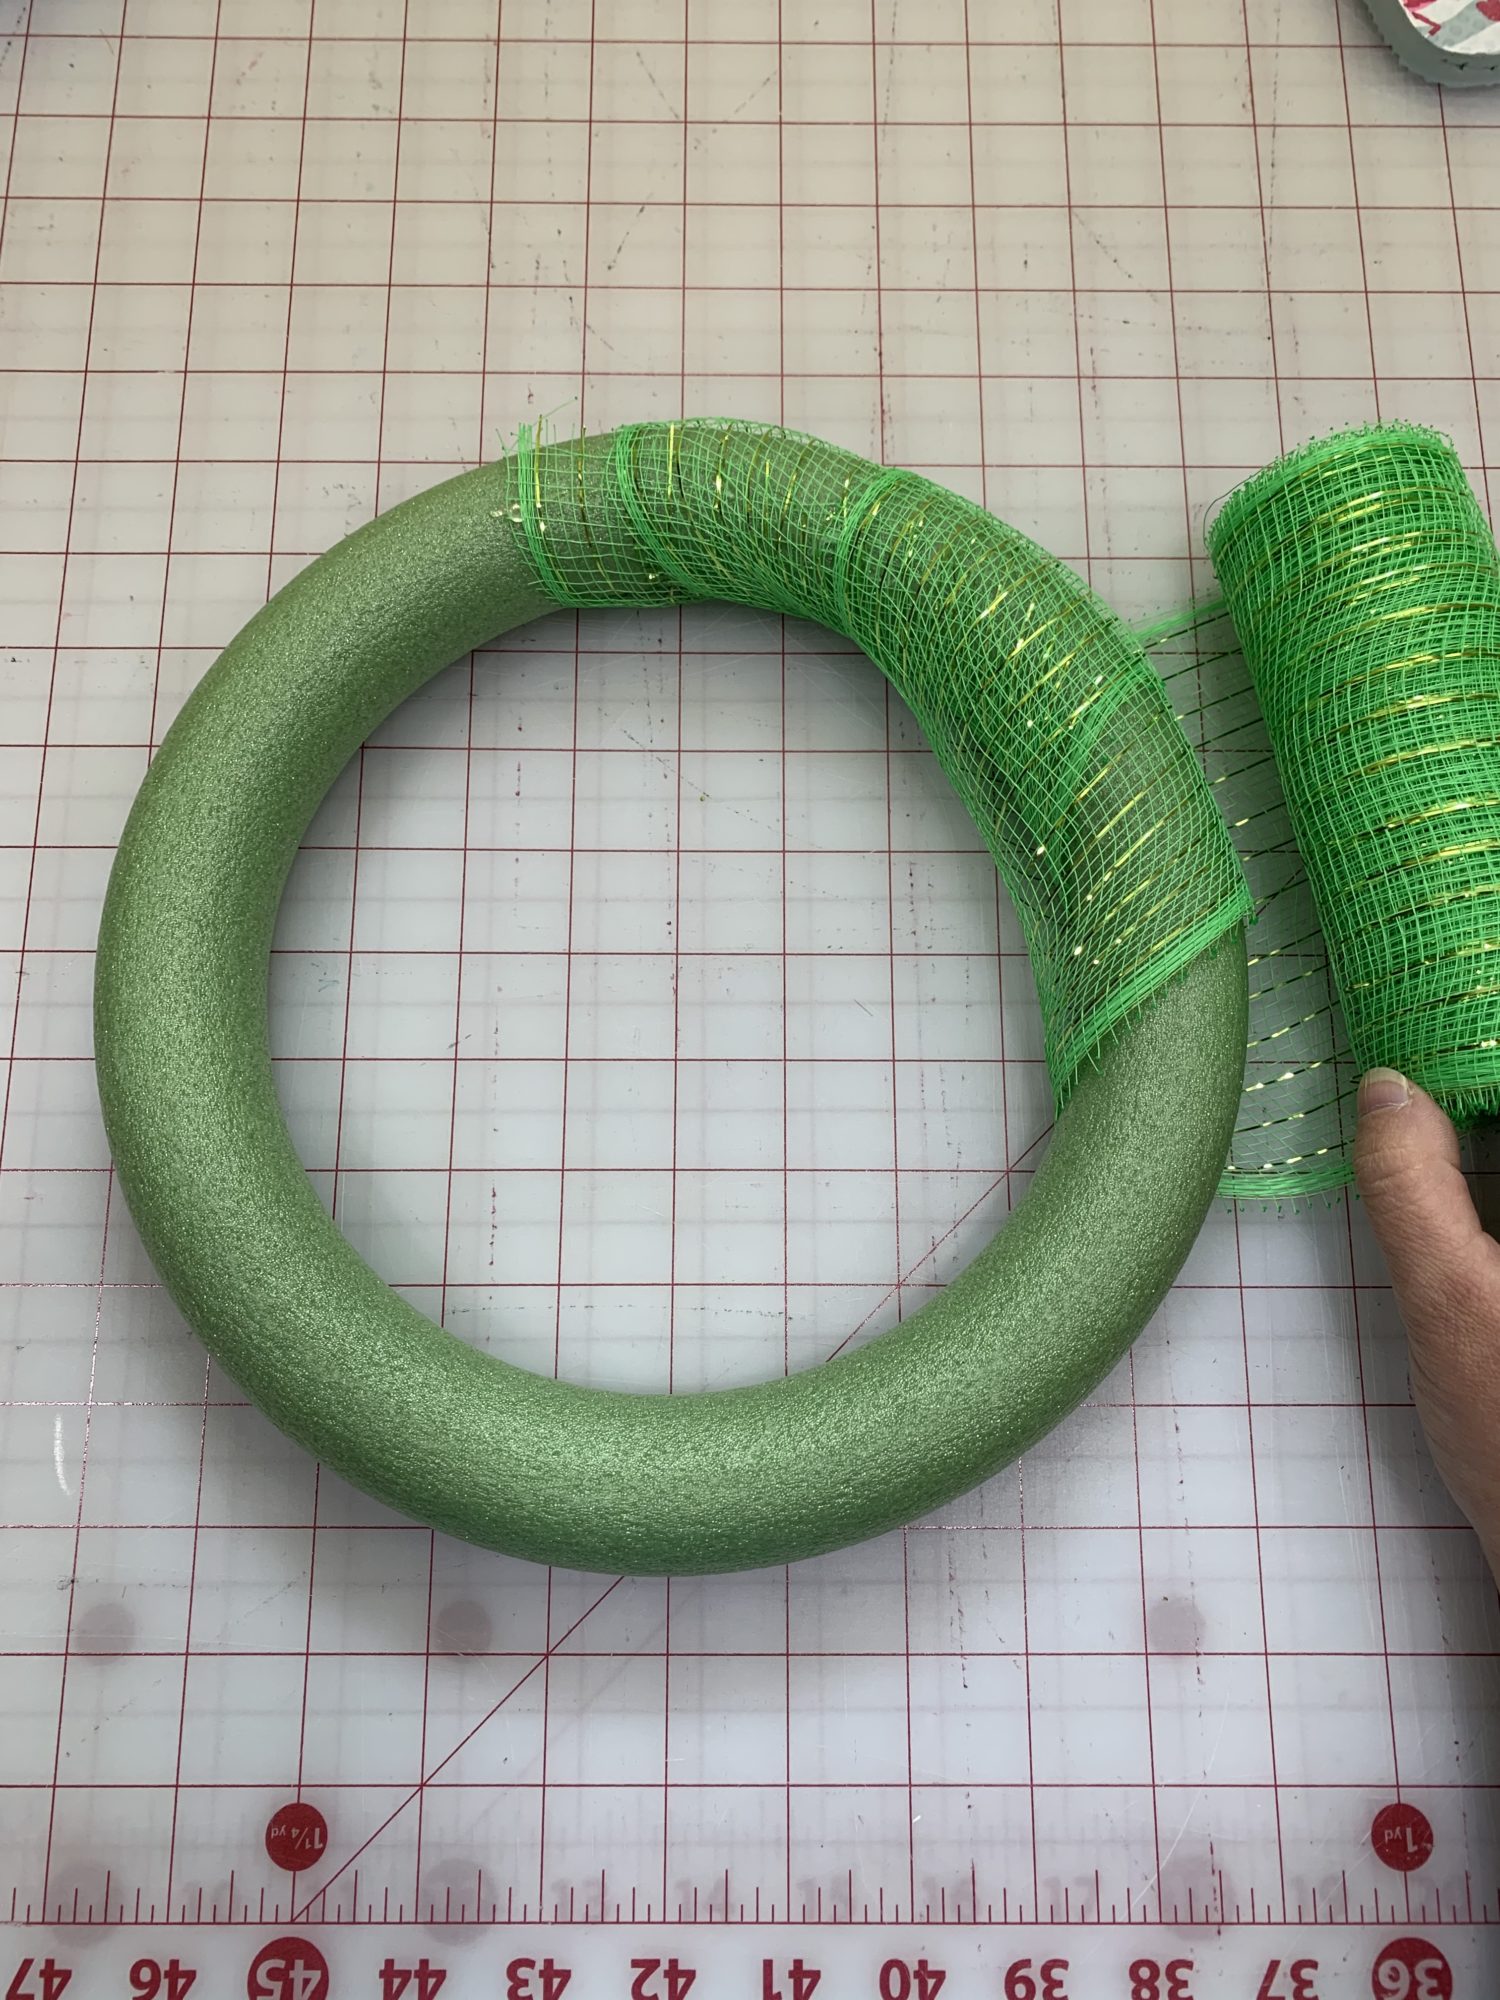
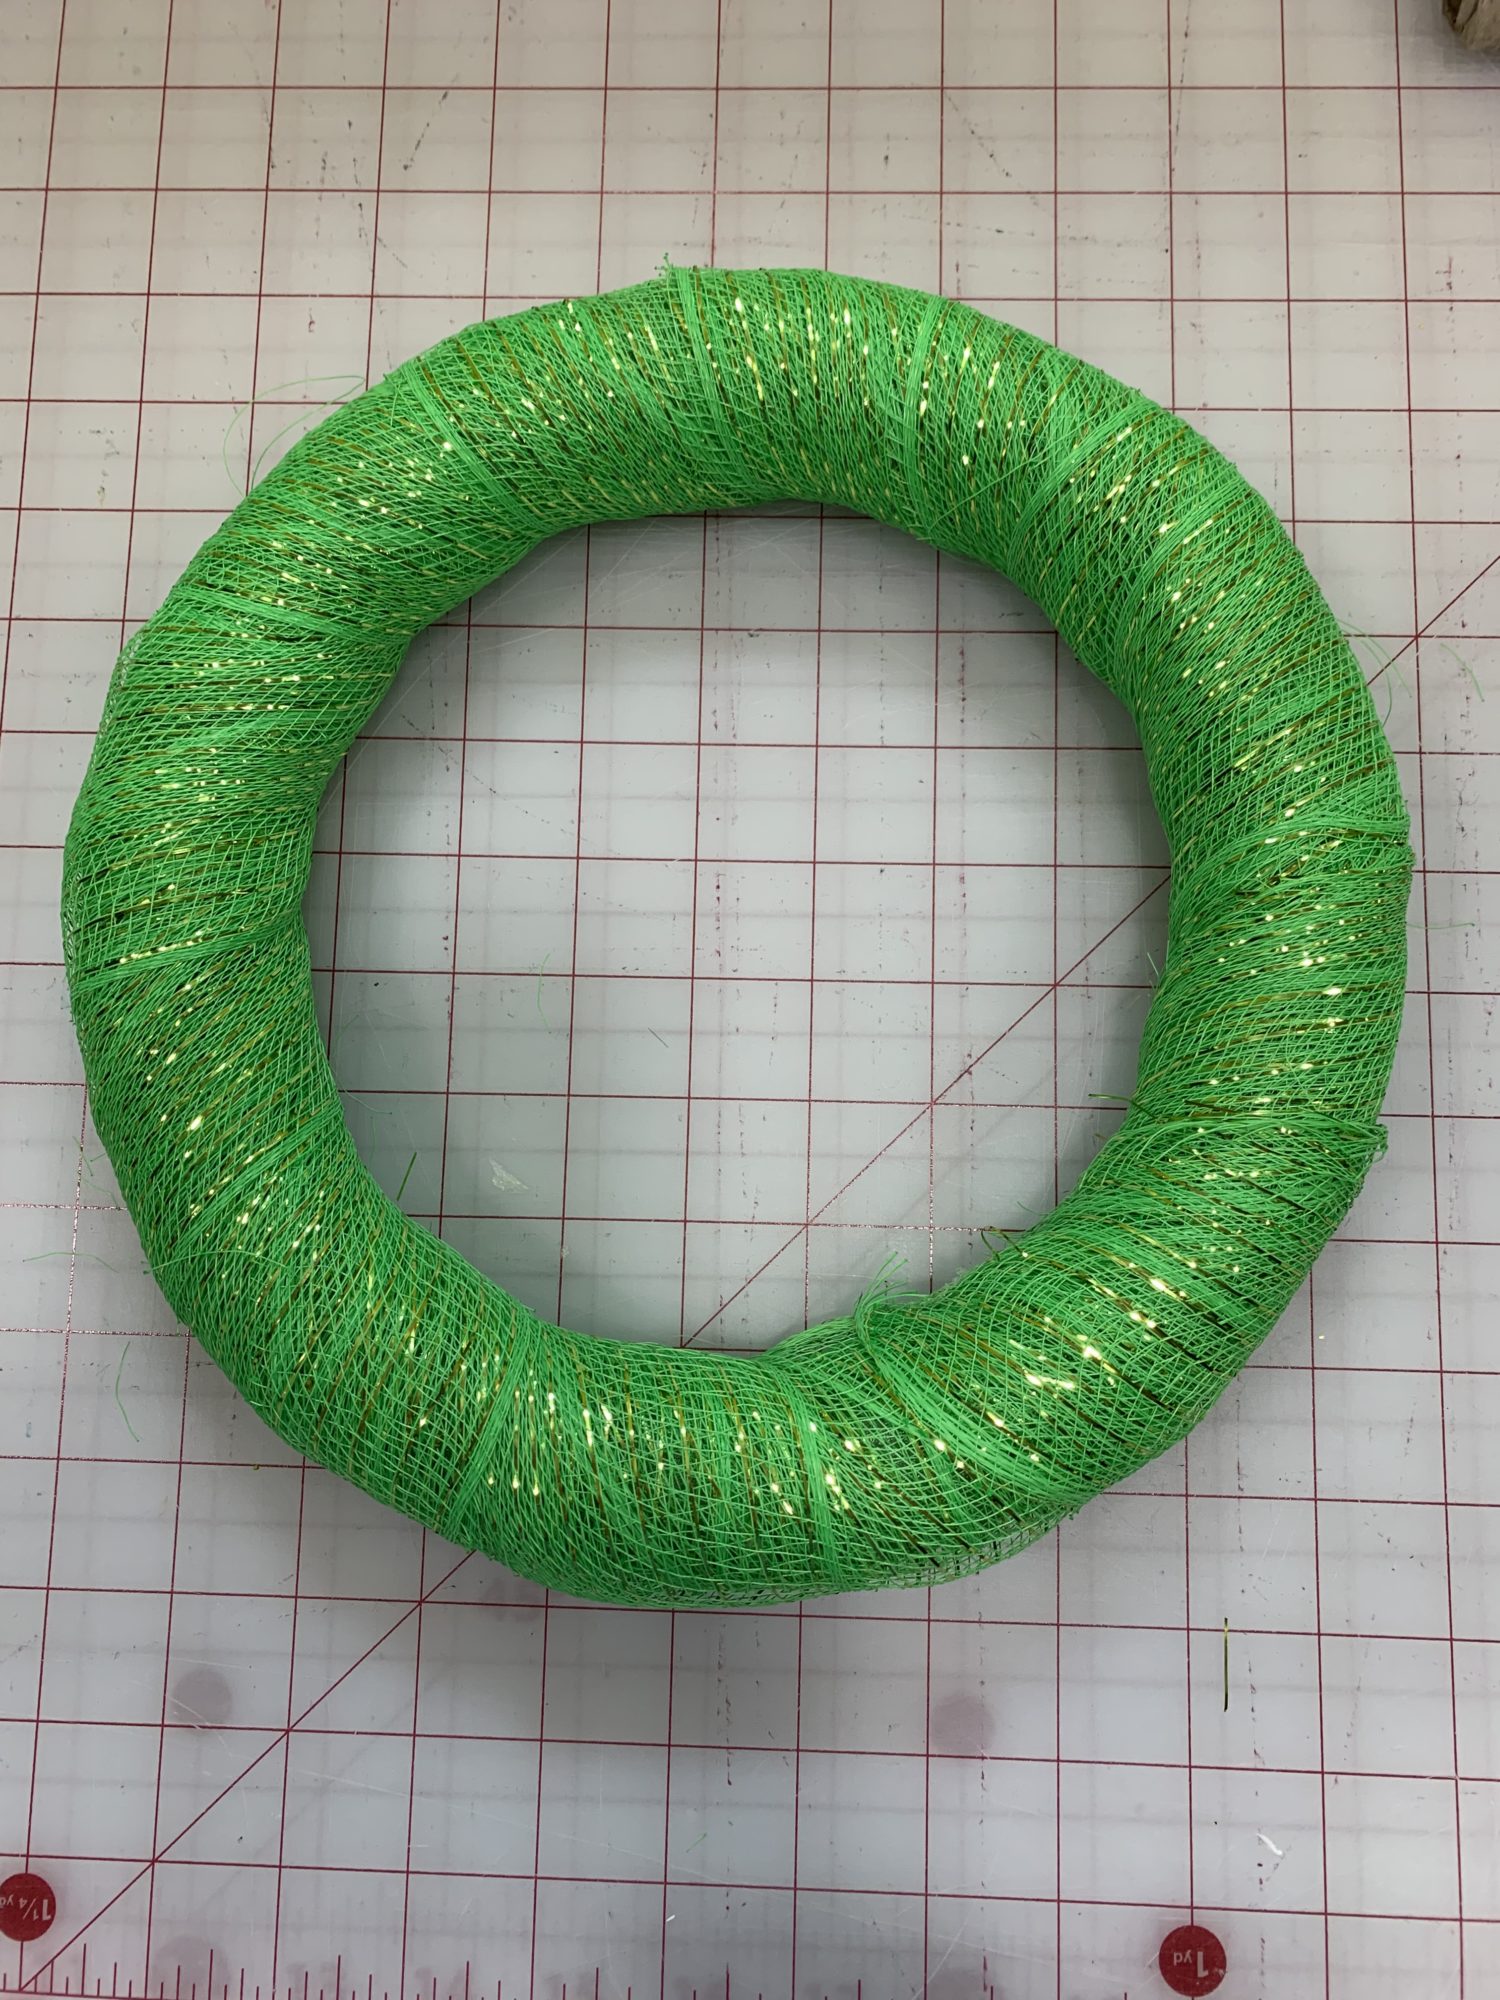
Prepare the wreath form
- Use the floral mesh, or whatever you chose, to cover the wreath form. This is just to make the form pretty so that the parts that stick out aren’t noticeable.
- I used 1 roll of a decorative floral mesh to cover my form. It has some sparkle to it, so it’s really pretty.
- Put some hot glue on the edge of the material and stick it on the wreath form, be sure that it is stuck to the back of the wreath.
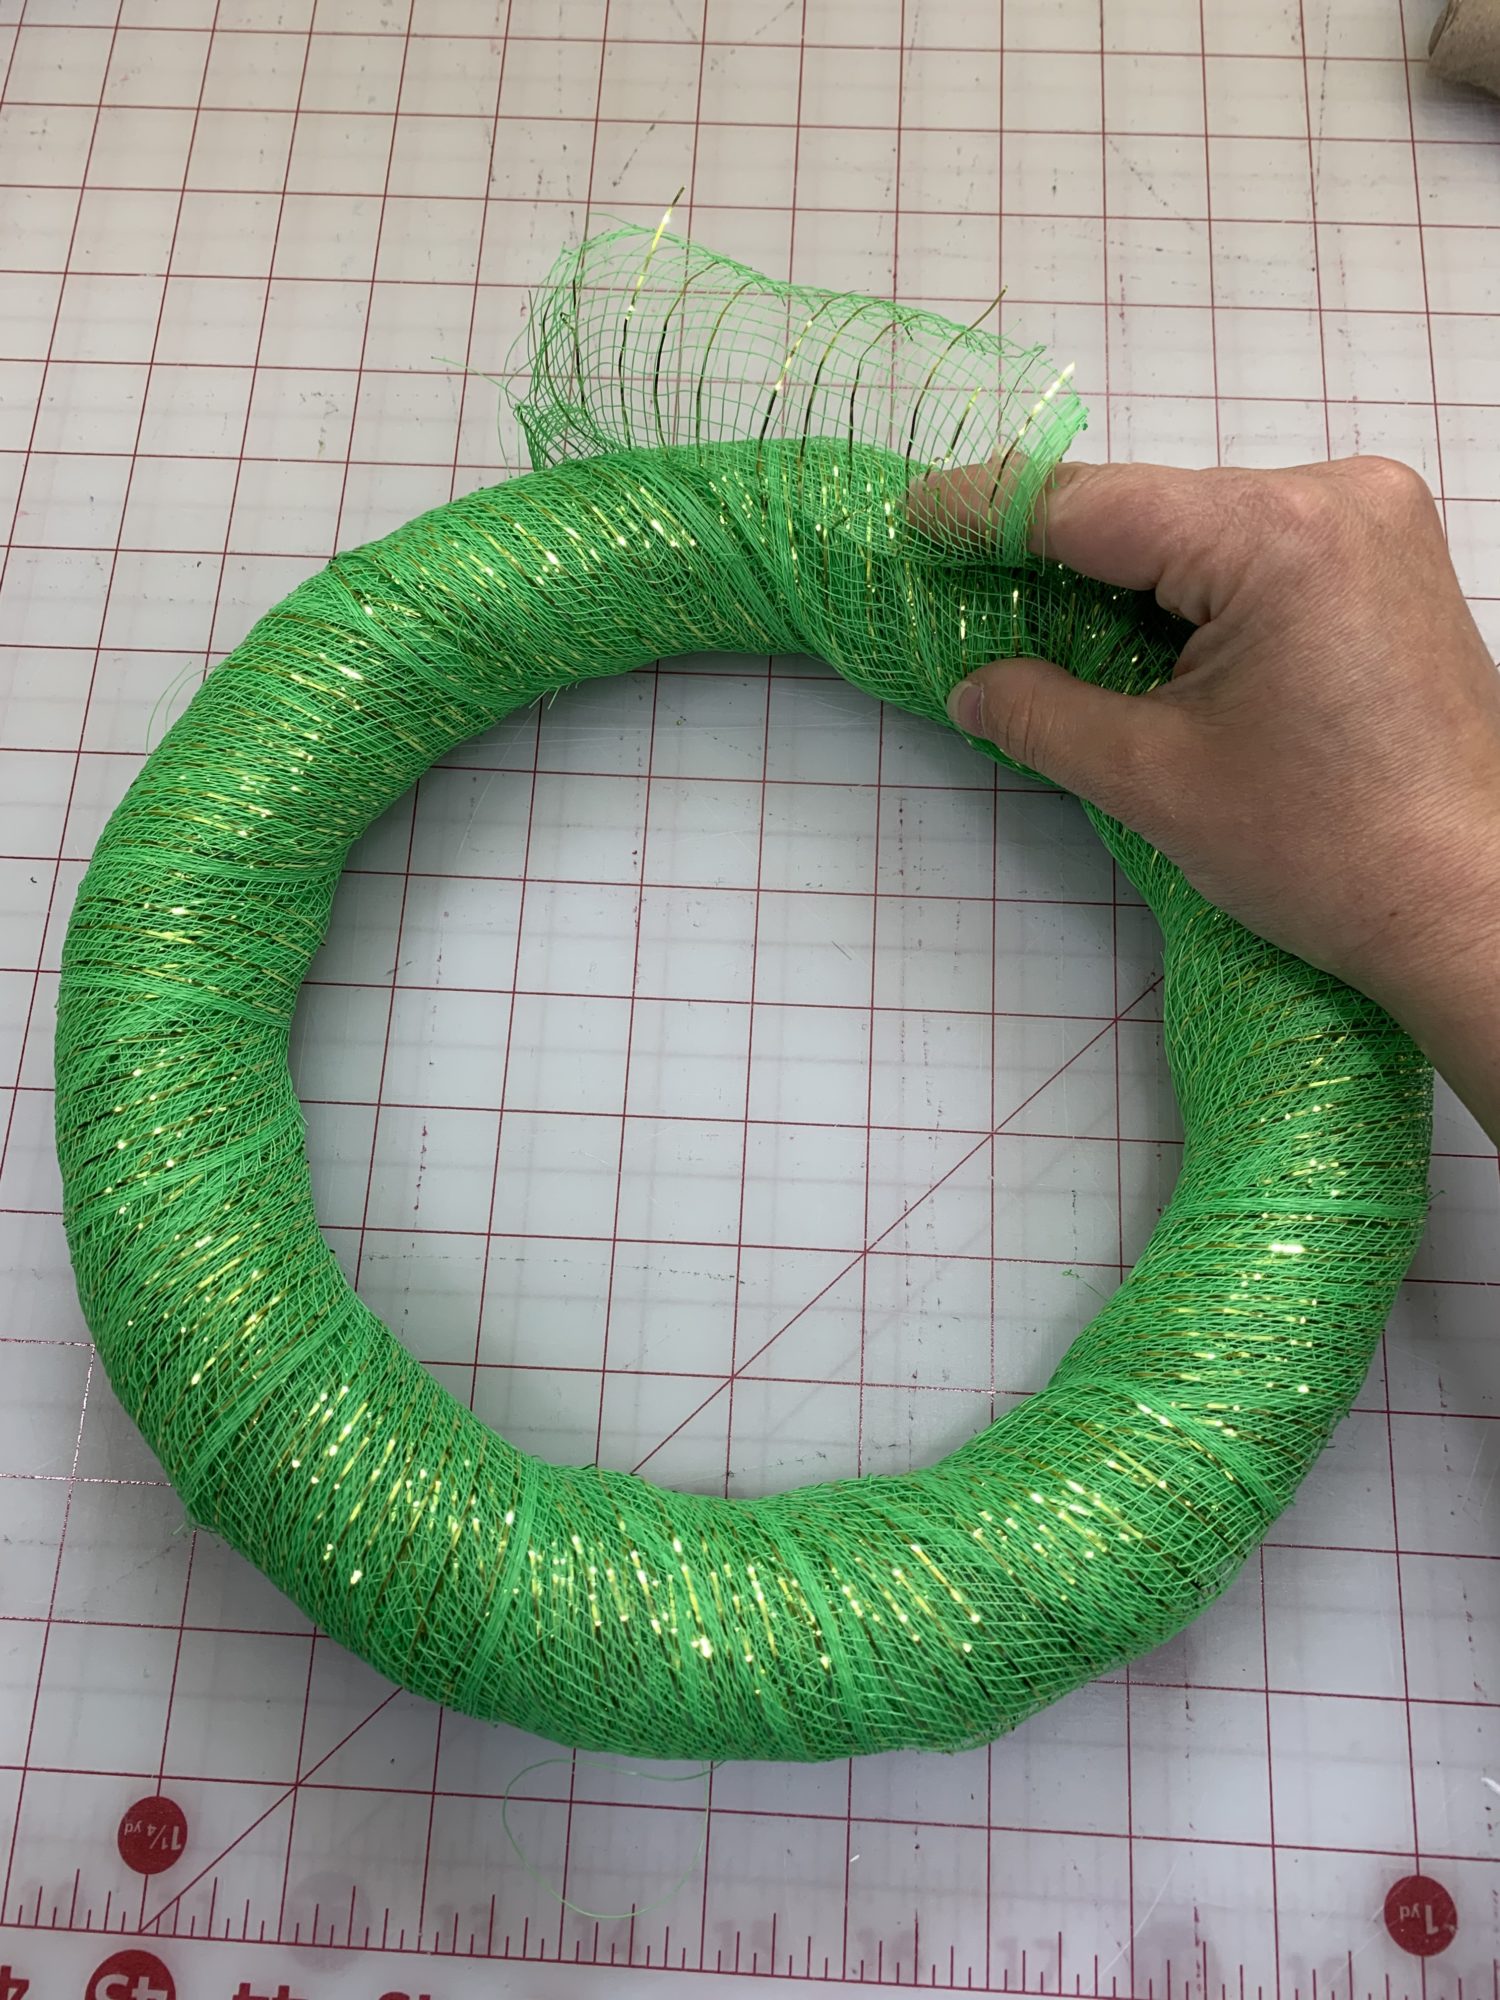
- Wrap the roll around and around the wreath form. Keep it taut while wrapping.
- I went around a few times until I ran out of mesh.
- When you get to the end, hot glue the edge and stick it down on the wreath (again, on the back!)
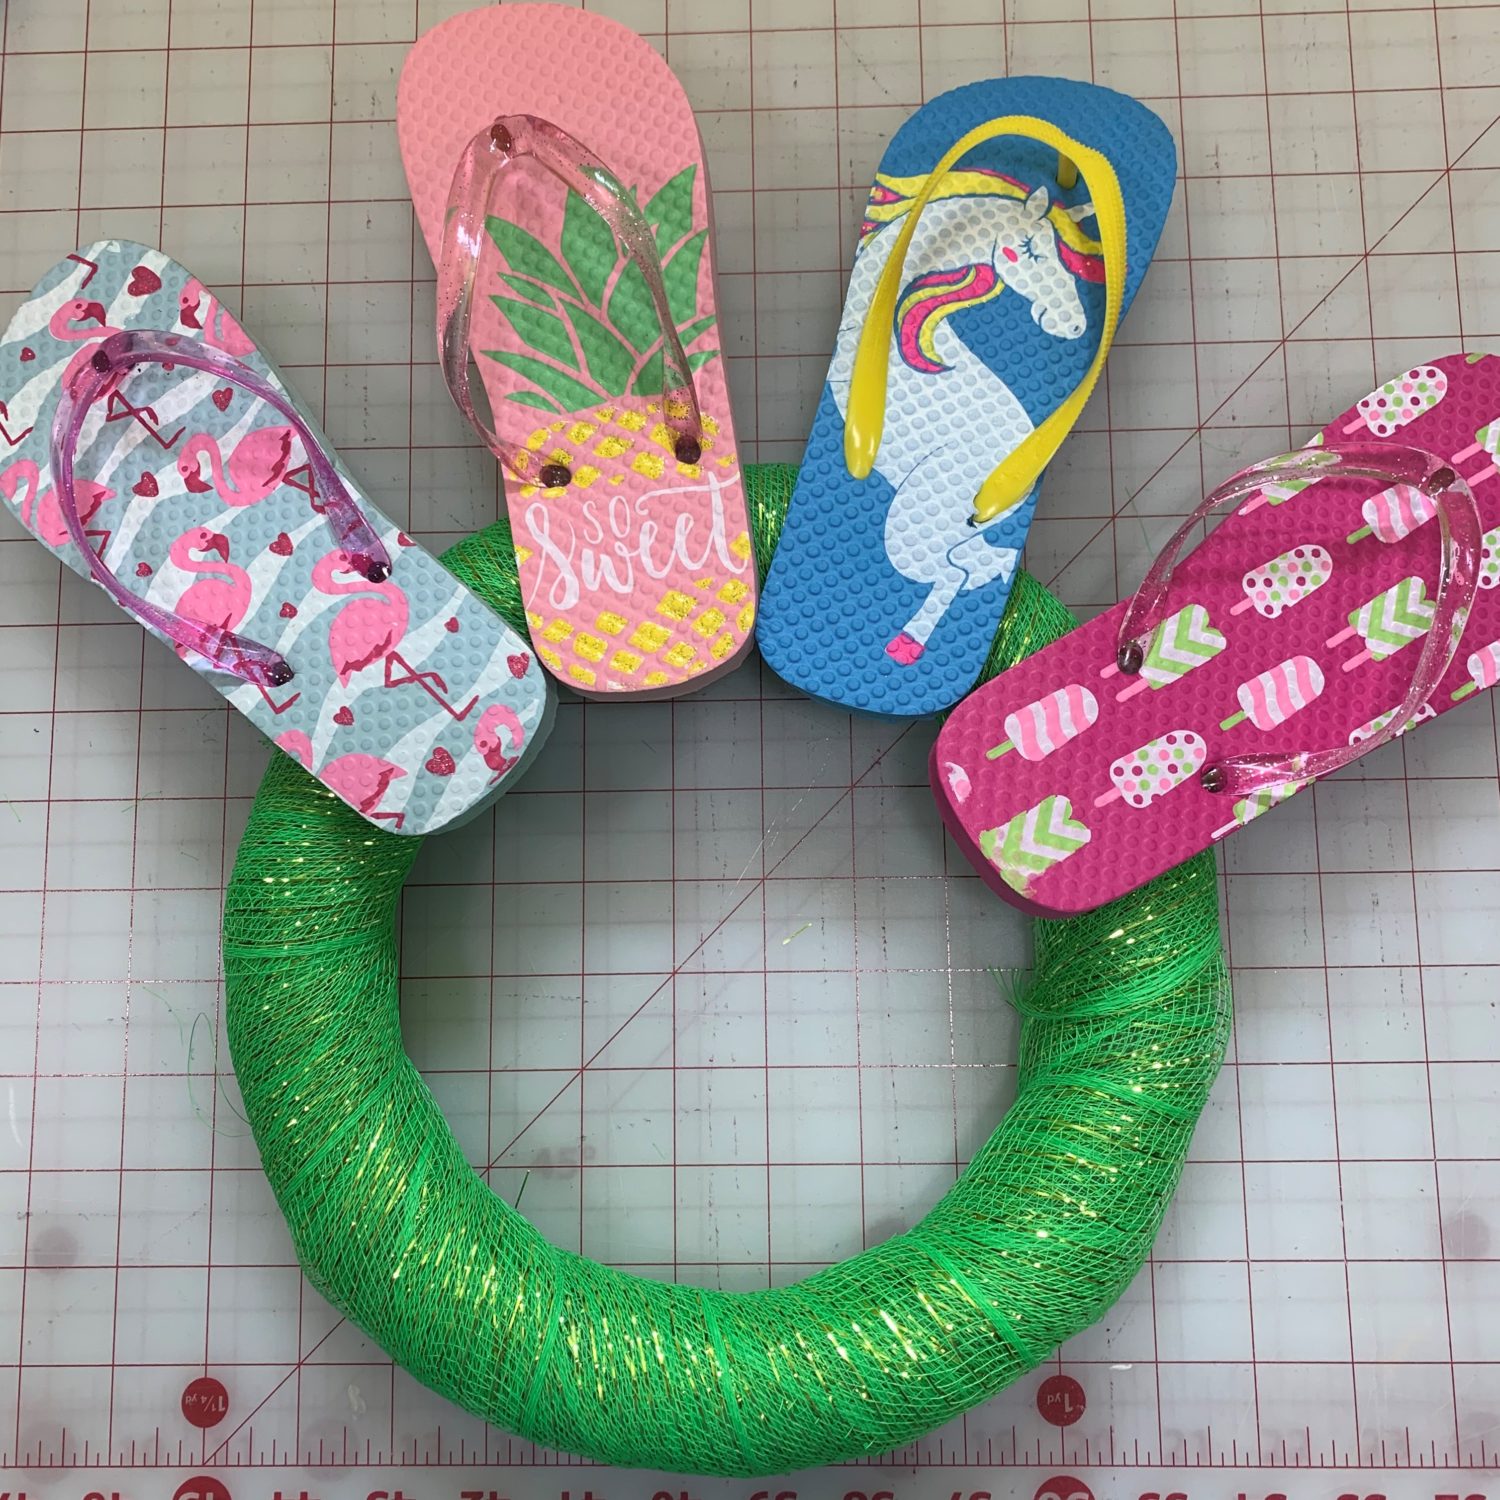
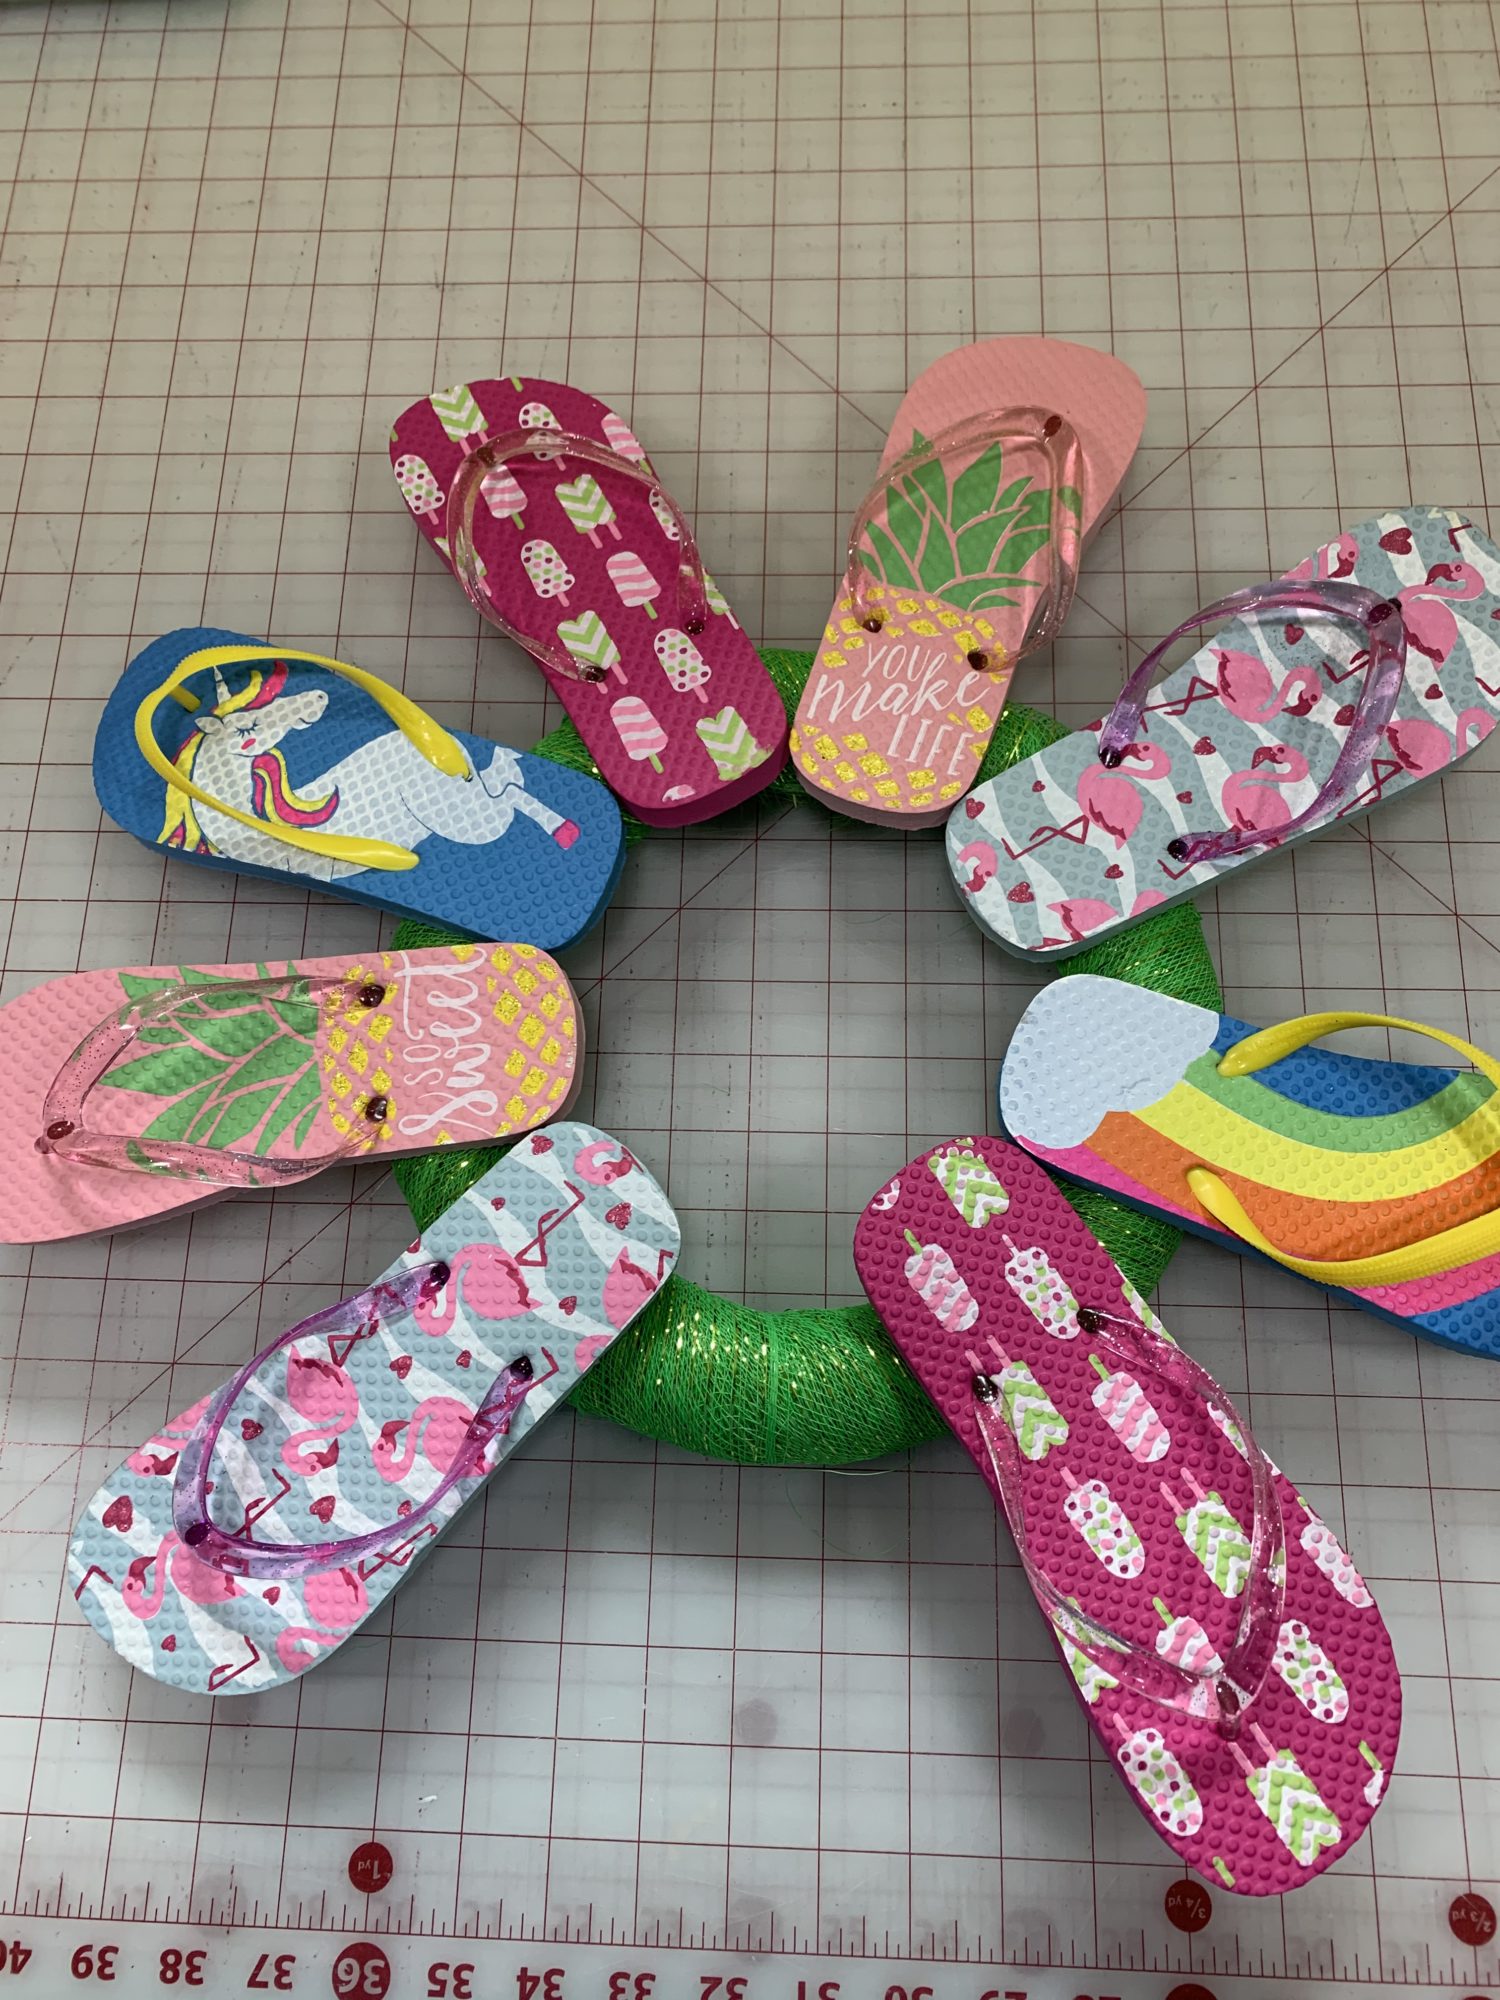
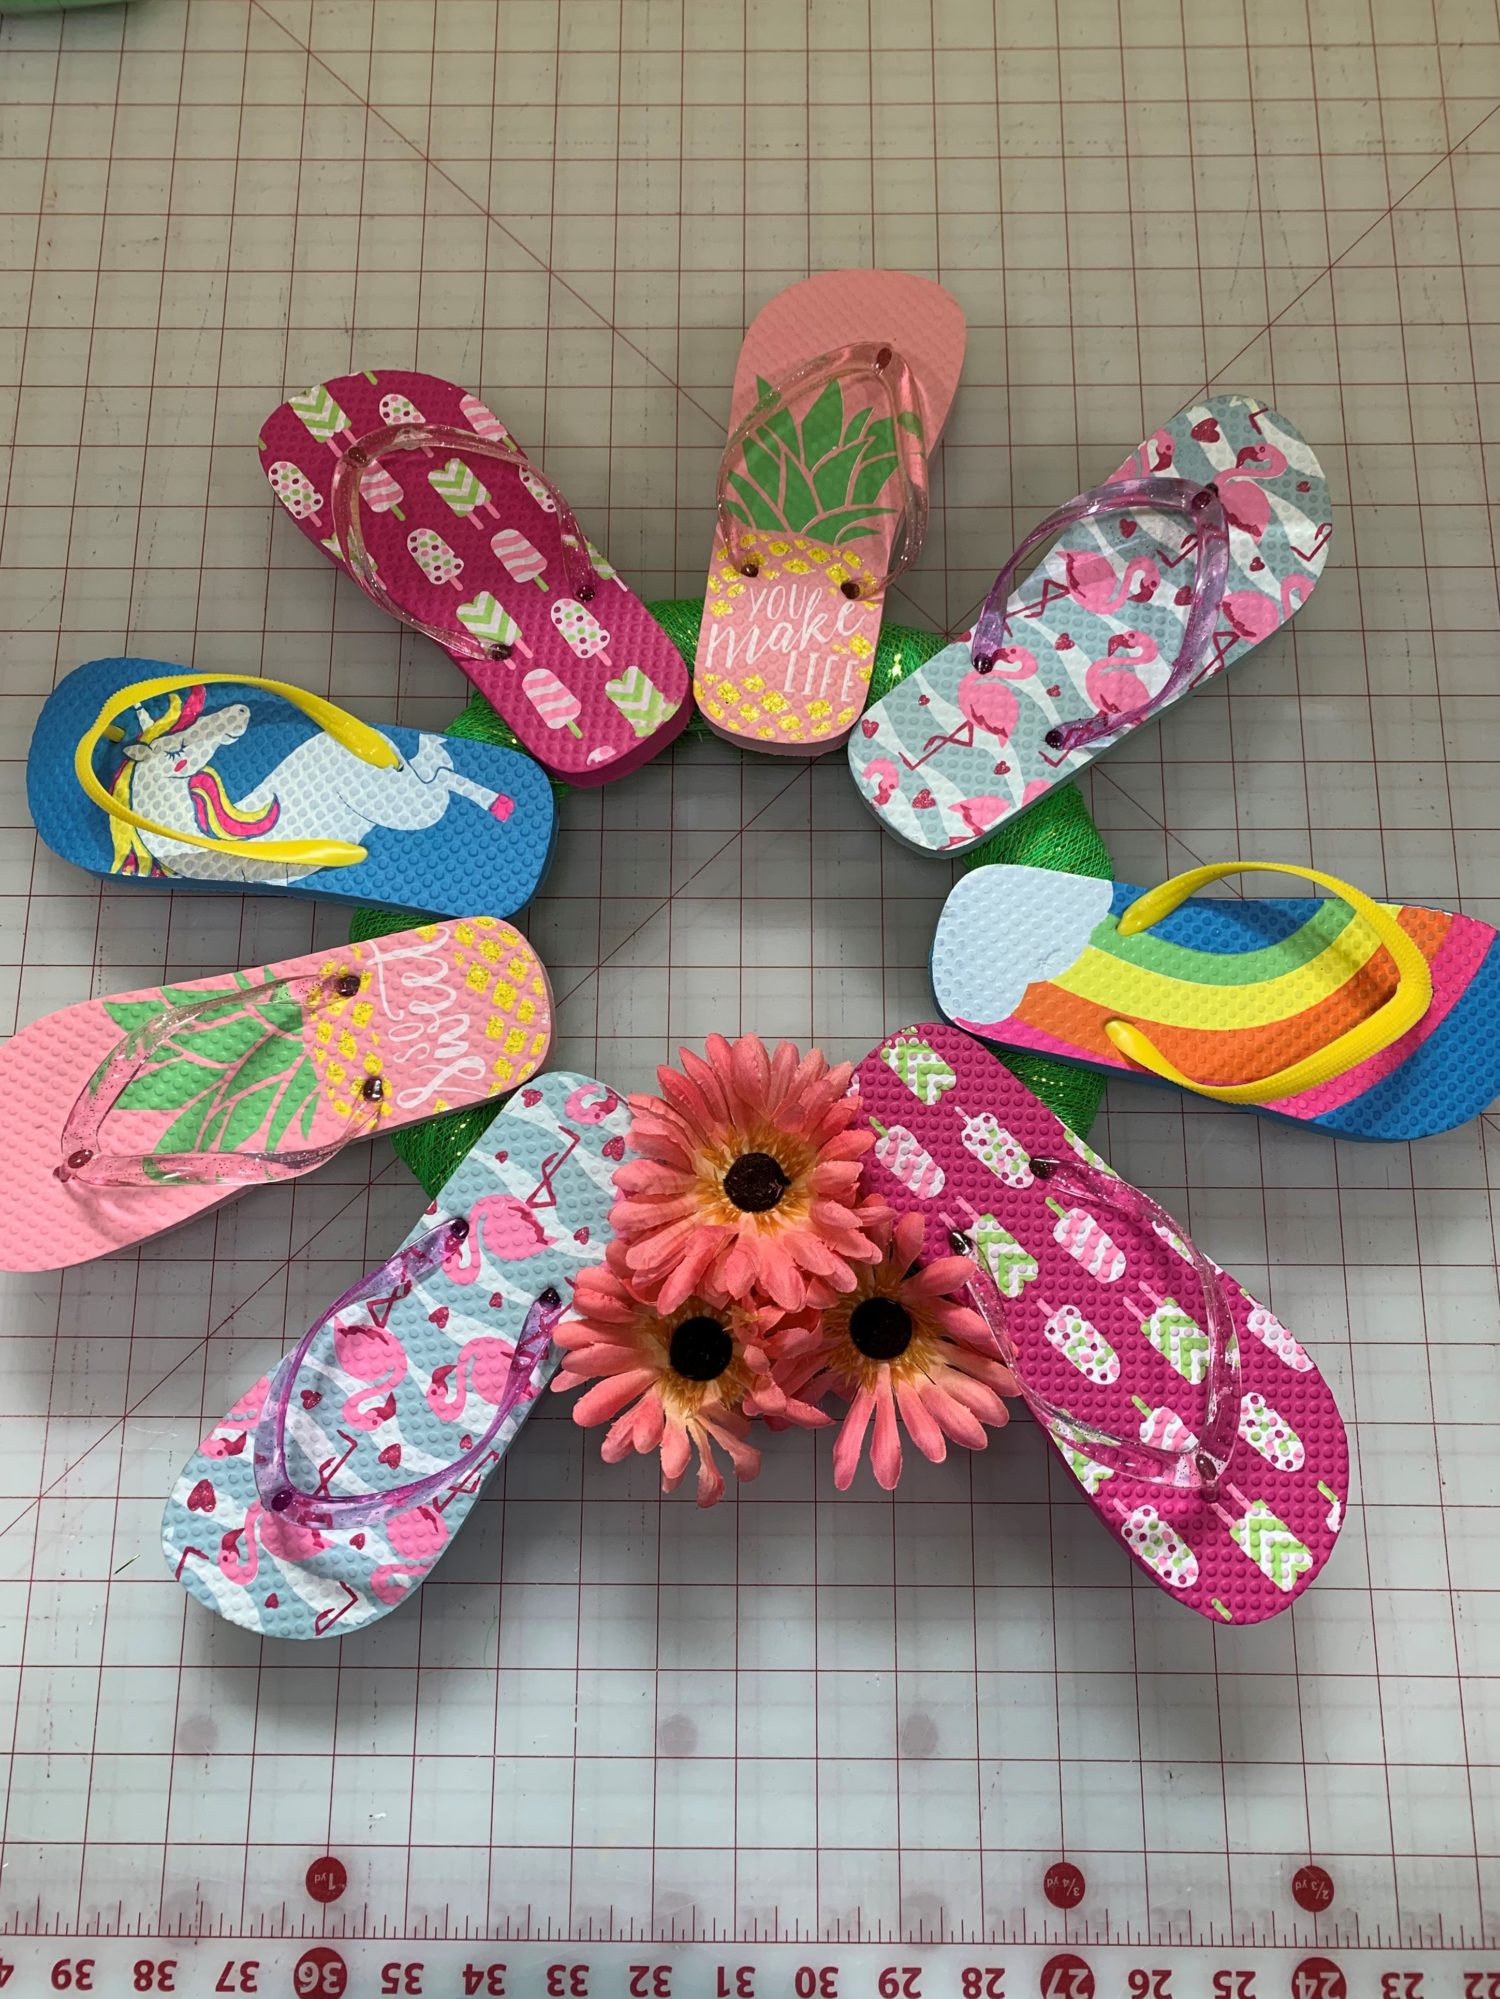
Time to add flip flops to the flip flop wreath!
- First, decide how you want to arrange your flip flops.
- You can keep them all the same direction or alternate them.
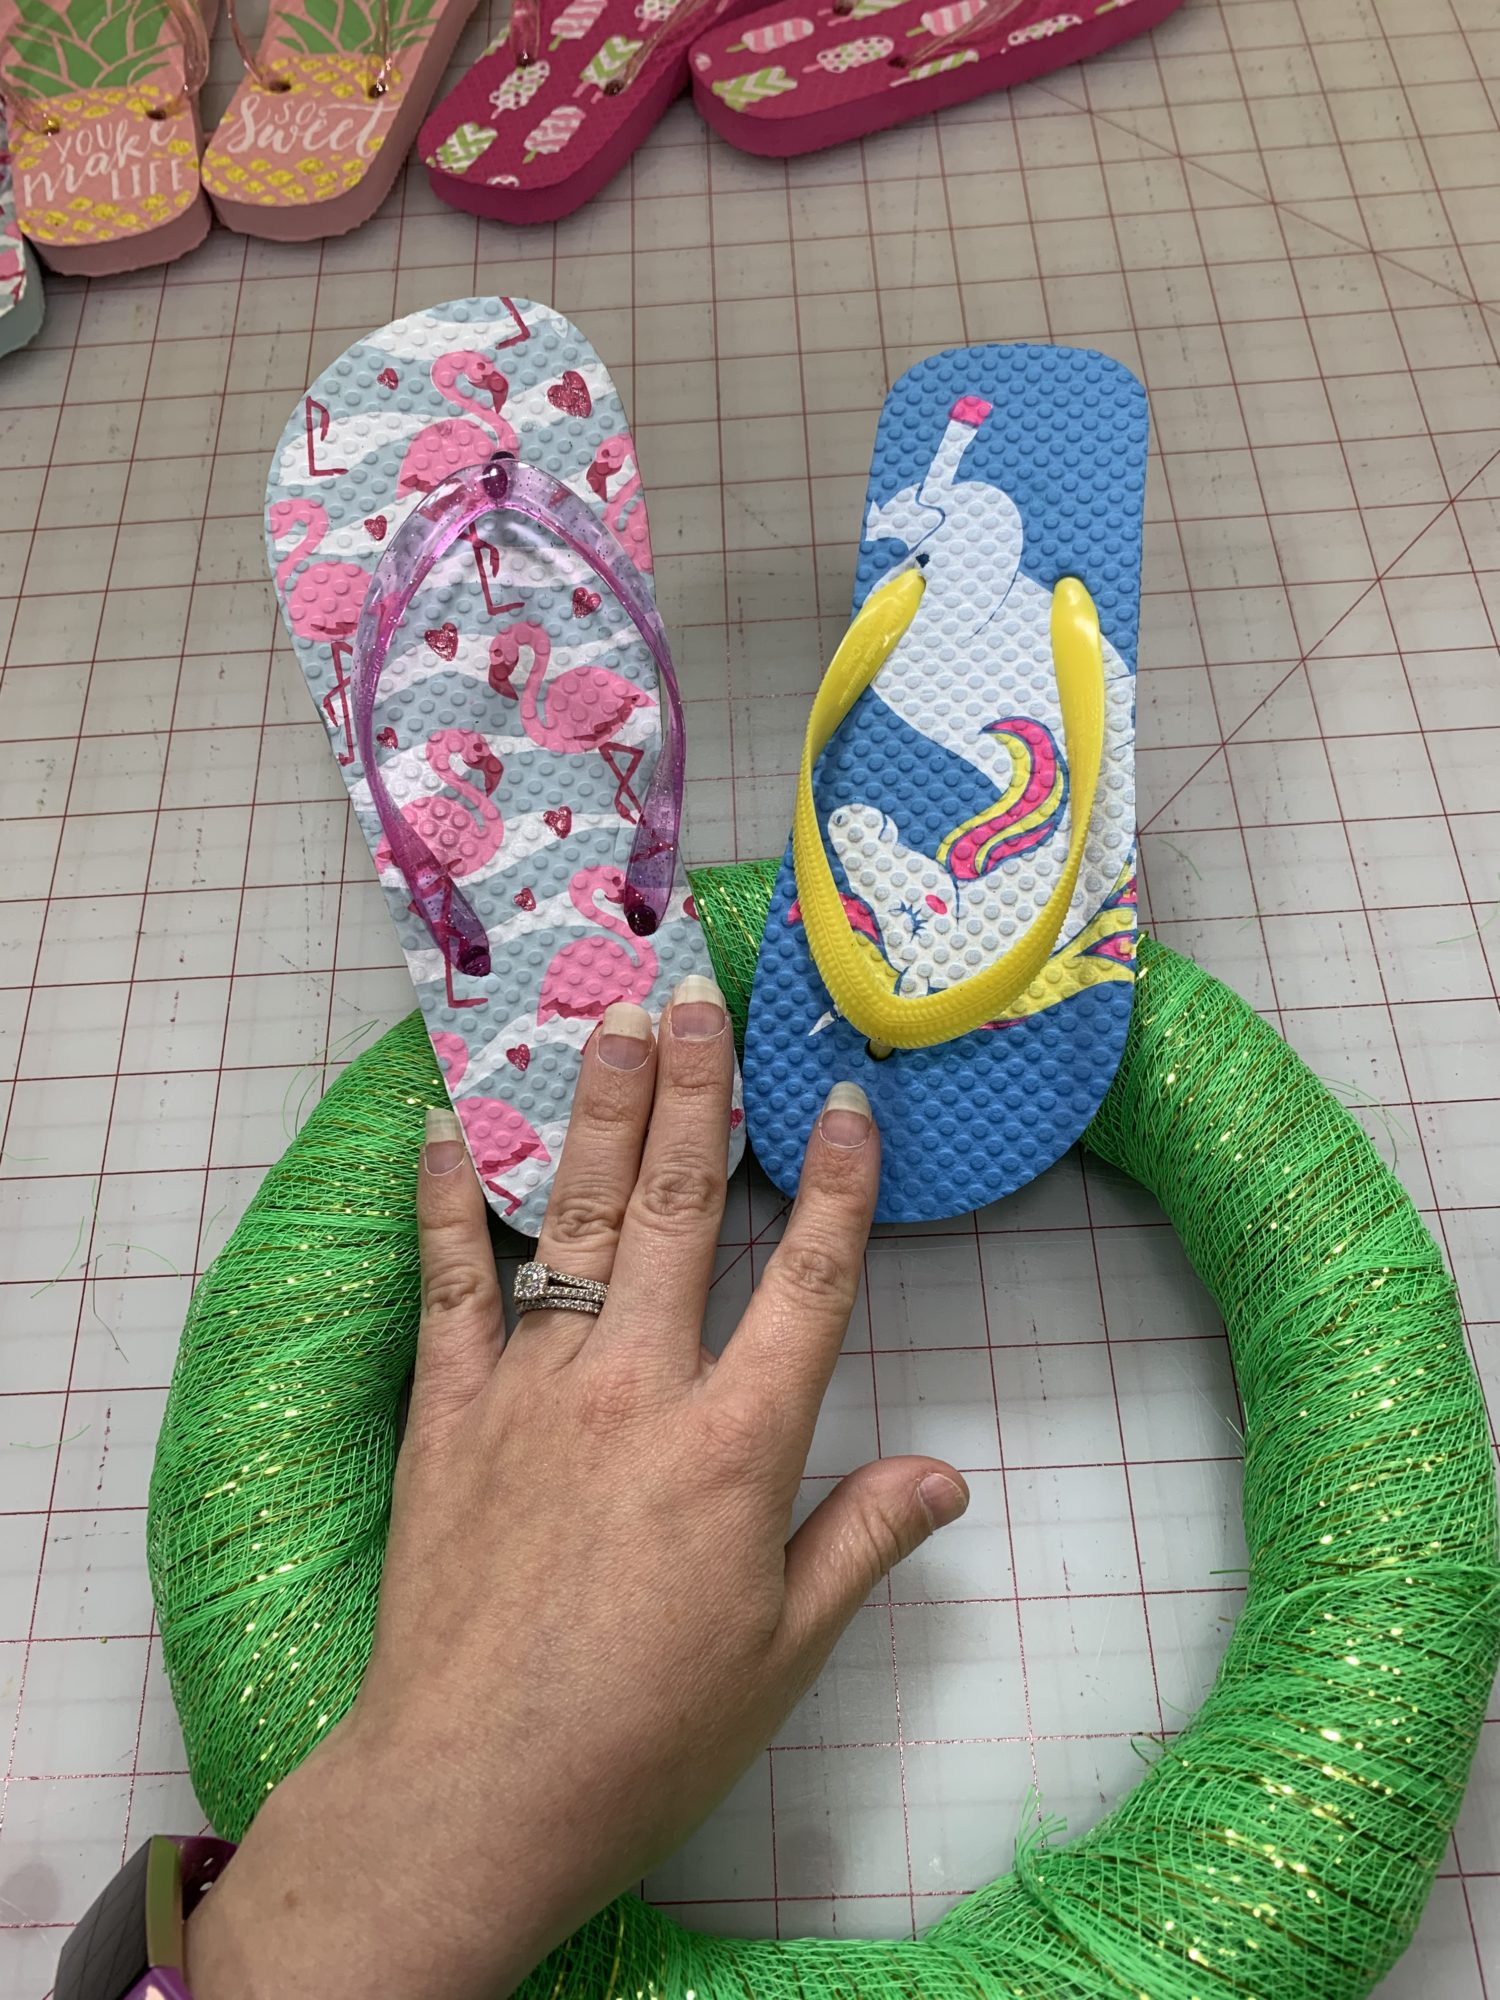
Alternating 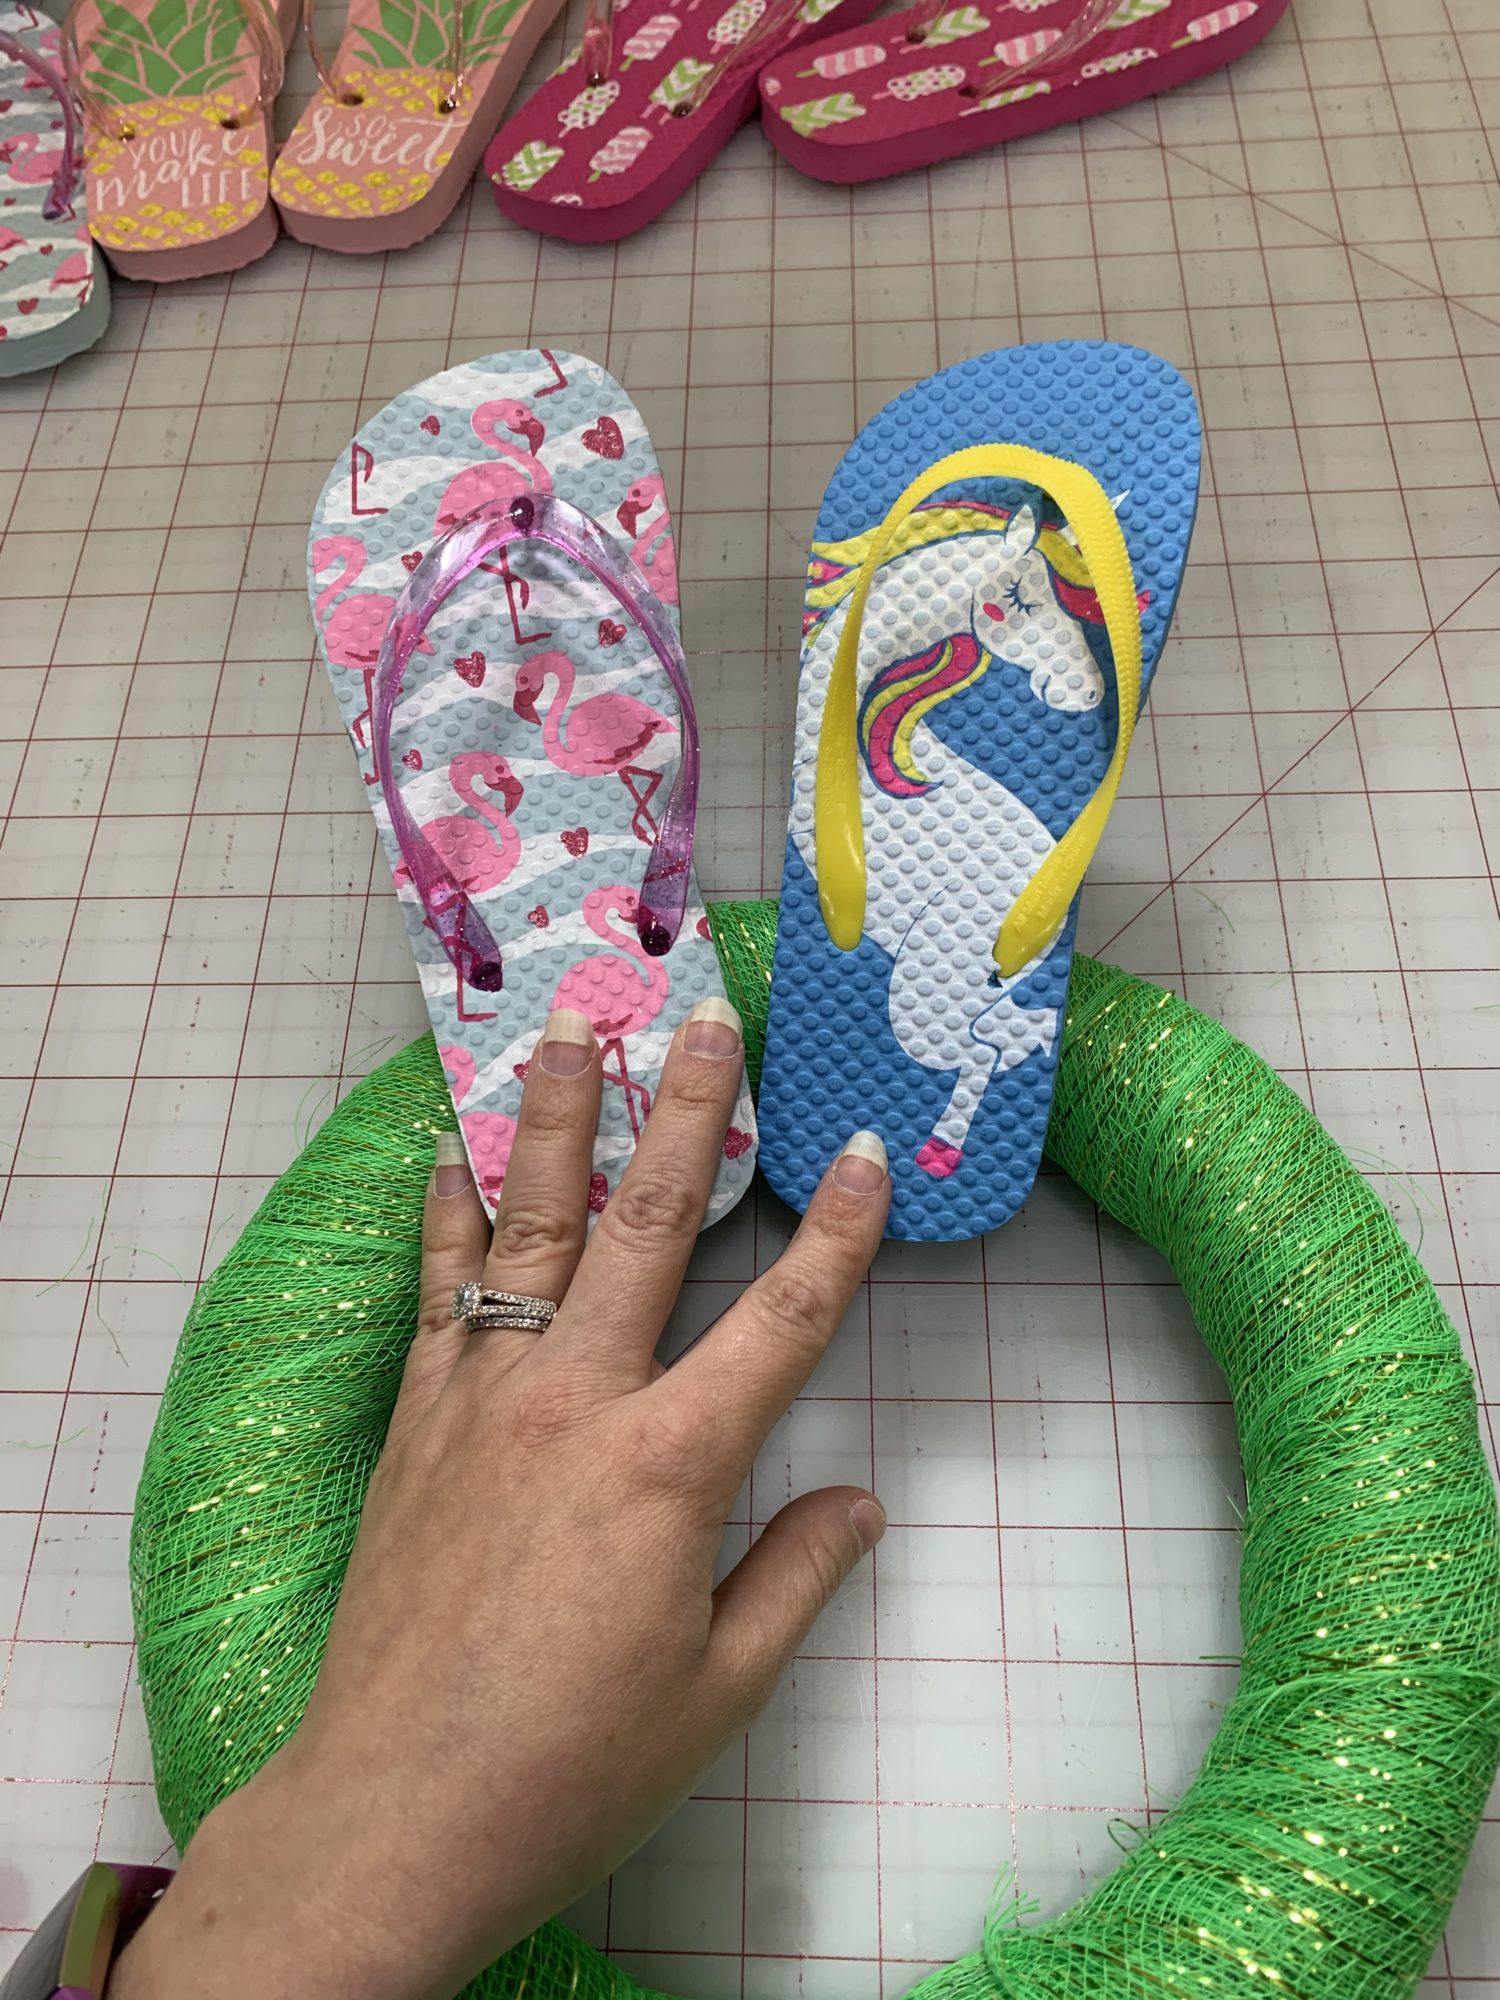
Same direction
- I glued all the flip flops right below the piece that holds the strap on, that way, I knew that they would all be even around the wreath.
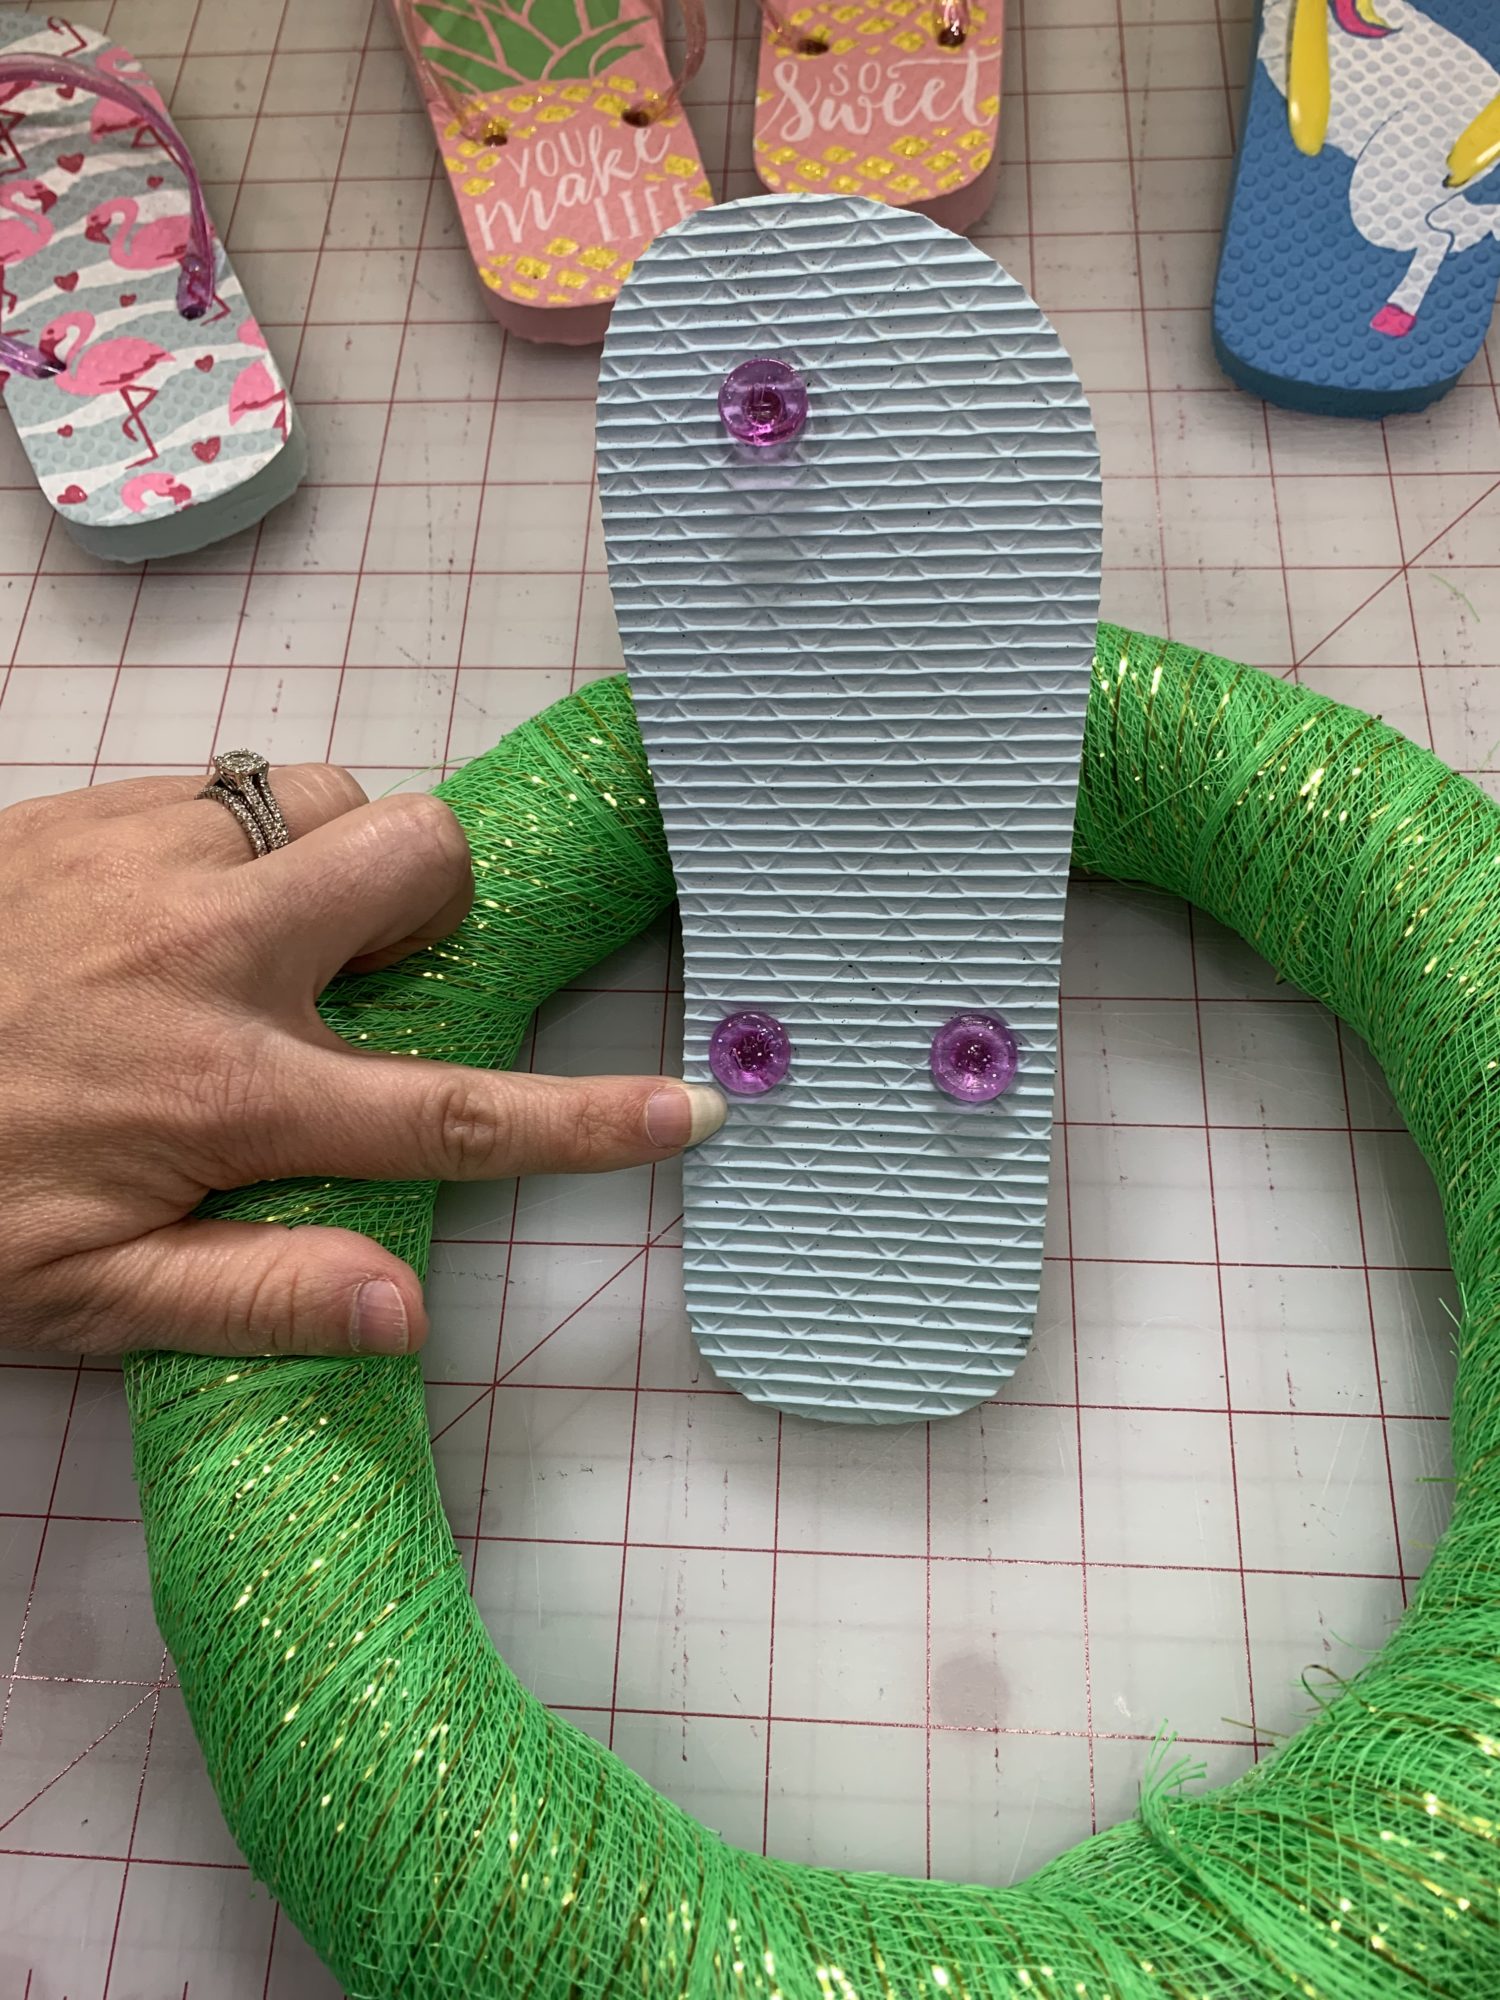
- Put lots of hot glue on the back of the flip flop and stick it on the wreath.
- Press and hold it for a bit to allow the glue to cool and stick.
- Put hot glue on the next flip flop, arrange it where you want it and stick it down.
- Continue gluing and sticking the flip flops all around the wreath.
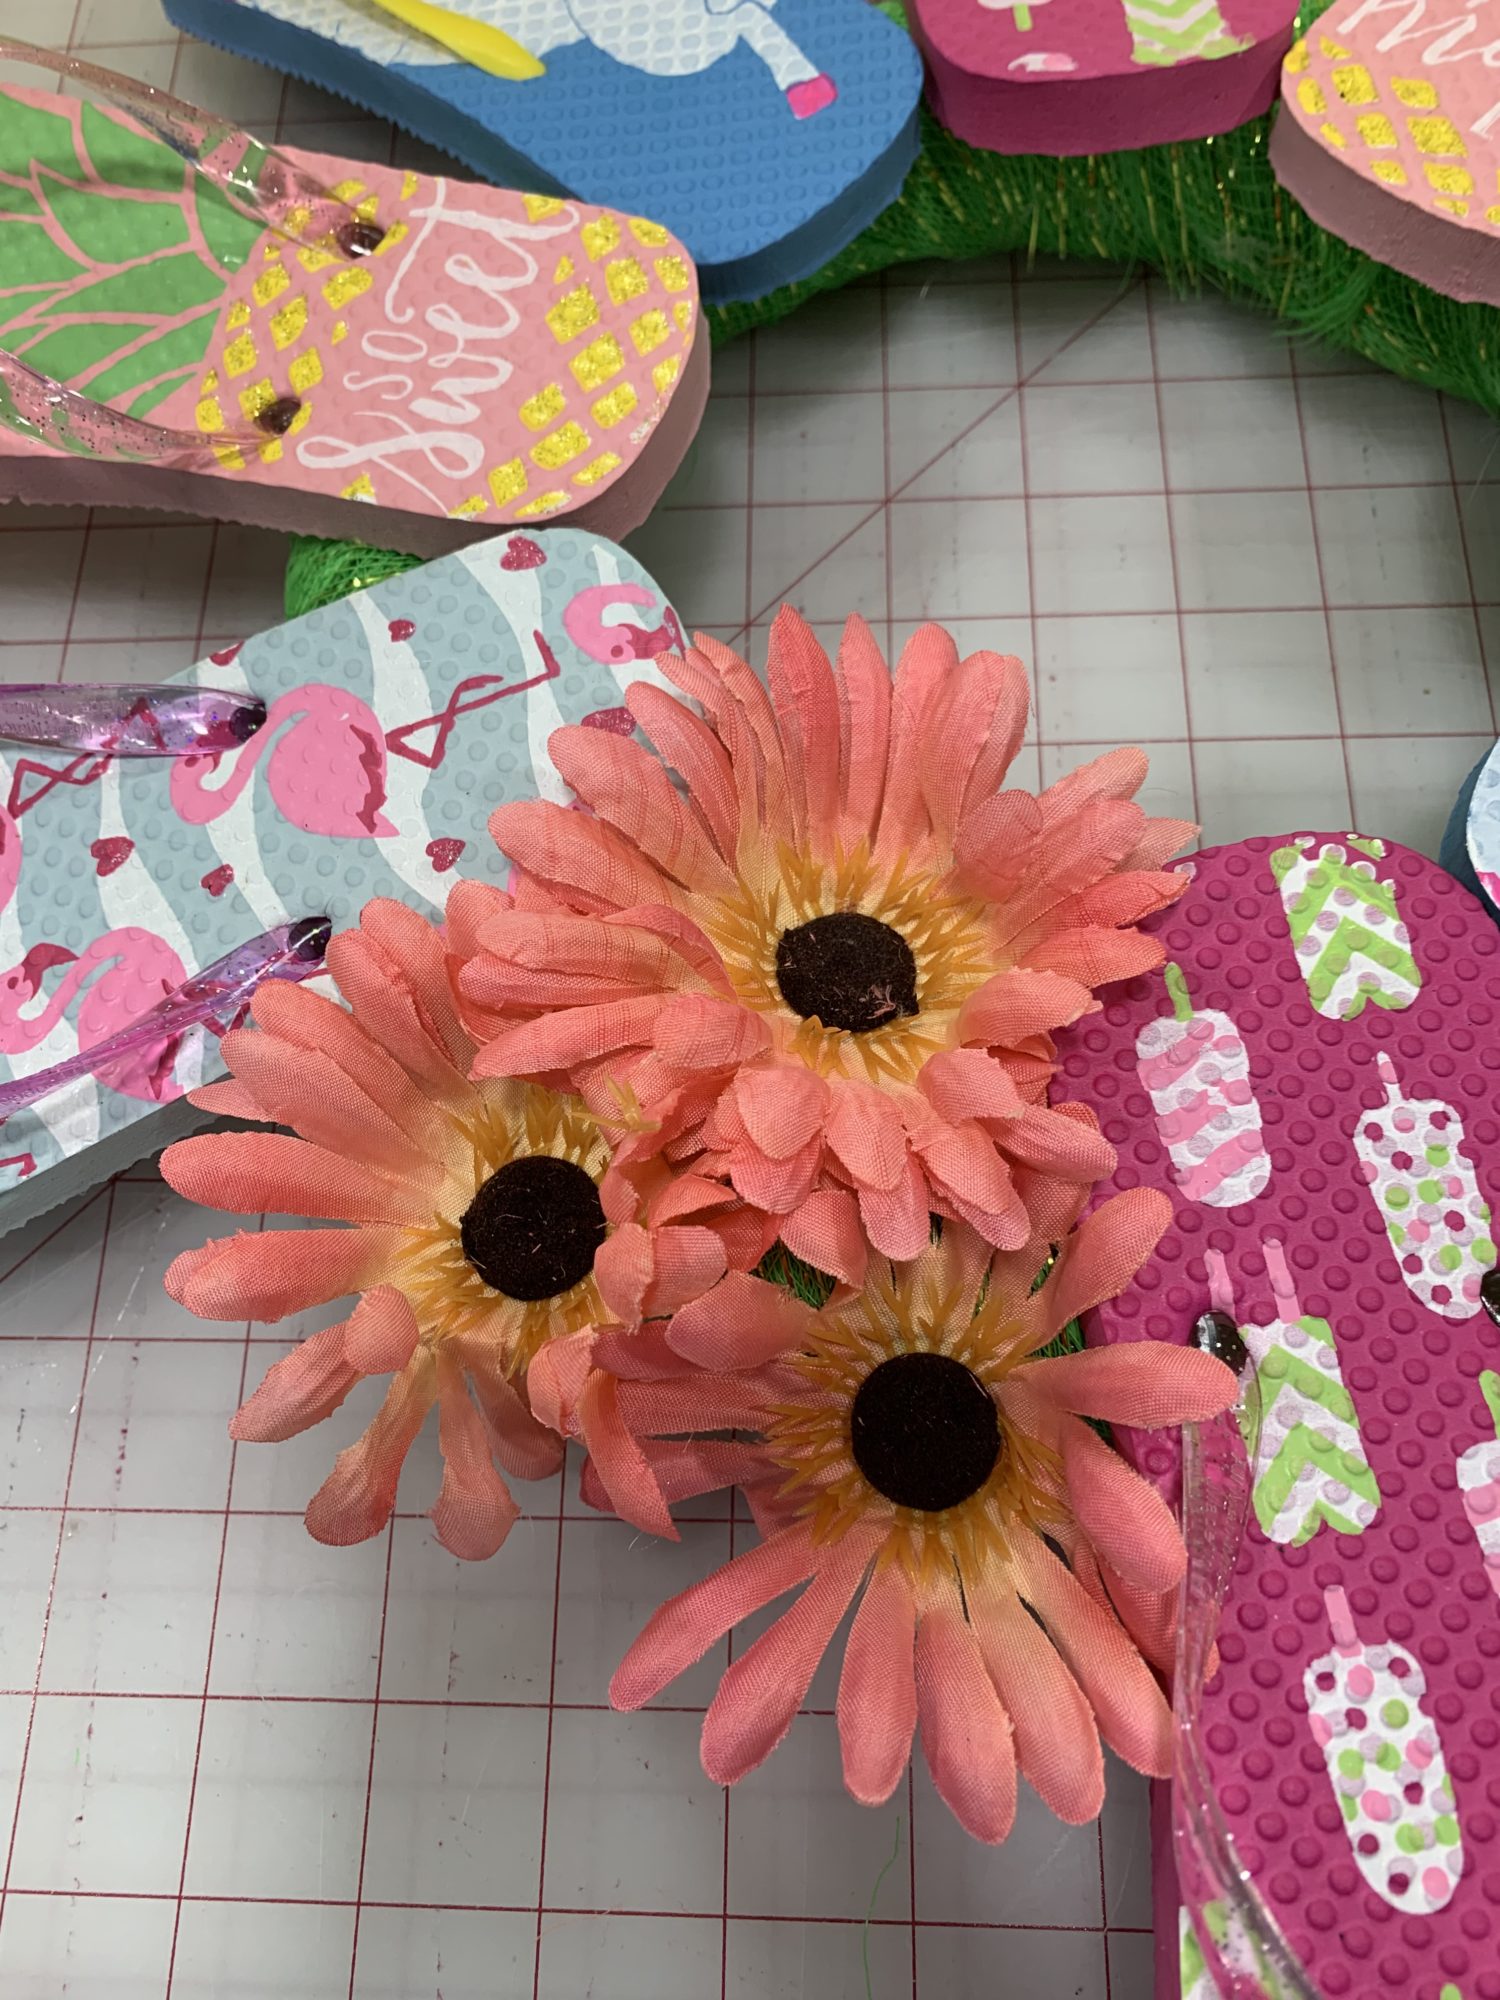
- I left an open spot at the bottom to add some flowers.
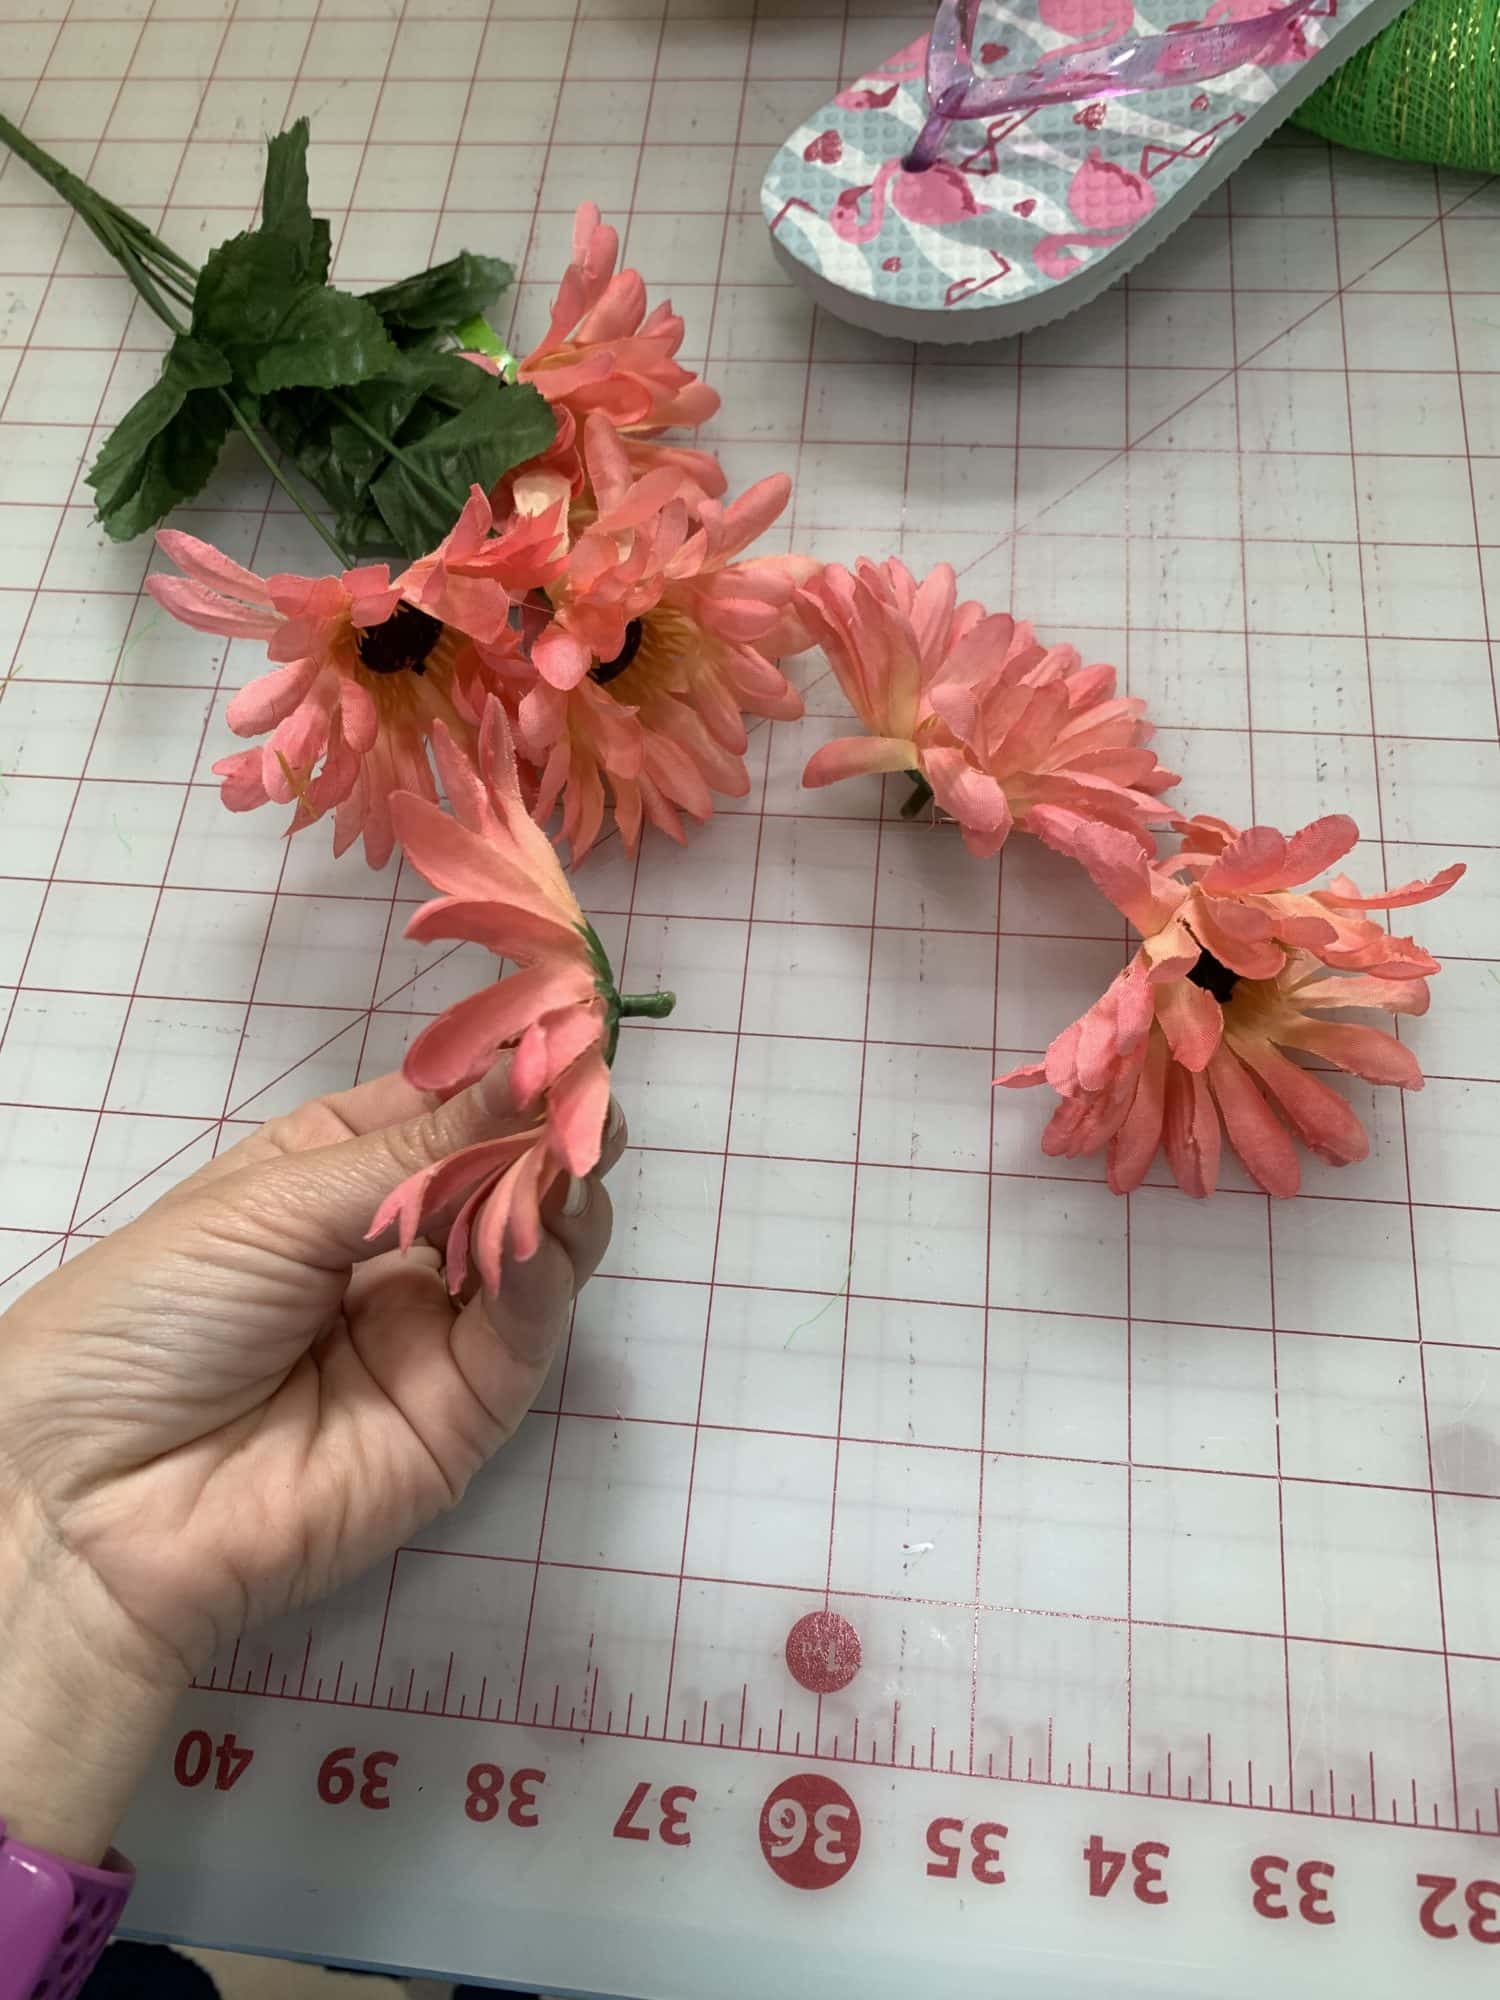
Decorate the flip flop wreath!
- I used flowers to embellish my wreath, you can use whatever you like best!
- To use flowers, remove the flower from the stem.
- Put hot glue on the back of the flower.
- Glue flower to the wreath.
- Continue with as many more flowers as you’d like.
- Add any other decorations that you may want.
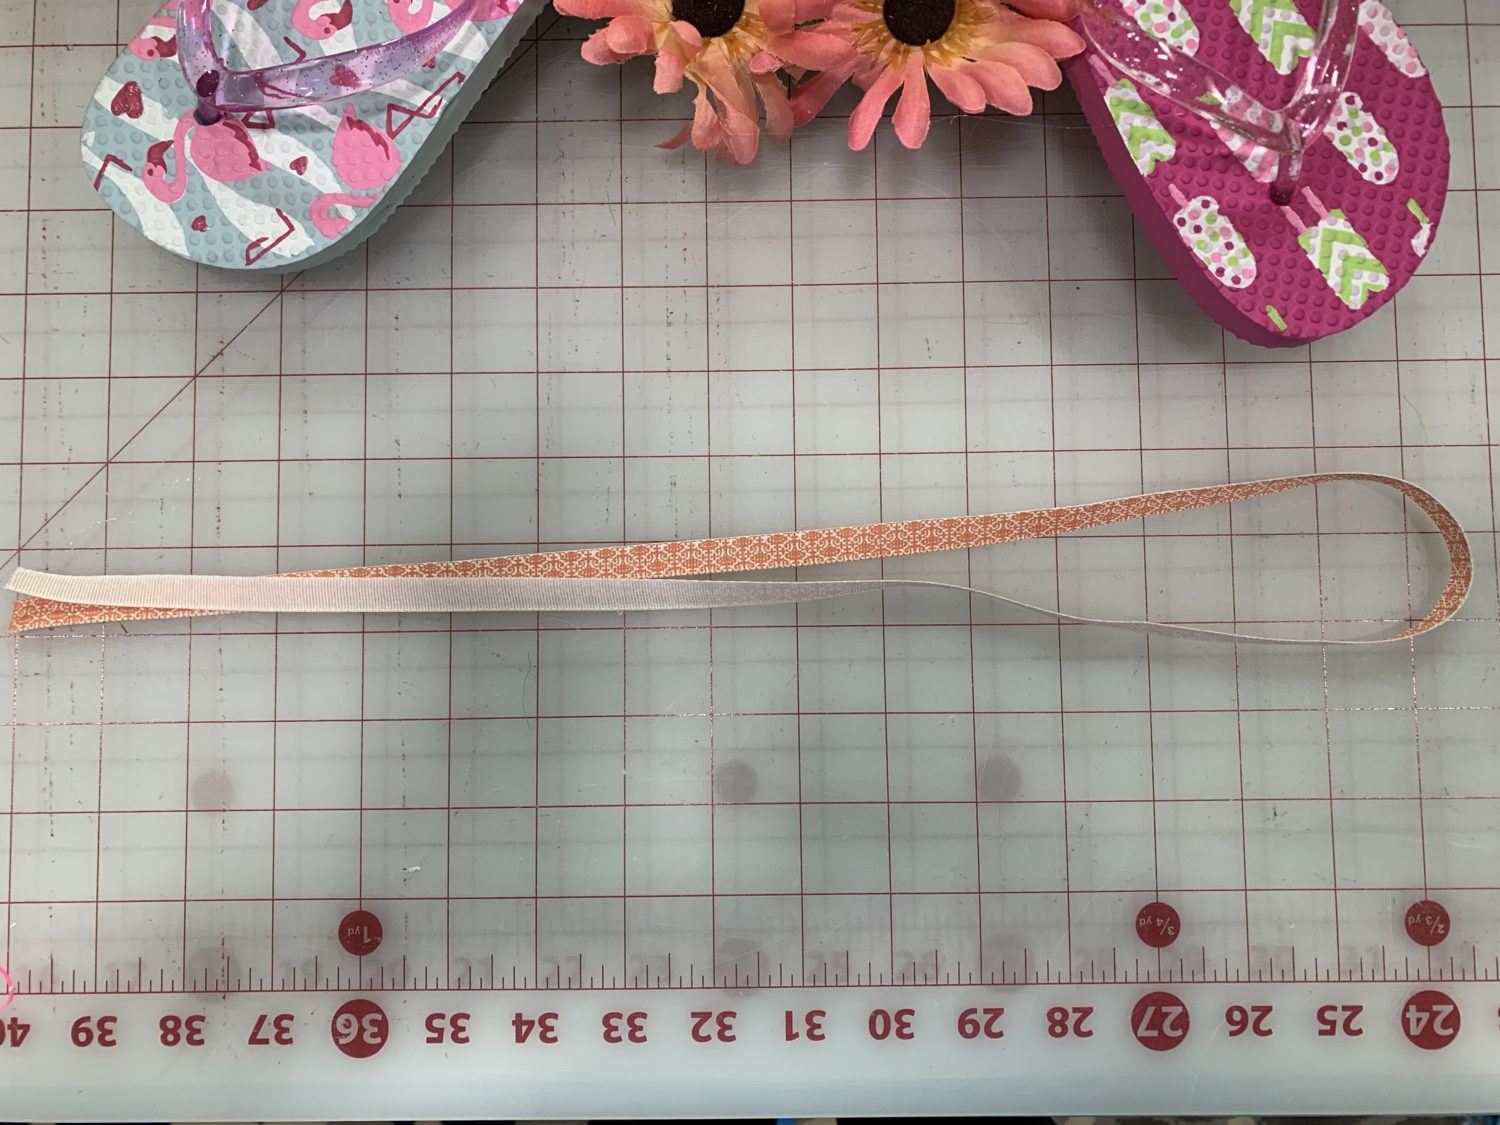
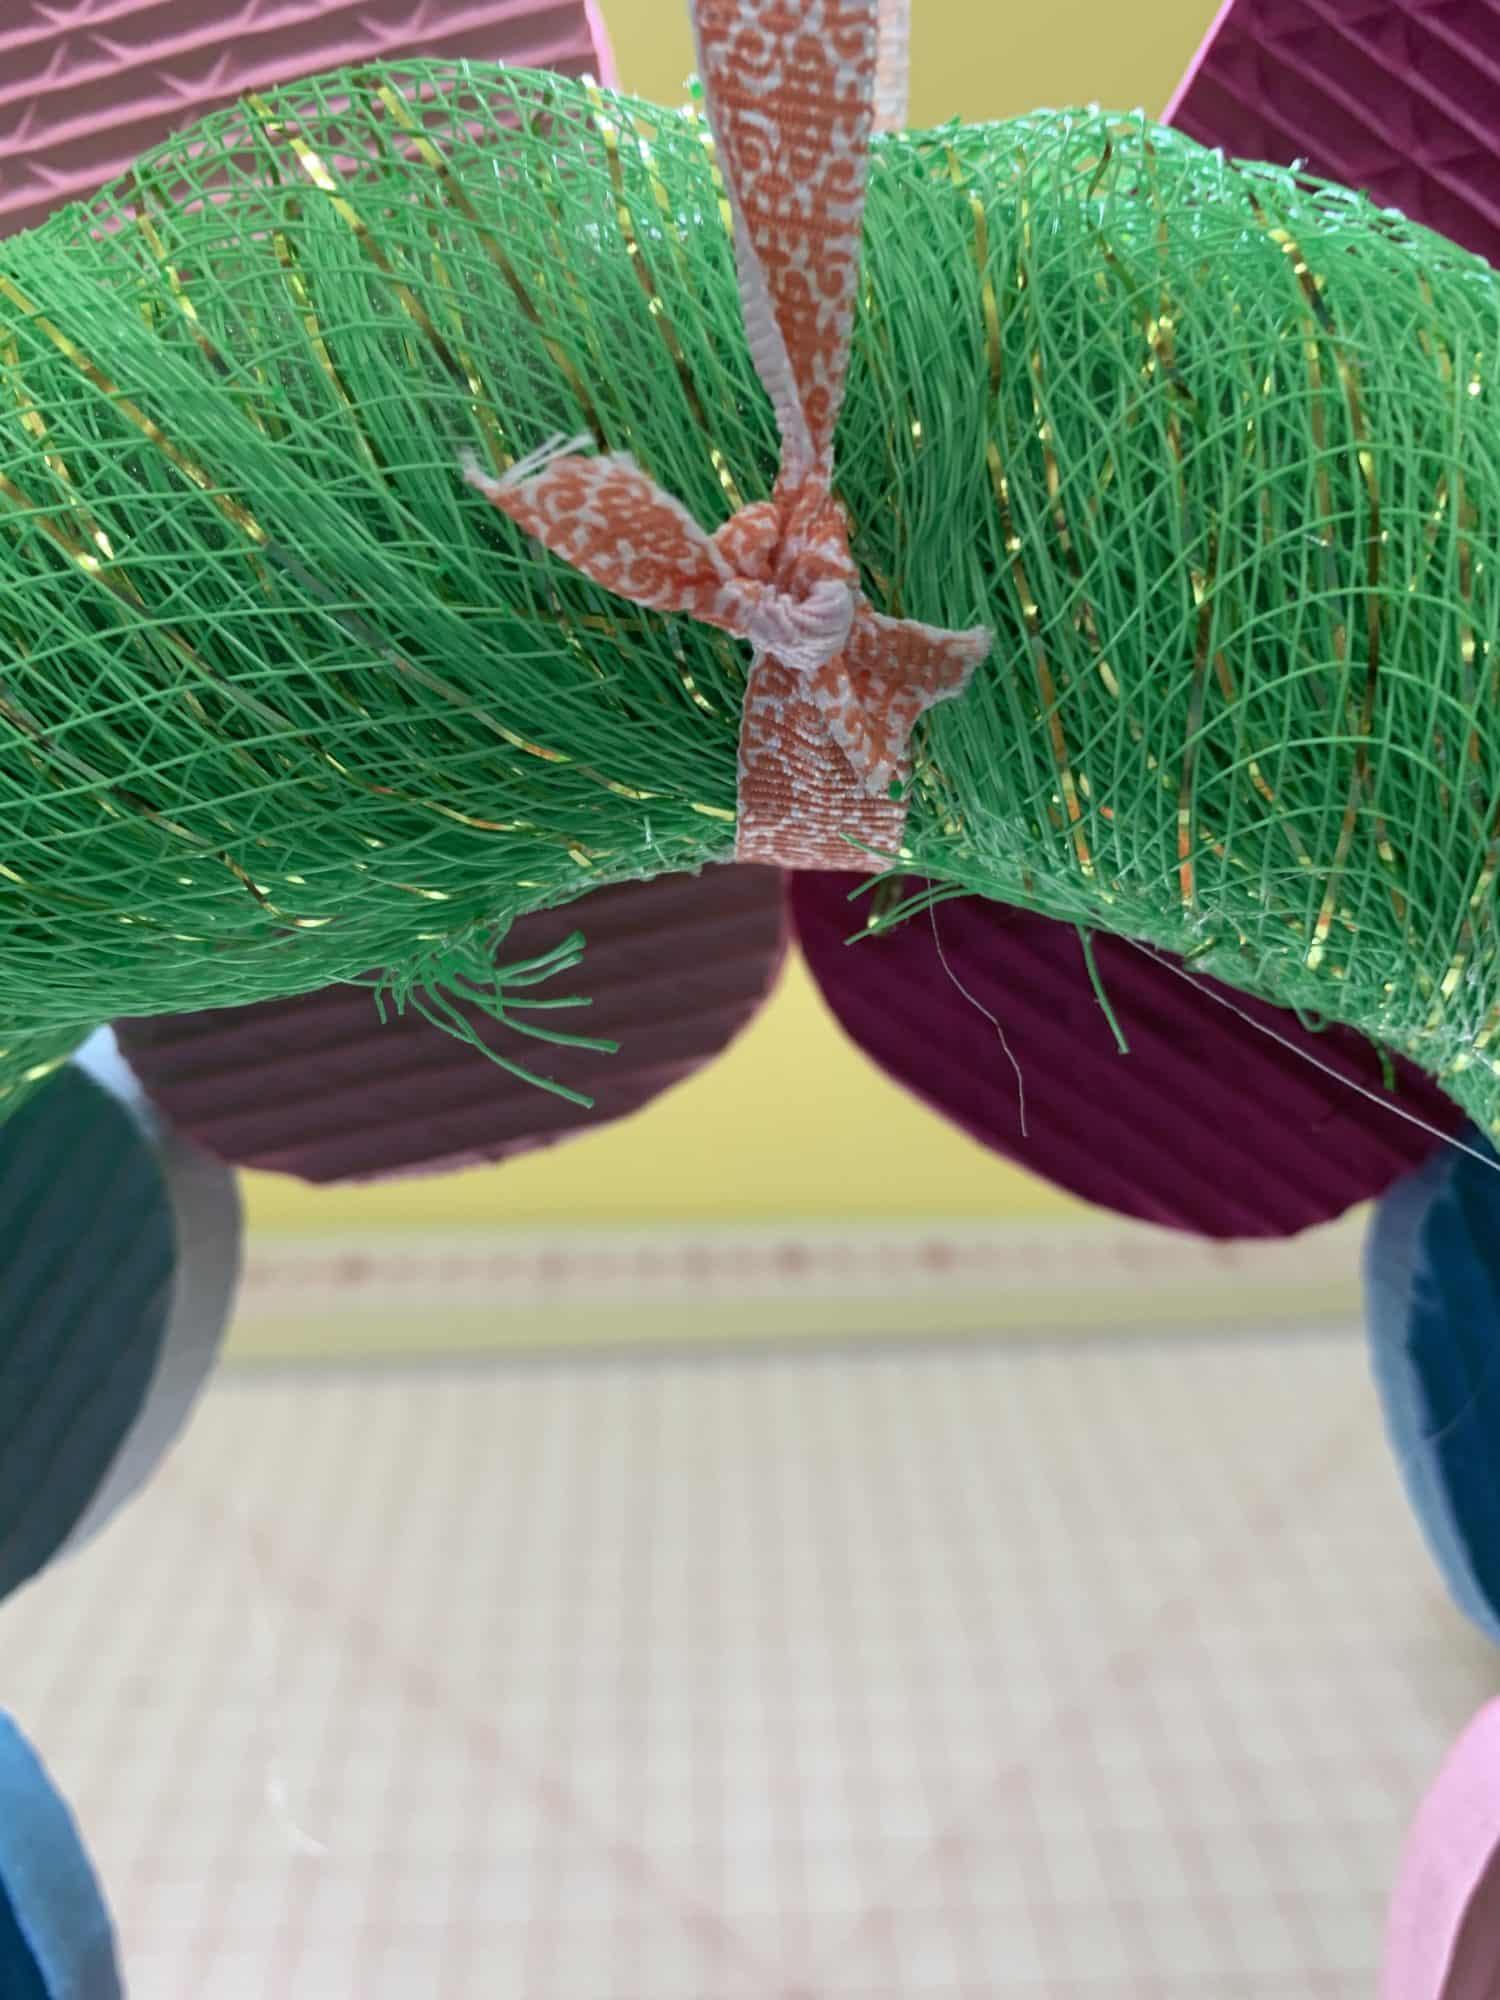
Add a ribbon hanger
- I cut a piece of ribbon about 32 inches long.
- Make sure that you cut your ribbon long or short enough so that your wreath ends up hanging where you want it. Your ribbon length will depend on where your hook is and how far down on your door you’d like the wreath to be.
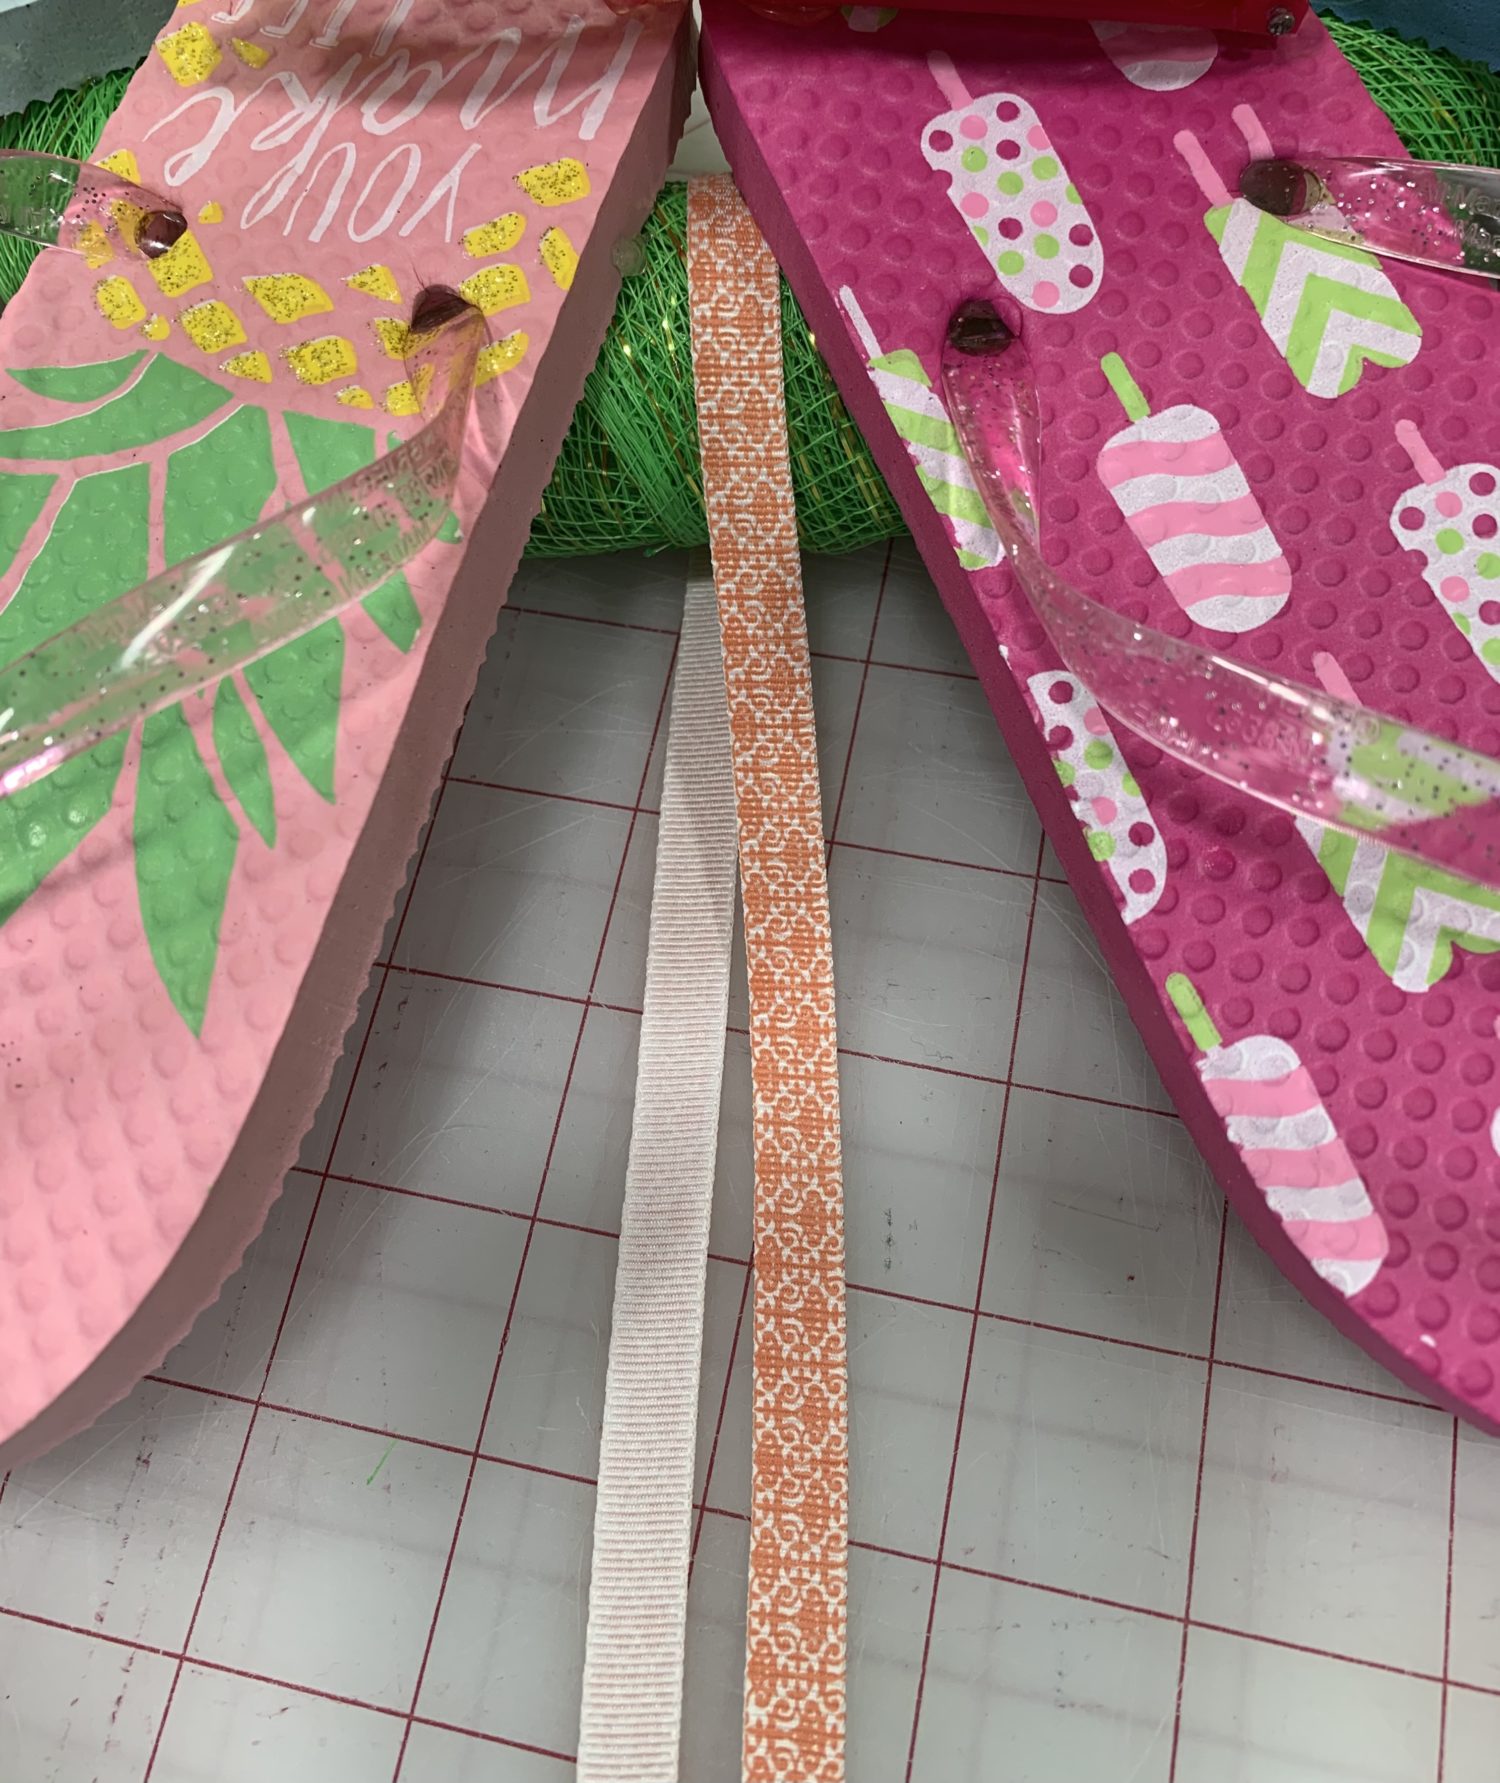
- Put the ribbon through a space at the top of the wreath, wrap it around the wreath form, and match the two ends at the top.
- Tie a knot to secure the ribbon together.
- Arrange the ribbon so that the knot is at the back of the wreath and is hidden.
Ta Da! You made your own adorable flip flop wreath!!
Now, go hang it on your door and admire your crafty skills 🙂
Want more FUN DIY Freebies? Check out the FREEBIE TUTORIALS and the FREEBIE PATTERNS!
As always, we’re here to help if you need it! Join us HERE and on Facebook, Instagram, Twitter, Youtube, and Pinterest. We’re everywhere you are.
Thank you so much for sharing your tips and whimsical wreath! The visuals enhanced your instructions, thank you for that!
Very nice! I’m currently working on a flip flop wreath 😊