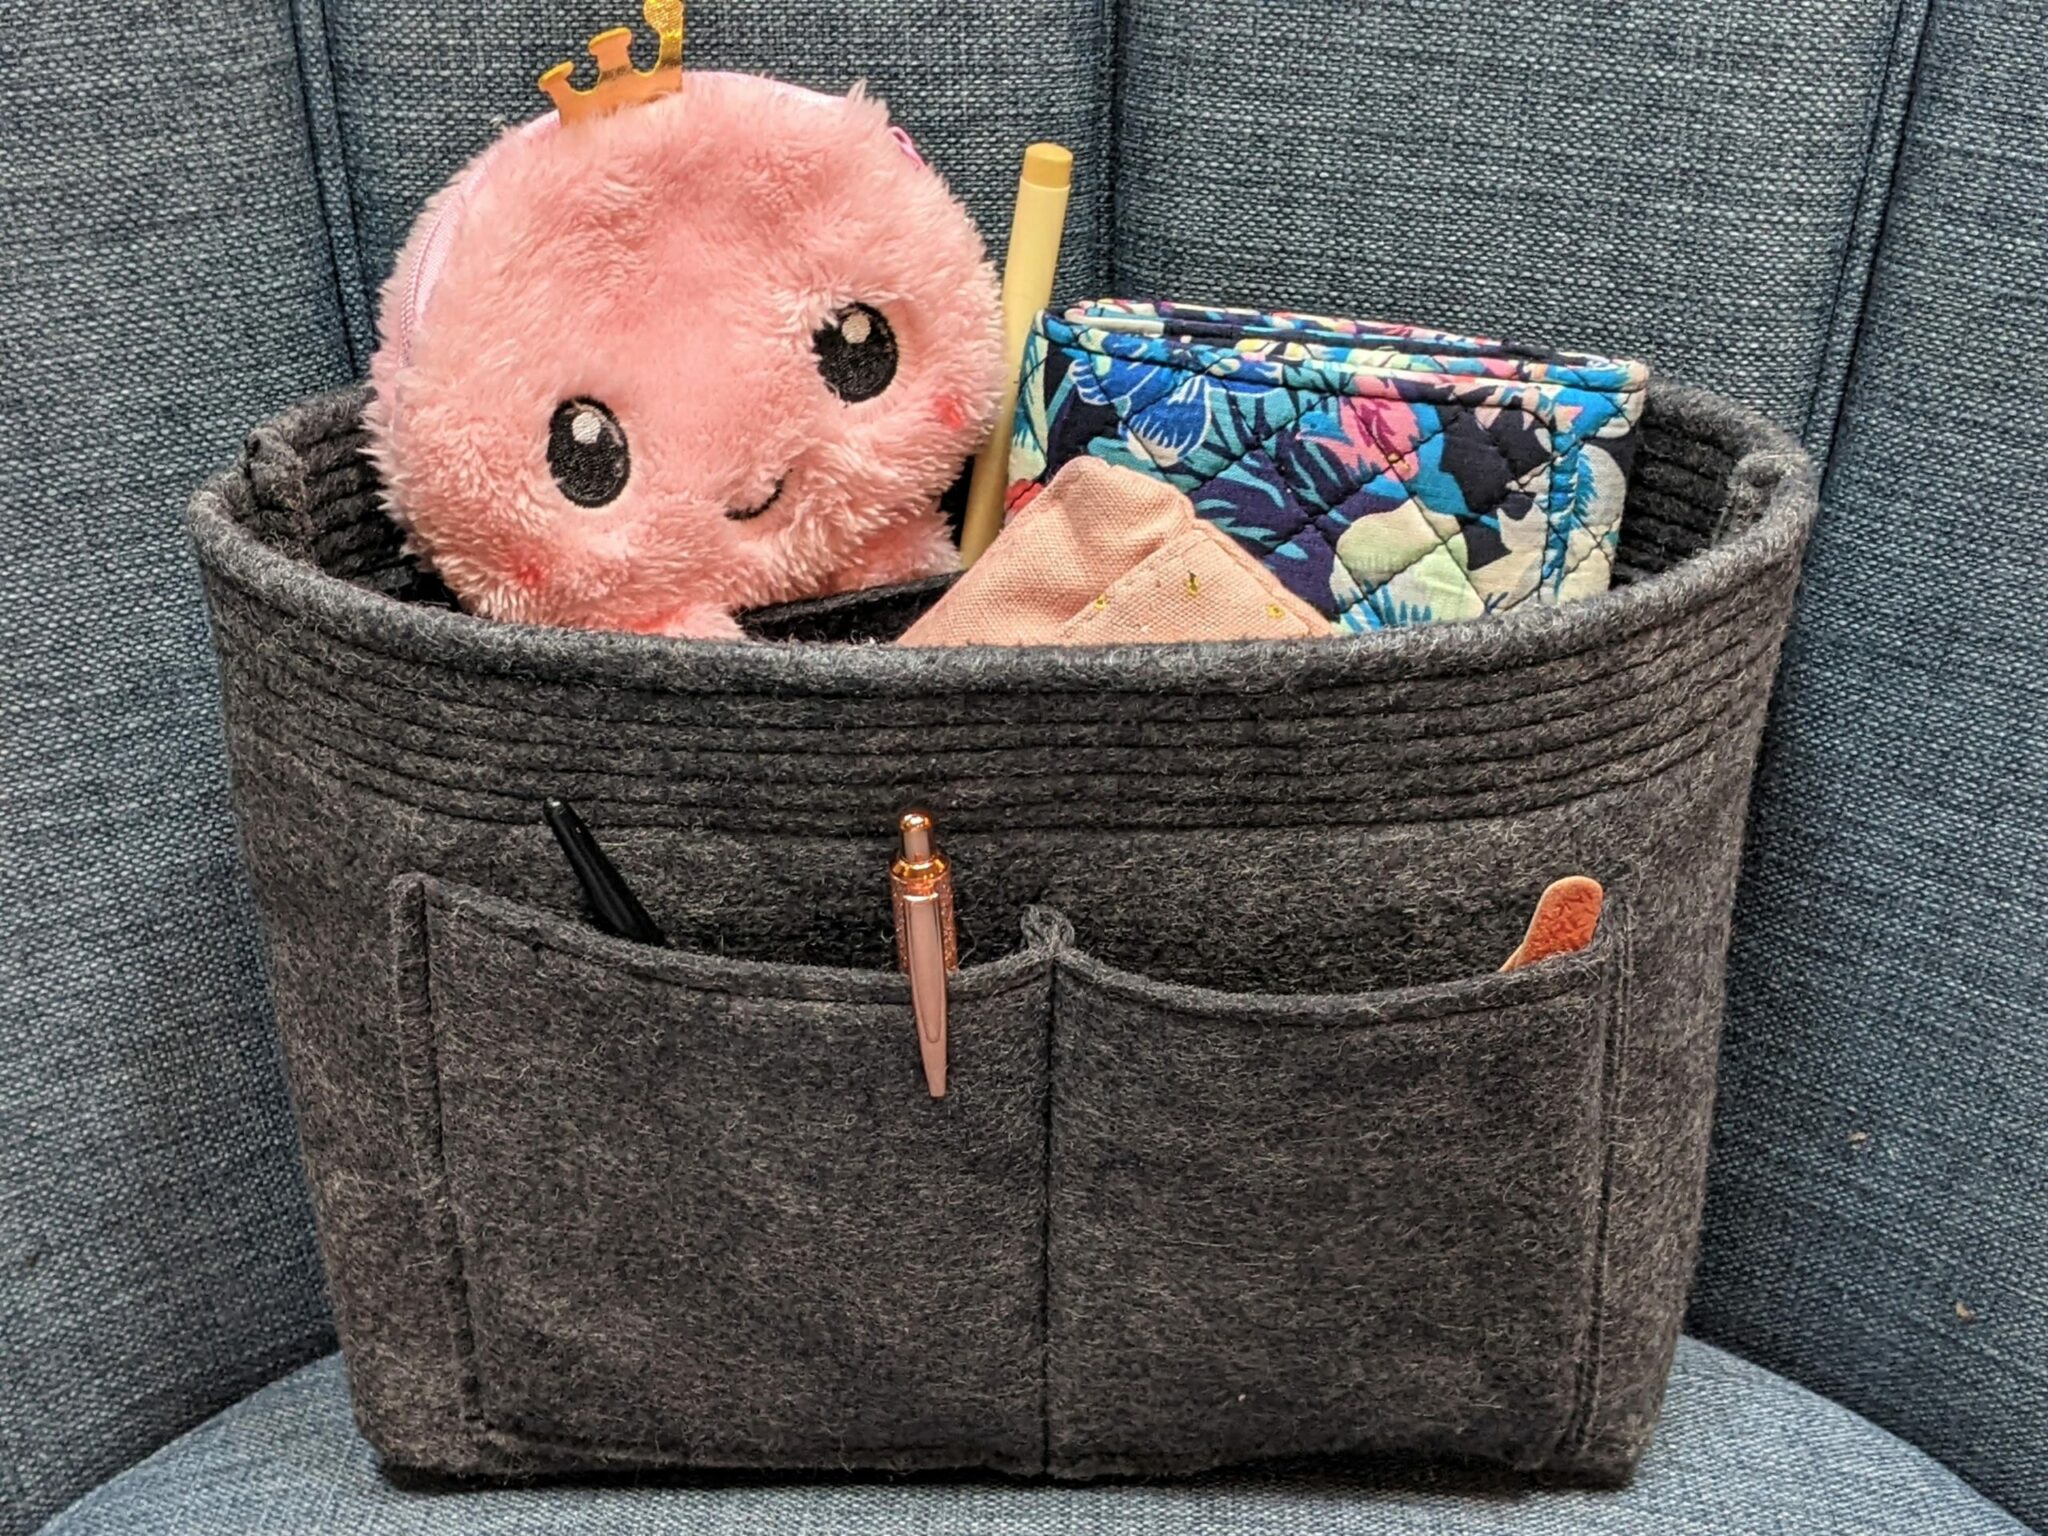
I love a handbag with a lot of pockets and separate sections. However, most of my favorite ones are lacking in that department. I made a drop-in organizer with several pockets that you can just slide on into your bag and you get instant organization potential! Plus, it’s easy to take out and put into another bag making it nice and easy to switch between your handbags.
Materials Needed
- Felt: Thicker craft felt approximately 36”x36”
- Sewing machine and basic sewing supplies
- Optional:
- Lightweight interfacing and/or heat n’ bond light
- Snaps
- Microtex sewing machine needle or heavier weight needle
- Chalk
Cut out Your Pieces
*These are the measurements I used for this example. The approximate finished measurements of the organizer are 9”x7.5”x4”. You can make it bigger or smaller if you prefer and you can use these measurements as a starting point to adjust from.
- Main Bag: (2) 14’x22’
- Outer Pockets: (4) 10”x5”
- Inner Pockets: (4) 8”x5”
*Interfacing or heat n’ bond pieces should be cut so that each measurement is 1/2” less than the felt to leave a border around the edges.
*If your felt is not long enough for the main bag, you can cut two equal pieces for each side to sew together but don’t forget to account for your seam allowance.
Prepare Your Pieces
*If you are using interfacing or heat n’ bond, iron that onto the wrong side of one piece of each set of 2.
- Lay your two largest pieces wrong sides together and pin around the edges.
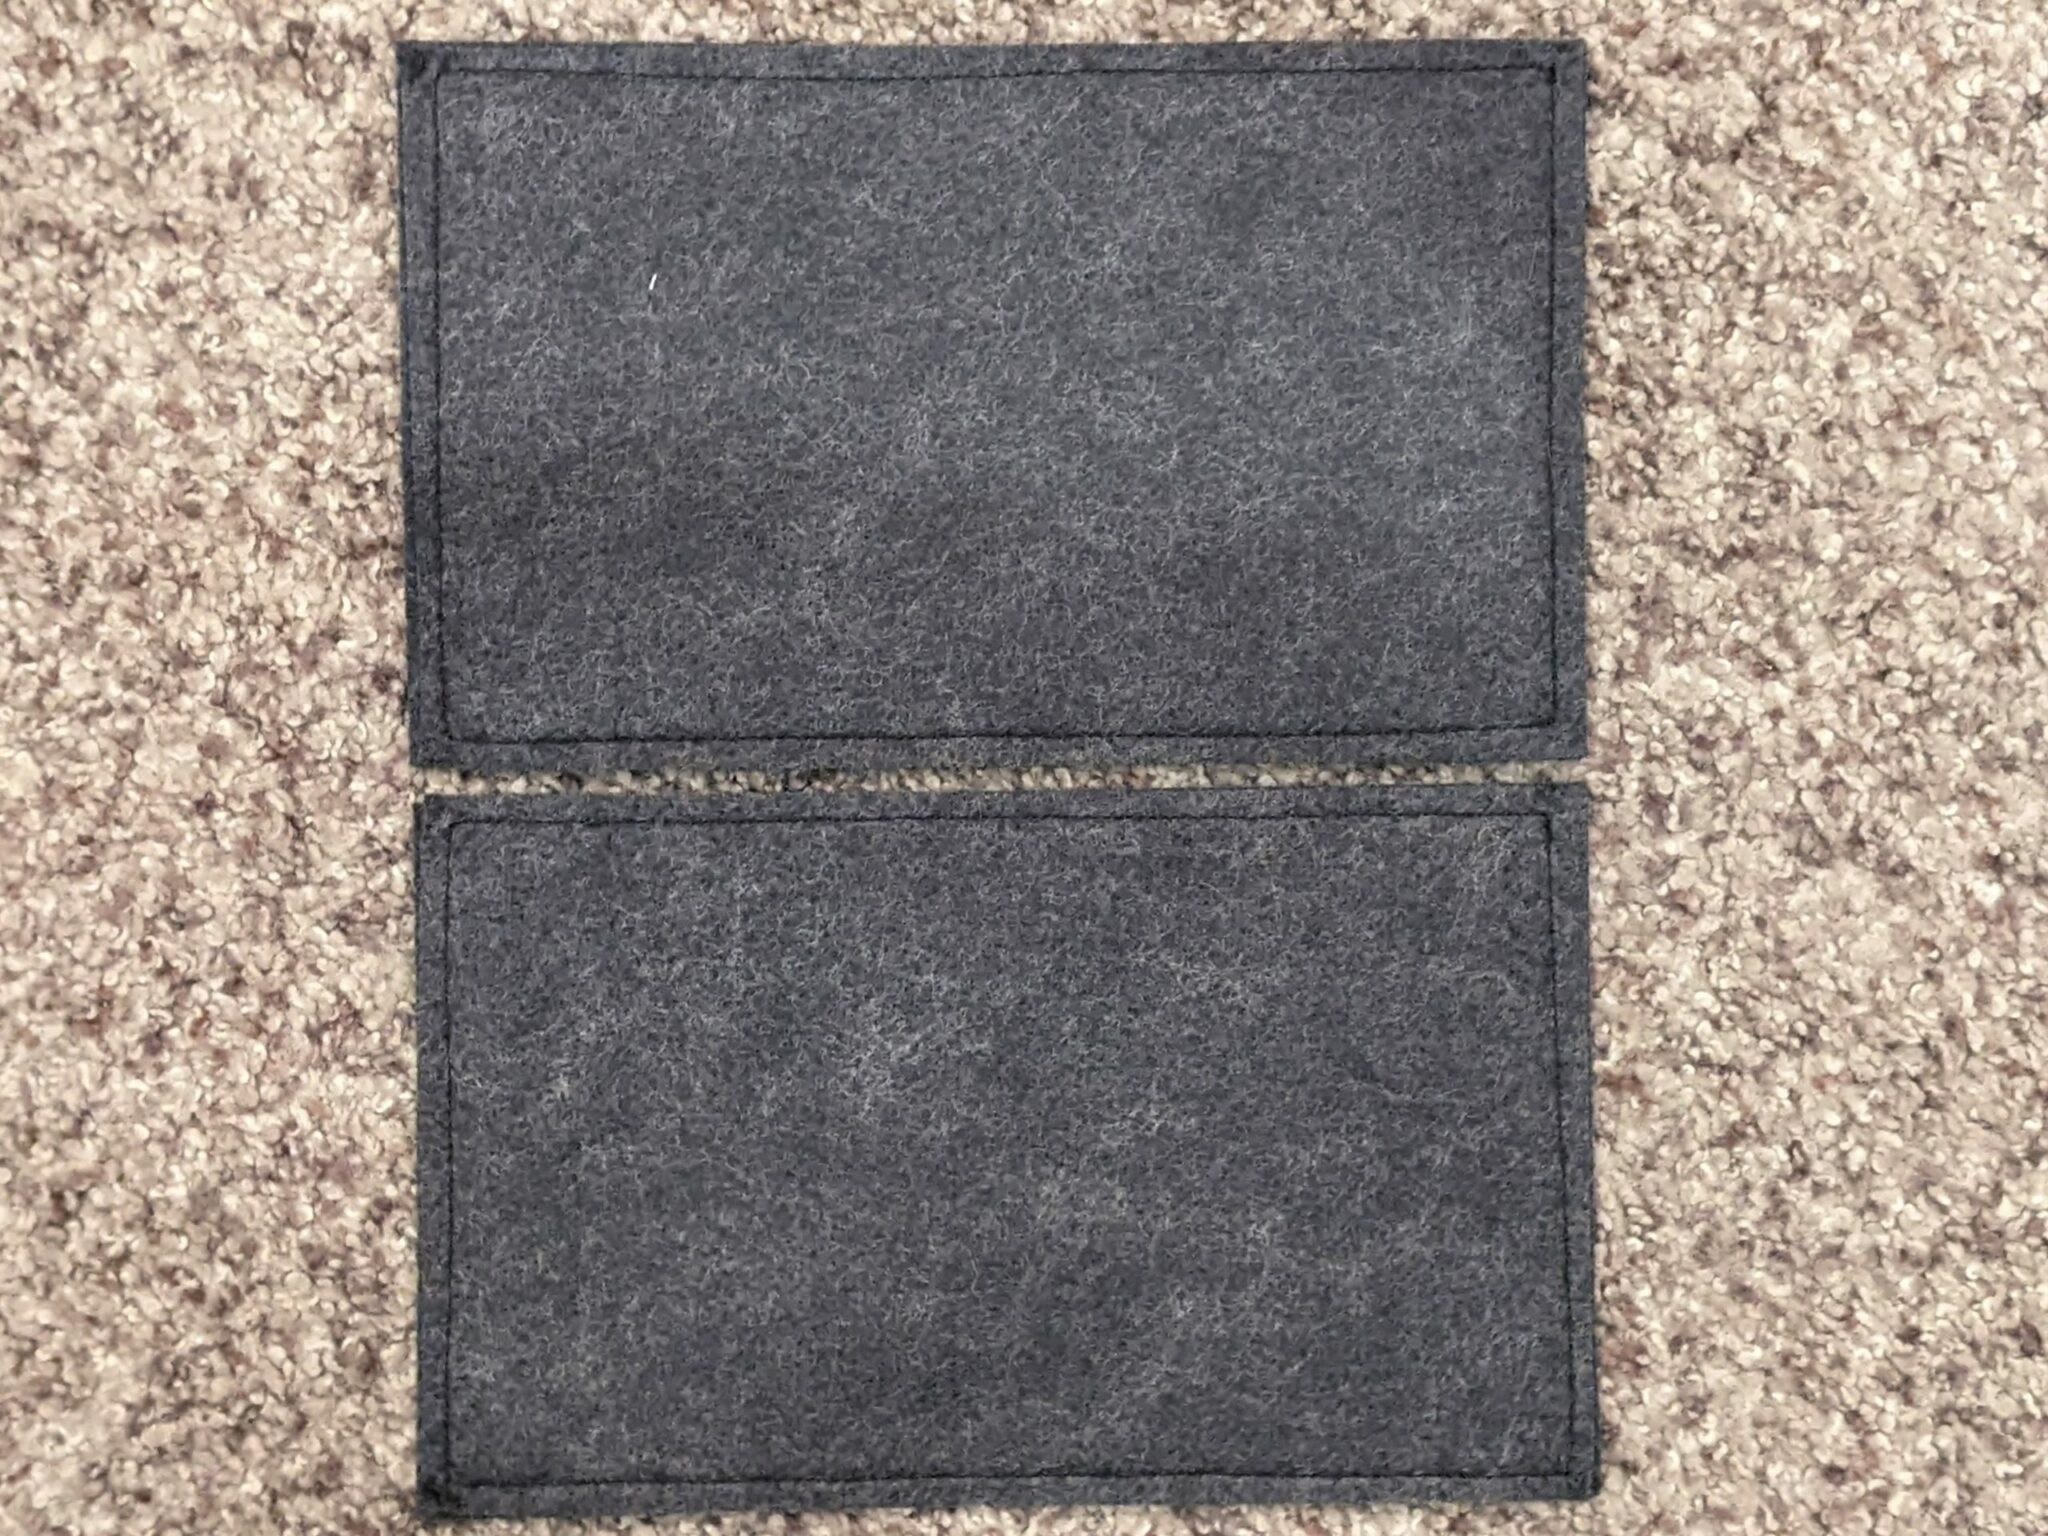
- There are 2 sets of each size of pocket. Lay the pockets in sets of two right sides together and pin around the edges.
- Sew around the edges of each pocket with a ⅛” seam allowance. You will now have 2 large pockets, 2 slightly smaller pockets, and 1 large main piece.

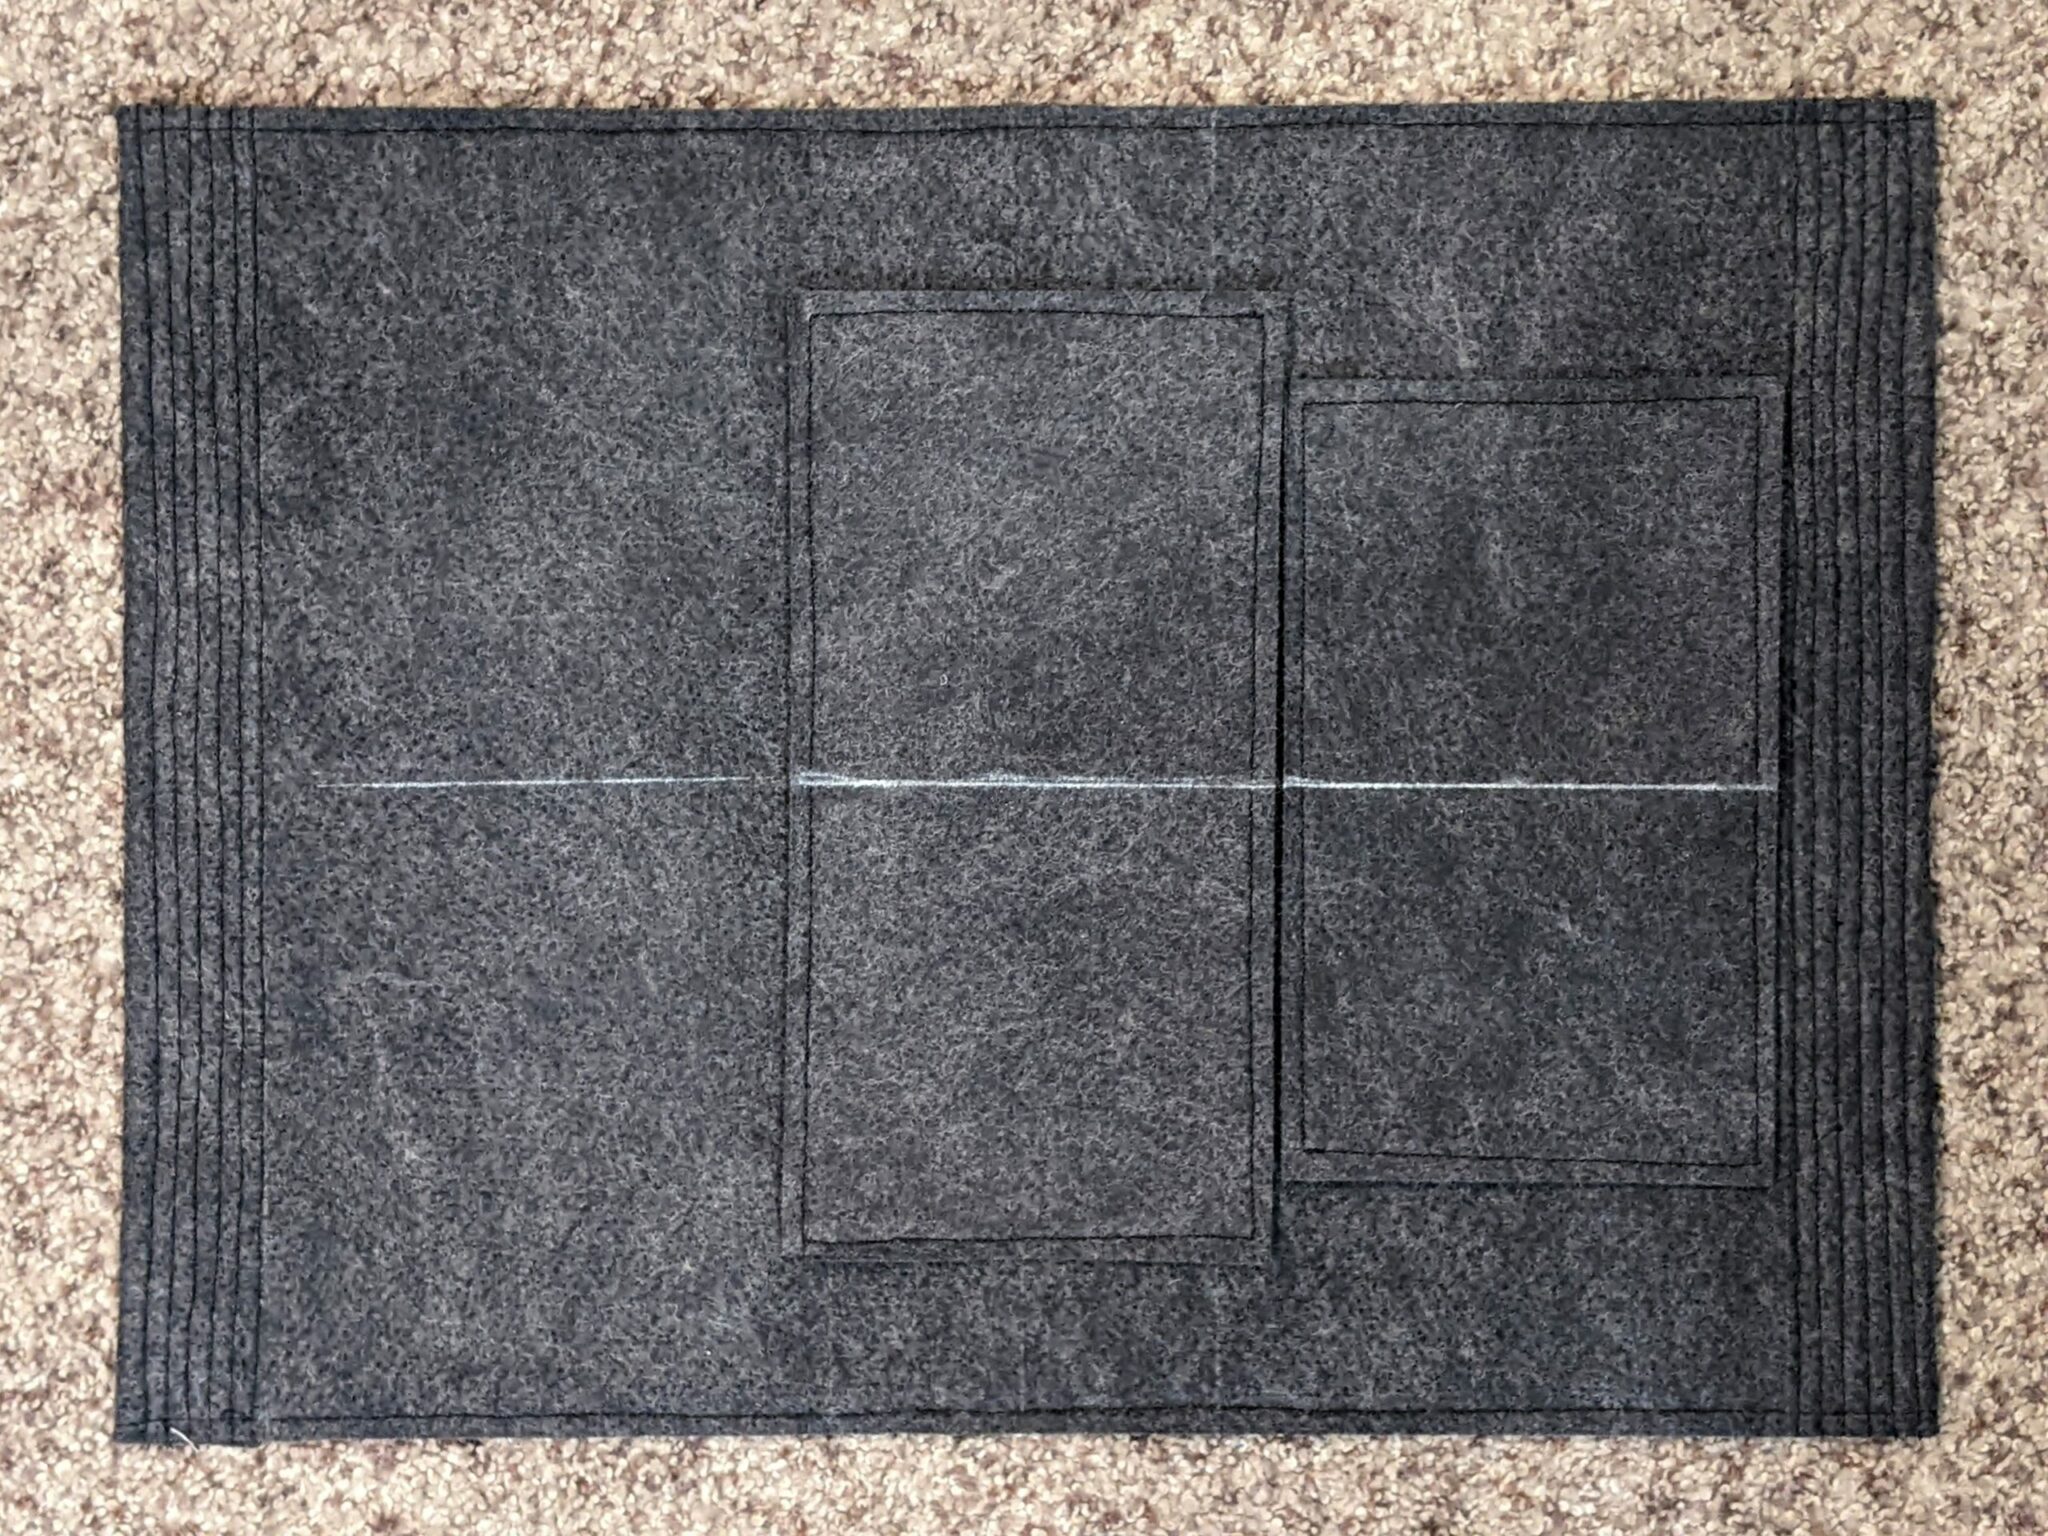
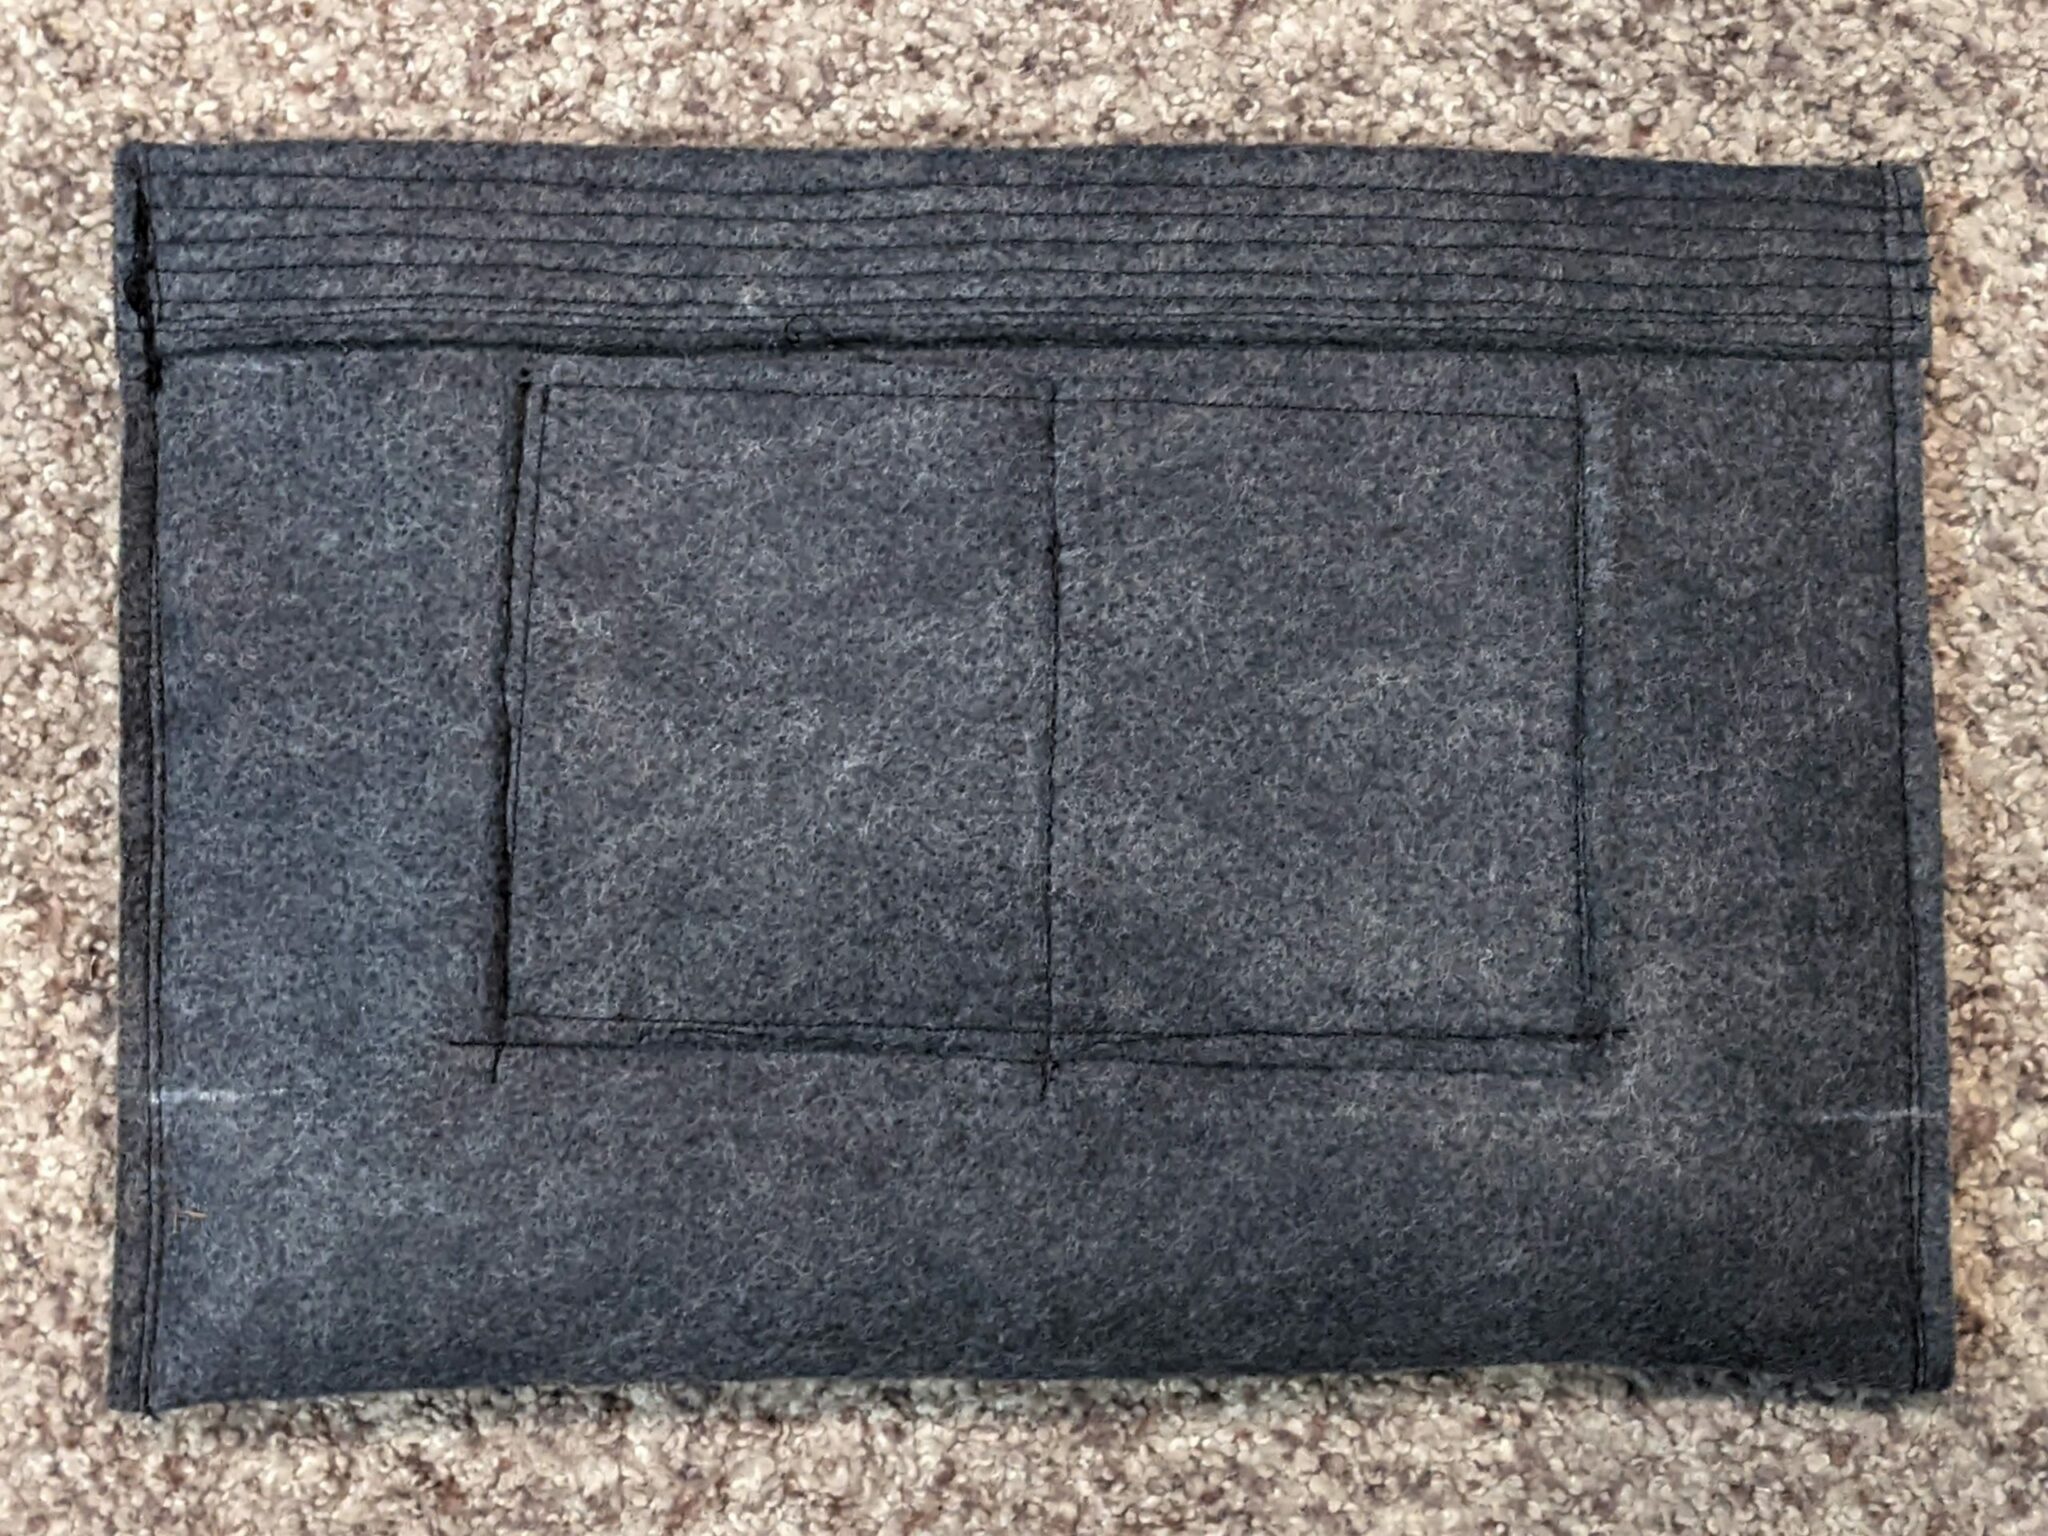
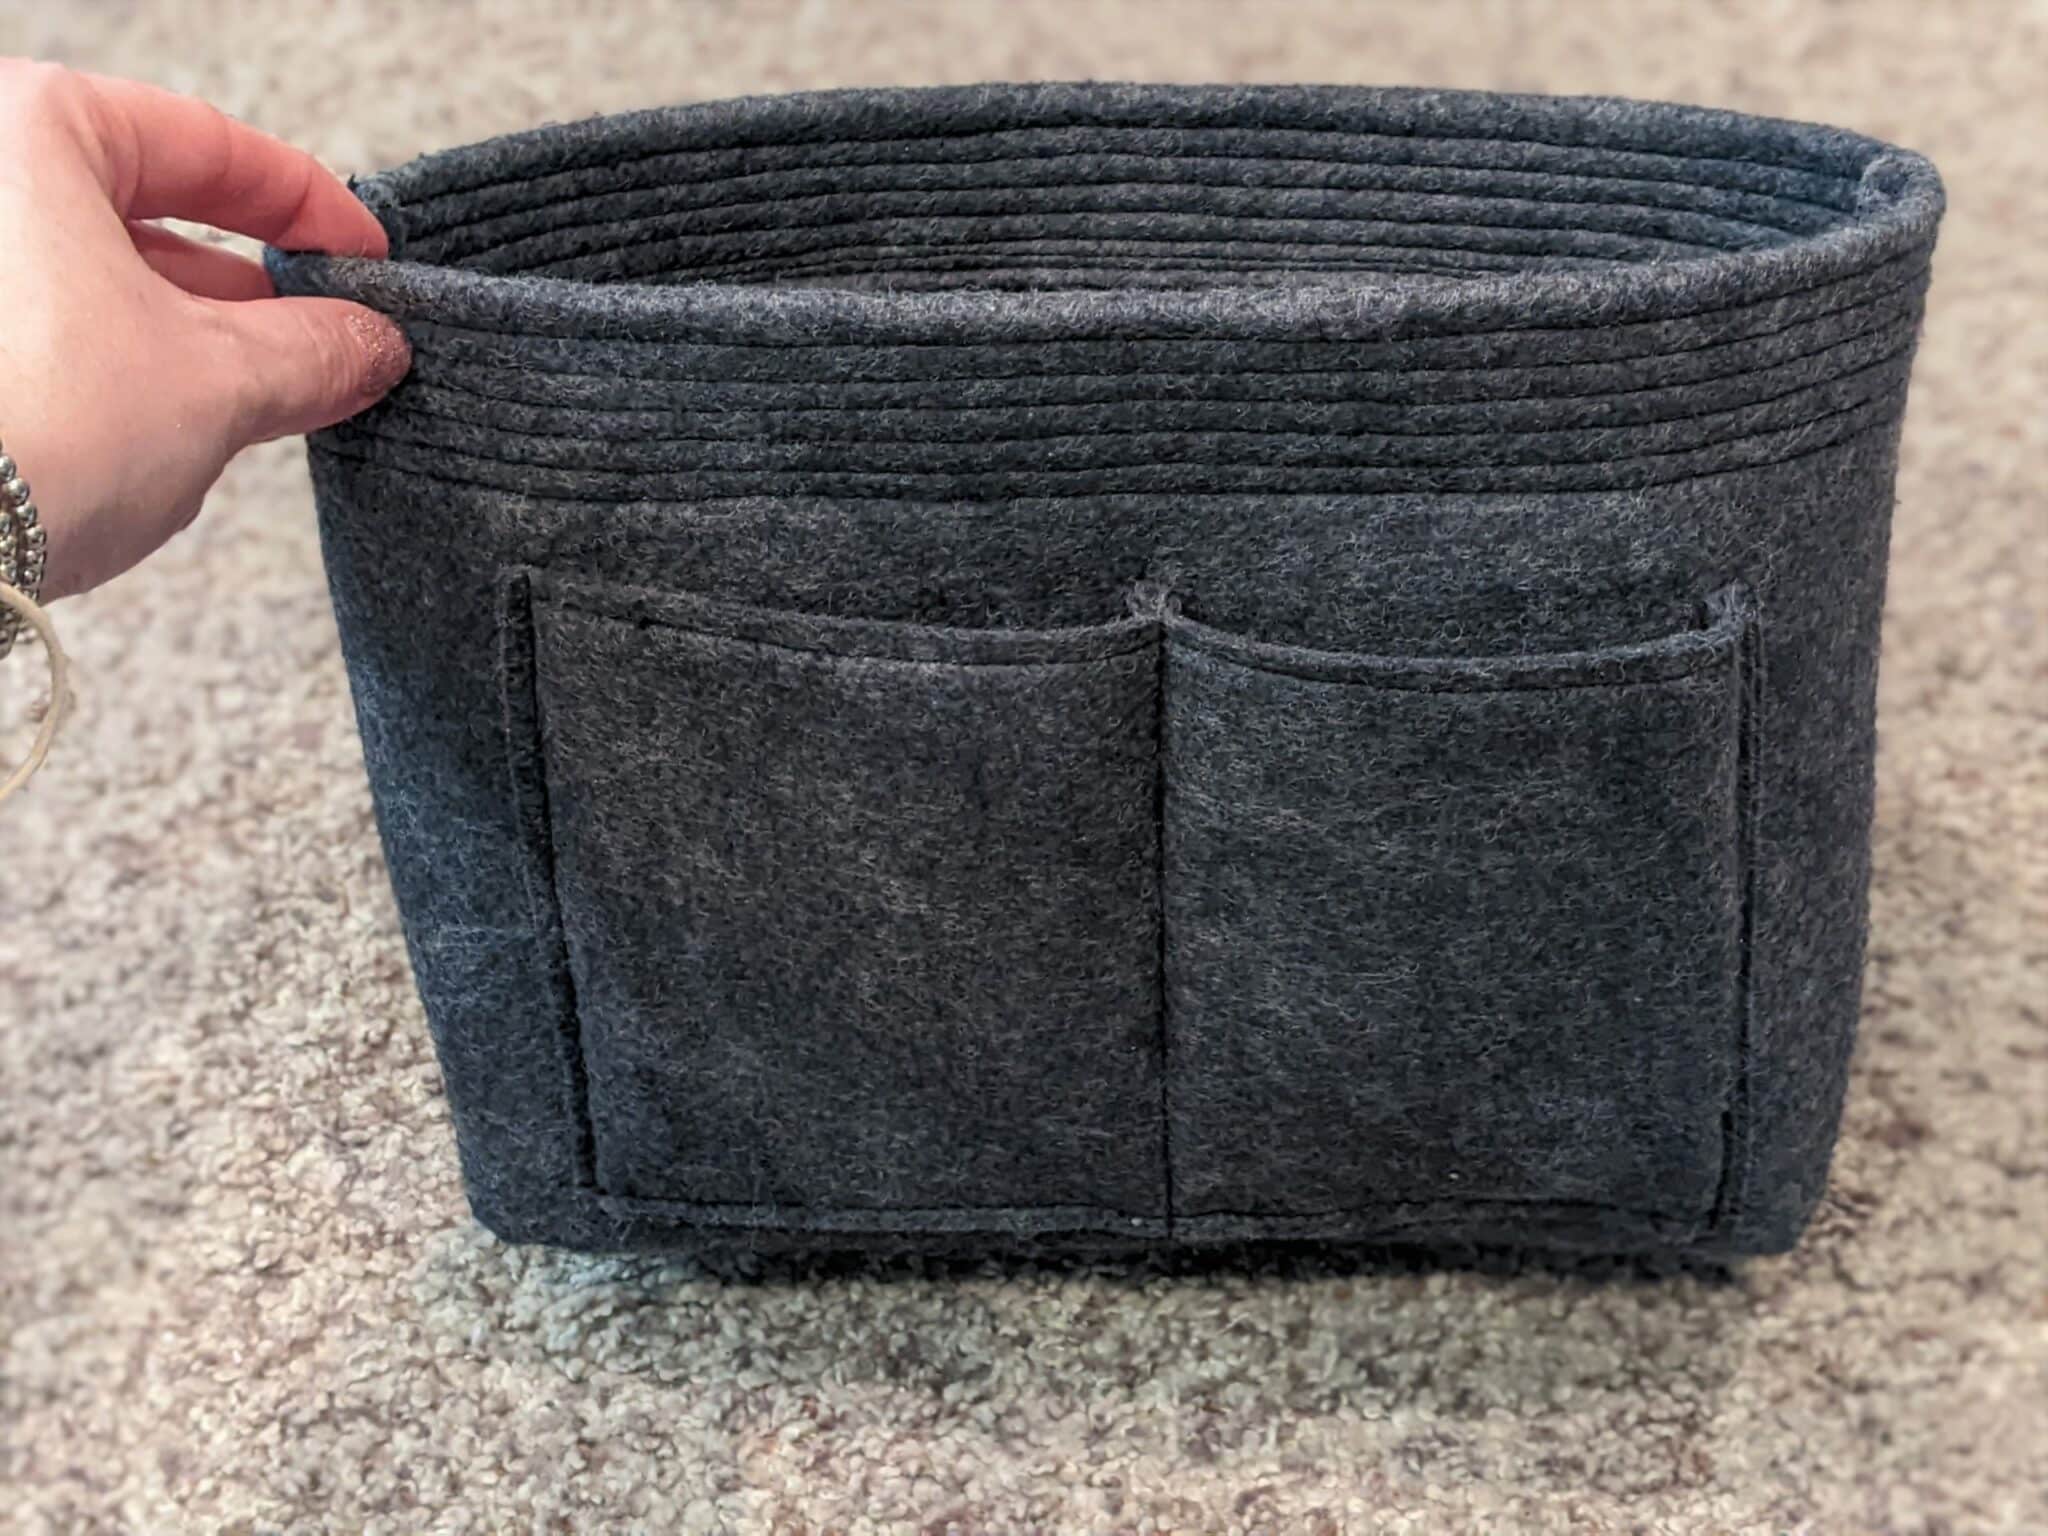
Main Bag
All steps are done on both sides of the bag. I am mainly showing one side, but you will repeat all of the steps on the opposite side.
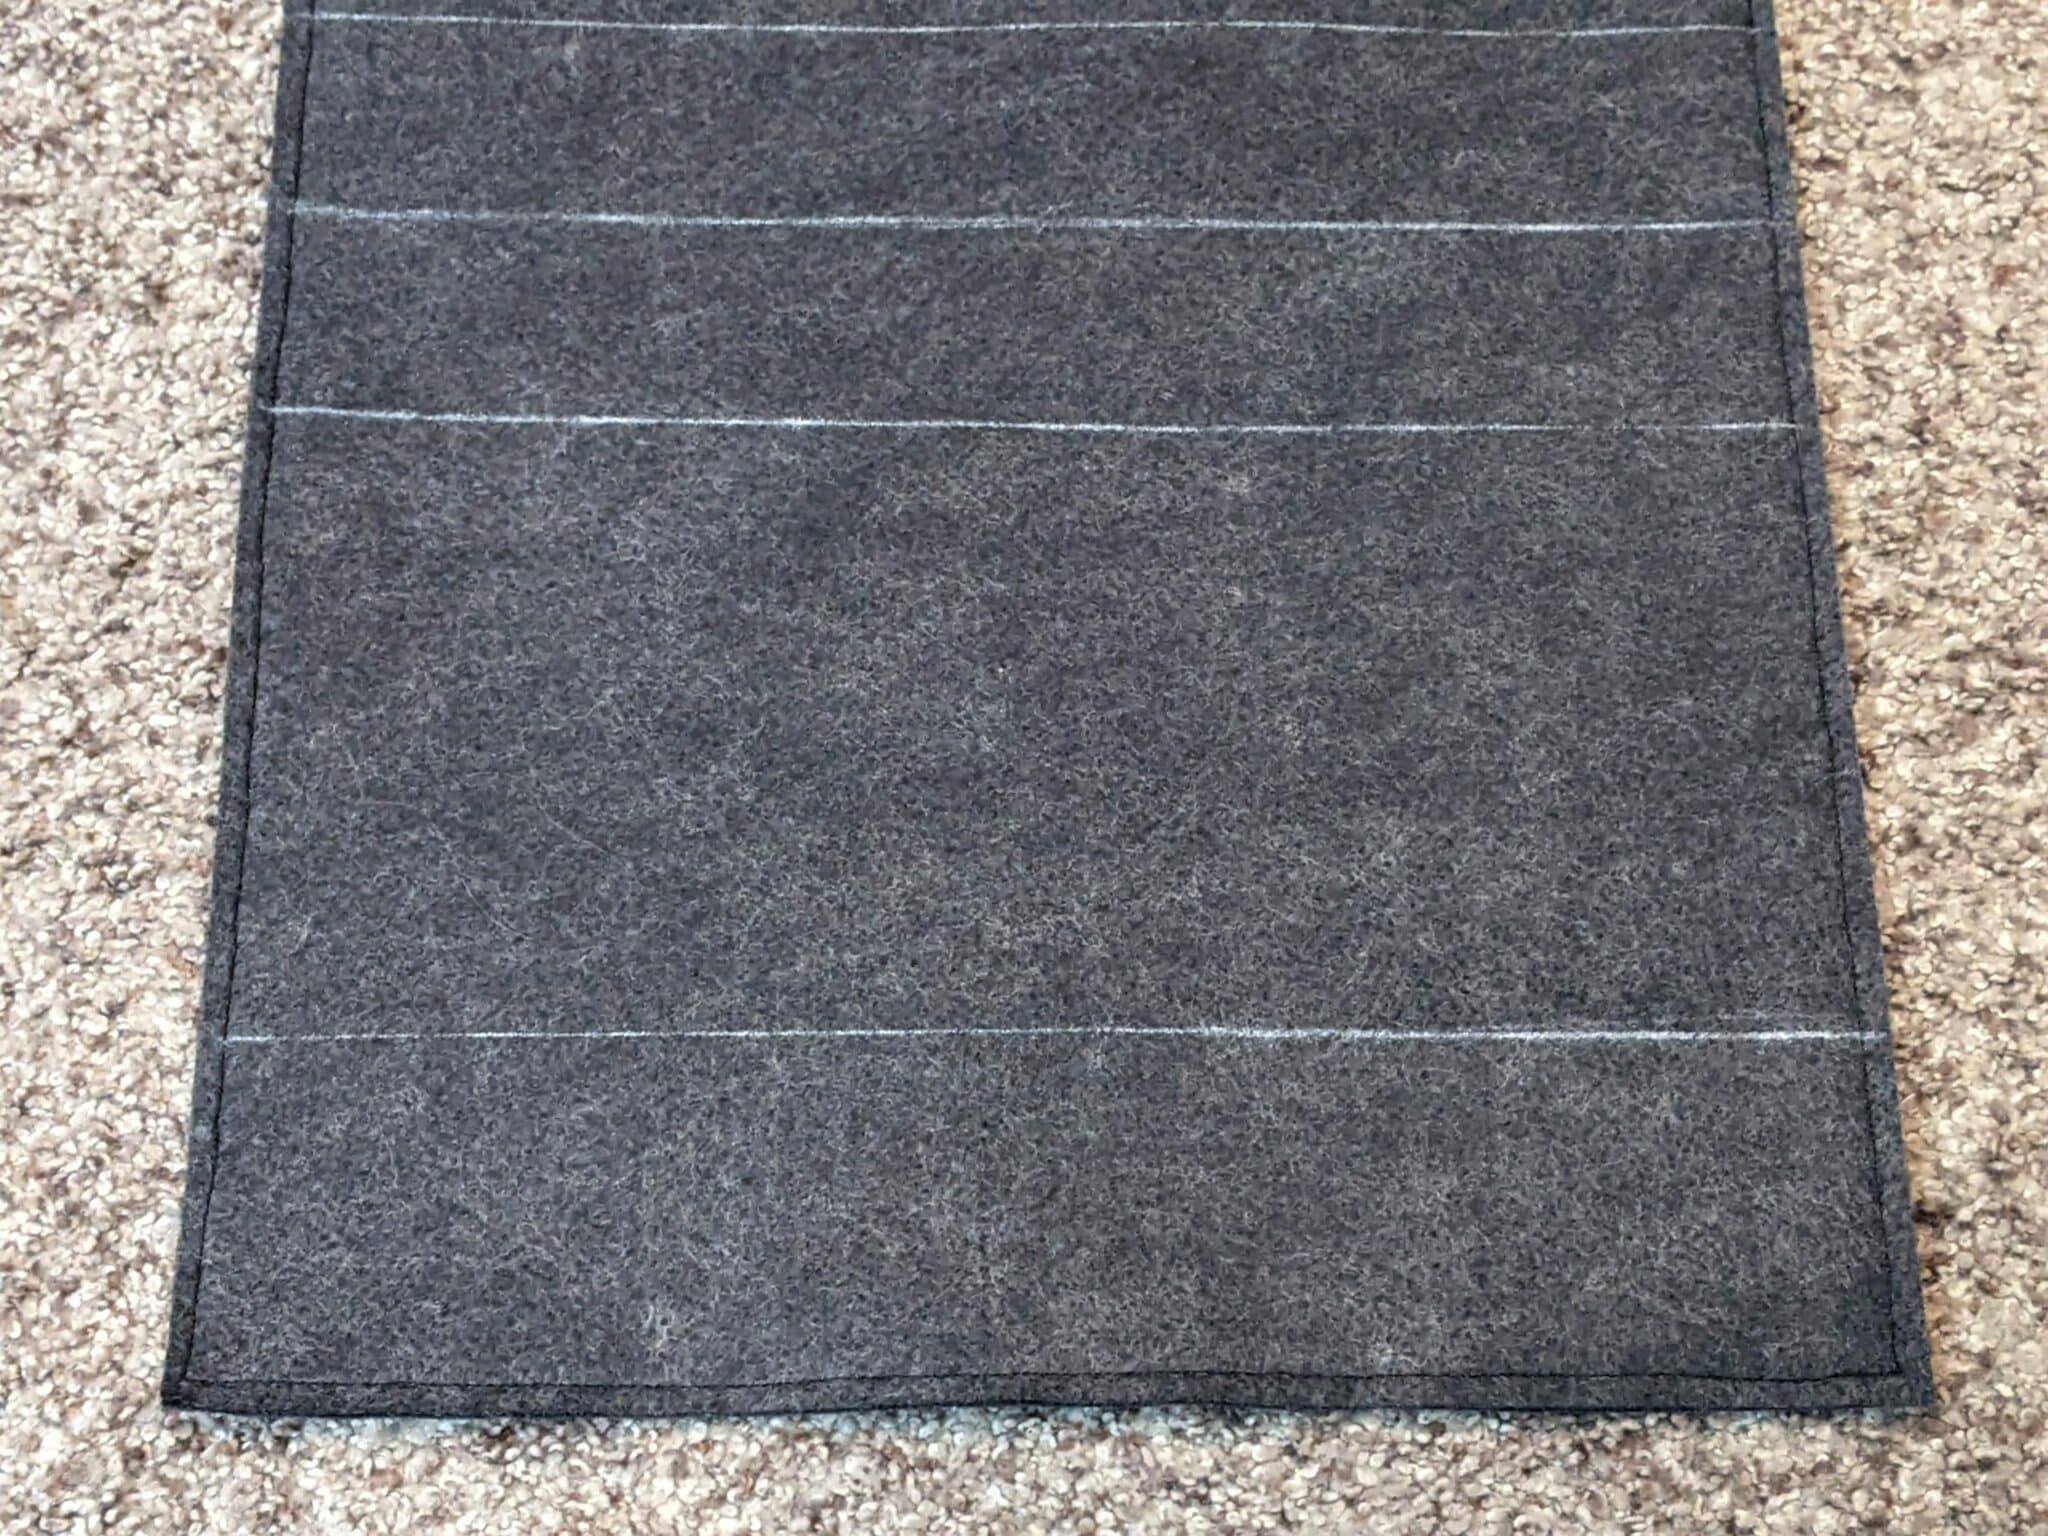
You can draw guidelines onto the back of your main piece with chalk to help you, but this is optional.
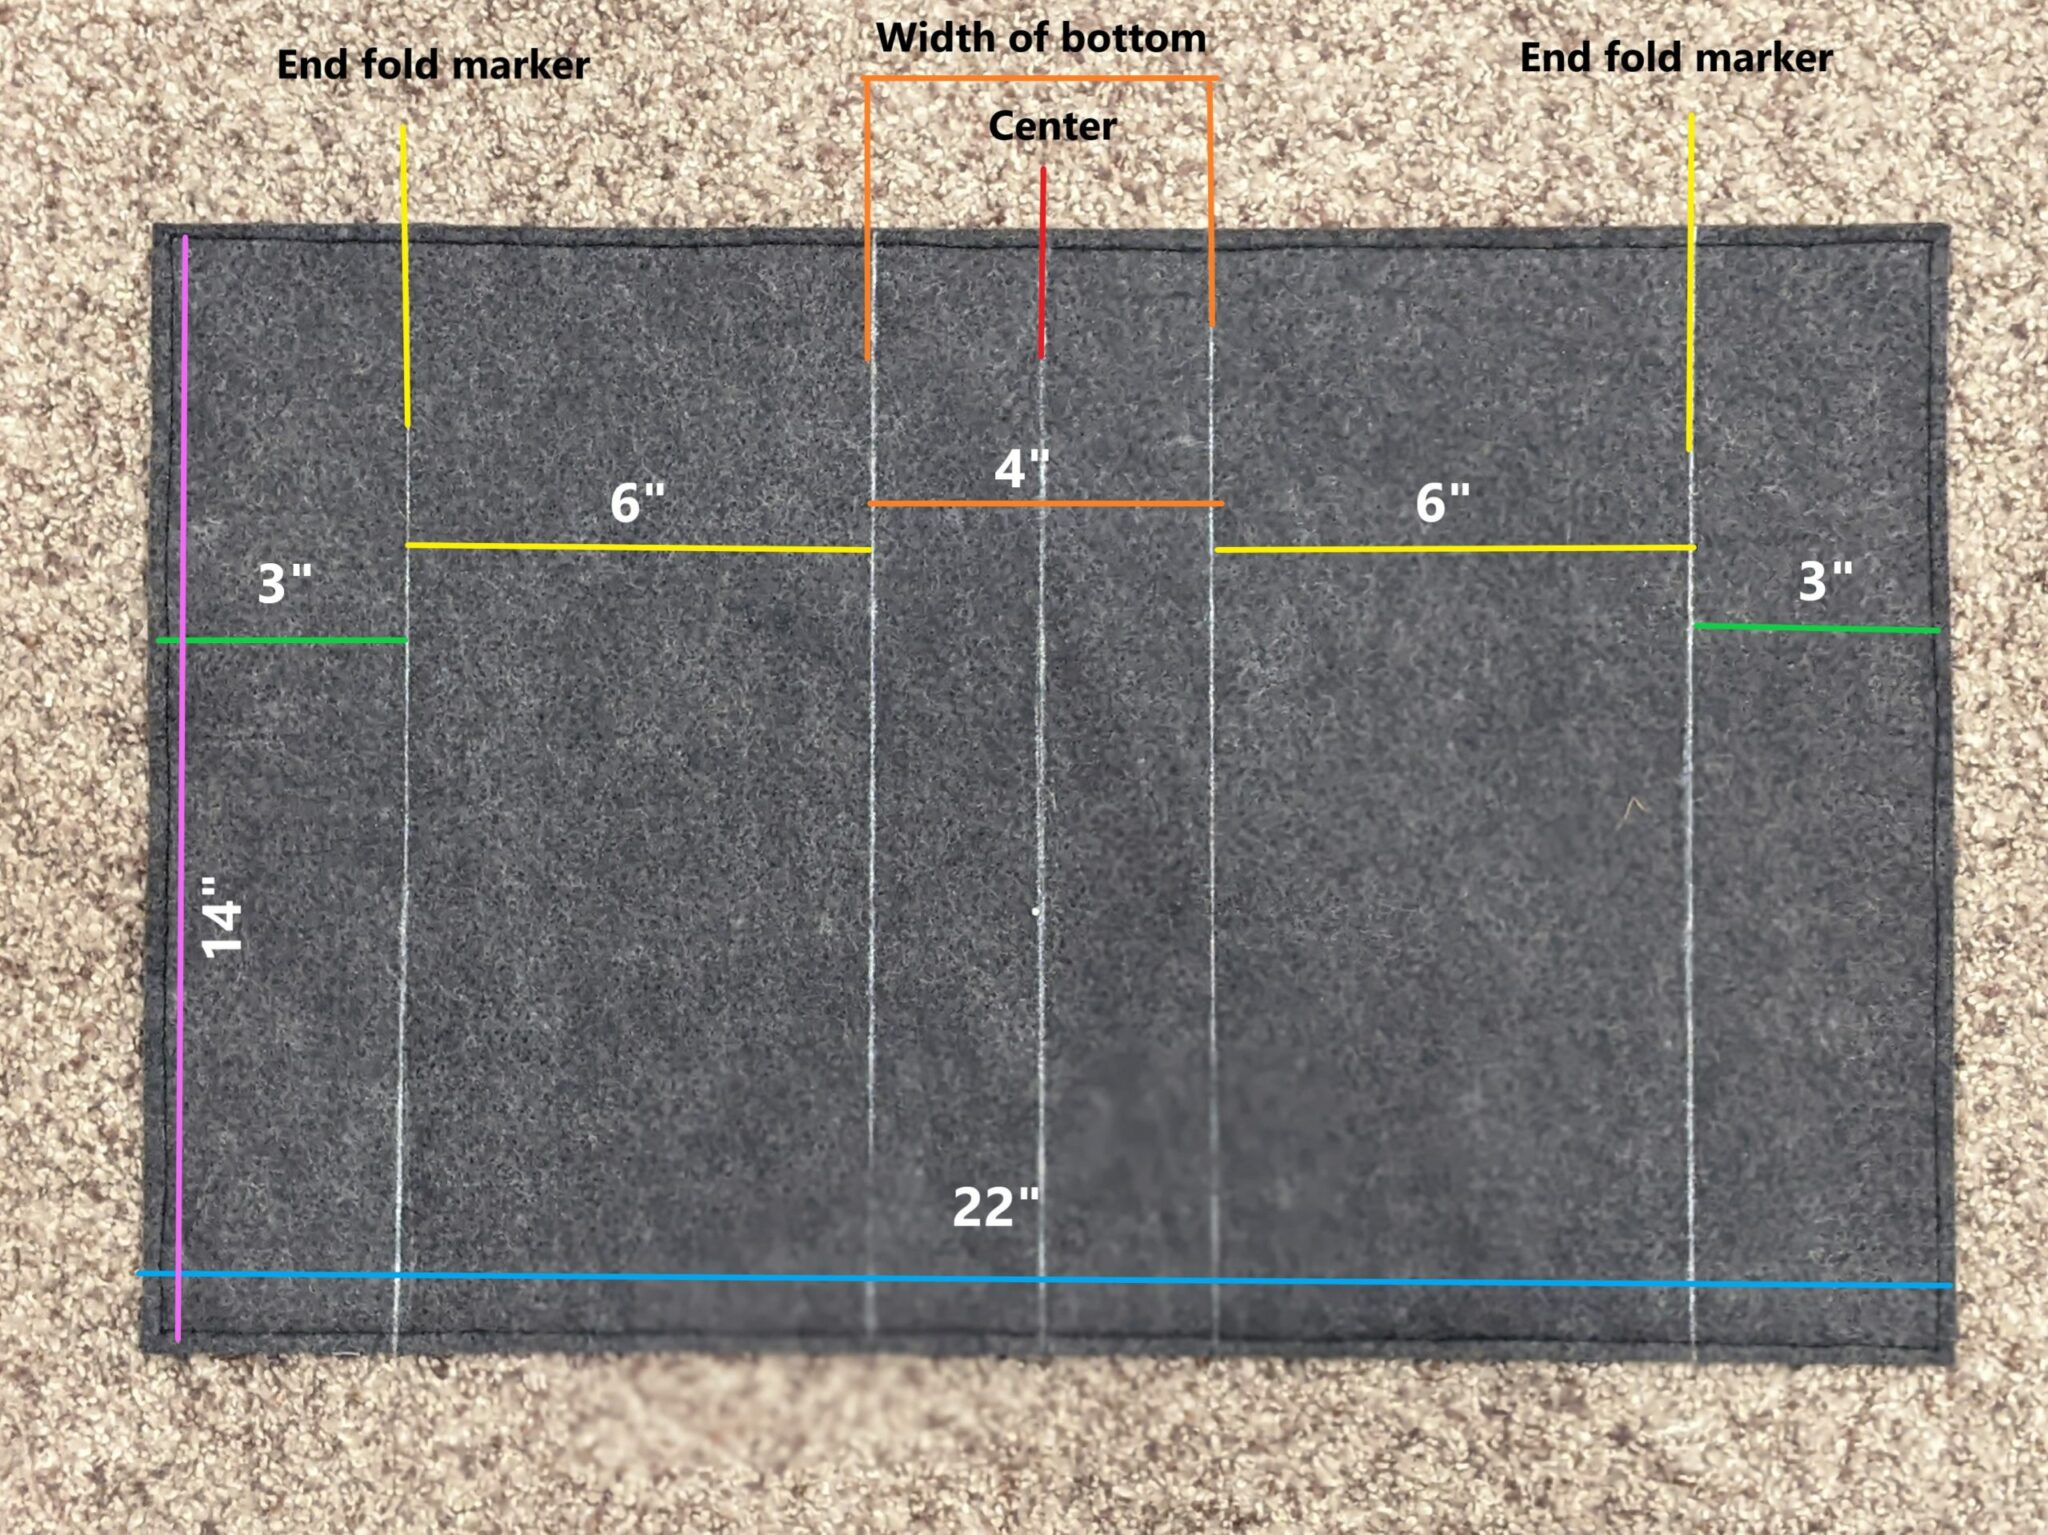
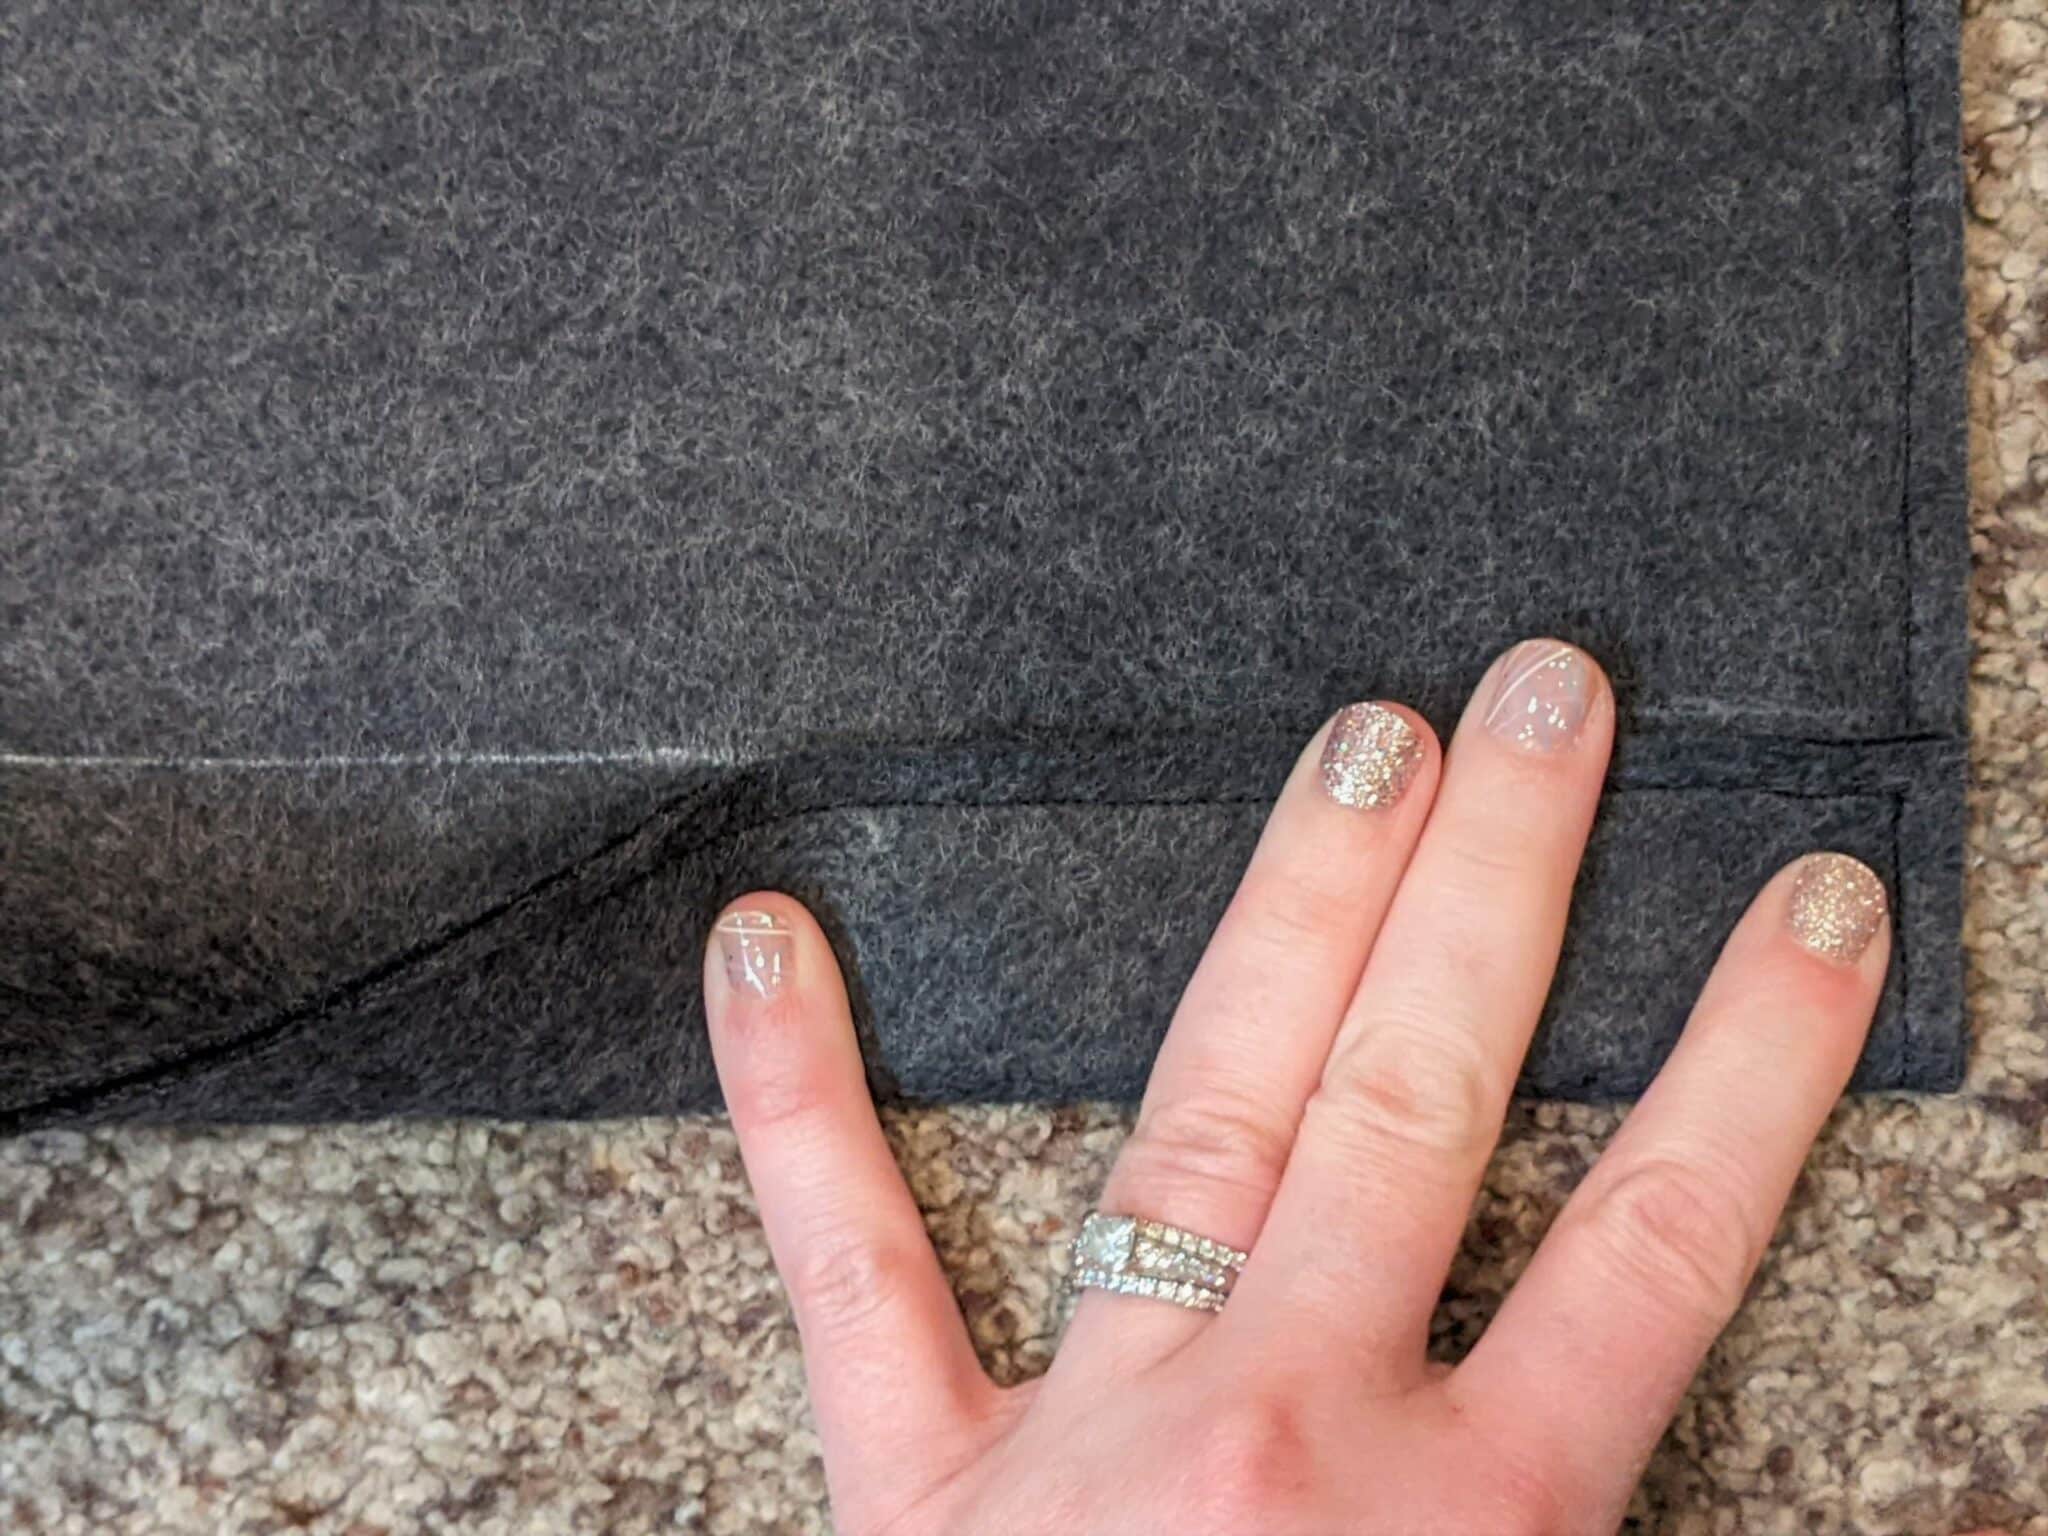
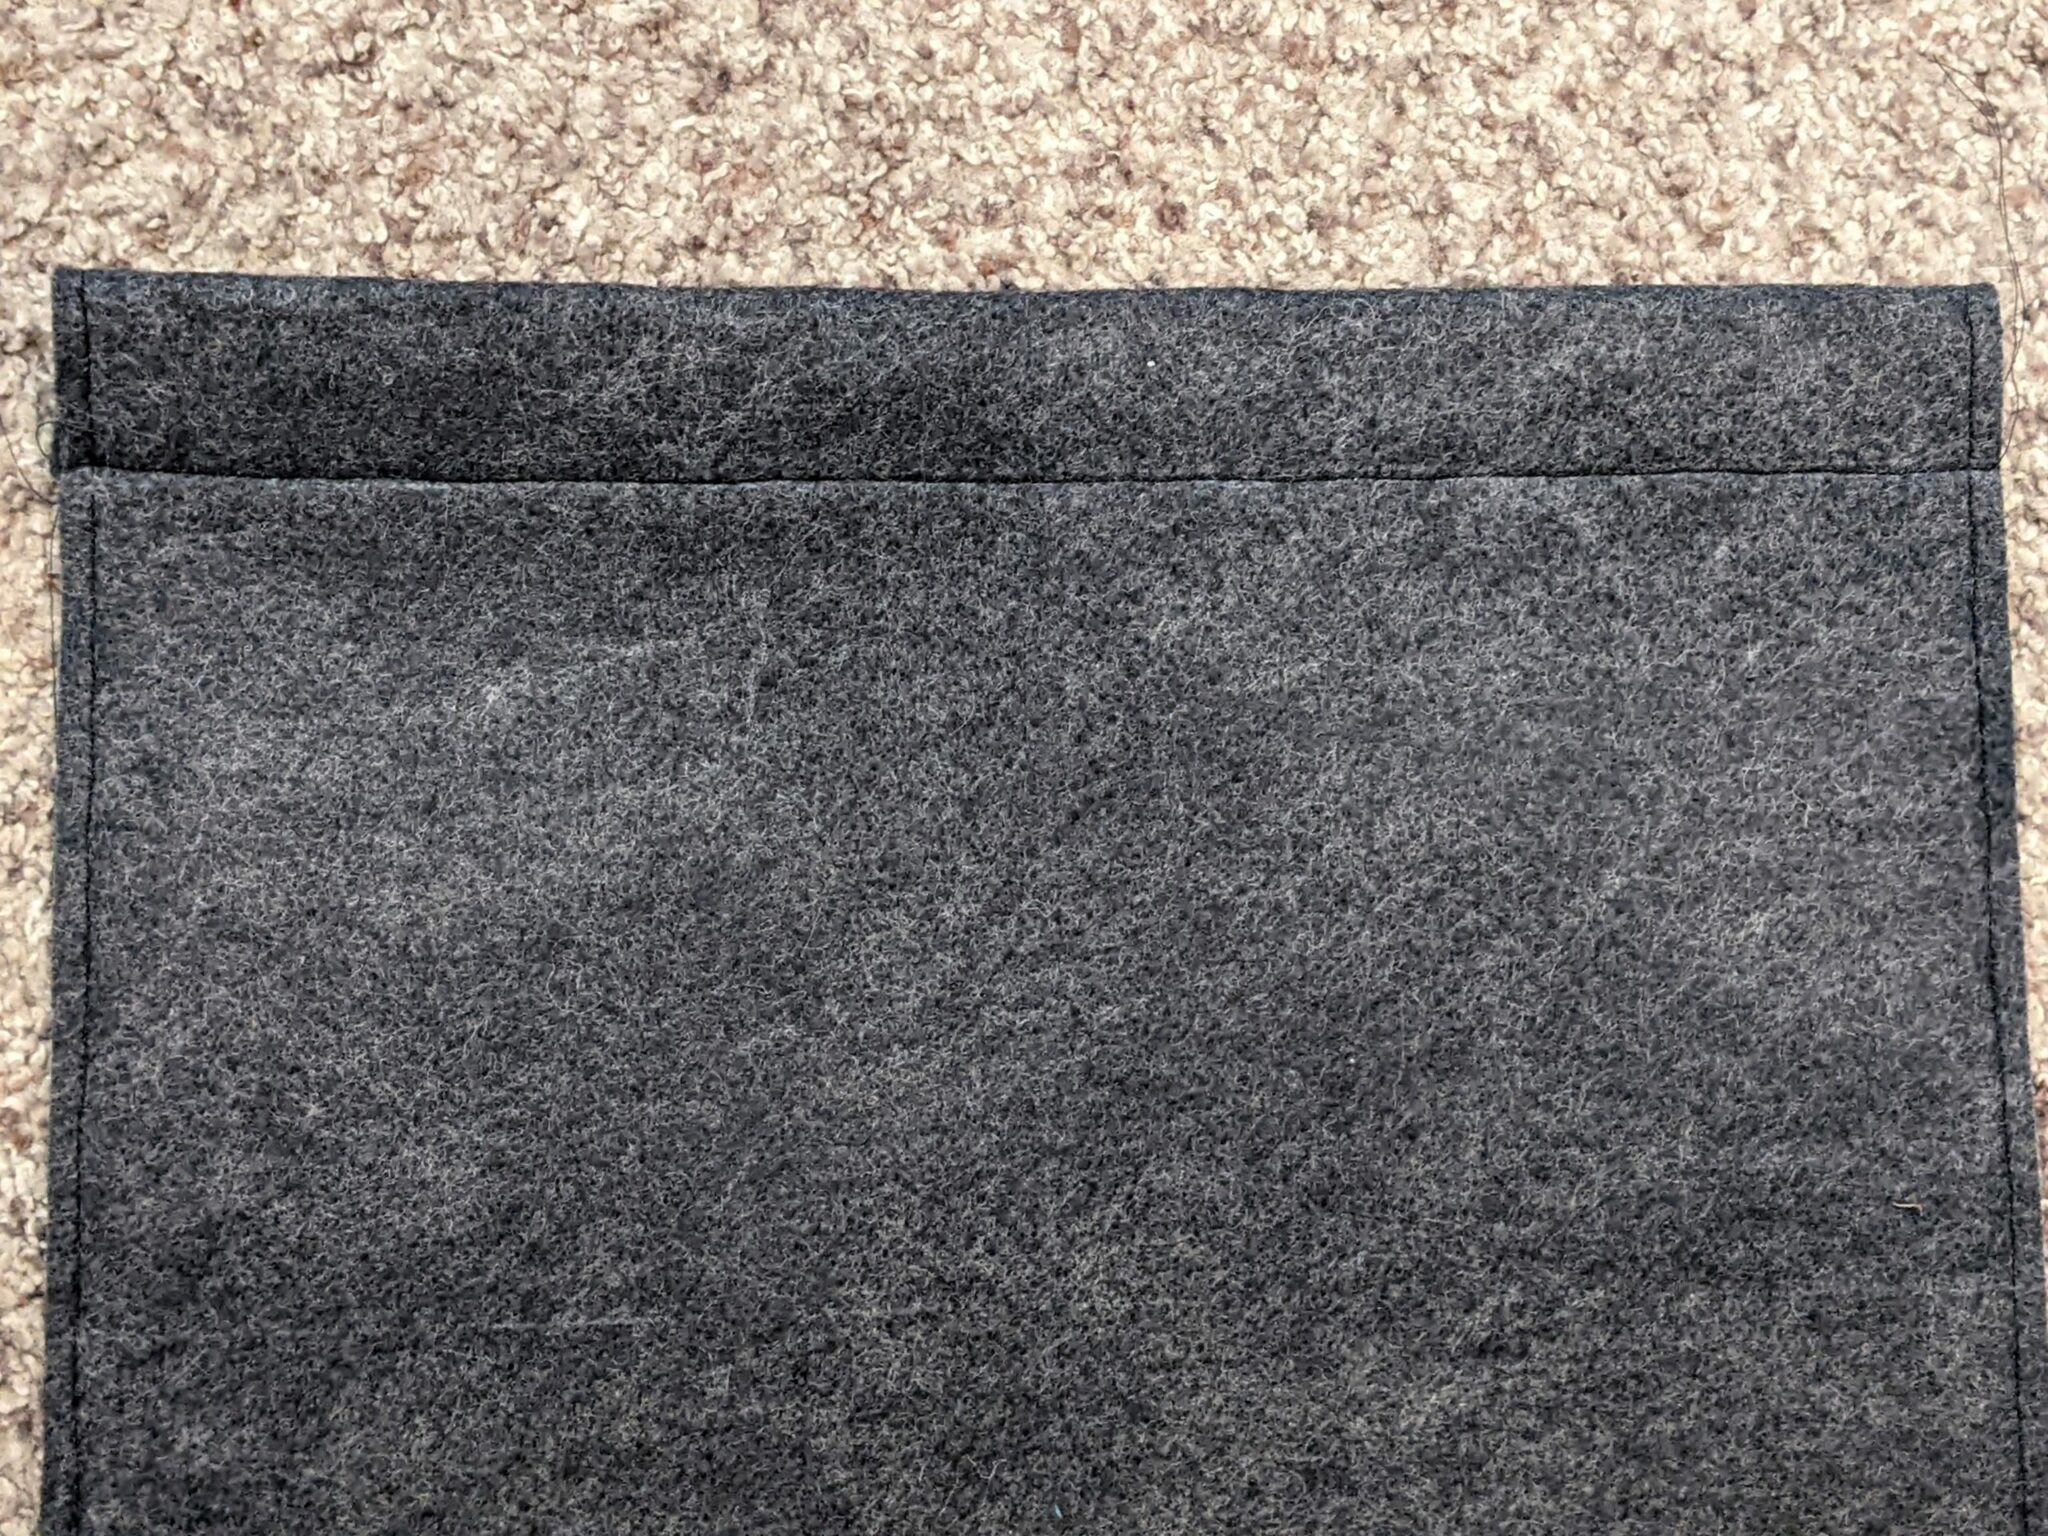
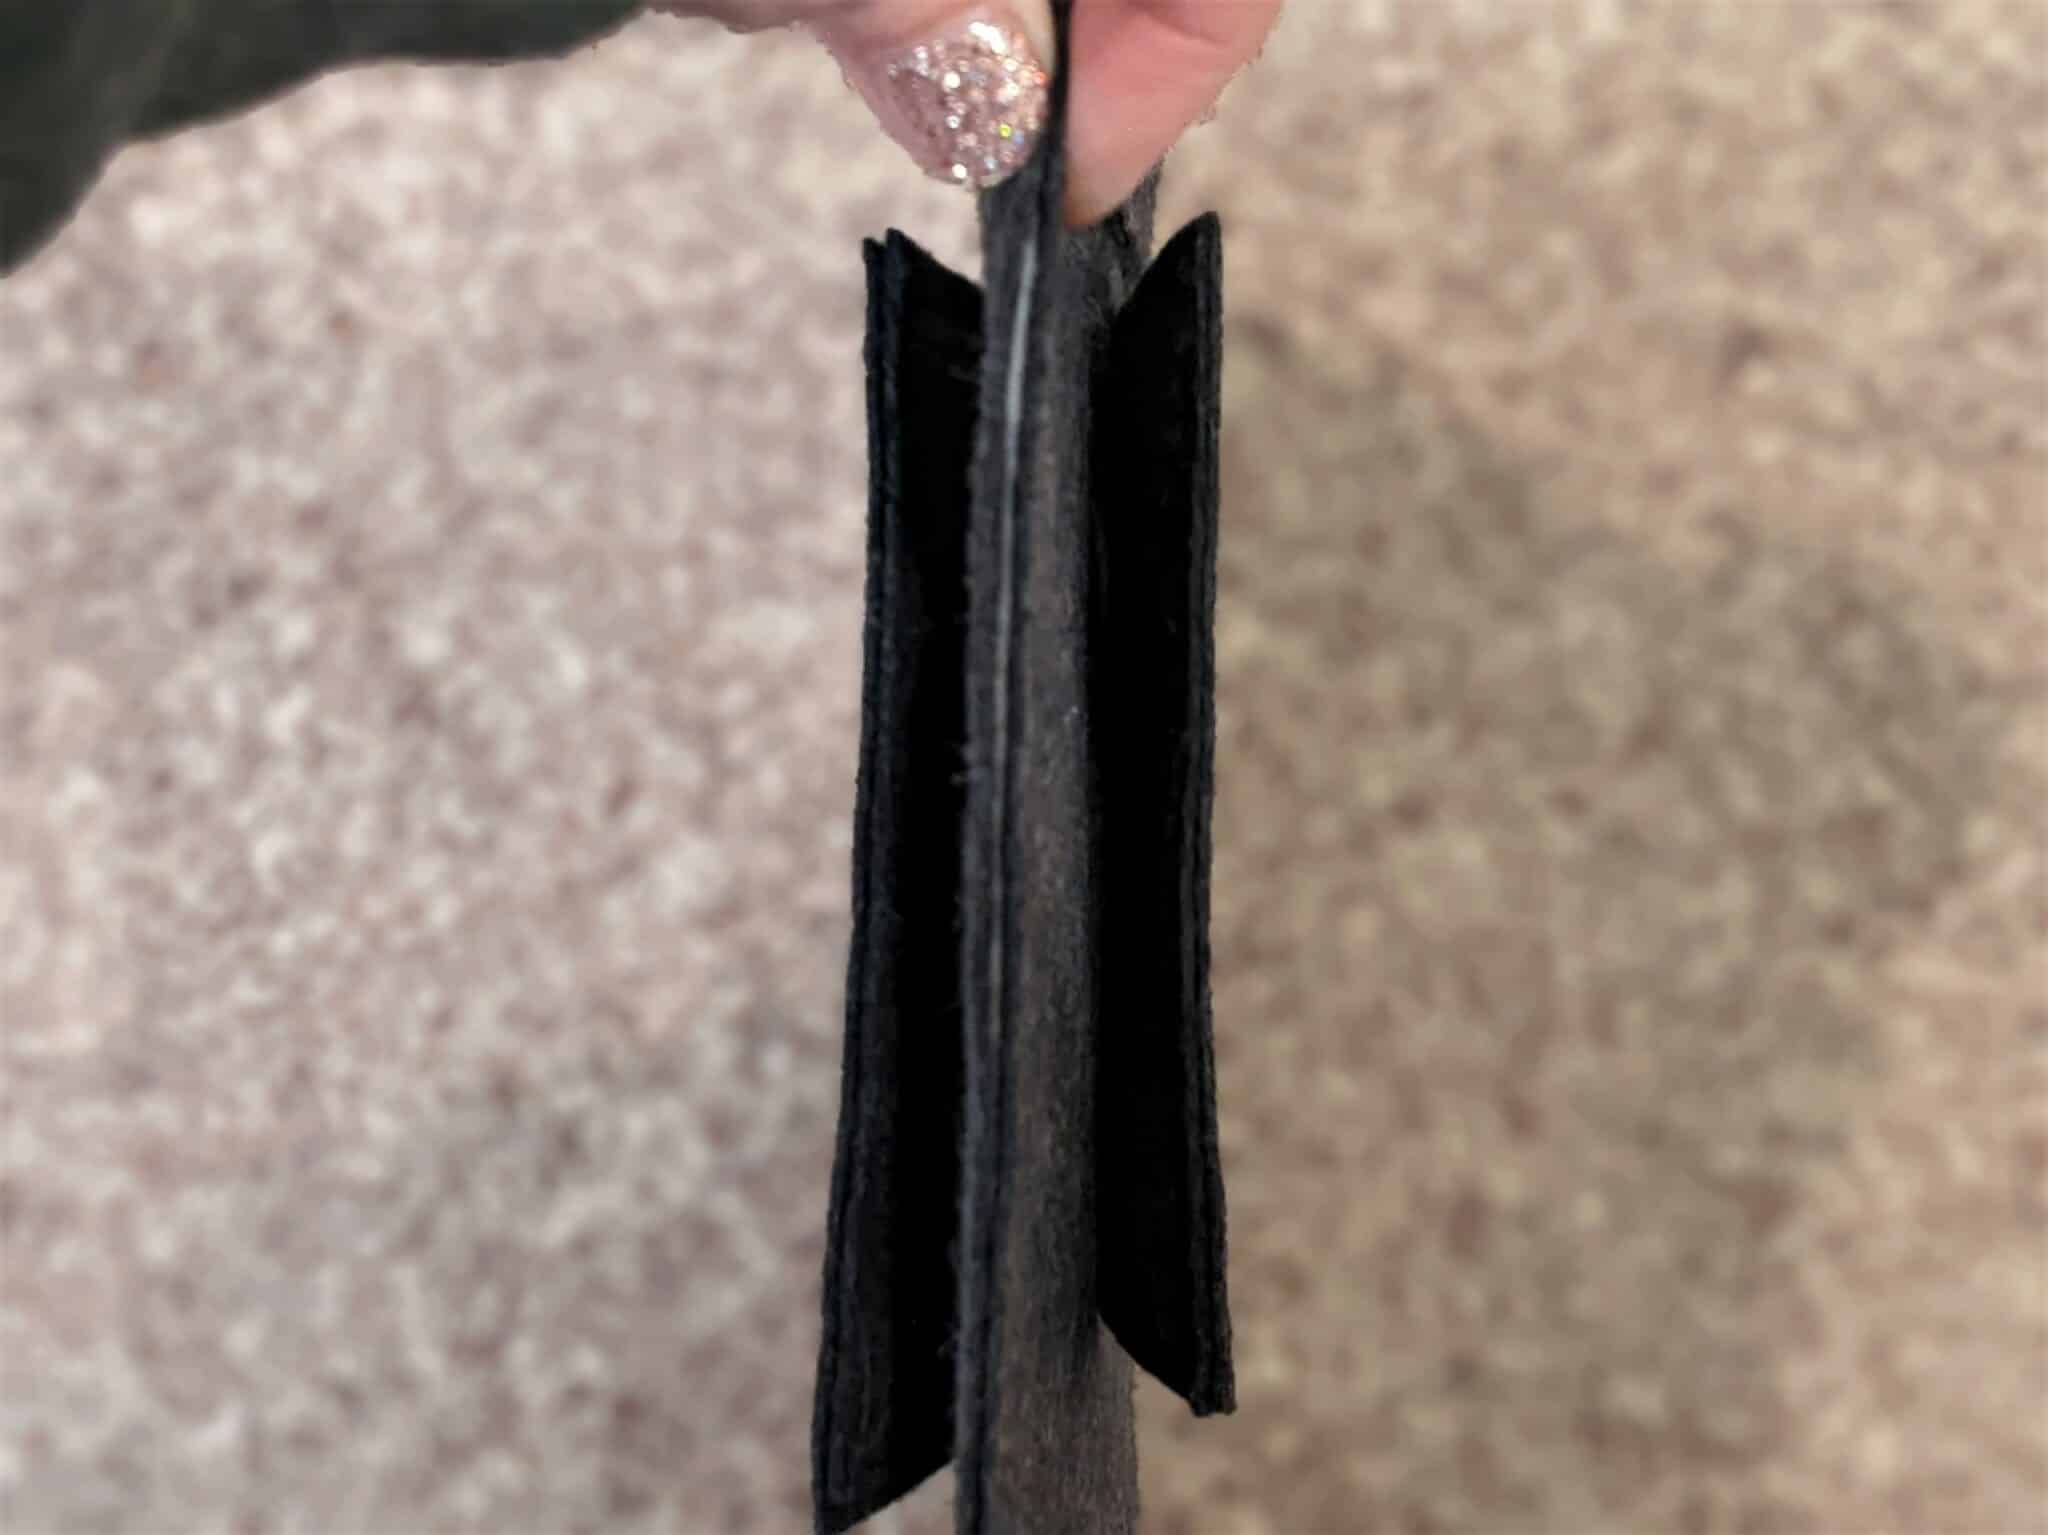
- Fold each short end towards the back 1.5” (press if needed) and pin.
- Sew across the end ⅛” away from the raw edge.
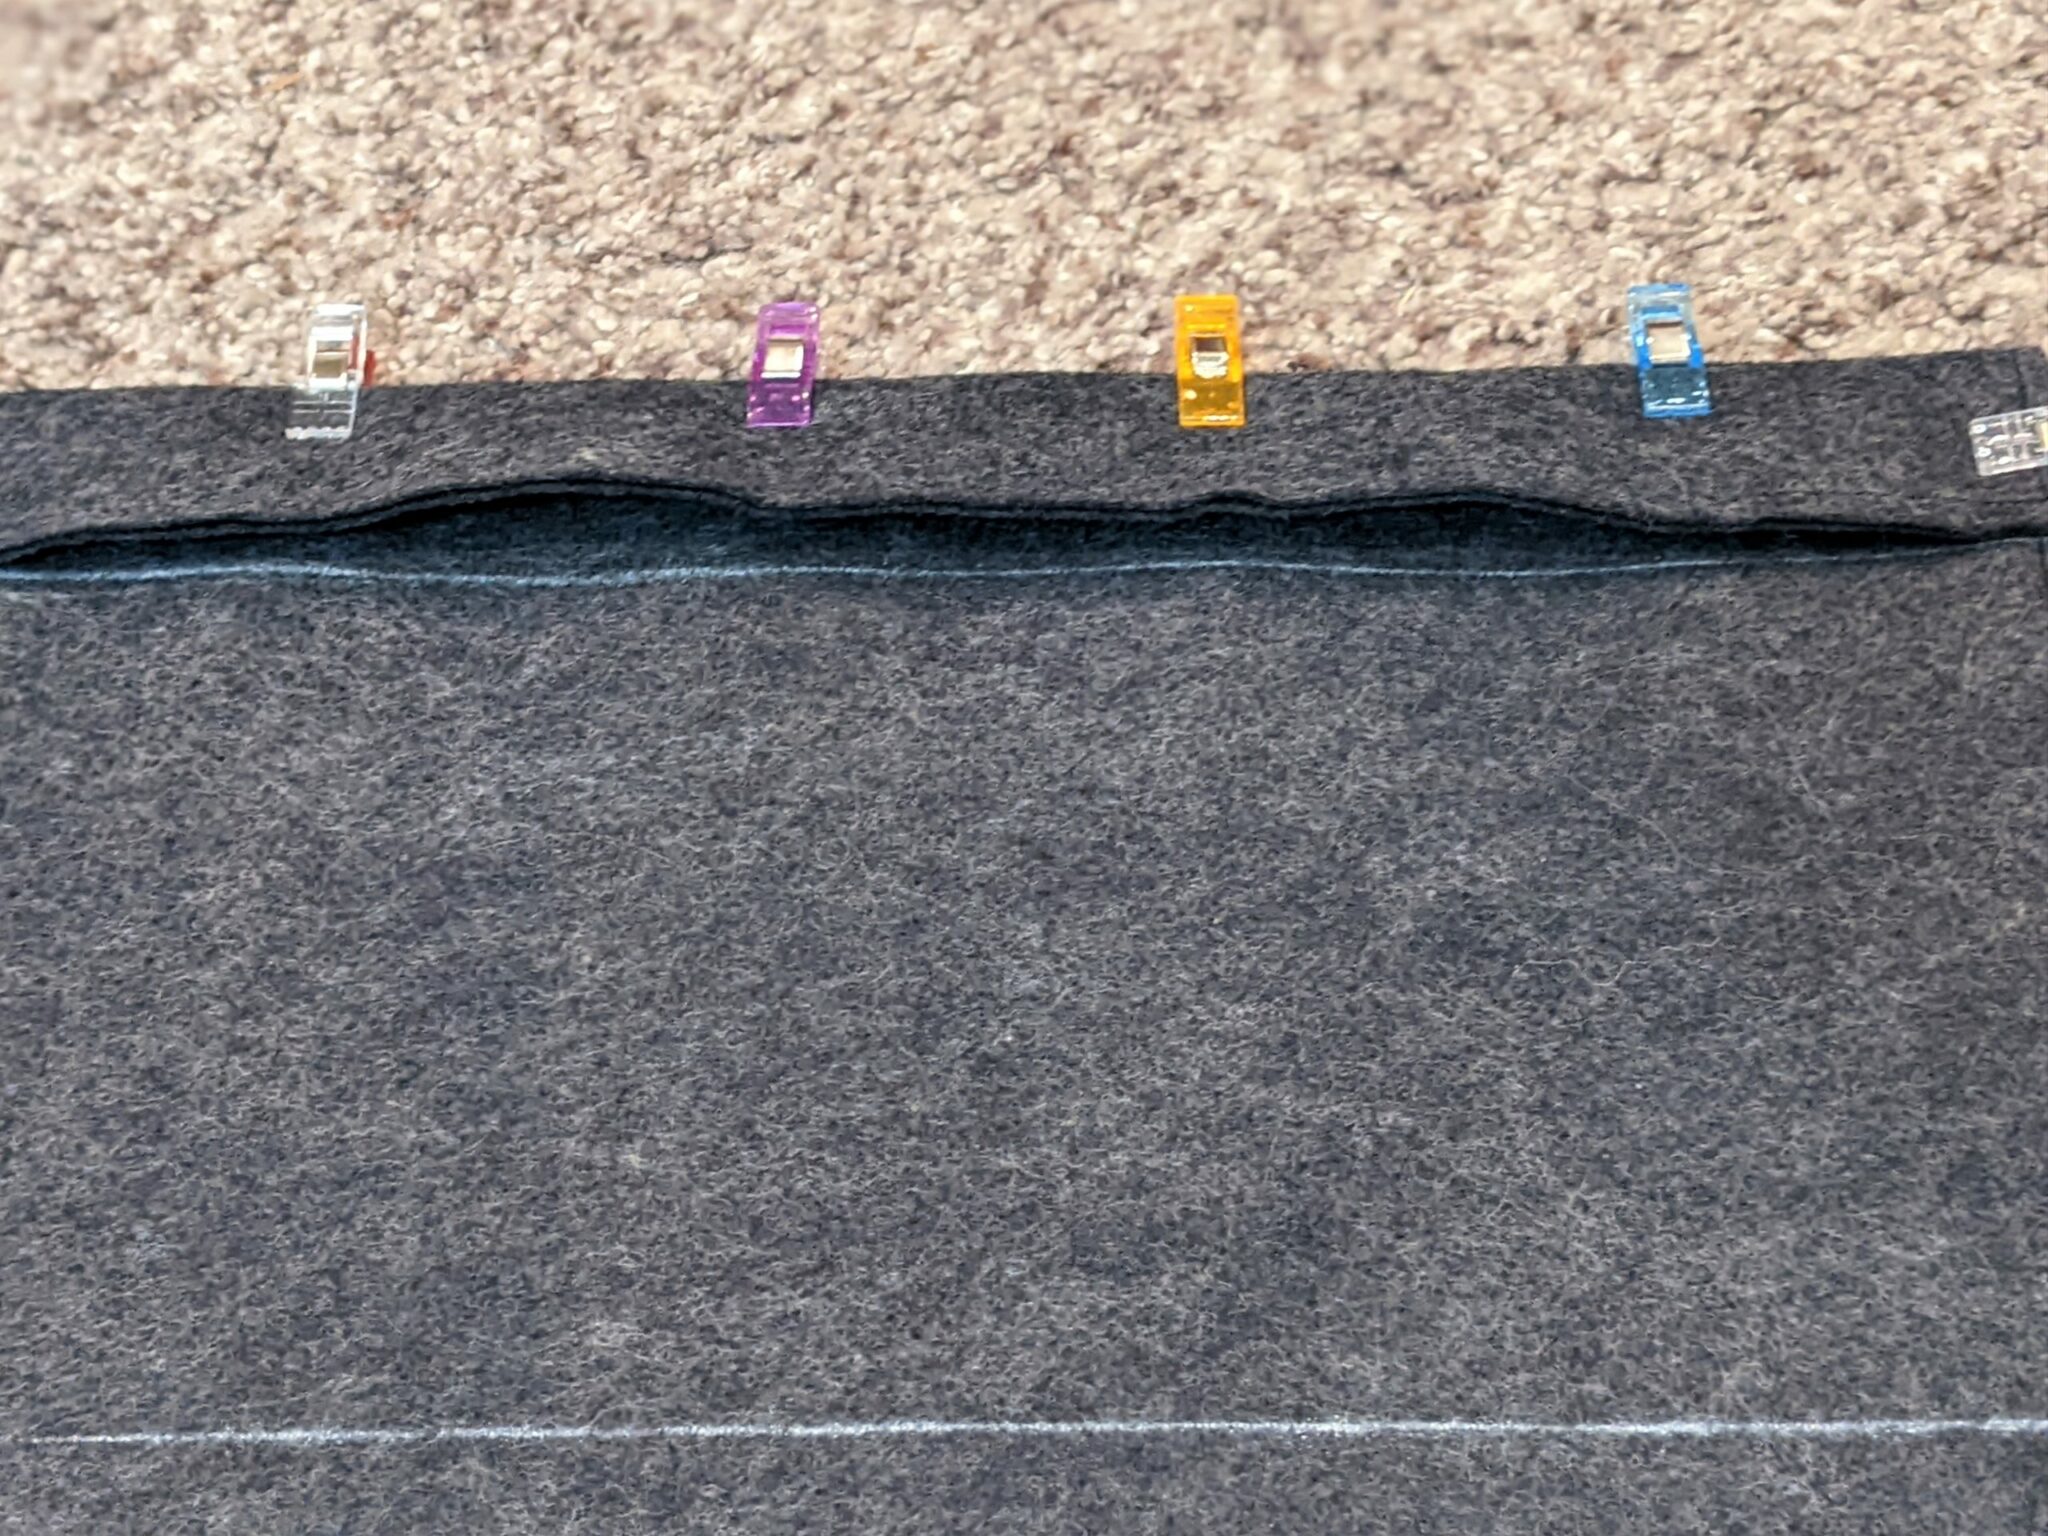
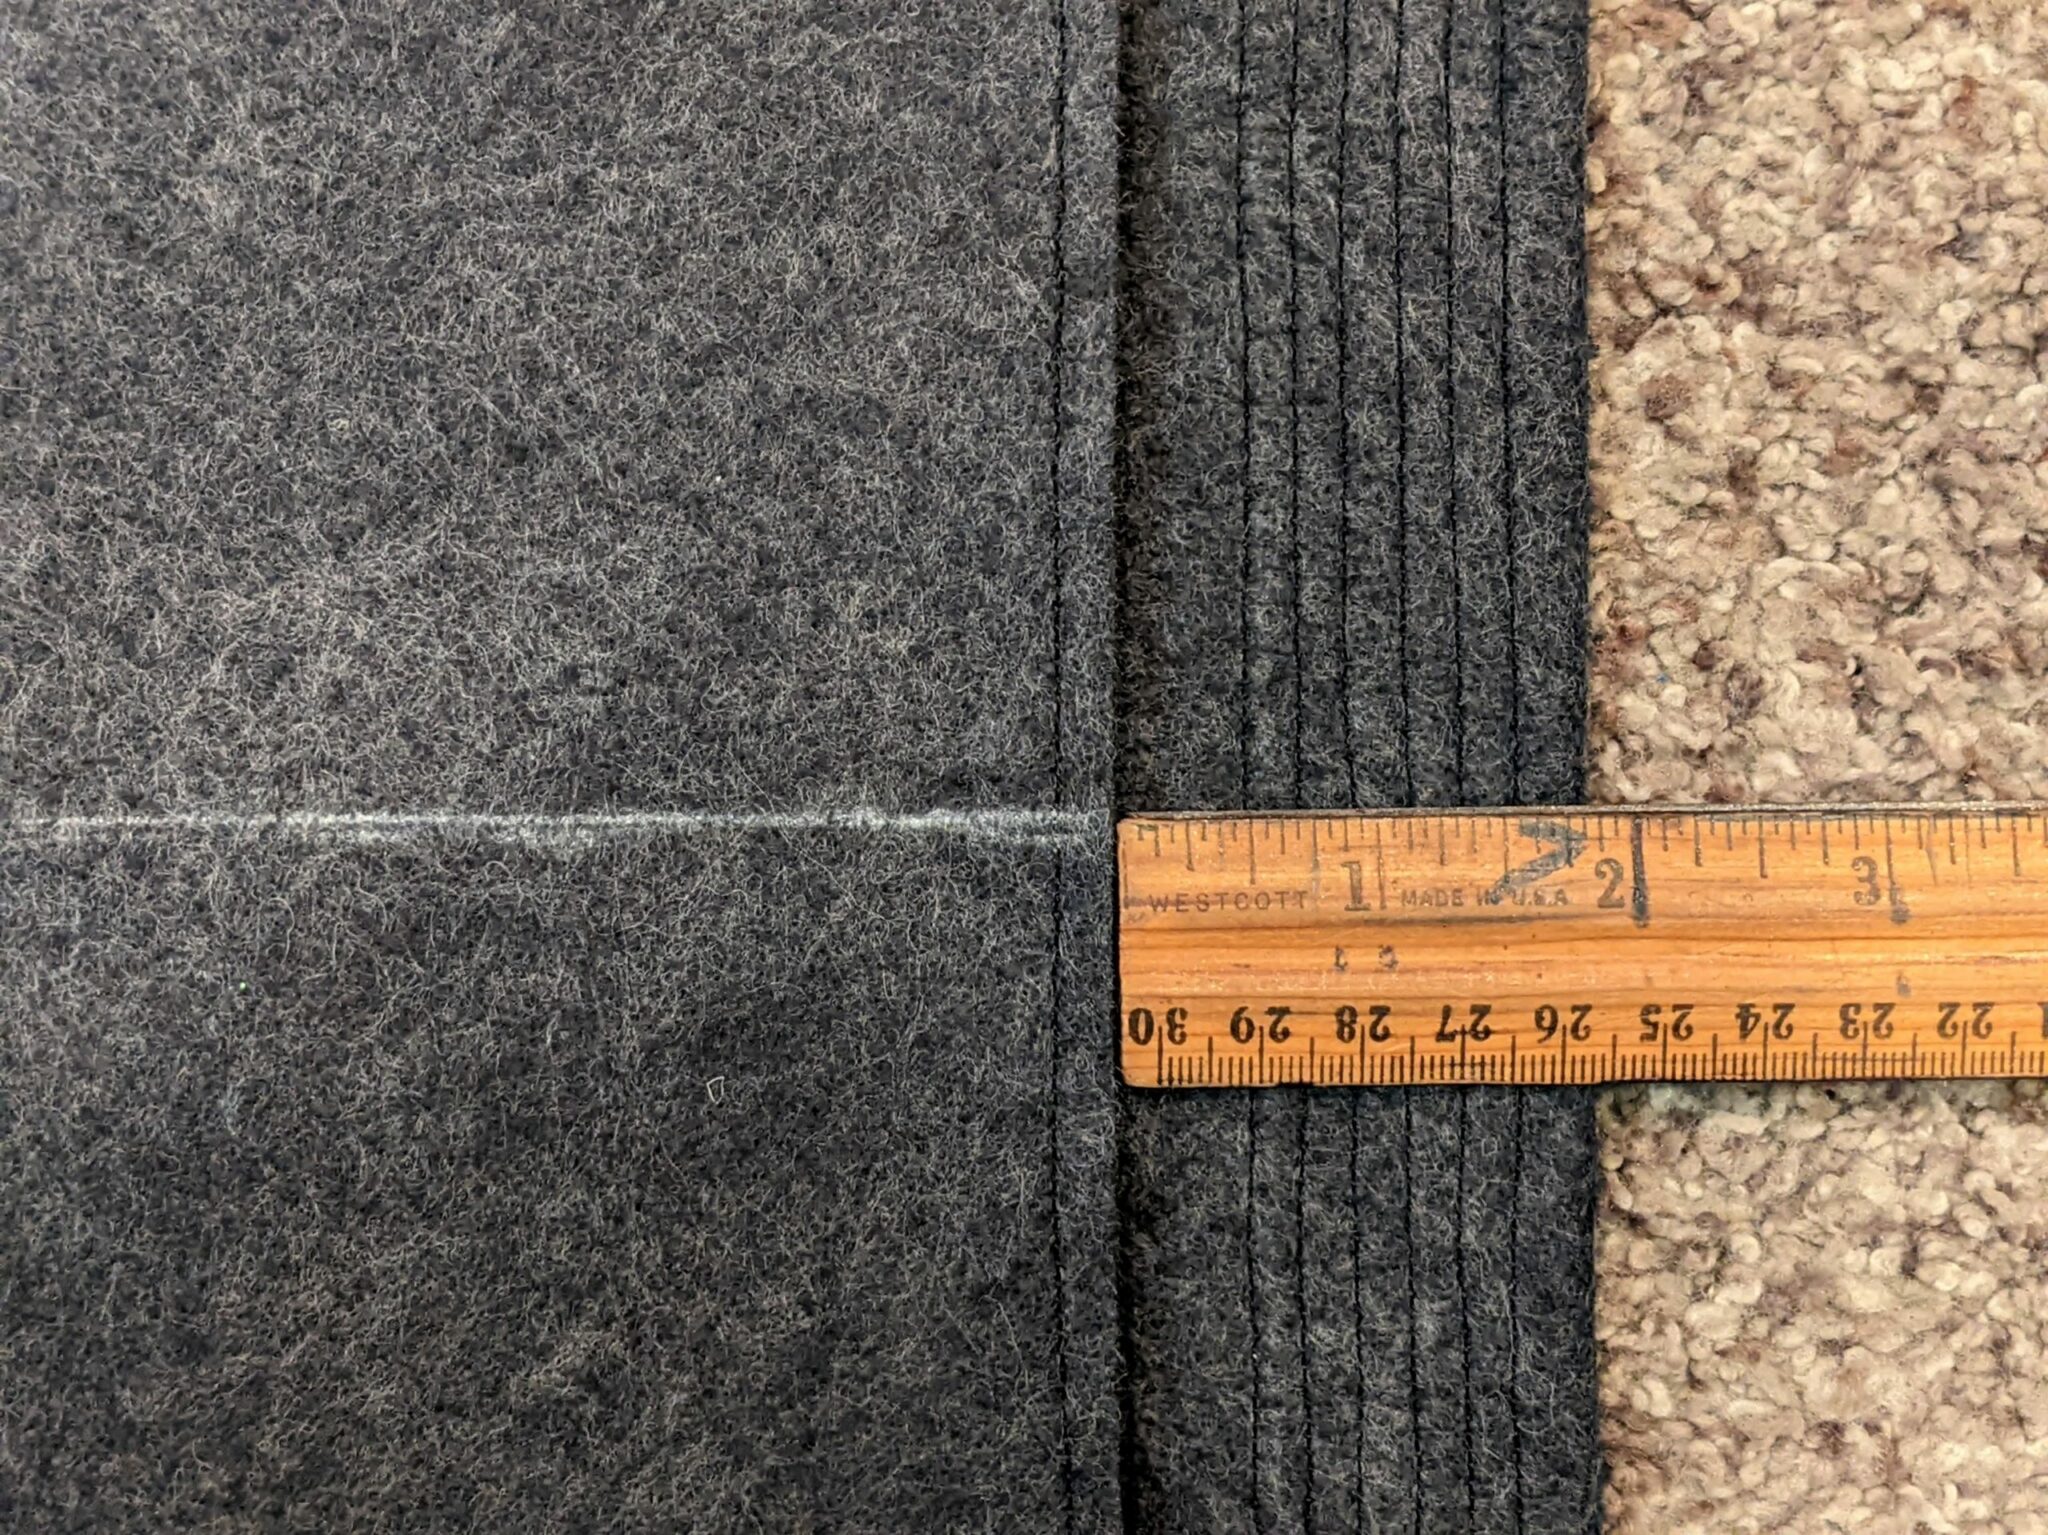
- Optional:
- Follow along your first line of stitches and sew parallel lines all the way up. You can make them as far apart or close together as you’d like.

Pockets
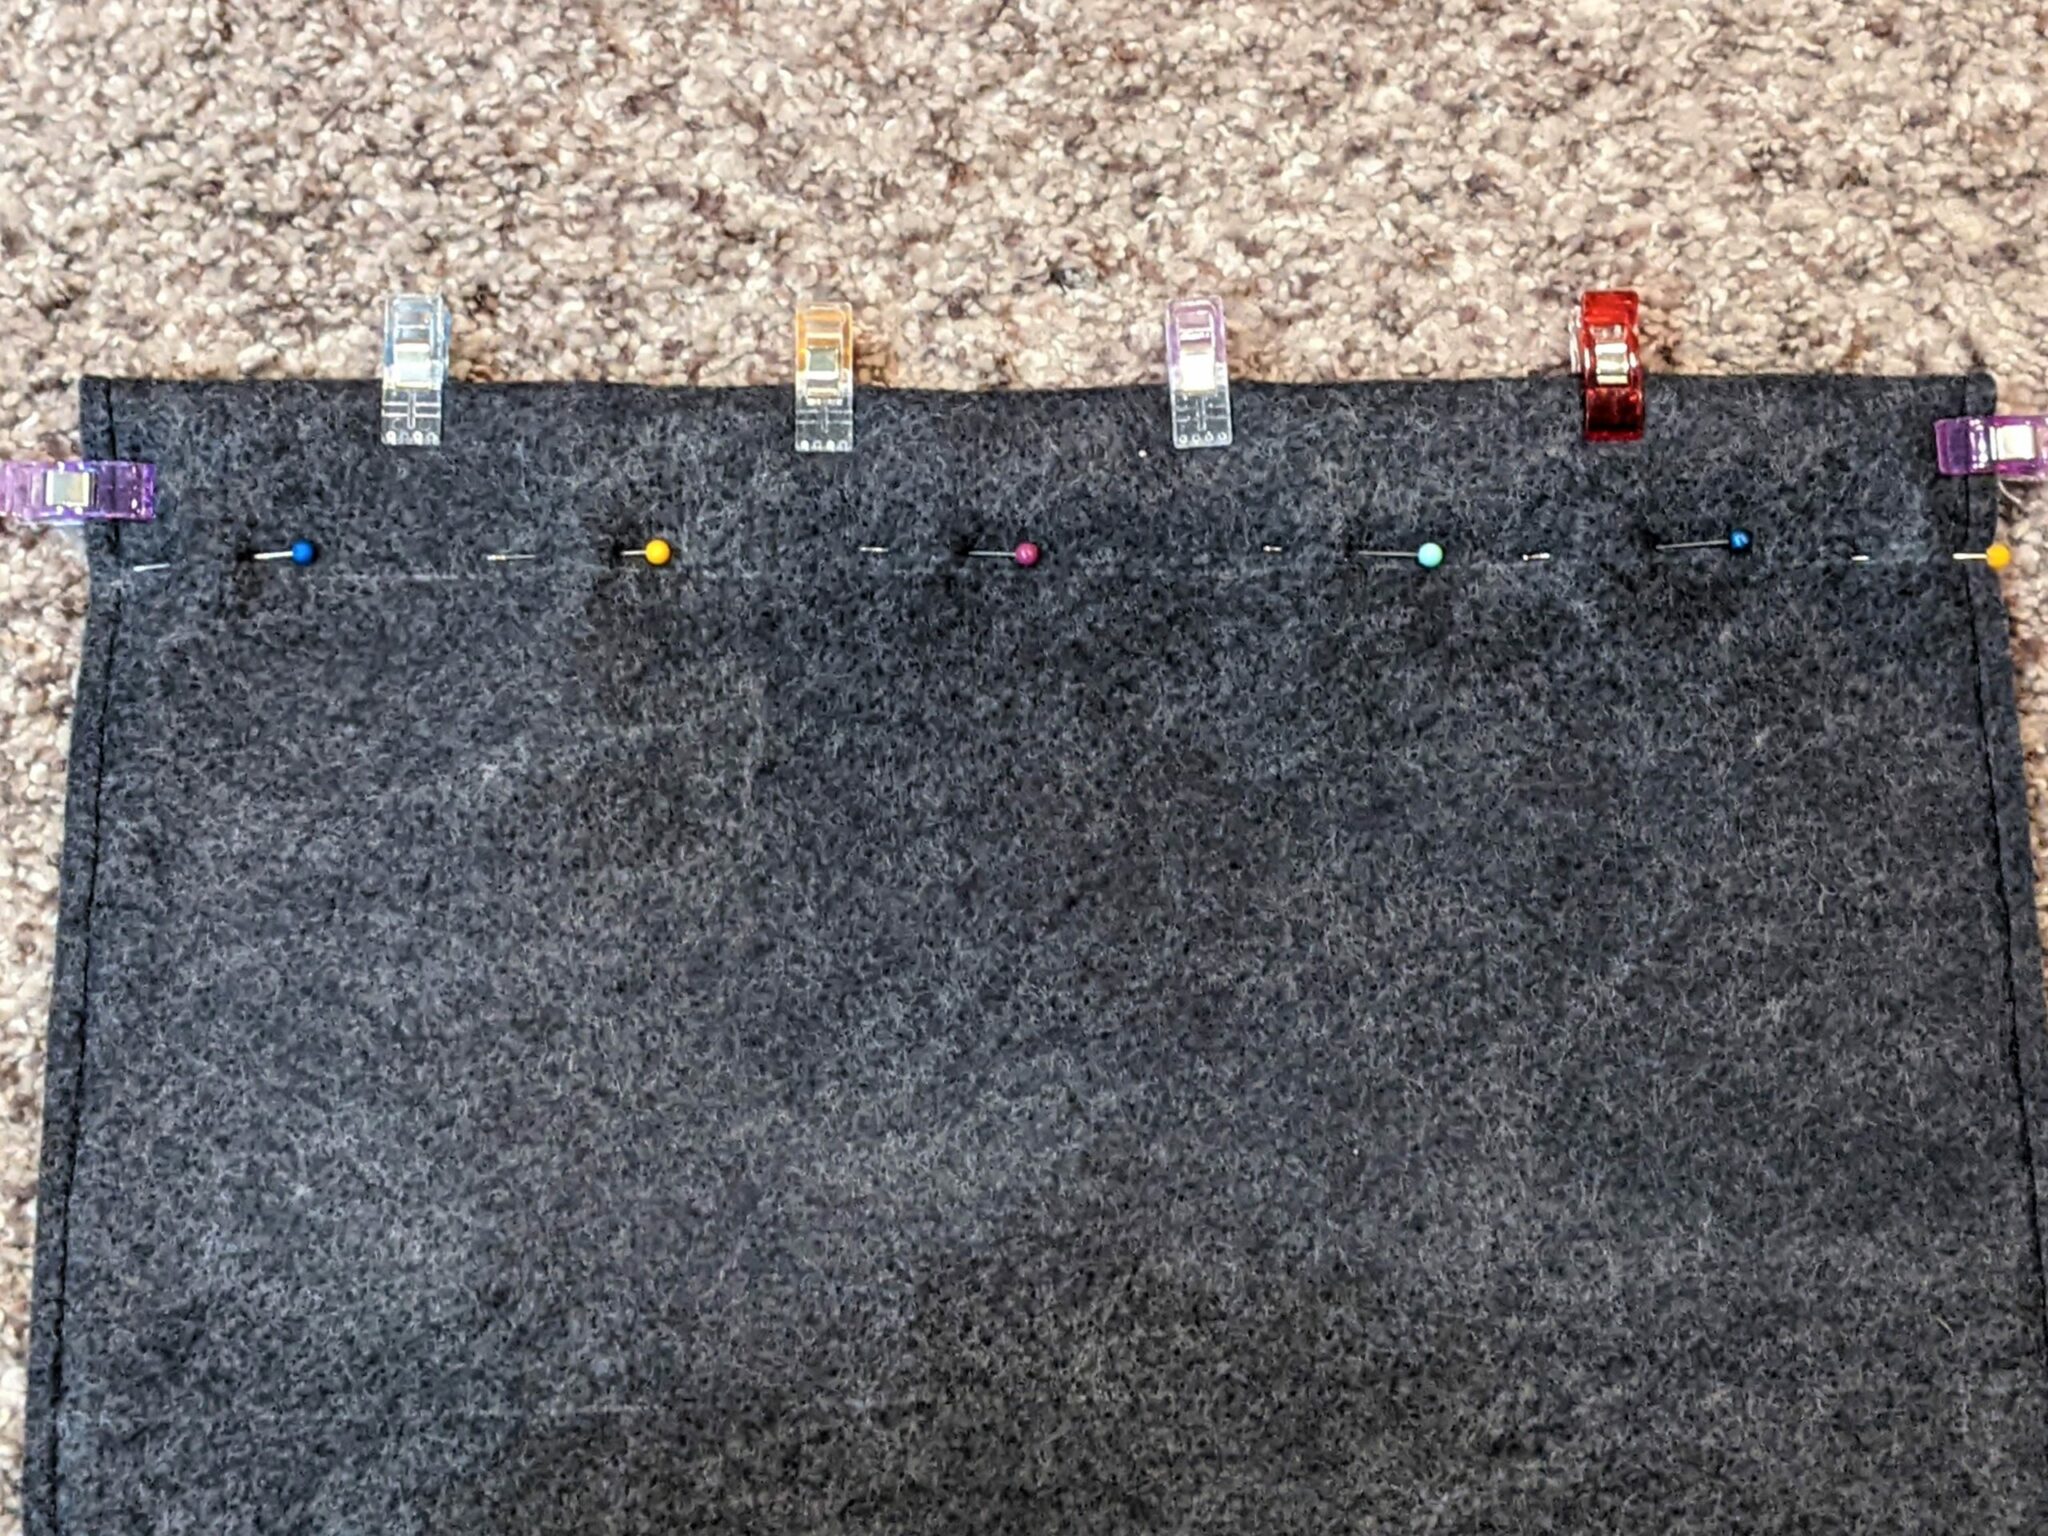
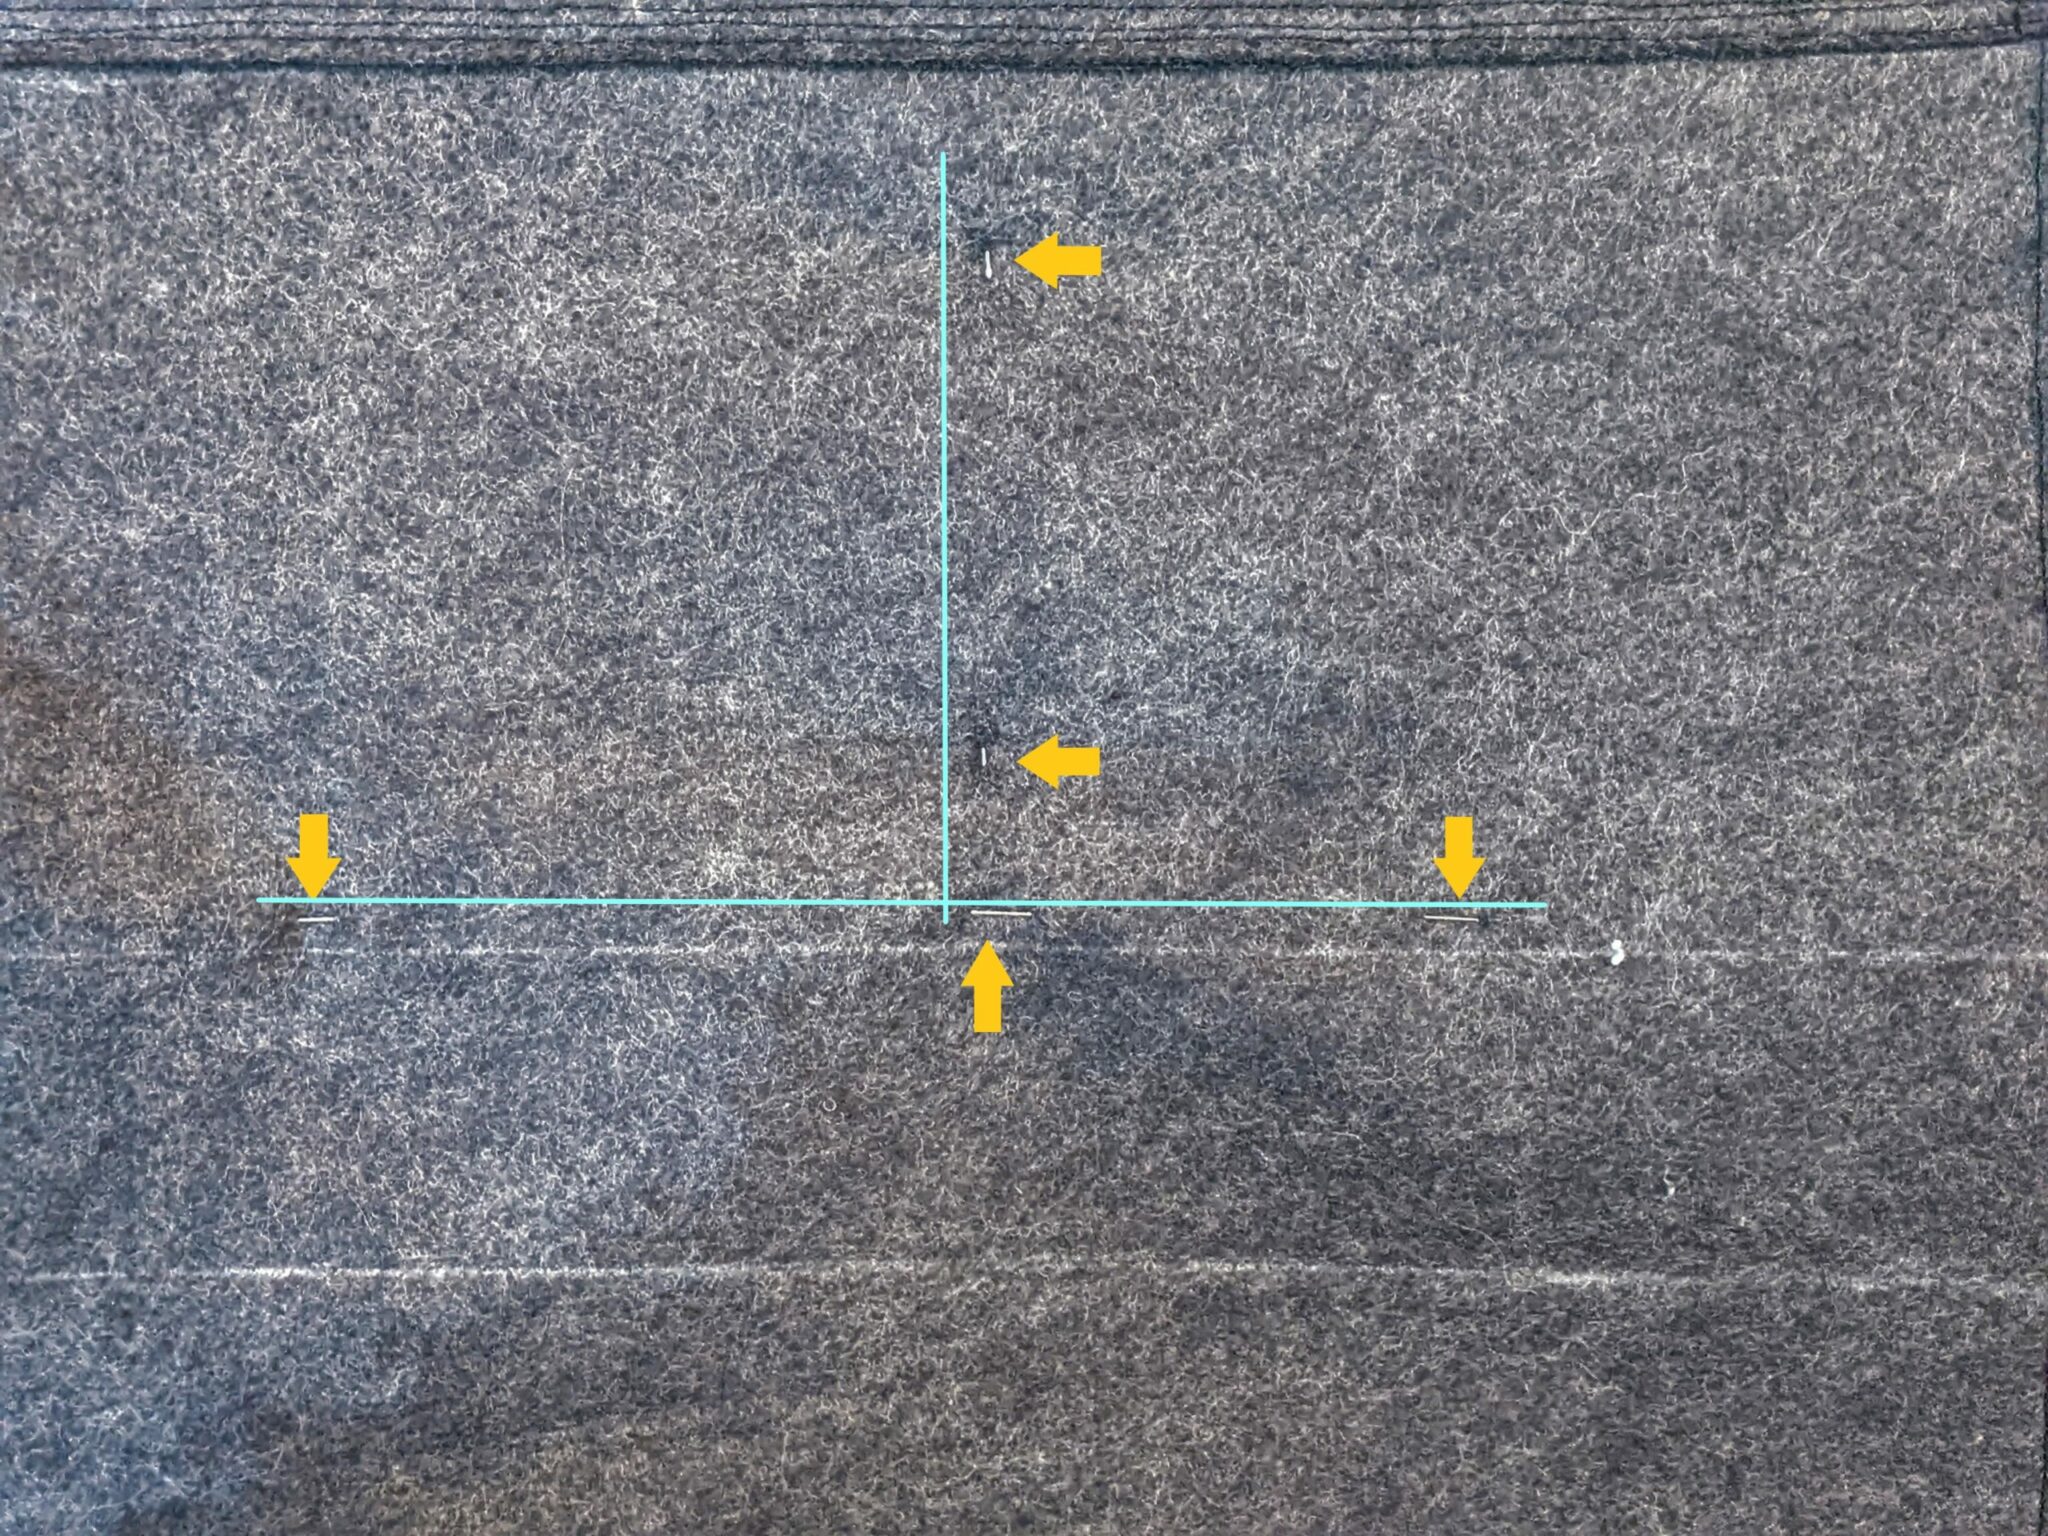
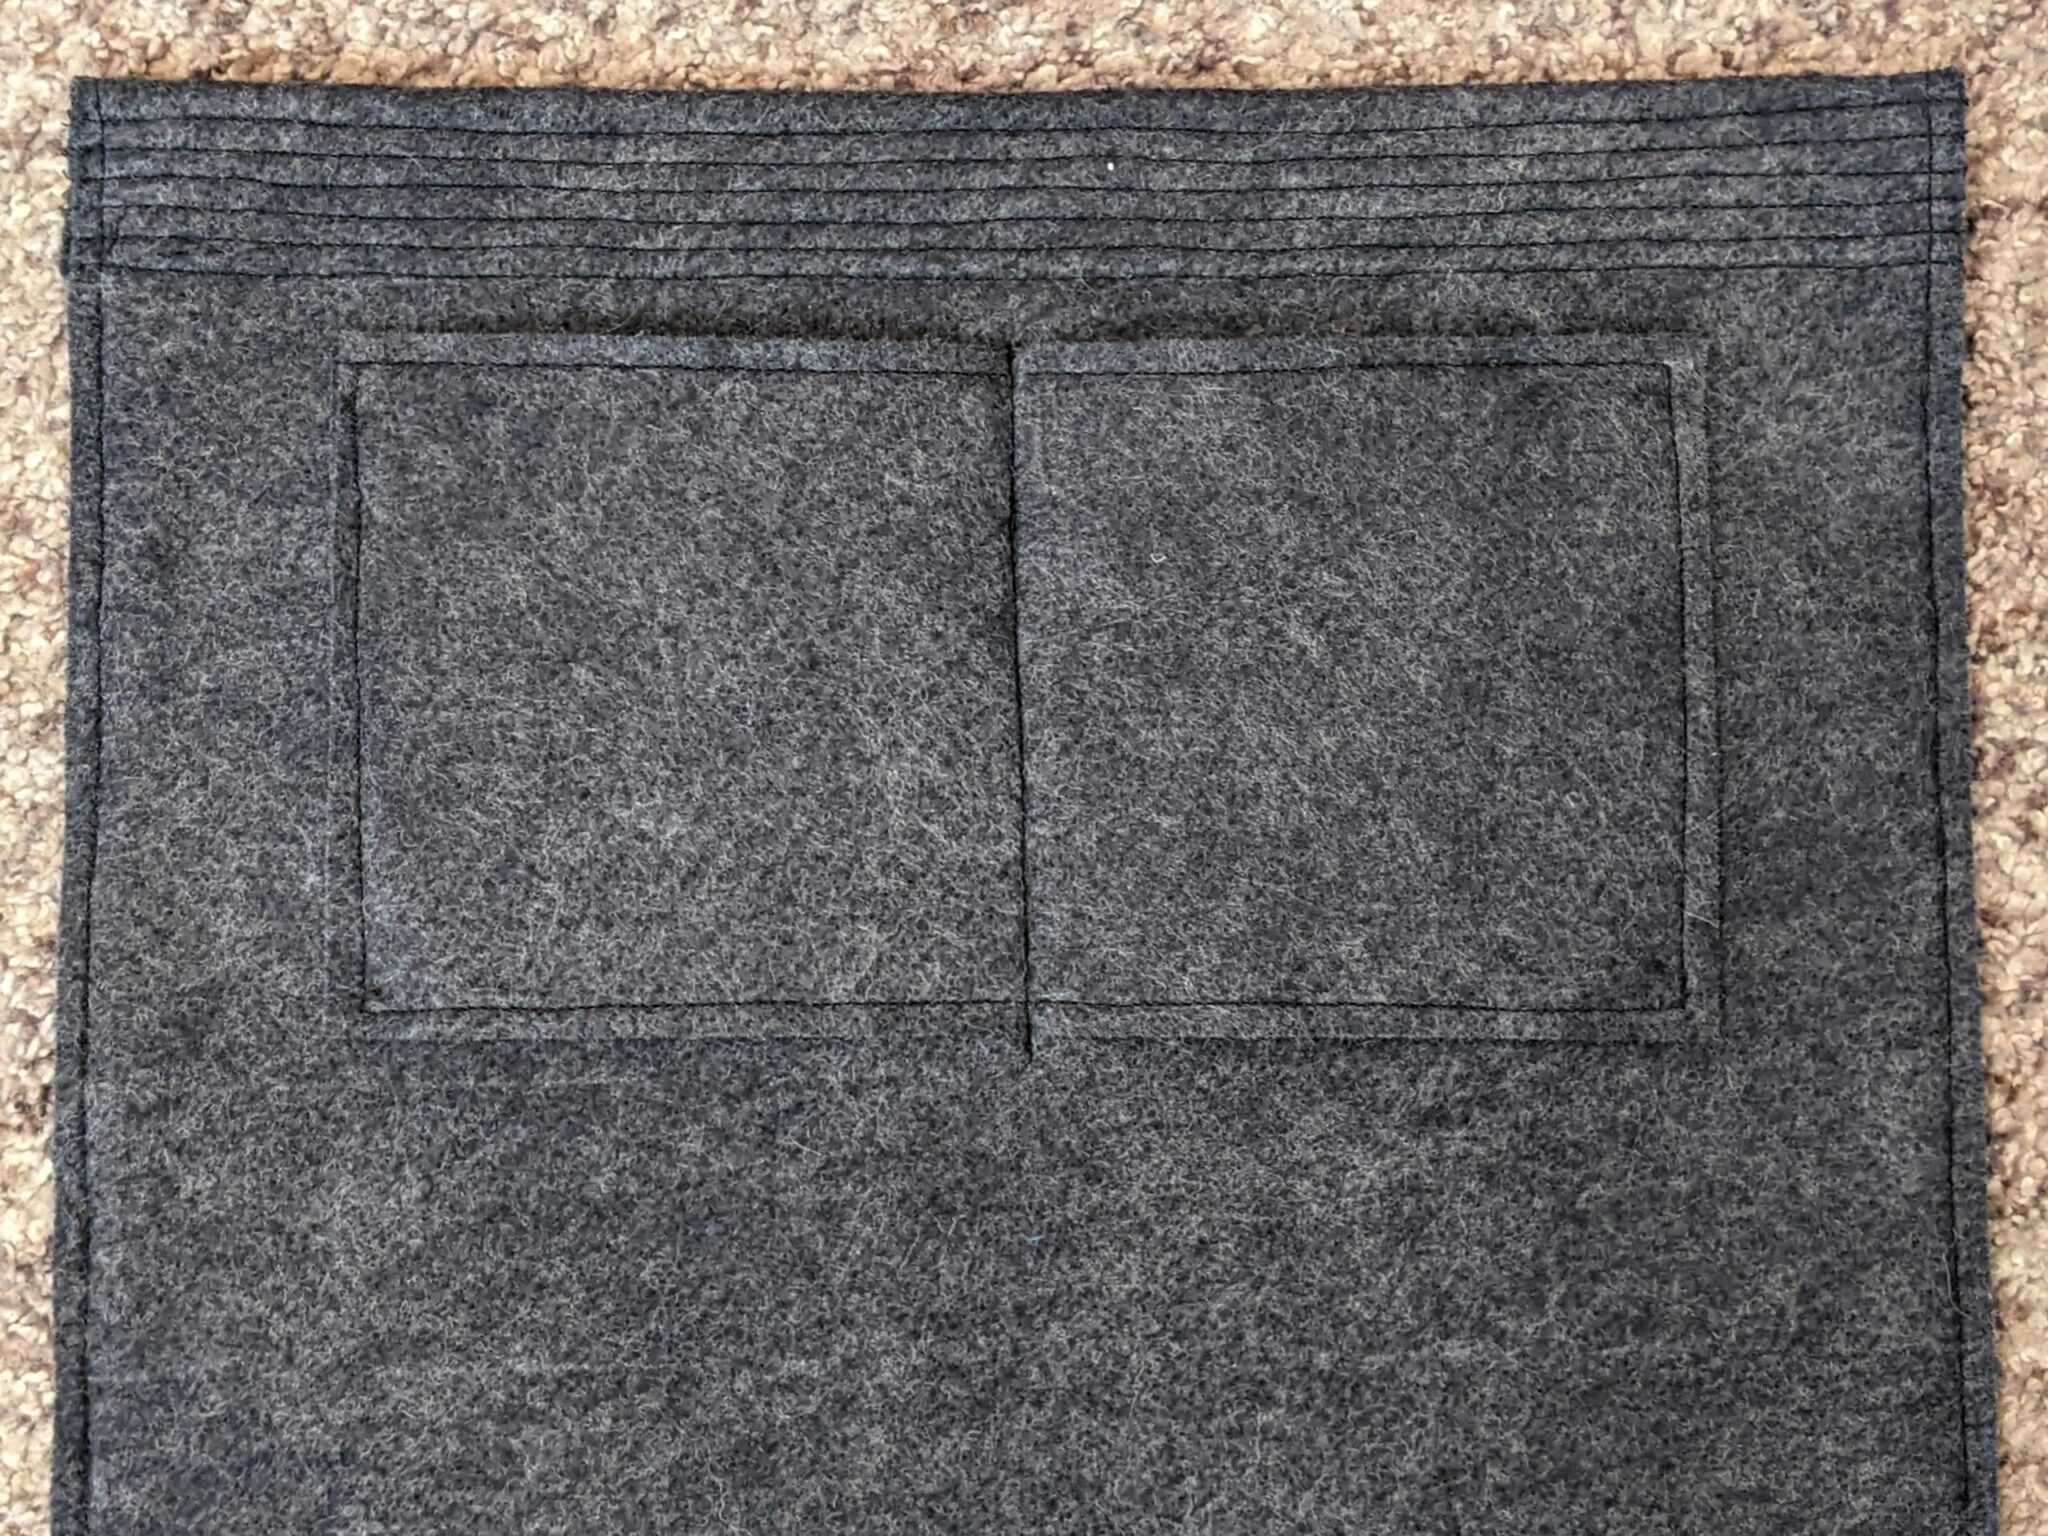
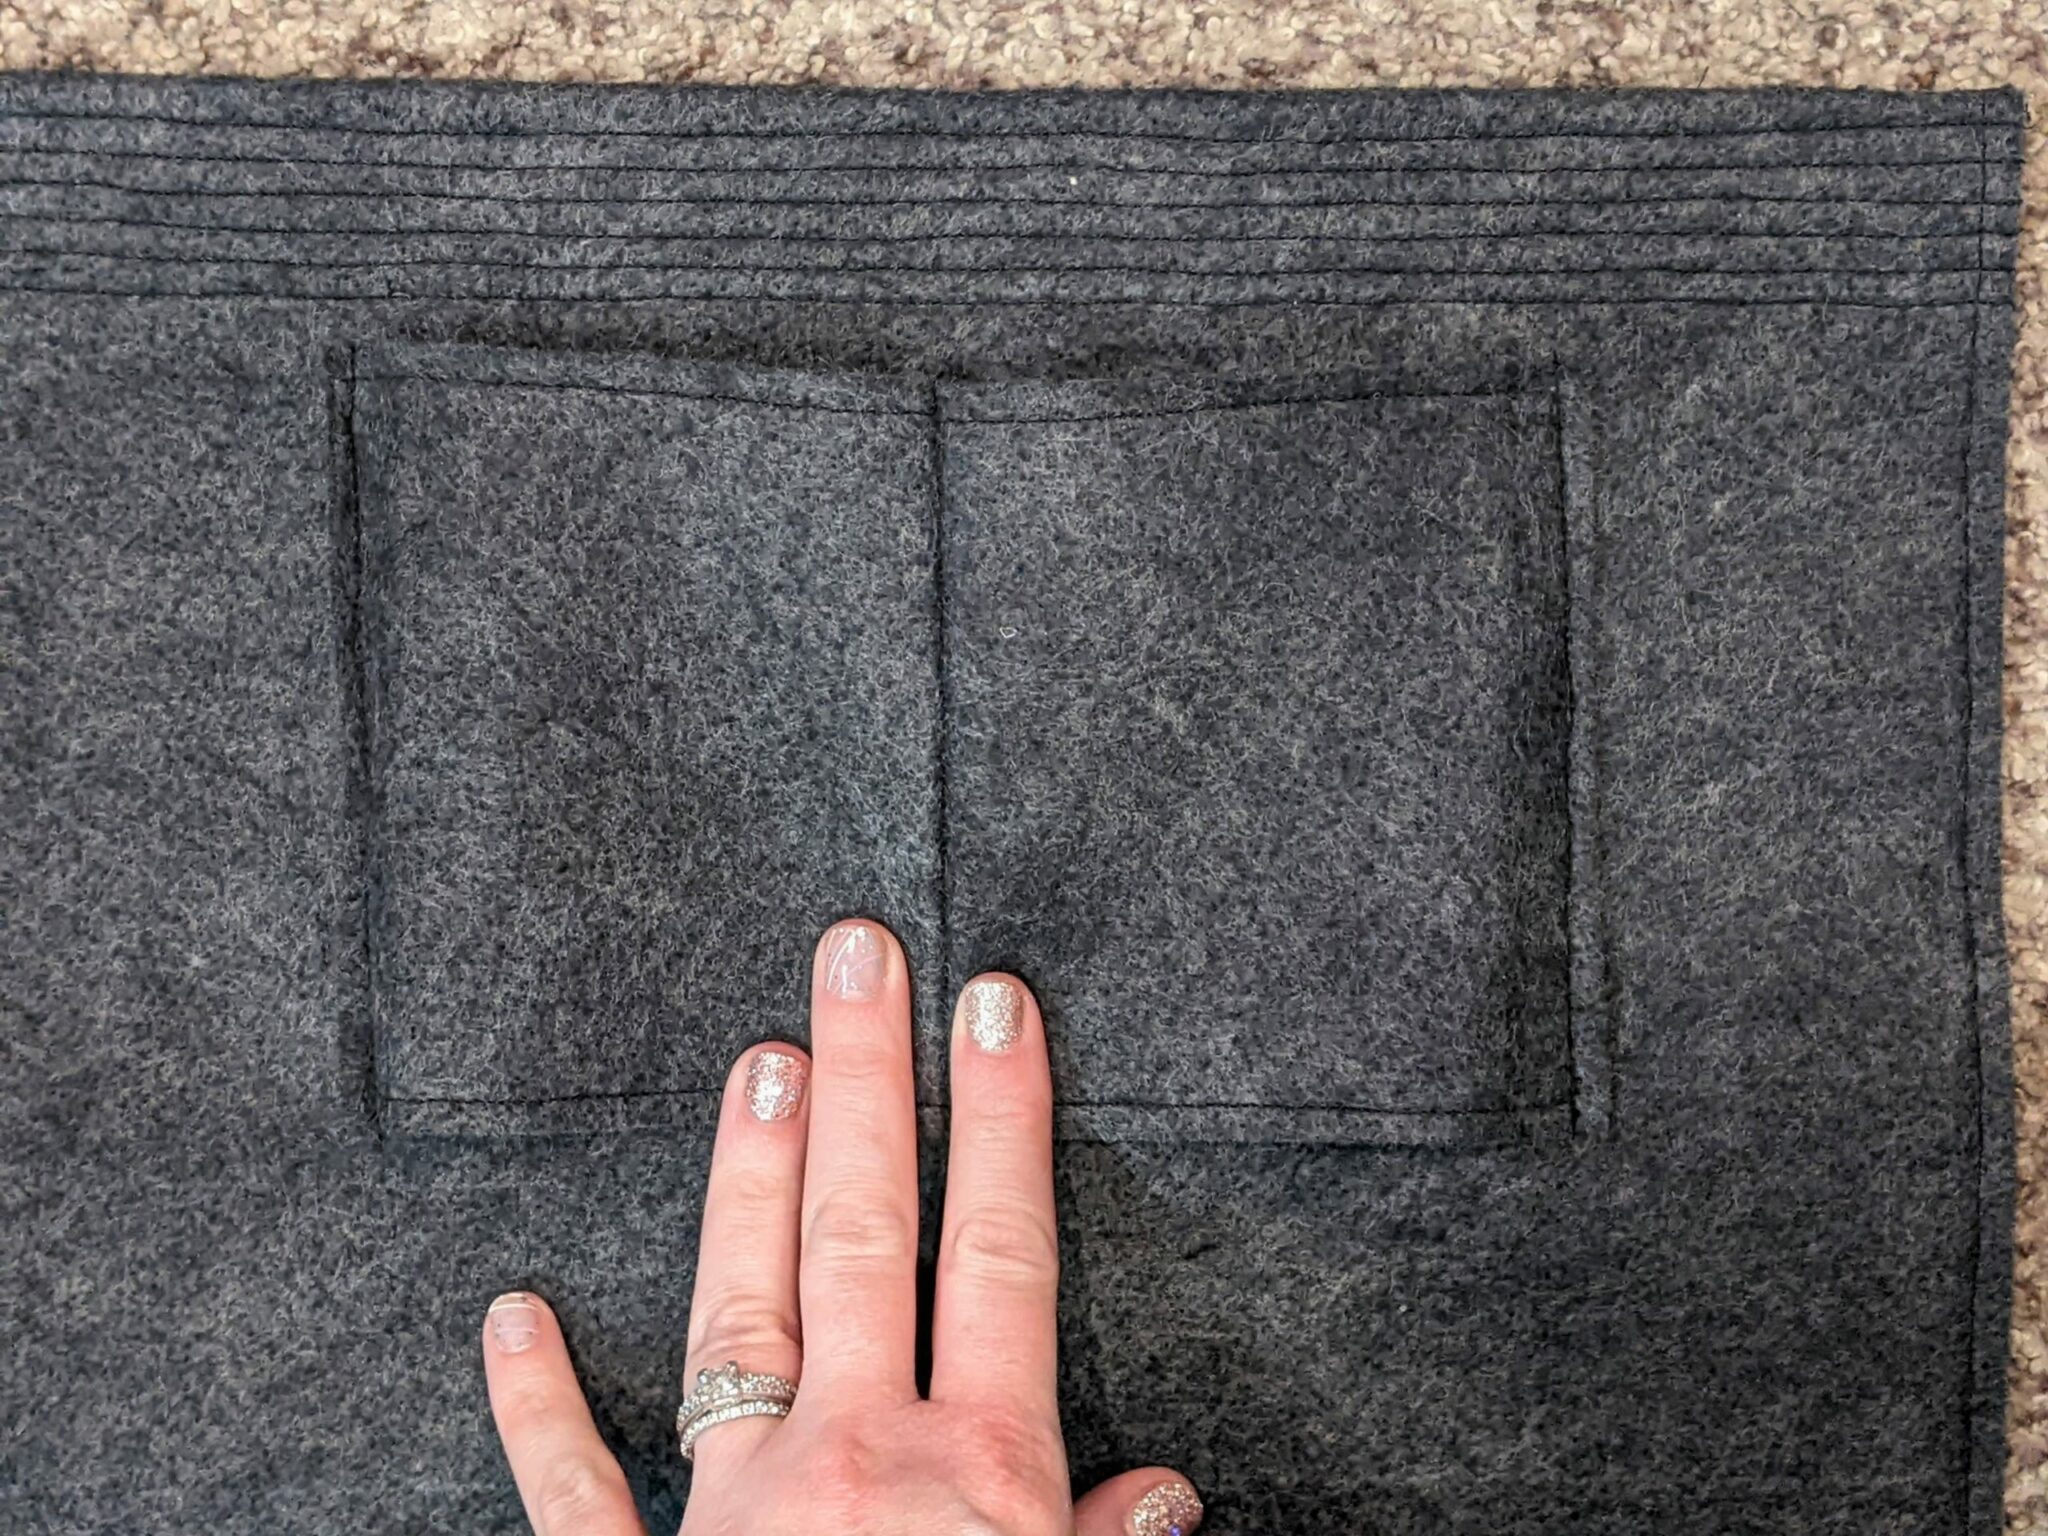
- Measure and mark the vertical center of each pocket and both outer sides of the bag with chalk or pins.
- Match up the centerline of the outer pocket with the centerline of the outside of the bag.
- Adjust the pocket so its top edge is ½” away from the bottom line of stitching along the top then pin along the centerline.
- Use pins to at the bottom edge of the pocket for a placement marker for the inner pocket.


- Turn the bag over to the backside.
- You will be able to see where the front pins are placed to line up the centerline and bottom edge of the inner pocket.
- Pin the inner pocket in place then remove any extra pins.
- Sew along the centerline going through the bag and both pockets. You may need to switch to a microtex or needle made for thicker fabrics as well as adjust the tension on your sewing machine.
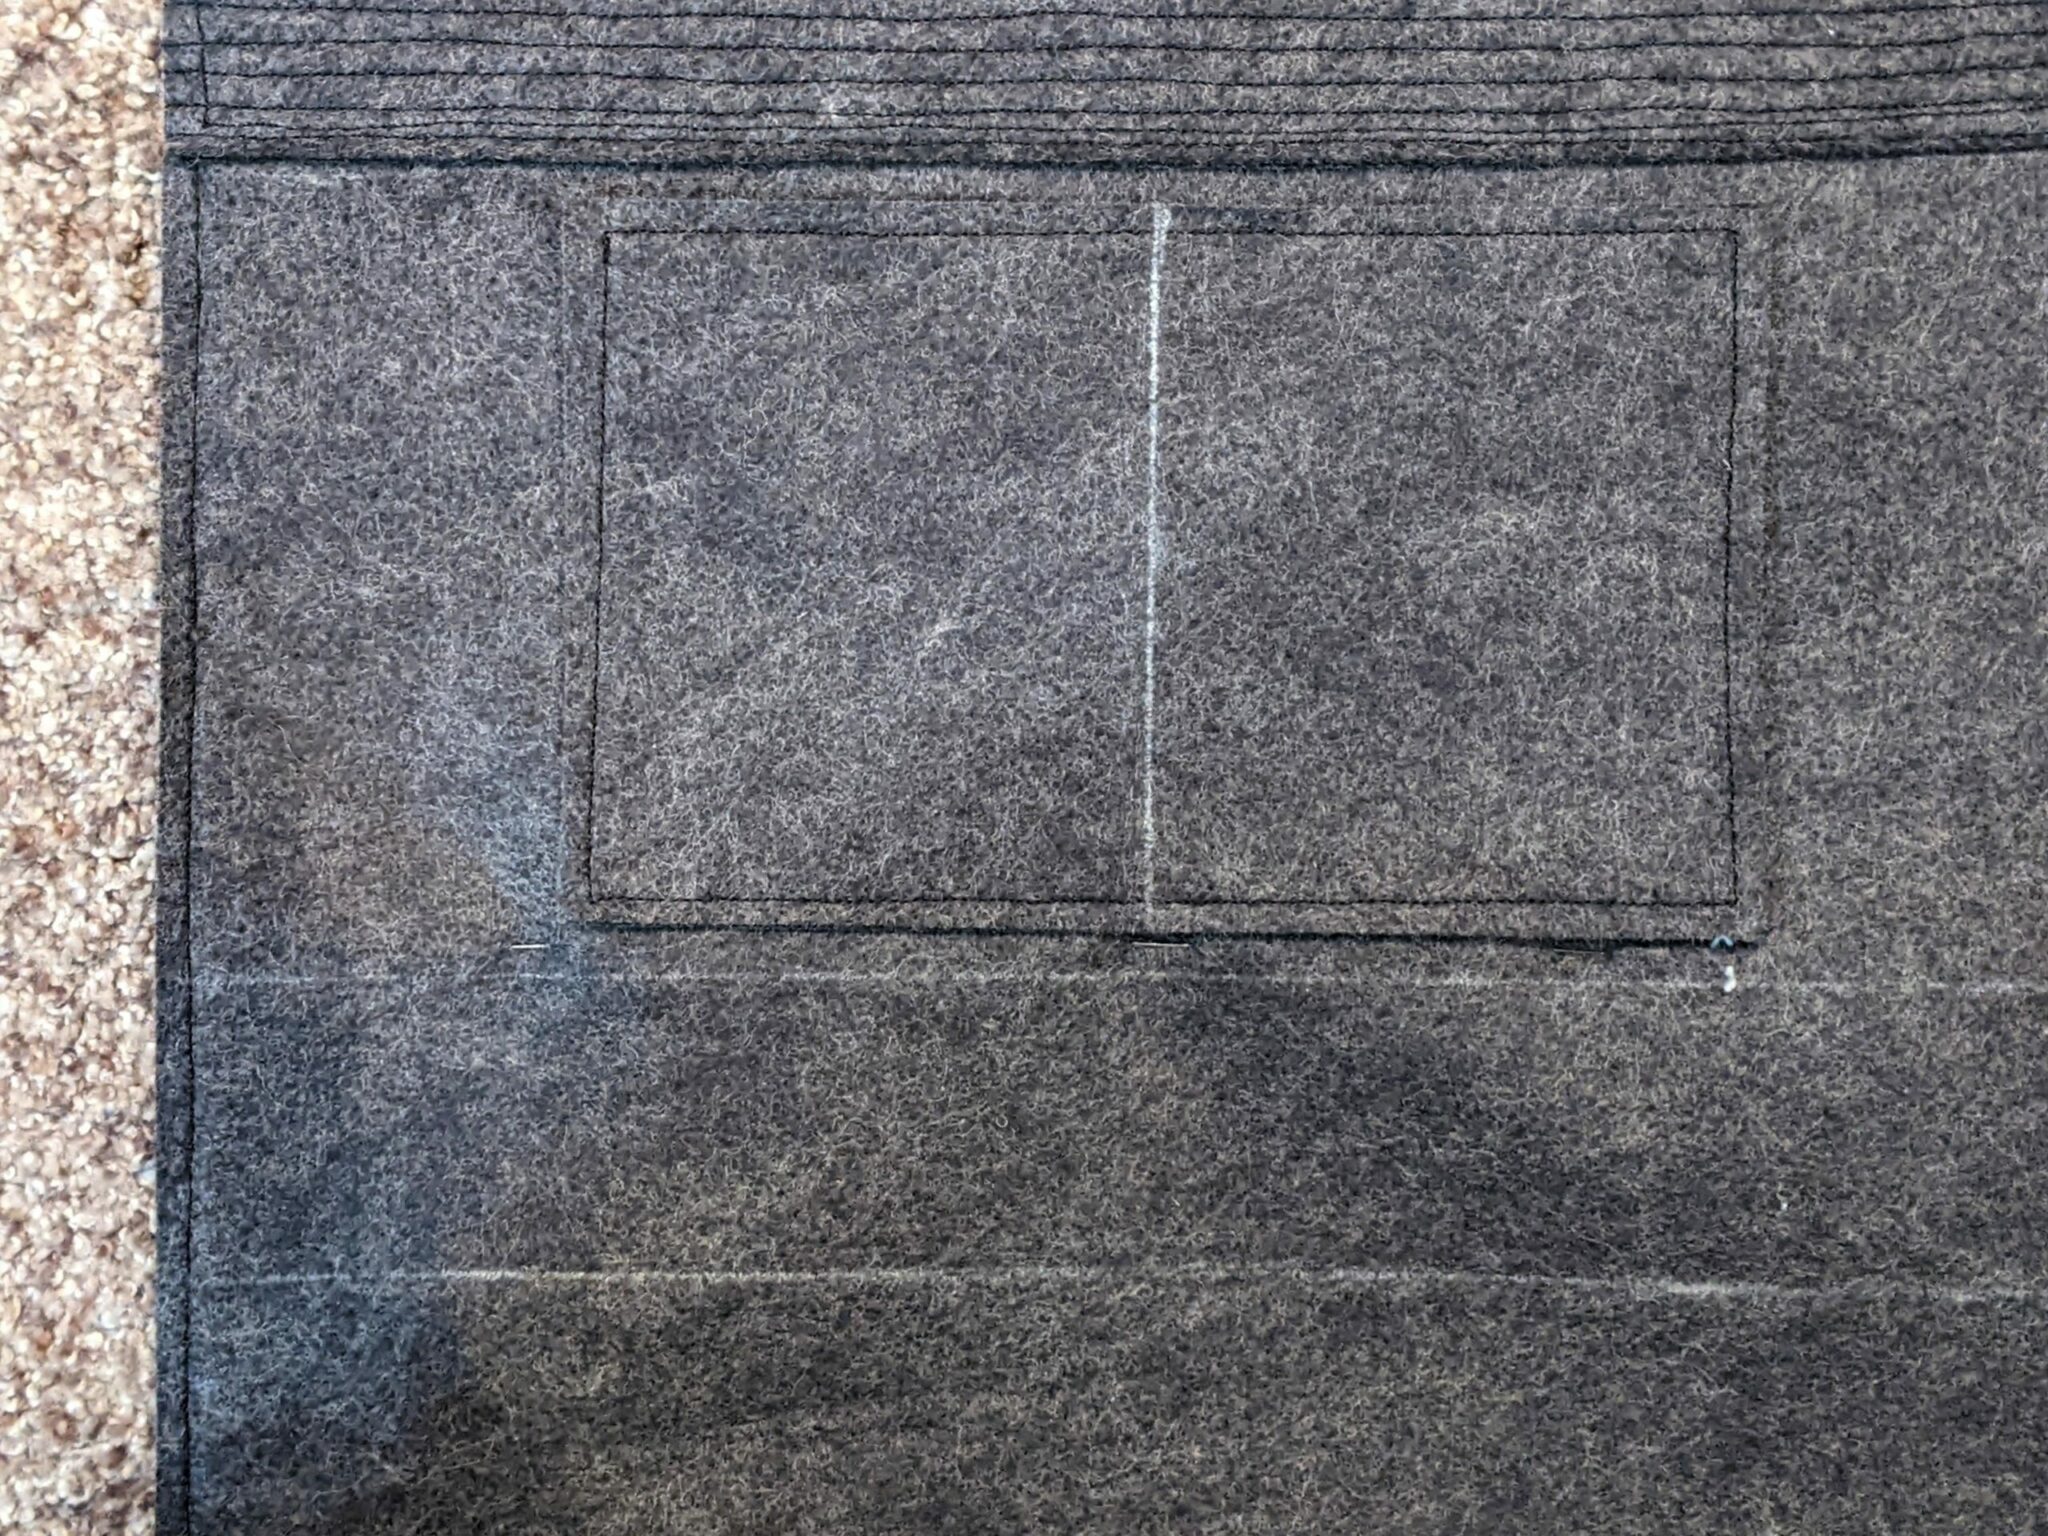
- Fold the outer pocket in half away from the bag then mark the pocket ½” away from the fold.
- Sew down the ½” line.
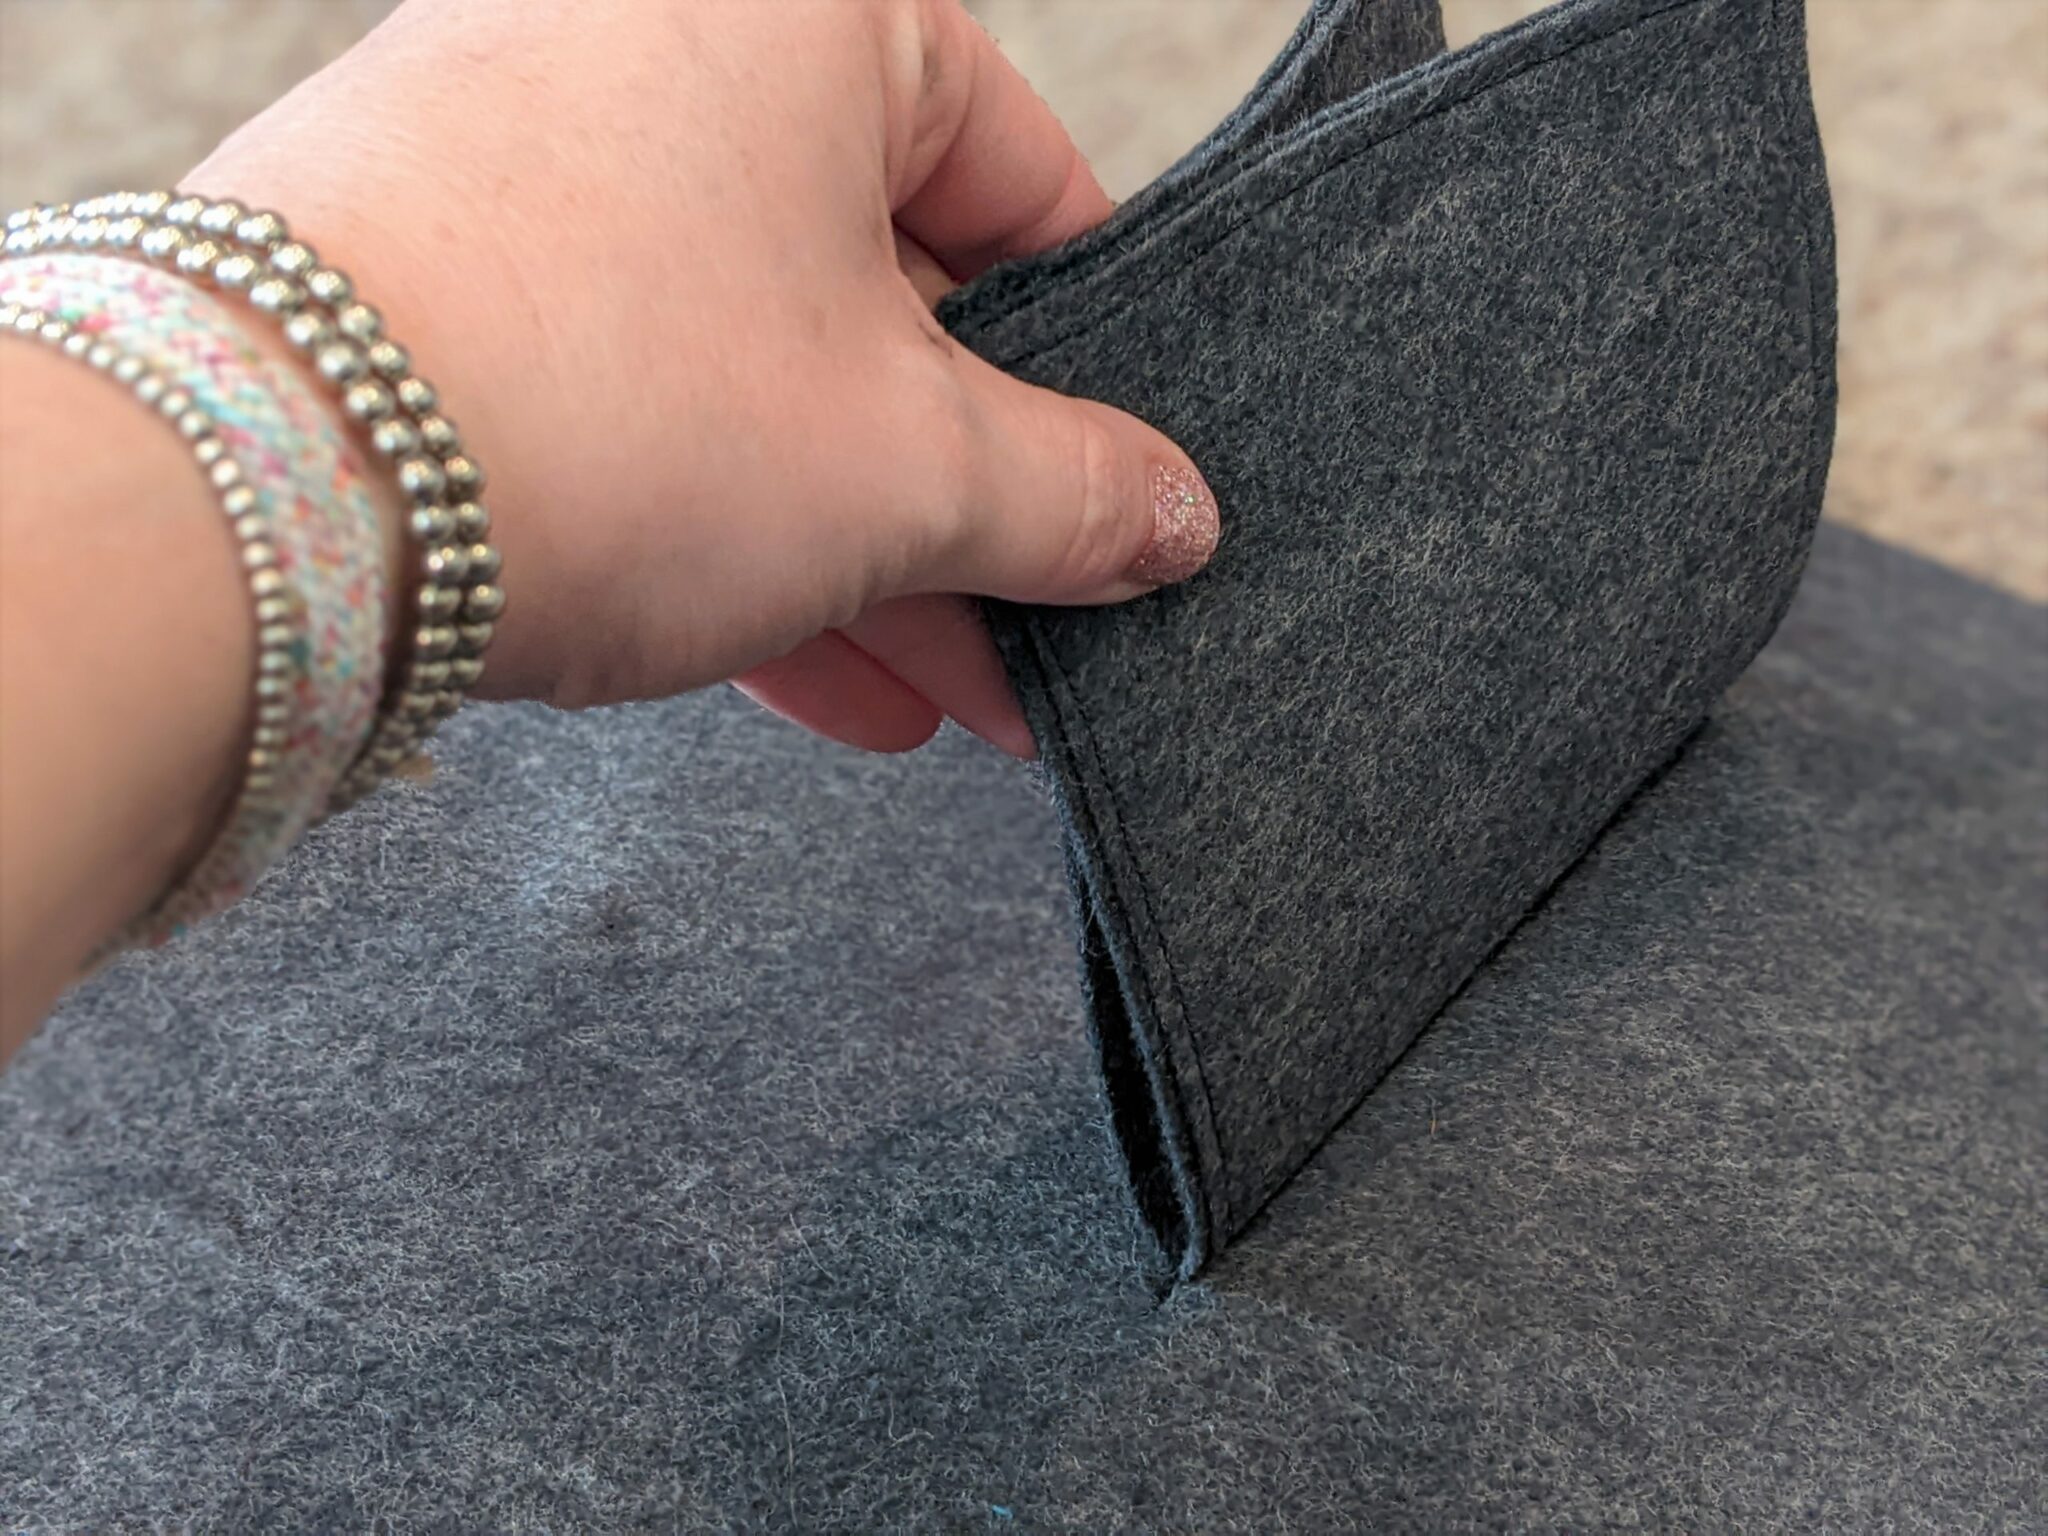
- Lay your bag out flat then maneuver the outer pocket so that the edges line up with the edges of the inner pocket and pin in place.
- Sew the pocket edges in place trying to sew over the stitch lines that are already on the pocket to camouflage the second line of stitching.
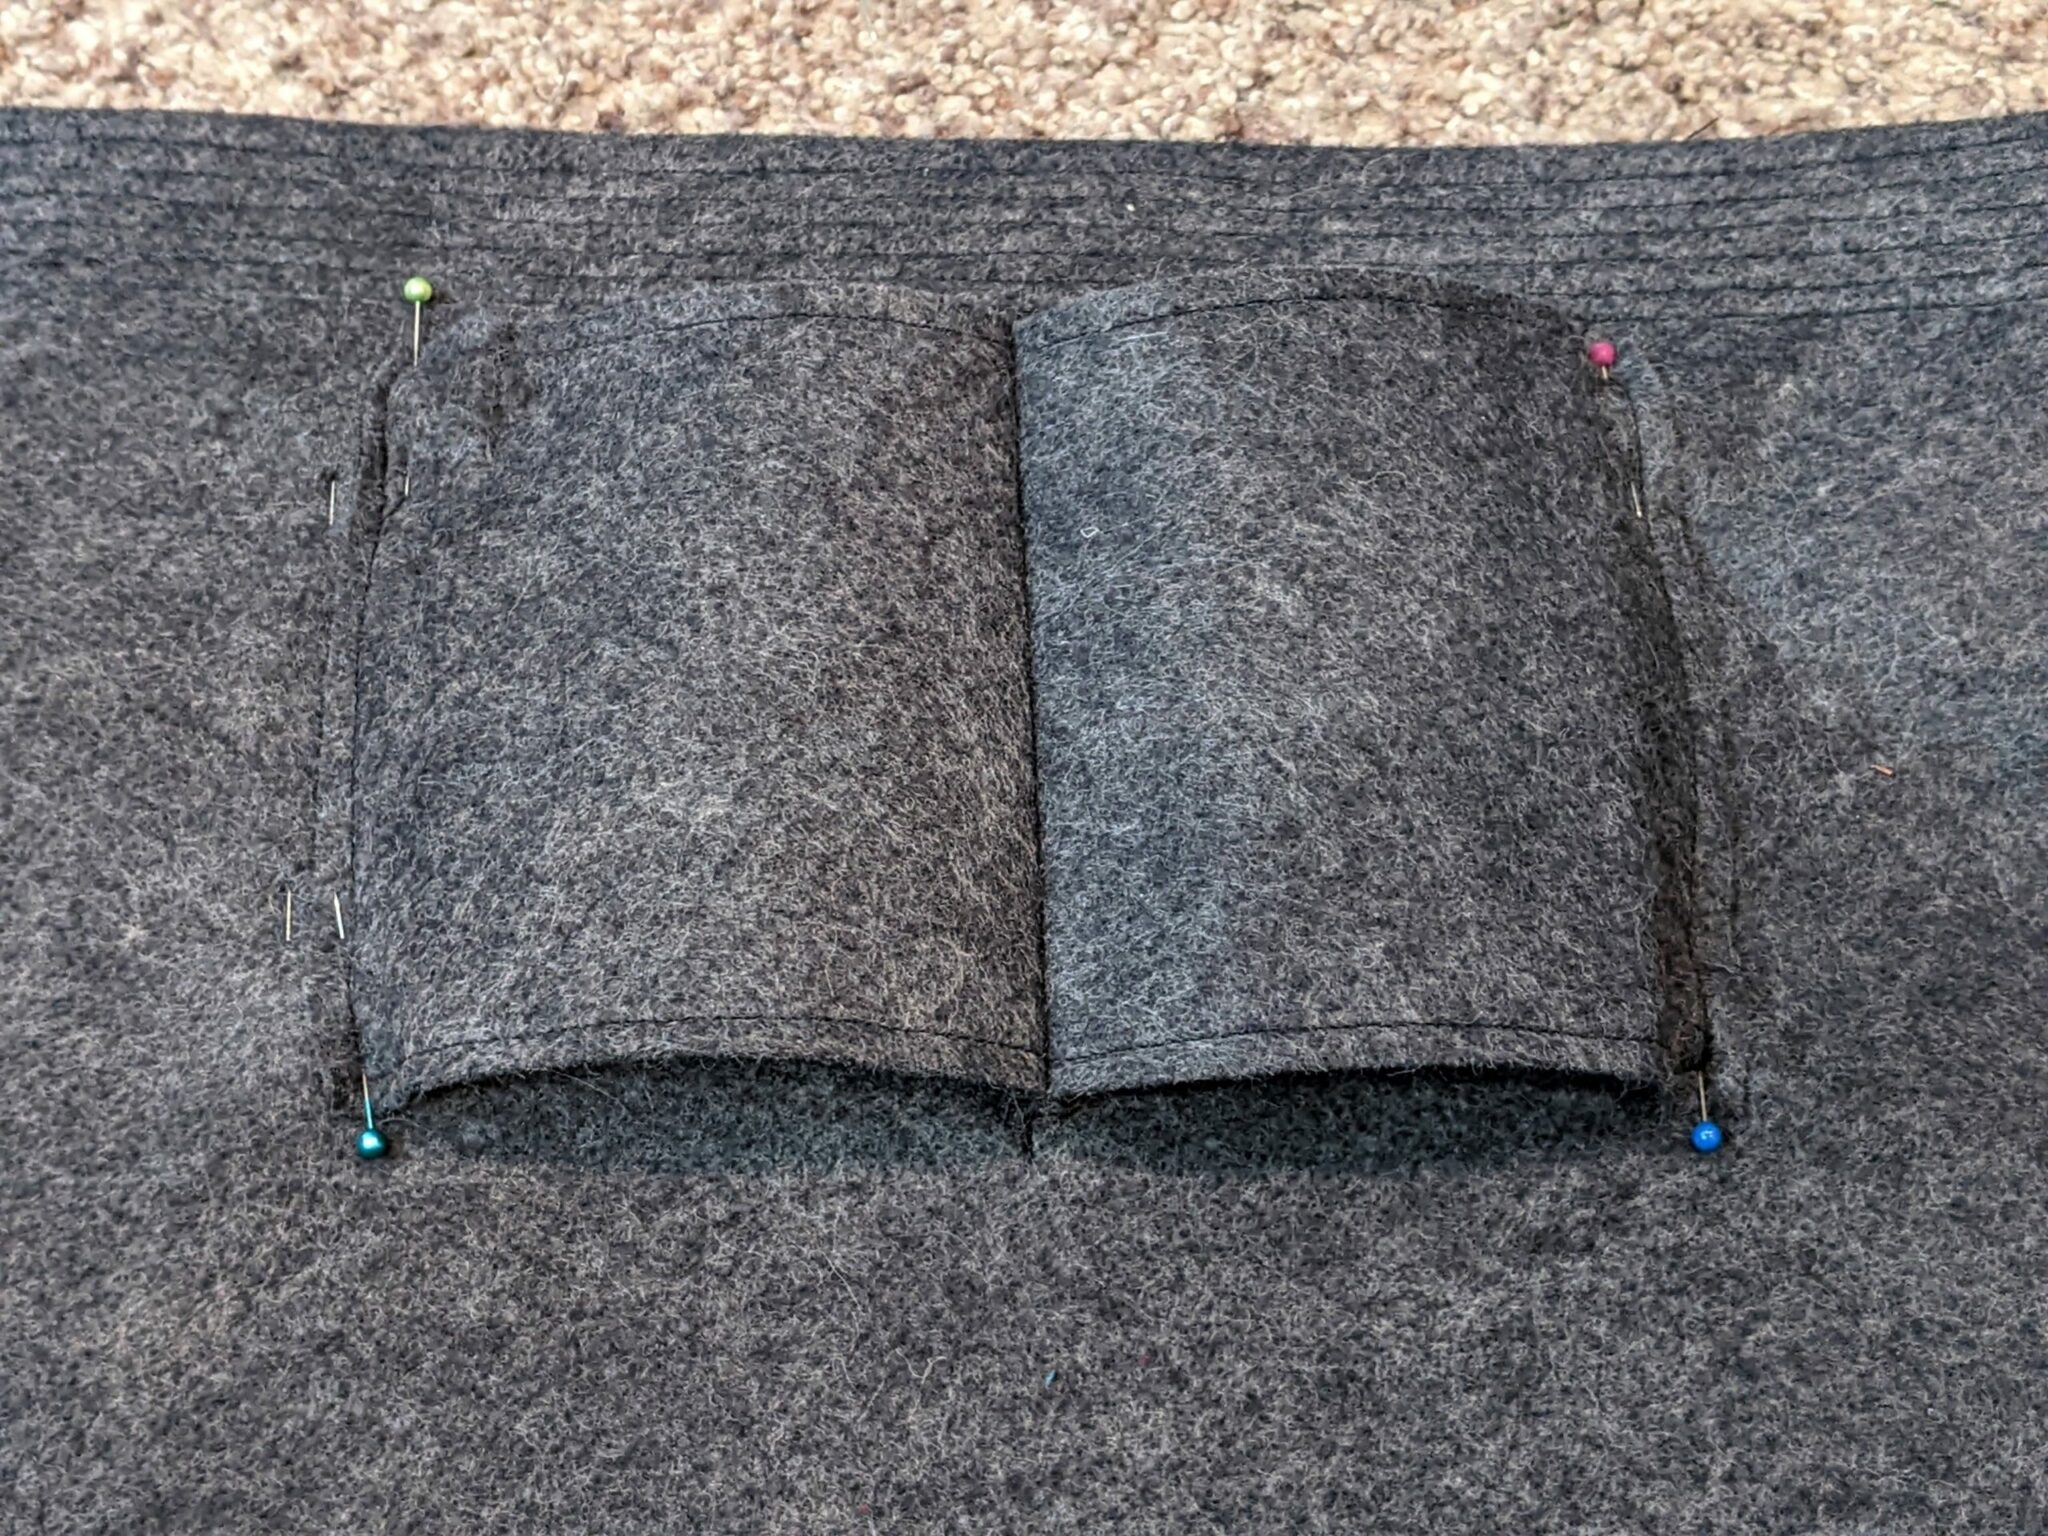
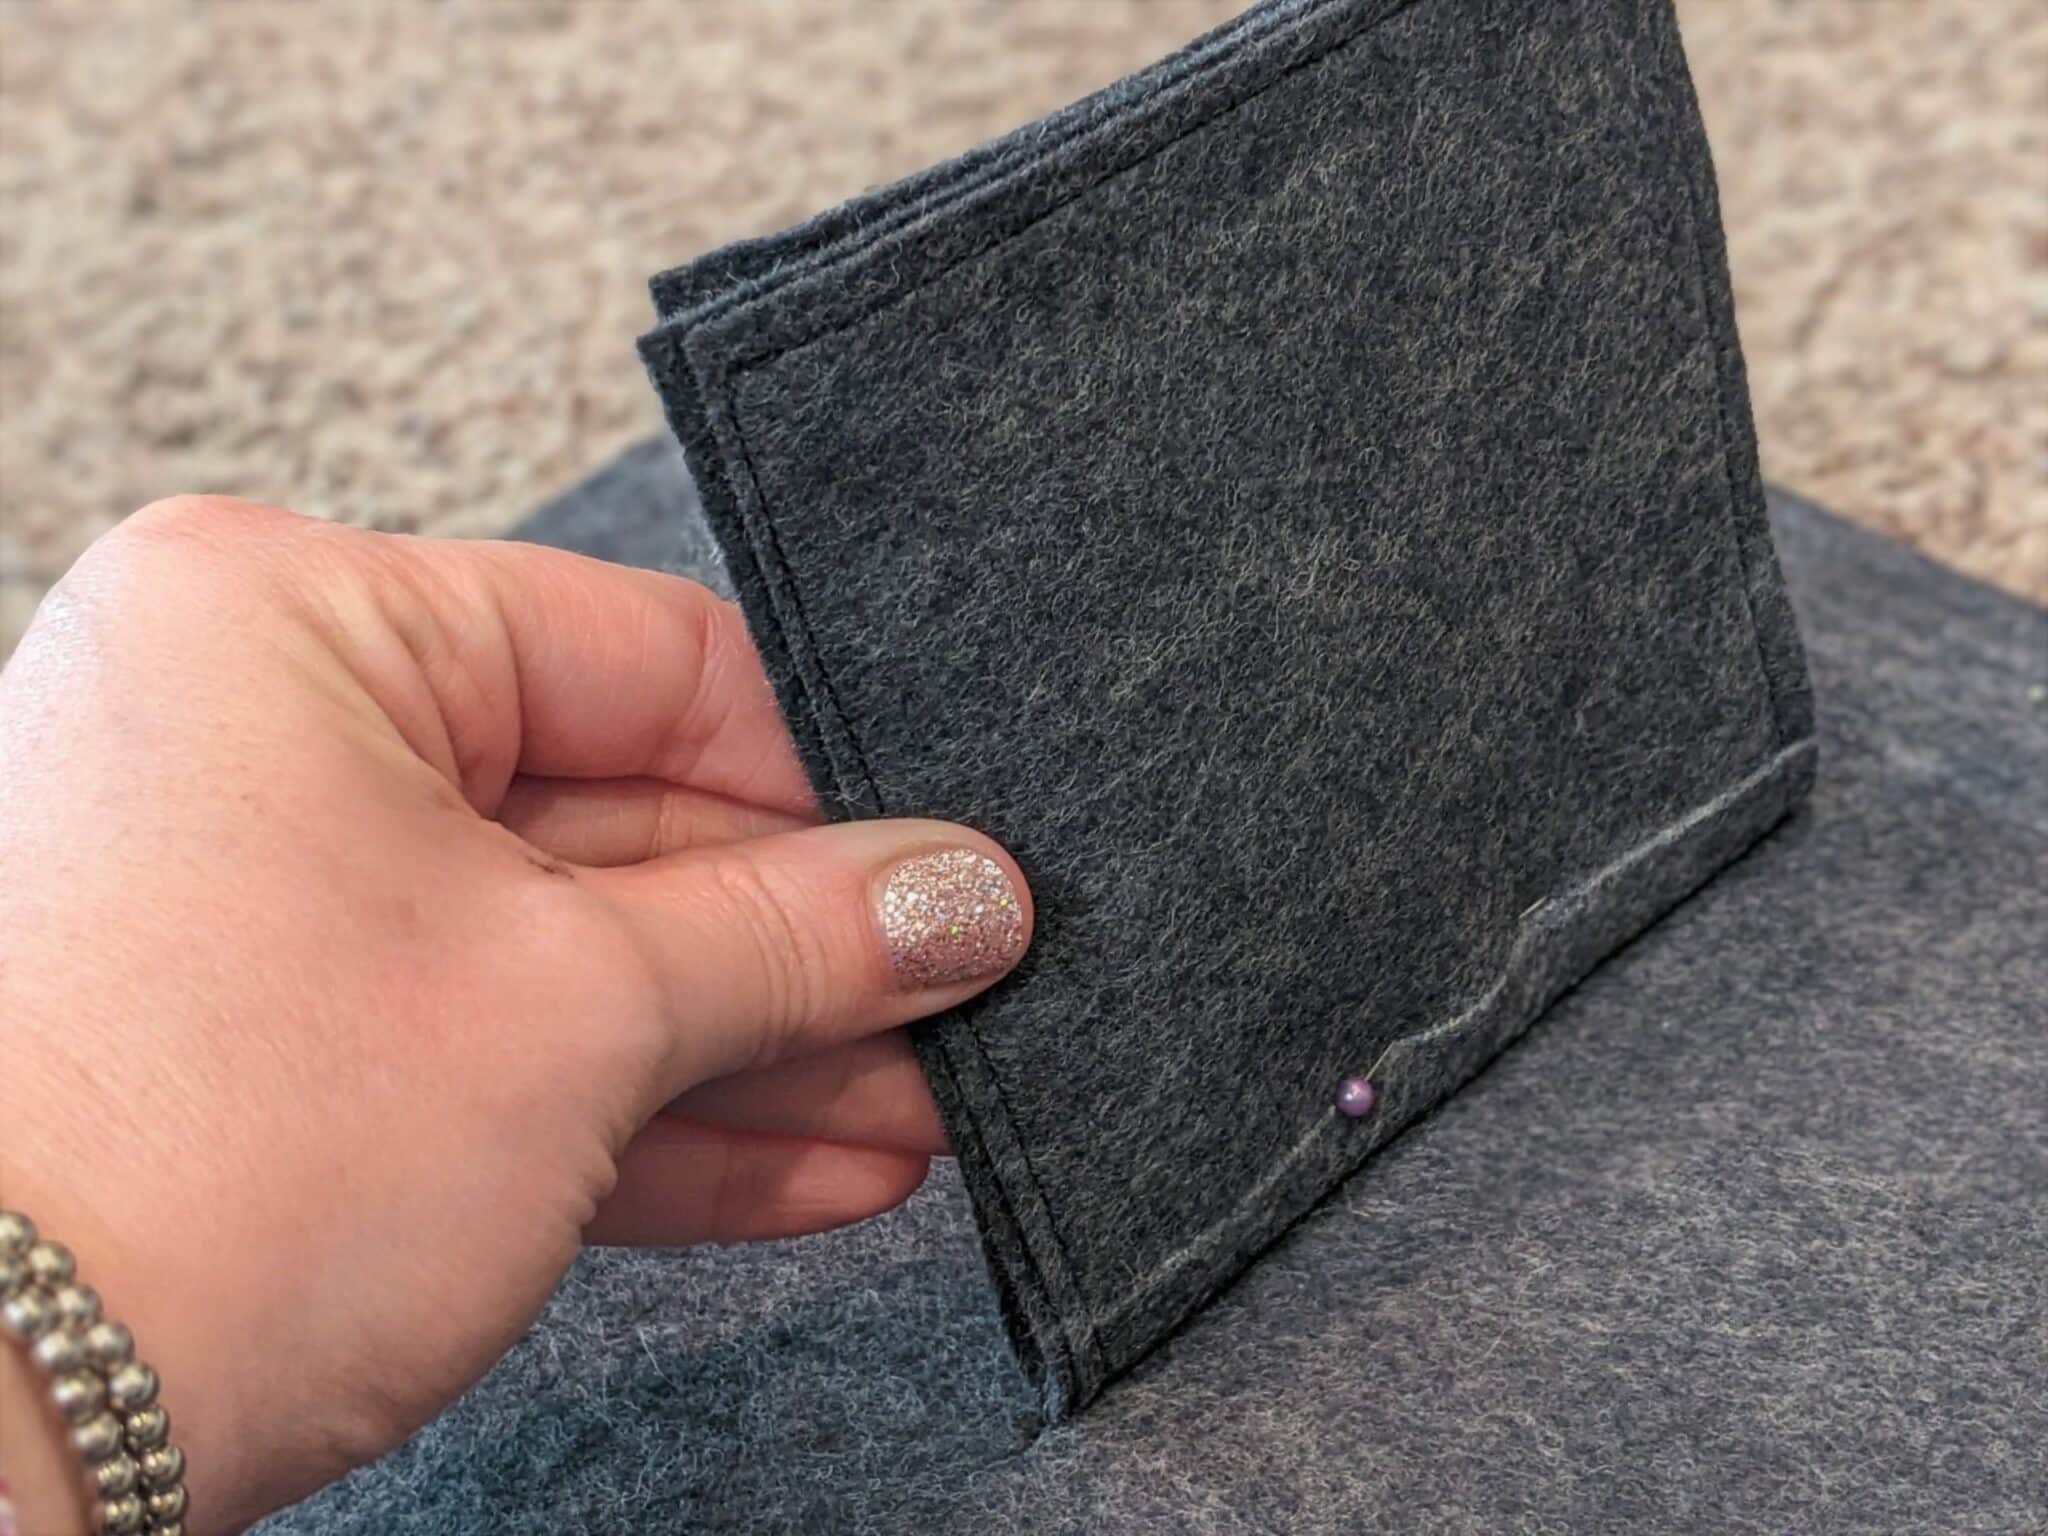
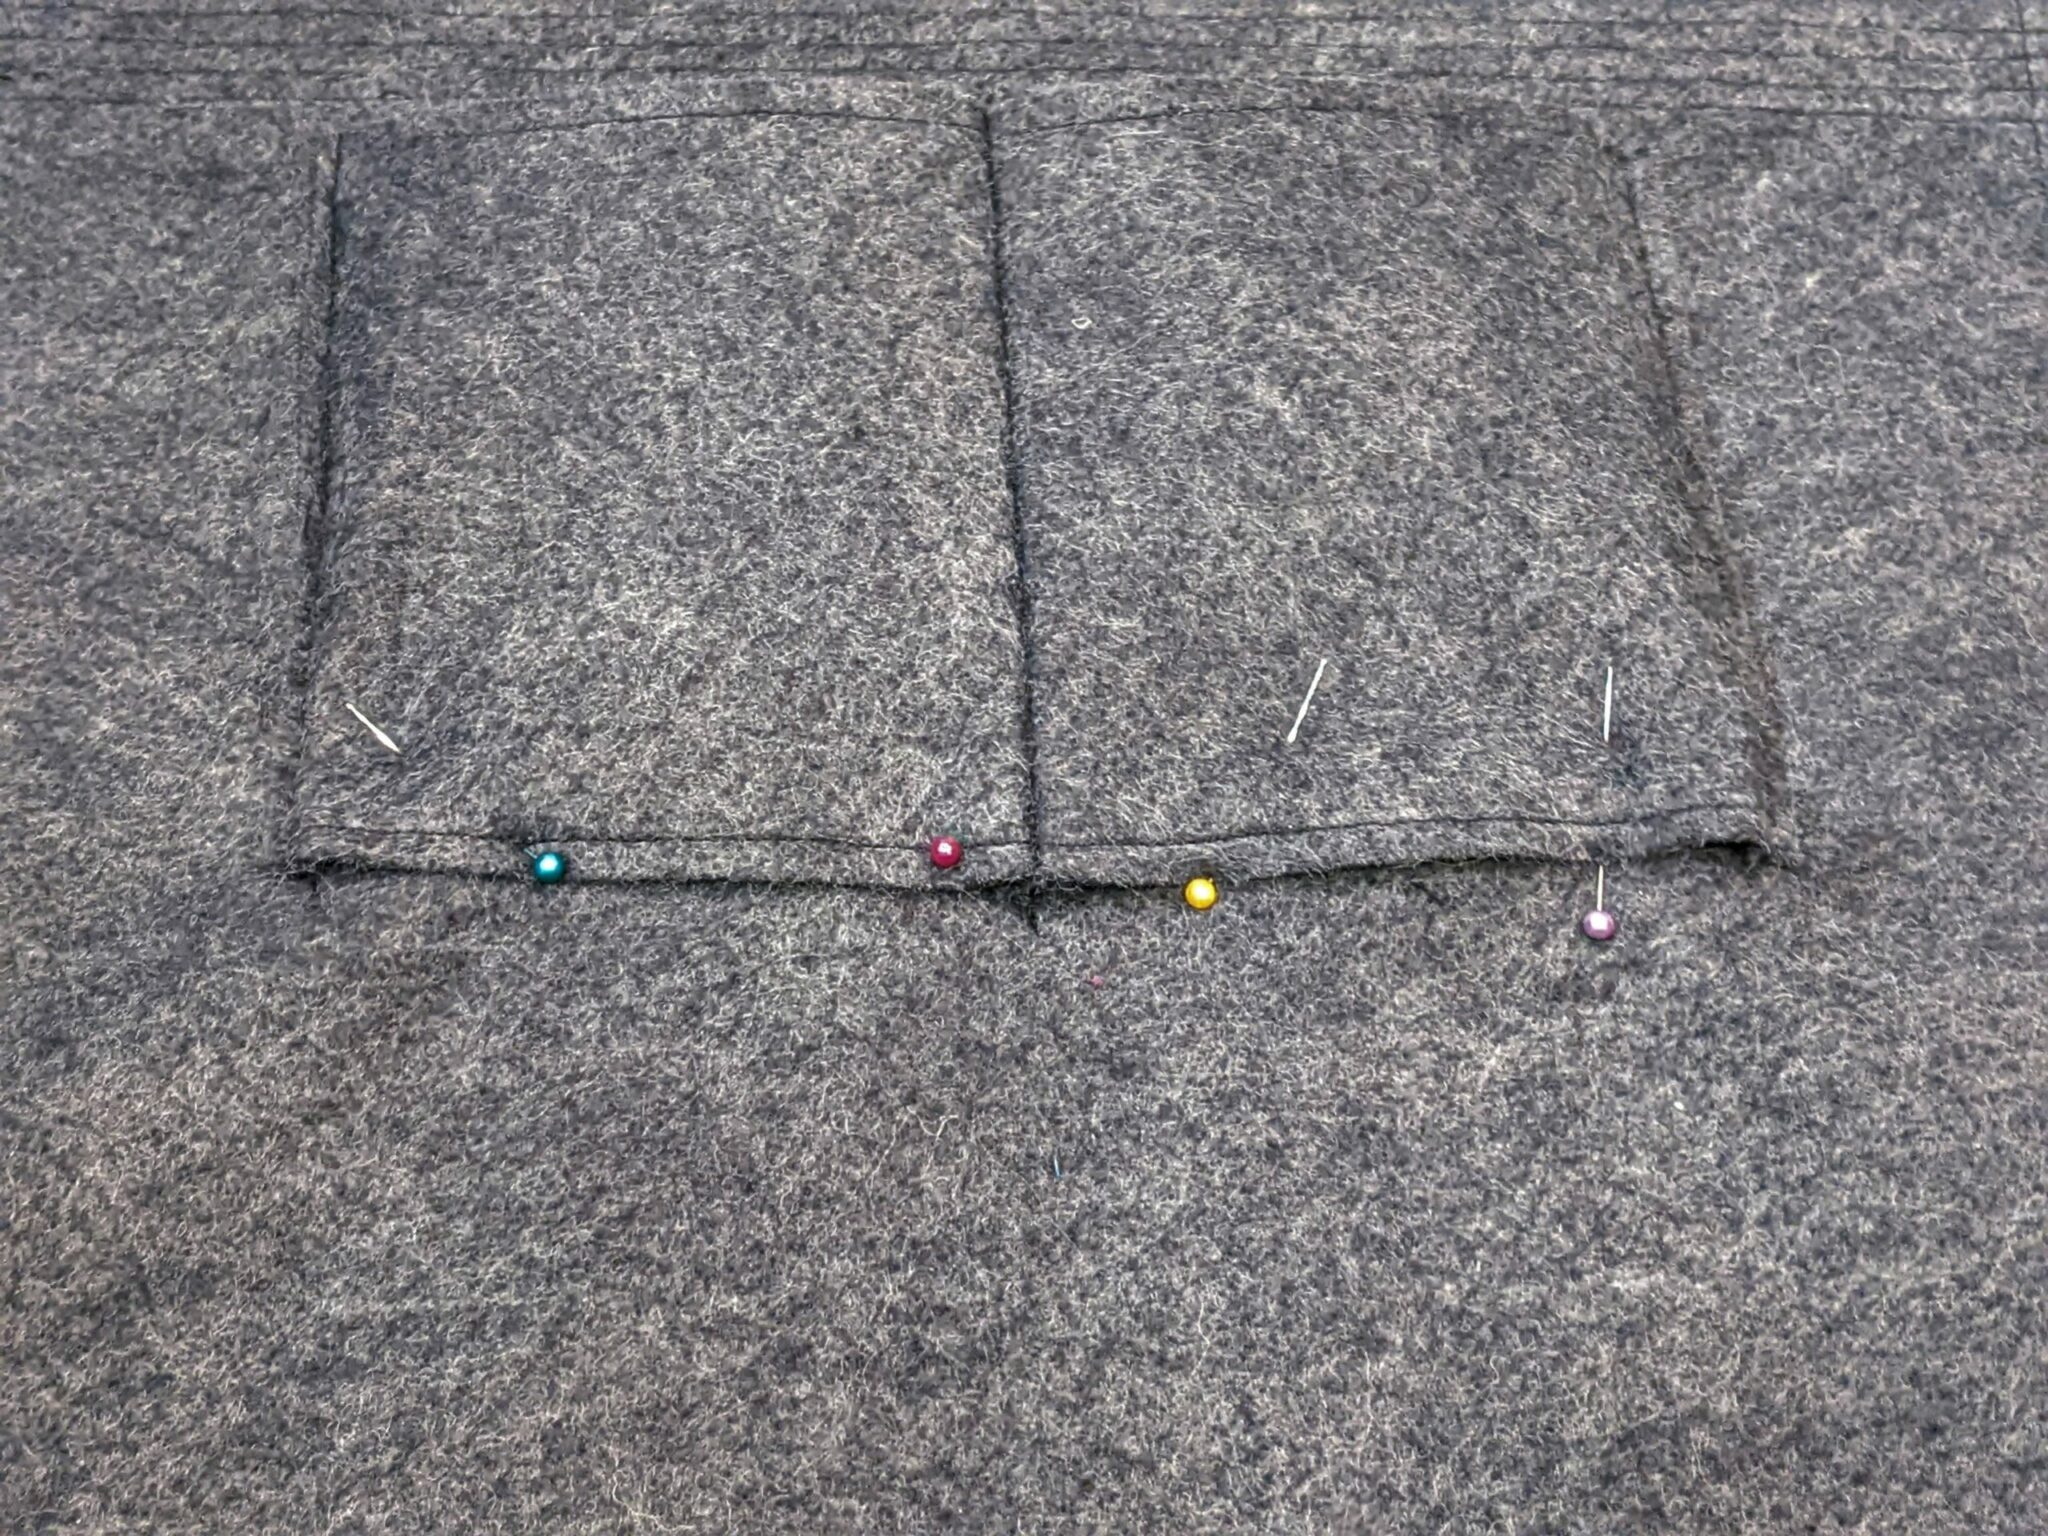
- Pin the bottom edges of the inner and outer pockets. You will have a small fold on each outer edge.
- Sew ⅛” in from the bottom edge. You may need to manually turn your machine to sew over the small folds on each outer edge as it is very thick to sew through. You can also hand stitch this section if needed.
Finishing Up
- Fold the whole bag in half right sides together lining up the outer edges and pin or clip.
- Sew from top to bottom on each side making sure the two sides are lined up nicely at the top edge.

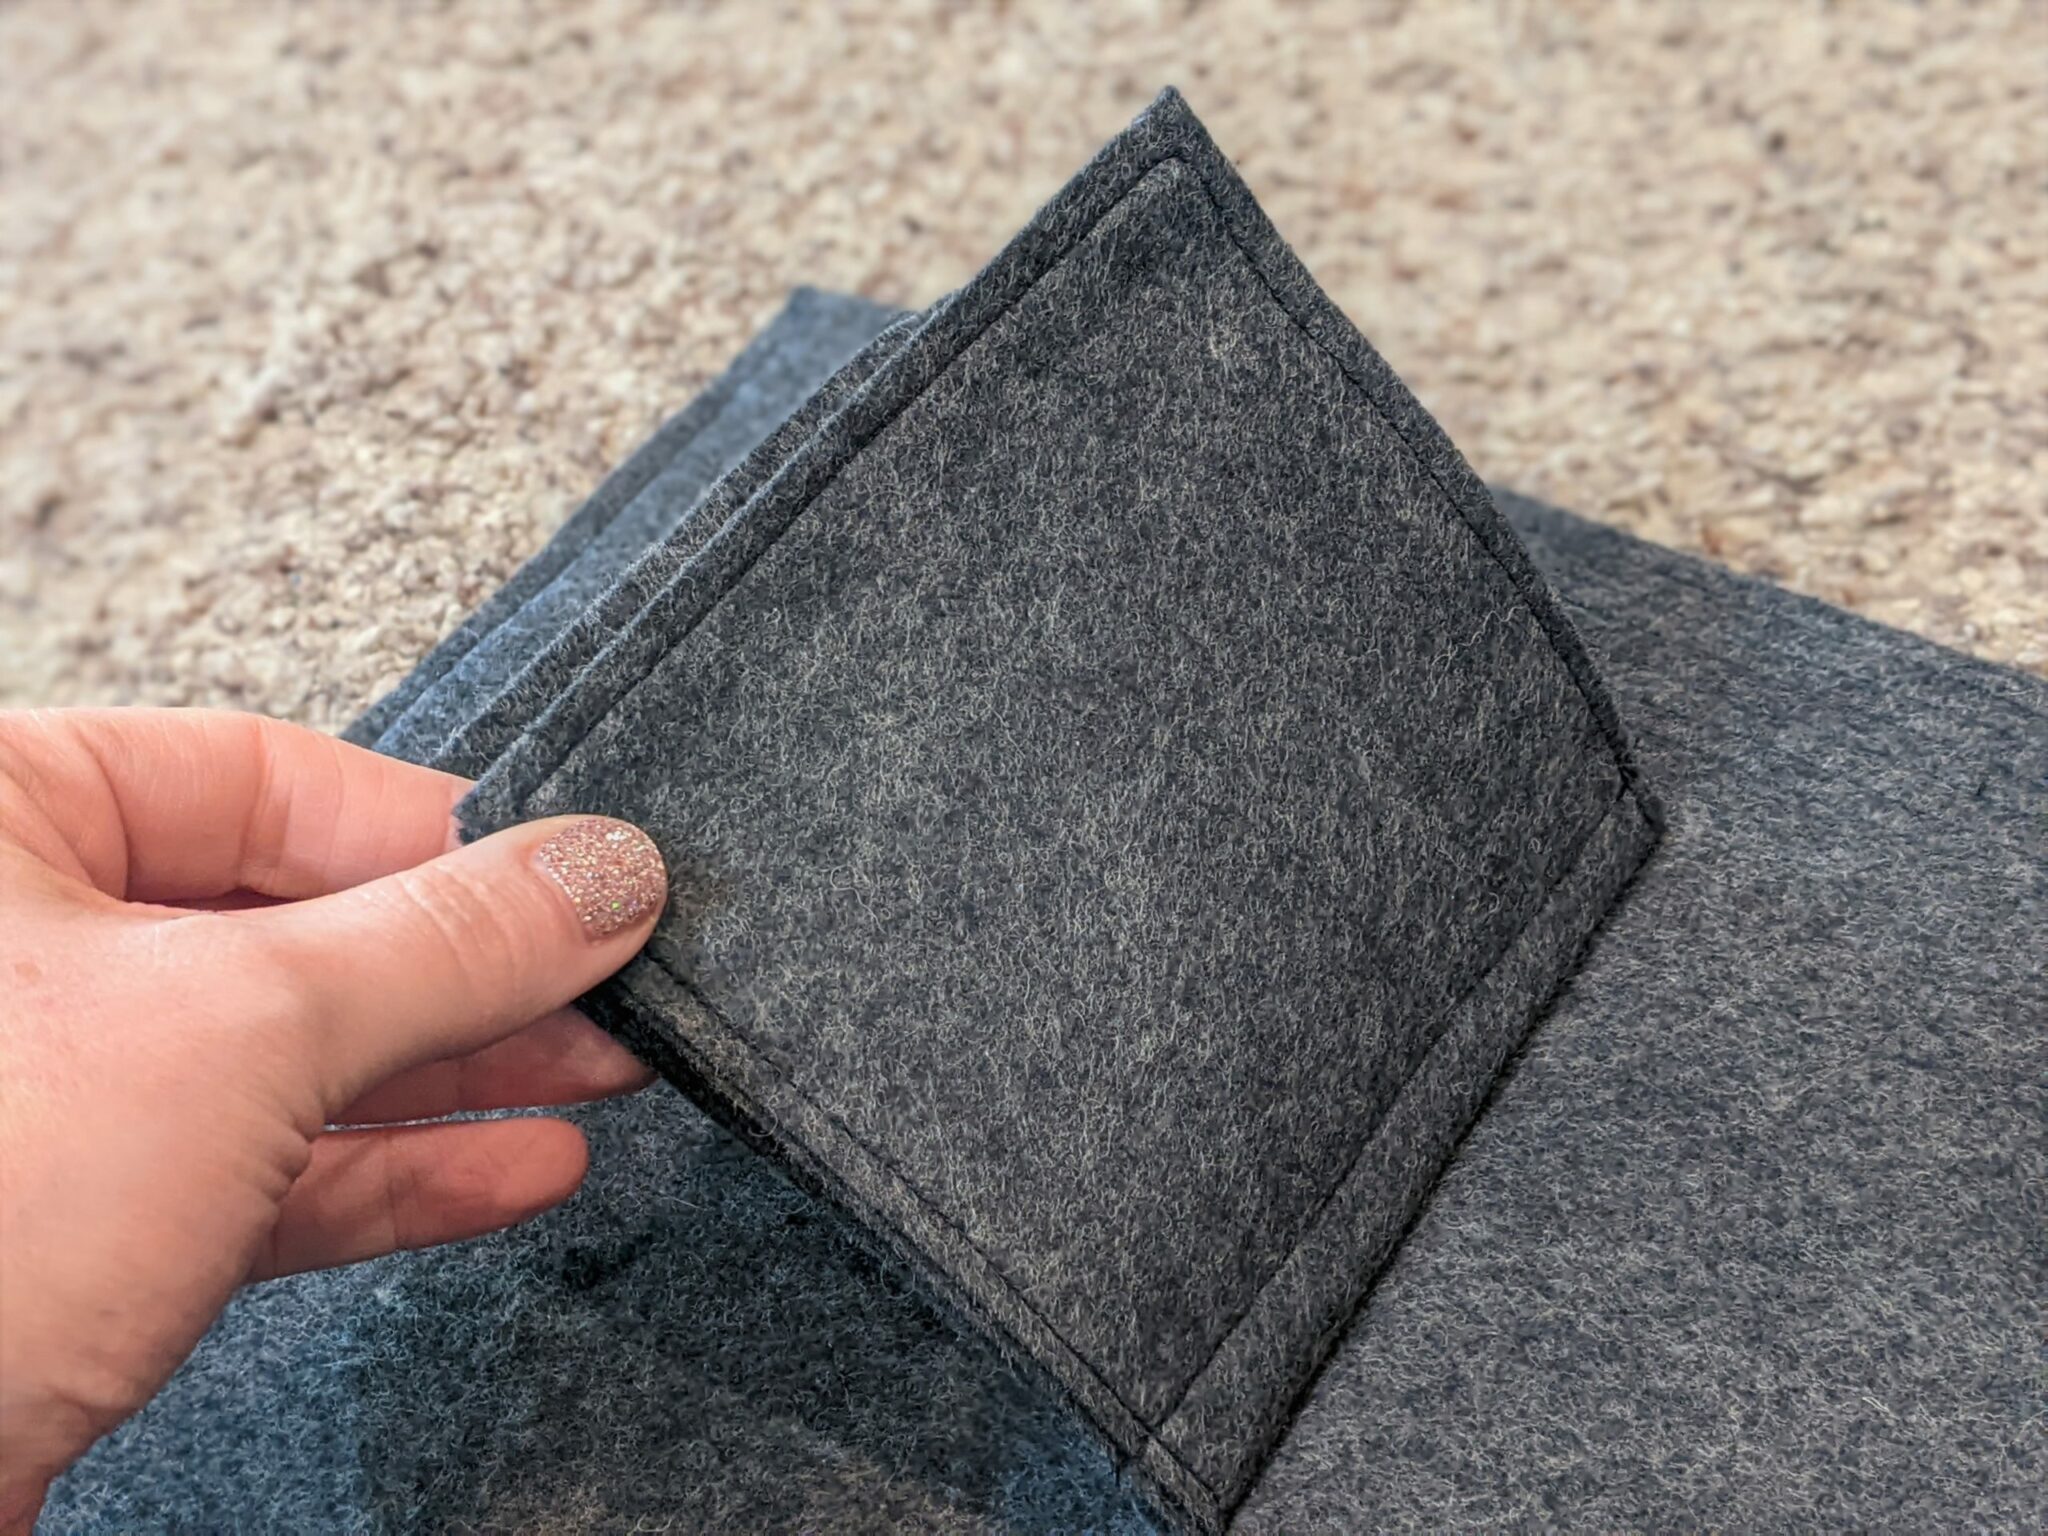
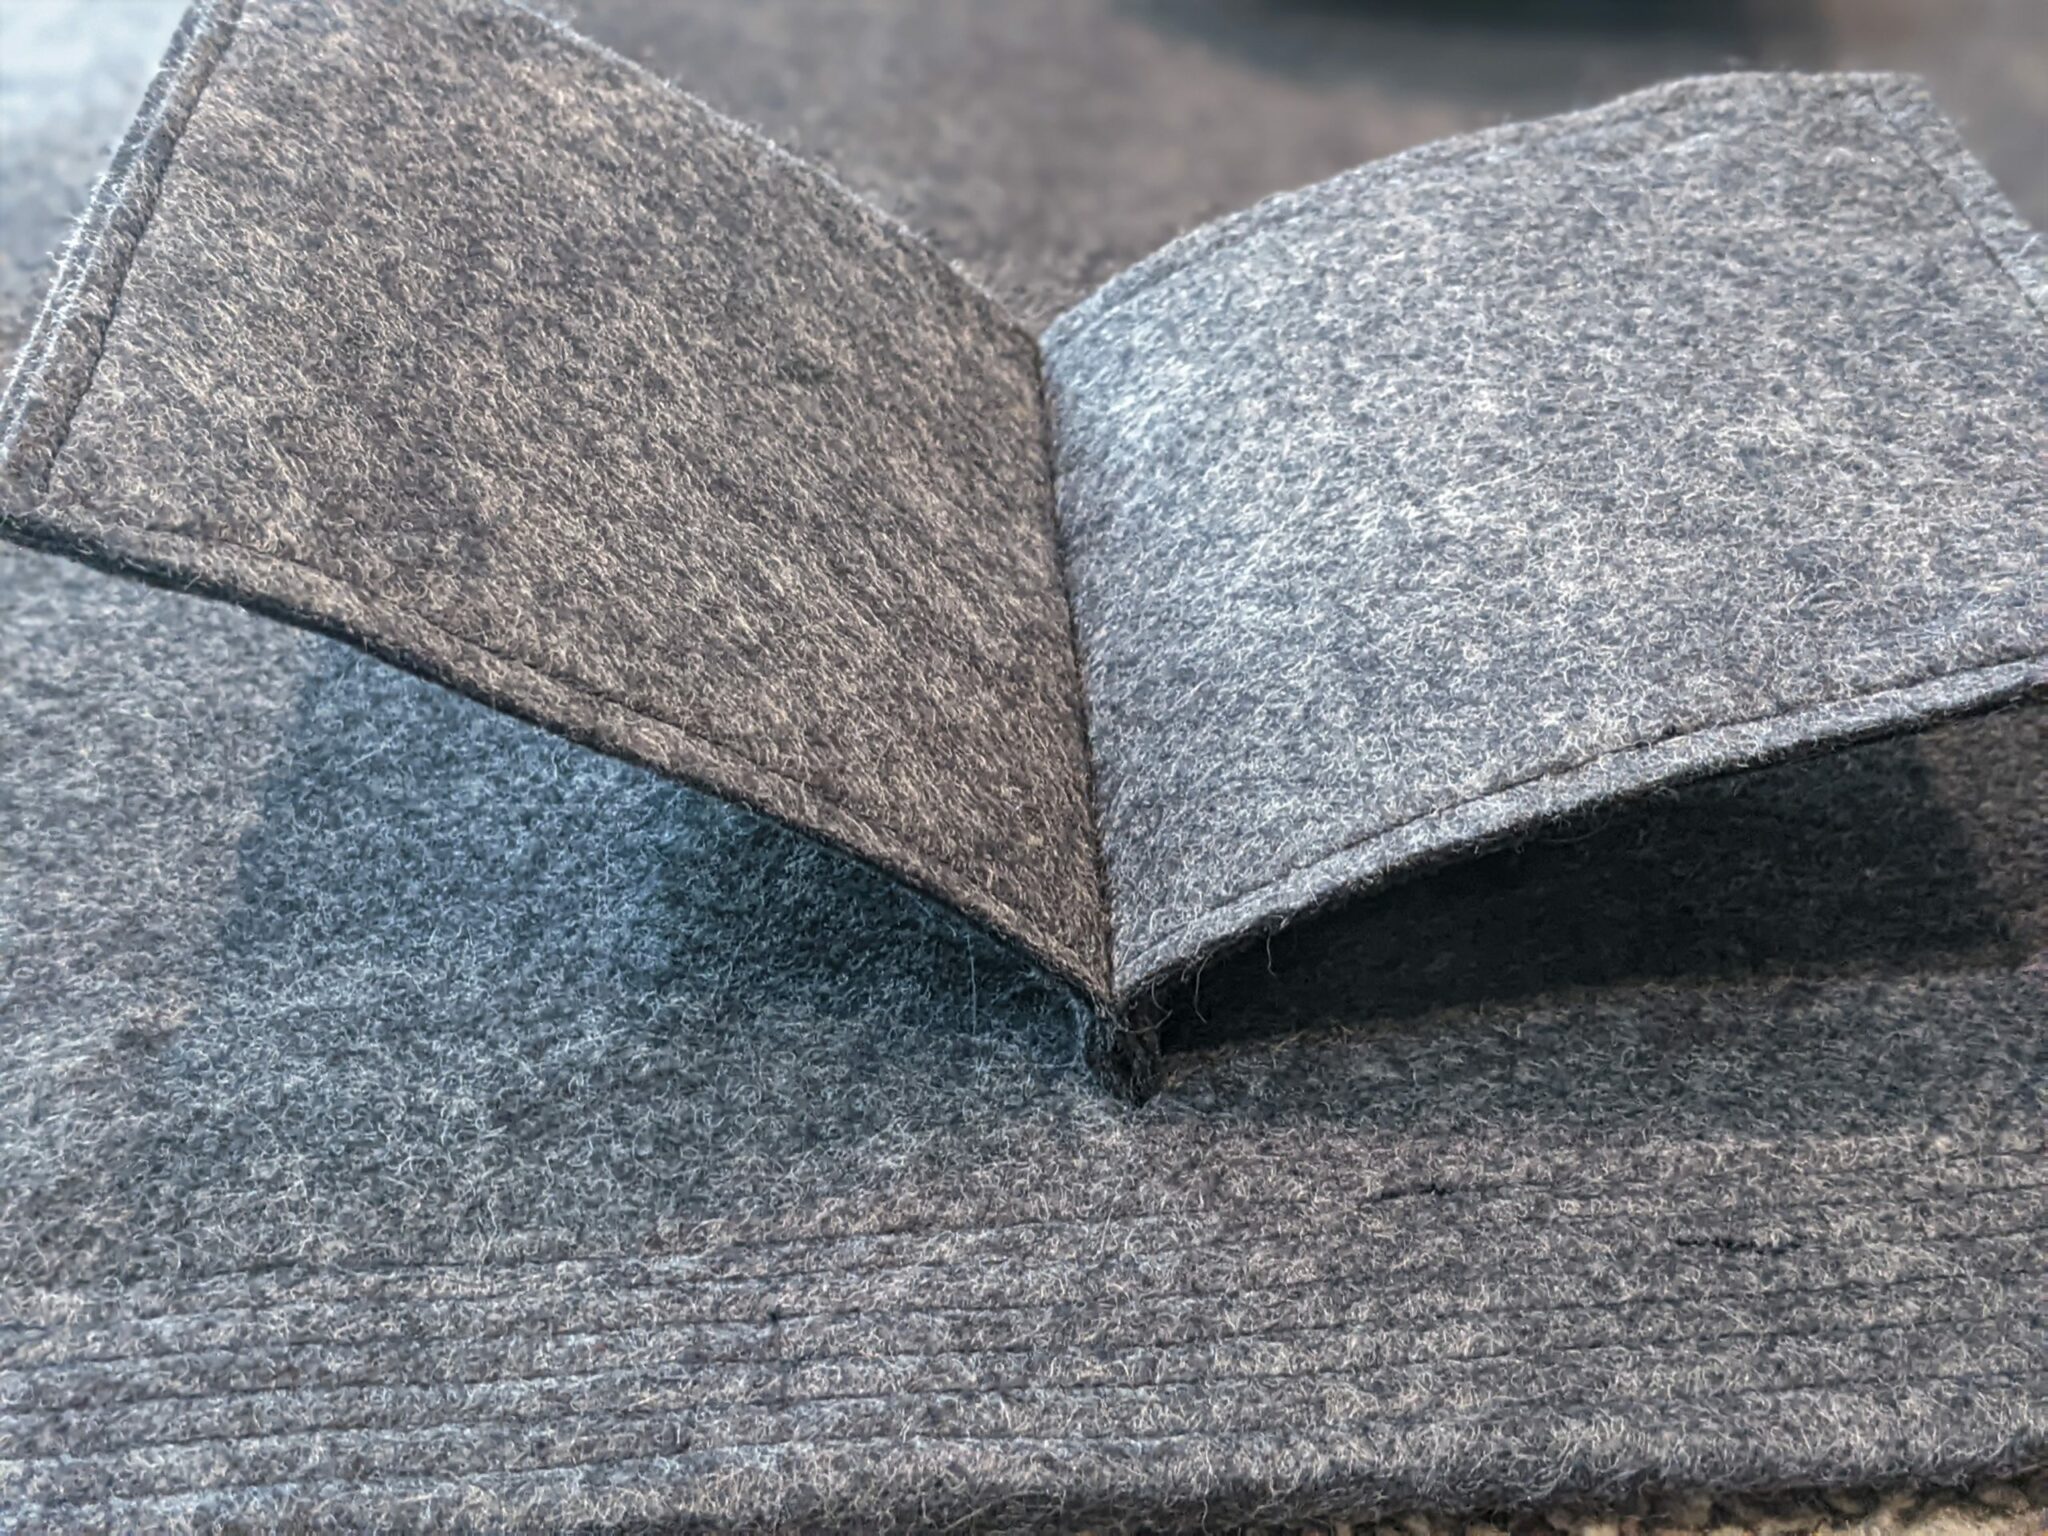
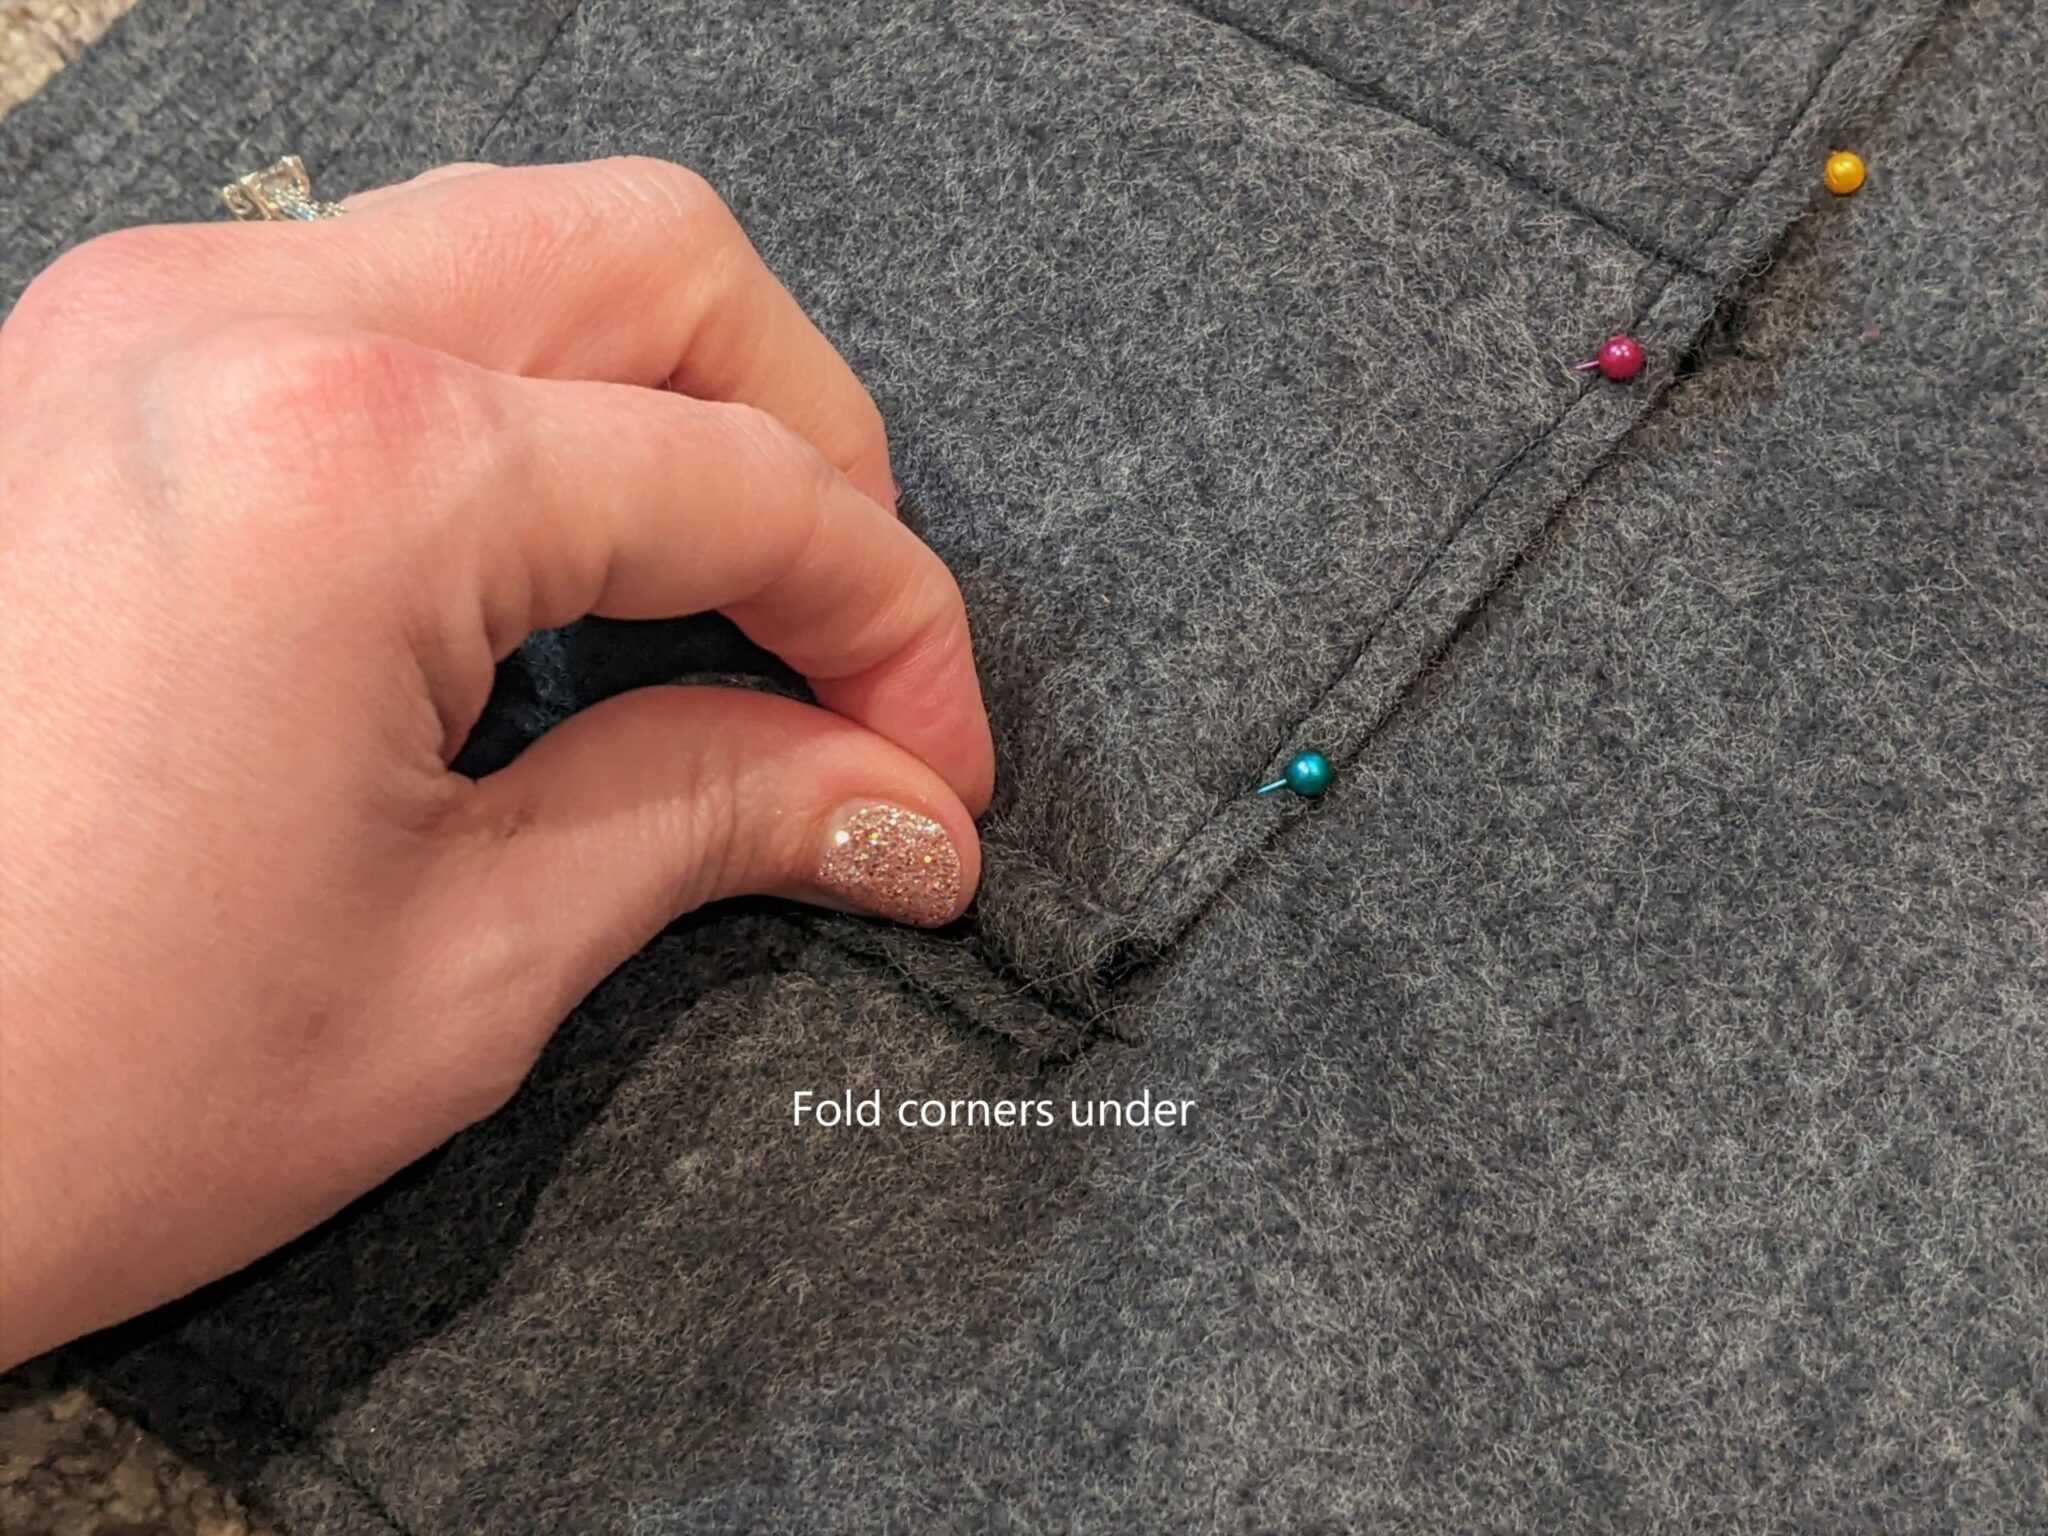
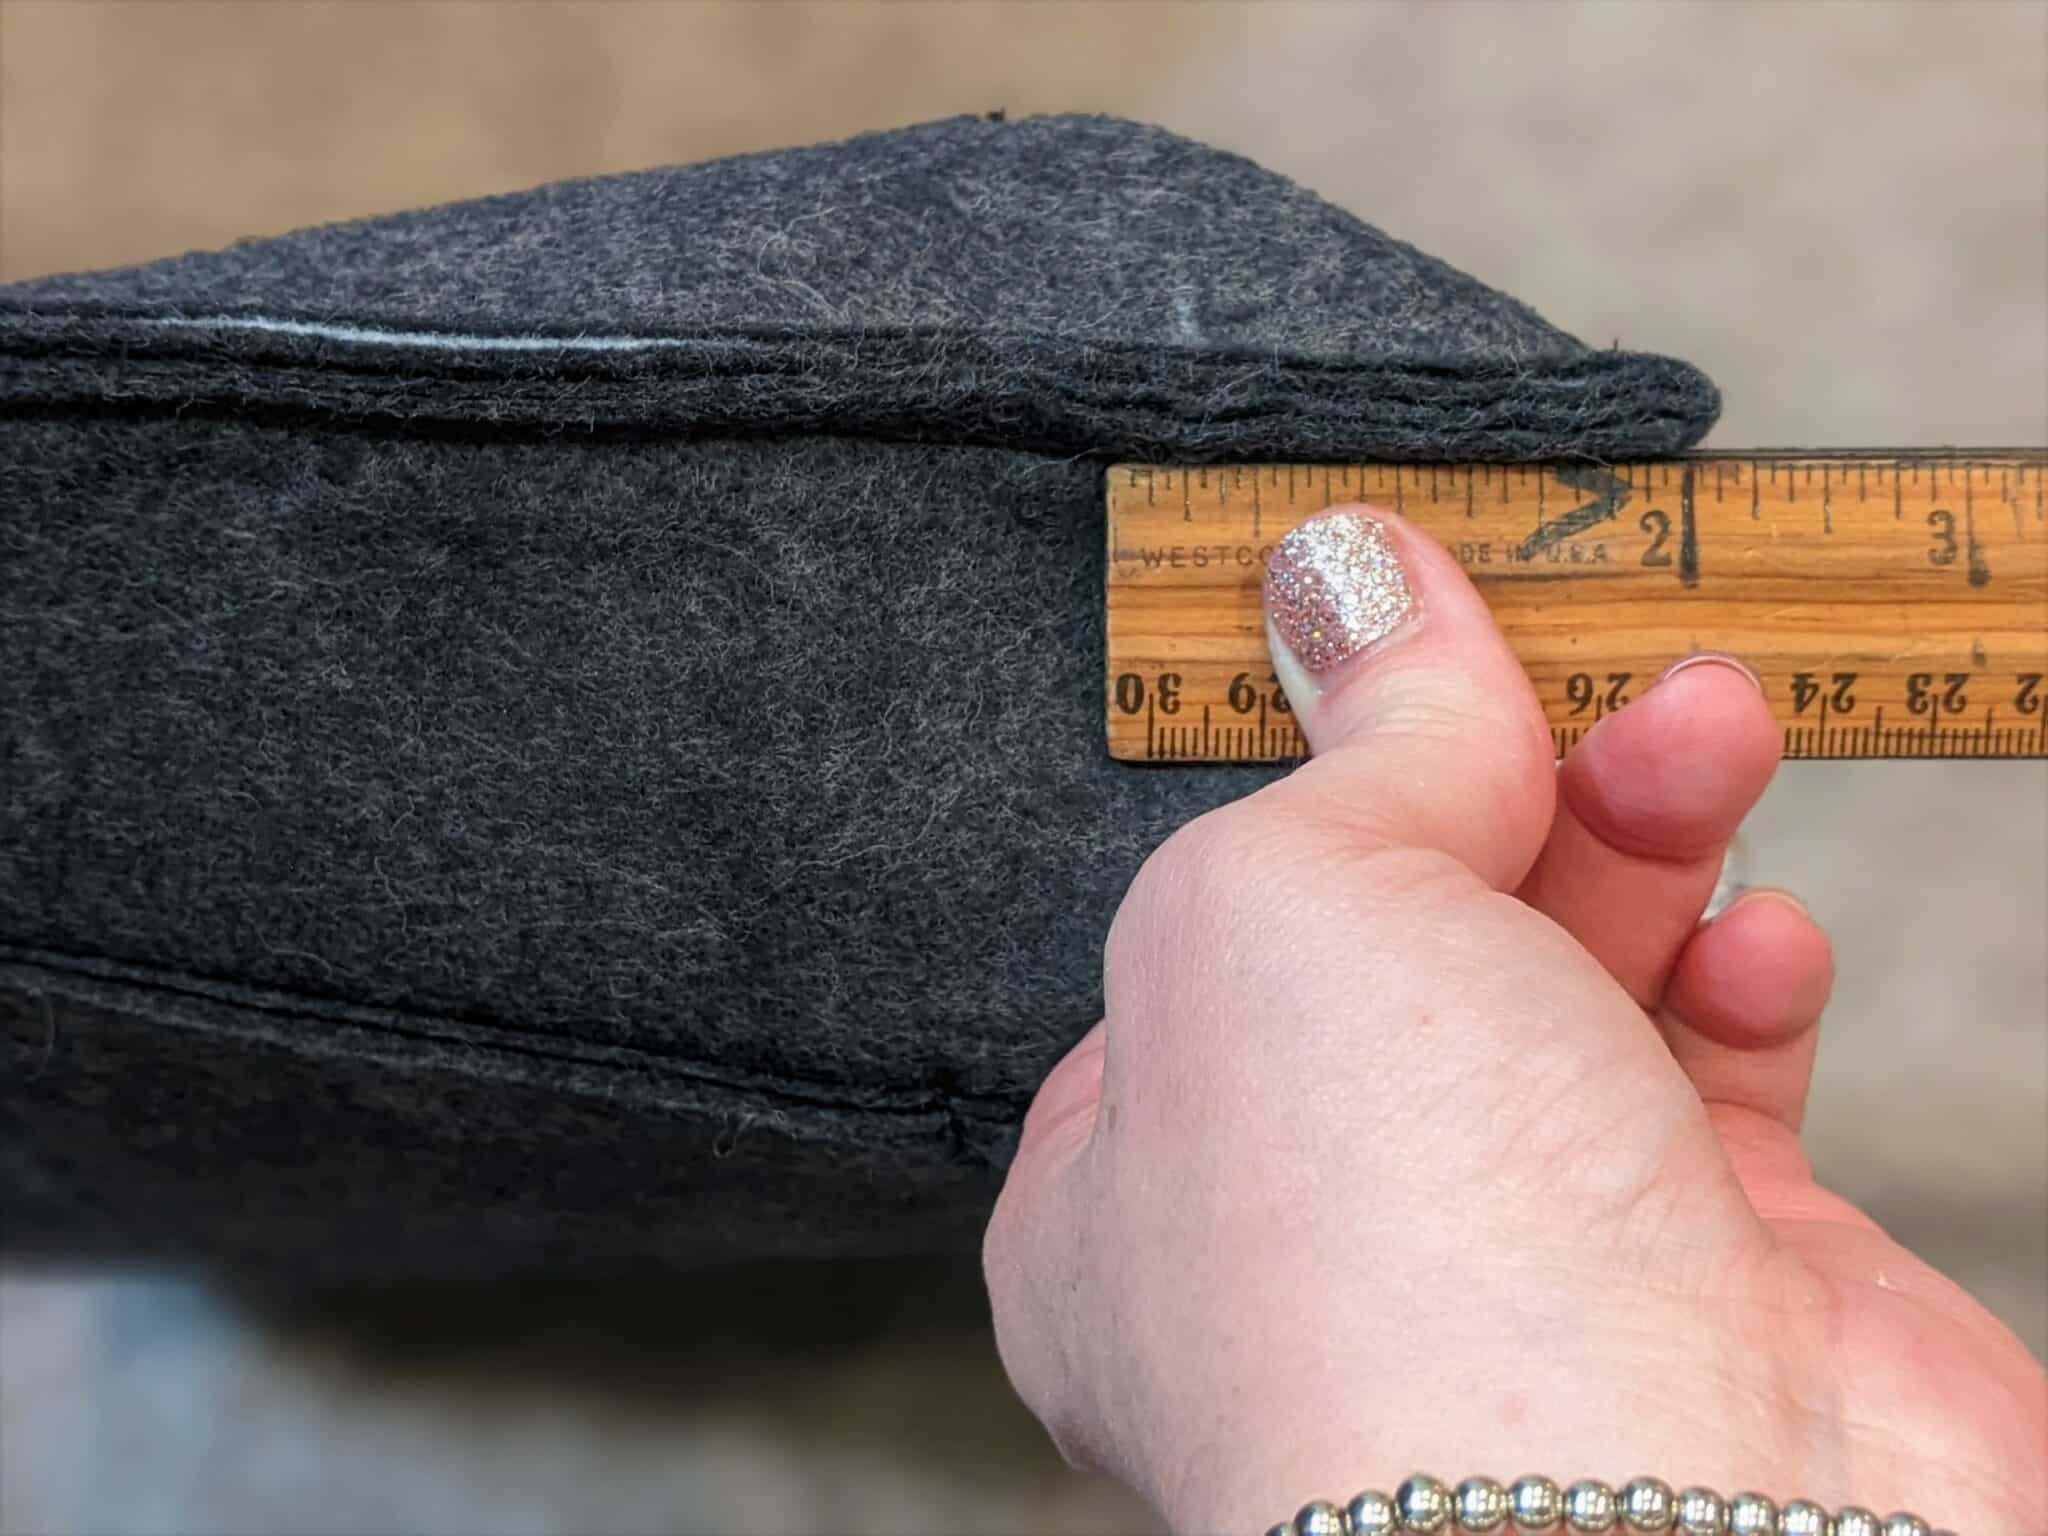
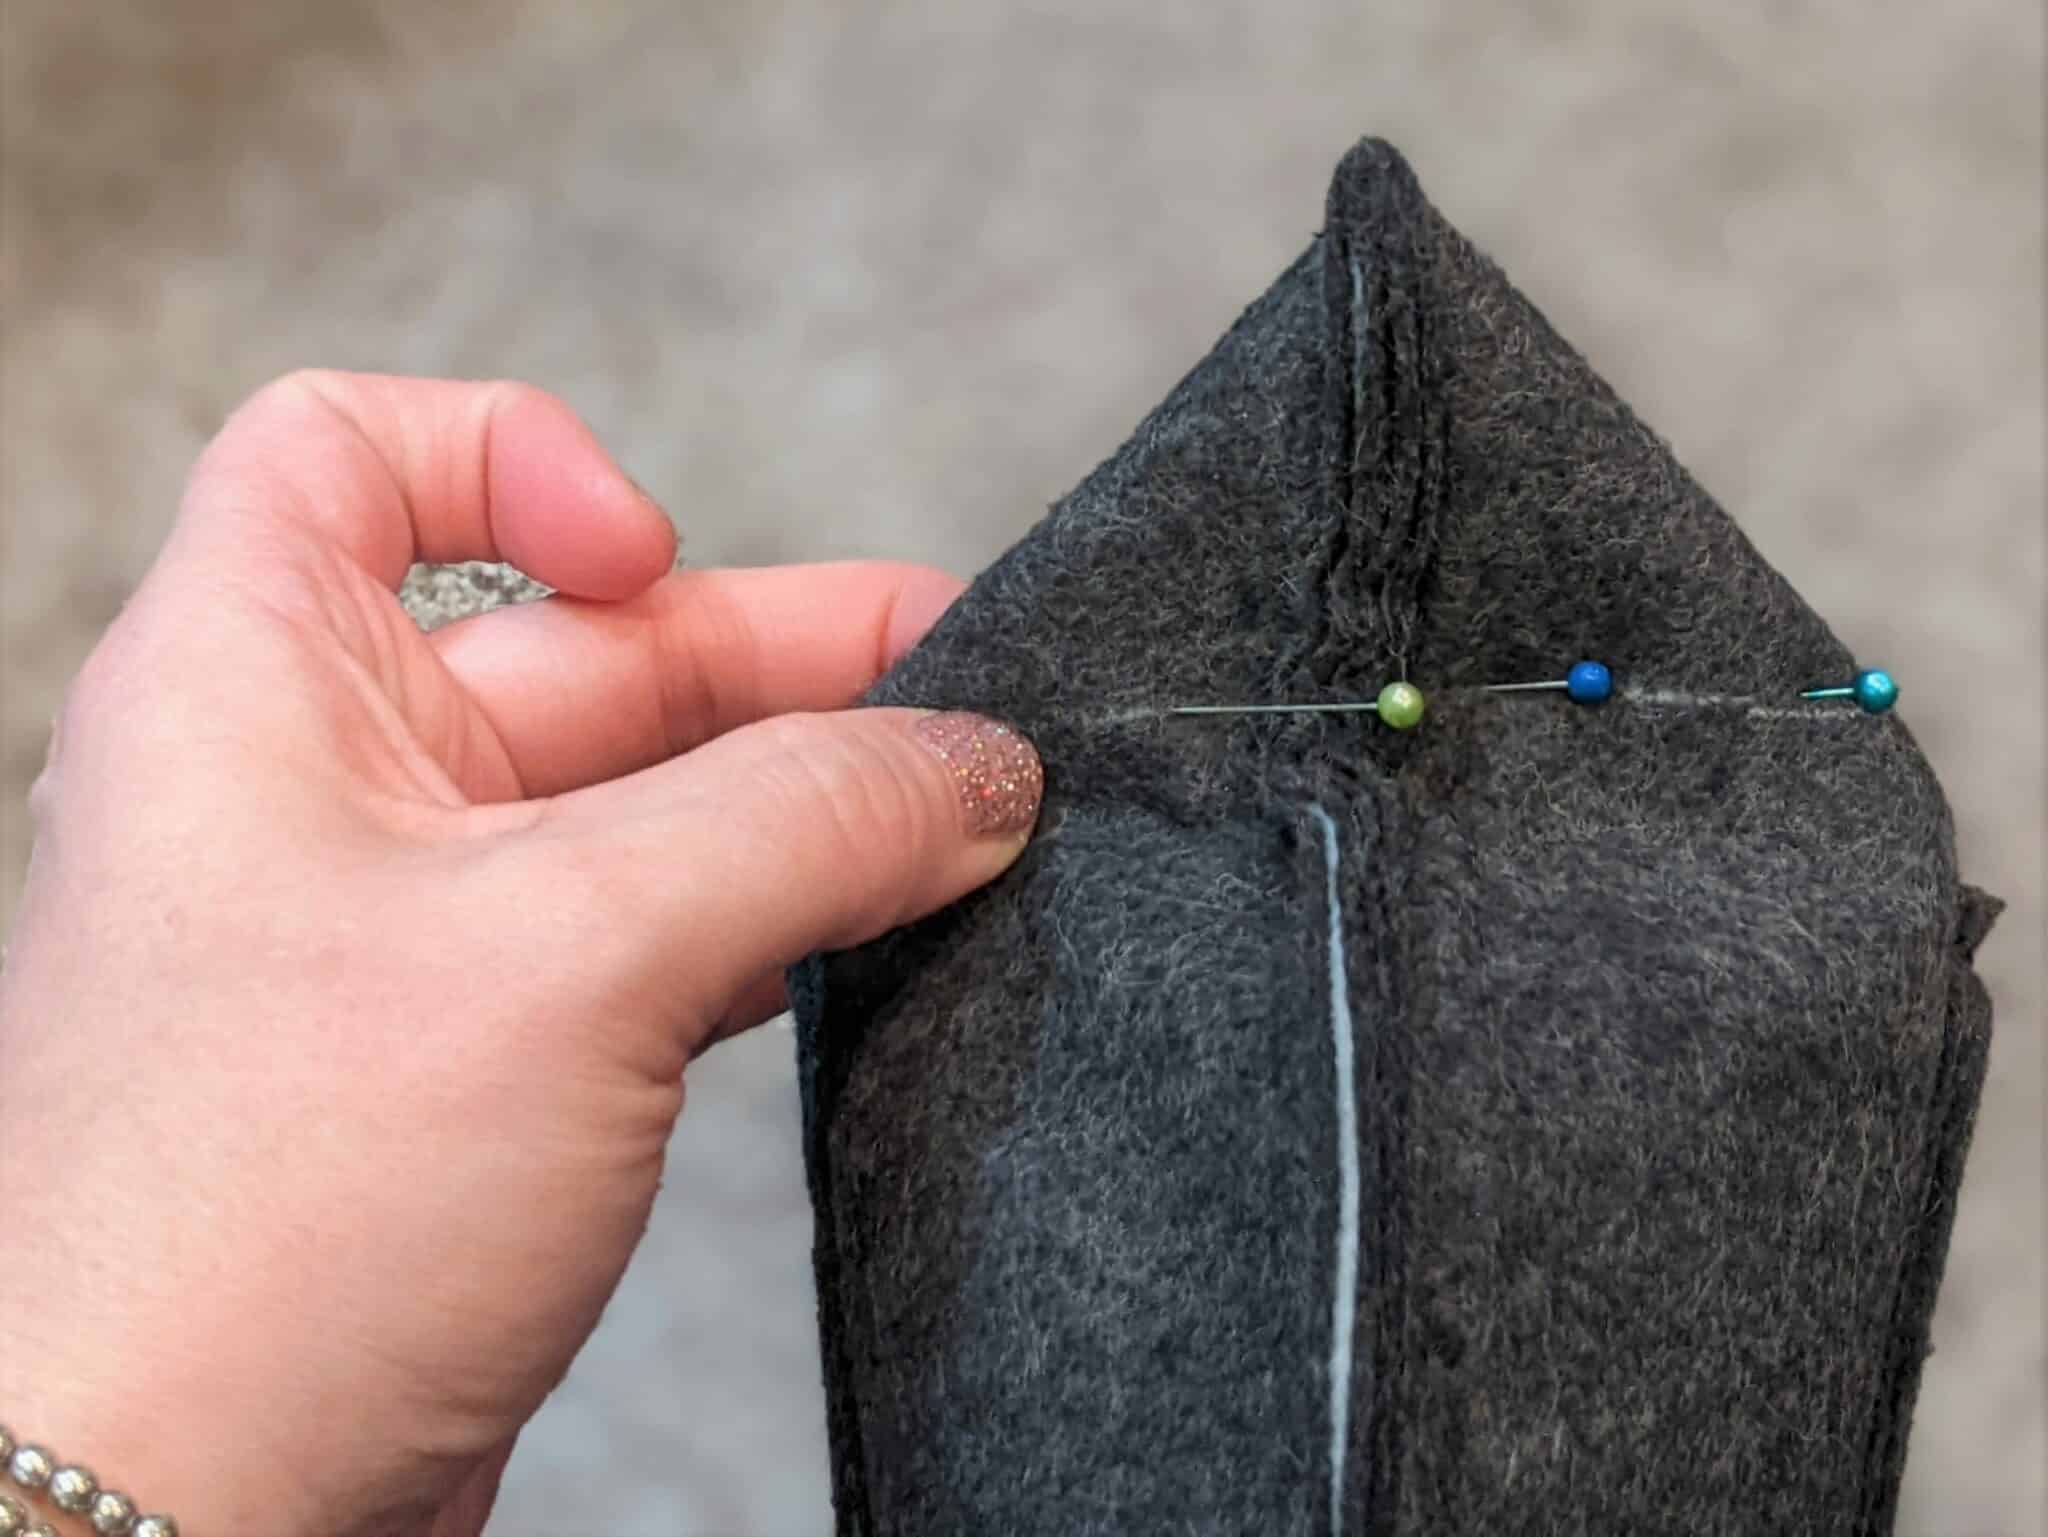
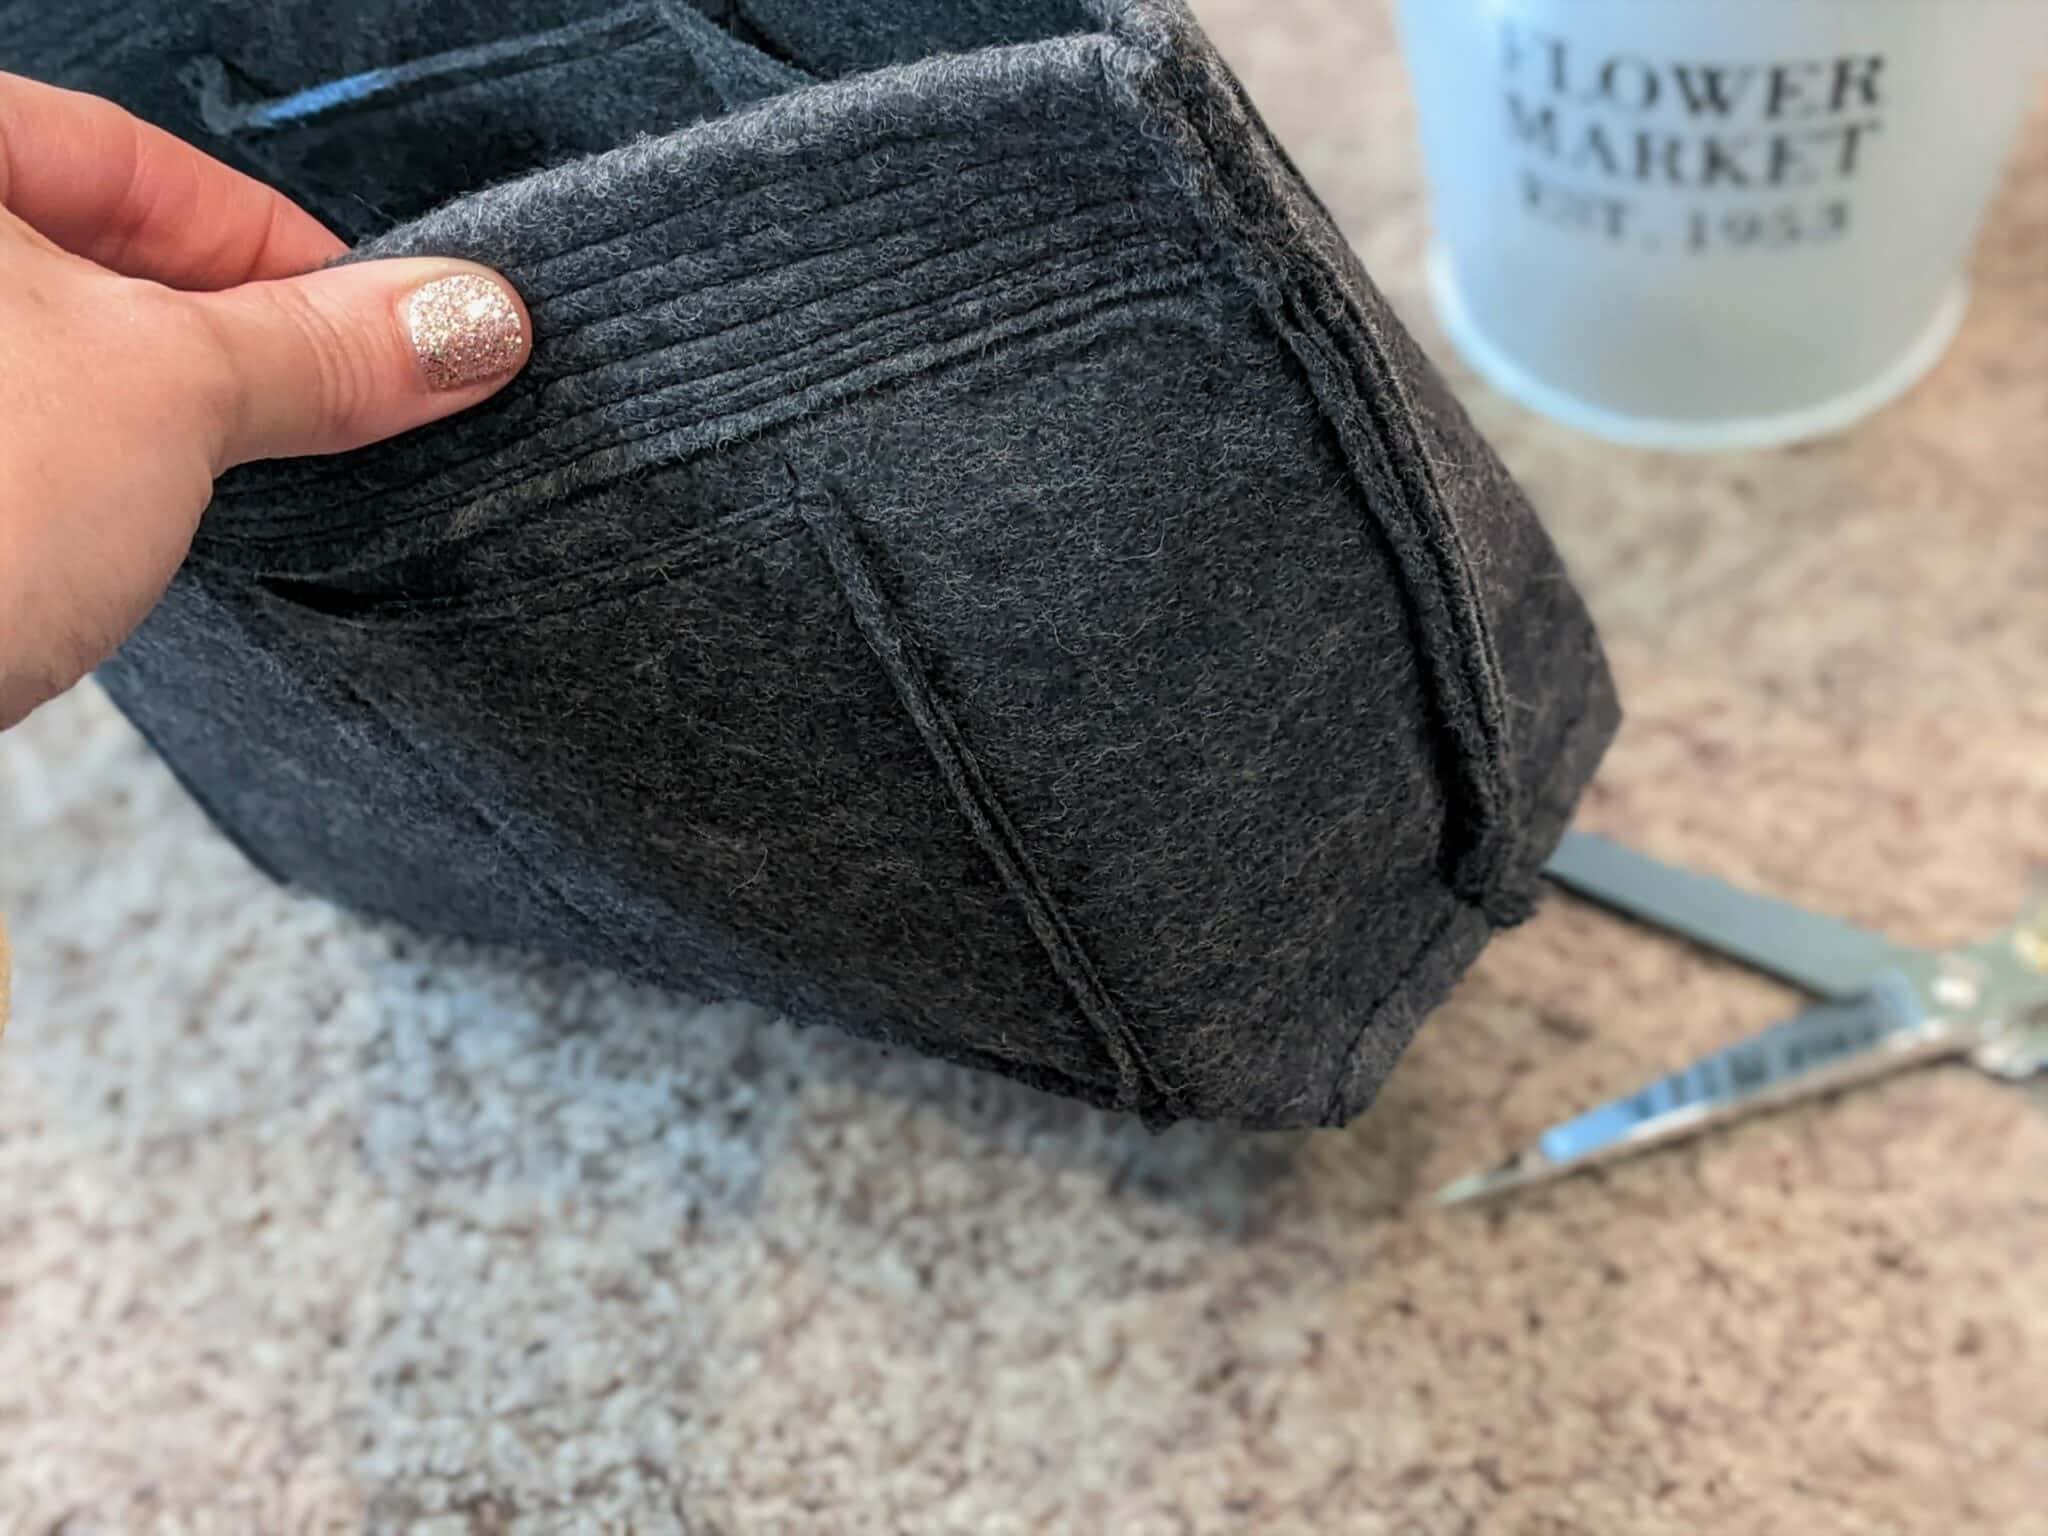
- Flatten out the bottom of the bag and push in the bottom sides to make a triangle at the base.
- Measure in 2” from the point of the triangle draw a line across and pin.
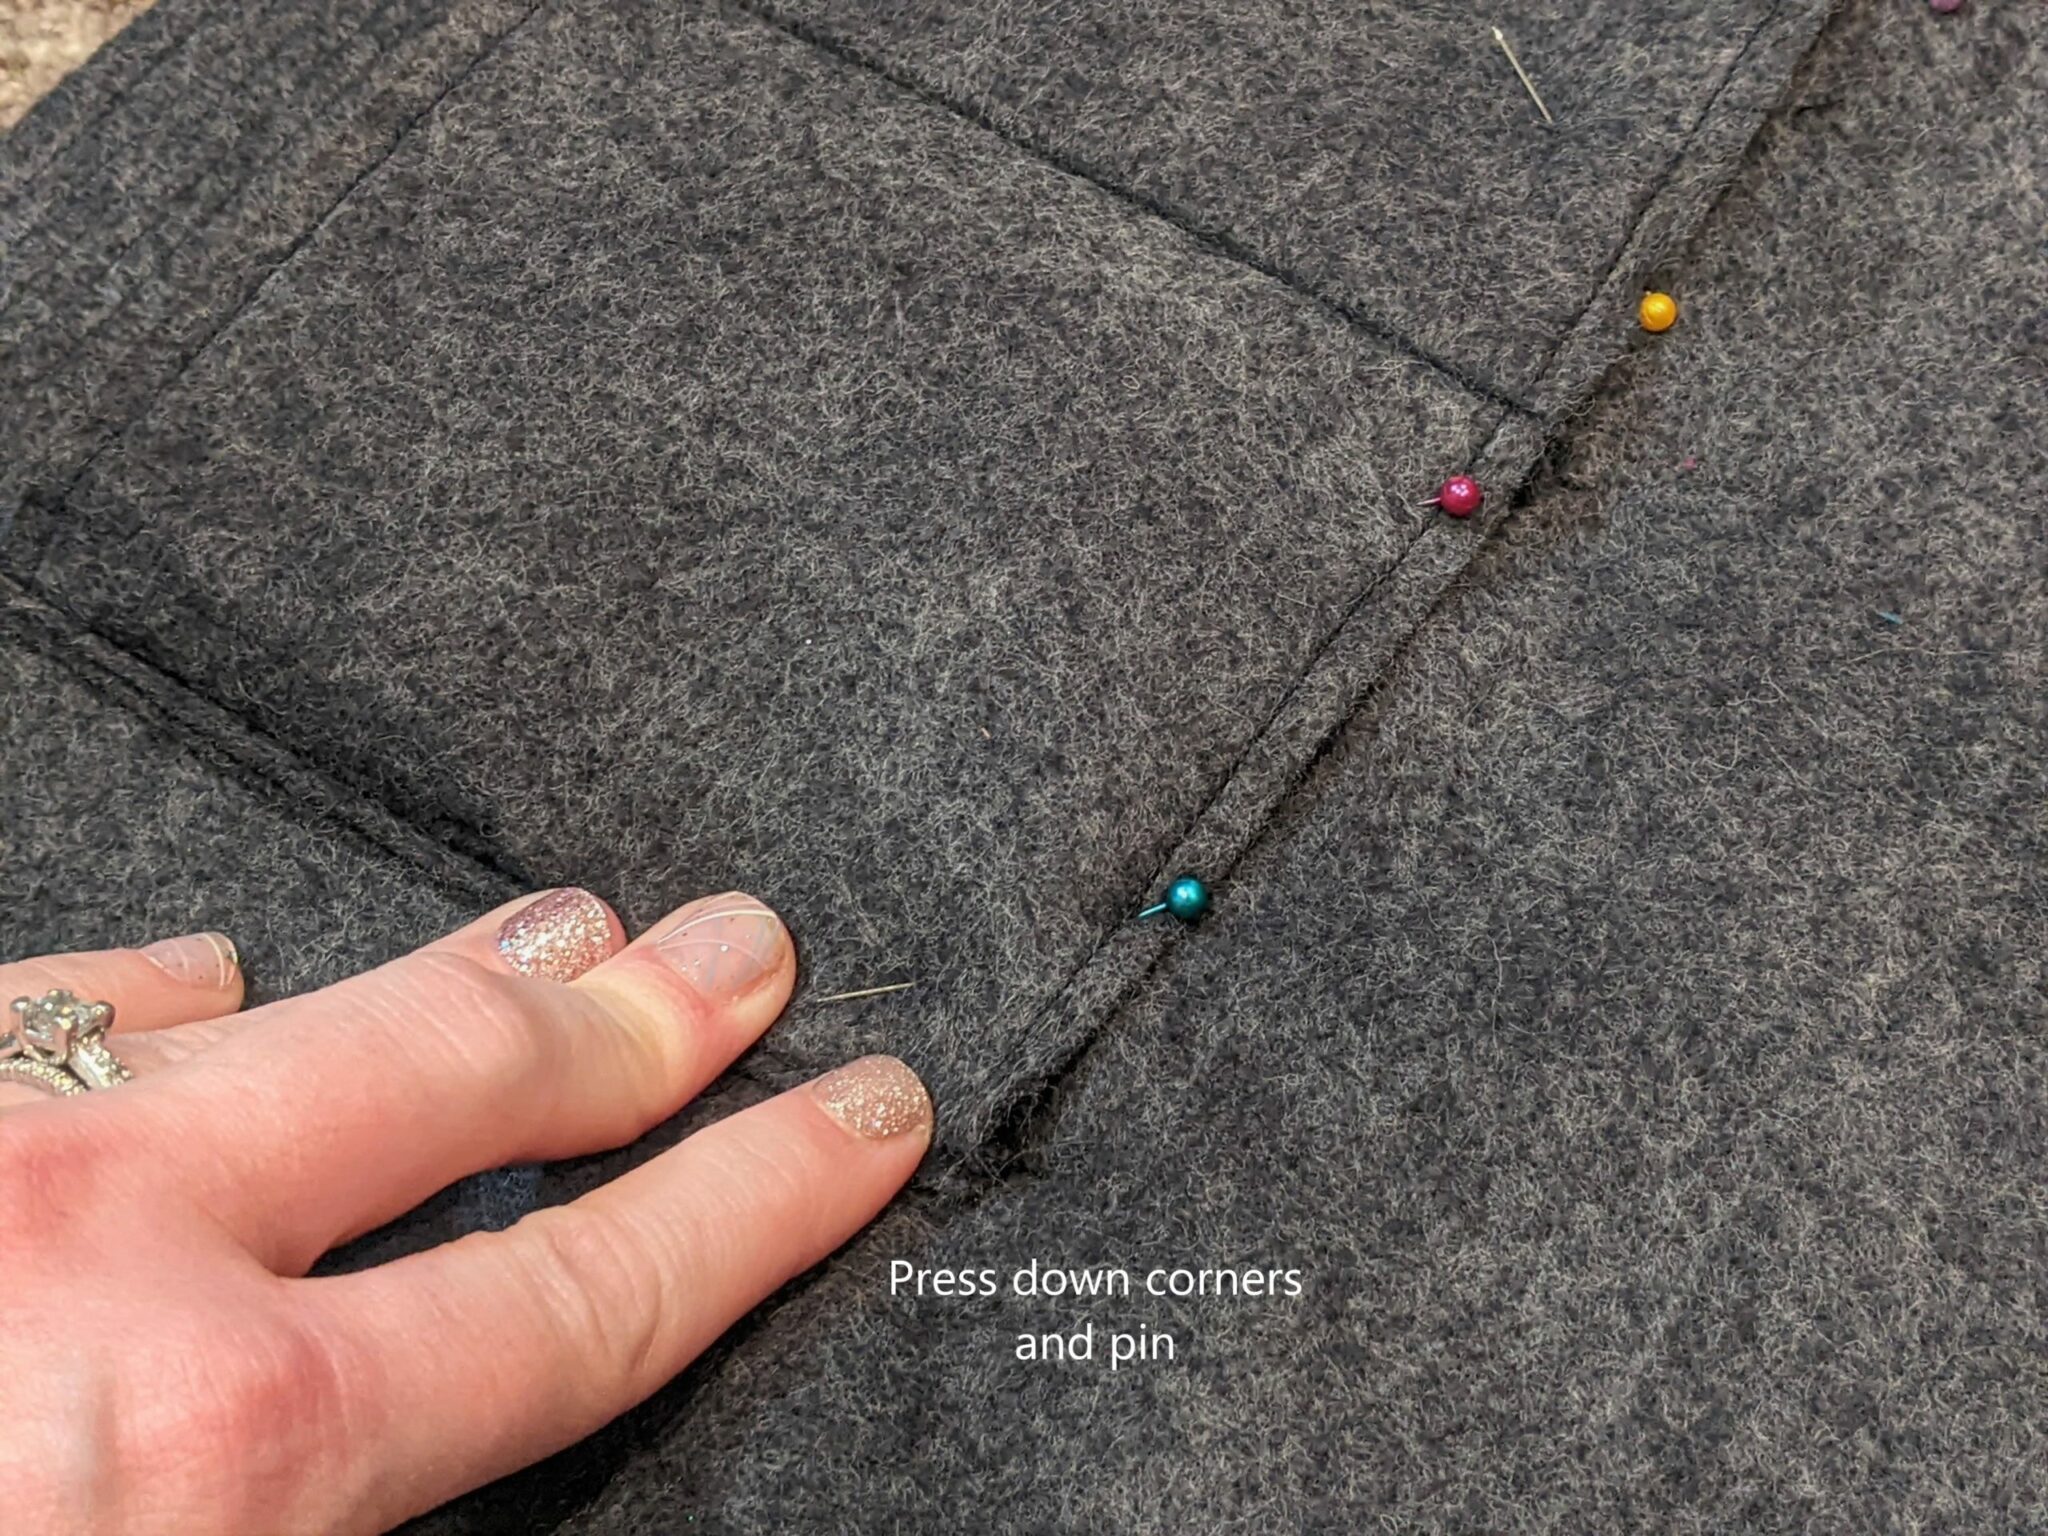
- Sew along the line.
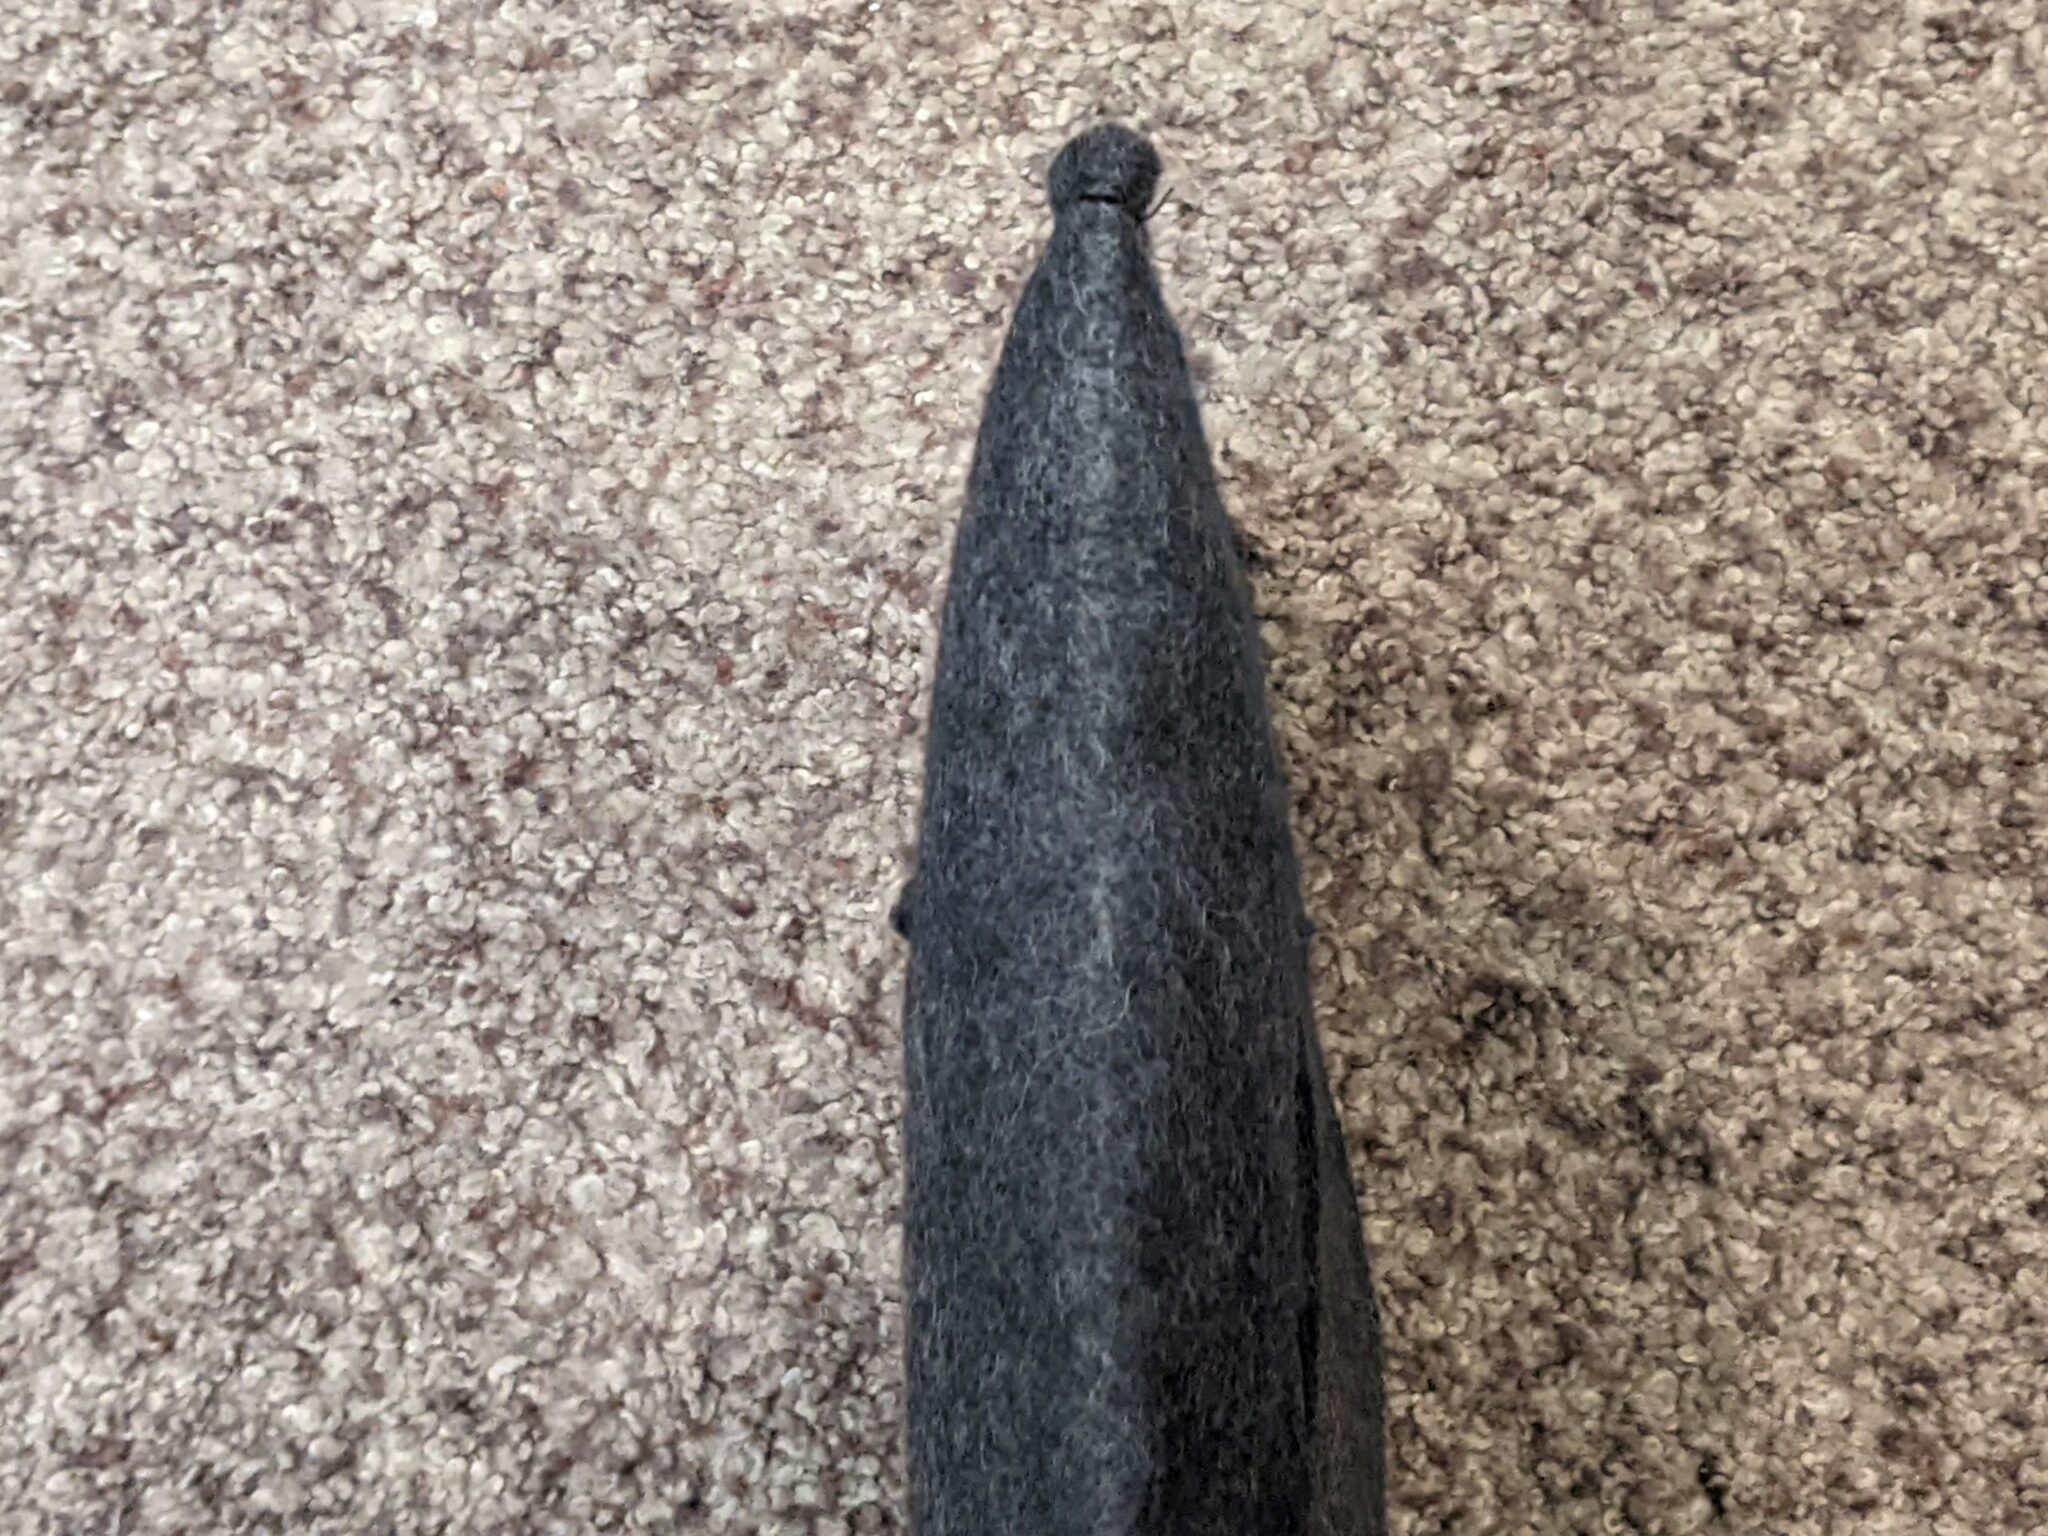
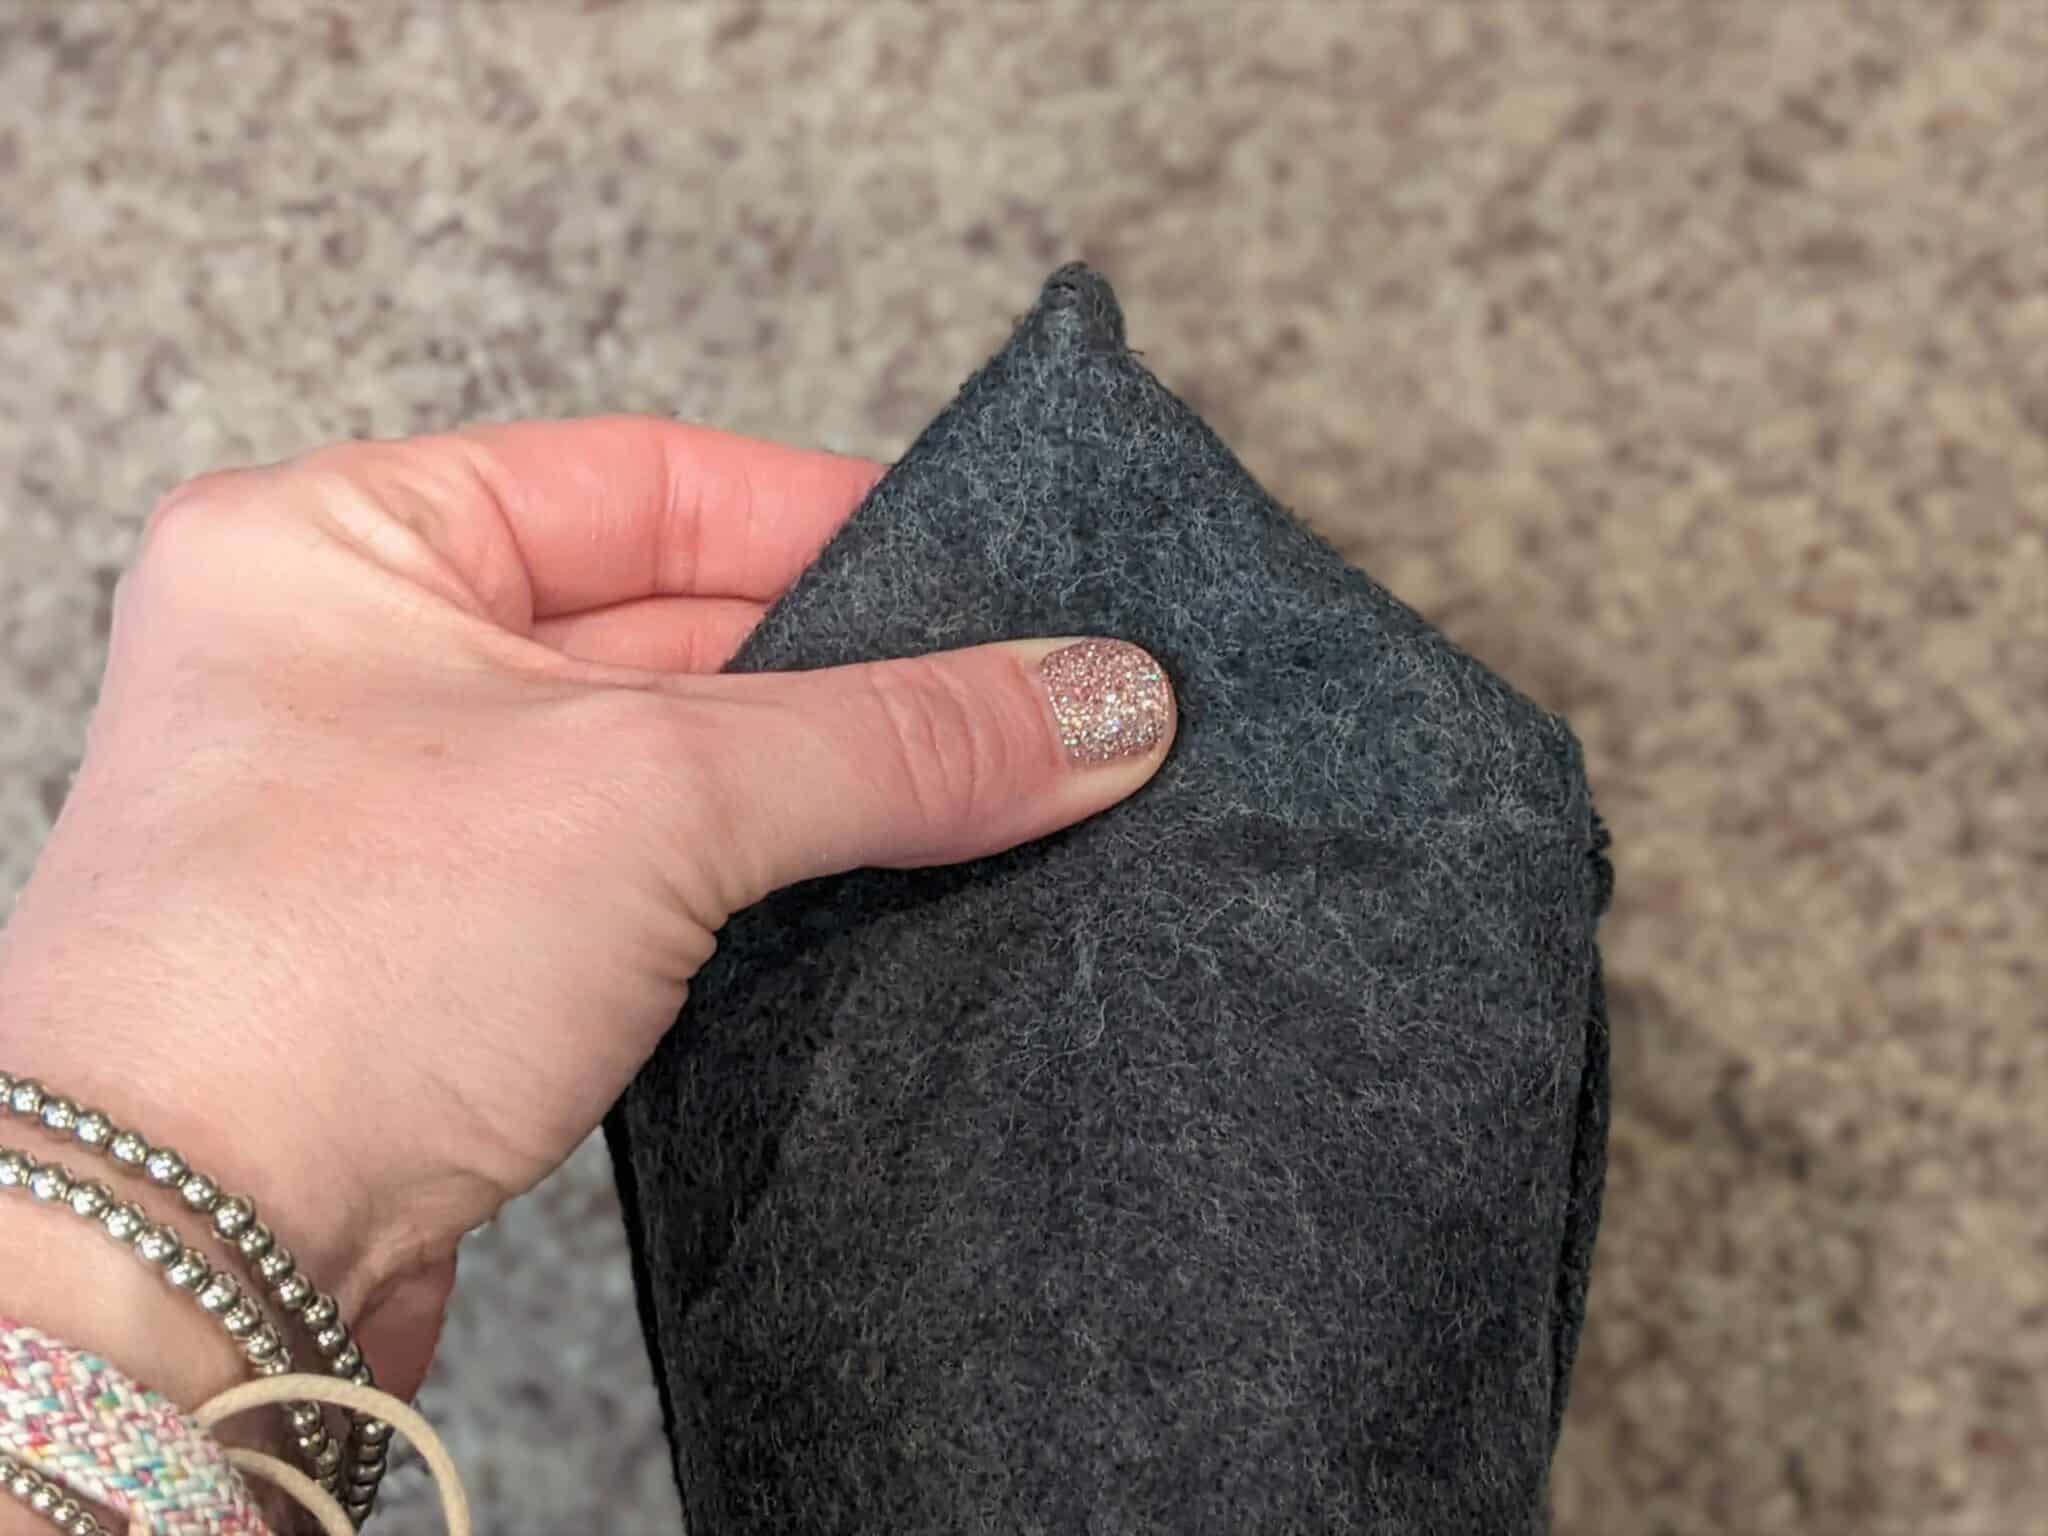
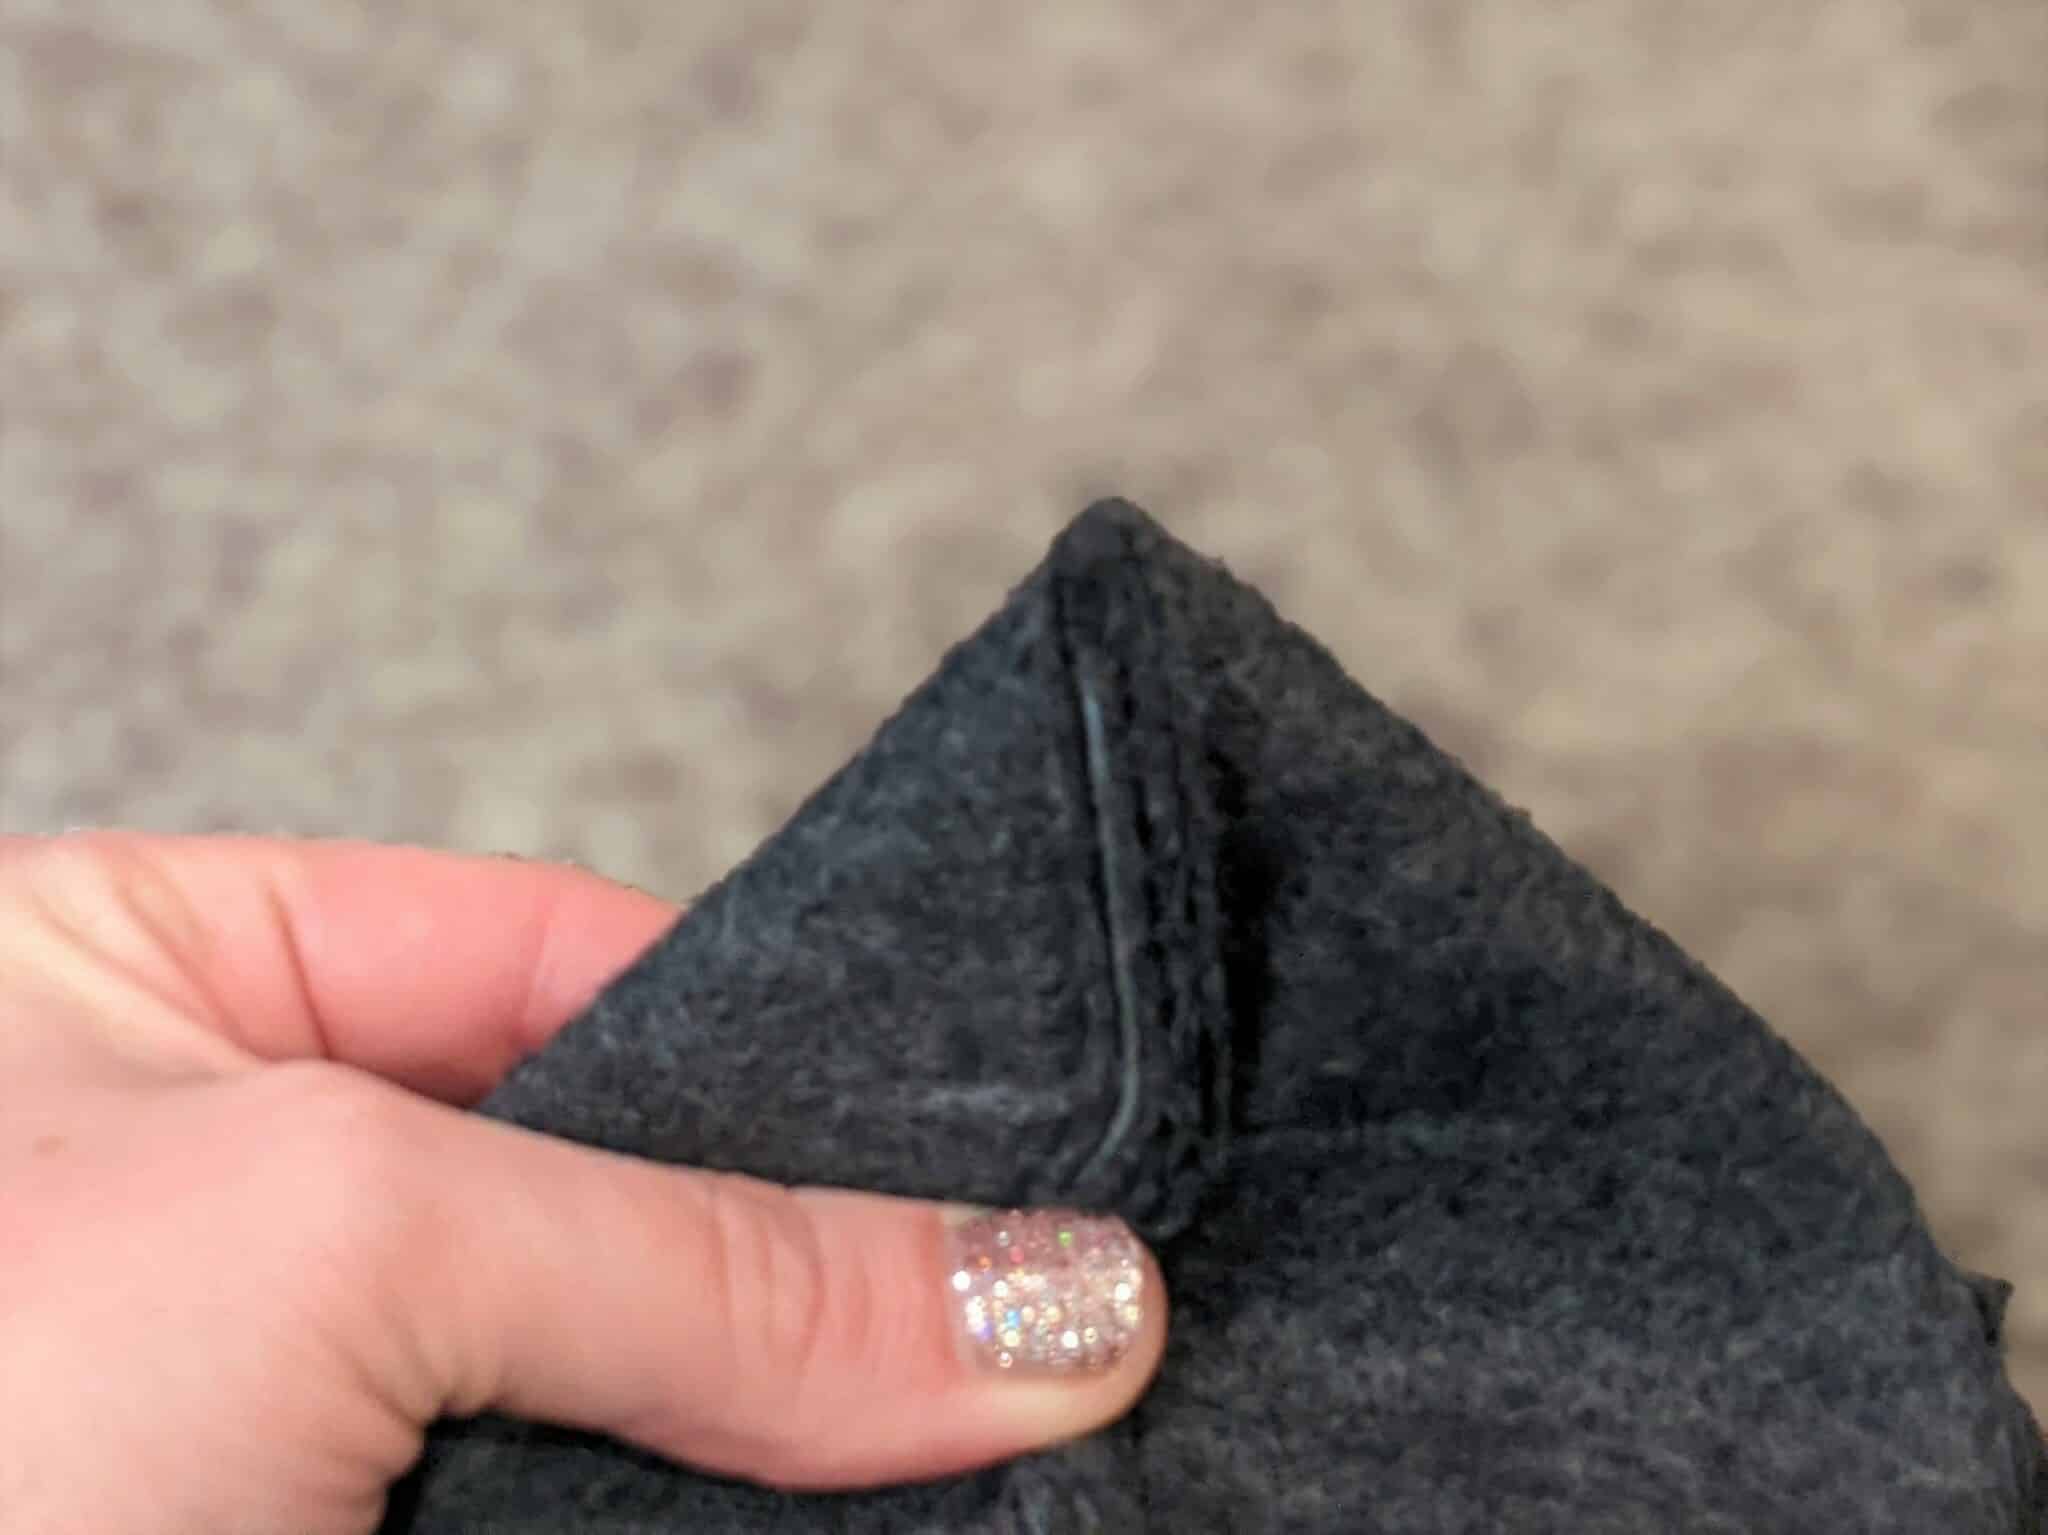
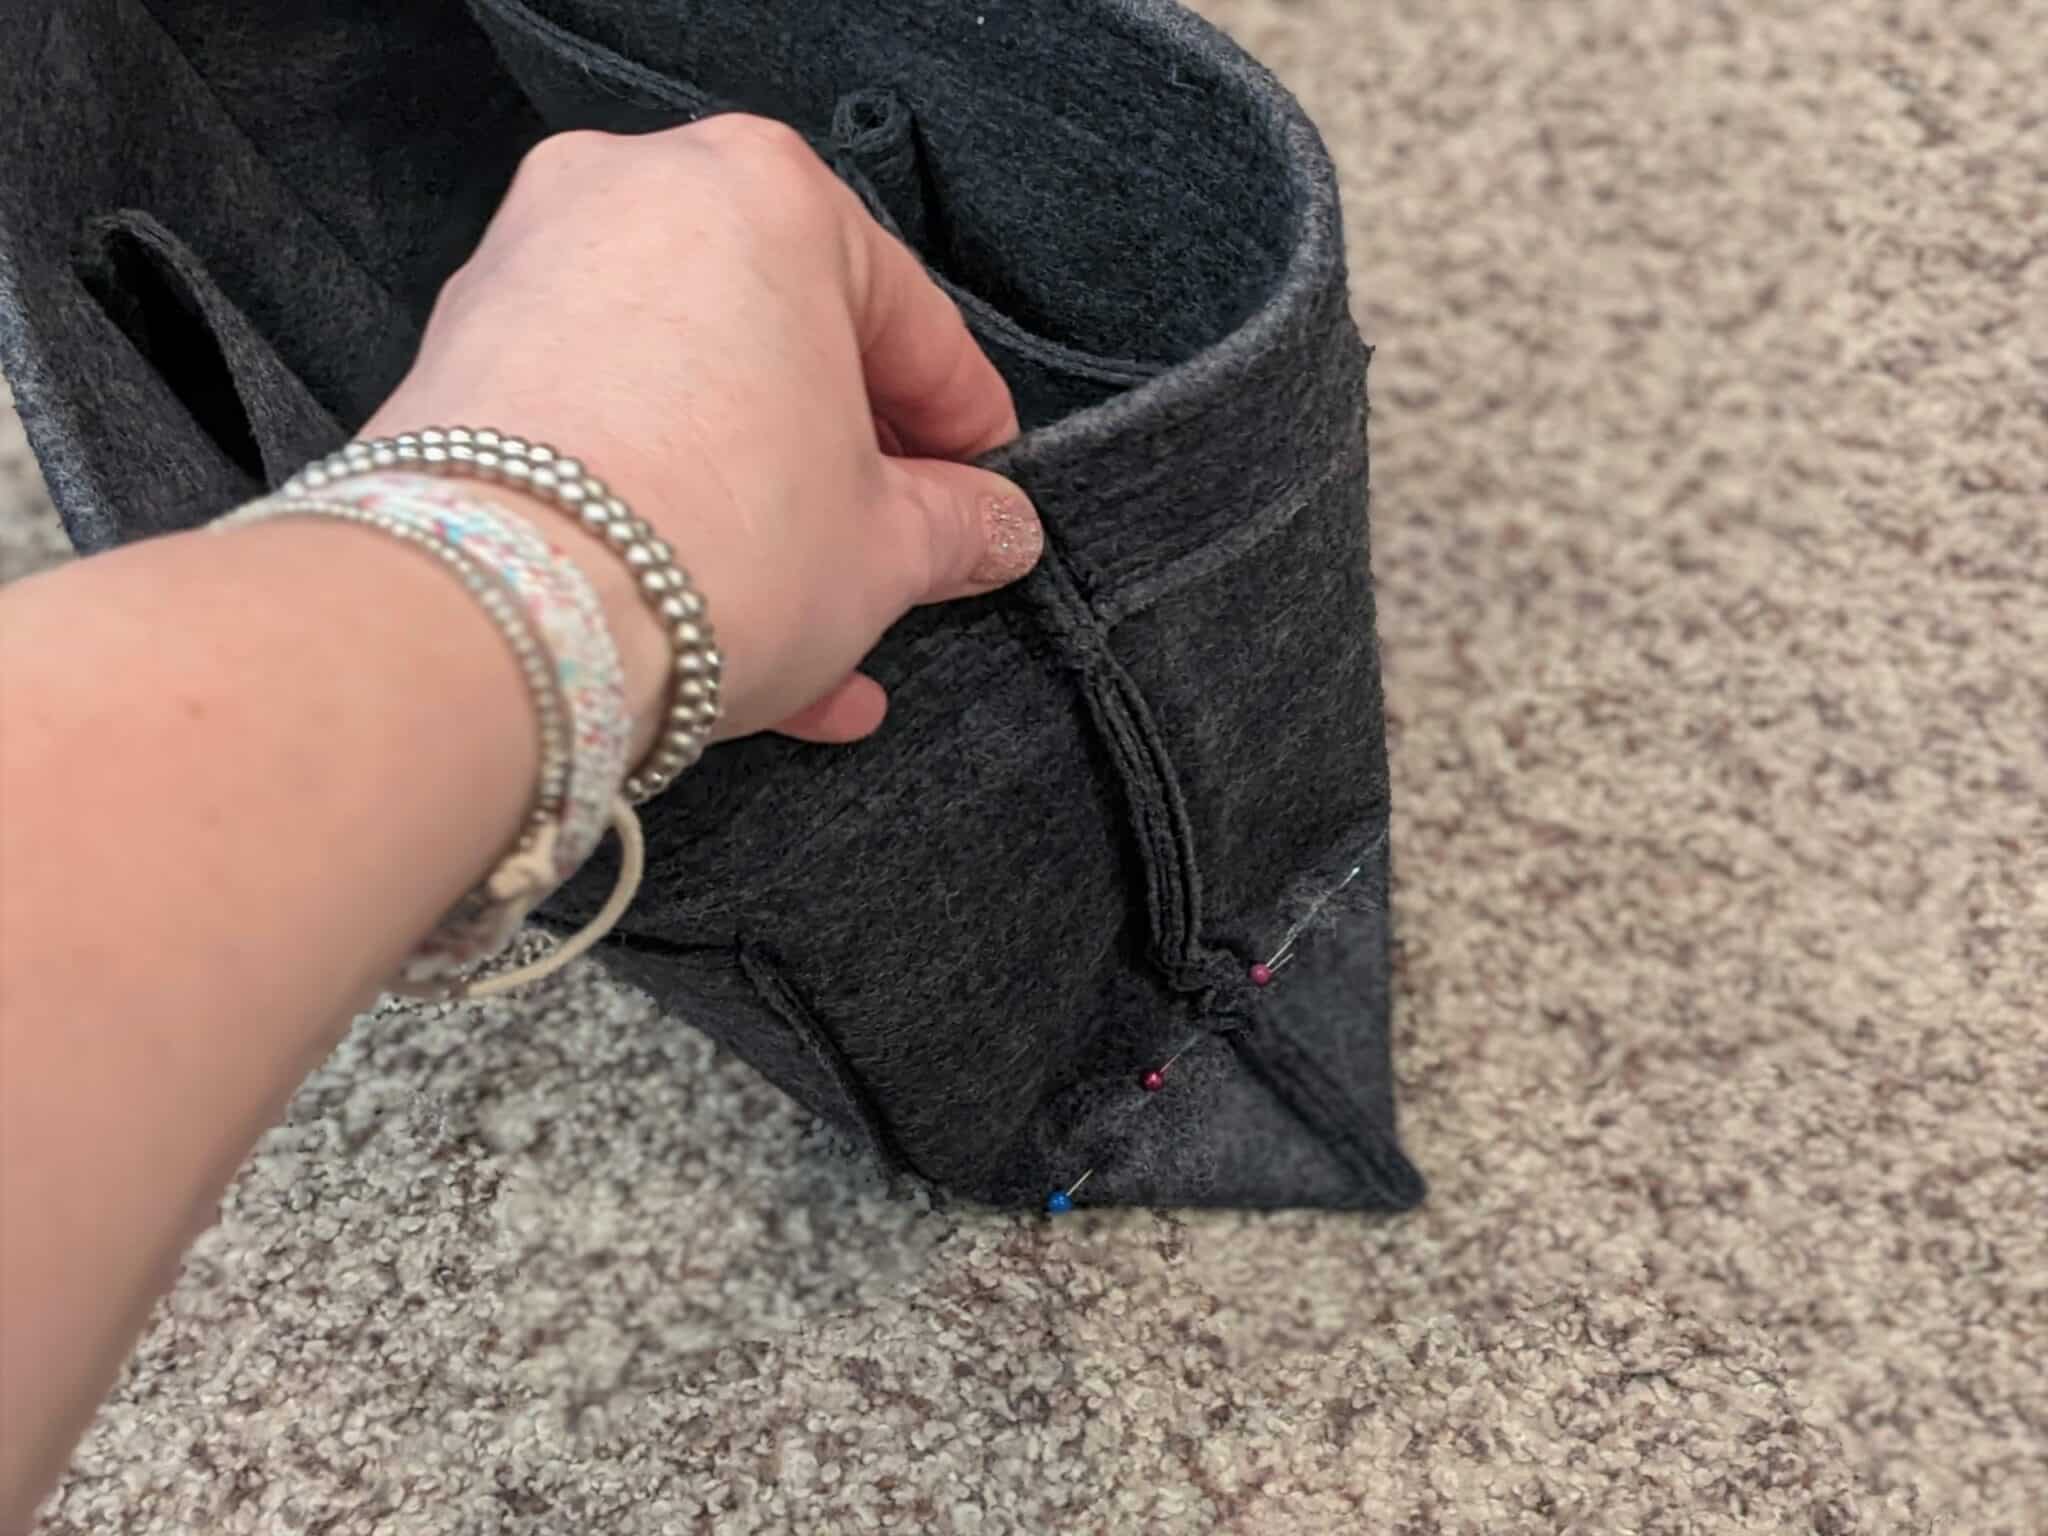

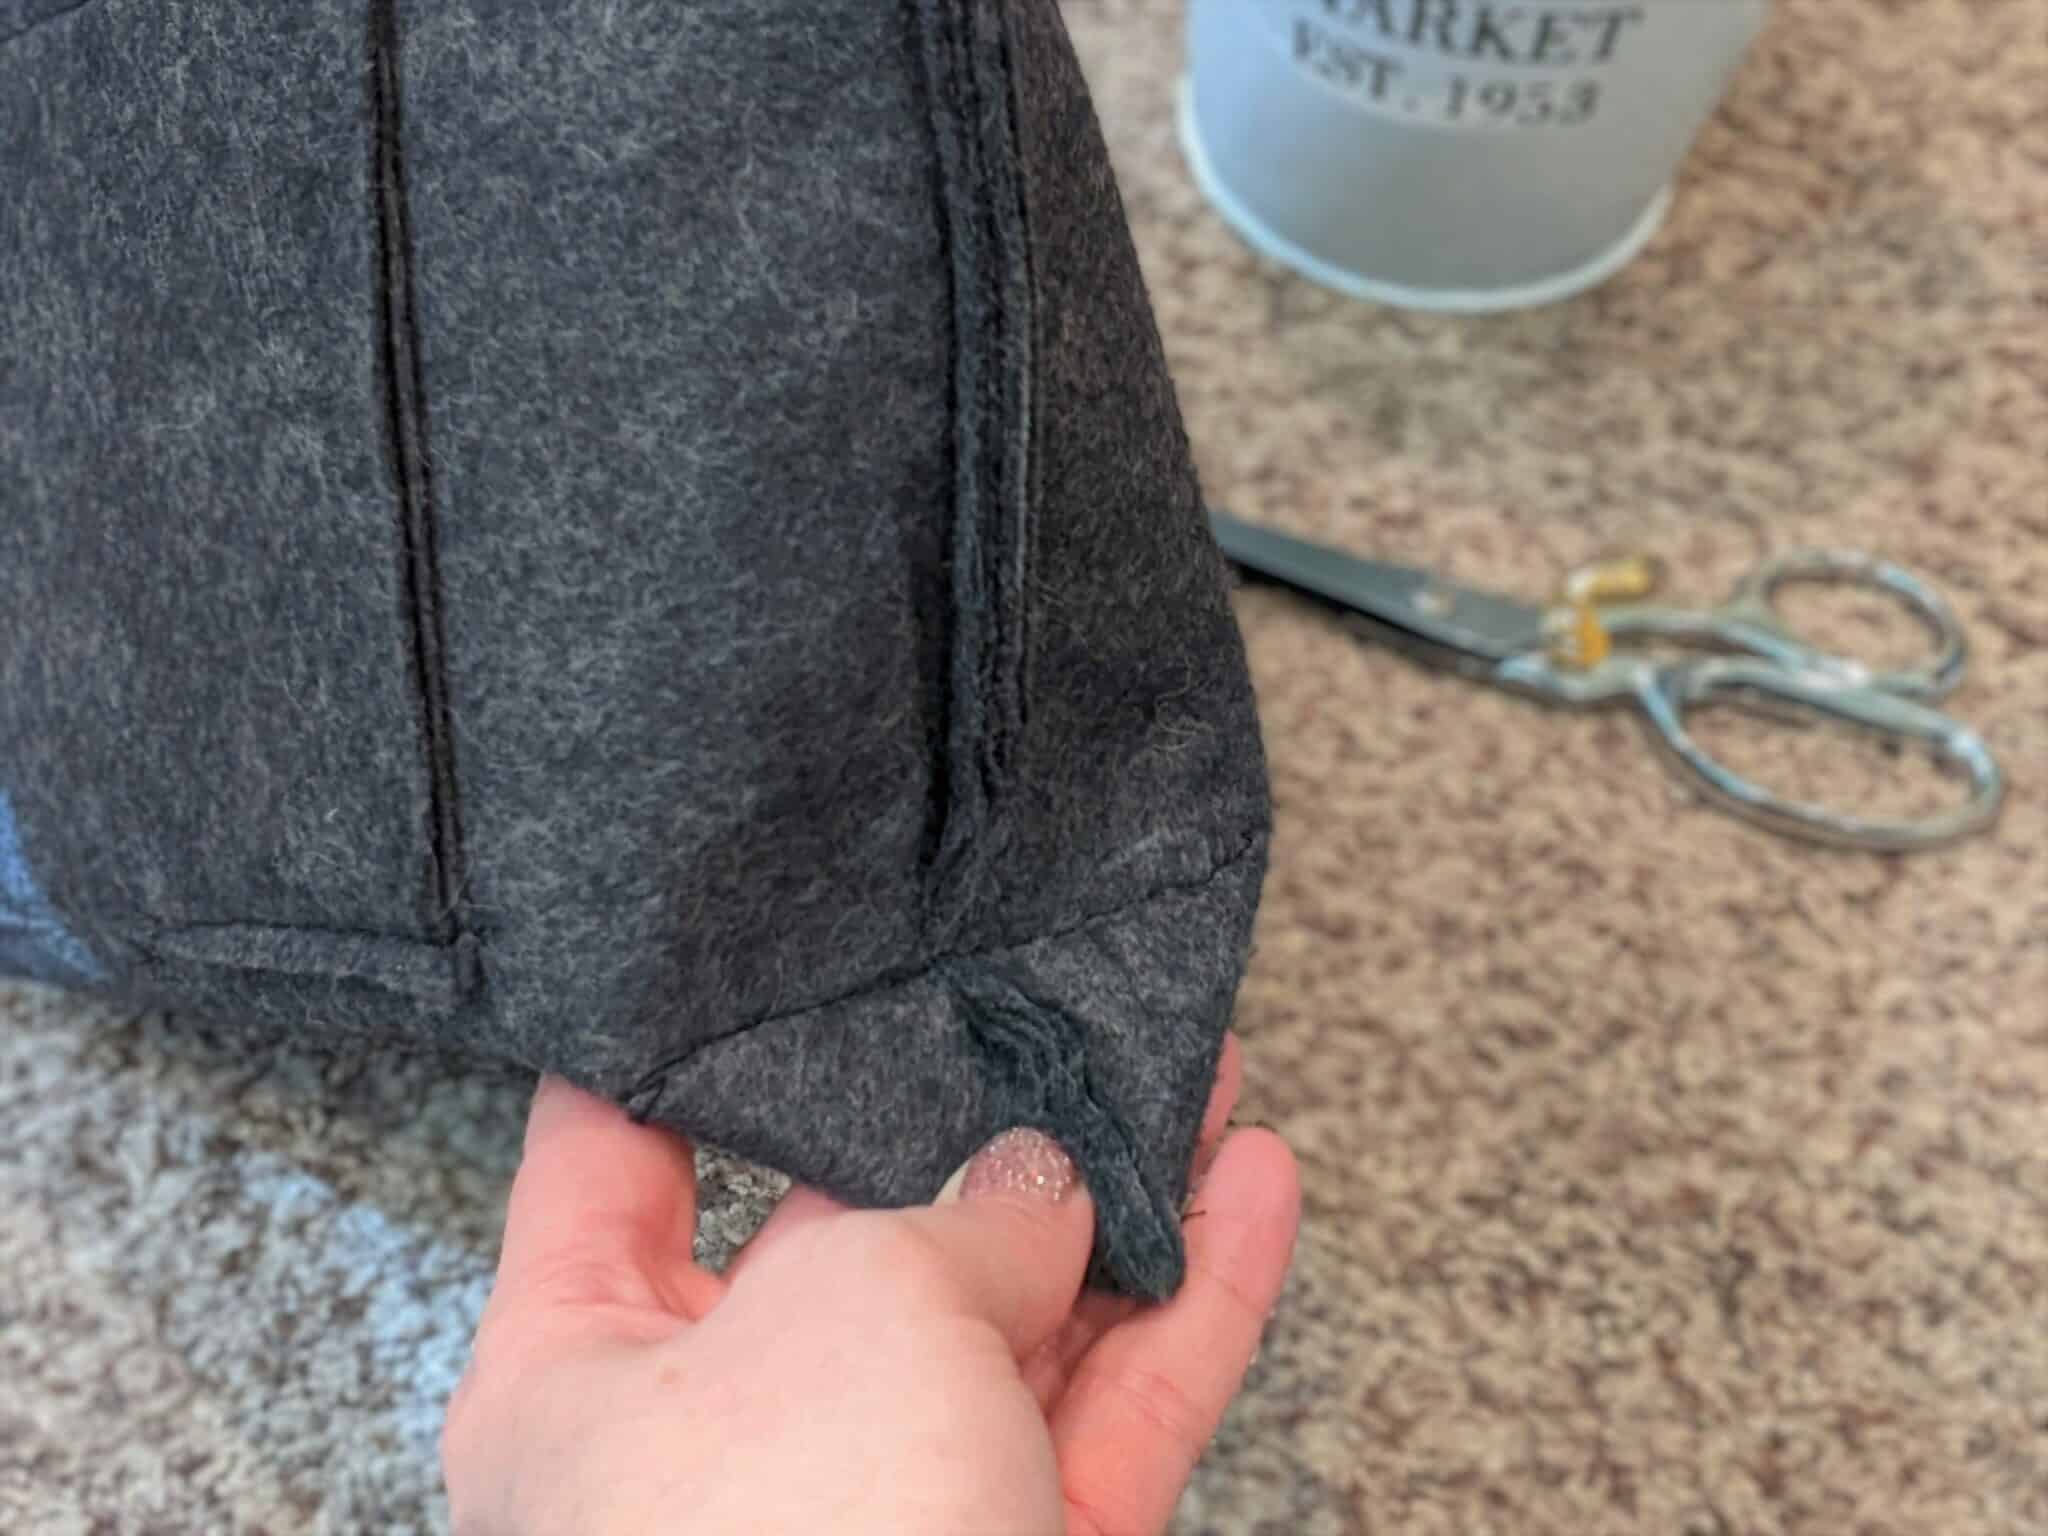
- Cut off the point of the triangle ¼” away from the stitch line.
- Optional:
- Add a snap to the center or one on each end.
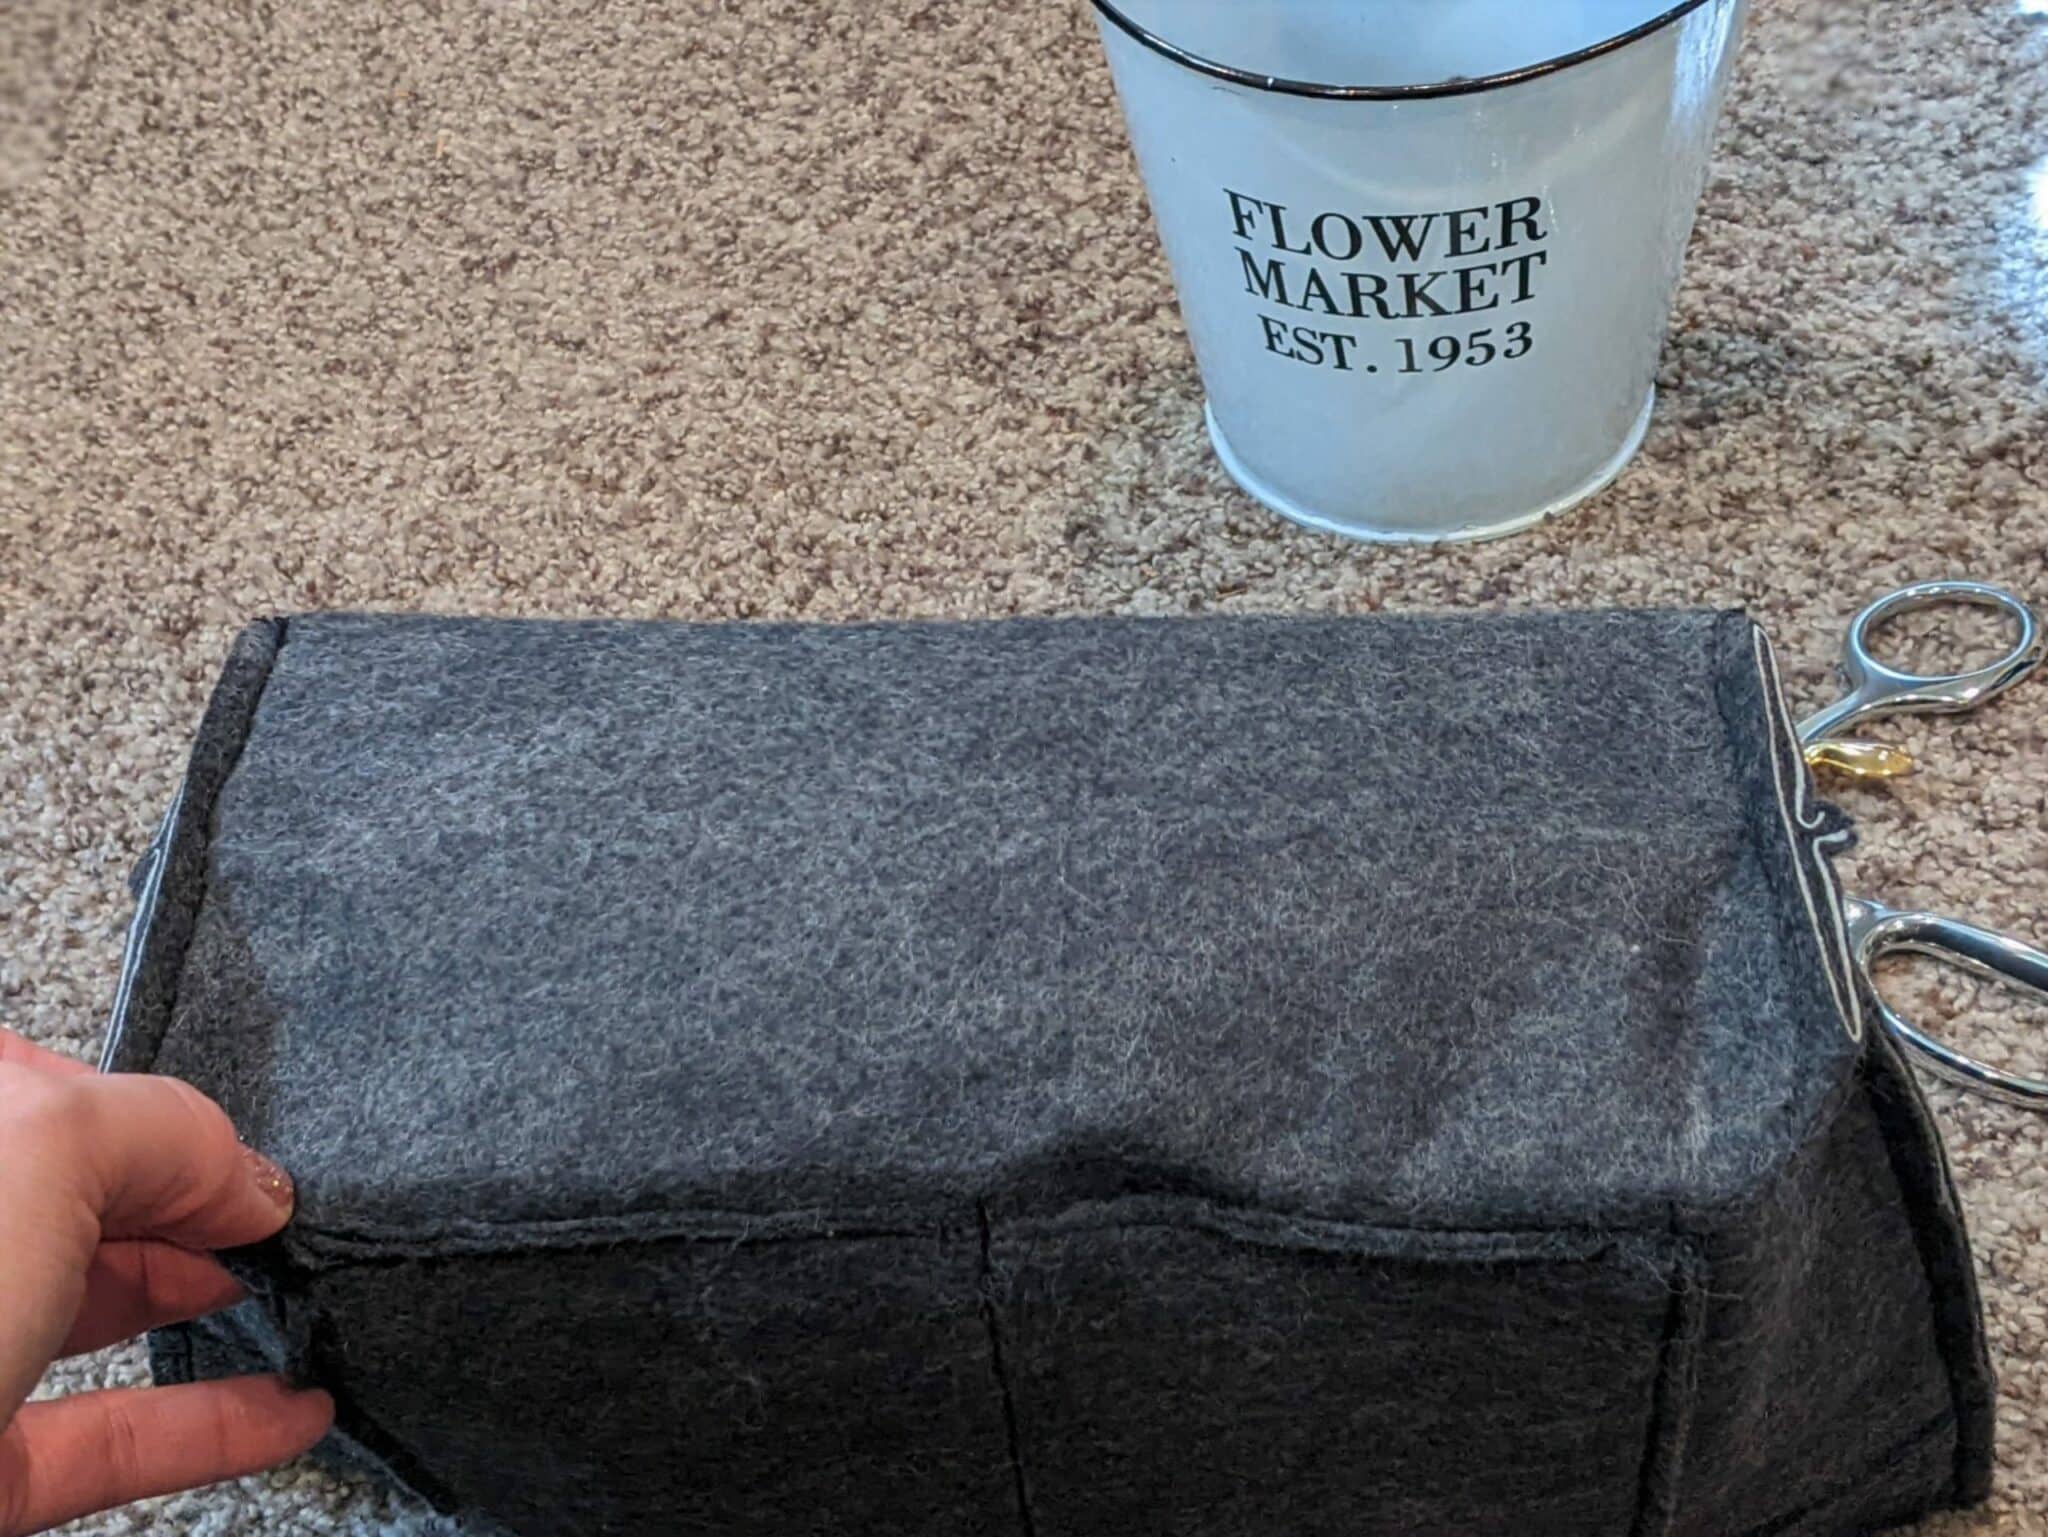
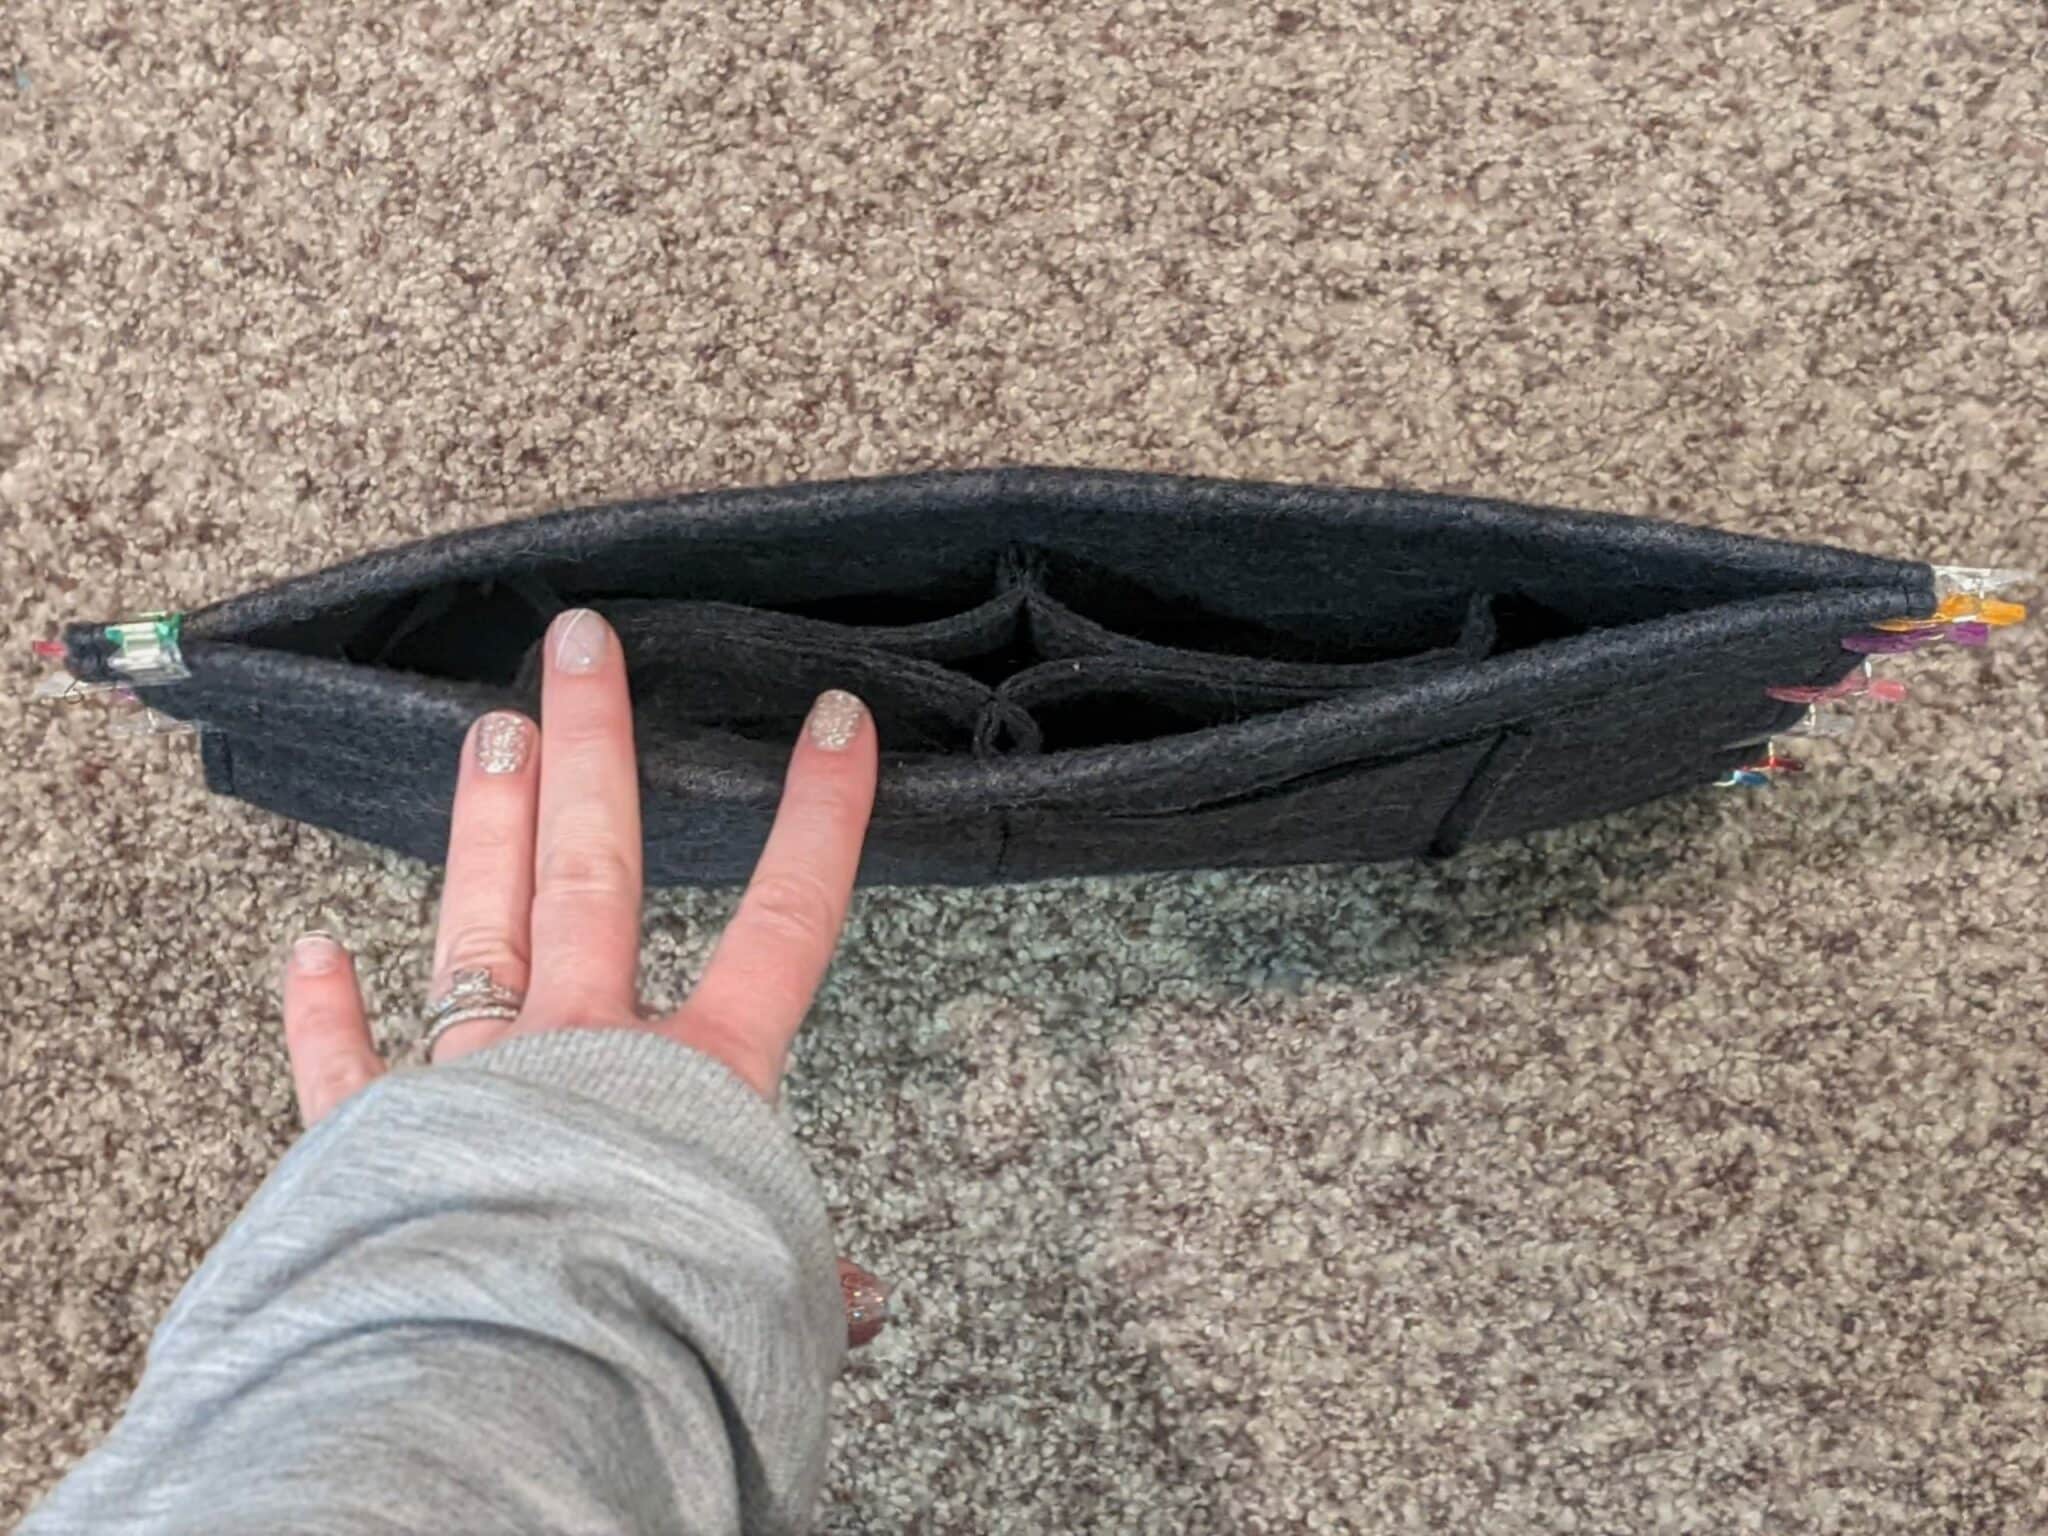
- Turn your bag right side out.
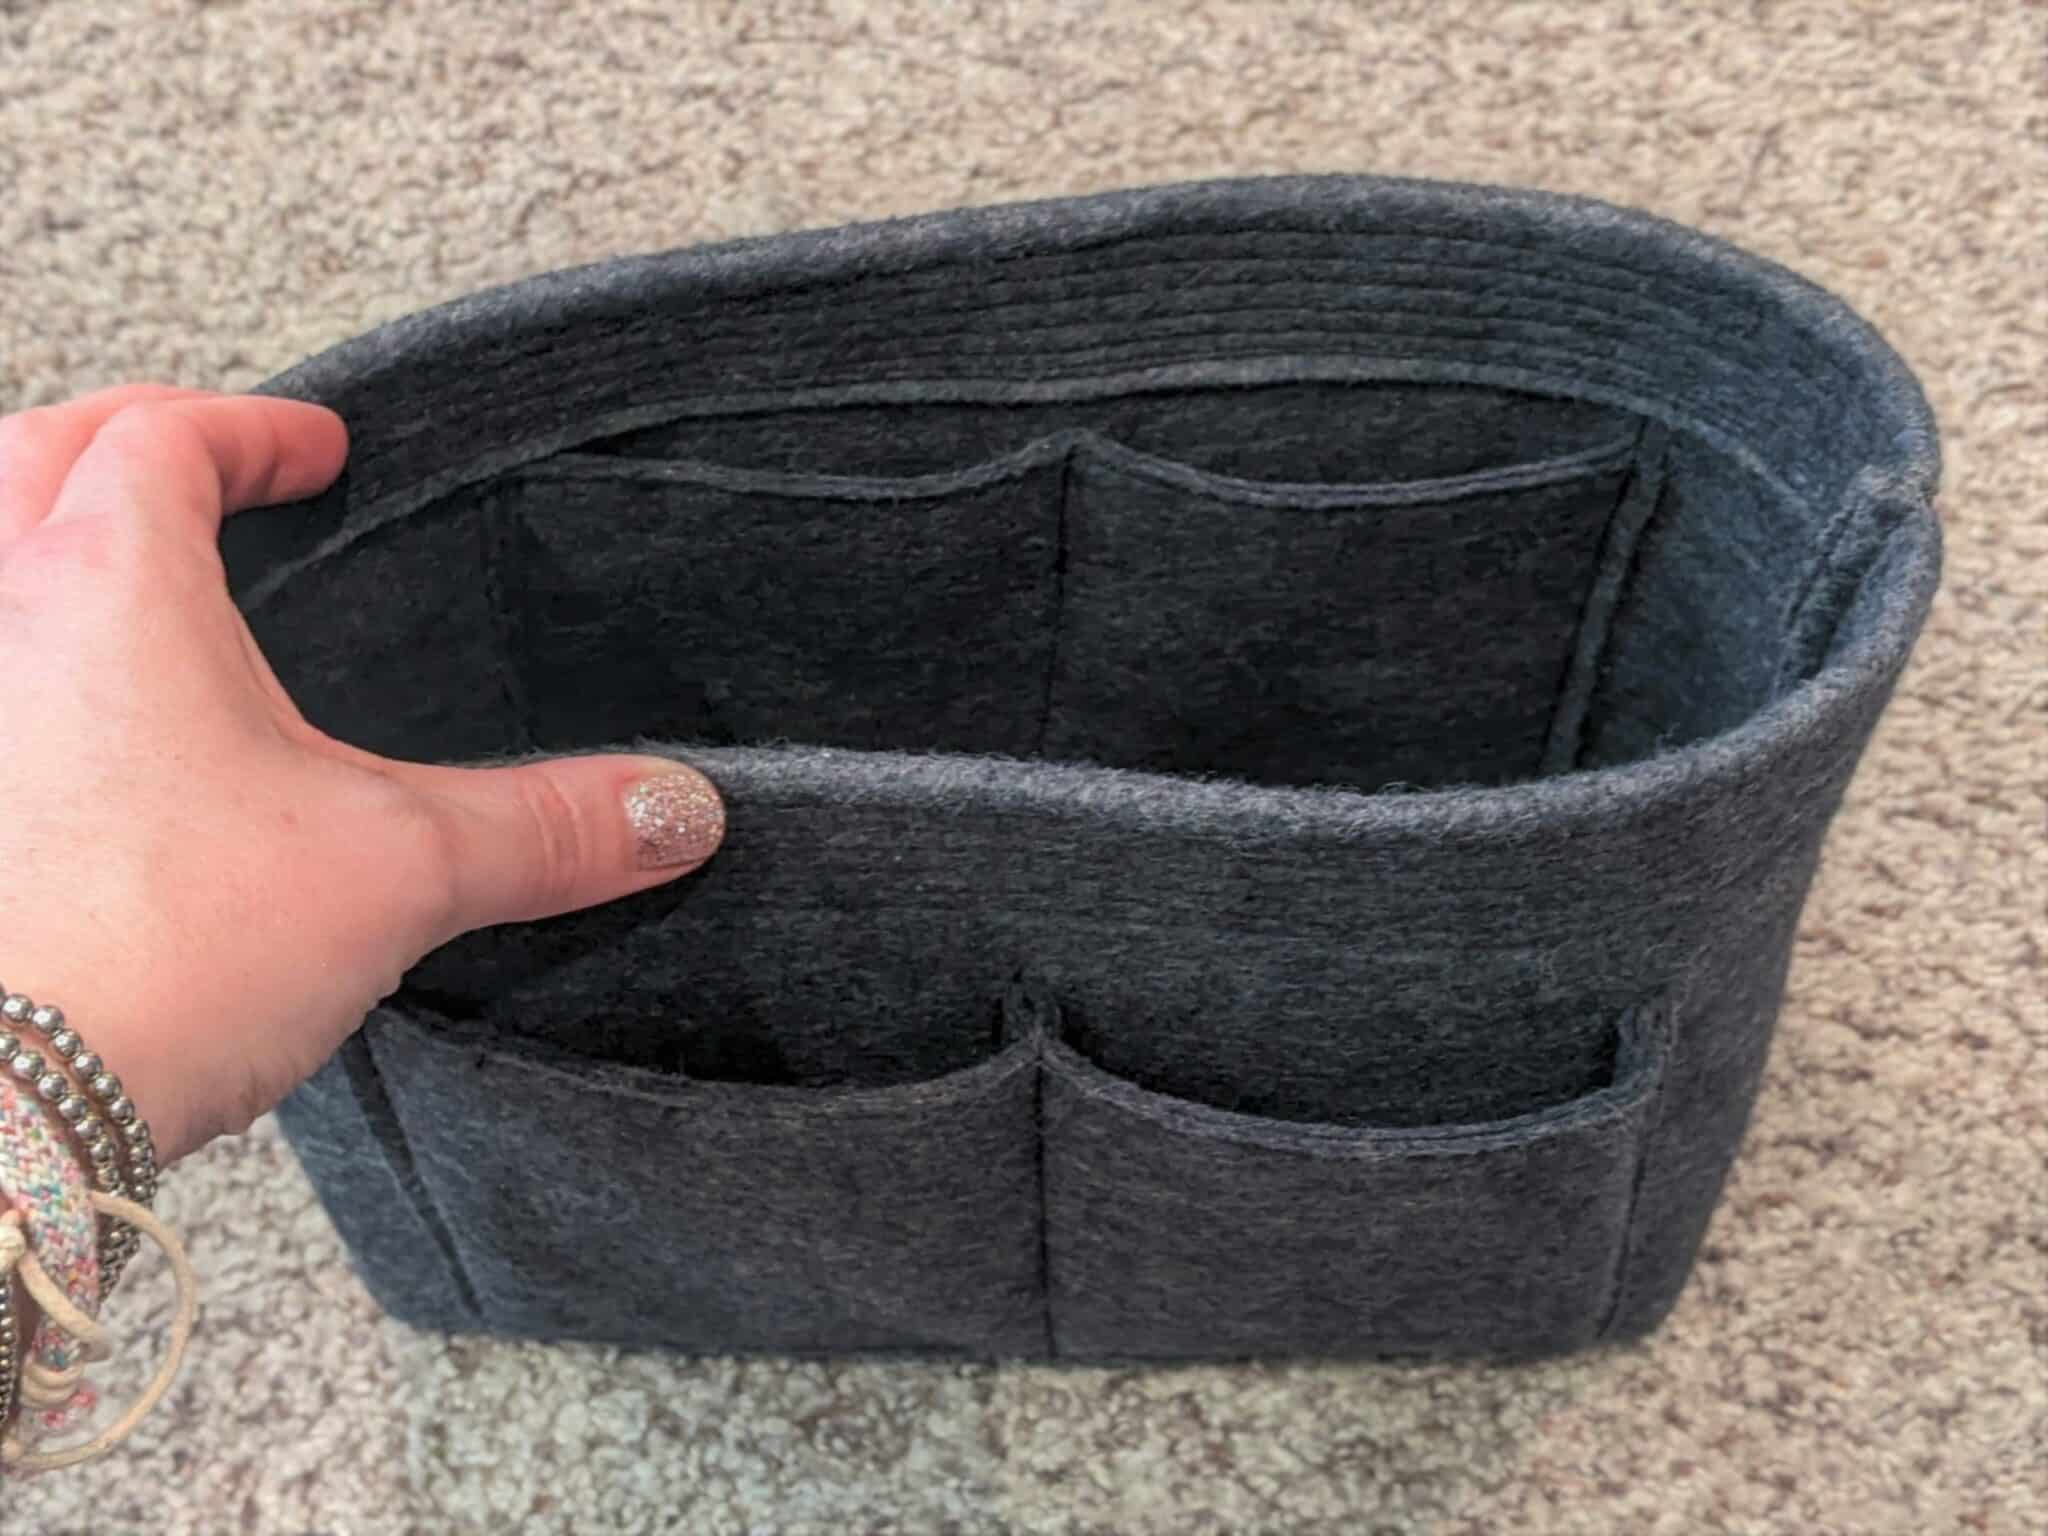
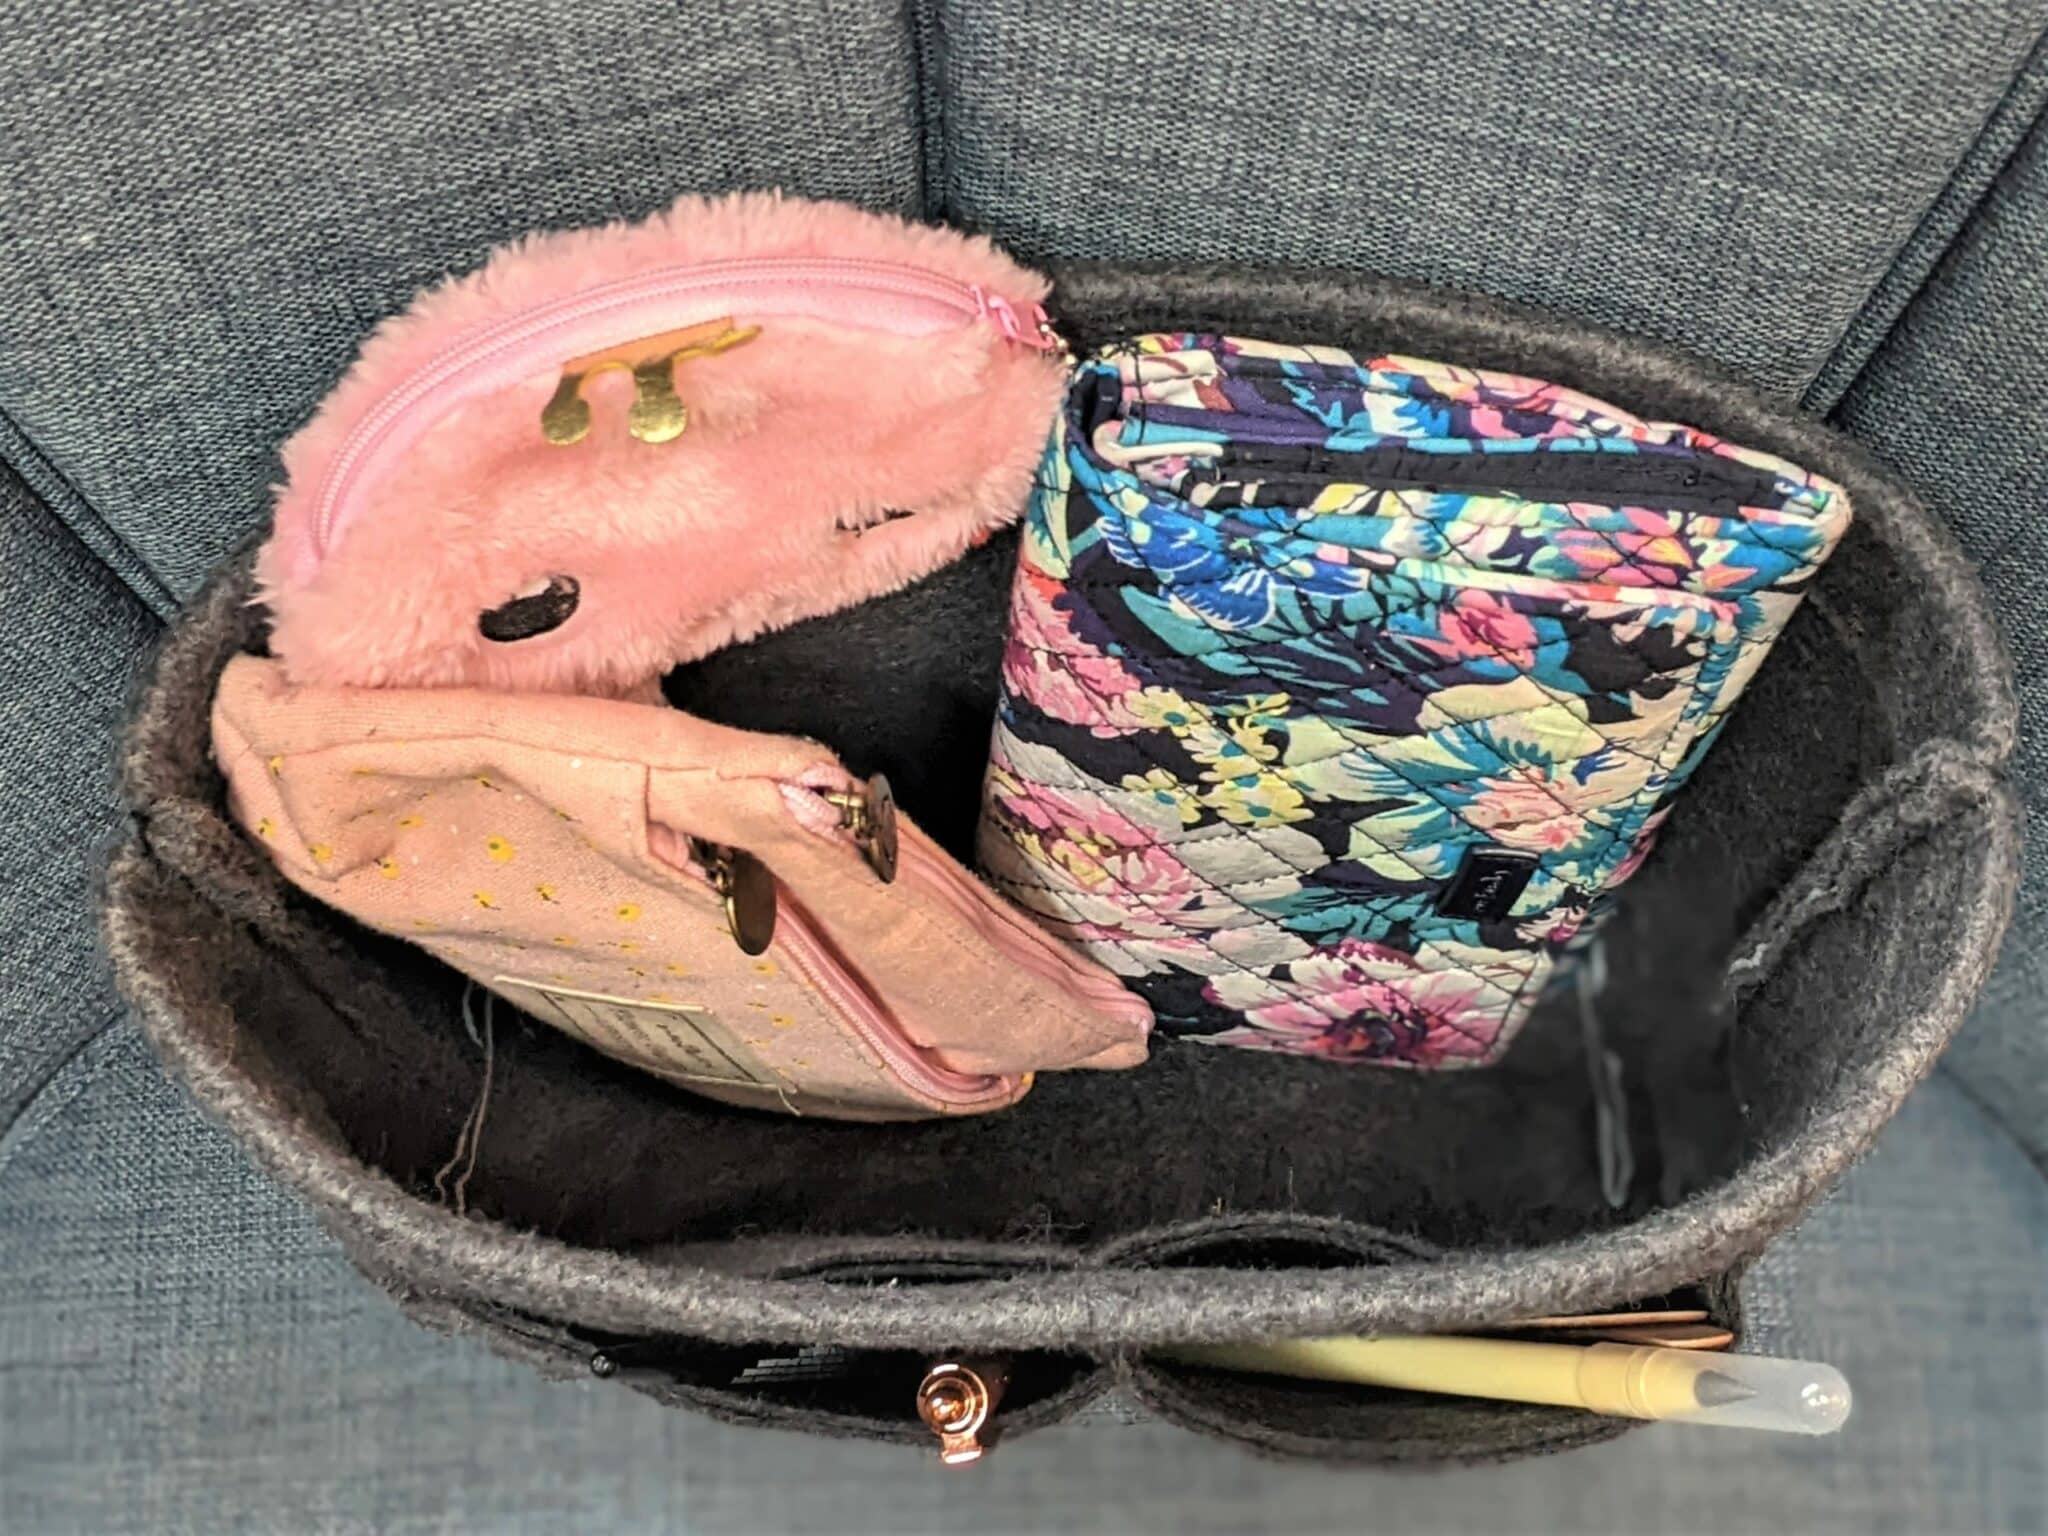
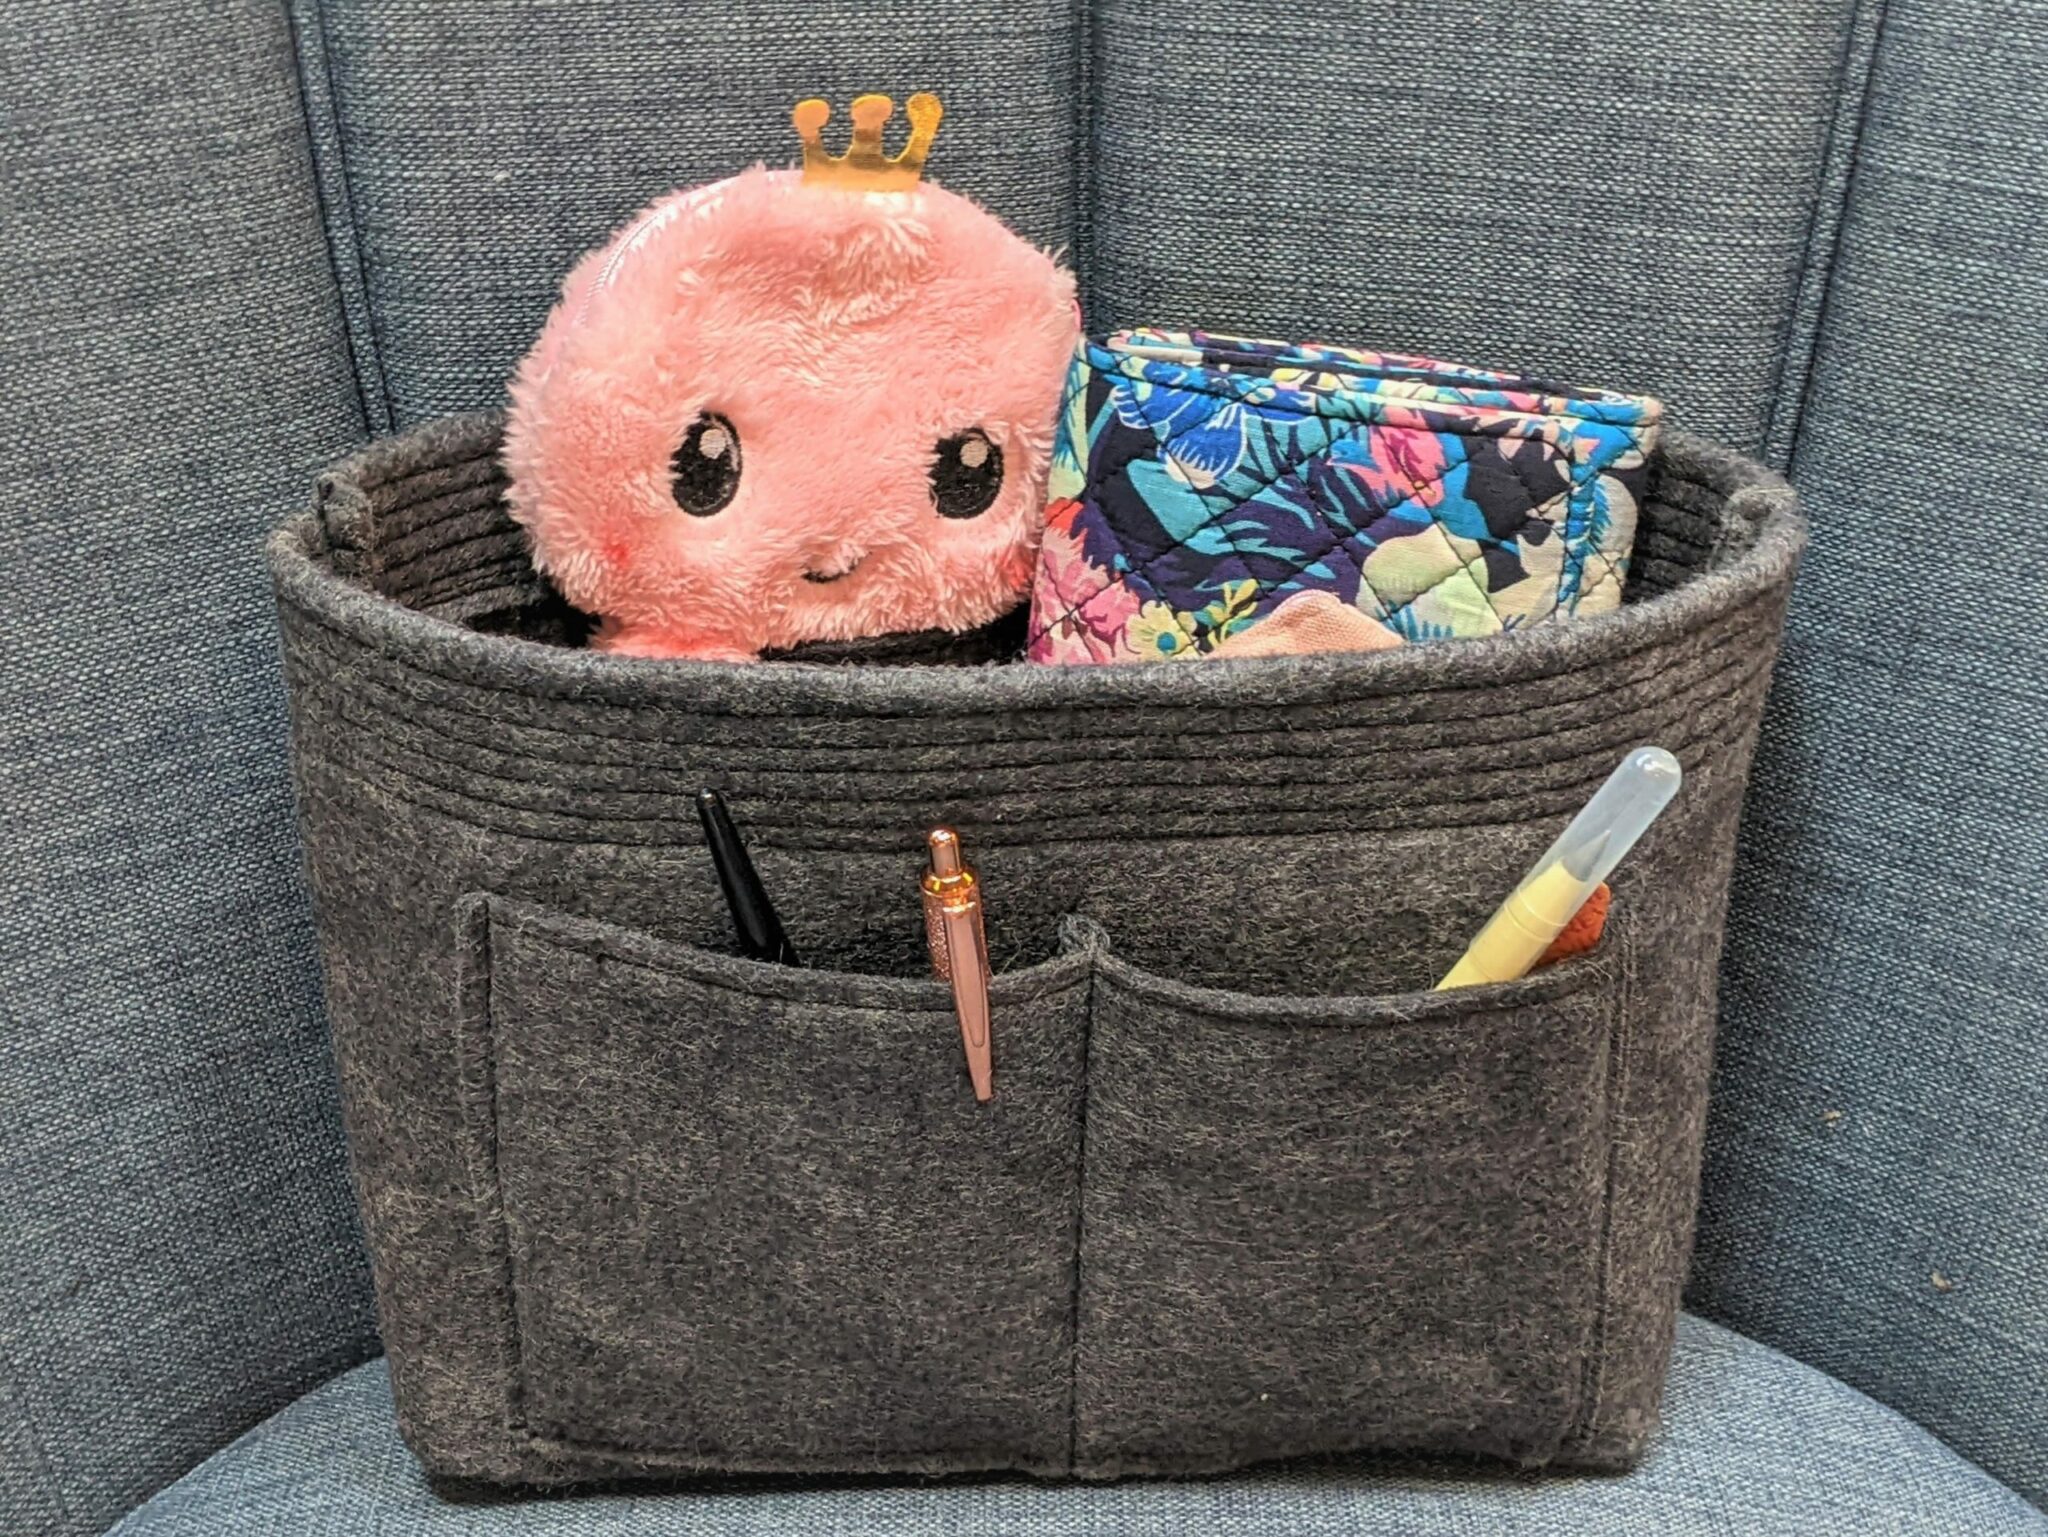
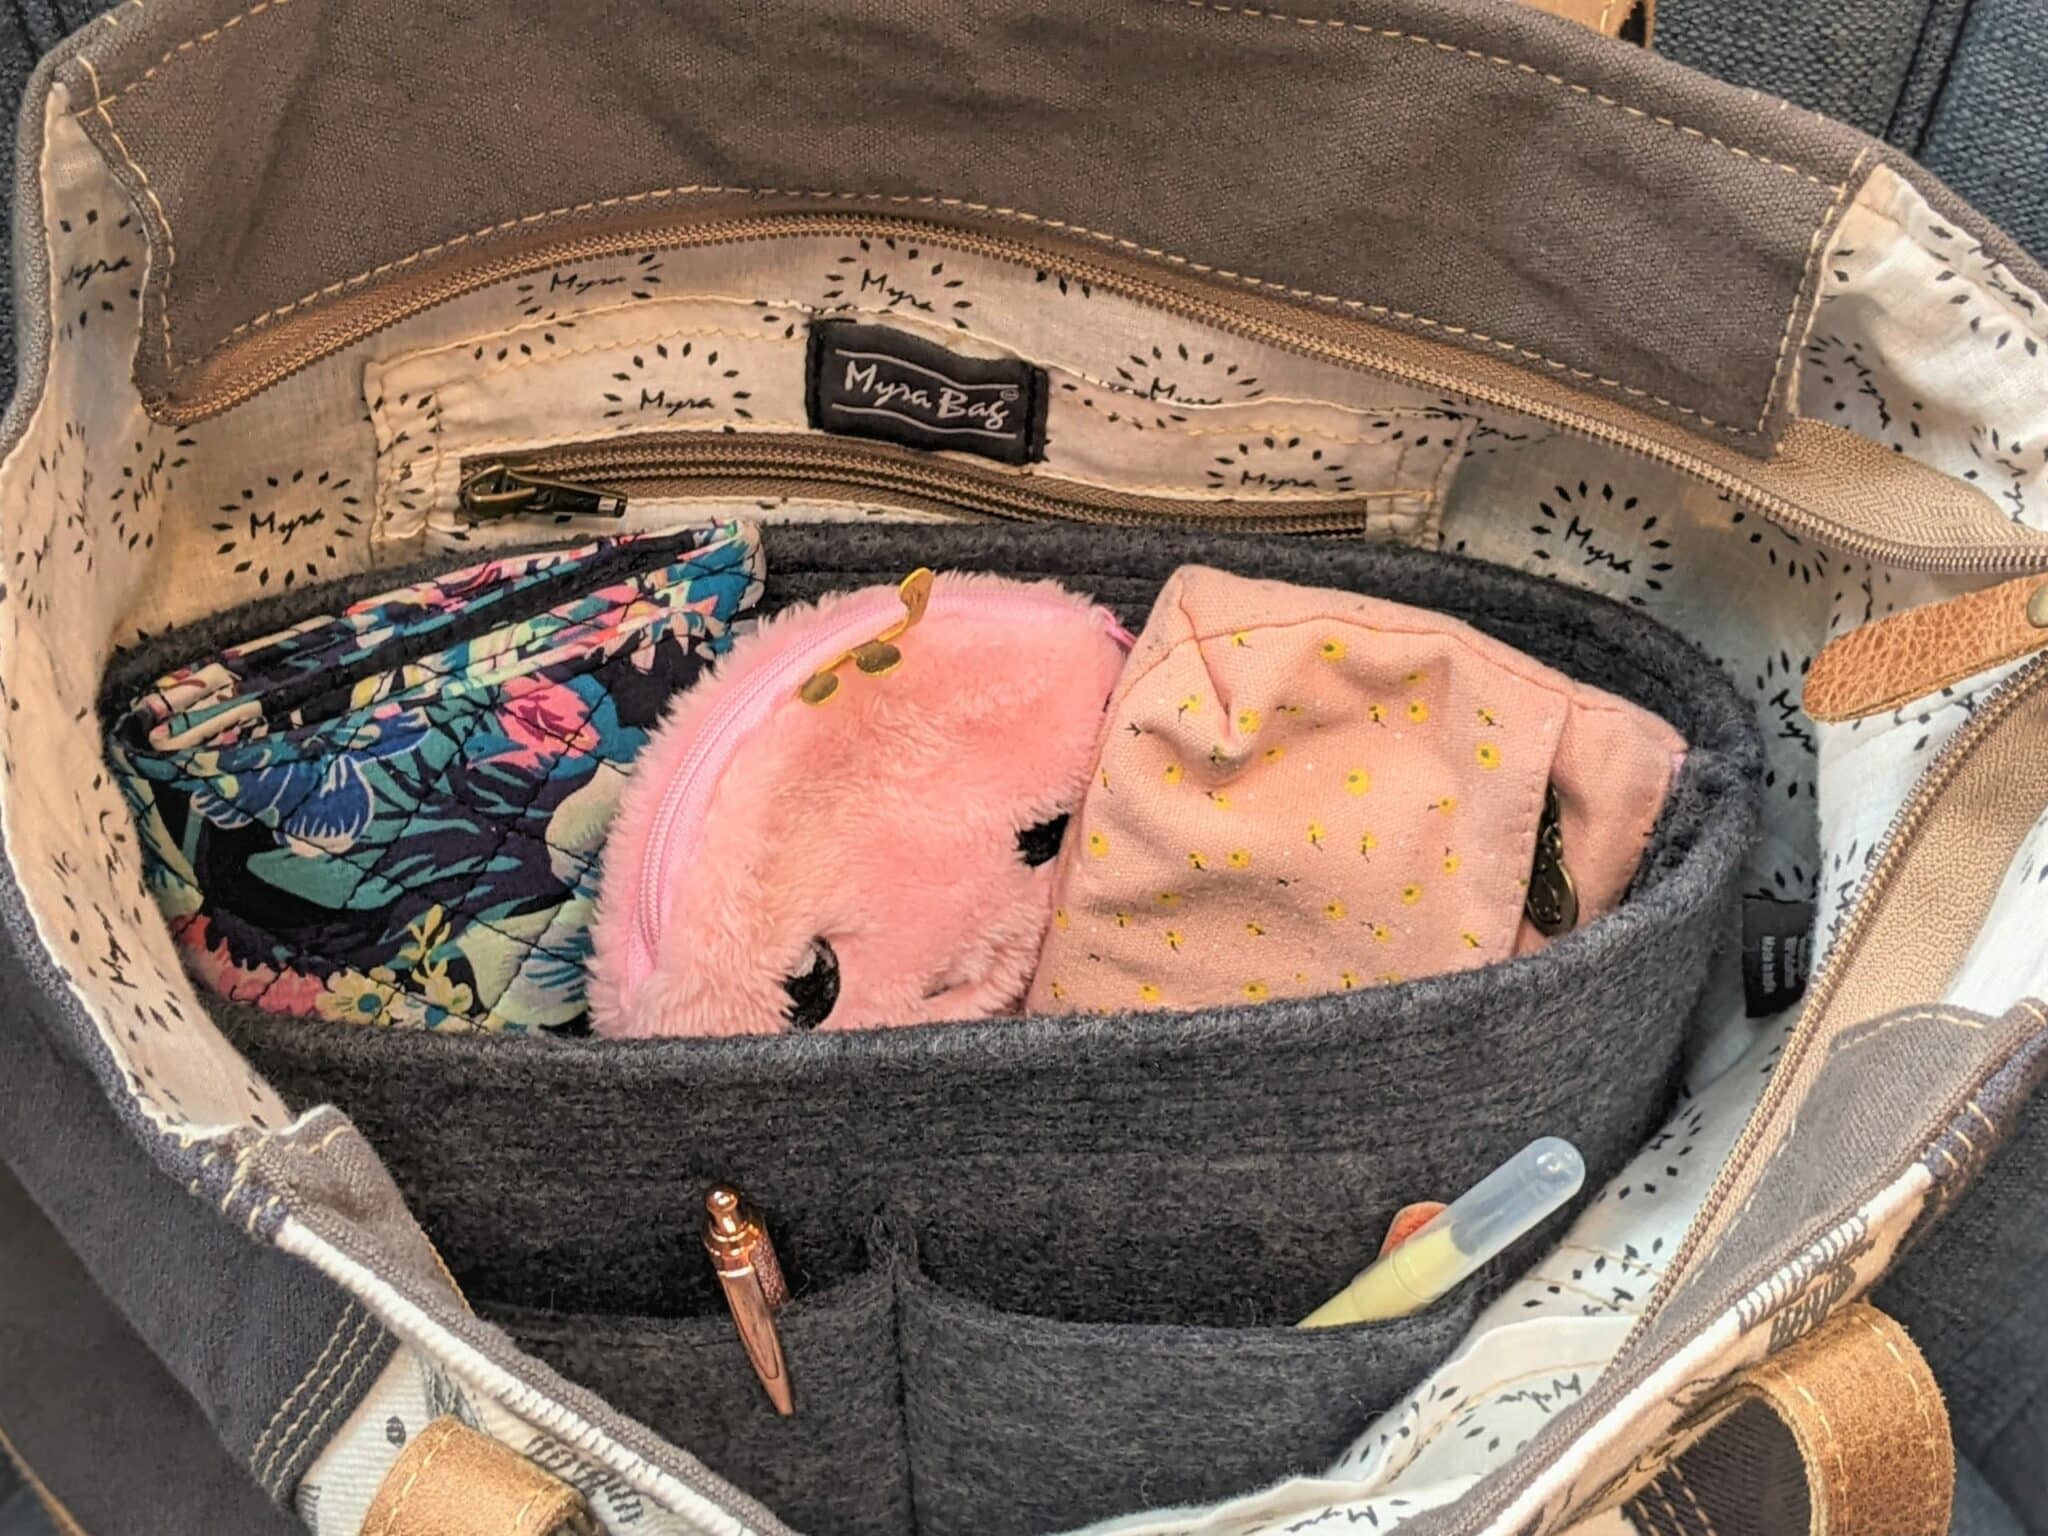
Fill it up with all of your treasures, then drop it into your handbag and go!
Want more FUN DIY Freebies? Check out the FREEBIE TUTORIALS and the FREEBIE PATTERNS!
As always, we’re here to help if you need it! Join us HERE and on Facebook, Instagram, Twitter, Youtube, and Pinterest. We’re everywhere you are.
Leave a Reply