Guest Blog Post from Lindsay Bracco
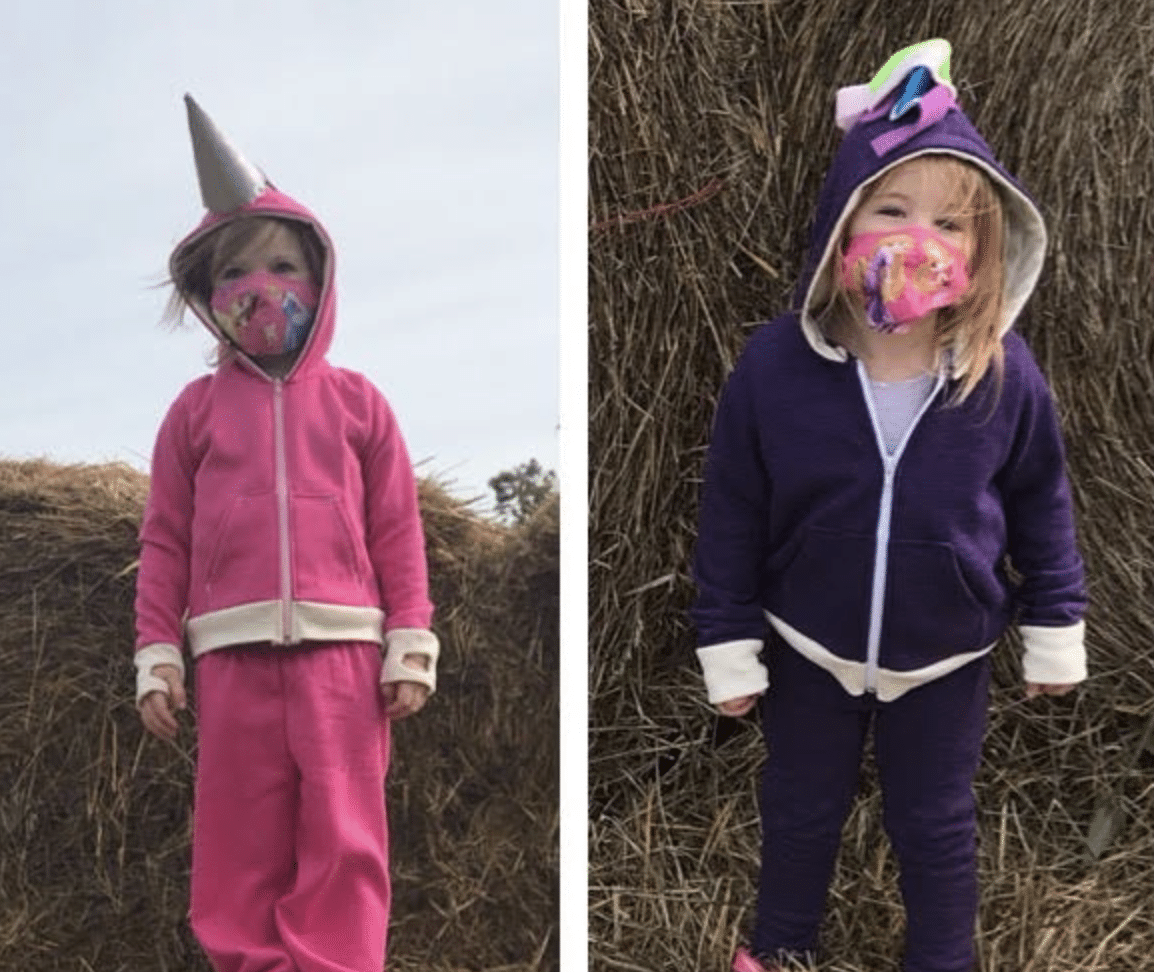
Are anyone else’s kids as obsessed with unicorns as my kids?? My kiddos both decided this year that they had to be unicorns for Halloween. I love making my kids’ costumes, but they have to be costumes that they can wear multiple times. I’m not putting a ton of effort into a one time wear! So, I started brainstorming how to make a wearable unicorn. Enter the Hyde Sweatshirt Jacket! If you’re an adult who likes unicorns you can even use the Donna or Eric Sweatshirt Jacket patterns too! It’s a fun little hack for anyone!

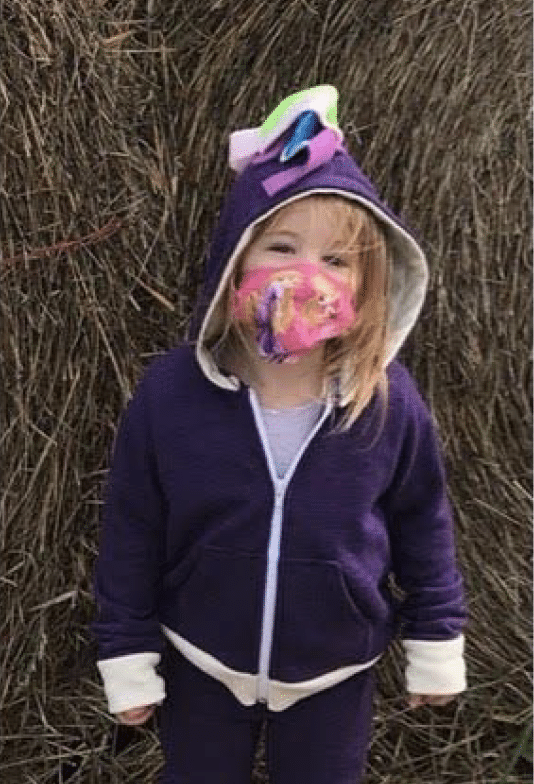
I hacked this pattern just a little bit to make an adorable unicorn mane and horn that my kiddos are obsessed with! It is actually a super easy hack and the only part that changes is the hood.
You will follow all the directions in the pattern up until you get to constructing the hood. Then, you add some “hair” and a horn, and follow the pattern again to attach the hood!
In case you’re wondering, yes, only one kid has a horn. The purple unicorn decided that she didnot want a horn, but no, she is not a horse!
Let’s get started!
First, you want to cut out the pieces that you will need. The Hyde Sweatshirt Jacket pattern gives the option of a lined or an unlined hood. Either one works for this unicorn hoodie. I chose to make my lined.
You’ll need:
- 2 hood pieces (and 2 lining pieces if you wish)
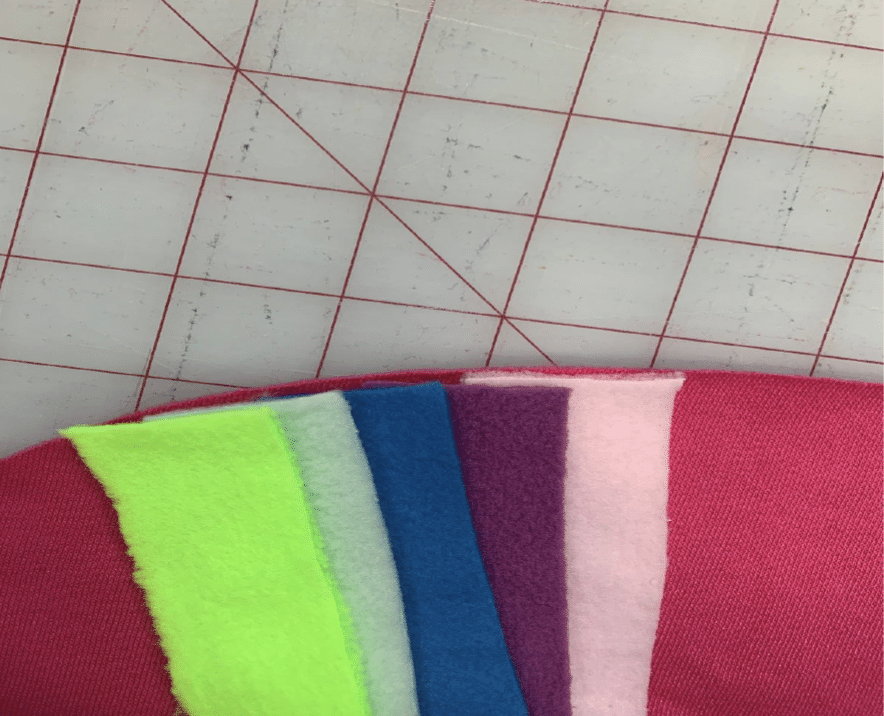
- Strips of fabric for the mane-I used fleece for my mane, but you can use any fabric that isn’t going to fray.
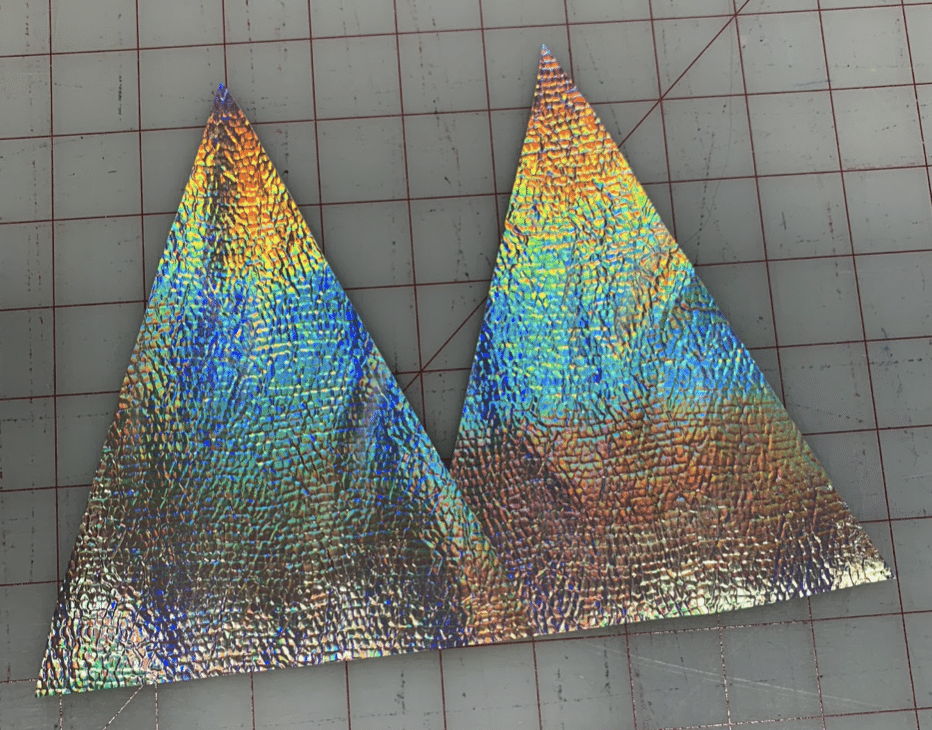
- 2 triangle pieces for the horn– For the horn, I found a holographic vinyl at Joann Fabrics that looks super magical. Since it is a heavier weight fabric, I didn’t need to use any interfacing with it. If you use a thinner fabric, you’ll probably want to use some nice heavy interfacing so your horn is stiff and stands up nicely.
- A bit of stuffing
- Velcro if you want your horn to be removable. I also used scrap fabric to cover the bottom of my horn so that the stuffing doesn’t fall out.
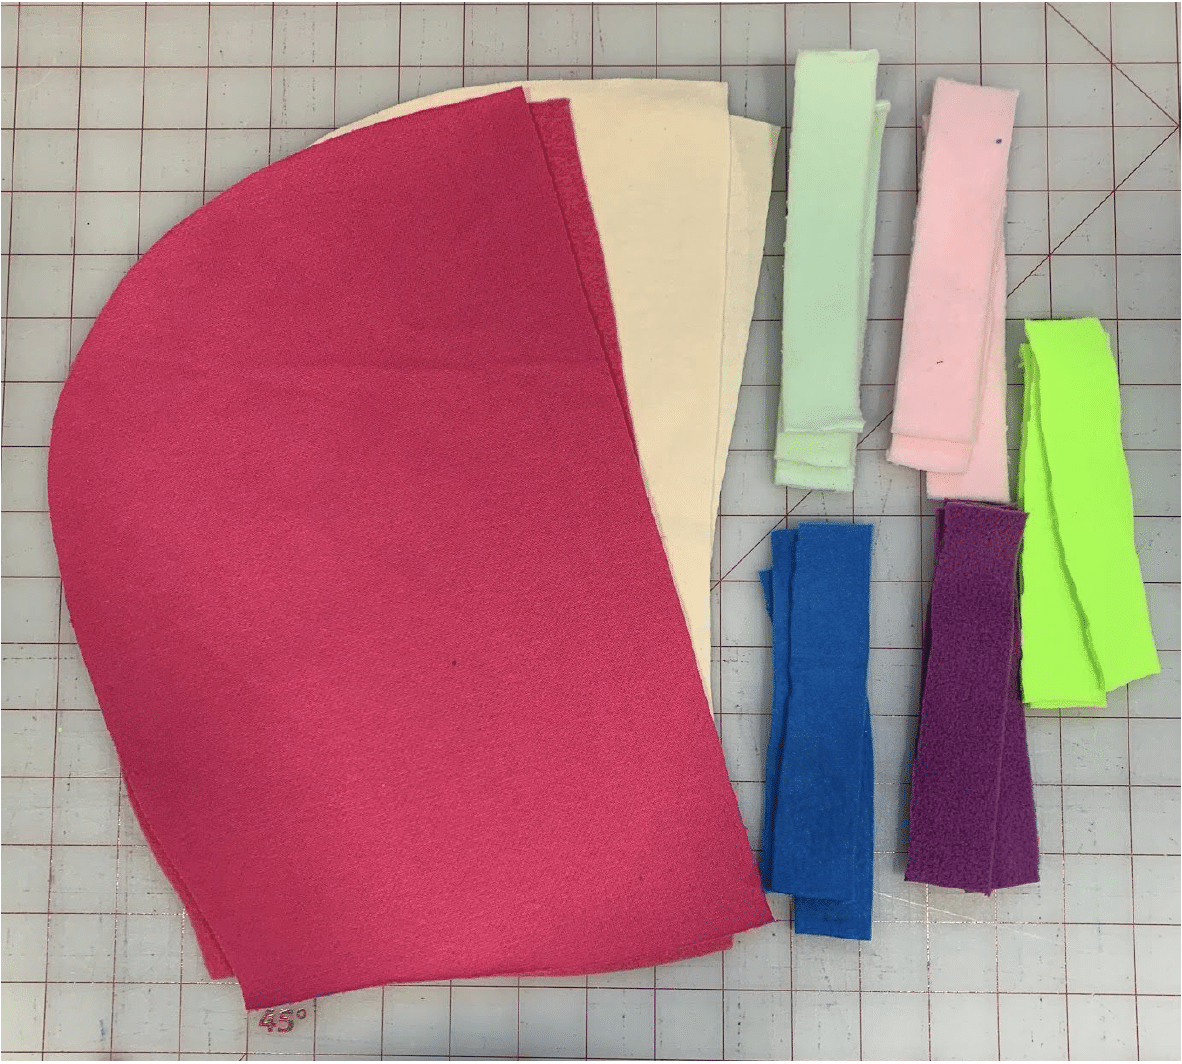
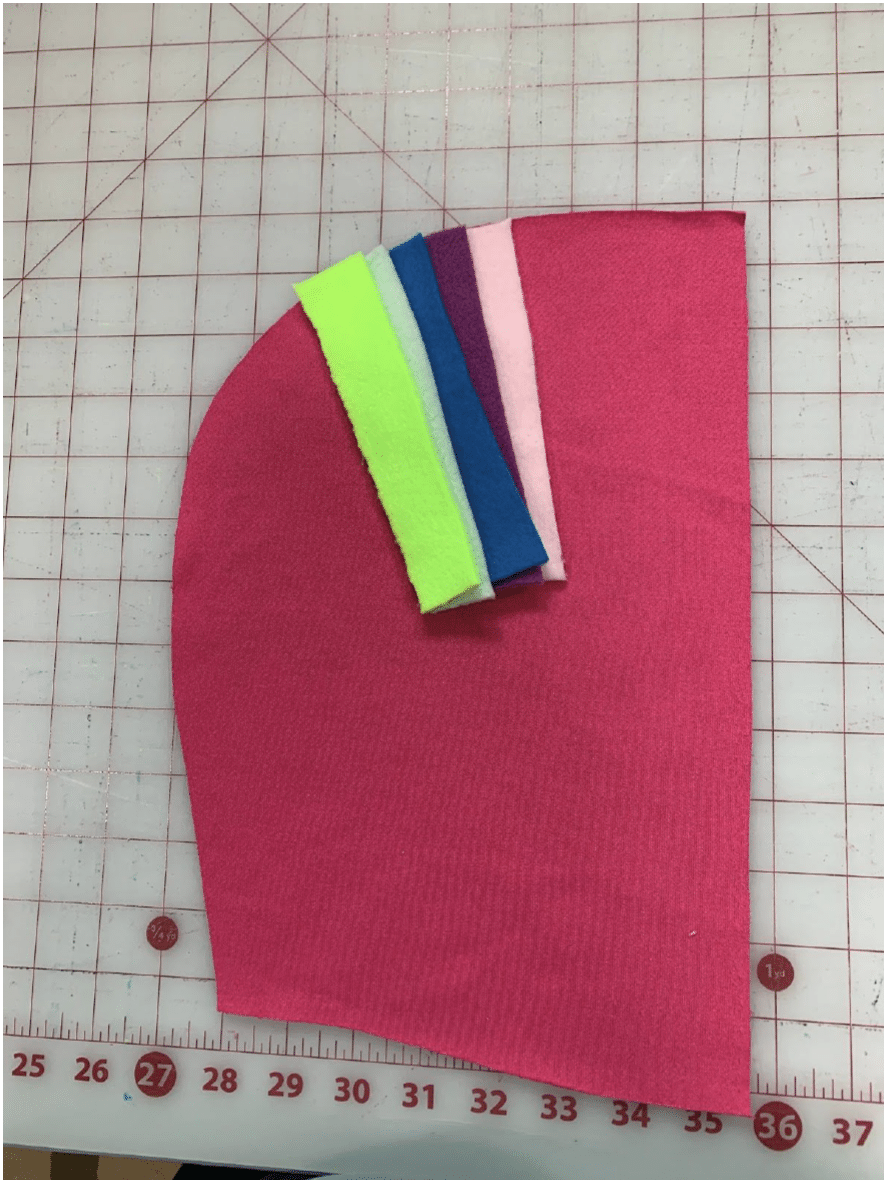
- Cut the mane strips: 1″ x 5.5″ I cut 15 strips of fabric for my mane pieces, but you can use more or less depending on your preference.
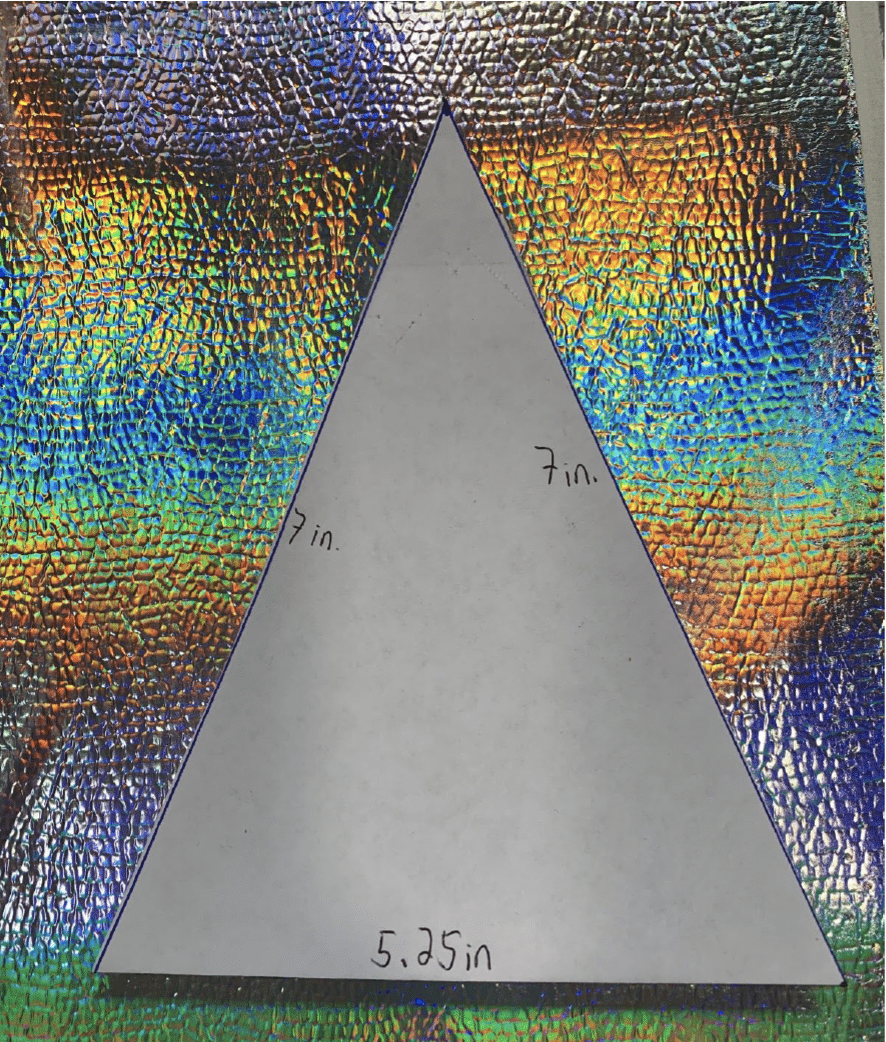
- Cut the triangular pattern: The sides of my triangle are 7″ long and the bottom is 5.25″ wide. I made a size 4 hood so if your hood is bigger or smaller, you may want to alter the horn a bit to fit your hood better. Once the pattern was cut, I cut out two triangle pieces from my vinyl fabric.
Now, you’re ready to construct the hood!
I sewed my lining first to get it out of the way. Just put the lining pieces right sides together and sew along the curve using a stretch stitch or serger. I trimmed my seam allowance after sewing to reduce some of the bulk in the seam.
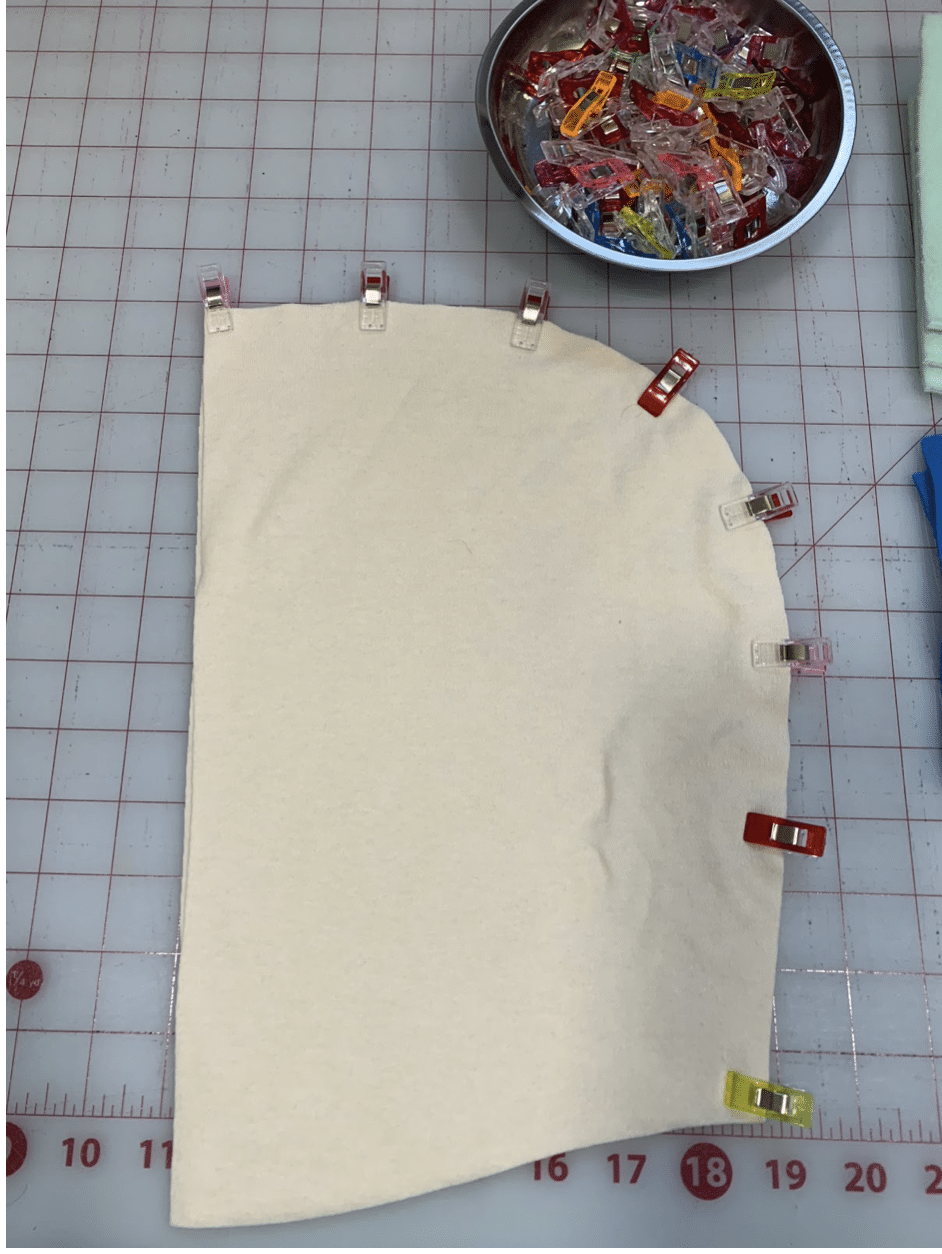
Set the lining aside, you’re ready to tackle the main part of the hood with the fun unicorn features!
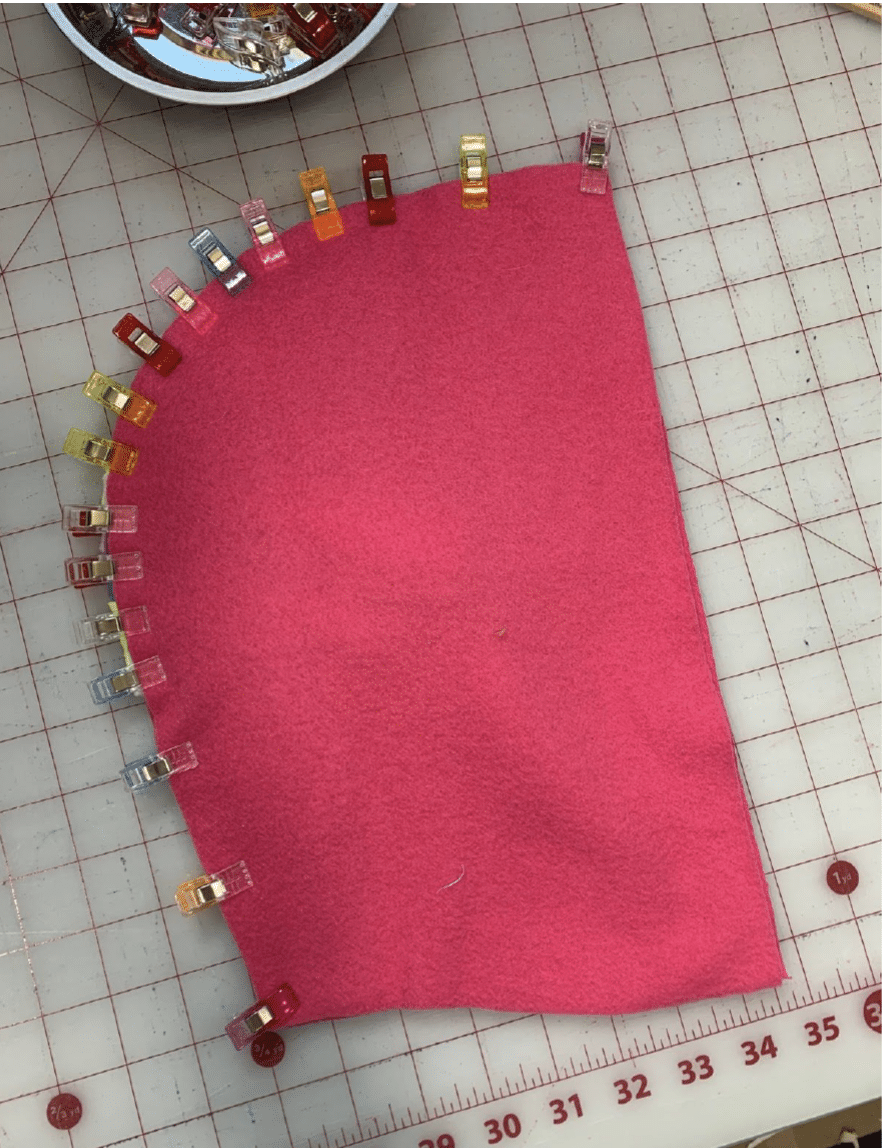
- Place one hood piece right side up and start putting the strips on top of it lining up the edges. I put each strip on top of the strip before it so that they halfway overlap. Follow the curve of your hood and keep overlapping strips until you run out of strips.
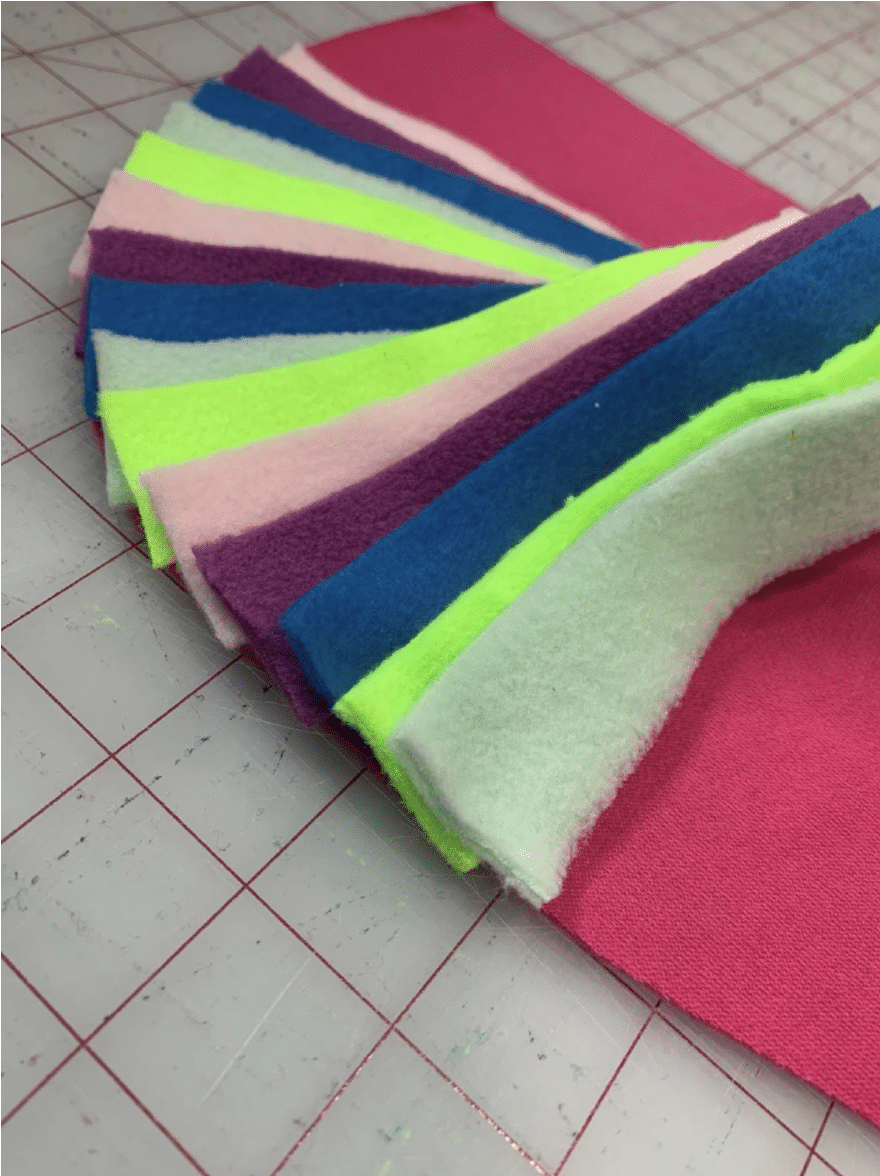
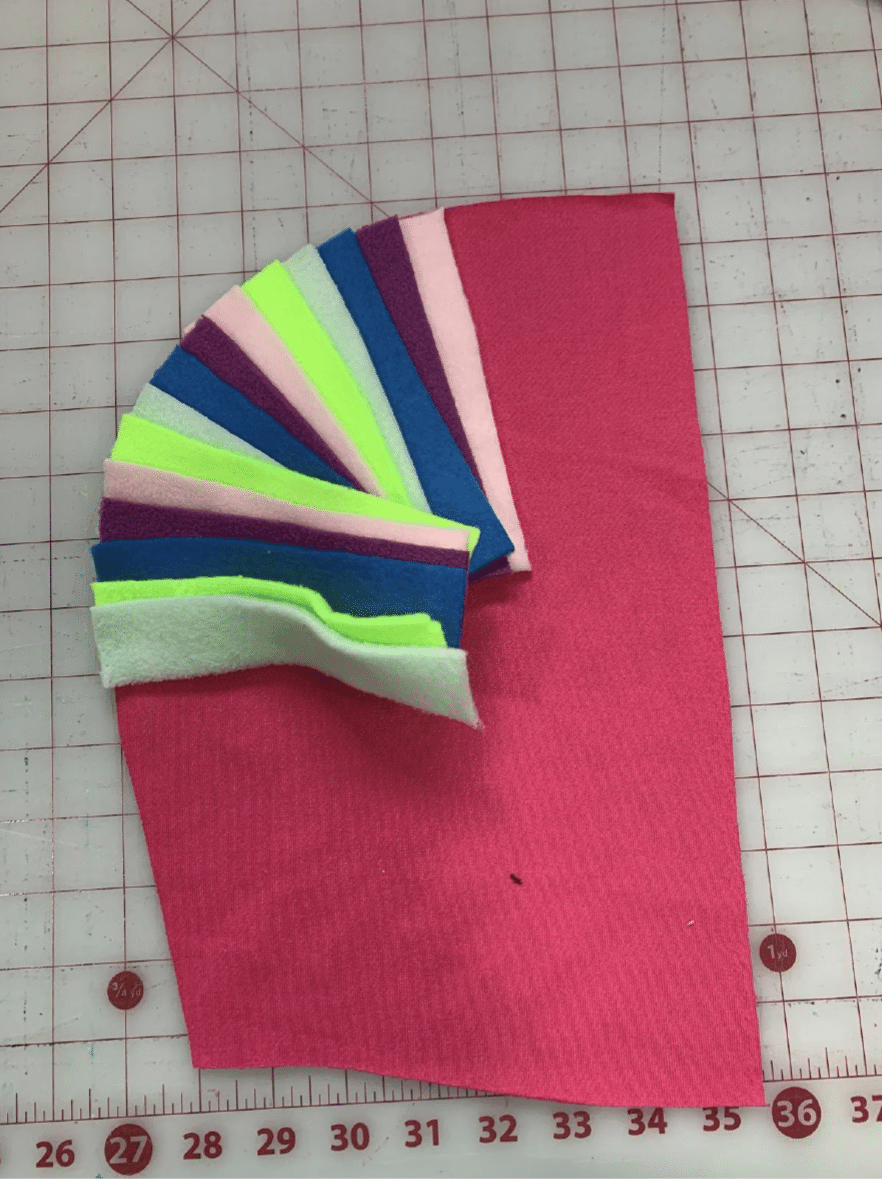
- Now that the strips are placed, put the other hood piece on top of the first piece, right sides together, so that the strips are sandwiched between the two hood pieces. Clip or pin around the curve and sew. I used a zig zag stitch here. Use lots of clips and go slow so that your strips don’t shift while you’re sewing!
- Leave your main hood piece (with mane strips sewn in the seam) inside out. Turn your lining piece right sides out and place the lining inside of the hood so that the right sides are together. Sew along the front opening.
Time for the horn!
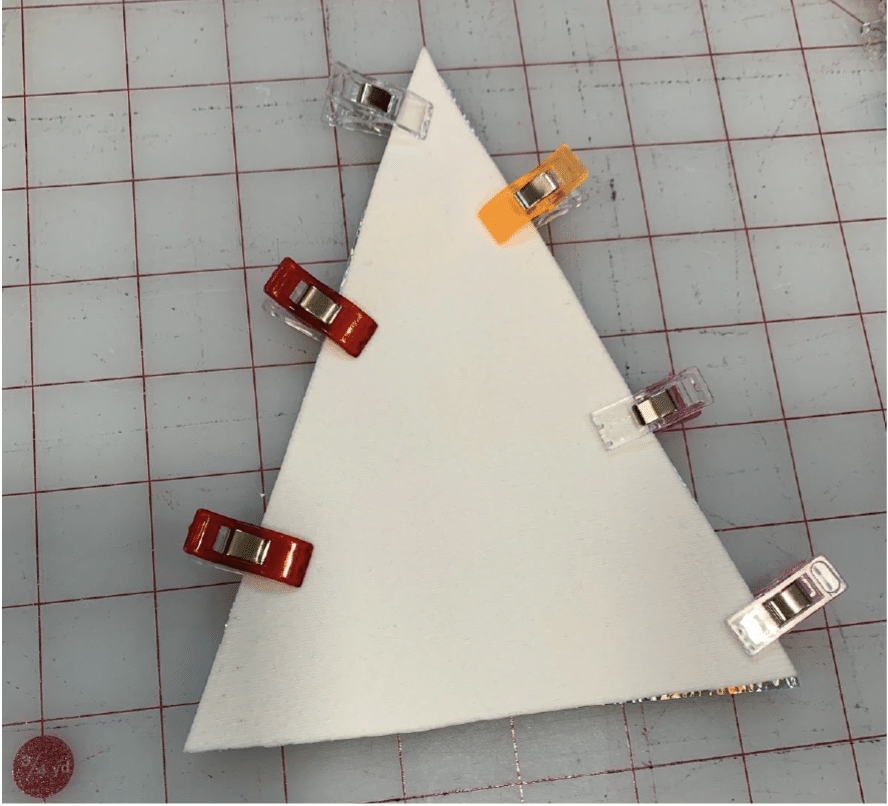
- Place your 2 triangle pieces right sides together and sew down the long sides. Trim the seam allowance and trim the tip of the triangle close to the stitches, but without going through them.
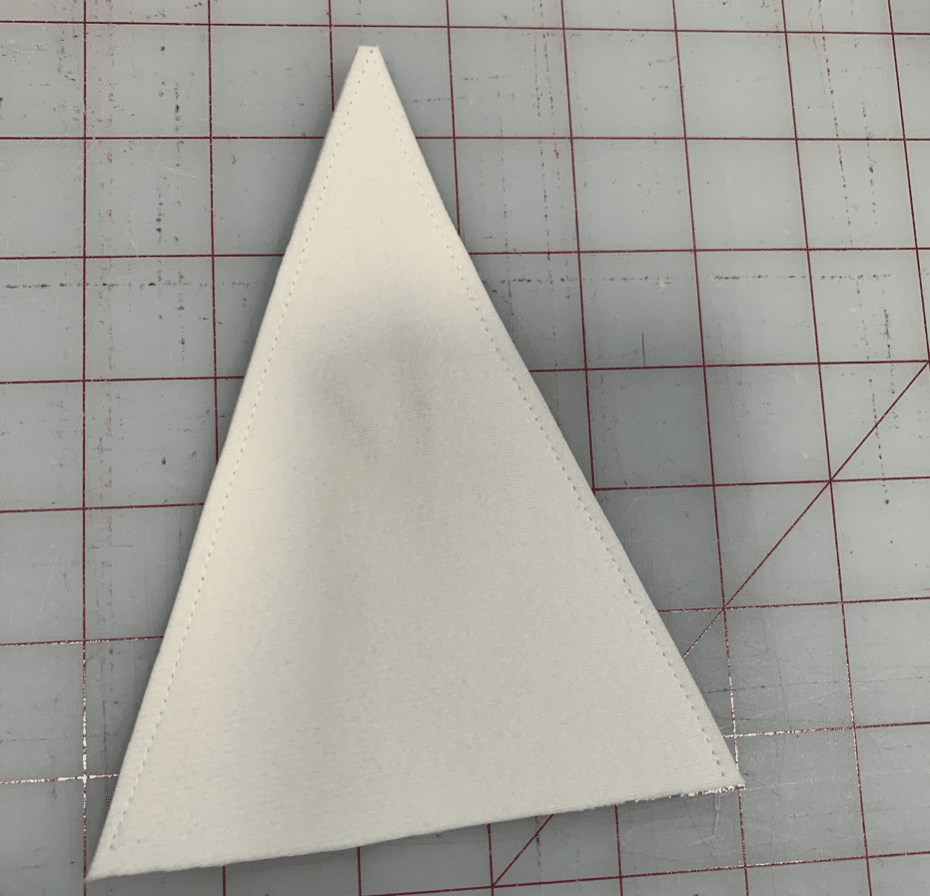
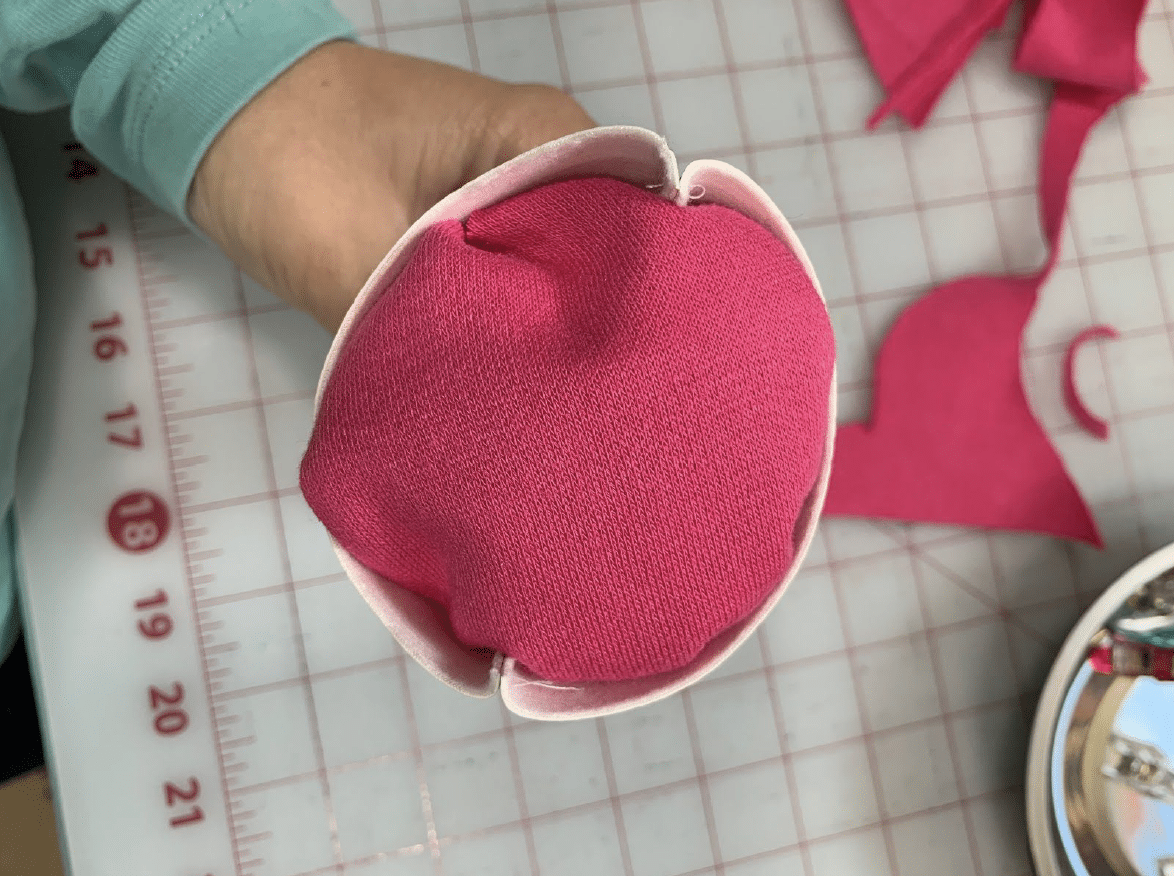
- Turn the horn right side out. It takes a bit of effort since the vinyl is so thick, but I didn’t want to hand sew it.
- Once it is right sides out, put a bit of stuffing inside of it to give it a nice horn shape. I used some stuffing out of an old pillow since you don’t need much
- If you want to sew your horn directly to your hood, you’re ready to hand sew it on!
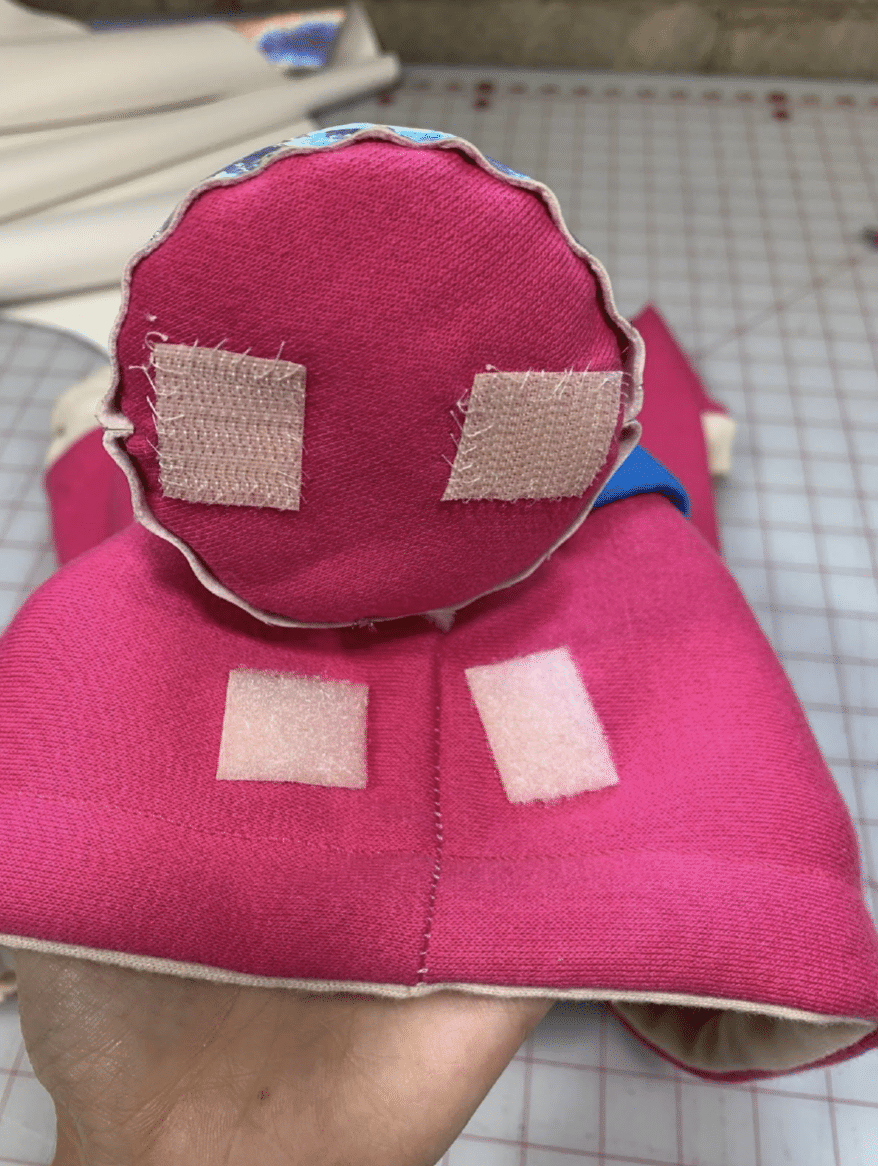
- If you want a removable horn, cut a scrap of fabric in a circle about half an inch bigger than your horn.
- Then, place the fabric on the bottom of the horn and tuck the raw edges in so that they are on the inside of the horn.
- Hand stitch through the horn and the fabric. This will keep the stuffing from falling out and will give you somewhere to sew the Velcro.
Almost done!
- Take a few pieces of Velcro and hand sew them to the bottom of the horn.
- Then, hand sew the other side of the velcro to the top of your hoodie, make sure the Velcro pieces will line up with each other! I used two pieces of Velcro, but I probably should have a couple more just to keep the horn a little more stable on the hood.
- Put your horn on the hood and follow the pattern tutorial to attach your hood to the jacket!
That’s it! I hope your kids love this project as much as mine have! Be sure to show us your fabulous unicorns!
Need more DIY projects in your life? Check out all the posts on our BLOG!
As always, we’re here to help if you need it! Join us HERE and on Facebook, Instagram, Twitter, Youtube, and Pinterest. We’re everywhere you are.
Leave a Reply