Hello! I’m going to share a very beginner friendly tutorial for Color Blocking.
But first, I’d like to introduce myself. My name is Christina and I am the owner/seamstress behind Soaring Turtle Creations LLC. I have 2 adorable children who (mostly) love to model my every growing array of creations. When I first heard the words ‘color blocking’ I was like, ‘Say what?’ I know that there are those out there like me, so I hope that this post helps you get over your own ‘Say what?’ moment! This is my very first blogging adventure and I hope you enjoy it as much as me!
Plus, there is a coupon code for the Girls’ Weekender Tunic and information about a giveaway…make sure you read on to find out more!
Color blocking is when two or more contrasting or complimentary fabric pieces are sewn together to create a finished garment. In the PDF pattern world, I have seen an increase in the number of patterns that have color blocking instructions/pieces included within the pattern itself. However, the majority of patterns don’t have this option built in, and that is OK because, in my opinion, that leave the door open to more creativity!
For some, you hear the words ‘color blocking’ and you think, ‘Yikes! A modification? I can’t do that, I can barely turn on my serger…’ And then there’s those who will say, ‘Wait! What’s a serger?!’
If you truly don’t know what a serger is please feel free to comment and/or message me and I will be happy to help you with that question. But since this tutorial is not about sergers, I’ll simply address the first question here. Have no fear! Color blocking really is quite simple. And, rest assured, a serger is definitely not necessary to creating your color blocked creations!
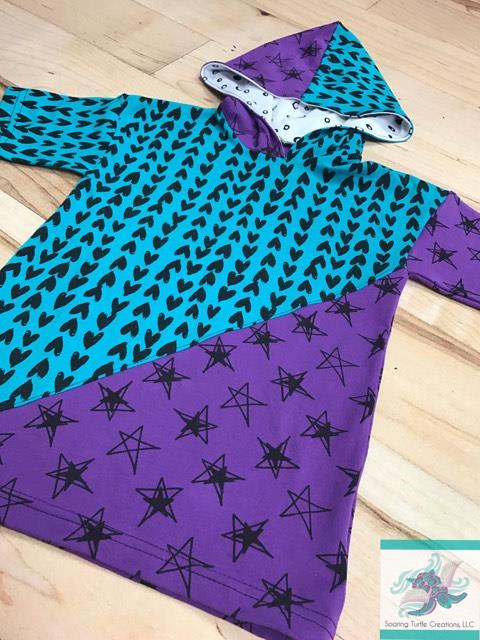
For this tutorial I am using the Girl’s Weekender Tunic, however, you can use this information to color block any pattern you want! The Girl’s Weekender Tunic pattern is a relaxed fit shirt or tunic that was originally intended for sweater knits. It has a small dolman style sleeve, so it is super quick to sew up! For this tutorial, I decided to add short sleeves to the dolman sleeve. The Girls’ Weekend Tunic can be found HERE and if you want a Mommy and Me matching opportunity, you can get the Women’s Weekender Tunic HERE. Check out all of the other great 5 out of 4 patterns HERE!
Now, on to the tutorial!
Step 1: Print out your pattern and, following the pattern instructions, tape all pieces together and cut out your pattern pieces.
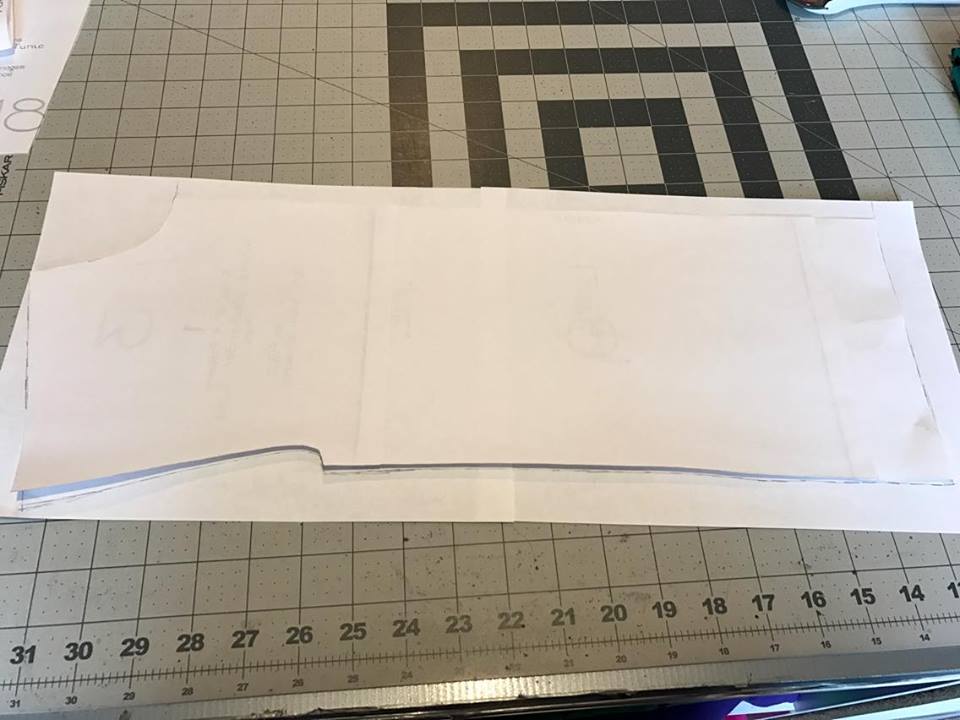
Step 2: Find the pattern piece that you want to color block and grab some extra paper. Tape the extra paper together creating a piece that is slightly larger than your pattern piece then tape it to your pattern piece on the side that says ‘FOLD.’

You should now have a piece that looks like this. Make sure that when folded over the patter piece is fully covered by your extra paper.
Step 3: Fold your pattern piece over your extra paper and trace around your entire pattern piece (except for the ‘FOLD’ edge).

Step 4: Cut away excess paper around the area you traced.
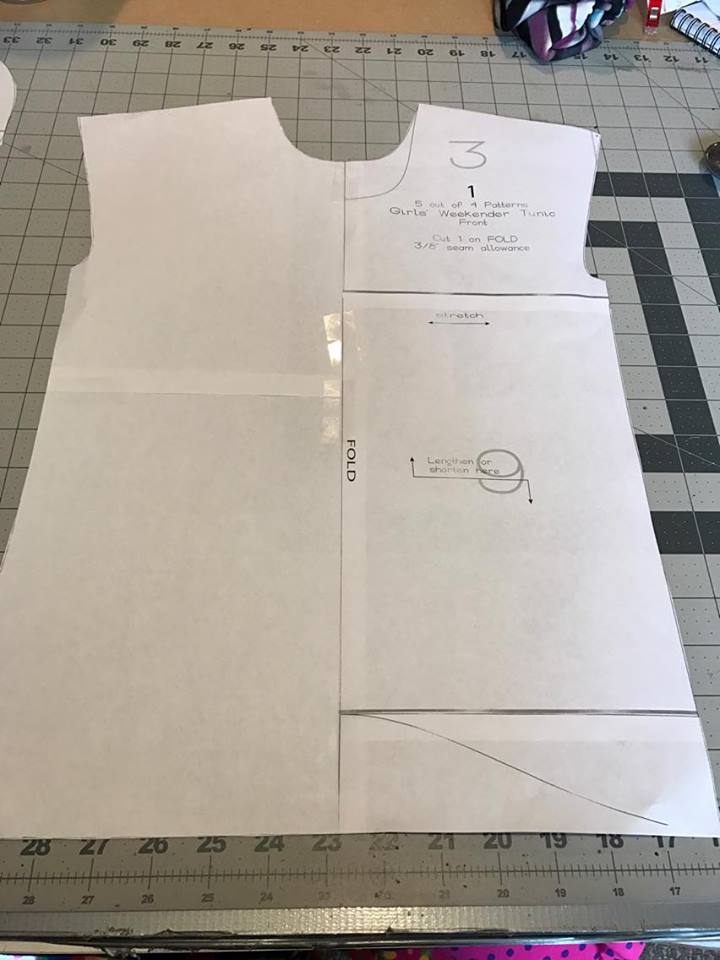
Your extra paper will now have a mirrored image of your pattern piece creating a full pattern piece instead of just a half that is cut on the fold. (*Please note- this only applies to pattern pieces that state to cut on a FOLD. If your pattern piece is not cut on a FOLD the first 4 steps are unnecessary.)
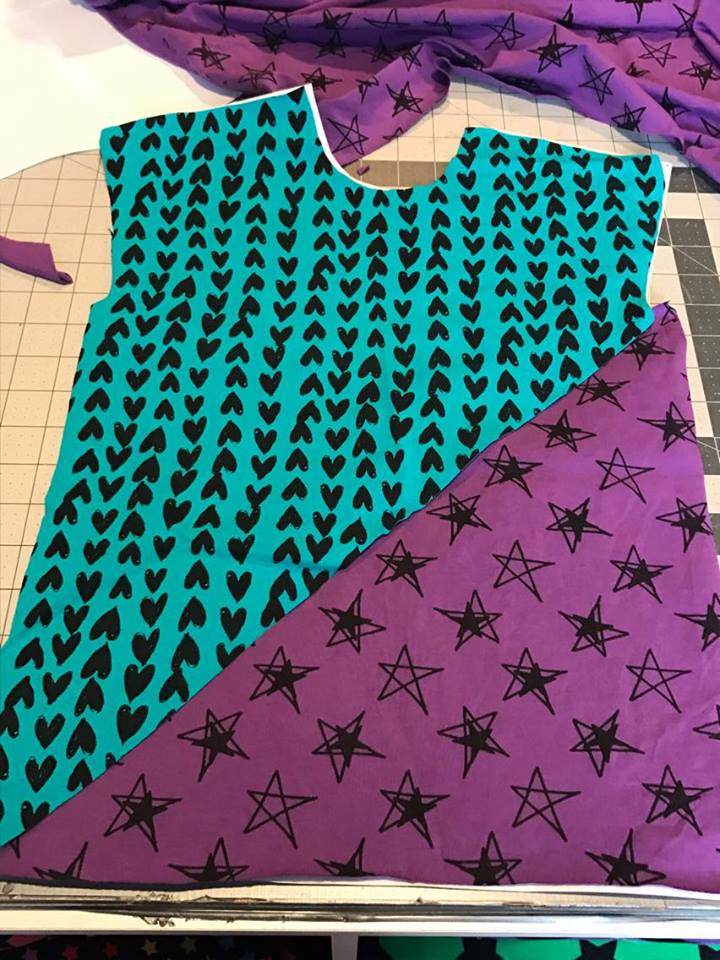
Step 5: Decide how you want to color block your item. The options are really endless. For the purpose of this tutorial, I did a simple two piece color block using a diagonal seam line on my pattern piece.
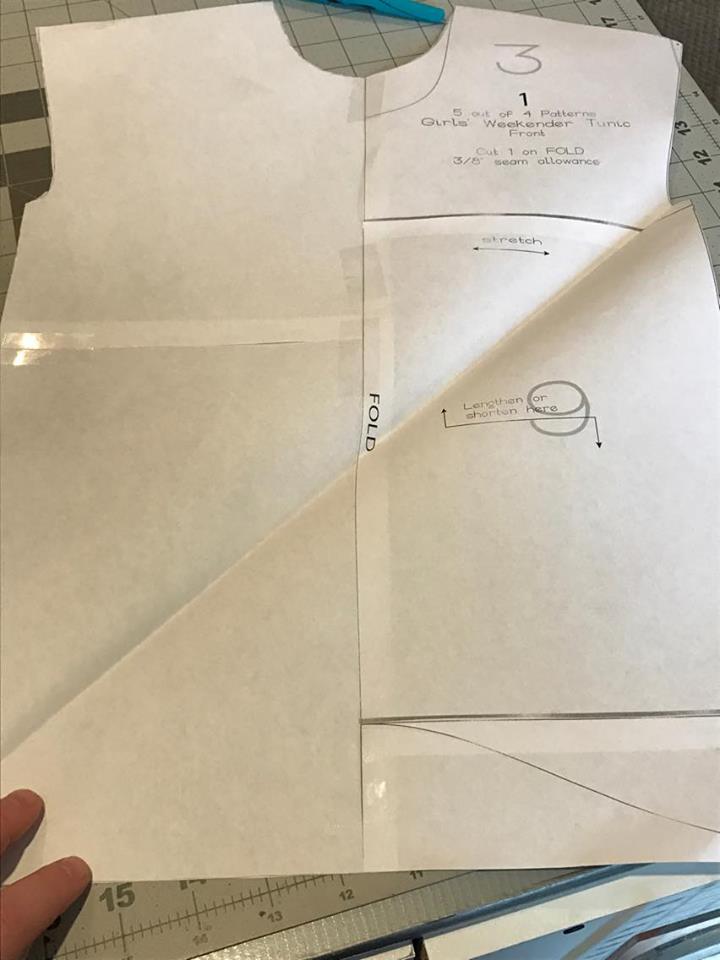
If you are doing a straight cut color block like I did then there is no need to cut your pattern piece. Simply fold it where you want your color block line to be. ***If you want to get fancy and do curved lines then you will need to take the scissors to your pattern piece and cut it apart for it to work properly.
Step 6: Decide which fabric you will be using for each piece (this is probably one of the hardest parts of this tutorial!) and, using your previously determined fold line, fold your pattern piece and lay it on your fabric. Cut your first color blocking fabric piece out making sure to ADD a seam allowance! ***You MUST add a seam allowance at the seam line that you created.*** You can decide how much of a seam allowance you want to add. For this item I added 1/4″ seam allowance. Then, REPEAT for your other piece.
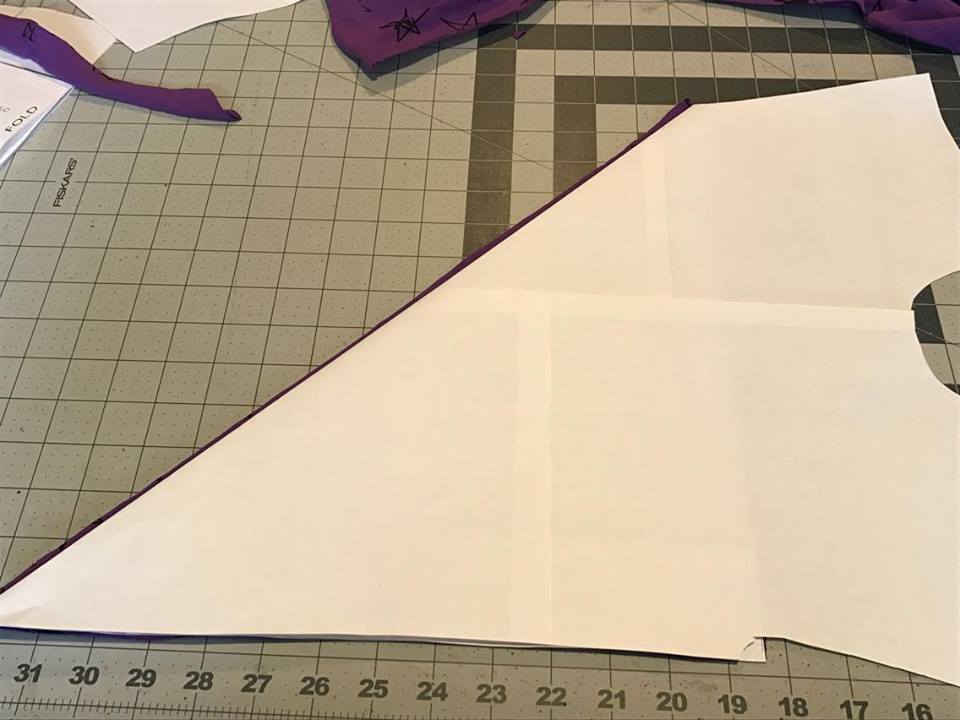
In the picture above, I’m cutting out the bottom/right triangle piece. It’s hard to tell, but I’ve added 1/4″ seam allowance at the new seam line that I created.

This is what my piece looks like after I cut it out, laying on top of my pattern.

In the picture above, I am cutting the top/left piece of my color blocked item. You can see the 1/4″ seam allowance I added at the new seam line. This diagonal line is the only place you need to add seam allowance. **Most PDF patterns that I’ve seen include a seam allowance, but make sure you know what that seam allowance is because each pattern designer has their own preference. All knit 5 out of 4 Patterns have a 3/8″ seam allowance.
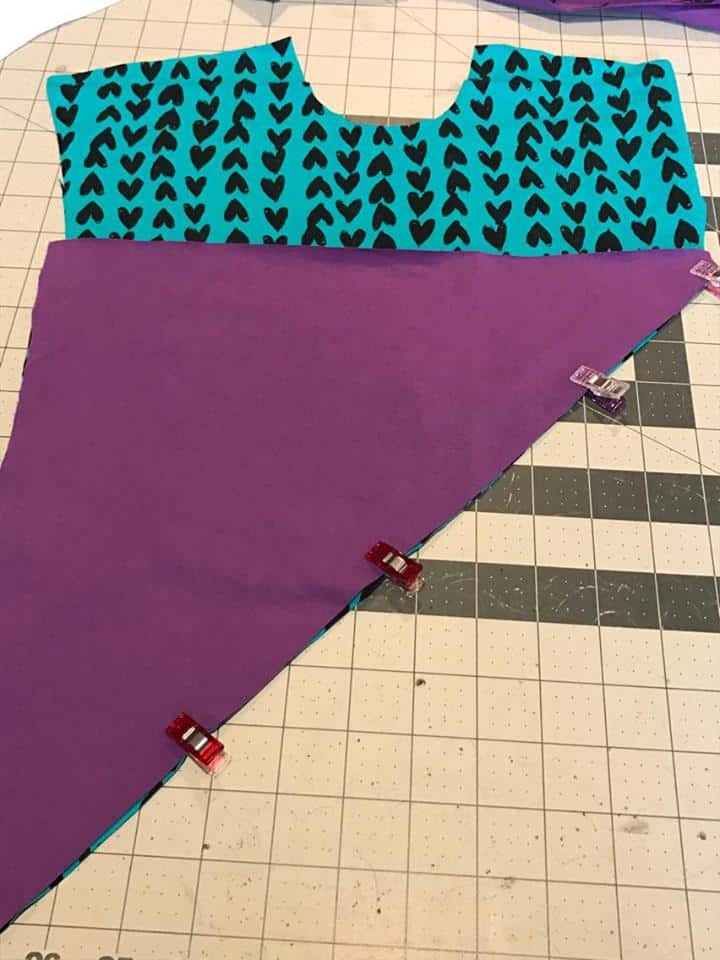
You should now have two pieces that look like this with a little bit of overlap where they meet.
Step 7: Pin/clip your pieces and sew them together! Press your seam to the side (either side, it doesn’t matter which one) and topstitch your seam allowance down.
There you have it! Now just continue sewing your item according to your pattern instructions and consider yourself a color blocking master!!
Color blocking really is that easy folks.
Now that you’ve mastered the 2 piece, straight line color block, try adding in a 3 piece or more! Once you’ve done that go wild with some curves, because now that your a color blocking master, the sky is the limit!

Thank you for allowing me to join you on your color blocking journey! If you have any questions feel free to post a comment below! You can get the Girls’ Weekender Tunic 25% off today only with the code PROMO! I’d also love to see your 5 out of 4 pattern creations, so be sure to post them in the 5 out of 4 Facebook Group! We’re also having a pattern giveaway in the FB group, so make sure you join the fun!
-Christina
I may just be colour biased here, but this is so freaking adorable!!! Love the print and colour choices! Great simple tutorial.
Thanks so much Abbey! I think this is one of my favorite pieces to date. So much fun to make
Thank you! So straight forward and easy.
Thank you for this. You have taken all the intimidation of colour blocking away 🙂
So should I serge or sew with a stretch stitch? What do you recommend?
I’d use a stretch stitch. Sorry for the delay.
I see such cute outfits that use color blocking that I want to re-create but just never had the guts to try it. You make it so easy to try it. Thank you Thank you Thank you!