Guest Post By: Jenni Early
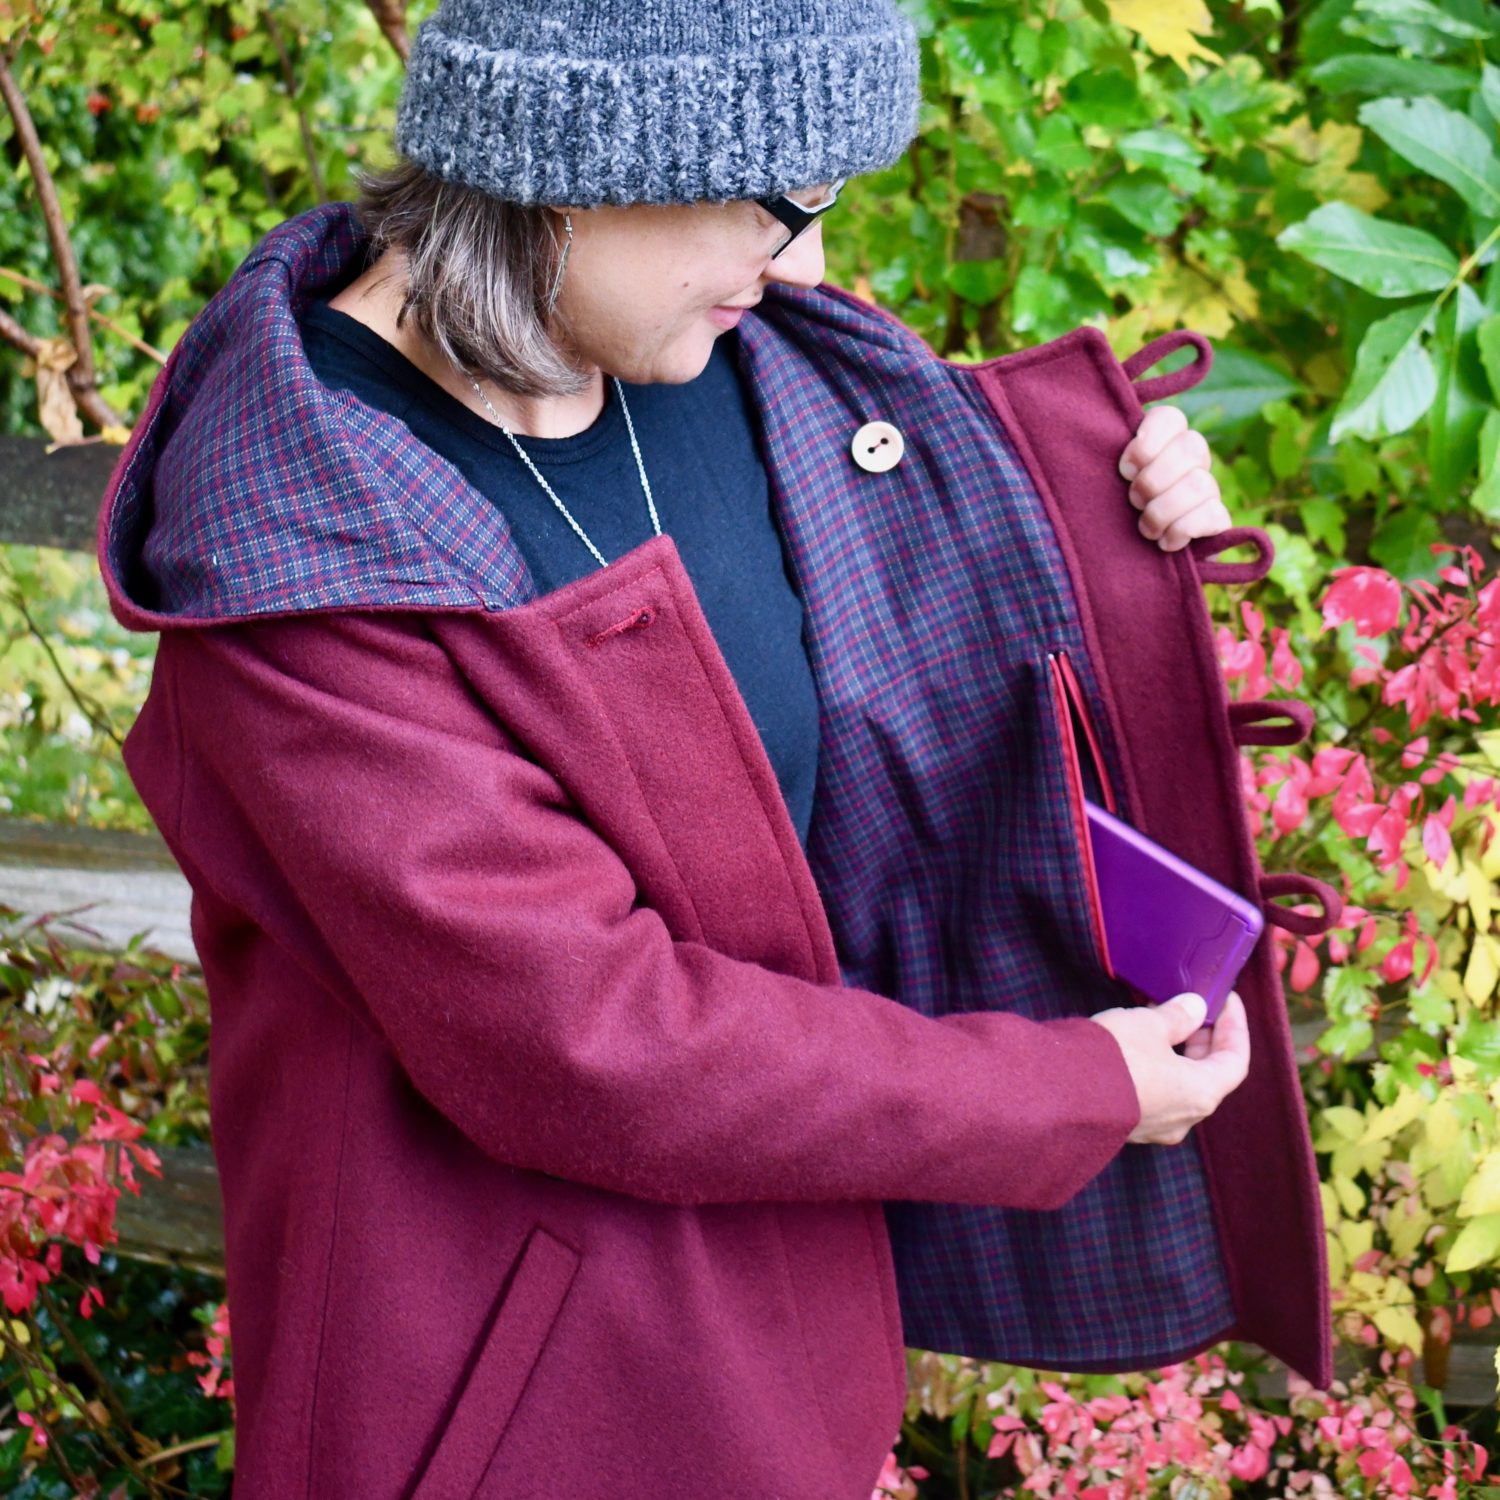
Recently I sewed up the Ruby Peacoat with a wool outer and a plaid lining that were both in my stash and I absolutely love this pattern. I adore the welt pockets for my hands, but I decided that, like any good coat, it needed an interior pocket so my phone and/or wallet would be more secure. I thought about a patch pocket or another welt pocket but ended up deciding that the best option would be a pocket with a zippered side opening. And I figured that you all would want to know how to do this hack as well. So here we go.
Supplies
- Ruby Peacoat Pattern and listed supplies in the tutorial
- Extra lining fabric:
- I used a piece that was 10″ X 24″ and then cut it down a bit later.
- 1 nylon zipper:
- Mine was 12″ long since that is what I had and it was taller than my phone I planned on putting into the pocket. You can always use a zipper that is too long and you can trim it down after constructing the pocket opening.
Extra lining piece 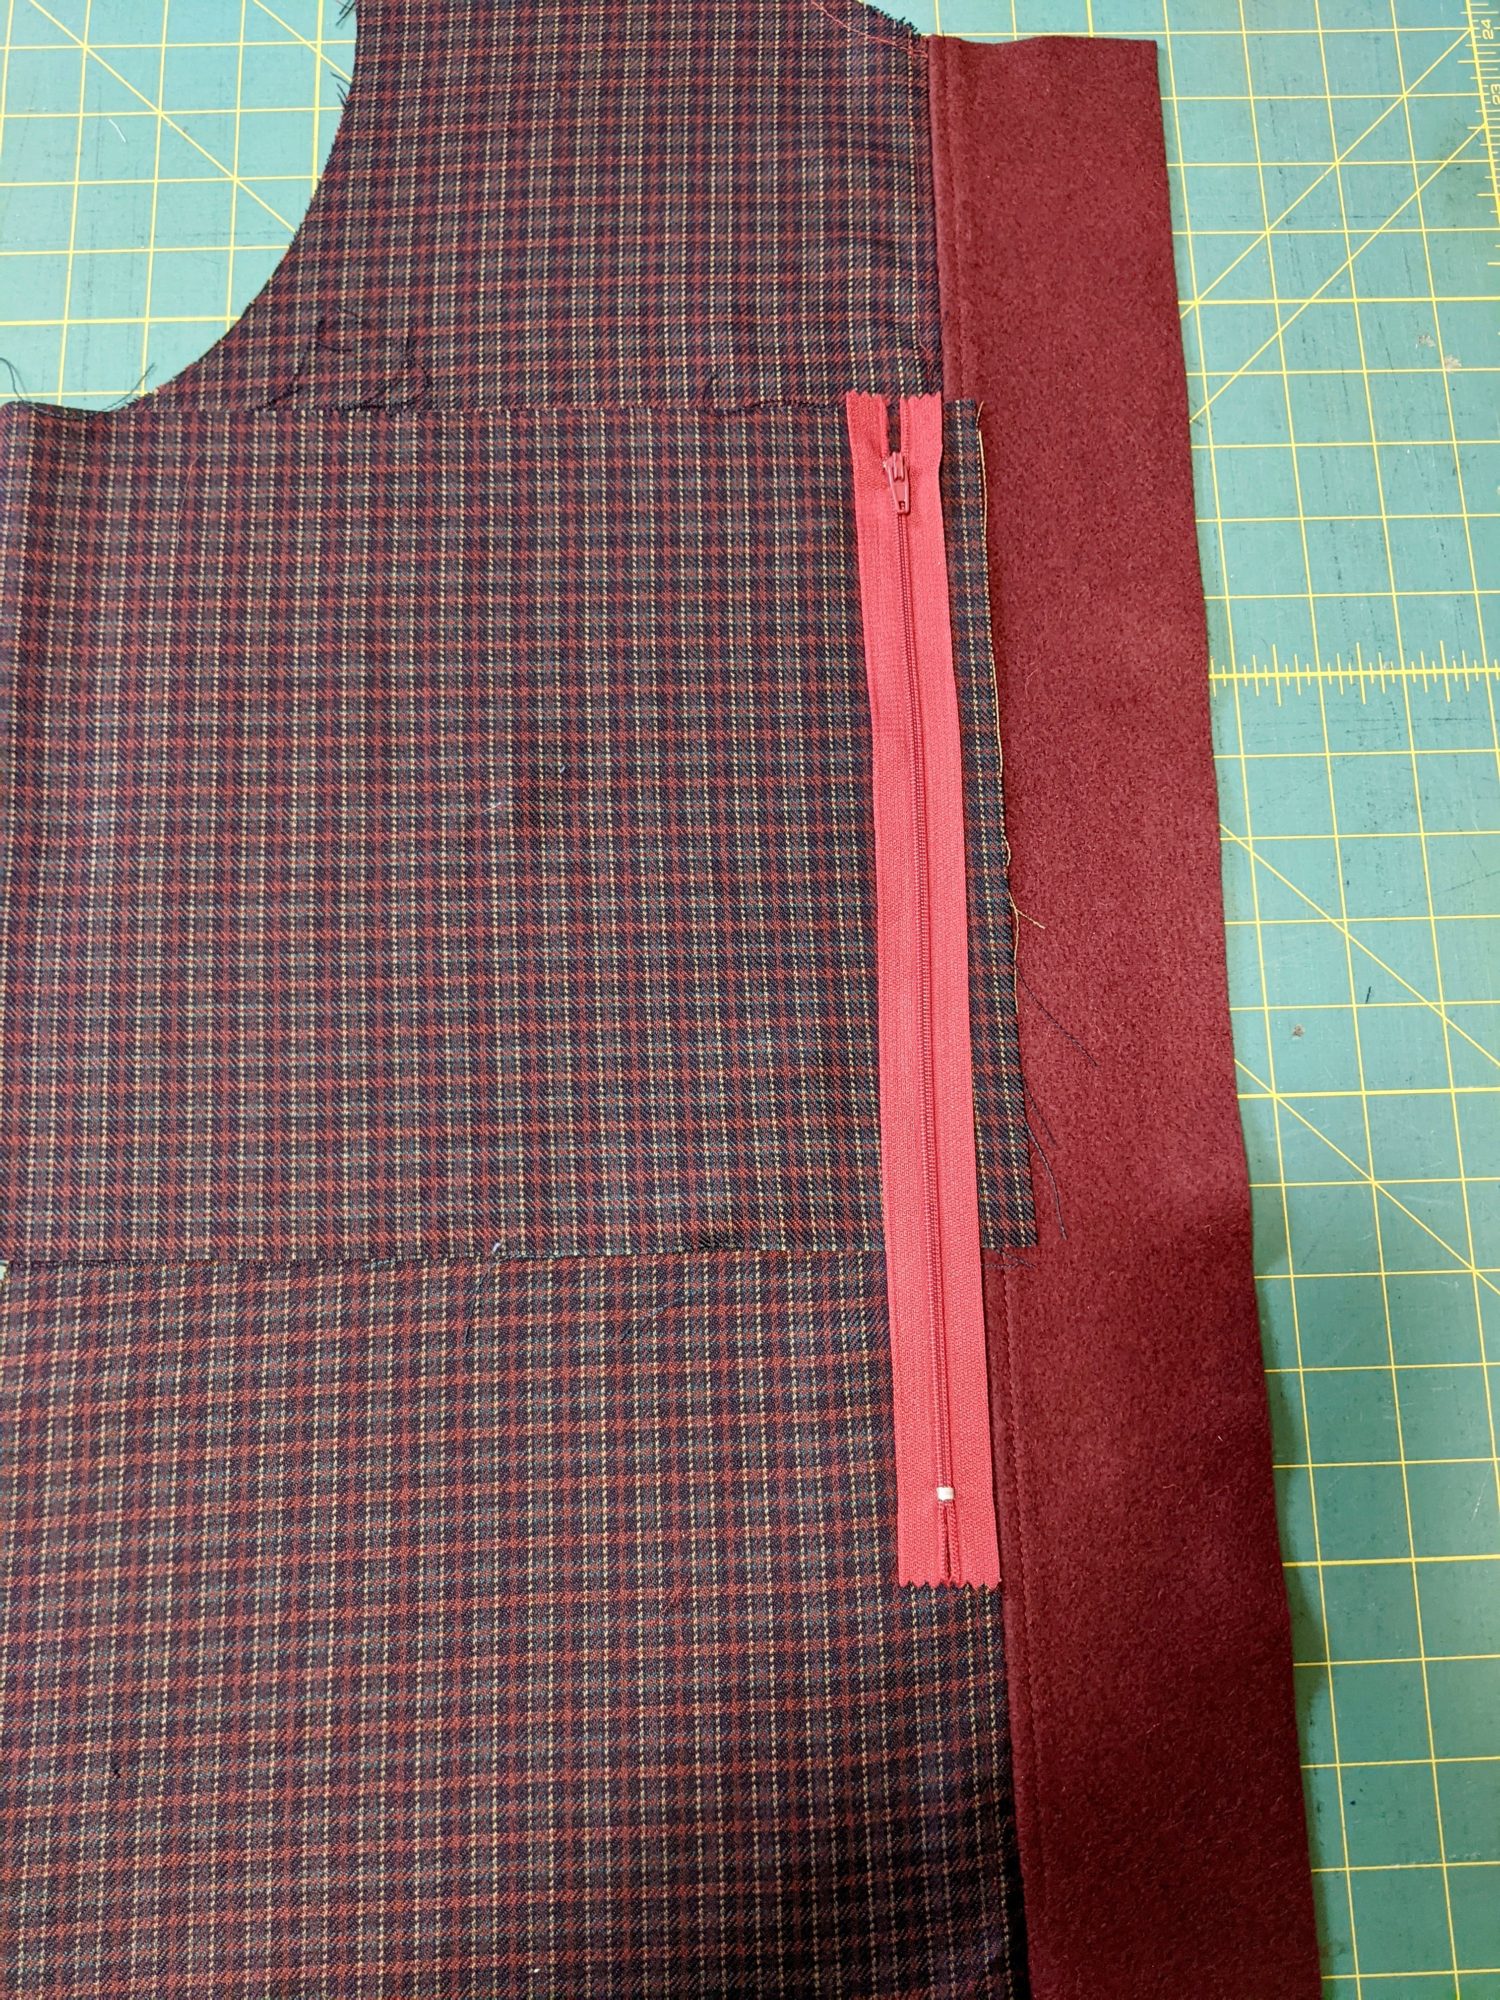
1 nylon zipper
Pocket Placement
The first thing I needed to figure out was where I wanted to put my zipper pocket. I had sewn up a muslin for this pattern already, so I tried it on and held my phone where I thought it would be easy enough to reach the phone without unbuttoning the jacket all the way. I marked this placement (with pins) and took the muslin off.
Here is my muslin on my body, and here is where I decided to put the phone. It would be just to the left of the front left facing and just below my breast, as I decided that would be more comfortable to wear that way.
Since I am right-handed, I needed to switch the side of the coat that was on top in front. I wanted to be able to reach behind the overlapping front and into the zipper pocket without having to undo all of the fastenings. So for my final version, I put my left side (the wearer’s left side) on top of the other side when the coat fronts overlapped. The pocket was also constructed on the left side. If you were left-handed, you might find it easier to switch what side goes in front.
Let’s Get Started
Attaching the Pocket Piece:
- This hack goes into the lining, so I started by constructing the coat outer using the pattern instructions.
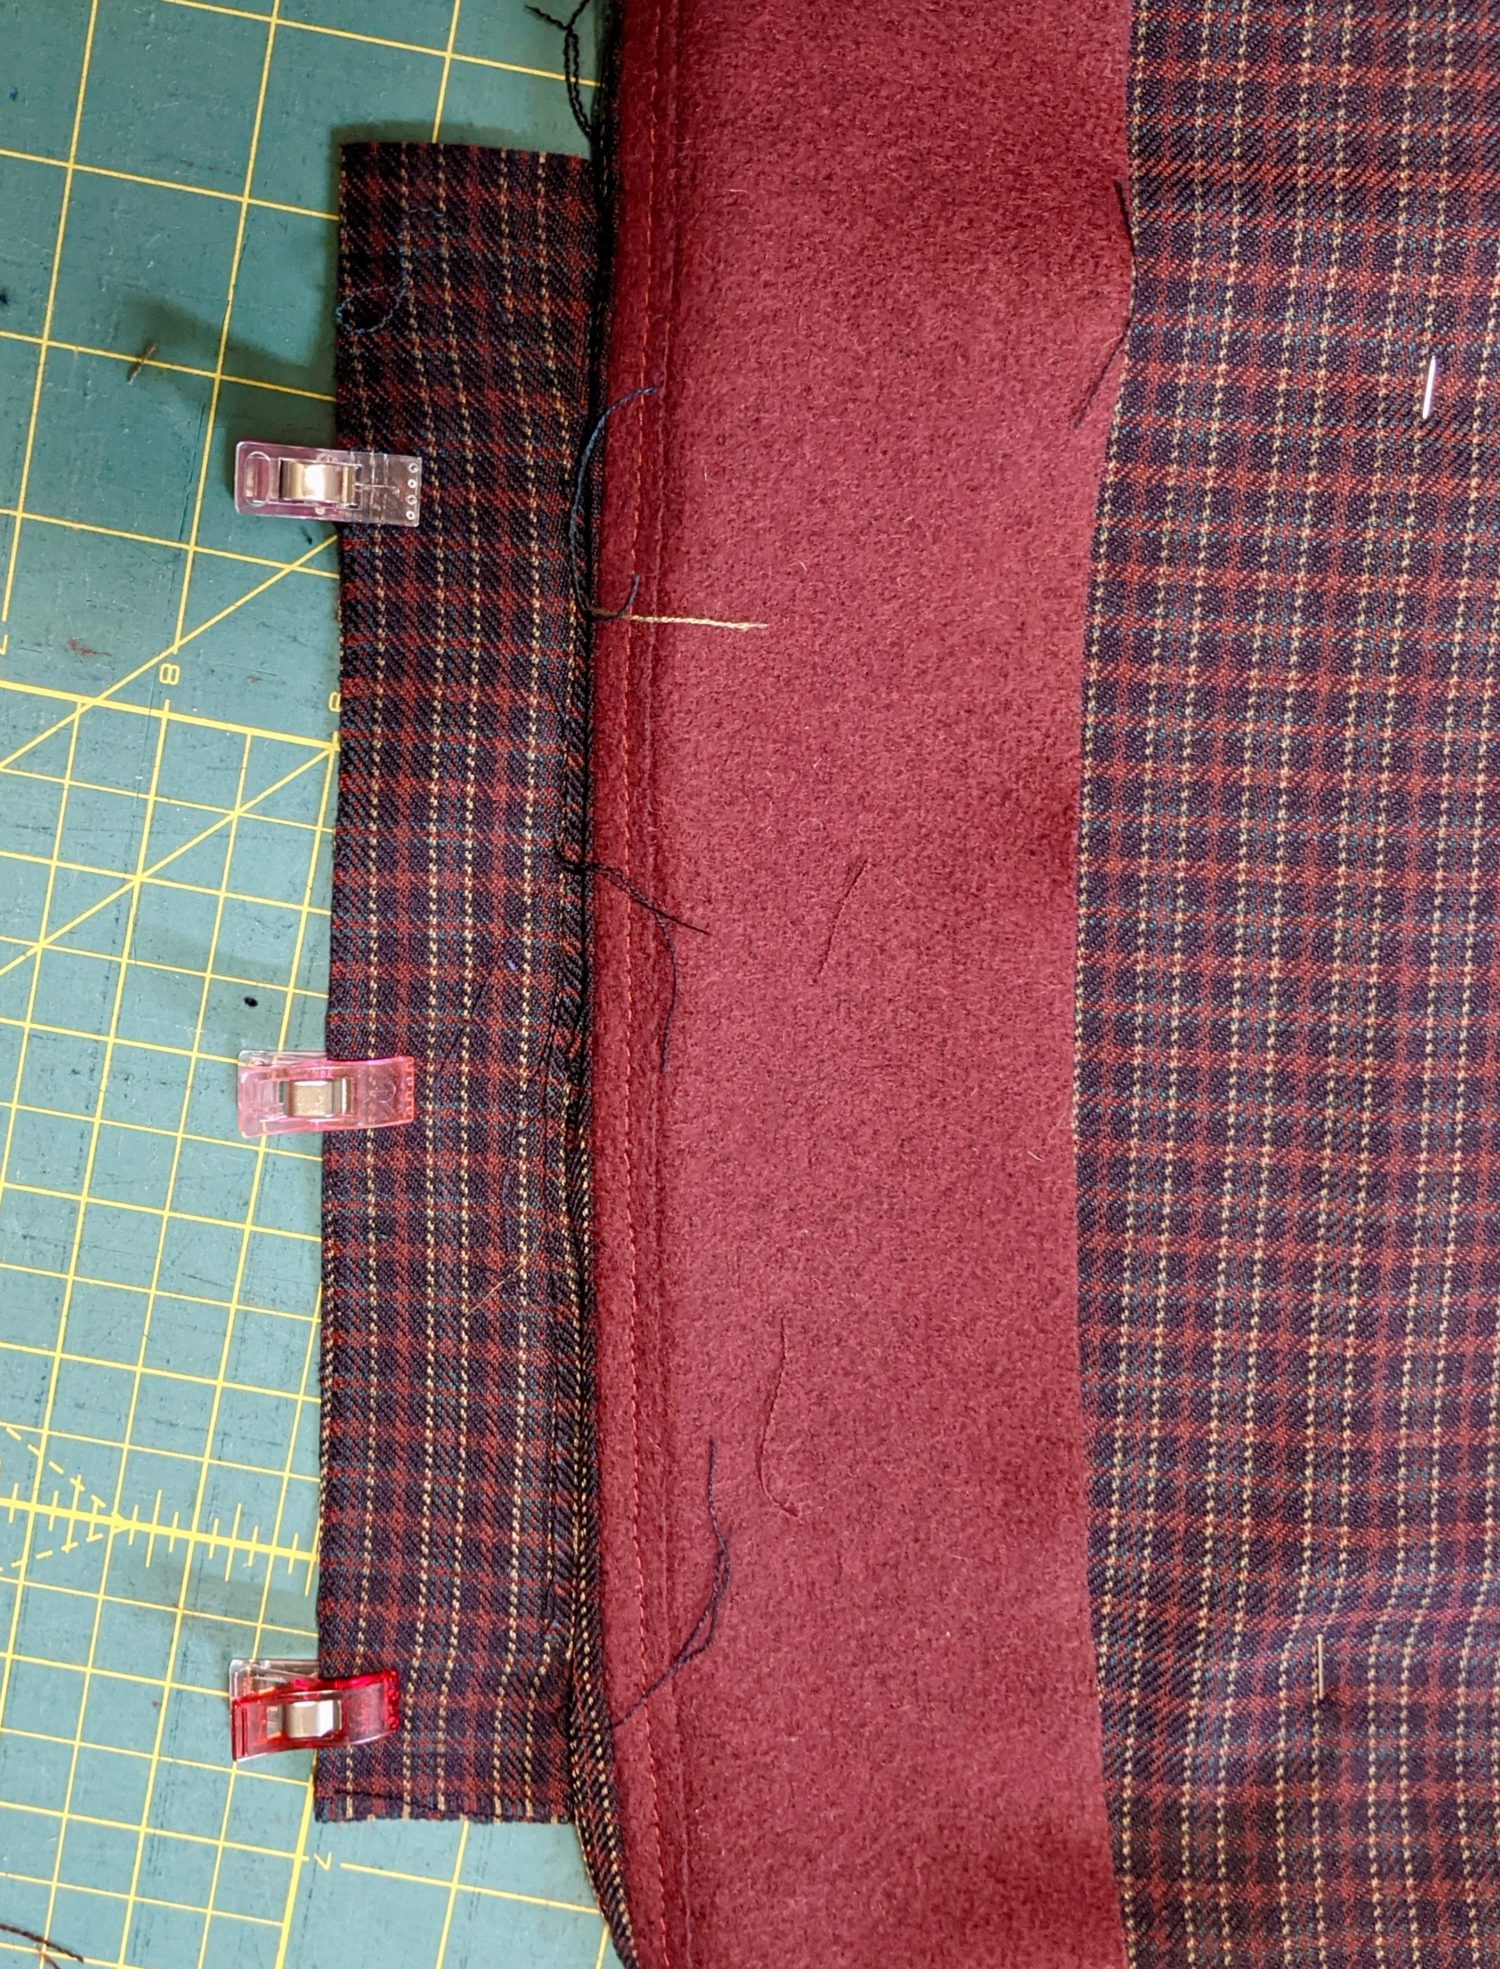
- I then sewed the front facing to the two front pieces and topstitched them down.
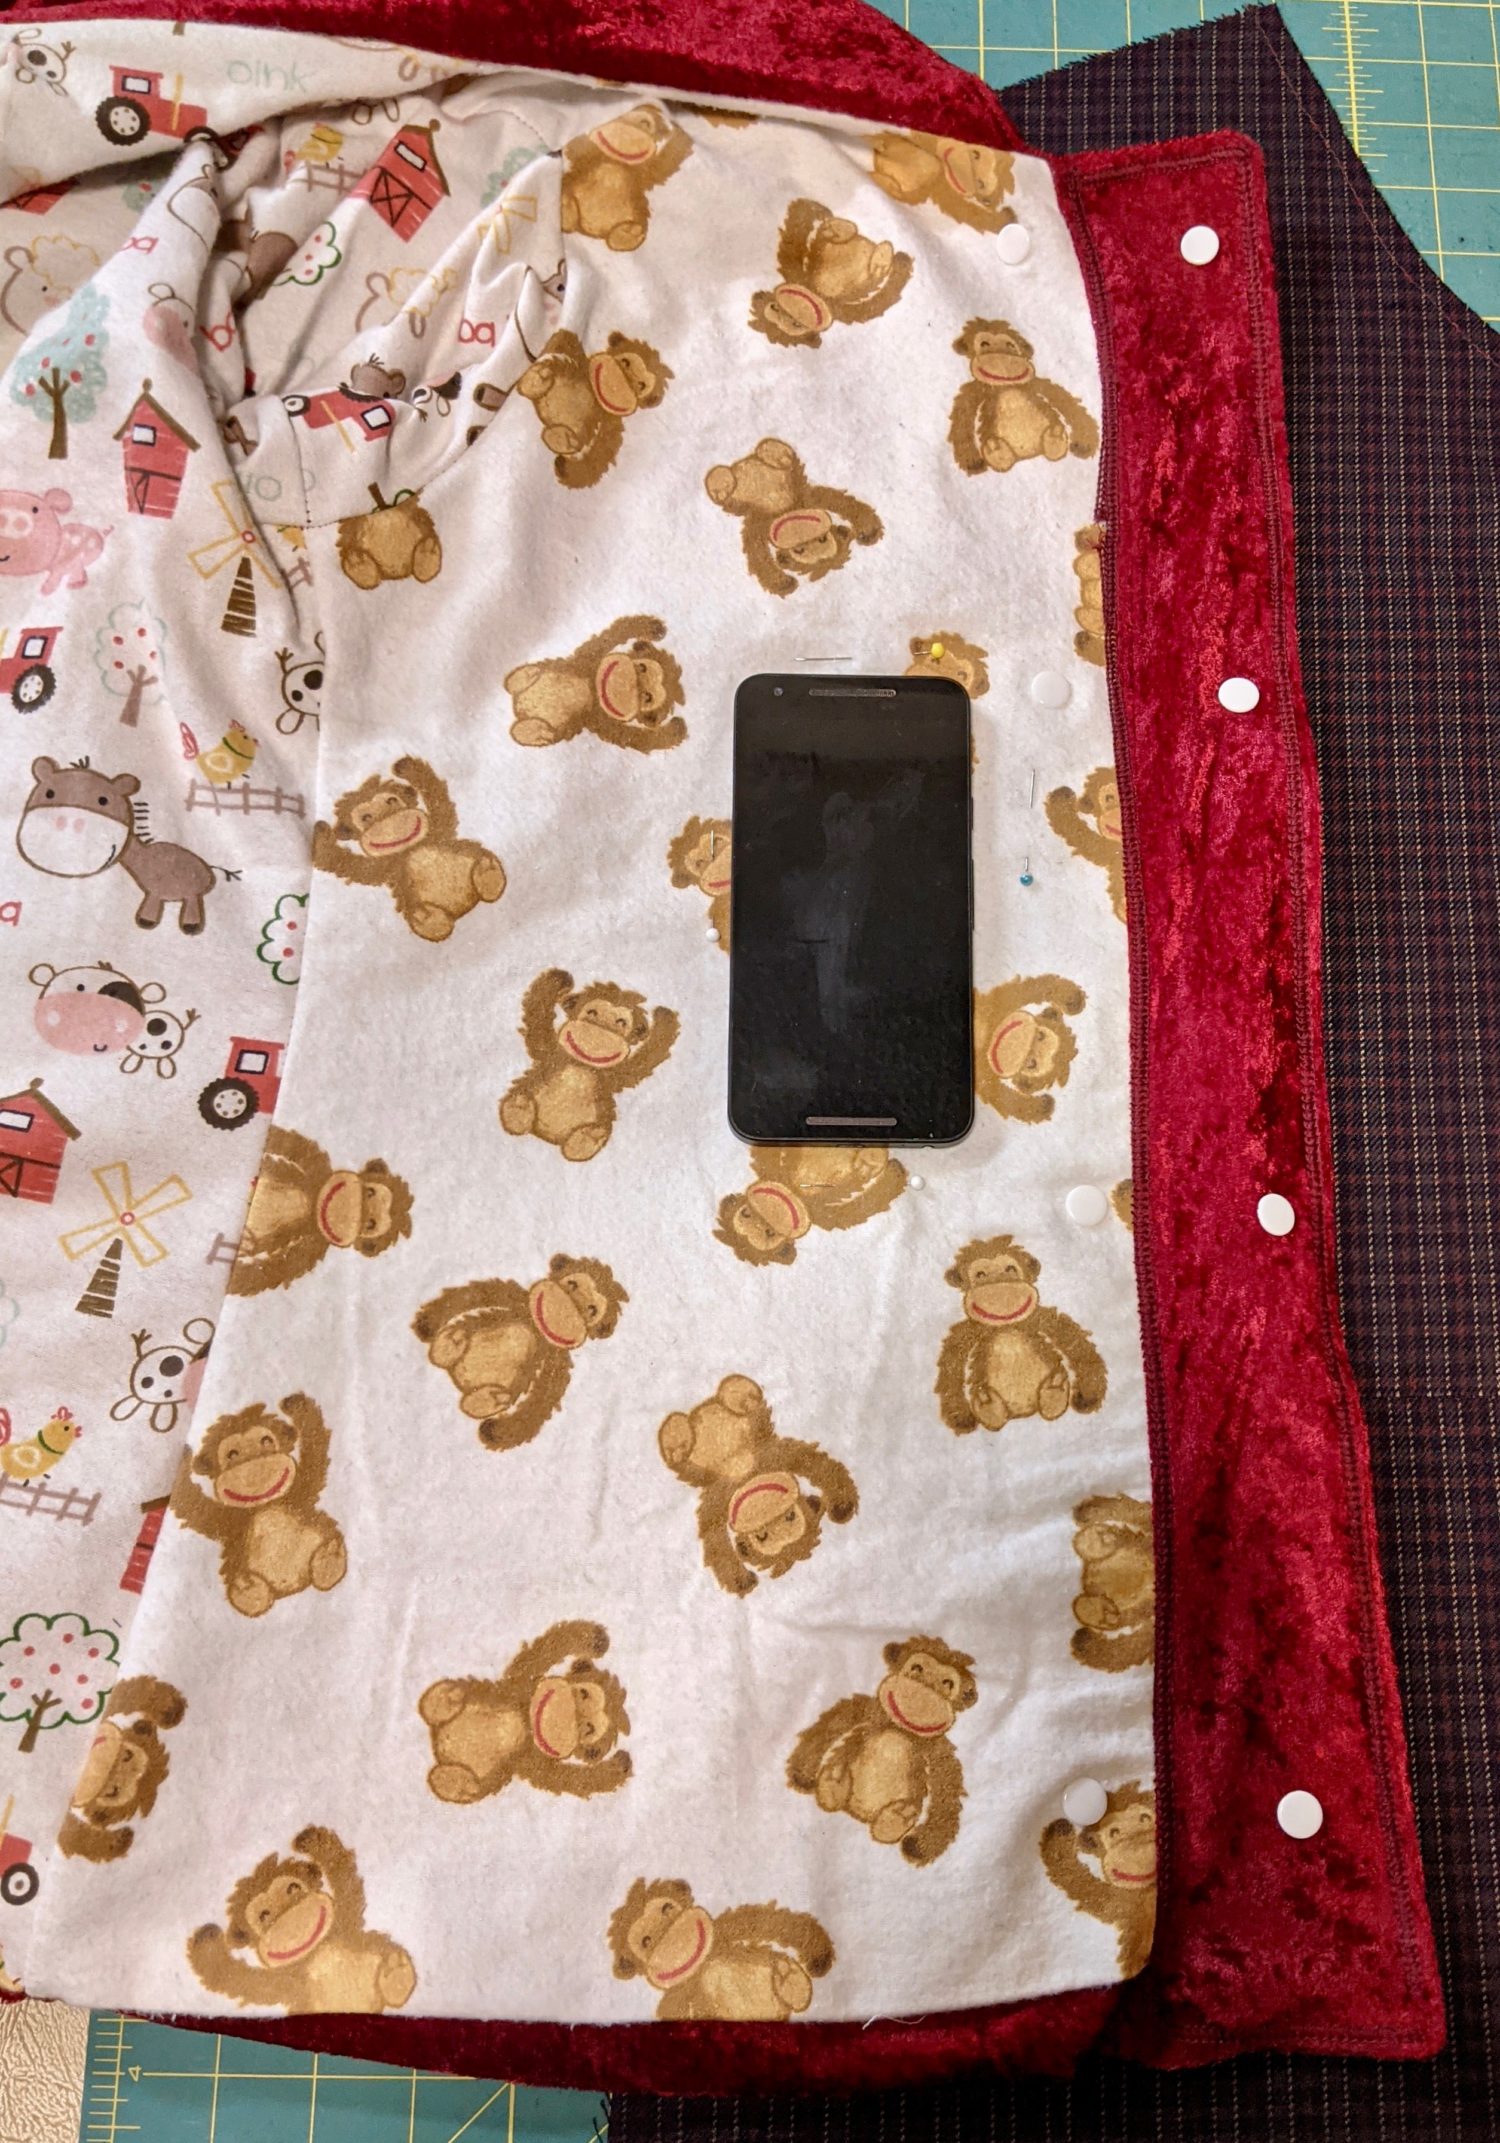
- I took the marking from the pins on my muslin and transferred them to my front lining pieces.
- You can see where I wanted my phone to go in the pins on this picture. The top of the phone will be about an inch below the bottom of the armscye.
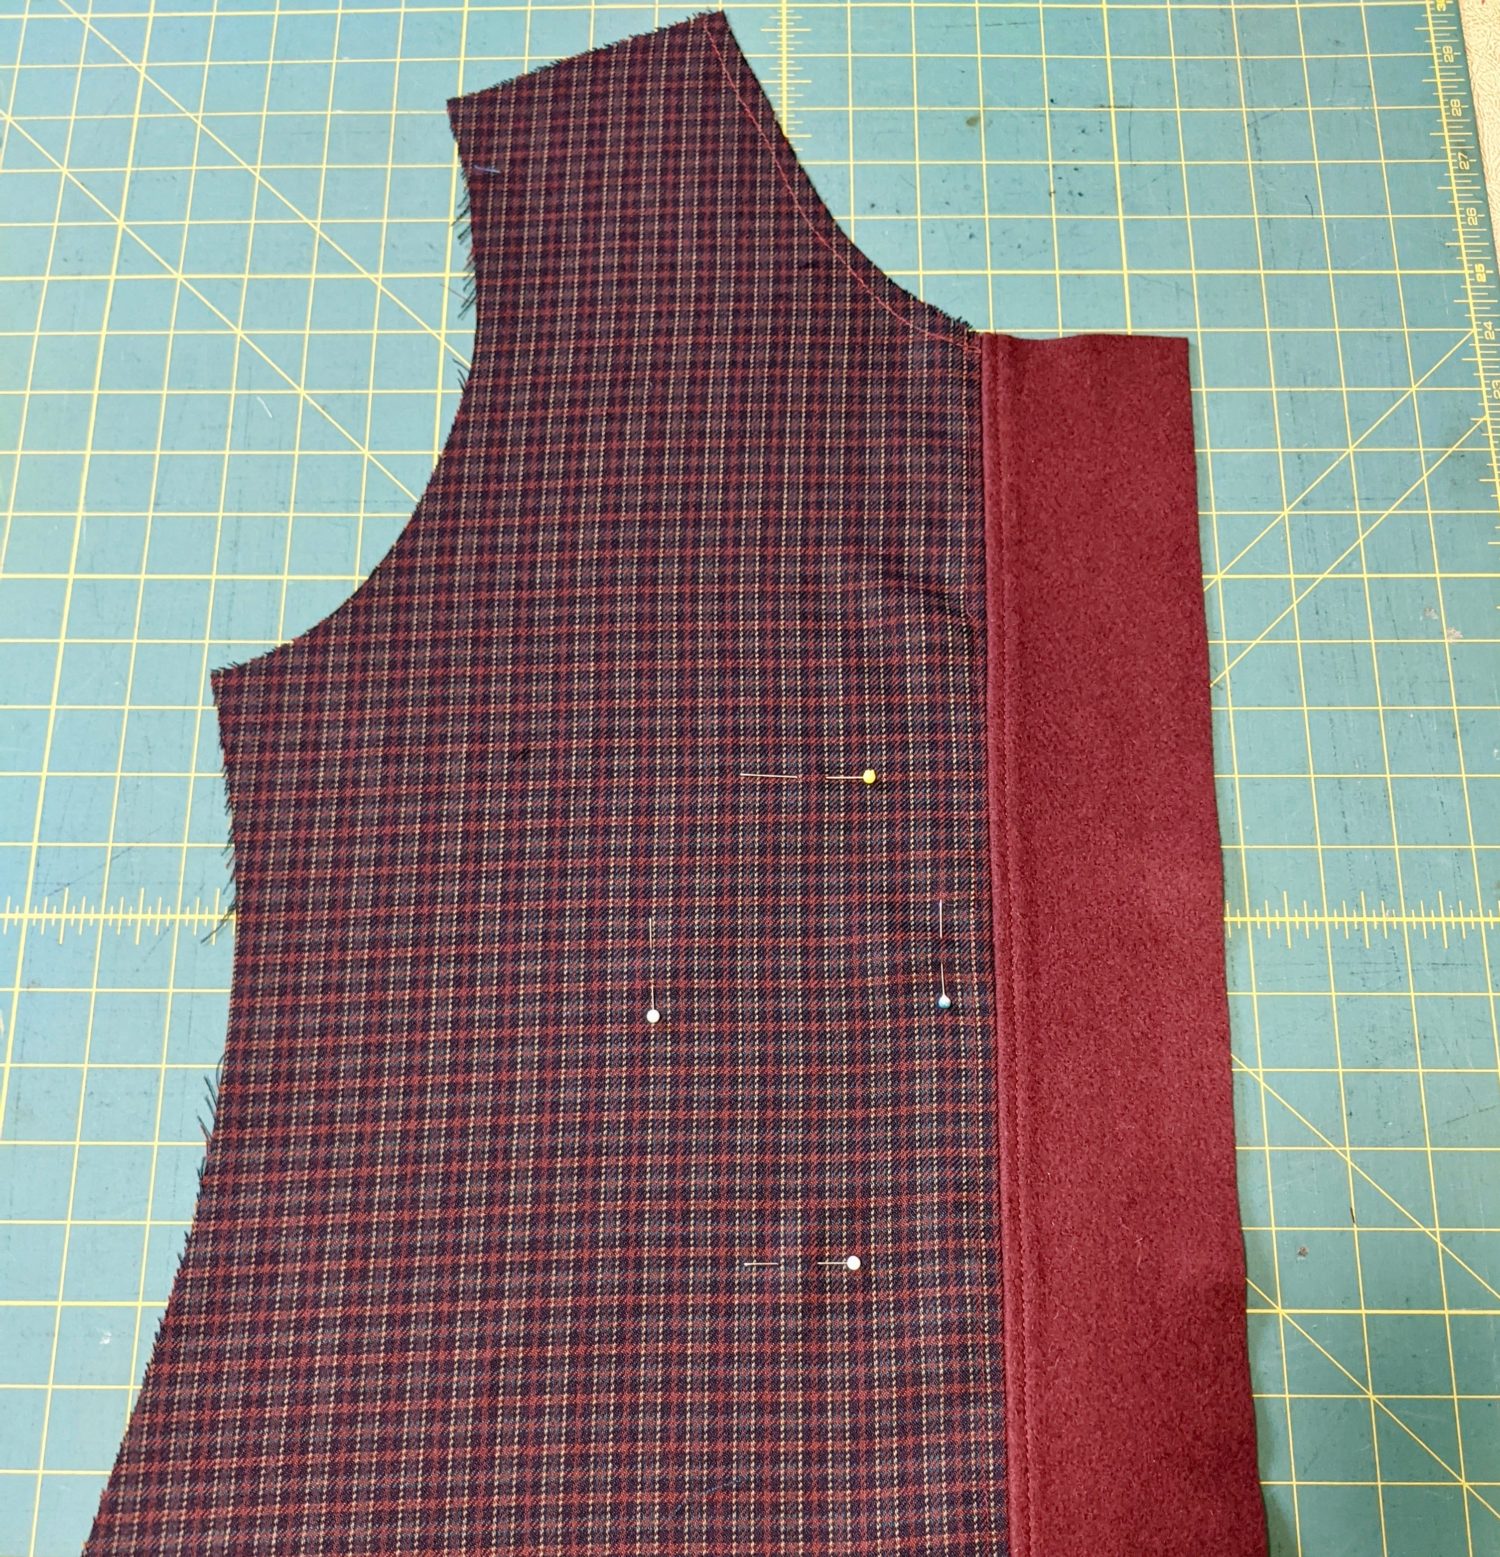
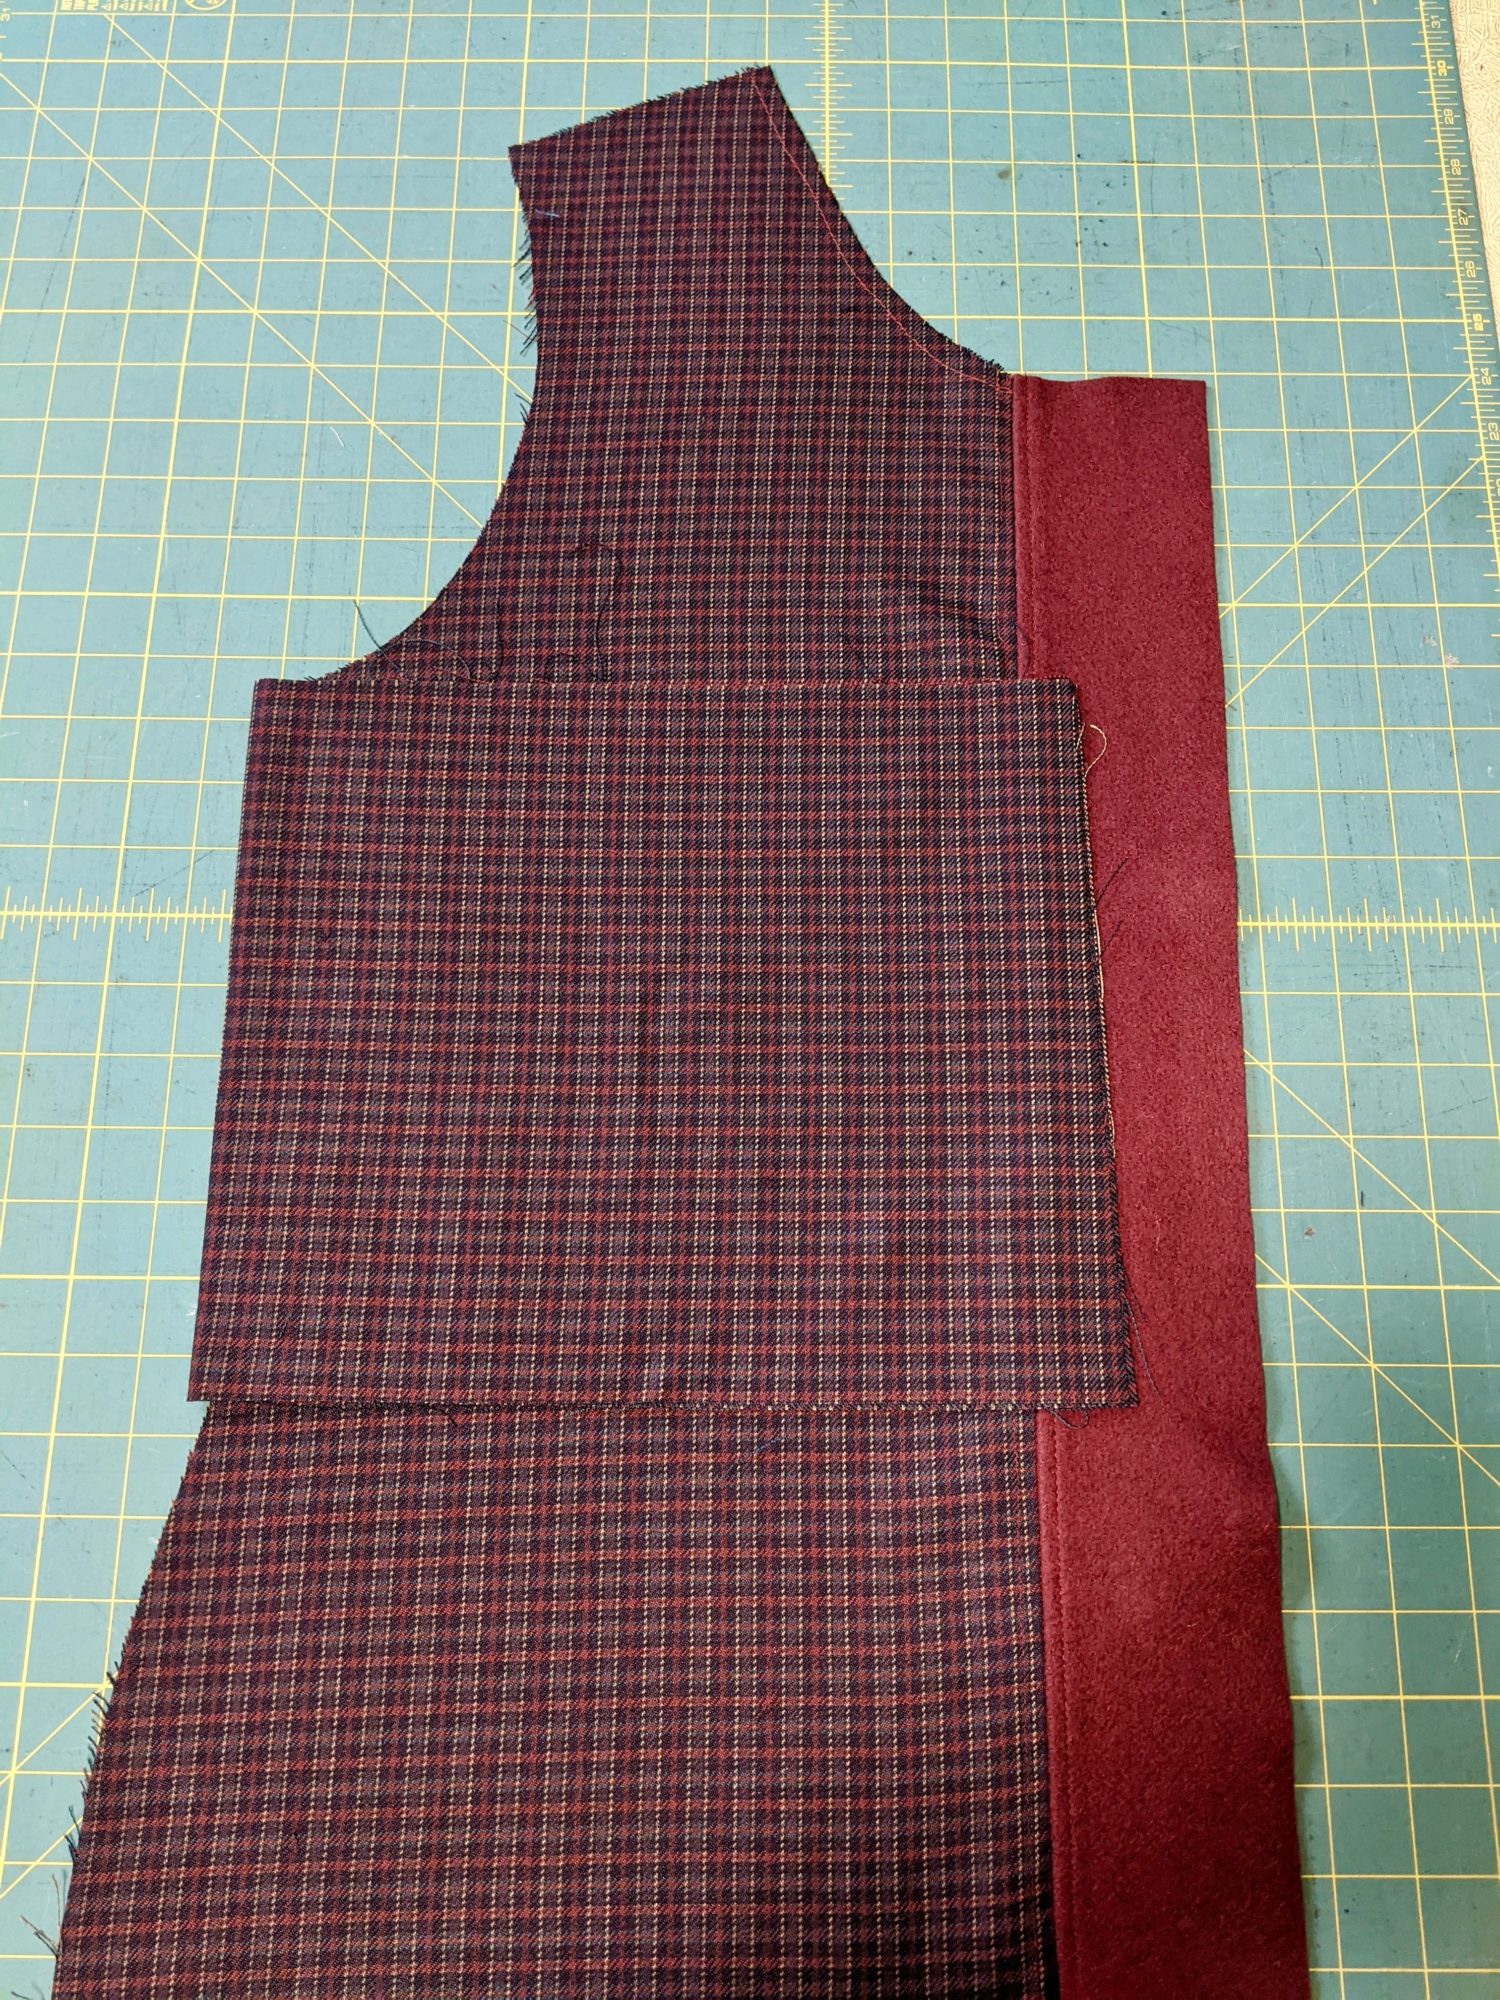
- Place the pocket piece right side down on top of the phone placement and pin the edges down.
- Line up the raw edge in the middle of the facing piece.
- Draw a long vertical rectangle (½ inch wide) on the front lining just to the left of the facing. This is where the zipper will go.
- Then draw a line down the middle of the rectangle, stopping about ⅜ inch from the top of the rectangle.
- Connect the center line to the four points, making a triangle at the top and bottom.
- Stitch around the rectangle, putting your needle down at the corners and pivoting to the next side.
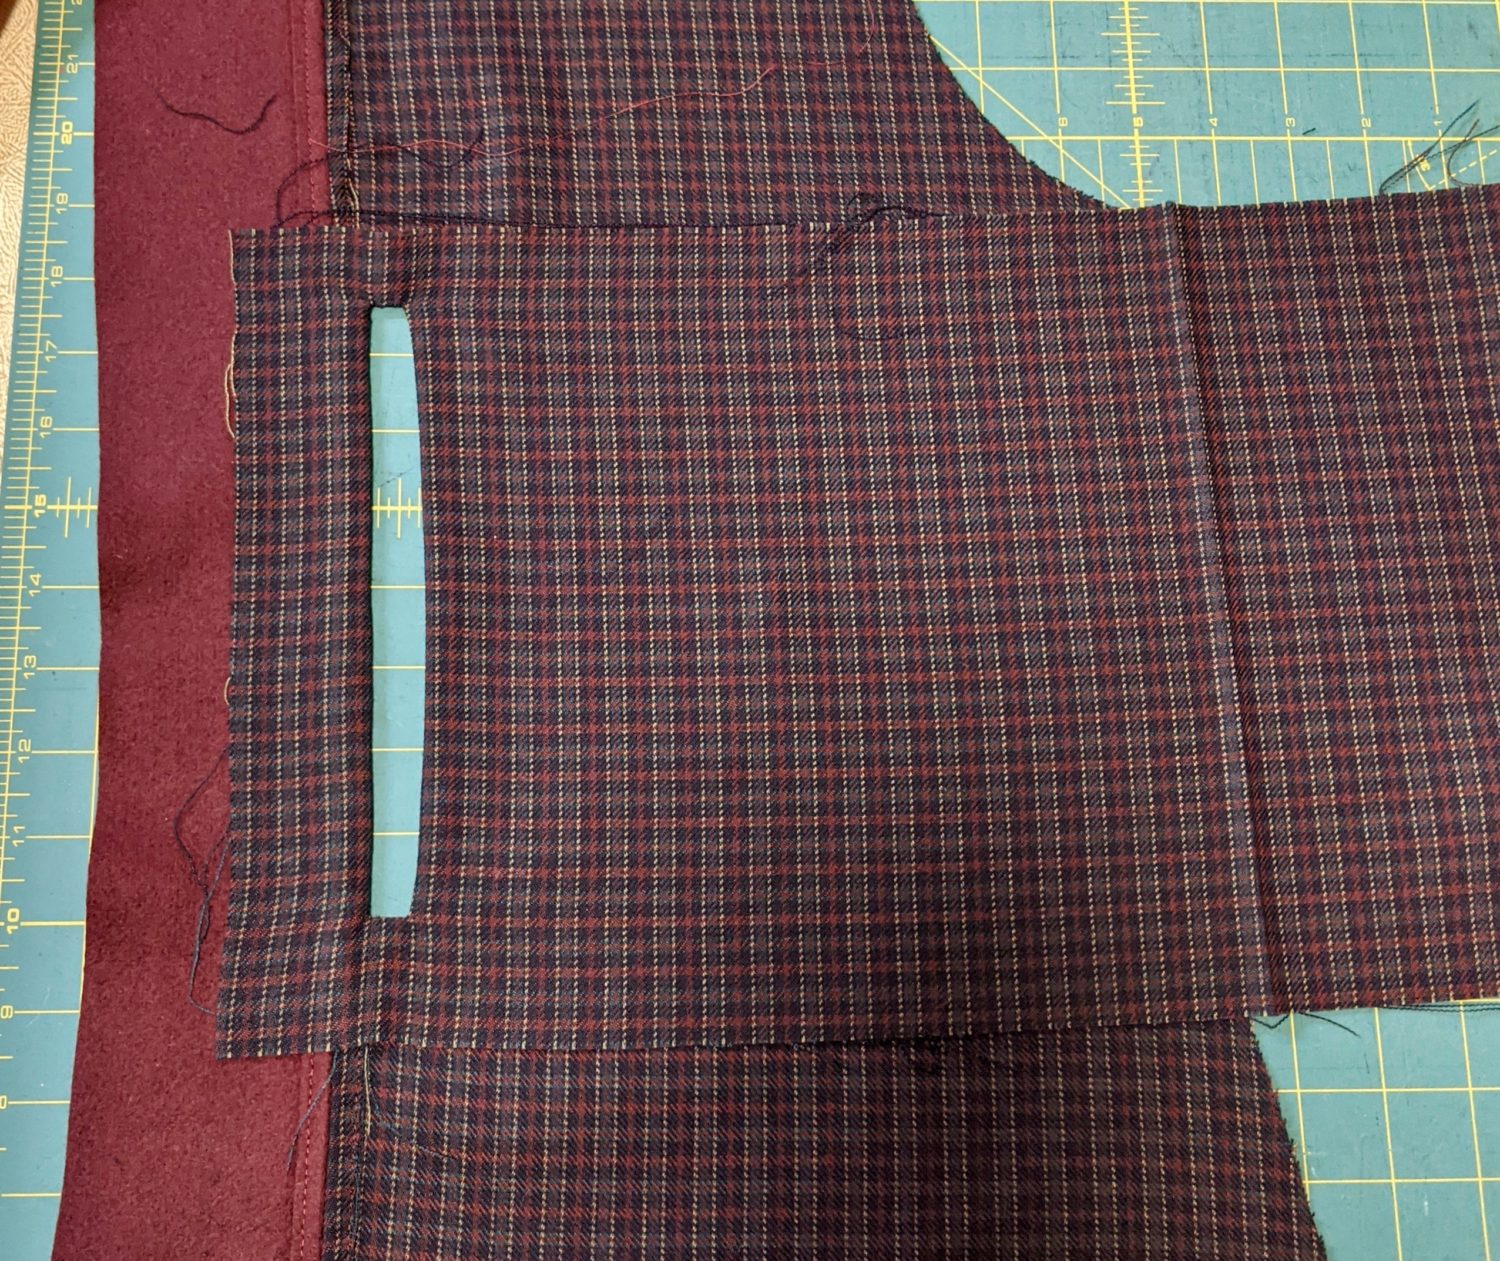
- After stitching down the edges, use your rotary cutter or scissors to cut a small opening at the middle of the center line.
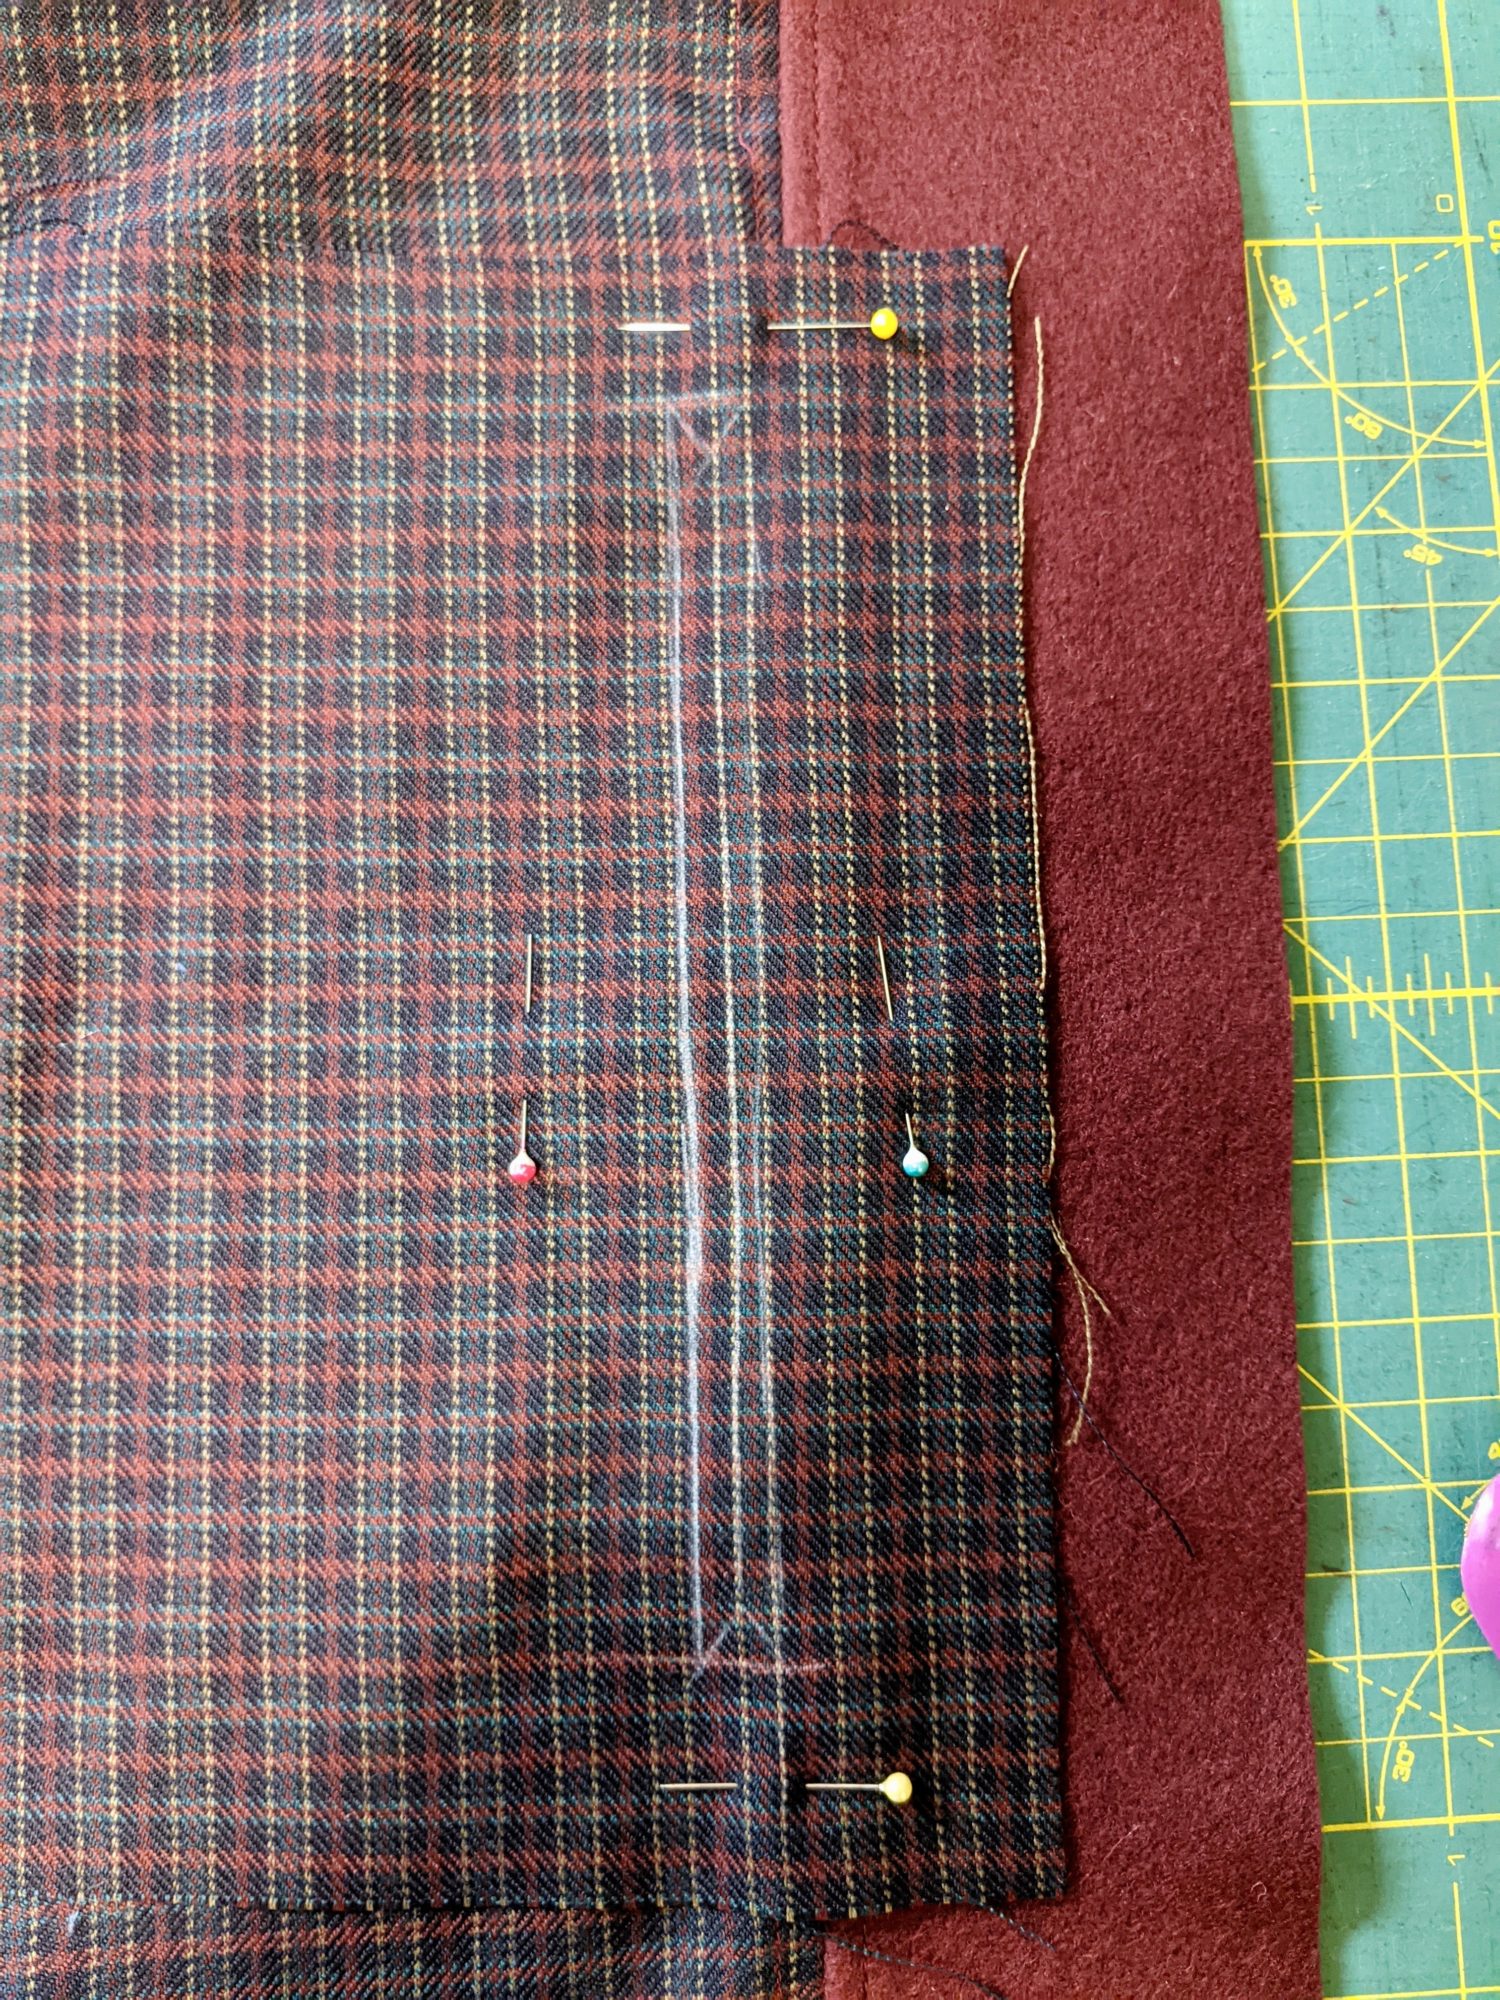
Draw your stitch guidelines and sew. 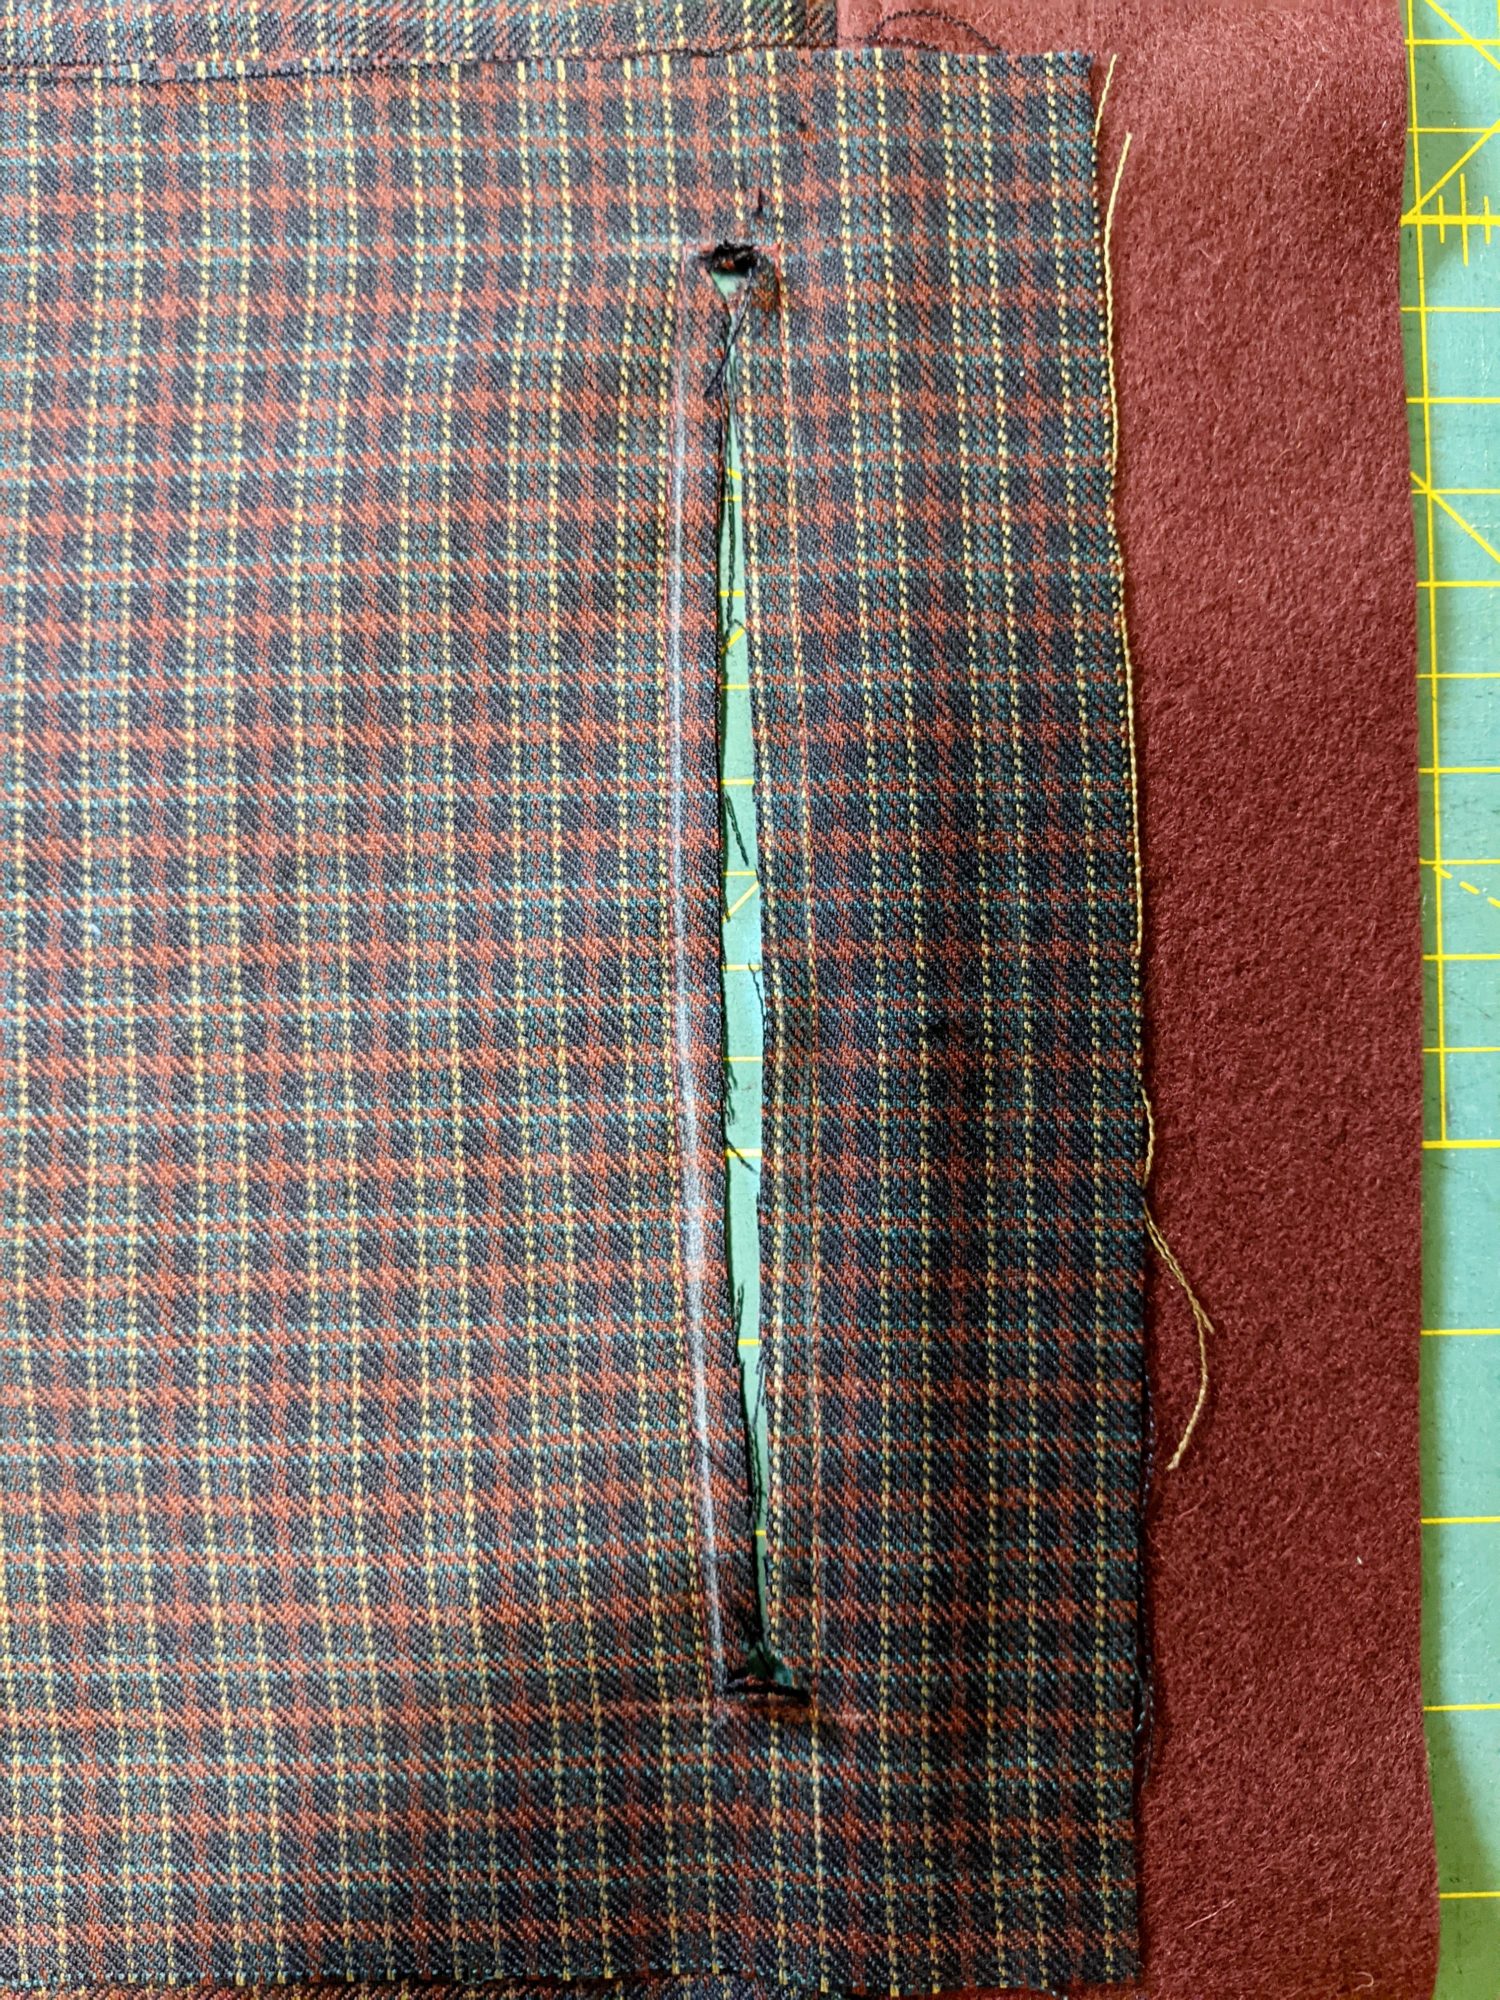
Cut along the middle of the center line.
- Use your scissors to cut in both directions to the ends of the line, making sure just to cut through the pocket piece and lining front.
- I also cut the triangles to the points of the rectangle as well, cutting as close as I could without cutting through my stitching.
- Turn the pocket piece to the wrong side of the front lining and press it down, making sure that all of the corners and edges are crisp.
Wrong side of opening after it is pressed. 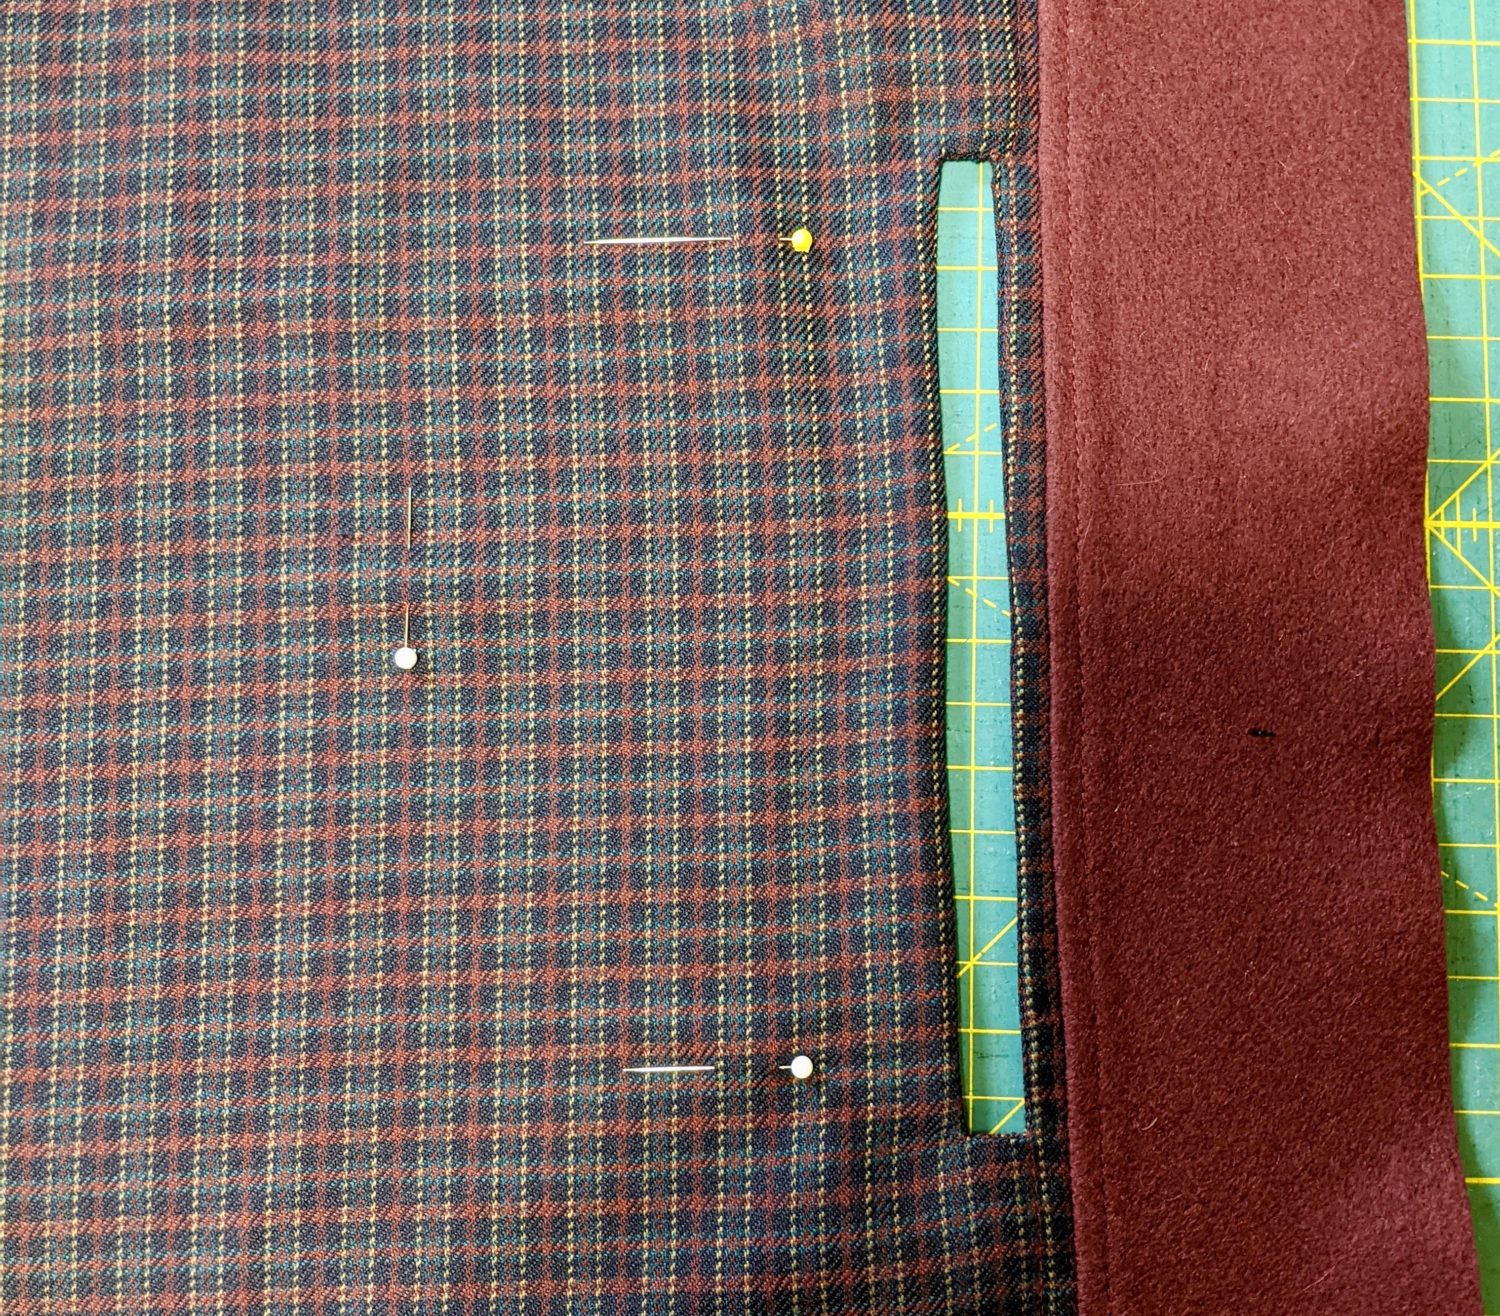
Right side of opening with pins still in marking the phone placement.
Attaching the Zipper:
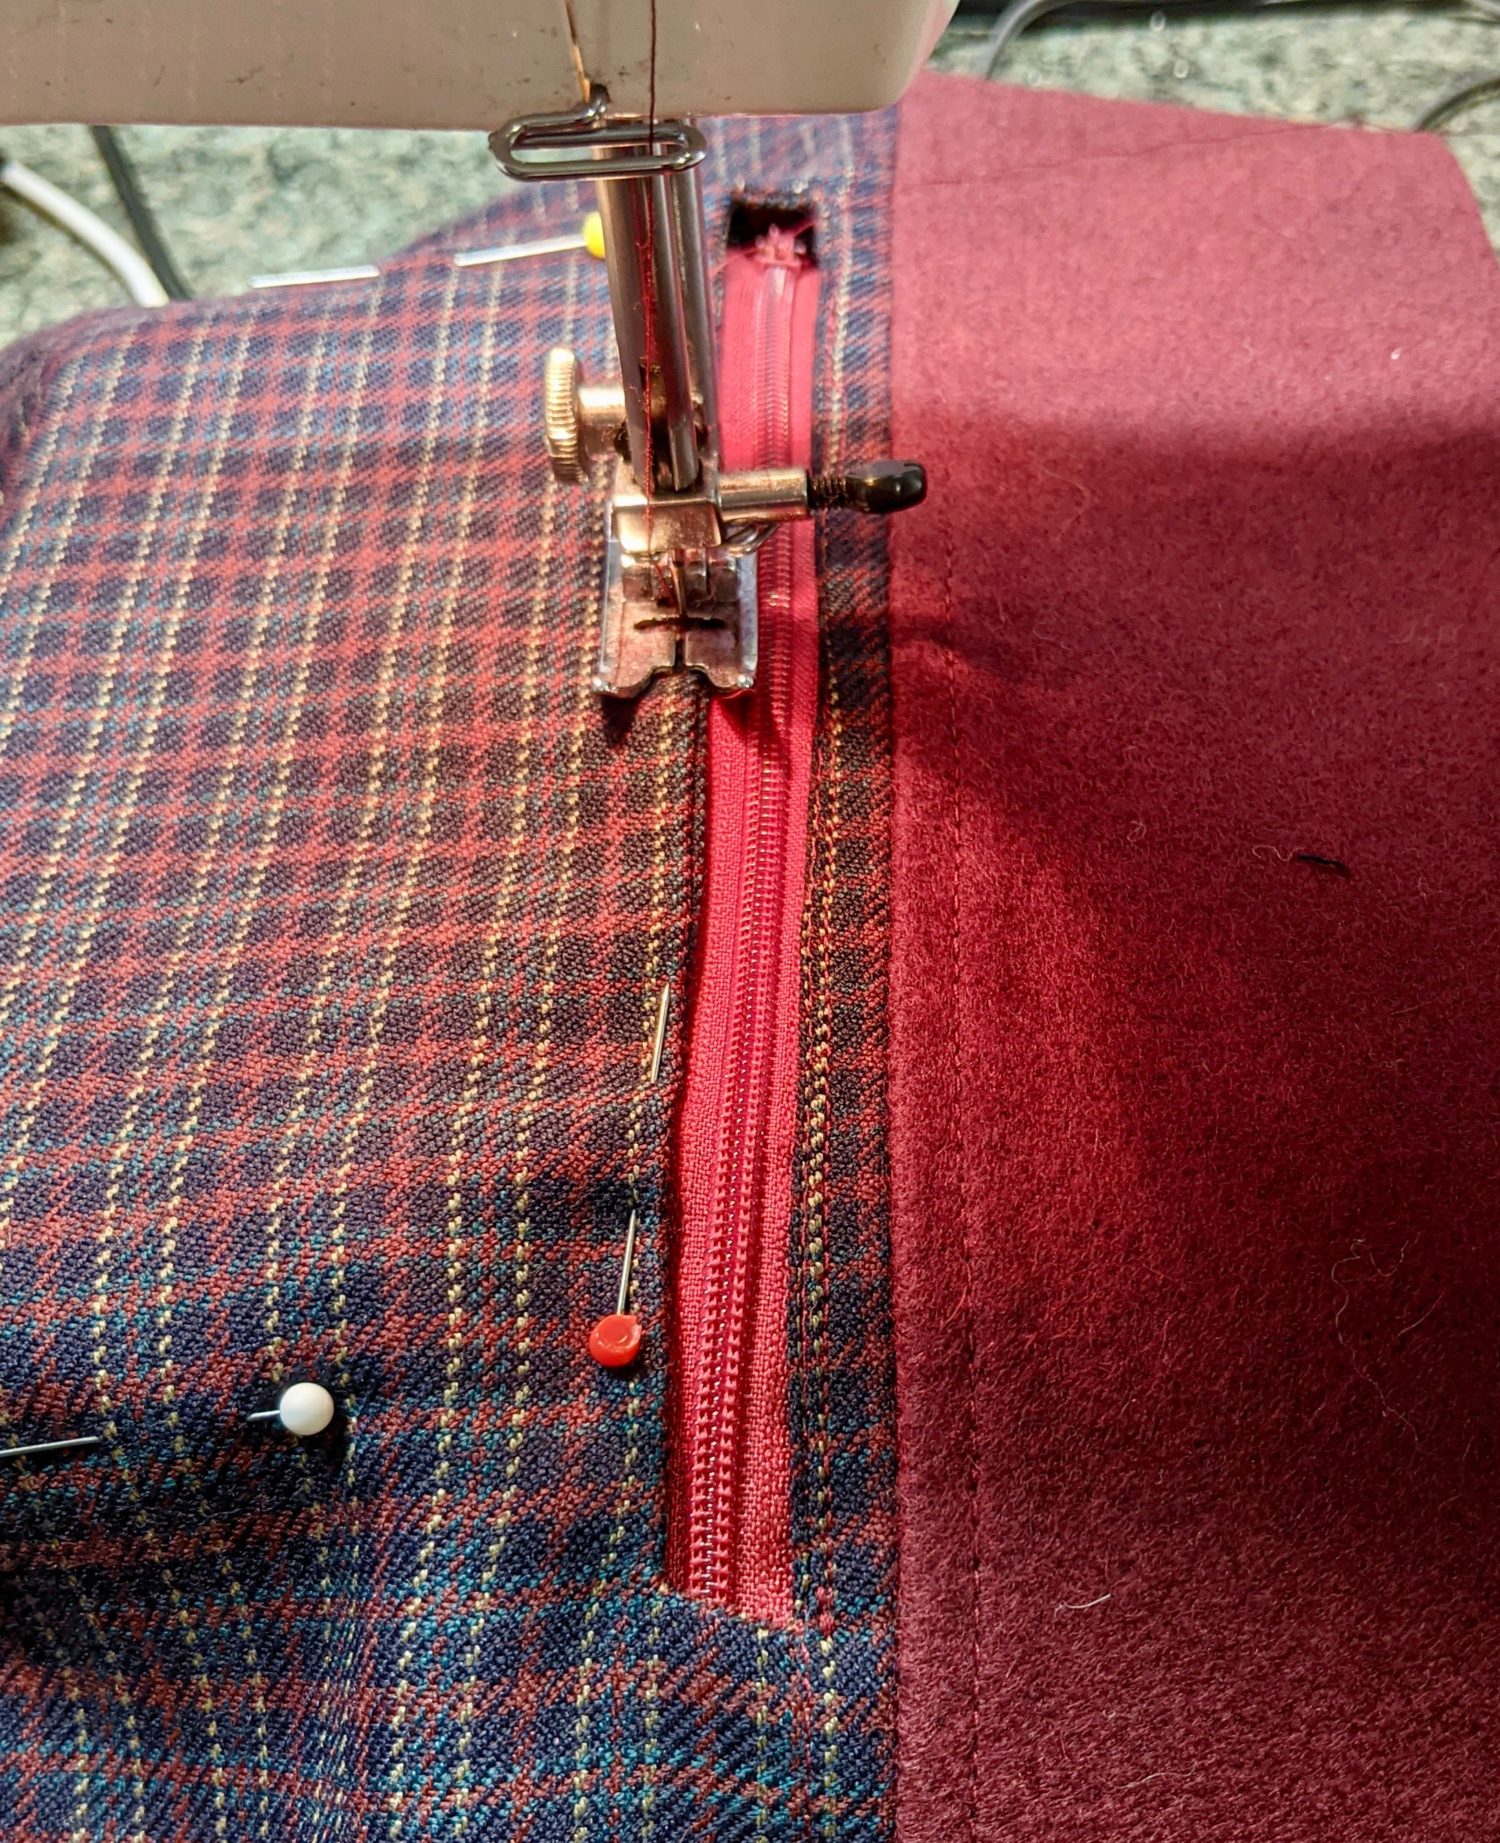
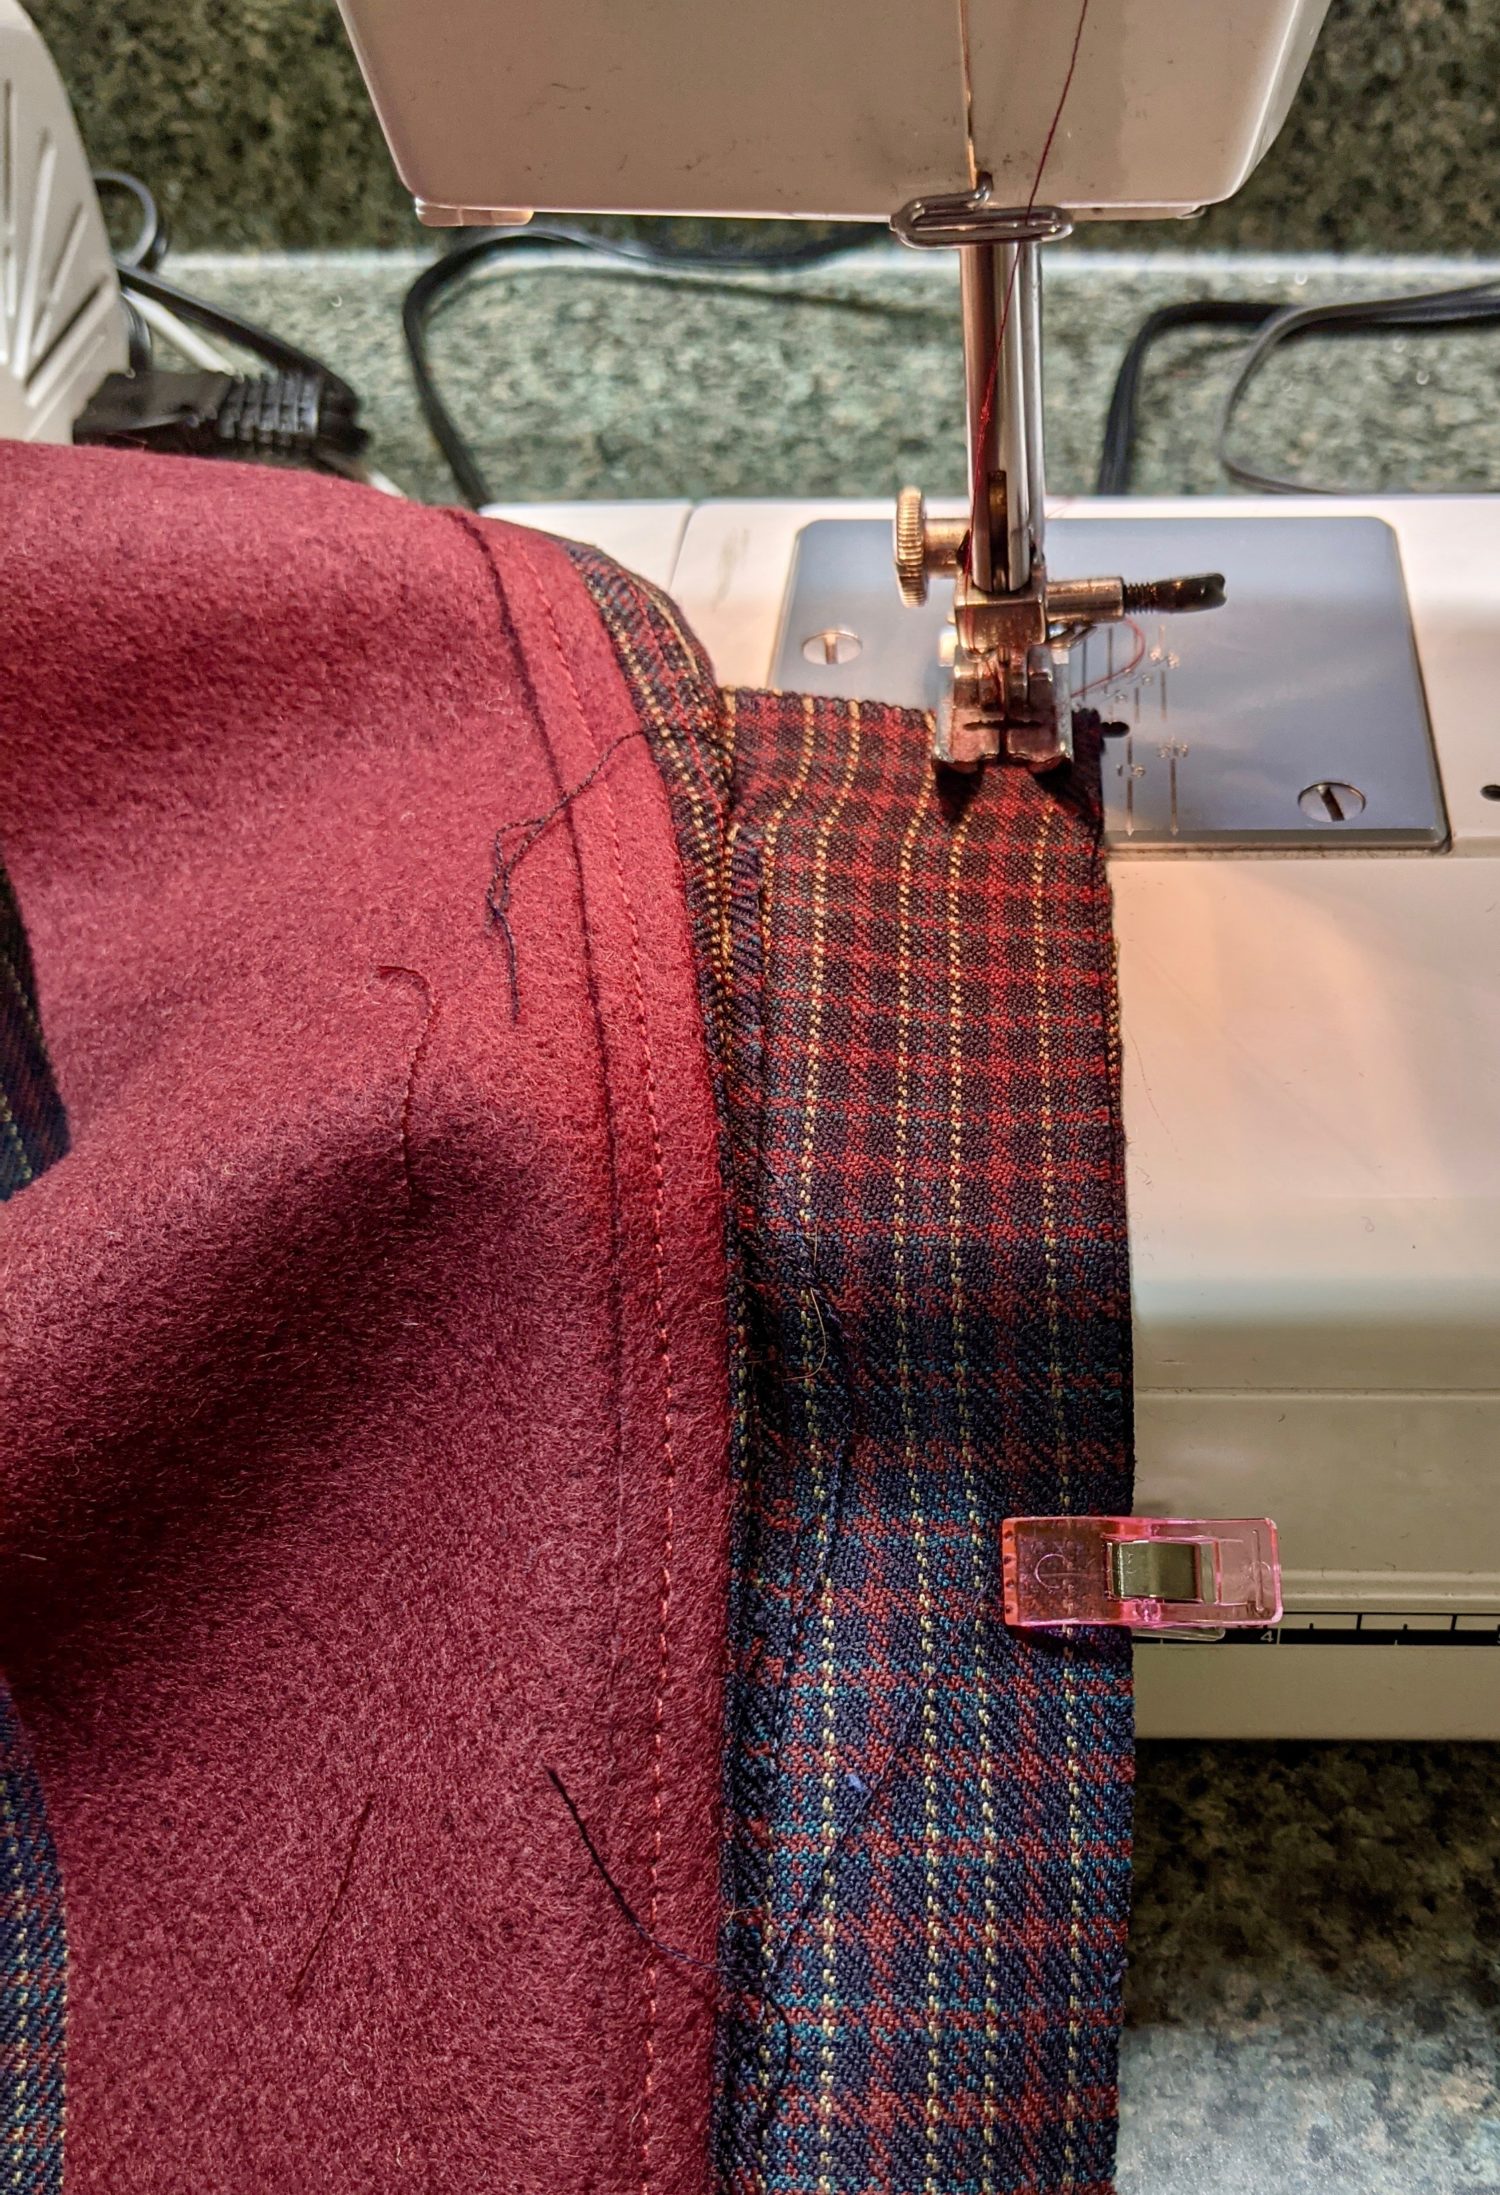
- Pin the zipper to the wrong side of the opening so the zipper pull is right at the top. (It doesn’t matter if the bottom of the zipper goes below the opening.)
- I just used pins, but you could use wash-away wonder tape as well.
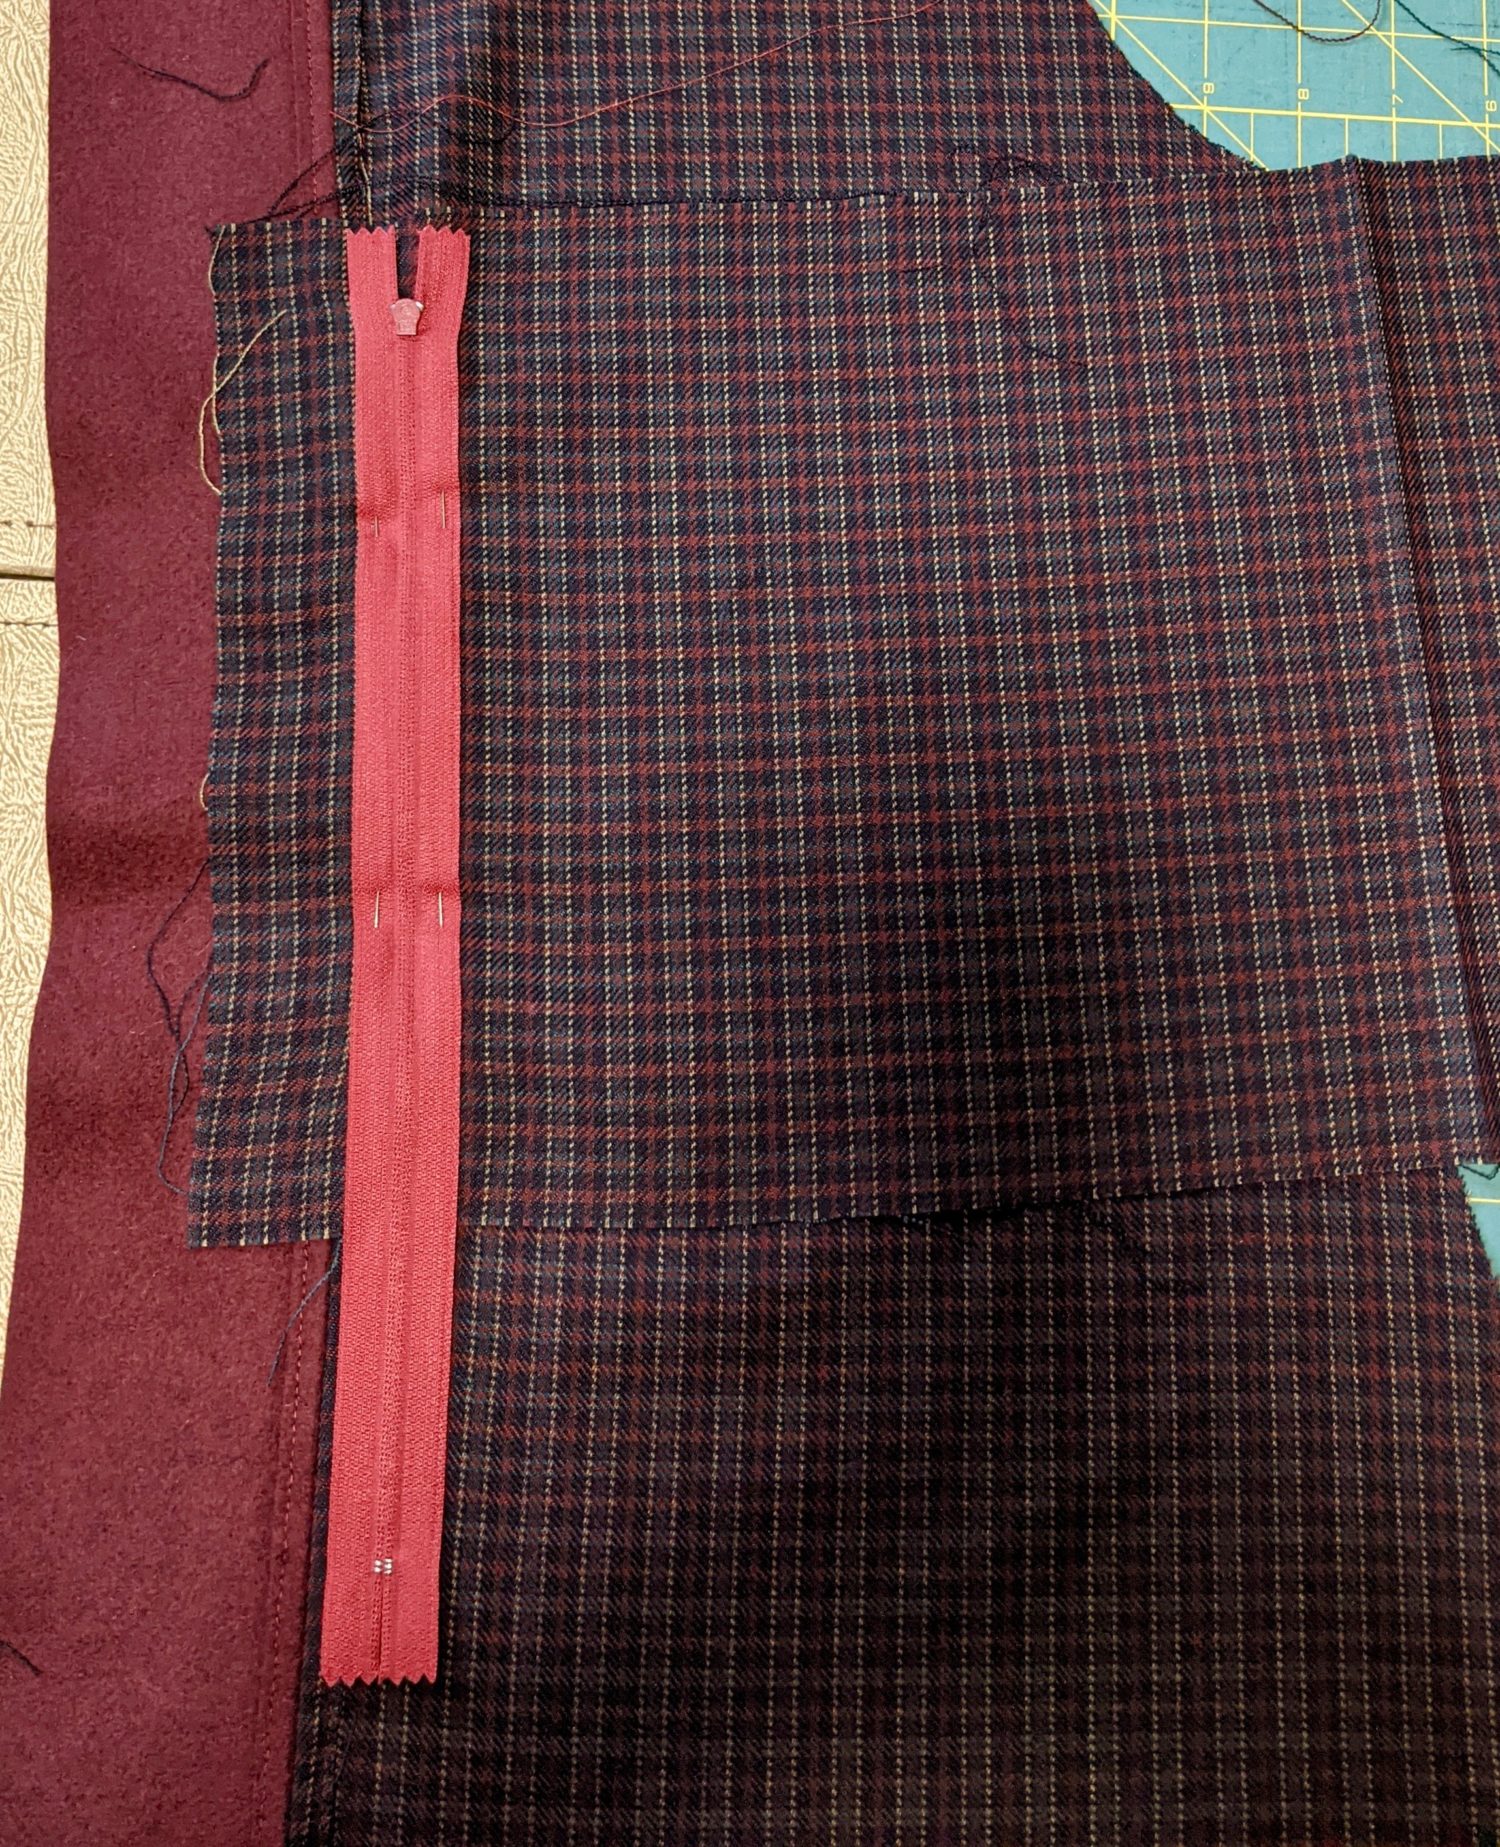
Zipper from the back side 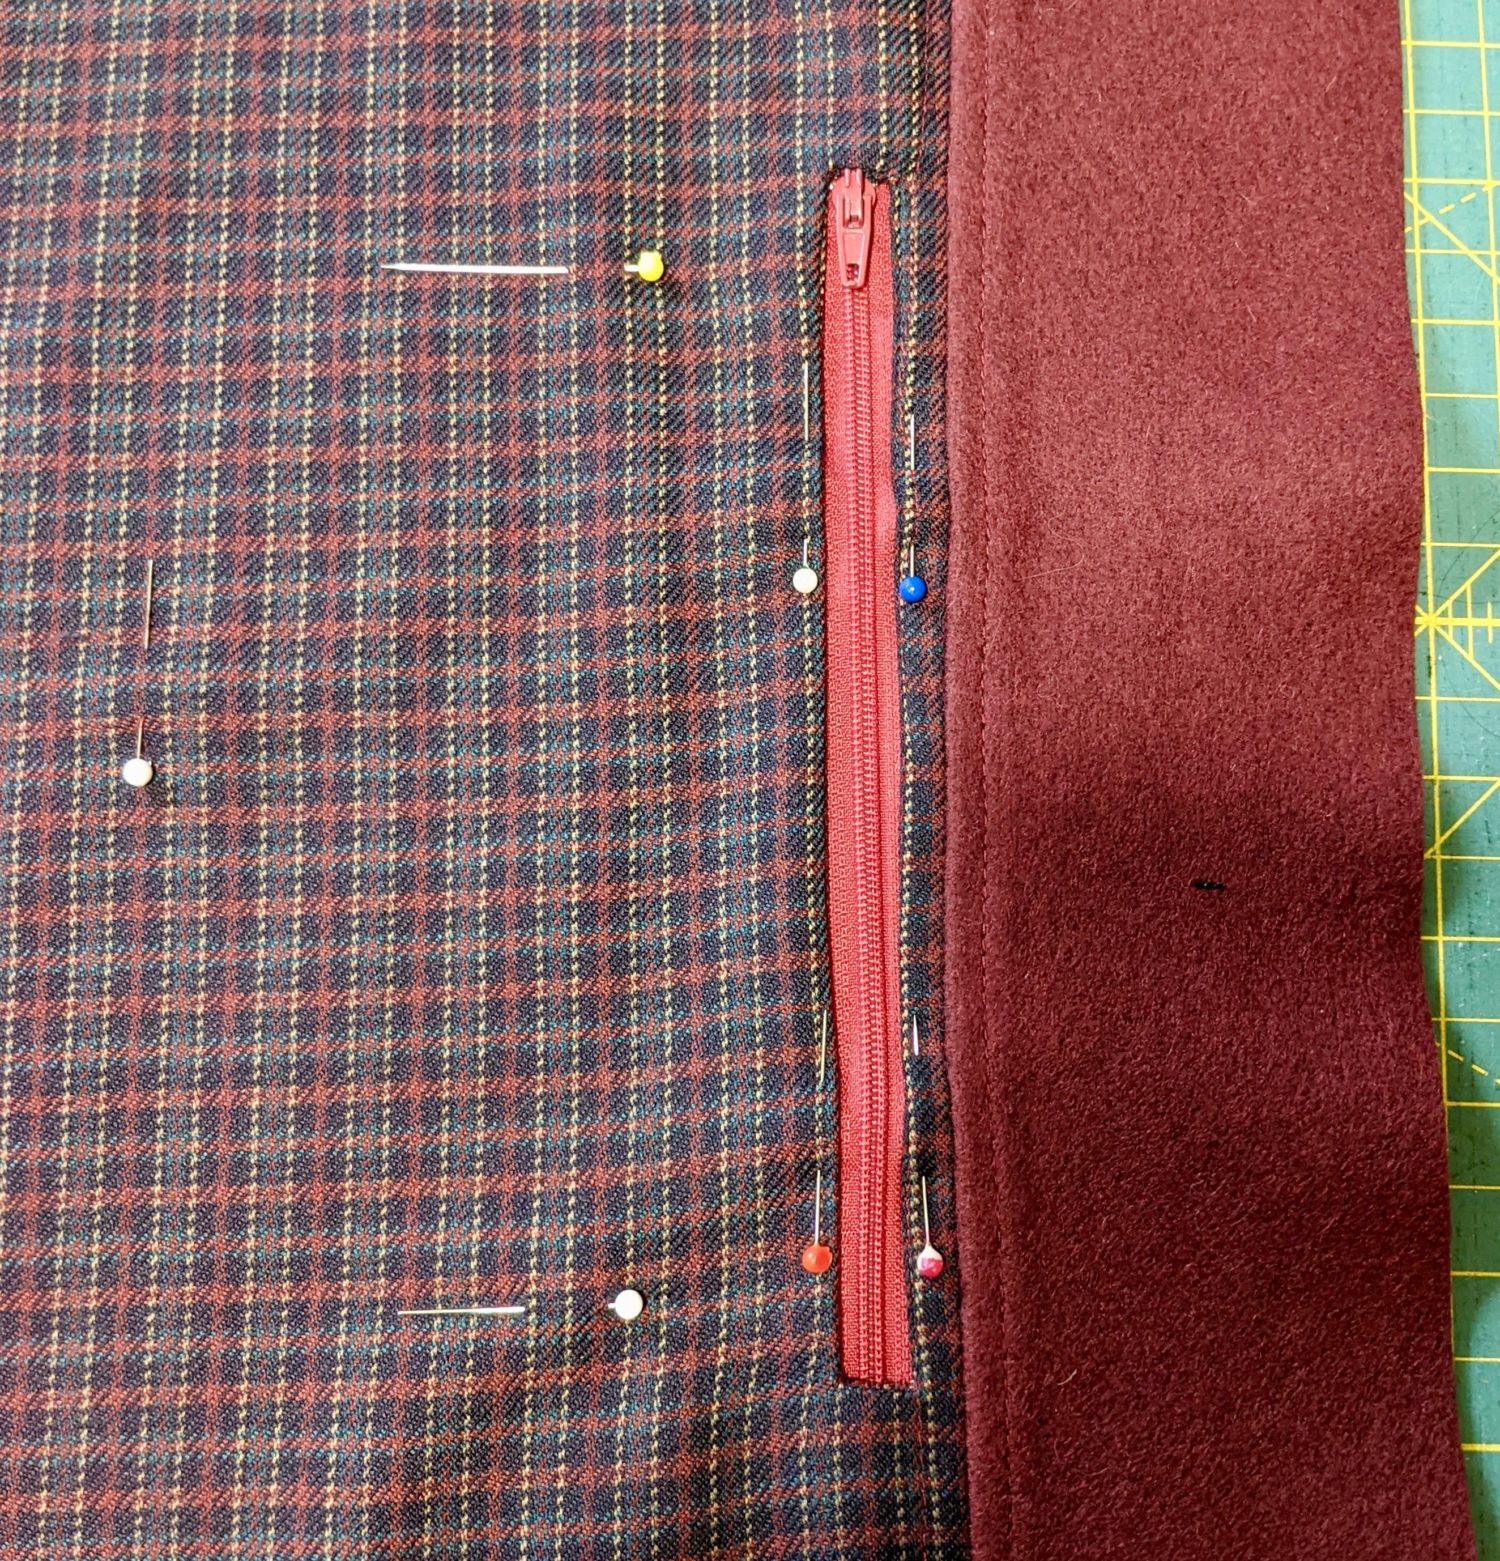
Zipper from the front side
- Stitch from top-to-bottom on both sides so the zipper doesn’t warp strangely, and also stitch across the top and bottom.
- To stitch the zipper down, I just used my regular presser foot, because I didn’t need to stitch right next to the zipper.
- Cut off any excess zipper at the bottom. Make sure to not use your nice fabric scissors to cut the zipper!
Sew along sides, top and bottom 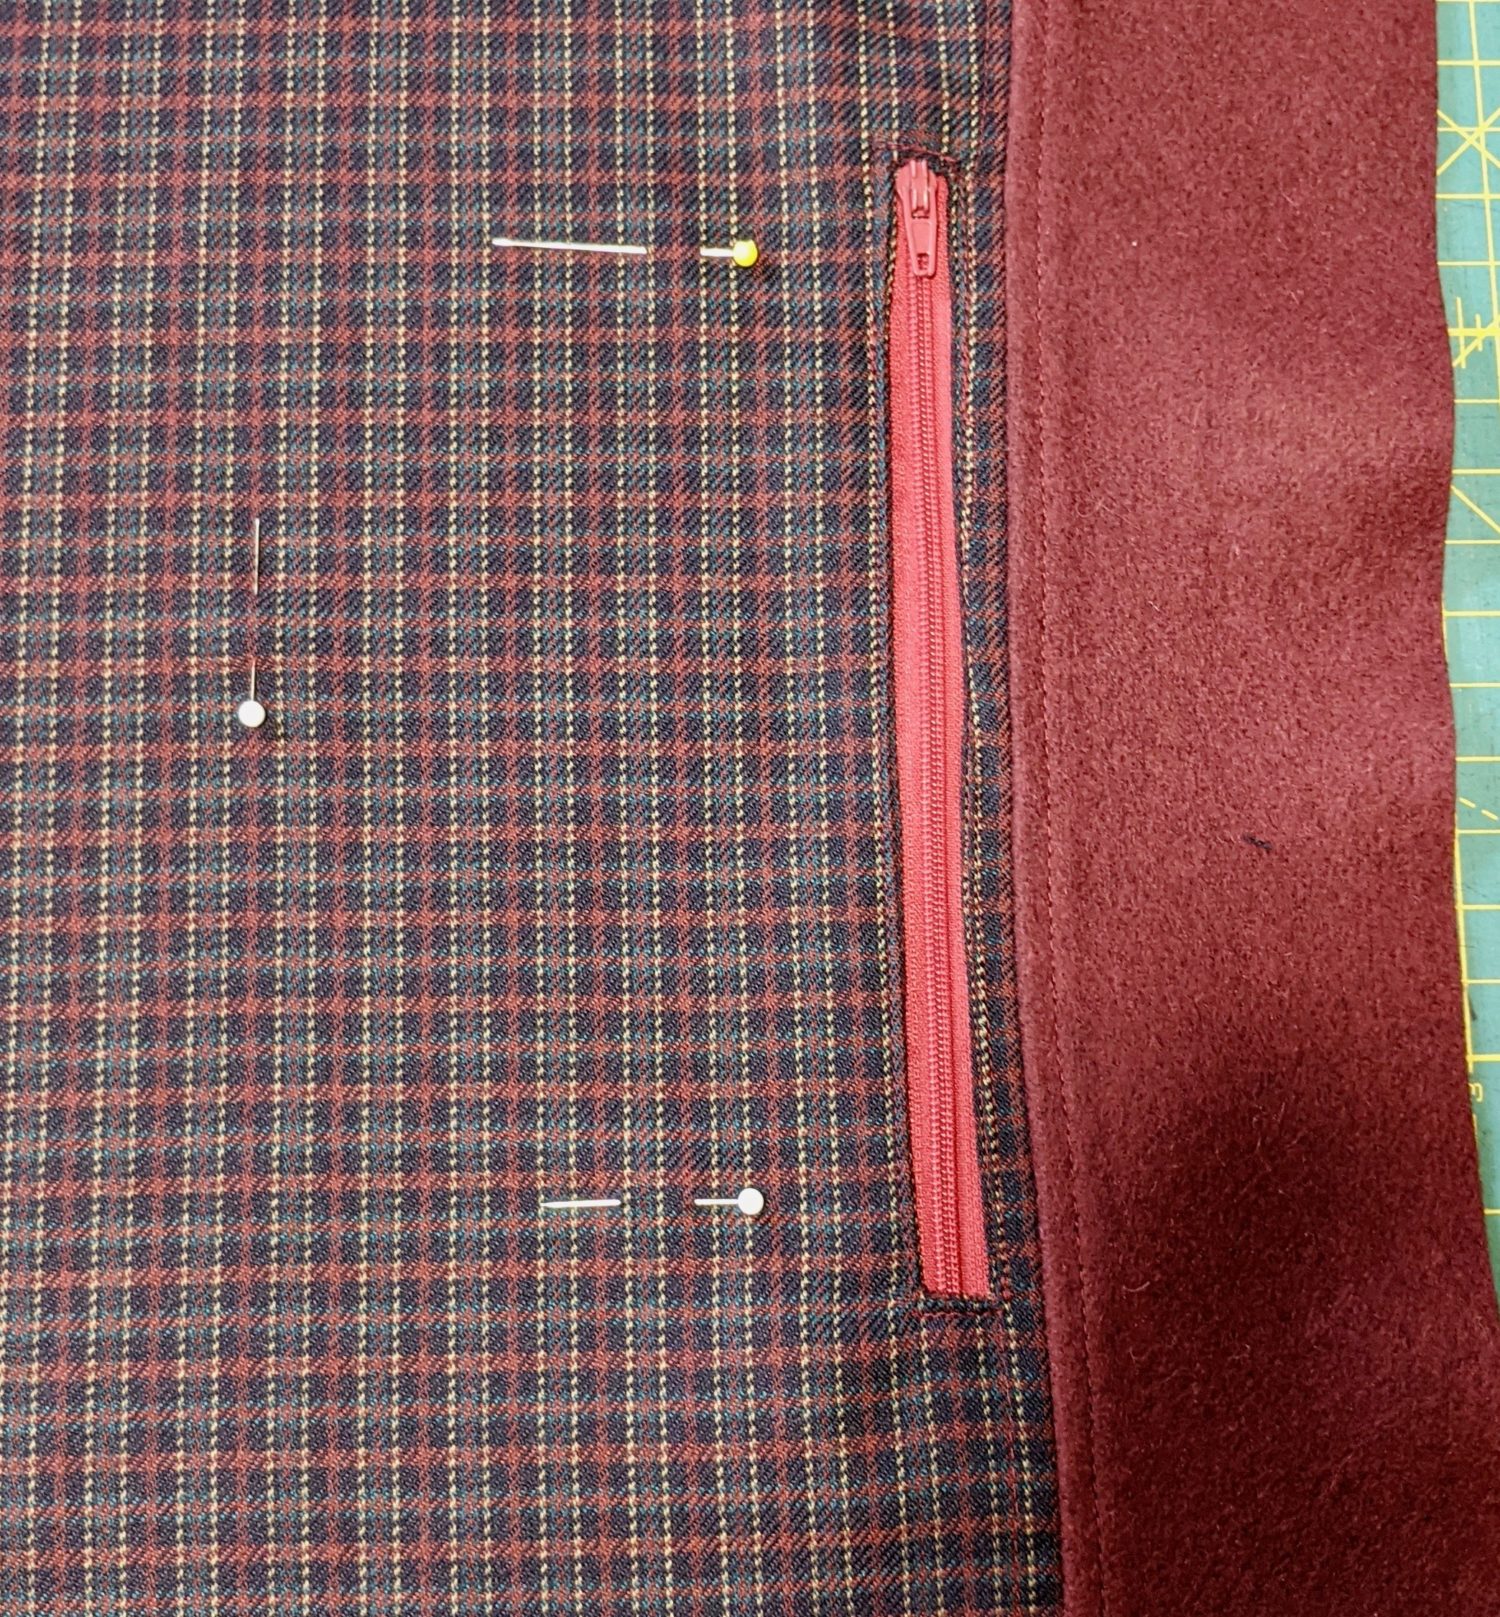
Front side 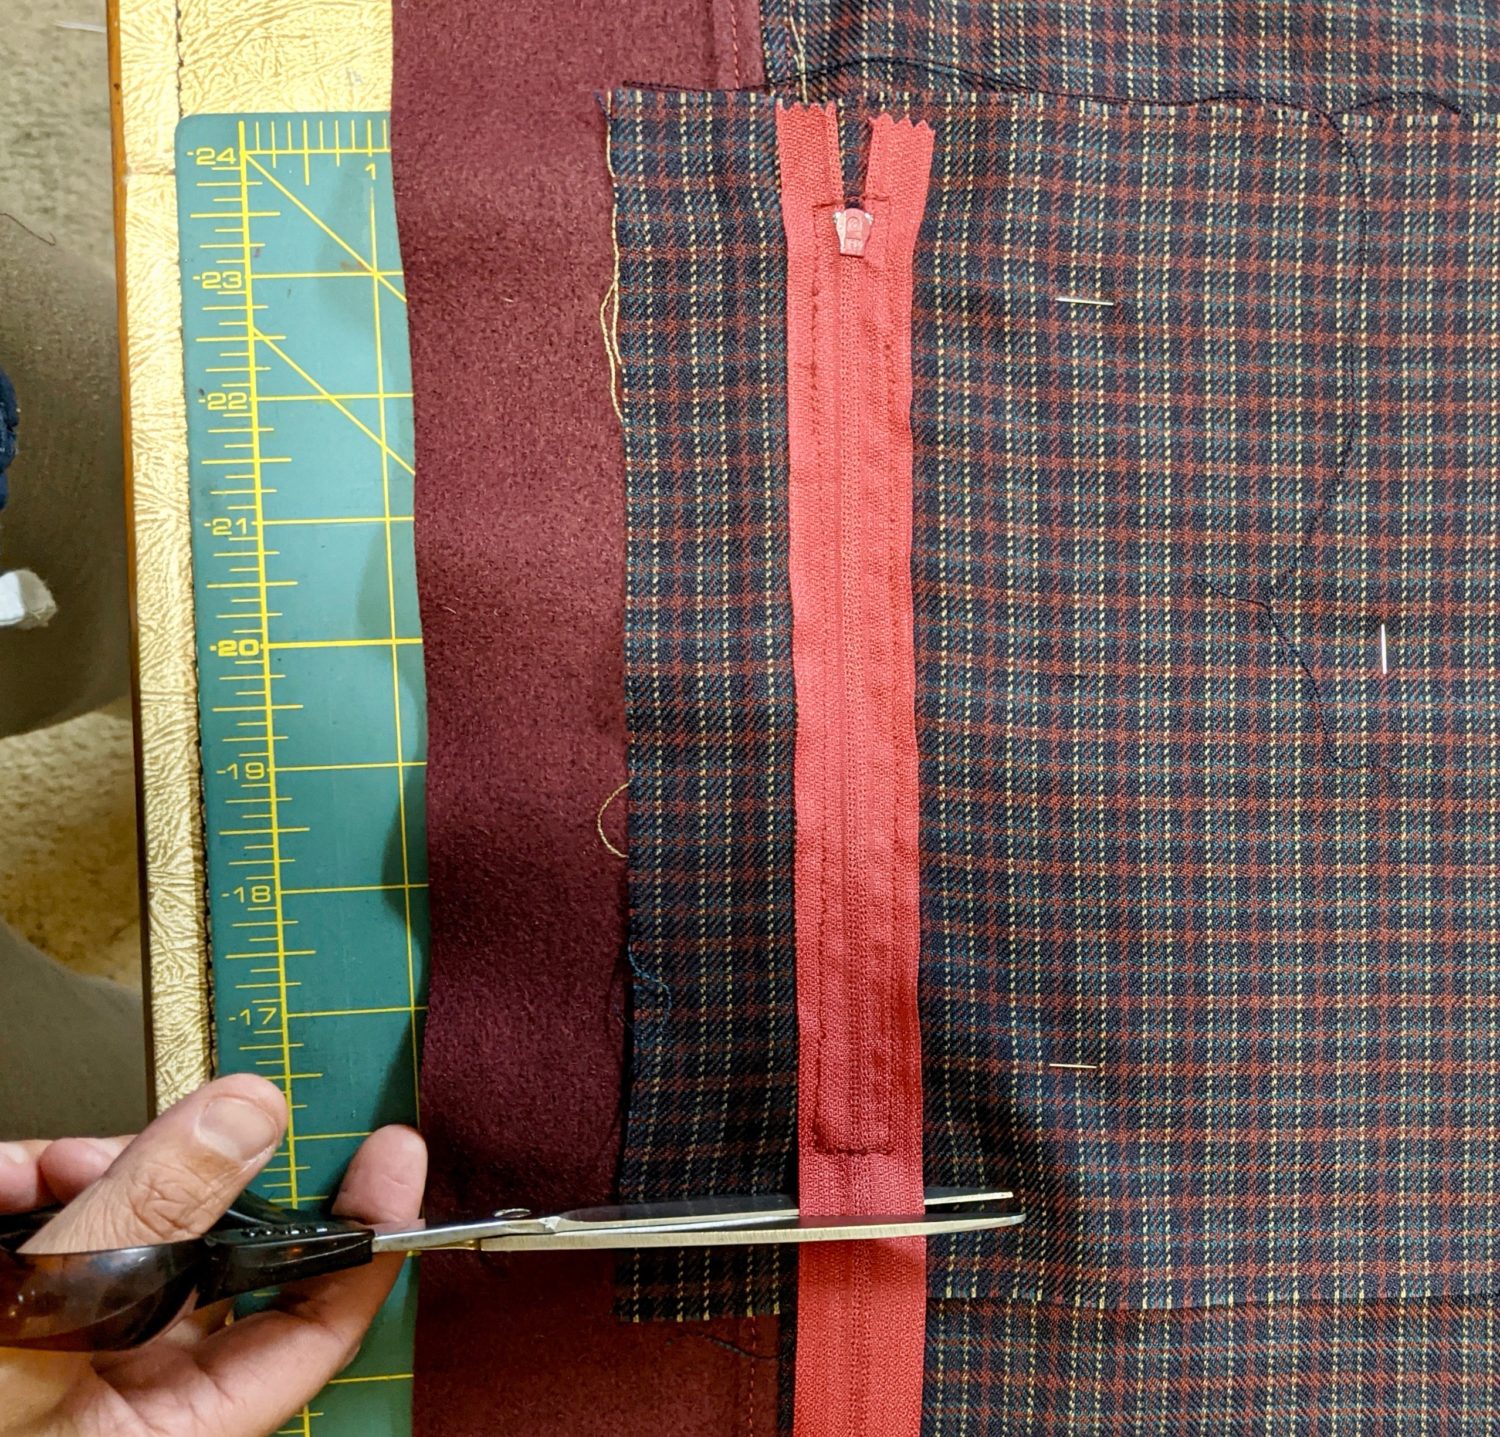
Back side. Cut excess zipper.
Finishing the Pocket:
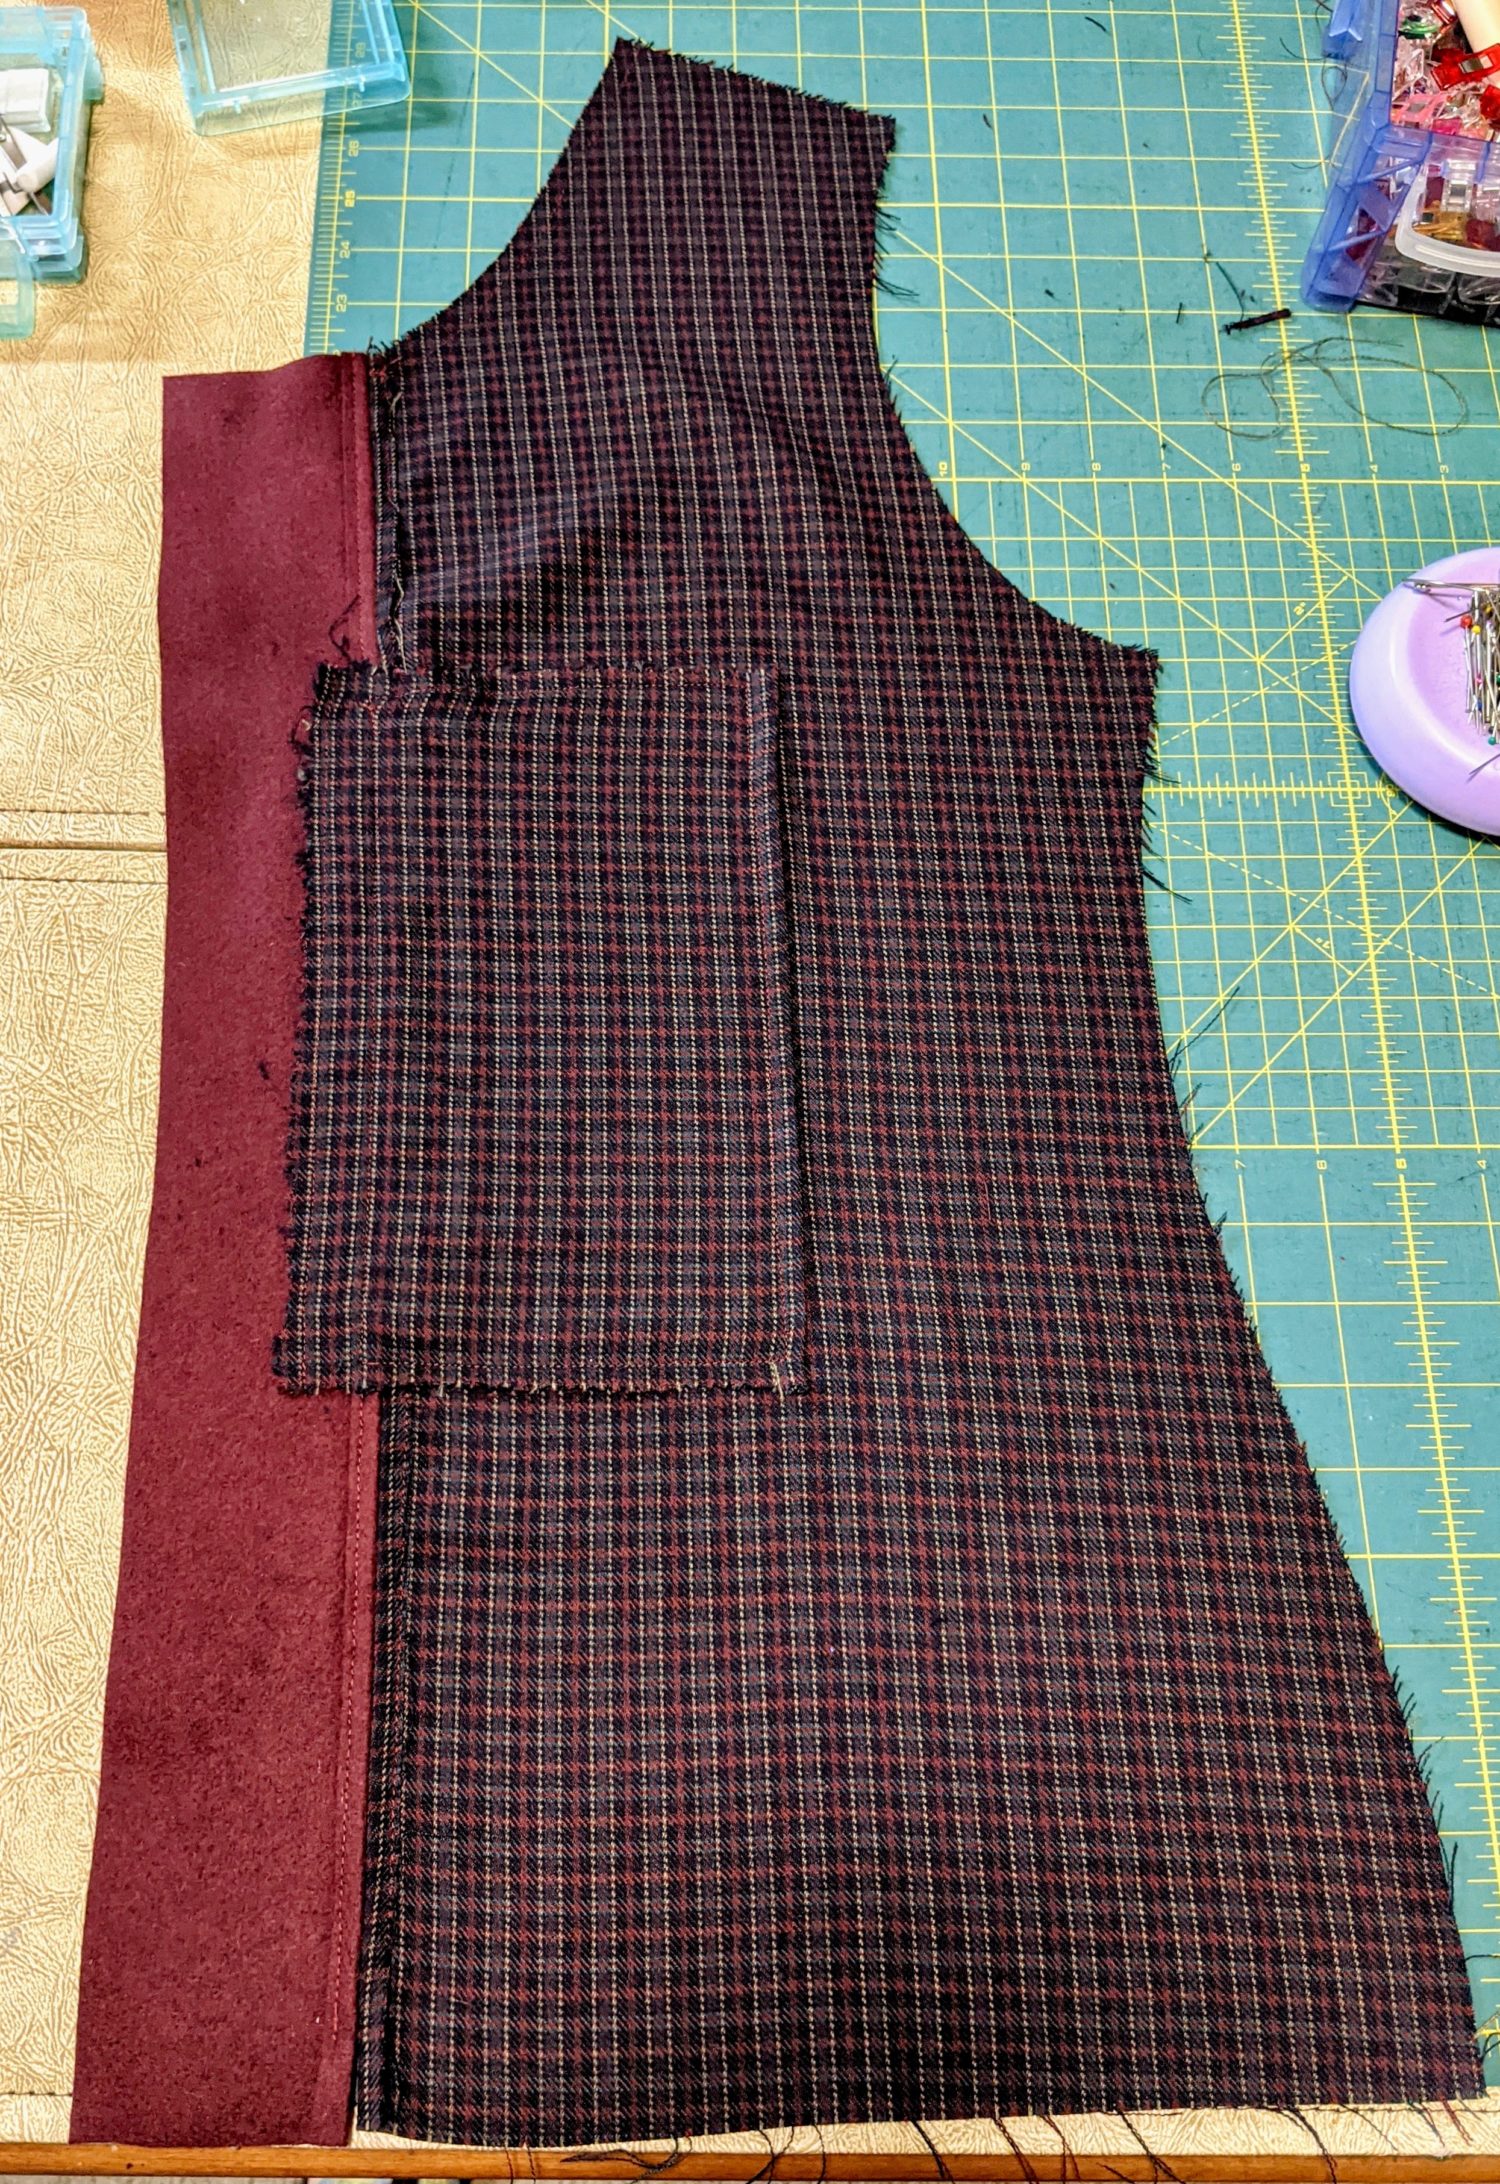
- Fold the pocket piece over, matching up the raw edges on the other side of the zipper.
- Move the facing piece out of the way and sew the raw edges together.
- Finally, topstitch all the way around the pocket from the right side of the lining.
- I made sure to stitch right on top of the facing/front topstitching that was already there.
Back side of the pocket 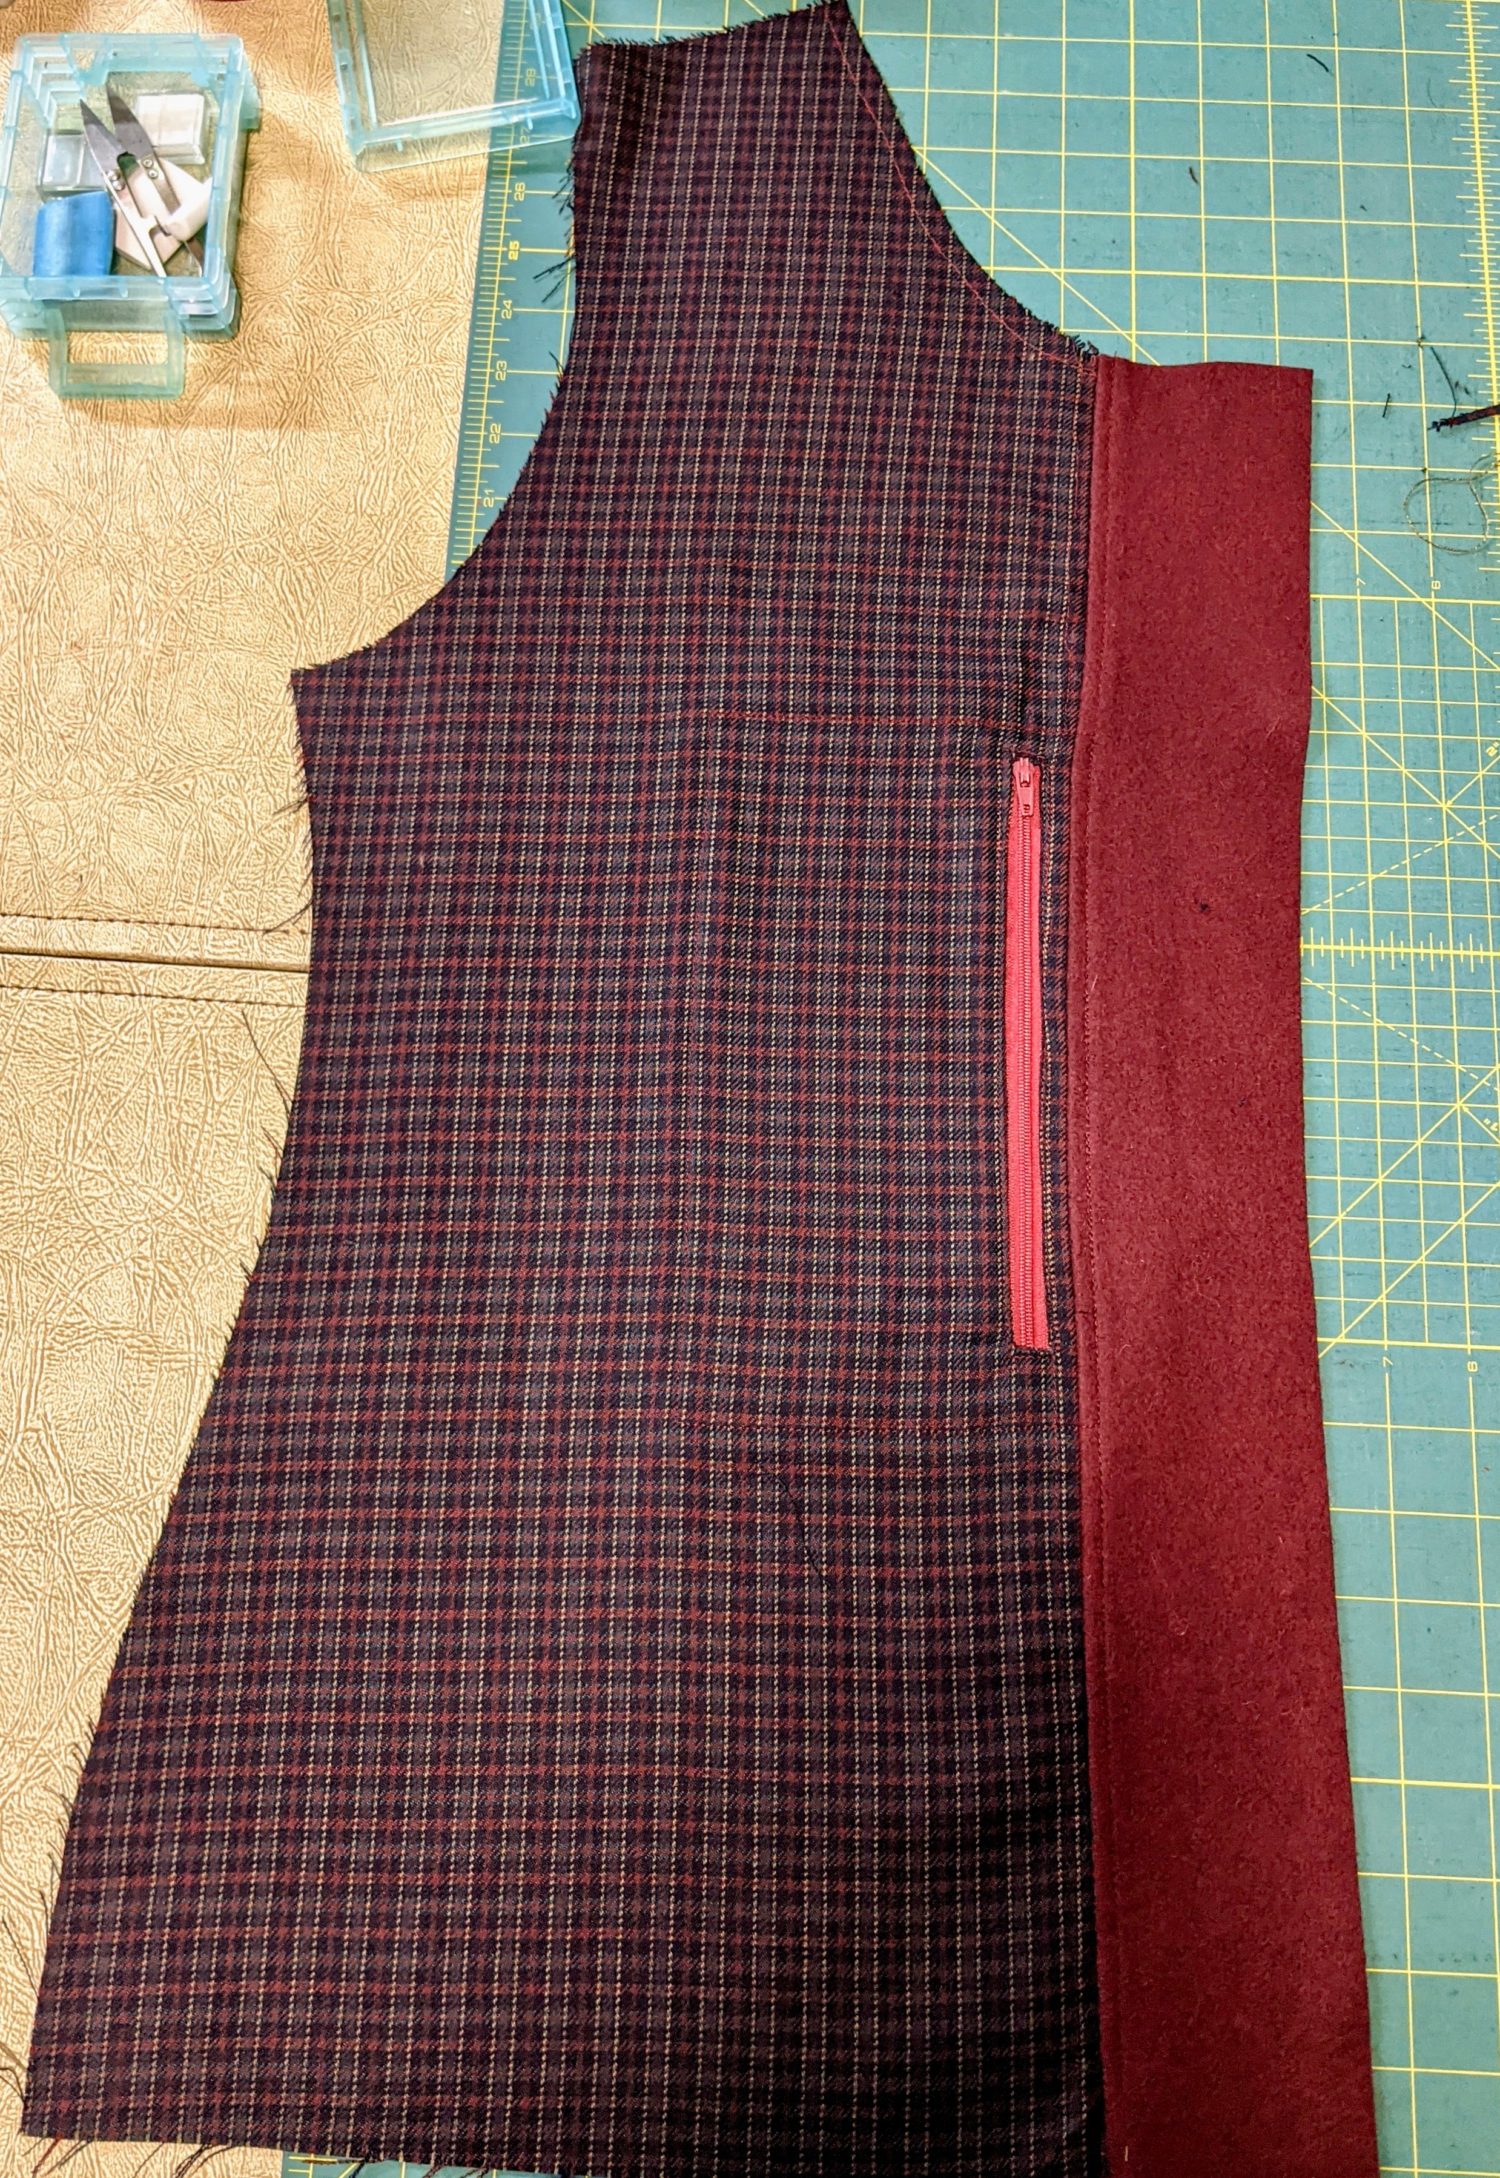
Front size of the pocket 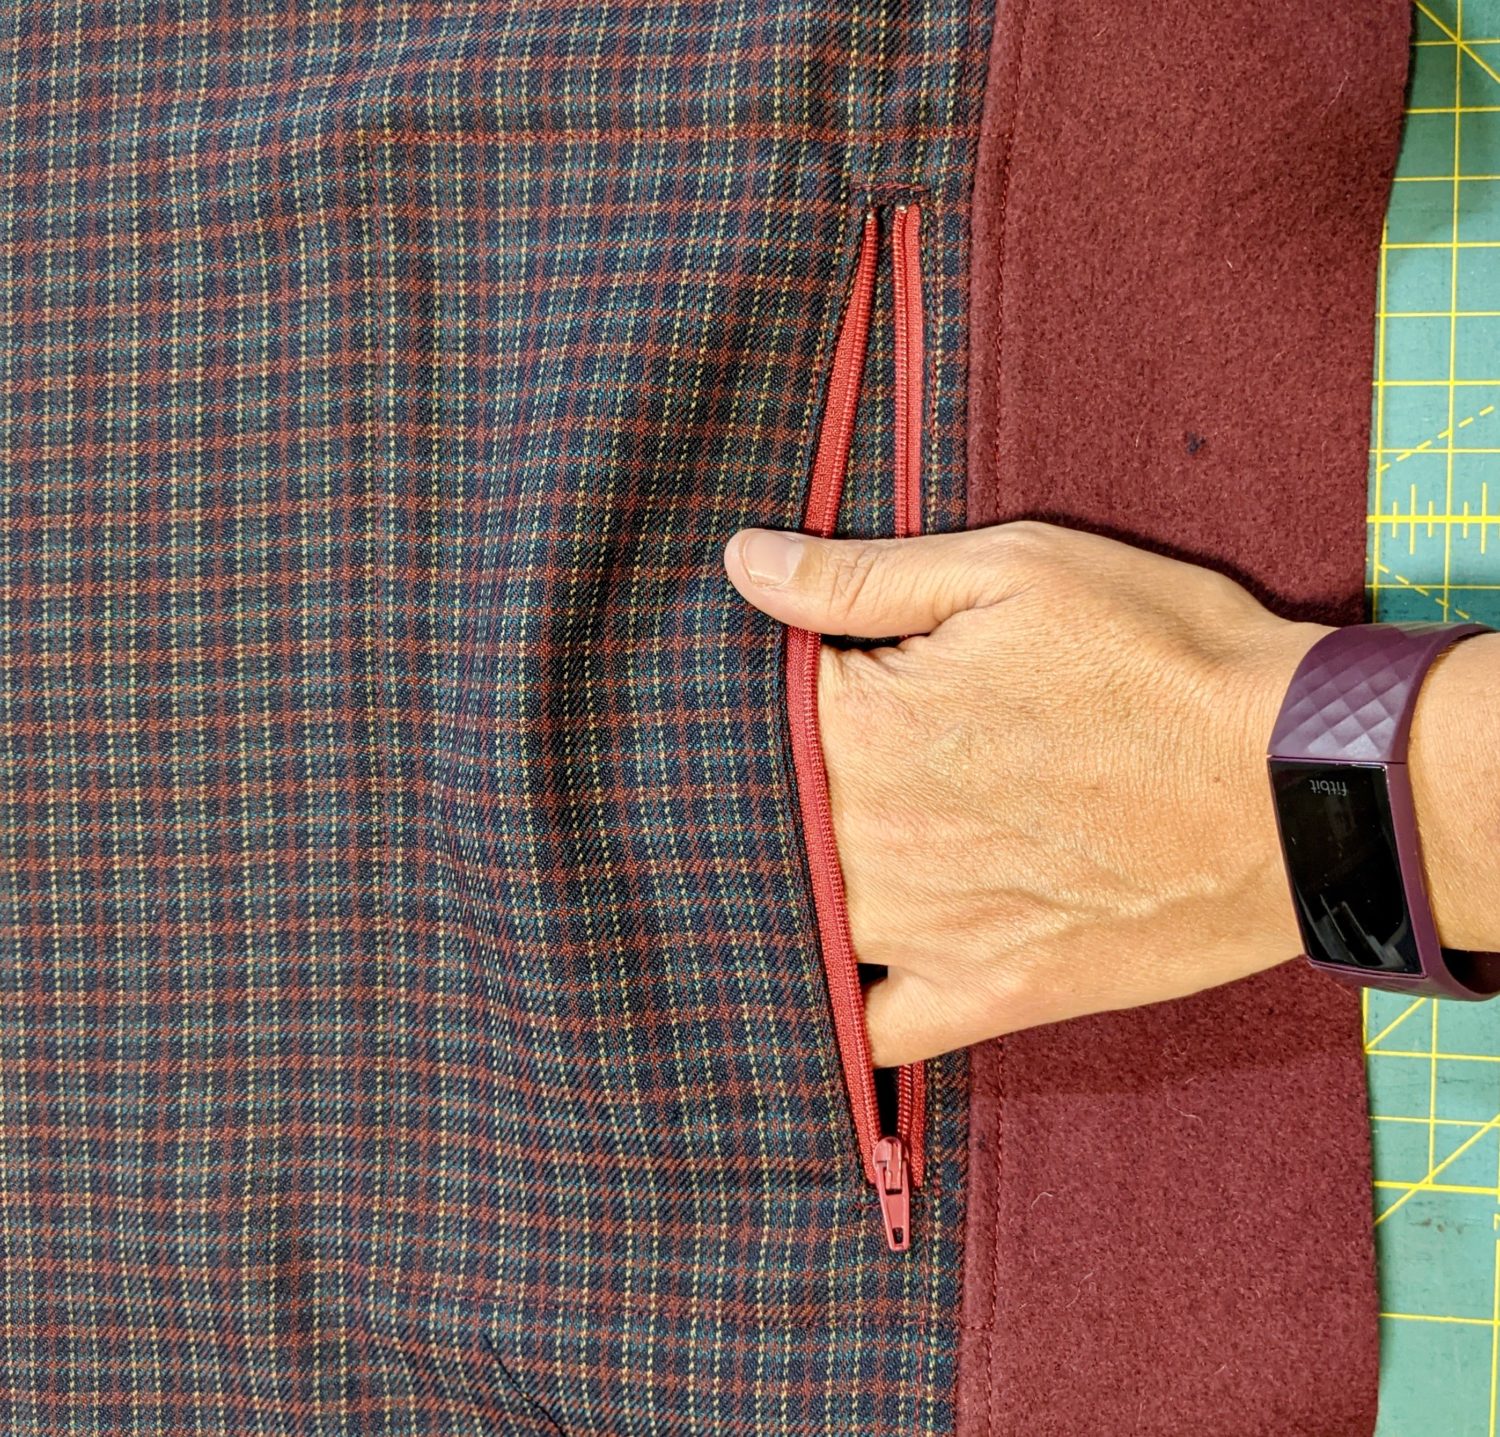
Finish Your Coat
After the pocket is done, proceed with the pattern as directed in the tutorial.
I absolutely love this make!! It will be so warm to wear all winter long!


About our guest blogger Jenni Early:
Jenni Early is a homeschool mom of six who spends much of her free time sewing up garments for her family and friends. You can check out her blog HERE: sewingandthetrivium.com Jenni is one of 5oo4’s Brand Ambassadors. She says, “I love 5oo4 because the patterns are so practical. They are what my family and I would wear anyway. I love the inclusive size range and the fact that each pattern has so many options!!”
Want more FUN DIY Freebies? Check out the FREEBIE TUTORIALS and the FREEBIE PATTERNS!
As always, we’re here to help if you need it! Join us HERE and on Facebook, Instagram, Twitter, Youtube, and Pinterest. We’re everywhere you are.
What a great hack. Thanks for the detailed sharing of your thought process and execution— very helpful