Guest Blog Post By: Jenni Early
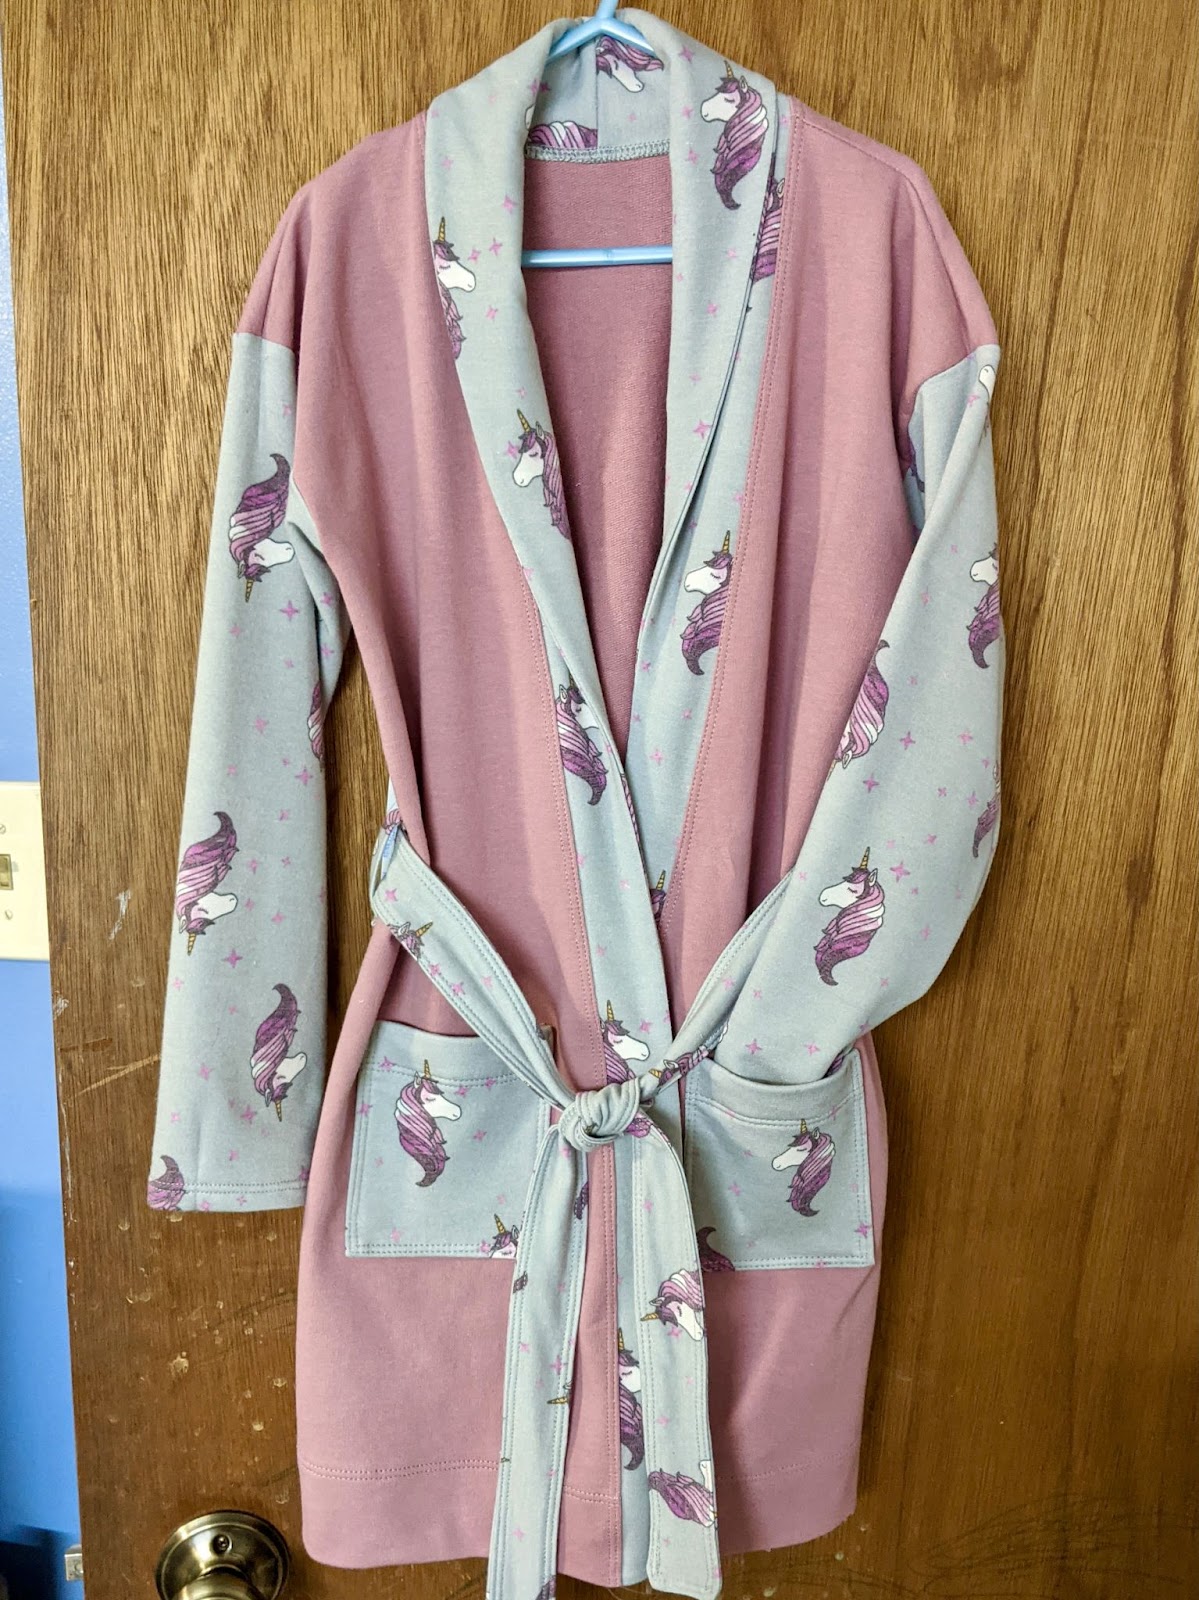
I don’t know about everyone else, but the people in my family always ask for new bathrobes right around Christmas and the New Year. Since I love the Eleanor cardigan (and adore 5oo4’s amazing instructions), I decided to try to hack this pattern instead of using another company’s like I have in the past. This bathrobe was a Christmas present for my niece and it turned out lovely!
Supplies
- Child or Adult Eleanor Cardigan pattern. If you’d like an oversized bathrobe, you may want to size up.
- The correct amount of fabric necessary to make a knee-length, no-hood Eleanor in the size you choose. I used a cotton french terry for the body of the robe (so it would absorb water) and a lighter-weight rayon french terry for the trim.
Adjusting the Band Pattern Piece
The only pattern piece that you will need to adjust for this hack is the band piece that goes down the front of the cardigan. Typically, this one is cut with measurements instead of using a pattern piece, but you will want to draw it out to adjust it.
- Draw the band for the size you choose (use the option for no hood to the knee), but make it half as wide as the chart calls for, plus an extra ⅜ inch for seam allowance (This is “x” on the picture).
- Starting halfway up from the bottom, use a french curve ruler to curve the top of your band out. It should follow the basic curve in the pictures below. At the top, it should be approximately three times as wide as your starting width (2x + x = 3x plus seam allowance).
- Cut four of your new pieces instead of cutting two on the fold like the tutorial suggests.


Cutting and Sewing the Eleanor Bathrobe
Cut out the cardigan/bathrobe as directed in the pattern tutorial. Remember to use the no-hood, knee-length version. Sew up the shoulders, side seams, sleeves, and hem, as directed in the Eleanor tutorial.
For the collar and bands, do the following:
- Clip or pin the larger ends of two of the bands together, right sides facing. Repeat with the other two bands.
- Sew along the larger edge seams (where you pinned).


- Press your seams. Then pin the “curvy” sides of your bands together, again right sides facing.
- Sew or serge this seam. Clip your curves if you used a sewing machine.


- Continue with steps 8 and 9 of the tutorial, sewing the small sides of the bands together, turning, and then attaching the straight side of the band to the center front and neckline of the bathrobe.


- If you like, add pockets and a sash to the bathrobe, per tutorial instructions.
That’s it! Super-quick, other than the adjustment on the band, and a really comfortable bathrobe, as well!


About Our Guest Blogger:
Jenni Early is a homeschool mom of six who spends much of her free time sewing up garments for her family and friends. You can check out her blog here. Jenni is one of 5oo4’s Brand Ambassadors. She says, “I love 5oo4 because the patterns are so practical. They are what my family and I would wear anyway. I love the inclusive size range and the fact that each pattern has so many options!!”
As always, we’re here to help if you need it! Join us HERE and on Facebook, Instagram, Twitter, Youtube, and Pinterest. We’re everywhere you are.
Leave a Reply