Skirt Measuring and Fitting Guide! It is a common misperception that ‘skirts are easy to make.’ This perception isn’t entirely unfounded. Skirts generally are easy to sew, but they are not necessarily easy to fit. Granted, you do not need to worry about crotch curves or inseams or cup sizes, but there definitely are methods you can use to get a better, more personalized fit – especially when it comes to a fitted skirt!
MEASURING
There are two critical measurements you will need to be able to properly fit your skirt. The first is your NATURAL WAIST.
This can be a tricky measurement because while in the majority of the population, this means the ‘smallest part of you’, it certaintly isn’t a universal landmark. Fortunately we have other ways as well!
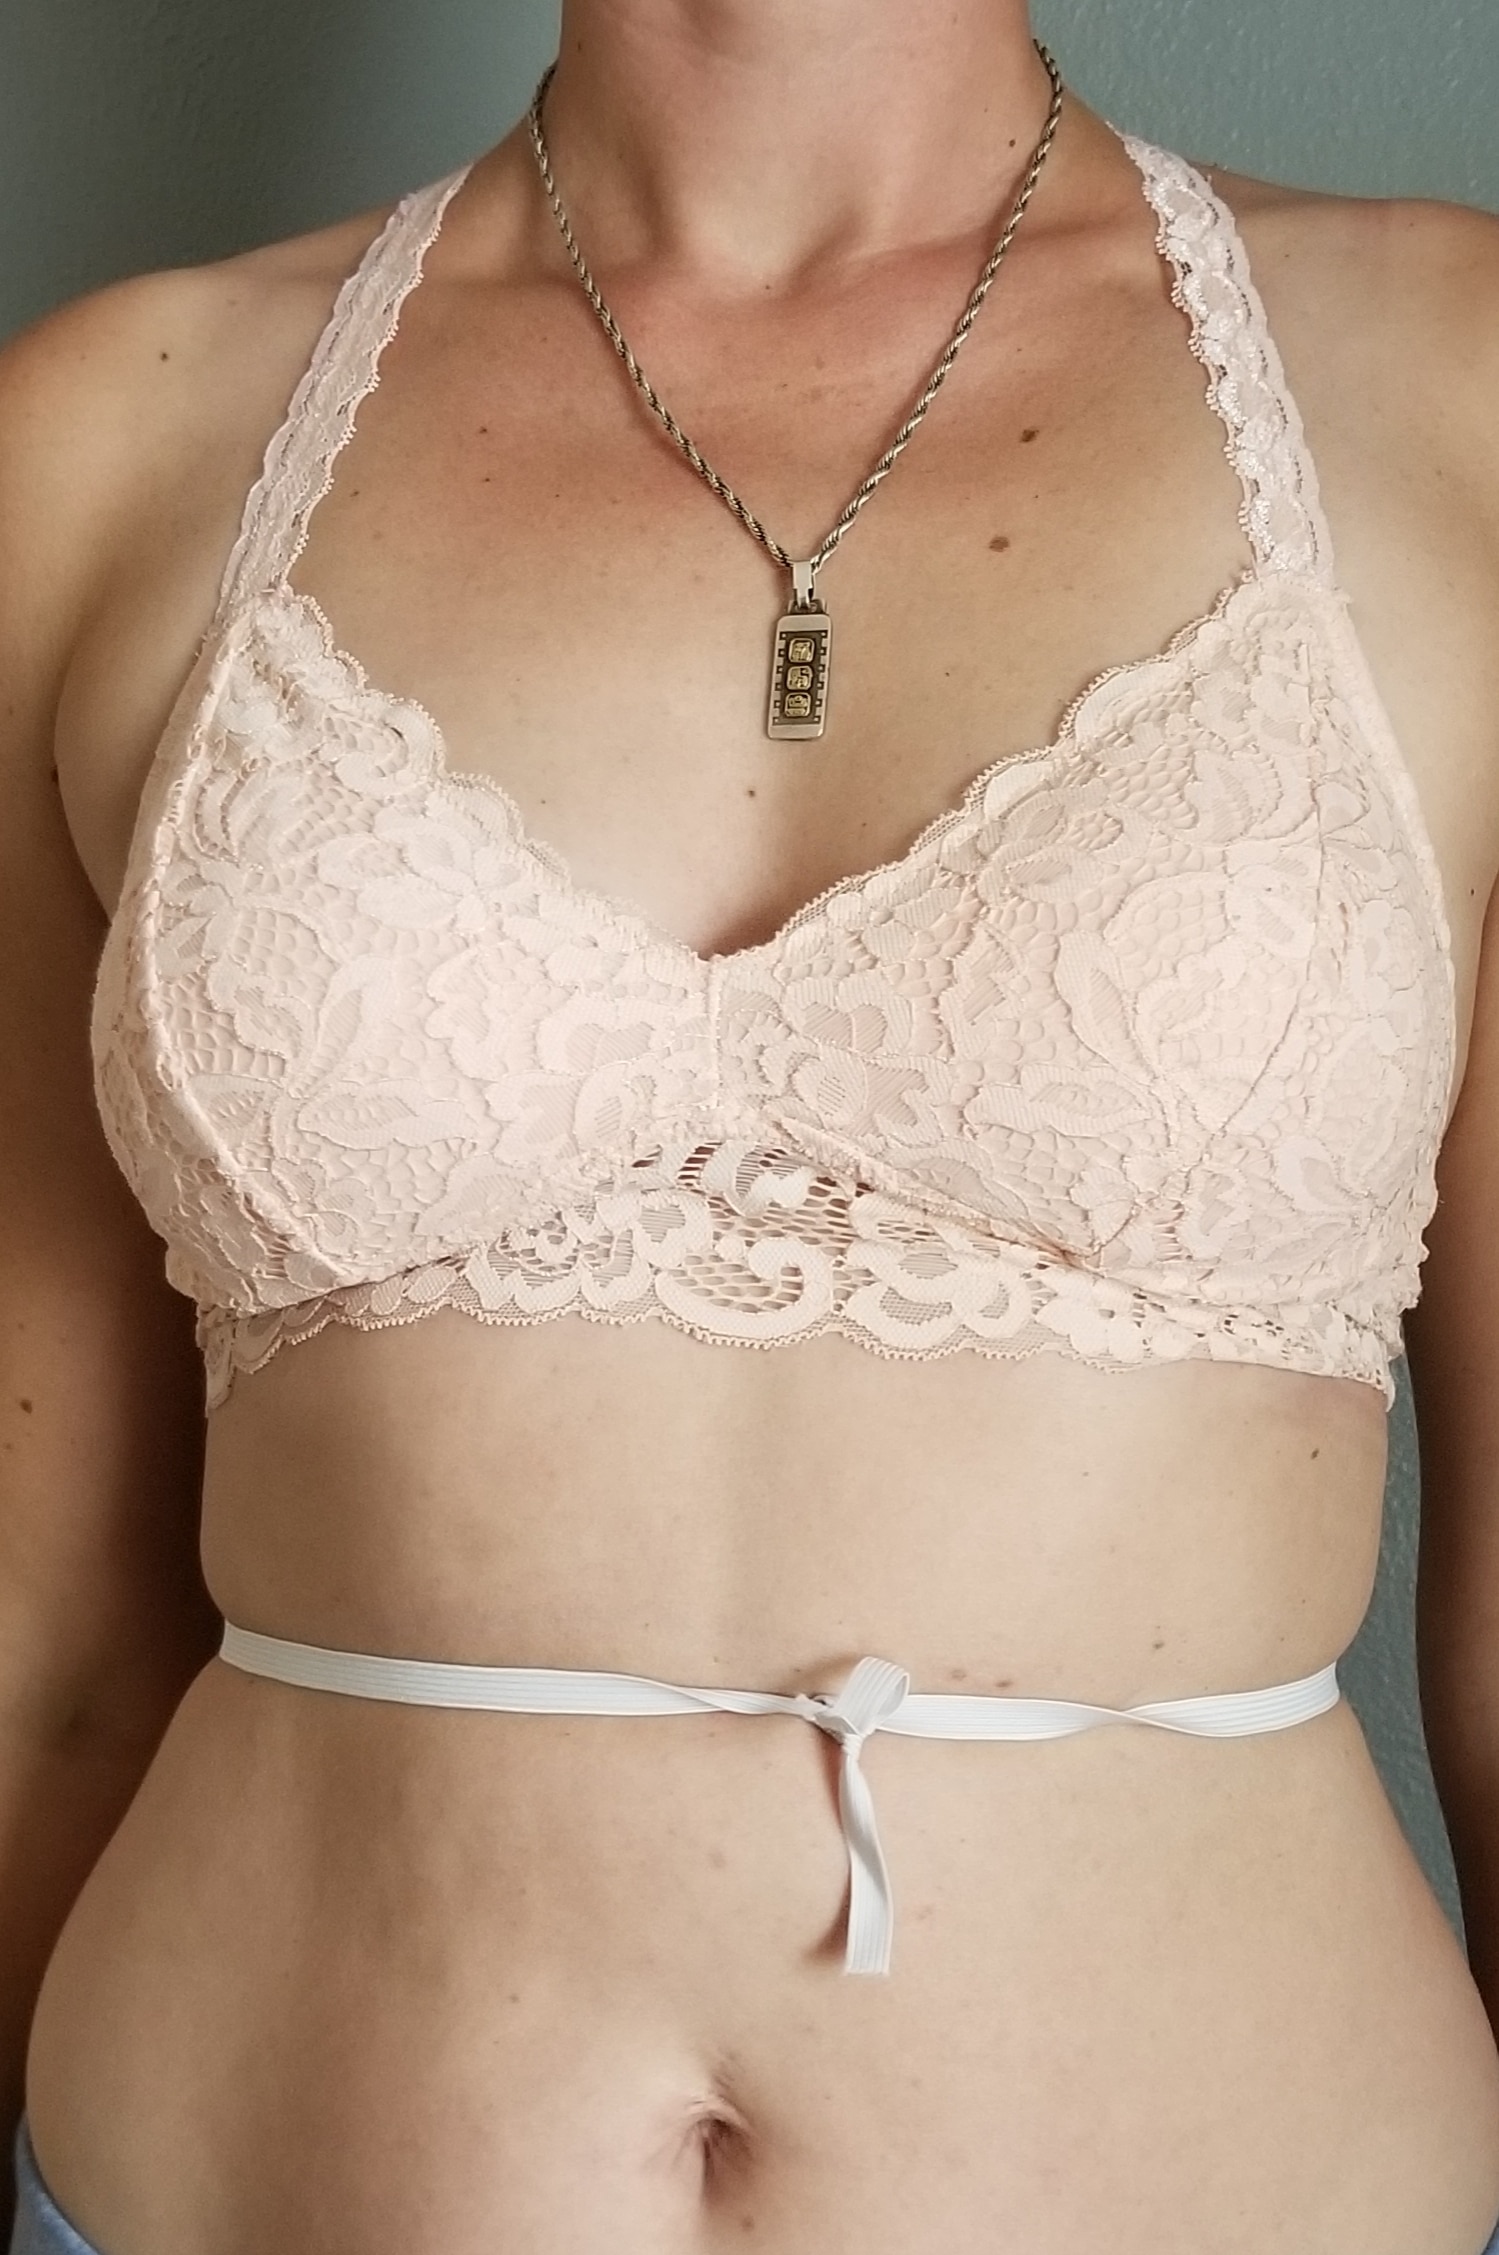
Method #1: the elastic band. If your waist is the smallest part of you, this is the best method. Wrap a piece of elastic around your middle – snug enough that it has to stretch a little but not super tight either. Do a couple of side bends and the twist and it will settle in your natural waist.
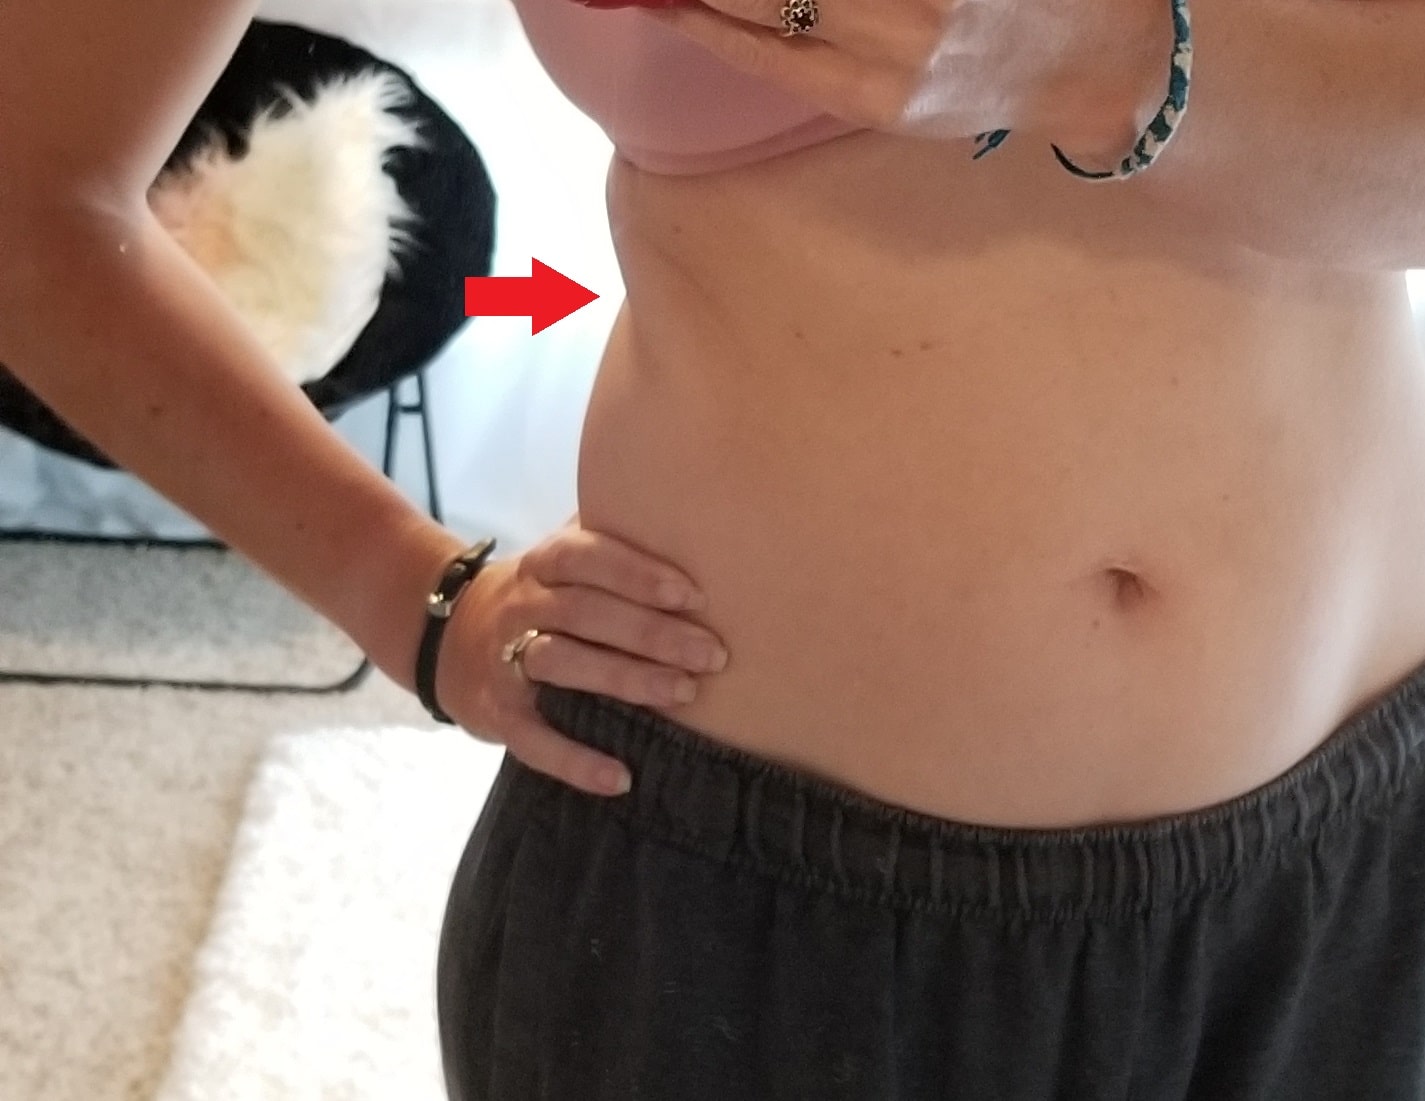
Method #2: the teapot. This is exactly what it sounds like! Put your hand on your hip and bend to the side like you’re ‘a little teapot’. Where you bend is right at the bottom of your rib cage and considered ‘natural waist.’
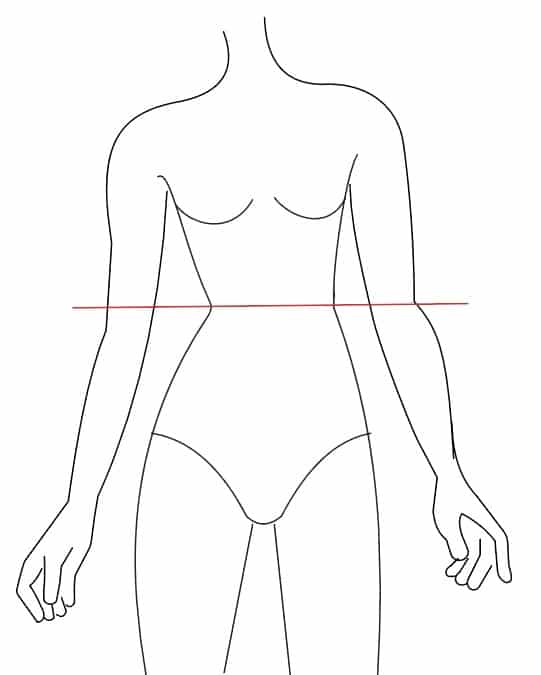
Method #3: elbow landmark. This method is less accurate but very helpful nevertheless. If you stand up straight with your arms hanging loosely by your side, your natural waist will more or less line up with the bend in your elbow.
The second critical measurement you will need is your FULL HIP.
This also can be confusing because there are is a lot of body ground that can be considered ‘hip.’ In the case of clothing fitting, your full hip is always where you are widest.
Where a person is fullest varies widely (we’ll get to how to fit for your shape here in a bit). Your full hip could be a few inches below your waist or it could be somewhere near the tops of your thighs. The important part is to find that fullest part of you so you know where to measure.
To find the fullest part of your, slide your measuring tape up and down, keeping it as level to the floor as you can. As you move it down, the measurement should increase. Once that measurement starts to decrease, you’re no longer at your fullest hip and you need to go back up.
Go ahead and note that measurement BUT WE’RE NOT DONE YET!

The last step in measuring your hip is to incorporate your belly into the measurement. This last step applies mostly to fitted skirts such as pencil skirts, but is a very helpful concept to have an general understanding of.
Most of us have belly. Some have very little and some have a lot – just like our booties. The hip measurement takes into account our tush but NOT our belly. If you simply use your full hip measurements, the skirt will fit the front of your body too snugly where your belly is and you’ll end up with pull lines.
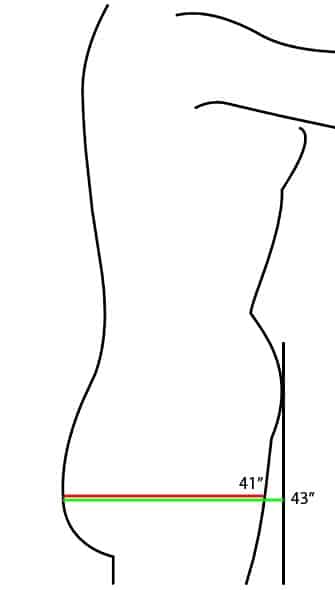
How do we incorporate our belly into our hip measurement? Easy! You’ll need a quilting ruler or piece of cardboard or something similar. You will place the ruler against your belly, perpendicular to the foor.
NOW take that hip measurement. See how our 41″ hip is now 43″? That takes our measurement model from a Size Medium hip to a size Large hip. Will your skirt be looser around? YES. But it will also fall more smoothly from your belly instead pulling around it. You can also grade back in after your full hip to reduce the fullness around your legs.
Another way to take your hip measurement is to use a large piece of butcher paper (or similar). Wrap it around you and tape it parallel to the floor.
The awesome Olga Balasa at Ageberry made a great video on this method you can WATCH HERE.
ADJUSTING FOR LENGTH
Now that we have our waist and hip measurements, we can pick our size. In the case of our measurement model (let’s call her Dot) we’re going to give her a 33″ waist. Dot will wear a Size Medium waist and a Size Large hip (with our new measurements incorporating her belly).
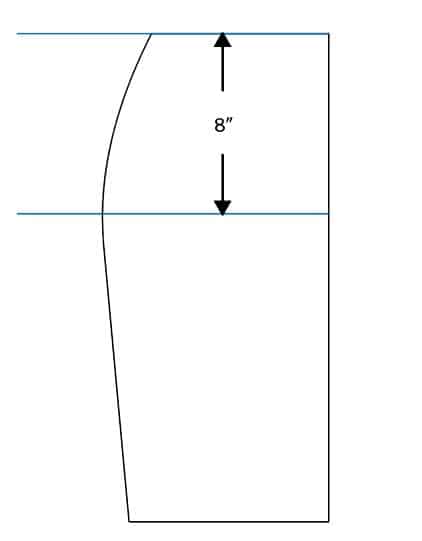
First we need to adjust for rise and hip curve placement. In an ‘average’ female form, the distance between the Natural Waist and Full Hip is 8″. If yours is higher or lower than 8″, you will need to adjust accordingly. This is very important so that the fullest part of the pattern is at the fullest part of your hip. If you do not do this, you will have fabric pulling in one spot and bubbling in others.
Dot’s Natural Waist to Hip measurement is 9″ so we will add 1″ to the pattern between the waist and the hip curve. All 5oo4 Patterns have instructions on lengthening or shortening your pieces.
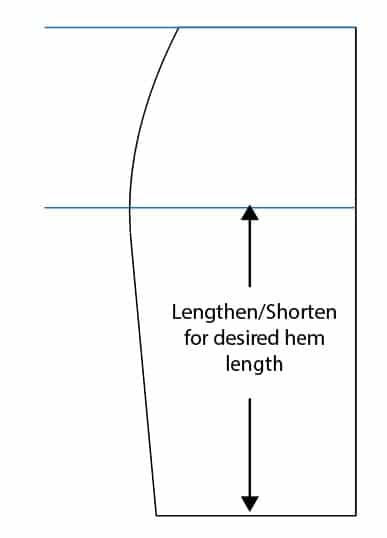
Next we need to lengthen or shorten for overall length. Height is a factor here, but absolutely, positively is NOT what we base our adjustments on. Using your NATURAL WAIST as the high point, measure down to where you want your hem to end. All 5oo4 Patterns have a Finished Measurements chart. You will make your adjustments according to that chart and take into account any changes you made in the previous step to figure out how much you will need to change the overall length.
Dot is 5’6″ but her legs are on the shorter side. From her natural waist to just above her knees only measures 23″. The Finished Measurement of the her knee length skirt pattern is 24.5″ PLUS we needed to add 1″ in the previous step to adjust for hip curve so it is now 25.5″ We need to remove 2.5″ from the overall length of Dot’s skirt.
TIP: If you are adding/subtracting more than 2″ of length, do this in multiple sections instead of just one. That will make it easier to redraw your lines and keep the pattern’s original shape intact. This applies to both steps of height adjustment.
GRADING
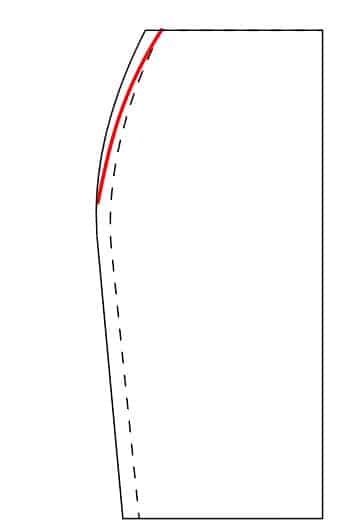
Dot’s skirt is now the appropriate length for her hip curve and overall length so now it is time to grade sizes.
Her full hip is a Size Large and her waist is a Size Medium. We will draw a gentle line from the fullest part of the Large up to the Medium waistline.
FURTHER CUSTOM FITTING
Before we get into further custom fitting, put your skirt on (without the waistband added yet). Find yourself a stretchy belt, make a quick fitted elastic ‘belt’ or simply tie a piece of elastic around your waist. That is your natural waistline marker and how we will now assess and adjust.
Pull your skirt so that the hemline is parallel to the FLOOR. Do not worry about whether or not the waistline is level.
This is so important so I’m going to say it again:
THE HEMLINE SHOULD BE PARALLEL TO THE FLOOR. NOT THE WAISTLINE.
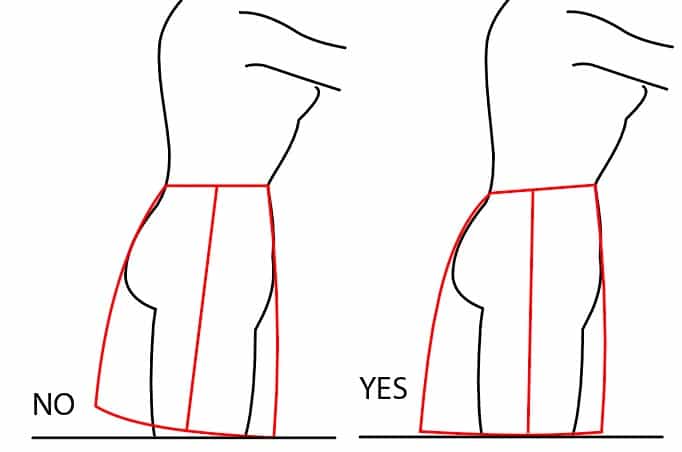
You may be thinking, “But wait! If I do that, the back/front is too high/low!”. It’s ok! In these next sections, we’re going to address how to fit your waistline to hipline.
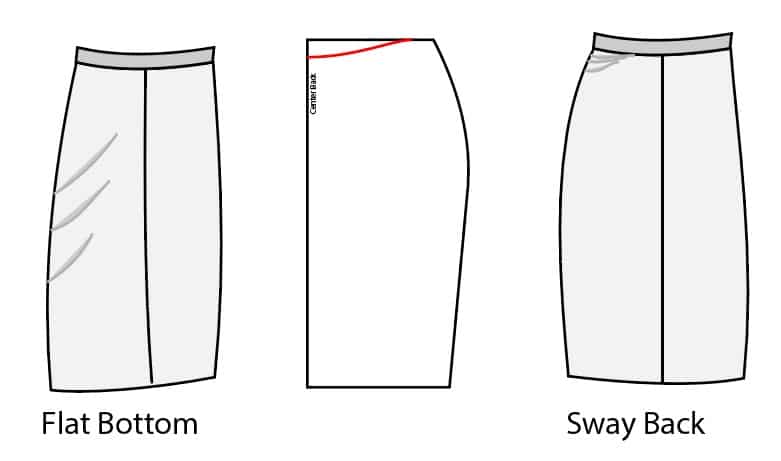
FLAT BOTTOM
If you are a smaller in the booty area than what the pattern was drafted for, you might see the fabric is baggy below your derriere. The side seam will swing towards the front and the hemline will droop in the back.
Pull up on the center back until the hemline is even and the side seam is straight. Mark your new seamline. You will need to remove that amount of length from the center back, tapering off to nothing at the side seams.
SWAY BACK
Sway back can be due to genetics, posture or many other things. You will see wrinkles just below the waistband area in the small of your back. Although the cause is different, the solution is the same as the Flat Booty. Pull up on the center back until the wrinkles disappear and mark the new waistline seam. You will remove that amount from the center back, tapering off to nothing at the side seams.
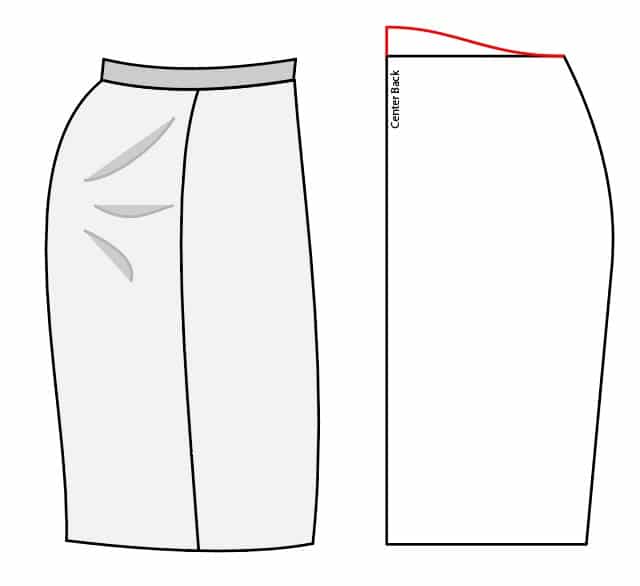
FULL BOTTOM
If you are more blessed in the rear, even with adding the width at the side seams in our initial measuring method, you may find you need some extra fabric vertically .
The side seams may pull backwards towards your tush and the hemline will pull up in the back. Pull down at the center back until the hem is level and the side seam is straight. Measure how much you will need to add to reach your natural waistline.
You will need to add that amount to the center back of your pattern, tapering to nothing at the side seams.
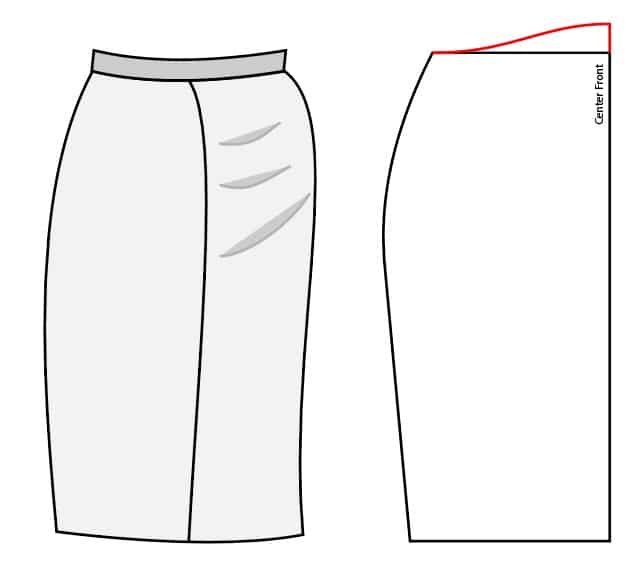
FULL TUMMY
If you find your tummy pulling forward, even with adding the width at the side seams in our initial measuring method, you may find you need some extra fabric vertically .
The side seams may pull forwards towards your belly and the hemline will pull up in the front. Pull down at the center front until the hem is level and the side seam is straight. Measure how much you will need to add to reach your natural waistline.
You will need to add that amount to the center front of your pattern, tapering to nothing at the side seams.
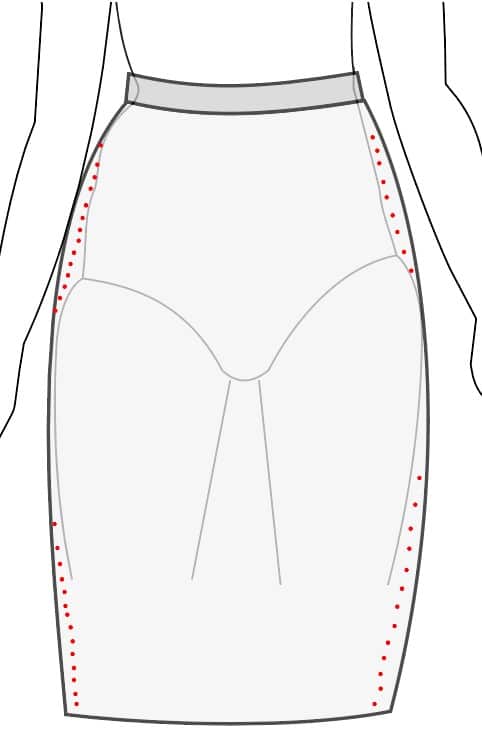
HIP CURVES, HIP DIPS, HIP SHAPES
There are many shapes of full hips, upper hips and waistlines. You may have ‘violin hips’ or ‘hip dips’. Your hips might stay full further up towards your waist or they may have a steeper curve. You may find that if you needed to go up a size in your hip to accomodate your belly that now the portion below your full hip feels too loose.
Now is a perfect time to custom fit your skirt to your own unique silhouette! The easiest way is to try on your skirt inside out and GENTLY pinch out the excess fabric along the side seams. Baste along your pin lines and then turn it right side out and see what you think. In this manner, you can adjust the side seam curves to fit just right!
Ready to give it a try on your own skirt(s)? The Women’s Mambo Skirt Bundle includes FOUR skirts (fitted, a-line, half circle and pleated) and all of the Waistbands are interchangeable for about a zillion different looks! Even better? The waistbands are also interchangeable on the FREE Women’s Luna Circle Skirt! You can also buy them separately! The Rita Fitted Skirt HERE, the Tina A-line Skirt HERE, the Erica Half Circle Skirt HERE and the Monica Pleated Skirt HERE.
As always, we’re here to help if you need it! Join us HERE and on Facebook, Instagram, Twitter, Youtube, and Pinterest. We’re everywhere you are.
awesome instructions!
I am almost 89 years old. I have started sewing again, as a way to exercise my mind. I love your 5 out of 4 instructions on adjusting or making a skirt pattern. I would love to try to do this but I must have printed instructions that I can take to the cutting table. How do I get this?
What a brilliant resource for skirt fitting. Thank you so much for taking the time to help with fitting issues 🙂
How much do you add by the hip measurements to cut a skirt, that it’s not to tight sitting? I use denim fabric